ubuntu
42 TopicsHow to create an Ubuntu VM on Windows 10 using Quick Create
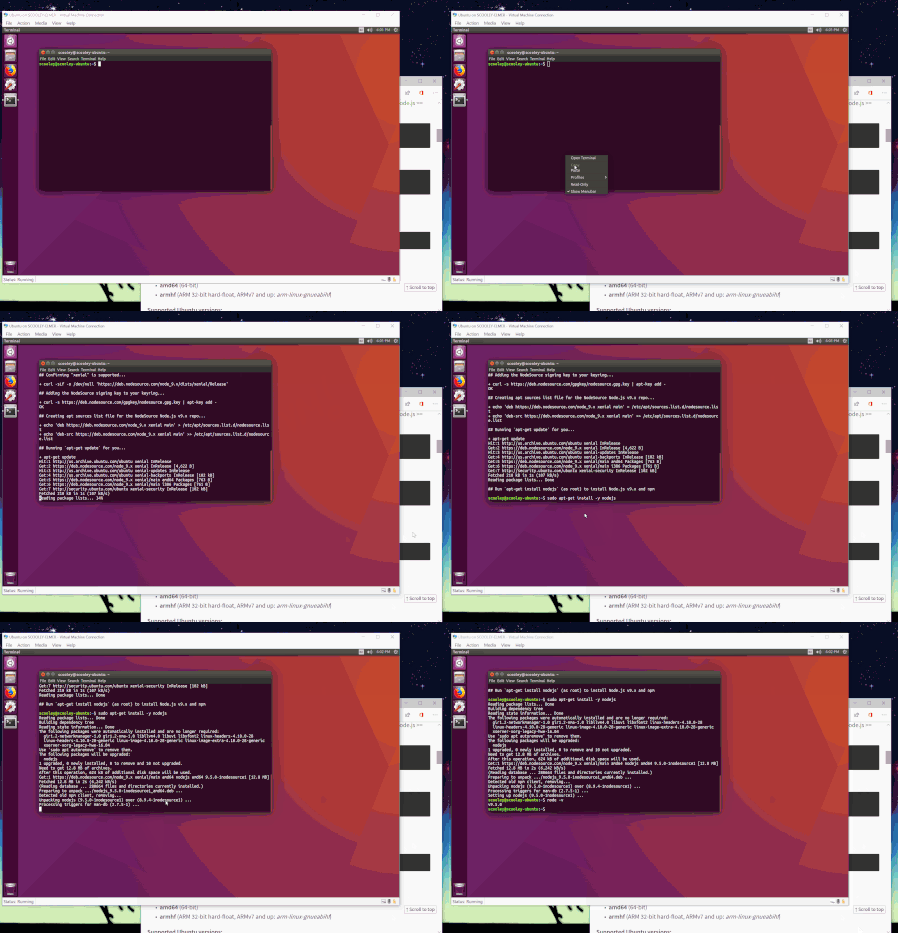
Windows 10 is not just a modern desktop operating system, and it also has some great IT Pro and Developer related features build in. One of them is client Hyper-V. This is the same hypervisor which powers virtualization in Windows Server and the Microsoft Azure datacenters. With Hyper-V, you can create virtual machines running on Windows 10, without the need for third-party software. You can not just run Windows virtual machines, and you can also run Linux virtual machines. In this blog post, I am going to show you how you can create an Ubuntu VM on Windows 10 using Hyper-V. Check out the full blog here: https://www.thomasmaurer.ch/2019/06/how-to-create-an-ubuntu-vm-on-windows-10/49KViews0likes1Comment
Issue Loading Microsoft Teams on Ubuntu 18.04
I'm trying to access Microsoft Teams desktop on Ubuntu 18.04 After installation of .deb file, I run "teams" command and two window start, Microsoft Teams and Microsoft Teams Preview. One is blank and the other I cannot open. Any ideas about how to fix this, and use Teams desktop on Ubuntu? (My main aim is to edit xlsx files, but you can't do this in the browser) (I can add my log if that is helpful)44KViews0likes7CommentsAnnouncing the Open-Source Release of ML Video Codec (MLVC)
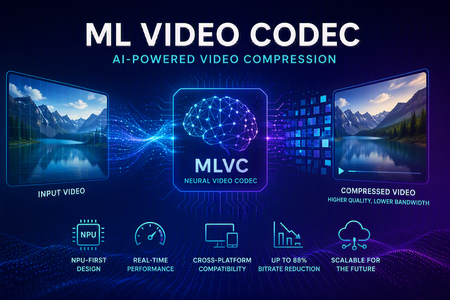
Video codecs compress video for transmission or storage, reducing bandwidth and storage requirements. MLVC is a modern machine-learning-based codec that uses substantially less bandwidth than conventional codecs, improving streaming and video-call quality—especially on constrained or unreliable networks—while lowering delivery and storage costs. MLVC is the product iteration of DCVC (Deep Contextual Video Compression) family of NVC (Neural Video Codec), open sourced by Microsoft Research since 2021, with improved compression efficiency, real-time performance on commodity Neural Processing Units (NPUs), and cross-platform support. We recently published this work in the paper MLVC: Multi-platform Learned Video Codec for Real-World Deployment. We are releasing the source code because we believe the next generation of video coding will be built openly, and we want the broader community — researchers, video codec engineers, platform vendors, product teams, as well as general developer community — to build it with us. Why MLVC Traditional video codecs (e.g., H.264/AVC, H.265/HEVC) have served the industry for a long time, but each generation requires enormous engineering effort for incremental gains and needs dedicated hardware which takes years to become commonly available. MLVC replaces conventional primitives — motion estimation, transforms, entropy modeling — with end-to-end learned neural compression, trained directly against rate-distortion objectives, and run on general-purpose NPU devices. The table below compares MLVC to popular video codecs, showing its lower bitrate and resulting savings in bandwidth and storage. Resolution vs H.264 vs H.265 360p 87.8% 75.5% 540p 82.7% 65.4% For example, for 360p video at 30 fps, where H.264 requires 1 Mbps, MLVC requires roughly 122 kbps for equivalent quality — about one-eight the bitrate under real-time conditions. The inference compute was kept approximately equal for the 360p and 540p resolutions. These results are based on a P.910 subjective test and are based on the Video Conferencing Dataset (VCD) dataset that we developed and also recently released as an open-source project. The following video demo illustrates the extent of quality enhancement achieved by MLVC relative to H.265/HEVC at the same bitrate of 200kbps (please watch by opening in a new window for better demonstration) \ Beyond video compression efficiency, MLVC also offers: NPU-first design. MLVC is built to run almost entirely on the AI accelerators already shipping in modern devices — Apple Neural Engine, Qualcomm and Intel NPUs — at no more than 50% NPU utilization, leaving NPU headroom for the rest of the system. Real-time execution at the targeted operating points. Demonstrated 540p at 30 fps on Apple, Intel, and Qualcomm hardware. A scaling-law trajectory. Empirically, MLVC's coding efficiency improves with increased model capacity and additional training compute. Content-adaptive behavior out of the box, without hand-tuned Rate Distortion Optimization heuristics. Already running in Microsoft Teams MLVC is more than just a research concept for Microsoft. We are currently rolling it out in Microsoft Teams, where it is being validated on real peer-to-peer video calls with active telemetry and A/B testing. The integration runs alongside fallback to conventional video codecs for hardware or reliability constraints — the kind of mixed-environment deployment that real products need. The scaling and reliability insights from this rollout are shaping the codec and its roadmap. We welcome your contributions We can not cover every use case, every device class, or every content domain by ourselves. That is why we are open sourcing MLVC. If you work on: Streaming, Video On Demand (VOD), or live broadcast Real-time communication and conferencing Cloud gaming or remote rendering Surveillance, drones, or robotics Mobile capture, Augmented Reality (AR) / Virtual Reality (VR), or volumetric video Codec hardware, NPUs, or inference runtimes We would love your help. Contributions of all kinds are welcome, including model improvements, training recipes, new platform ports and conversion targets, runtime backends, domain-specific fine-tunes, evaluation tooling, bug reports, and feedback on what is missing for your scenario. We particularly welcome platform ports that expand NPU coverage and efficiency improvements that push the rate-distortion frontier. What's in the release The MLVC repository is available at https://github.com/microsoft/mlvc and shared under the MIT License. It includes: MLVC model source code of the full network architecture. Trained model weights ready to run. Training scripts used to produce shipping models. Training data collection documentation to help reproduce and improve MLVC. Platform conversion scripts to target different NPUs and runtimes. Issues and pull requests will be open from day one. A follow-up release will add a C++ codec library, simplifying integration into real-world applications. Where we're heading Our long-term goal with MLVC is to create an open, learned video codec that meets or exceeds the coding efficiency of the best conventional codecs across the full range of video content, runs efficiently on the AI hardware already shipping in client and cloud devices, scales with compute the way modern ML systems do, and evolves in the open at the pace of the ML community rather than the pace of standardization cycles. In the near term that means stabilizing 540p real-time performance, expanding hardware coverage, and improving loss resilience. In the medium term: higher resolution, e.g., 1080p, and broader streaming scenarios. In the long term: an open video codec ecosystem that meaningfully replaces legacy stacks where it makes sense to. We can't create the future of MLVC alone. We're glad you're here, and we are looking forward to building the next-generation video codec with you. Who are we MLVC is brought to you by the following awesome folks working on the project at Microsoft: Ross Cutler, Ando Saabas, Tanel Pärnamaa, Ardi Loot, Haiyan Xie, Lauri Ehrenpreis, Andrei Znobishchev, Martin Lumiste, Evgenii Indenbom, Yan Lu, Bin Li, Jiahao Li, Naba Kumar, Babak Naderi, Juhee Cho, Badal Yadav, Jinxin Zhou, Tianyu Ding, Patrick Gregory. — The MLVC Team, Microsoft15KViews0likes4CommentsLesson Learned #269: Unable to connect - Is unavailable or does not exist - Connection Time out
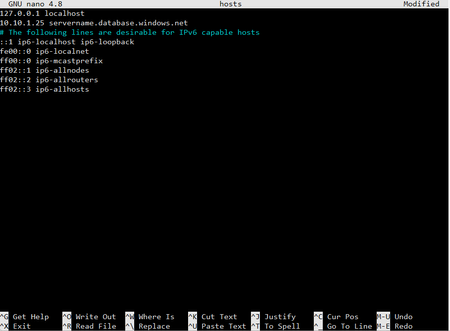
Today, I worked on a service request that your customer is facing the following error message: During handling of the above exception, another exception occurred: Traceback (most recent call last): File "src/pymssql/_pymssql.pyx", line 653, in pymssql._pymssql.connect pymssql._pymssql.OperationalError: (20009, b'DB-Lib error message 20009, severity 9:\nUnable to connect: Adaptive Server is unavailable or does not exist (servername.database.windows.net)\nNet-Lib error during Connection timed out (110)\nDB-Lib error message 20009, severity 9:\nUnable to connect: Adaptive Server is unavailable or does not exist (servername.database.windows.net)\nNet-Lib error during Connection timed out (110)\n')13KViews0likes2Comments
Microsoft Teams for Ubuntu 20.04 will not start
I am trying to get the official MS Teams application to run on my Ubuntu 20.04 machine. No matter how I install it, it will not display any sort of window when ran normally (i.e. clicking the icon in Applications, running teams if installed with apt, or running 'snap run teams' if installed with snap). When I run snap run teams, I get this error: 2022/02/18 10:15:43.002794 cmd_run.go:1039: WARNING: cannot start document portal: Expected portal at "/run/user/197001104/doc", got "/home/username/.cache/doc" When installed with apt and I run 'teams', I get no output and the process ends immediately. The only way I am ever able to get a window to display is if I install with snap, 'snap install teams', then run it with 'snap run --trace-exec teams'. Then it works as expected. When not ran with 'snap run --trace-exec teams', I can see several processes running when I check 'ps aux | grep teams'. These never close themselves and require a 'kill <PID>' to exit. I have tried the following versions with apt/dpkg: 1.4.00.26453 1.3.00.16851 1.2.00.32451 and the version snap installs is: 1.4.00.26453 I have tried uninstalling, reinstalling, clearing my cache using the following script, and any combination of the three. https://gist.github.com/mrcomoraes/c83a2745ef8b73f9530f2ec0433772b7 ~/.config/Microsoft/Microsoft Teams/logs/teams-startup.log A JavaScript error occurred in the main process Uncaught Exception: Error: /usr/share/teams/resources/app.asar.unpacked/node_modules/native-utils/build/Release/native-utils.node: undefined symbol: _ZN5Utils32IsQuietHourOrDoNotDisturbEnabledEv at process.module.(anonymous function) [as dlopen] (ELECTRON_ASAR.js:143:31) at Object.Module._extensions..node (internal/modules/cjs/loader.js:722:18) at Object.module.(anonymous function) [as .node] (ELECTRON_ASAR.js:152:18) at Module.load (internal/modules/cjs/loader.js:602:32) at tryModuleLoad (internal/modules/cjs/loader.js:541:12) at Function.Module._load (internal/modules/cjs/loader.js:533:3) at Module.require (internal/modules/cjs/loader.js:640:17) at require (/usr/share/teams/resources/app.asar/external/v8-compile-cache/v8-compile-cache.js:173:28) at Object.<anonymous> (/usr/share/teams/resources/app.asar/node_modules/native-utils/index.js:1:173) at Object.<anonymous> (/usr/share/teams/resources/app.asar/node_modules/native-utils/index.js:3:3) snap version snap 2.54.3+20.04.1 snapd 2.54.3+20.04.1 series 16 ubuntu 20.04 kernel 5.13.0-28-generic If any other info is needed or would be useful for troubleshooting, please let me know. I am all out of ideas.11KViews0likes3CommentsIncreased security and resiliency of Canonical workloads on Azure - now in preview
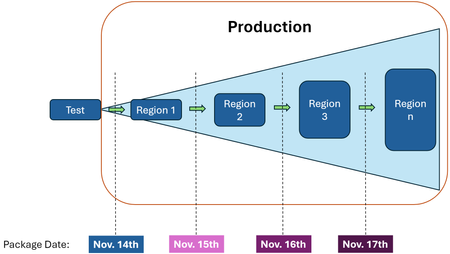
Microsoft and Canonical have partnered to make it easier for you to stay current with Linux operating system (OS) updates and increase the security and resiliency of Canonical workloads on Azure. Azure is the first cloud provider to collaborate with Canonical to integrate its snapshot service. Azure Guest Patching Service (AzGPS) and Azure Kubernetes Service (AKS) will leverage the new capability to apply the same update consistently on your fleet across regions via safe deployment principles (SDP).9.3KViews0likes0CommentsSemanticKernel – 📎Chat Service demo running Llama2 LLM locally in Ubuntu
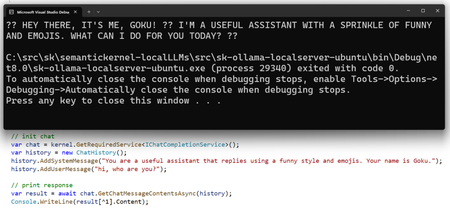
Learn how to run a Llama 2 model locally with Ollama, an open-source language model platform. Interact with the model using .NET and Semantic Kernel, a chat service and a console app. Experiment with large language models without external tools or services.7.7KViews0likes0CommentsRun OpenClaw Agents on Azure Linux VMs (with Secure Defaults)
Many teams want an enterprise-ready personal AI assistant, but they need it on infrastructure they control, with security boundaries they can explain to IT. That is exactly where OpenClaw fits on Azure. OpenClaw is a self-hosted, always-on personal agent runtime you run in your enterprise environment and Azure infrastructure. Instead of relying only on a hosted chat app from a third-party provider, you can deploy, operate, and experiment with an agent on an Azure Linux VM you control — using your existing GitHub Copilot licenses, Azure OpenAI deployments, or API plans from OpenAI, Anthropic Claude, Google Gemini, and other model providers you already subscribe to. Once deployed on Azure, you can interact with an OpenClaw agent through familiar channels like Microsoft Teams, Slack, Telegram, WhatsApp, and many more! For Azure users, this gives you a practical middle ground: modern personal-agent workflows on familiar Azure infrastructure. What is OpenClaw, and how is it different from ChatGPT/Claude/chat apps? OpenClaw is a self-hosted personal agent runtime that can be hosted on Azure compute infrastructure. How it differs: ChatGPT/Claude apps are primarily hosted chat experiences tied to one provider's models OpenClaw is an always-on runtime you operate yourself, backed by your choice of model provider — GitHub Copilot, Azure OpenAI, OpenAI, Anthropic Claude, Google Gemini, and others OpenClaw lets you keep the runtime boundary in your own Azure VM environment within your Azure enterprise subscription In practice, OpenClaw is useful when you want a persistent assistant for operational and workflow tasks, with your own infrastructure as the control point. You bring whatever model provider and API plan you already have — OpenClaw connects to it. Why Azure Linux VMs? Azure Linux VMs are a strong fit because they provide: A suitable host machine for the OpenClaw agent to run on Enterprise-friendly infrastructure and identity workflows Repeatable provisioning via the Azure CLI Network hardening with NSG rules Managed SSH access through Azure Bastion instead of public SSH exposure How to Set Up OpenClaw on an Azure Linux VM This guide sets up an Azure Linux VM, applies NSG (Network Security Group) hardening, configures Azure Bastion for managed SSH access, and installs an always-on OpenClaw agent within the VM that you can interact with through various messaging channels. What you'll do Create Azure networking (VNet, subnets, NSG) and compute resources with the Azure CLI Apply Network Security Group rules so VM SSH is allowed only from Azure Bastion Use Azure Bastion for SSH access (no public IP on the VM) Install OpenClaw on the Azure VM Verify OpenClaw installation and configuration on the VM What you need An Azure subscription with permission to create compute and network resources Azure CLI installed (install steps) An SSH key pair (the guide covers generating one if needed) ~20–30 minutes Configure deployment Step 1: Sign in to Azure CLI az login # Select a suitable Azure subscription during Azure login az extension add -n ssh # SSH extension is required for Azure Bastion SSH The ssh extension is required for Azure Bastion native SSH tunneling. Step 2: Register required resource providers (one-time) Register required Azure Resource Providers (one time registration): az provider register --namespace Microsoft.Compute az provider register --namespace Microsoft.Network Verify registration. Wait until both show Registered. az provider show --namespace Microsoft.Compute --query registrationState -o tsv az provider show --namespace Microsoft.Network --query registrationState -o tsv Step 3: Set deployment variables Set the deployment environment variables that will be needed throughout this guide. RG="rg-openclaw" LOCATION="westus2" VNET_NAME="vnet-openclaw" VNET_PREFIX="10.40.0.0/16" VM_SUBNET_NAME="snet-openclaw-vm" VM_SUBNET_PREFIX="10.40.2.0/24" BASTION_SUBNET_PREFIX="10.40.1.0/26" NSG_NAME="nsg-openclaw-vm" VM_NAME="vm-openclaw" ADMIN_USERNAME="openclaw" BASTION_NAME="bas-openclaw" BASTION_PIP_NAME="pip-openclaw-bastion" Adjust names and CIDR ranges to fit your environment. The Bastion subnet must be at least /26. Step 4: Select SSH key Use your existing public key if you have one: SSH_PUB_KEY="$(cat ~/.ssh/id_ed25519.pub)" If you don't have an SSH key yet, generate one: ssh-keygen -t ed25519 -a 100 -f ~/.ssh/id_ed25519 -C "you@example.com" SSH_PUB_KEY="$(cat ~/.ssh/id_ed25519.pub)" Step 5: Select VM size and OS disk size VM_SIZE="Standard_B2as_v2" OS_DISK_SIZE_GB=64 Choose a VM size and OS disk size available in your subscription and region: Start smaller for light usage and scale up later Use more vCPU/RAM/disk for heavier automation, more channels, or larger model/tool workloads If a VM size is unavailable in your region or subscription quota, pick the closest available SKU List VM sizes available in your target region: az vm list-skus --location "${LOCATION}" --resource-type virtualMachines -o table Check your current vCPU and disk usage/quota: az vm list-usage --location "${LOCATION}" -o table Deploy Azure resources Step 1: Create the resource group The Azure resource group will contain all of the Azure resources that the OpenClaw agent needs. az group create -n "${RG}" -l "${LOCATION}" Step 2: Create the network security group Create the NSG and add rules so only the Bastion subnet can SSH into the VM. az network nsg create \ -g "${RG}" -n "${NSG_NAME}" -l "${LOCATION}" # Allow SSH from the Bastion subnet only az network nsg rule create \ -g "${RG}" --nsg-name "${NSG_NAME}" \ -n AllowSshFromBastionSubnet --priority 100 \ --access Allow --direction Inbound --protocol Tcp \ --source-address-prefixes "${BASTION_SUBNET_PREFIX}" \ --destination-port-ranges 22 # Deny SSH from the public internet az network nsg rule create \ -g "${RG}" --nsg-name "${NSG_NAME}" \ -n DenyInternetSsh --priority 110 \ --access Deny --direction Inbound --protocol Tcp \ --source-address-prefixes Internet \ --destination-port-ranges 22 # Deny SSH from other VNet sources az network nsg rule create \ -g "${RG}" --nsg-name "${NSG_NAME}" \ -n DenyVnetSsh --priority 120 \ --access Deny --direction Inbound --protocol Tcp \ --source-address-prefixes VirtualNetwork \ --destination-port-ranges 22 The rules are evaluated by priority (lowest number first): Bastion traffic is allowed at 100, then all other SSH is blocked at 110 and 120. Step 3: Create the virtual network and subnets Create the VNet with the VM subnet (NSG attached), then add the Bastion subnet. az network vnet create \ -g "${RG}" -n "${VNET_NAME}" -l "${LOCATION}" \ --address-prefixes "${VNET_PREFIX}" \ --subnet-name "${VM_SUBNET_NAME}" \ --subnet-prefixes "${VM_SUBNET_PREFIX}" # Attach the NSG to the VM subnet az network vnet subnet update \ -g "${RG}" --vnet-name "${VNET_NAME}" \ -n "${VM_SUBNET_NAME}" --nsg "${NSG_NAME}" # AzureBastionSubnet — name is required by Azure az network vnet subnet create \ -g "${RG}" --vnet-name "${VNET_NAME}" \ -n AzureBastionSubnet \ --address-prefixes "${BASTION_SUBNET_PREFIX}" Step 4: Create the Virtual Machine Create the VM with no public IP. SSH access for OpenClaw configuration will be exclusively through Azure Bastion. az vm create \ -g "${RG}" -n "${VM_NAME}" -l "${LOCATION}" \ --image "Canonical:ubuntu-24_04-lts:server:latest" \ --size "${VM_SIZE}" \ --os-disk-size-gb "${OS_DISK_SIZE_GB}" \ --storage-sku StandardSSD_LRS \ --admin-username "${ADMIN_USERNAME}" \ --ssh-key-values "${SSH_PUB_KEY}" \ --vnet-name "${VNET_NAME}" \ --subnet "${VM_SUBNET_NAME}" \ --public-ip-address "" \ --nsg "" --public-ip-address "" prevents a public IP from being assigned. --nsg "" skips creating a per-NIC NSG (the subnet-level NSG created earlier handles security). Reproducibility: The command above uses latest for the Ubuntu image. To pin a specific version, list available versions and replace latest: az vm image list \ --publisher Canonical --offer ubuntu-24_04-lts \ --sku server --all -o table Step 5: Create Azure Bastion Azure Bastion provides secure-managed SSH access to the VM without exposing a public IP. Bastion Standard SKU with tunneling is required for CLI-based "az network bastion ssh" command. az network public-ip create \ -g "${RG}" -n "${BASTION_PIP_NAME}" -l "${LOCATION}" \ --sku Standard --allocation-method Static az network bastion create \ -g "${RG}" -n "${BASTION_NAME}" -l "${LOCATION}" \ --vnet-name "${VNET_NAME}" \ --public-ip-address "${BASTION_PIP_NAME}" \ --sku Standard --enable-tunneling true Bastion provisioning typically takes 5–10 minutes but can take up to 15–30 minutes in some regions. Step 6: Verify Deployments After all resources are deployed, your resource group should look like the following: Install OpenClaw Step 1: SSH into the VM through Azure Bastion VM_ID="$(az vm show -g "${RG}" -n "${VM_NAME}" --query id -o tsv)" az network bastion ssh \ --name "${BASTION_NAME}" \ --resource-group "${RG}" \ --target-resource-id "${VM_ID}" \ --auth-type ssh-key \ --username "${ADMIN_USERNAME}" \ --ssh-key ~/.ssh/id_ed25519 Step 2: Install OpenClaw (in the Bastion SSH shell) curl -fsSL https://openclaw.ai/install.sh | bash The installer installs Node LTS and dependencies if not already present, installs OpenClaw, and launches the OpenClaw onboarding wizard. For more information, see the open source OpenClaw install docs. OpenClaw Onboarding: Choosing an AI Model Provider During OpenClaw onboarding, you'll choose the AI model provider for the OpenClaw agent. This can be GitHub Copilot, Azure OpenAI, OpenAI, Anthropic Claude, Google Gemini, or another supported provider. See the open source OpenClaw install docs for details on choosing an AI model provider when going through the onboarding wizard. Most enterprise Azure teams already have GitHub Copilot licenses. If that is your case, we recommend choosing the GitHub Copilot provider in the OpenClaw onboarding wizard. See the open source OpenClaw docs on configuring GitHub Copilot as the AI model provider. OpenClaw Onboarding: Setting up Messaging Channels During OpenClaw onboarding, there will be an optional step where you can set up various messaging channels to interact with your OpenClaw agent. For first time users, we recommend setting up Telegram due to ease of setup. Other messaging channels such as Microsoft Teams, Slack, WhatsApp, and others can also be set up. To configure OpenClaw for messaging through chat channels, see the open source OpenClaw chat channels docs. Step 3: Verify OpenClaw Configuration To validate that everything was set up correctly, run the following commands within the same Bastion SSH session: openclaw status openclaw gateway status If there are any issues reported, you can run the onboarding wizard again with the steps above. Alternatively, you can run the following command: openclaw doctor Message OpenClaw Once you have configured the OpenClaw agent to be reachable via various messaging channels, you can verify that it is responsive by messaging it. Enhancing OpenClaw for Use Cases There you go! You now have a 24/7, always-on personal AI agent, living on its own Azure VM environment. For awesome OpenClaw use cases, check out the awesome-openclaw-usecases repository. To enhance your OpenClaw agent with additional AI skills so that it can autonomously perform multi-step operations on any domain, check out the awesome-openclaw-skills repository. You can also check out ClawHub and ClawSkills, two popular open source skills directories that can enhance your OpenClaw agent. Cleanup To delete all resources created by this guide: az group delete -n "${RG}" --yes --no-wait This removes the resource group and everything inside it (VM, VNet, NSG, Bastion, public IP). This also deletes the OpenClaw agent running within the VM. If you'd like to dive deeper about deploying OpenClaw on Azure, please check out the open source OpenClaw on Azure docs.7.3KViews5likes2CommentsCanonical Ubuntu 20.04 LTS Reaching End of Standard Support
We’re announcing the upcoming end of standard support for Ubuntu 20.04 LTS (Focal Fossa) on 31 May 2025, as we focus on delivering a more secure and optimized Linux experience. Originally released in April 2020, Ubuntu 20.04 LTS introduced key enhancements like improved UEFI Secure Boot and broader Kernel Livepatch coverage, strengthening security on Azure. You can continue using your existing virtual machines, but after this date, security, features, and maintenance updates will no longer be provided by Canonical, which may impact system security and reliability. Recommended action: It’s important to act before 31 May 2025 to ensure you’re on a supported operating system. Microsoft recommends either migrating to the next Ubuntu LTS release or upgrading to Ubuntu Pro to gain access to expanded security and maintenance from Canonical. Upgrading to Ubuntu 22.04 LTS or Ubuntu 24.04 LTS Transitioning to the latest operating system, such as Ubuntu 24.04 LTS, is important for performance, hardware enablement, new technology benefits, and is recommended for new instances. It may be a complex process for existing deployments and should be properly scoped and tested with your workloads. While there’s no direct upgrade path from Ubuntu 20.04 LTS to Ubuntu 24.04 LTS, you can directly upgrade to Ubuntu 22.04 LTS, and then to Ubuntu 24.04 LTS, or directly install Ubuntu 24.04 LTS. See the Ubuntu Server upgrade guide for more information. Ubuntu Pro – Expanded Security Maintenance to 2030 Ubuntu Pro includes security patching for all Ubuntu packages due to Expanded Security Maintenance (ESM) for Infrastructure and Applications and optional 24/7 phone and ticket support. Ubuntu Pro 20.04 LTS will remain fully supported until May 2030. New virtual machines can be deployed with Ubuntu Pro from the Azure Marketplace. You can also upgrade existing virtual machines to Ubuntu Pro by in-place upgrades via Azure CLI. More Information More information covering Ubuntu 20.04 LTS End of Standard Support can be found here. Refer to the documentation to learn more about handling Ubuntu 20.04 LTS on Azure. You can also check out Canonical’s blog post and watch the webinar here.6.2KViews1like1Comment