best practices
1665 TopicsMicrosoft Defender for Cloud Customer Newsletter
What's new in Defender for Cloud? Defender for Cloud is now integrated into the Defender portal to bring together cloud security posture management and threat protection in a single experience. Read more about it here. Cloud security reporting in the Defender portal is now in public preview Customers can now create, customize, and share security insights across the organization through Defender portal’s integrated cloud security reporting capabilities. With these reporting capabilities, customers can view built-in reports like CNAPP Executive Summary, create custom reports, export to PDF and more. For more details, please refer to this documentation. Check out other updates from last month here! Check out monthly news for the rest of the MTP suite here! Blog(s) of the month In May, our team published the following blog posts we would like to share: Better together with Azure WAF + Defender for Storage + Defender for Azure SQL Databases Public preview: Expanded coverage and unified management for SQL VA Express Configuration | Microsoft Community Hub Defender for Cloud in the field Check out the two short videos on Defender Portal integration and Start Secure Stay Secure with Defender for Cloud Microsoft Defender for Cloud deeply integrates with Microsoft Defender Start secure and stay secure with Microsoft Defender for Cloud Visit our YouTube page GitHub Community Check out this PS script and CLI to help you enable Defender for API at scale: Onboard to Defender for API at scale Visit our GitHub page Customer journey Discover how other organizations successfully use Microsoft Defender for Cloud to protect their cloud workloads. This month we are featuring Loyens & Loeff, a law and tax firm, that operates in a high complex environment, sought to modernize the digital workplace with Microsoft 365 Copilot, Defender for Cloud and Purview. Join our community! We offer several customer connection programs within our private communities. By signing up, you can help us shape our products through activities such as reviewing product roadmaps, participating in co-design, previewing features, and staying up-to-date with announcements. Sign up at aka.ms/JoinCCP. We greatly value your input on the types of content that enhance your understanding of our security products. Your insights are crucial in guiding the development of our future public content. We aim to deliver material that not only educates but also resonates with your daily security challenges. Whether it’s through in-depth live webinars, real-world case studies, comprehensive best practice guides through blogs, or the latest product updates, we want to ensure our content meets your needs. Please submit your feedback on which of these formats do you find most beneficial and are there any specific topics you’re interested in https://aka.ms/PublicContentFeedback. Note: If you want to stay current with Defender for Cloud and receive updates in your inbox, please consider subscribing to our monthly newsletter: https://aka.ms/MDCNewsSubscribe
News to Know – Volume 3, Edition 6, June 2026
This month’s newsletter brings together the latest updates, insights, and best practices to help you use Viva Glint & Pulse as part of your broader AI transformation strategy. As Copilot adoption grows, employee listening can help organizations better understand employee experiences, identify opportunities for support, and turn feedback into action that drives meaningful business impact. *Side note: Have you configured your Viva Glint blog notifications to send you an email when a new newsletter or blog is posted but you haven’t been receiving them? You may need to add notifications@communityhub.microsoft.com to your approved email sender domain list to ensure that you get the email notifications. We’ve also added this information here. New on your Viva Glint platform This section highlights new capabilities and updates now available to help you strengthen security, reporting, and administrative control in Viva Glint. Benchmark Refresh: Industry benchmark suites. This month, the industry benchmarks have been updated in alignment with the annual refresh cycle. As part of this update: Coverage has been refined, with Media added and Retail – Wholesale Distribution removed due to insufficient data. The one-year data collection suites are labeled “Industry 2025 (Calendar Year)” and include data collected from January 1 to December 31, 2025. To broaden benchmark coverage, a two-year data collection period (i.e., January 2024 - December 2025) was used to introduce Automotive and Nonprofit and to refresh Pharmaceuticals benchmarks. These benchmarks are labeled "Industry 2024 - 2025" on Viva Glint. To access external benchmark comparisons in reporting, customers must opt in to benchmarking. Opting in increases the overall benchmark data pool, improves data coverage, and supports a broader set of benchmark suites. Customers who have not opted in won’t be able to view or include external benchmarks in their reports. Survey Configuration: Custom confidentiality statements. Viva Glint admins now have the option to use Viva Glint’s default confidentiality statement in their survey programs, or they can opt to turn off the default Viva Glint confidentiality statement and define their own organization‑specific confidentiality messaging. This enables clearer, context-appropriate communication to survey participants while maintaining Viva Glint’s core confidentiality protections and trust standards. The update helps organizations meet legal, compliance, and cultural requirements without compromising employee trust. Learn more here and here. Reporting: Topic Assignments Included in Comment Report Export. When exporting comments from the Comments report to a spreadsheet, Viva Glint now includes the topic(s) assigned to each comment. This enhancement allows analysts to seamlessly extend their analysis into external tools with Viva Glint’s topics already applied. Coming soon to Viva Glint The following section offers an early look at capabilities coming to Viva Glint shaping the future of continuous listening, analytics, and AI‑powered insight. Please note that public documentation (e.g., MS Learn articles) is not typically published until a feature is generally available. Seamless Entra authentication for MTO organizations | Generally available starting mid June. Seamless Domain Discovery (SDD) will simplify the sign-in experience for multitenant organizations and support users by introducing automatic tenant discovery. This new Entra‑based experience reduces reliance on MTO policies, lowers admin overhead, and aligns Viva Glint access with standard Microsoft 365 sign‑in—delivering a more scalable and seamless authentication experience. For scenarios where users need to explicitly access a different tenant (for example, guest or support access) or they have access to more than a one Viva Glint instance with their credentials, domain selection remains available to ensure flexibility and control. This feature will start rolling out to MTO customers in mid June with the rollout expected to be complete by the end of June. Custom data retention policy | Generally available starting late June. Viva Glint admins will be able to set how long survey data is retained before deletion to help meet organizational and compliance needs. This policy will apply across Viva Glint survey data, including engagement, ad hoc, recurring, always-on, and 360 surveys, as well as focus areas and goals. Customers with an existing retention policy will see their current settings carried over automatically. Improved audit activity logs for user data import | Generally available starting late June. Viva Glint audit activity logs will soon provide enhanced visibility into successful data imports with a downloadable processed file details report. With this feature, admins can quickly review processed, updated, or partially ingested records for SFTP and MODIS user data imports. “Select All” toggle for report filters | General availability coming soon. A new “Select All” option in the reporting filter panel will let users select or clear every attribute value in one click. This removes the pain of managing filters with long value lists, speeding up analysis and reducing manual effort. We aim to make this feature generally available in the next couple of months. Copilot Reporting: Dynamic Topics with Copilot | General availability coming soon. By leveraging Copilot, this functionality is designed to enhance the relevance and context of comment themes by extending beyond the current static set of topics and identifying customer-specific topics that can be tracked over time. These custom topics will remain confined to your platform and will not be accessible to Microsoft or other customers. This feature will also improve the accuracy of assignment to topics for both standard and dynamic categorization. We aim to make this feature generally available in the next couple of months. Copilot-supported commenting for Viva Glint survey takers | Private preview ongoing. Soon, Viva Glint survey participants will be able to use an in-survey Copilot experience to polish their written feedback (please note: this capability is not available for respondents accessing surveys via attribute-based login or personalized links). Copilot can rephrase comments so employees can communicate more clearly and with greater confidence. By helping reduce distinctive writing patterns and making it easier to provide thoughtful input, the feature can increase comfort and perceived privacy—driving higher participation, richer responses, and more candid insights that organizations can act on. Continuous Employee Engagement with Workplace Metrics | Private preview ongoing. Improve actionability for Work-Life Balance and Collaboration focus areas by integrating Viva Insights workplace metrics into Viva Glint reporting. This feature will help Senior Leaders in your organization access supplementary data points, in conjunction with survey responses, to better understand their team's experience and conduct more data-driven discussions on what can be improved in these areas. Between survey cycles, leaders can also enable notifications to keep track of changes in their team's workplace patterns, allowing them to keep a better pulse on behavior change commitments. Private Preview is targeted in May 2026. Future capabilities will include the ability to map Viva Insights and Copilot metrics to survey items and bring in additional data sources from M365, such as meeting metadata and content. To express your interest, please complete the following: Private Preview: Continuous Employee Engagement with Workplace Metrics. If you are already part of the Employee Experience Customer Connection (EECC) program, request to join our Workplace Patterns & Continuous Listening EECC Teams subchannel through the main Viva Glint EECC Teams channel so you can iterate on the future of continuous engagement with the product team in monthly calls. If you aren’t already part of the EECC, see the Connect with us section in this newsletter for more detail on how to join. Employee Feedback Agent | Private preview ongoing. Enhance your Employee Listen program with The Employee Feedback Agent a dynamic, AI-powered conversation, where employees can share what matters most through natural, chat-like interactions, whether prompted or always-on, enabling real-time feedback and deeper insights into the drivers behind their experiences. By combining Copilot intelligence and People Science principles, the agent streamlines feedback collection and reduces administrative overhead for HR and leaders. Unlike traditional Copilot tools that simply summarize information, the Employee Feedback Agent collects experiential data through probing questions and back and forth dialogue with employees. Future capabilities will expand impact with an actionable insights reporting experience, accelerating the “feedback-to-action” cycle. Raw Data Export API Egress | Private preview ongoing. Unlock seamless, automated access to raw survey data—no more manual downloads. Built on Microsoft Graph, these APIs make integrations easier and help admins move faster with greater efficiency. Express your interest here. See our public roadmap for more feature updates. Events and learning opportunities Stay up to date with upcoming events, recent documentation updates, and highlights from EECC customer sessions—designed to help you learn, connect, and get more value from Viva Glint & Pulse. Recent documentation enhancements: Have technical questions about Viva Glint? Microsoft Learn is your best source for clear, current guidance. We’ve expanded and refined our documentation to add detail on new capabilities, address frequent questions, and strengthen the topics customers rely on most. These updates improve clarity and consistency, making it easier to use Viva Glint with confidence. Below are a few of the most impactful recent updates now live on Microsoft Learn: Additional notes added to live survey updates Update to allowed email sender domain list to ensure receipt of blog notifications Focus area cascading guidance clarification 360 configuration guidance updates here and here Important note added around adding survey reminders EECC Customer Engagement Sessions: Previous sessions: May 28th – Help Shape What’s Next for Viva Glint 360 Assessments Target Audience: Viva Glint 360 Admins We invited Viva Glint 360 admins to join an interactive listening session focused on the real-world experience of running 360 assessments in Viva Glint. The session created a space for admins to share candid feedback and directly influence the future direction of Viva Glint 360s, which have seen limited evolution to date. The discussion centered on where the 360 process creates friction for admins, managers, and participants; moments where workflows slow down, break, or require manual workarounds; and small, high-impact improvements that could meaningfully enhance the overall experience. It was a candid, discussion-driven session with the Viva Glint Product team and customer peers sharing what’s working well and where challenges remain. Key takeaways: Aggregate reporting emerged as one of the top customer requests, with many customers emphasizing the need for easier ways to consolidate and analyze 360 feedback data. Customers also exchanged creative workarounds and best practices during the session, showcasing strong peer collaboration within the community. Poll results helped validate the highest-priority enhancement areas, which will help inform future Viva Glint 360 investment planning. If you are not yet a member of the Employee Experience Customer Connection (EECC) but would like to participate in upcoming sessions, as well as gain access to numerous other engaging and valuable Viva Glint and Pulse customer activities, please see the sign-up information below. Customer Success Stories See how organizations are using Viva Glint, Pulse, and Copilot to turn employee insight into measurable impact. Energy Company Advances from Copilot Adoption to Measured, HR‑Led AI Transformation with Microsoft EVE After scaling Microsoft 365 Copilot across 20,000 employees, Energy company partnered with Microsoft’s Viva Glint team to introduce AI transformation measurement—aligning HR and IT around shared readiness, governance, and priorities for scalable agentic automation. Situation The customer scaled Microsoft 365 Copilot across 20,000 employees, but maturity varied across business units. As the organization shifts toward agentic automation, leaders need consistent, data‑driven measurement of readiness, impact, and transformation maturity to guide aligned enterprise investment. Solution At this critical inflection point, Microsoft's Viva Glint team engaged alongside the Microsoft FastTrack and broader account teams, introducing the Frontier Firm AI Transformation Measurement framework, enabling the customer to establish a common language for AI maturity and shift from qualitative discussions to data‑driven insight. Working closely with Group HR, Employee Experience (EEX), and IT, they leveraged Viva Glint to establish an enterprise‑wide measurement baseline—positioning HR as a strategic co‑driver of AI transformation alongside IT governance. Cross‑Functional Collaboration: HR and IT in Action Two priority areas emerged through joint HR–IT alignment: AI Transformation Measurement HR and IT partnered to create shared visibility into workforce readiness, adoption quality, and transformation maturity across the enterprise Viva Glint enabled scalable, repeatable measurement tied to business and technology priorities HR‑Led Agentic Experimentation HR partnered with IT governance to align agentic automation experiments to workforce readiness Ensured automation scaled responsibly, with employee experience, engagement, and change readiness embedded from the start Impact This customer is positioned to shift from AI experimentation to measured, governed, and scalable agentic transformation. Expected improvements in coming months include increases in Copilot MAU, higher usage frequency visible in dashboards, and strengthened employee engagement scores reflecting greater clarity and readiness for AI‑enabled work. Connect with us Stay engaged with the Viva Glint & Pulse community through the Employee Experience Customer Connection (EECC) program. The Employee Experience Customer Connection (EECC) program offers our customers an opportunity to be part of a feedback community as employee experiences continue to evolve with Viva and Microsoft 365 Copilot. What the program provides: Product team engagement for Employee Experiences powered by Viva and M365 Copilot Forums for you to influence product direction & unlock value for your organization Early insight into product roadmap Private preview engagement opportunities Connection with other enterprise customers If you’re interested in joining, please fill out this form so we can guide you through the enrollment process and help you get started. We look forward to partnering with you to build better products—together.127Views0likes0Comments
How much should Teams presence influence call routing
One thing I've noticed recently is that many Teams Phone environments still treat presence as a destination state rather than a routing input. A typical flow might look like: Caller selects an option Call is transferred User is unavailable Caller ends up in voicemail or another queue Technically the routing worked. From the caller's perspective, it often didn't. I'm curious how others are approaching this. Are you using Teams presence as part of your call-routing logic? For example: Available → transfer immediately Busy → offer an alternative path In a meeting → capture context Offline → route elsewhere Or are traditional queues and escalation paths still sufficient for most scenarios? Interested to hear what people are doing in real deployments.23Views1like0CommentsVNet integration for Azure SRE Agent (preview)
For many production systems, the logs, databases, private endpoints, repositories, and runbooks an SRE Agent needs to do its job are behind network boundaries your security team already governs. VNet integration for Azure SRE Agent, now in preview, puts the agent's outbound traffic under those same controls - your virtual network, your NSG rules, your private DNS - so it reaches only what your network allows. The principle is one your security team already applies to every other workload: a component's network access shouldn't depend on the component behaving correctly. Identity governs what the agent can reach. Permissions and hooks shape what it does within reach. The network sits beneath both: it blocks any request to a destination you haven't allowed no matter what the agent decides. Why egress control matters Two reasons. First, the agent reads sensitive things by design. Inspecting logs, code, configuration, and internal systems is the whole point during an incident, which means you have to decide where that data can go. Open egress gives that data a path out of your network - a risk you wouldn't accept for any other production-adjacent workload. Second, it reasons over text it didn't write - logs, issue descriptions, tool output — which is how prompt injection gets in. Handling that is partly model safety, and Azure SRE Agent runs under Microsoft's Responsible AI standard with safety work from OpenAI and Anthropic. Network controls add another layer: an instruction that tries to reach a destination you haven't allowed can't run, because the network blocks it. For example, an agent investigating an outage might query Log Analytics, read deployment configuration, and call an internal runbook - all private resources. With VNet integration, those calls follow the routes, DNS, and firewall rules your workloads already use. A request to an external endpoint you haven't allowed fails at the network boundary. It doesn't depend on the model recognizing the risk and refusing; the network stops it either way. Choose an egress mode Azure SRE Agent has three egress modes, and you don't have to start at the strongest. Unrestricted - all outbound traffic allowed Limited - deny all outbound, allow an explicit list of hosts. Gives you host-level control without setting up a full VNet Azure VNet - outbound traffic goes through a delegated subnet in your network, with your NSG rules and private DNS applied. The recommended mode for production and regulated workloads. How Azure VNet mode works Outbound traffic takes one of two paths, and every call takes exactly one. Your VNet. Everything not placed on the managed path goes through a delegated subnet in your own network, where your NSG rules, private DNS, and firewall all apply. The agent is just another workload on that subnet, so it can reach what the subnet can reach: databases behind private endpoints, internal services, monitoring stores, and key vaults -the parts of production that aren't reachable from the public internet. The resources that matter most during an incident are usually the private ones. If your network connects to on-premises over ExpressRoute or VPN, the agent can reach those systems too, as long as your existing routes and rules allow it. The managed infra path. Some destinations go through Azure SRE Agent's managed infrastructure network instead - platform services the agent needs, plus optional categories you turn on: package registries, code repositories, and remote MCP servers. This path skips your VNet, so your NSG rules and Firewall Policies don't apply to it. Treat it as a deliberate exception, used only where you need it. Why public services start on the managed path Public services are hard to allow by IP address. GitHub, PyPI, npm, NuGet, apt, and the container registries run on large, changing IP ranges, and they don't map to a single Azure service tag. If your NSG filters by IP and port, keeping those lists up to date is constant work, and when a list falls behind, the agent can't pull a package or read a repository - and an investigation stalls on a networking problem that has nothing to do with the incident. Each category has a toggle: package registries (PyPI, npm, NuGet, apt), code repositories (GitHub, GitHub Enterprise, Azure DevOps), remote MCP servers, and a list of additional hostnames. Starting with these on the managed path keeps the agent working reliably without maintaining an IP allowlist. For build-time dependencies, that's usually fine. If you want this traffic inspected too, the next step is name-based (FQDN) egress filtering in your own network. Once your firewall can allow github.com and pypi.org by name, you can move these categories off the managed path and route them through your VNet instead Configure it Two decisions: the subnet, and what (if anything) uses the bypass. Navigate to Settings > Workspace Configuration > Network Choose Azure VNet as the egress mode. Select a subnet that is /28 or larger and delegated to `Microsoft.App/environments`. Decide which categories, if any, use the bypass. Restrict who can change the egress mode and bypass toggles. These settings widen or narrow the agent's reach, so govern them like any production network control. Test the outbound behavior before using the agent with production data. A reasonable setup for most enterprises during preview: use Azure VNet mode, keep package registries and code repositories on the bypass if you need reliable access to them, and route everything else through your VNet. Stricter environments can turn those categories off and rely on their own name-based firewall rules. What it doesn't cover yet VNet integration is in preview, with two limitations to know. It covers outbound traffic only - reaching the agent privately from inside your network isn't part of this preview. And connector traffic still routes over the public internet; the governance and credential isolation in Connectors V2 still apply. Use VNet integration for outbound control of the agent workspace, and combine it with identity, RBAC, tool permissions, hooks, and connector governance for a complete set of controls. Where it fits VNet integration doesn't replace identity, RBAC, tool permissions, or connector governance. It controls where traffic can go. The agent still needs the right identity and permissions to access a resource in the first place. Identity is the foundation: your RBAC assignments decide what the agent can reach. Permissions and hooks shape what it does within reach: allow/ask/deny rules control what runs, and hooks let you inspect or change a tool call before it runs. VNet integration sits underneath, controlling where traffic can go no matter what the agent tries to do. You want the agent to be capable. You also want a boundary that holds whether or not it is. Get started Create an SRE Agent - https://aka.ms/sreagent Documentation - https://aka.ms/sreagent/newdocs Recipes - https://aka.ms/sreagent/recipes Build 2026 Announcement - https://aka.ms/Build26/blog/SREAgent517Views1like0CommentsManaged Connectors for SRE Agent (preview)- Govern what your agent can do
Giving an agent access to a tool is the easy part. The harder question is what it's allowed to do with that access. "Can the agent copy a file in OneDrive?" mostly answers itself. "Can it copy any file, to any destination, over one that's already there?" is the one that decides whether the integration has a governance layer. Managed Connectors is built around that second question. It expands the catalog of tools the agent can reach - OneDrive, SharePoint, Google Drive, GitLab, Power BI, Microsoft Security Copilot, with more being added regularly - and pairs it with a governance model that keeps the policy for those tools outside the agent's control. This is part of the Azure SRE Agent announcements at Build 2026 What's new Managed Connectors is the next generation of our connector experience. It significantly expands the catalog of third-party and first-party SaaS integrations available to SRE Agent and surfaces each one to the agent as a curated set of operations through the Model Context Protocol (MCP) - the same standard the agent already uses for every other tool source. Governance: the agent gets capability, you keep control The governance model is the headline of this release, so it's worth being concrete about it. When you add a connector, you walk through a short wizard - Set up connector, Configure tools, Review & Save - and the "Configure tools" step is where the policy is set. Three things make it different from "just wire the API up to the LLM": You choose what's exposed - it isn't automatic. A connector might offer 40+ operations; in the wizard you pick the ones the agent can use. The rest aren't shown to the model, so it can't call them. Parameter policy lives outside the agent. For each selected operation you can mark parameters as user-defined (pinned to a value you specify) or agent-defined (the agent fills it in). On the Microsoft Planner “Create a task” tool, for example, you can choose the group ID from a list of your joined groups – this means that the agent provides the task details but can’t assign it to any arbitrary group, because that isn’t a parameter it sees when invoking the tool. Per-tool approval is built in. Each operation has an Allow/Ask toggle integrated directly into the creation and edit wizards. "Ask" routes the call through the agent runtime human-in-the-loop approval flow before it executes. On that same Microsoft Planner connector, you might leave read-only tools like “List tasks” or "Get plan details” on Allow, but flip “Delete a task” to Ask so a human must confirm before anything is removed. This is enforced on the agent's runtime; it is not a prompt instruction the model can be talked out of following. Credential Isolation No long-lived secrets in the agent. No API keys, no client secrets, no certificates, no OAuth tokens. All service credentials are encrypted at rest and stored outside of the agent’s trust boundary Automatic token refreshed. Once you consent, the internal connector resource keeps your tokens valid. You won't be asked to re-authenticate unless your service itself requires it. You consent once, in your own browser, with your own service. SRE Agent never proxies your password or the sign-in flow. Per-connection authorization. Each connection is bound to the specific SRE Agent instance you set up on and cannot be used by external threat actors. How it fits together All of this is stored and evaluated outside the agent loop. Each configured connector becomes an MCP server that the SRE Agent runtime registers as a tool source, the same standard wire format the agent uses for everything else, so adoption on the model side is trivial. Each layer does one job, and the trust boundary between "what the model decided" and "what was actually sent" is explicit and inspectable: the agent never sees the operations you didn't select, never sees the parameter slots you pinned, and cannot bypass approval on operations you marked Ask. How to try it Open the SRE Agent portal and go to Builder > Connectors. Pick a connector from the catalog with the “Preview” label and go through the creation wizard steps. At the “Set up connector” step, choose how the connector authenticates. Start with “OAuth” if you just want to sign-in and see it working against your own account. At “Configure tools”, select the operations you want to expose, pin any parameters that shouldn't be agent-controlled, and mark sensitive operations as “Ask.” Review & Save. The connector is registered with the runtime and immediately available to your agent. You can enable/disable specific tools or connectors in the “Capabilities” section. Edit connector – after creating the new connector, at any point you can go back and authenticate it with a different account, add or remove operations, update tool parameters and configure approval policies Resources Create new SRE Agent — https://aka.ms/sreagent SRE Agent Documentation — https://aka.ms/sreagent/newdocs SRE Agent recipes — https://aka.ms/sreagent/recipes Build 2026 SRE Agent announcements - https://aka.ms/Build26/blog/SREAgent224Views1like0CommentsShaping what Azure SRE Agent does: Tool Permissions and Hooks
When an AI agent runs against production, the first question every security team asks is "What can it do, who decided it could, and what stops it from doing something it should not." Azure SRE Agent reached general availability in March. Since then, teams inside Microsoft and customers running it against real production workloads have asked for the same thing: finer-grained controls over what the agent can do on its own and a clear answer to who governs each call that reaches a tool. Today at Build 2026, we are releasing global tool access policies as one of a set of new governance controls. This post covers how they work. Tool access policies give security and platform teams a single place to define which tools the agent can invoke, under what conditions, and what requires human approval before it runs. Underneath those policies sits the identity the agent runs as the bedrock that every other control layer depends on. It is defense in depth applied to agent behavior: layers of control, each one holding on its own, so that governing the agent is something you can read, audit, and reason about as you scale it across production. Identity is the bedrock: managed identity today, agent identity next Start here, because nothing else matters if you skip it. The identity the SRE Agent runs as, and the Azure RBAC role assignments on that identity, are the most powerful boundary the agent works inside of. If your role assignments do not grant the agent access to a resource, none of the controls below come into play, because the agent cannot reach the resource to begin with. Network rules, tool permissions, hooks, and connector contracts all sit on top of an RBAC story that you write. The features in this post add layers above that floor. They do not replace it. Today the SRE Agent operates as a managed identity, and your RBAC role assignments on that identity govern what it can do. This is the bedrock, and it is the same model your other Azure workloads already use. You assign roles, you scope them, and the agent inherits exactly what you granted and nothing more. Everything that follows assumes the bedrock is in place. With identity settled, the next question is the obvious one: where is the agent allowed to send its traffic? Permissions: govern what the agent does with a tool Identity decides what the agent can reach. Permissions decide what the agent does with the access it has, down to the individual tool. Two levels cover the range: a point-and-click grid for the common cases, and hooks when a decision needs your own code. The grid is the easy mode. Every tool the agent can use, built-in tools along with MCP servers, services, and custom tools, shows up in one searchable list with two switches. On/Off sets whether the tool is available at all; turn it off and the agent cannot use it. Allow/Ask sets what happens when it is on: Allow lets the agent run the tool automatically, Ask requires a human to approve every time, except in Autonomous mode. Select tools in bulk to flip a whole category at once, filter by category or permission, and use the Advanced permissions tab when you want rules that apply at global, per-agent, or per-thread scope instead of tool by tool. Defaults stay put until you touch them, and the engine is fail-closed: if a rule cannot be evaluated, the call is blocked rather than allowed. That covers most of what teams need. Underneath those switches are three rules, allow, ask, and deny, and the Advanced tab is where you set them by scope. Global rules apply to every agent and thread, Agent rules to one custom agent, Thread rules to a single conversation. Deny is the hard one: it blocks the tool outright no matter the run mode, and a deny at a higher scope always wins, so an Allow at thread scope cannot reopen something denied globally. That split is deliberate. A platform team sets the Global guardrails that should never be crossed and the Asks that always need a human, and service teams add their own Allow rules at Agent scope for routine work, without being able to override the guardrails above them. Platform team, Global scope: deny: bash(az * delete *) - never delete, on any agent or thread deny: bash(kubectl delete *) ask: bash(az webapp restart *) - always confirm, even in Autonomous allow: bash(az monitor *) - auto-approve monitoring queries Service team, Agent scope: allow: bash(kubectl get *) - routine read-only work allow: bash(kubectl describe *) Two details make this safe to lean on. Rules match the canonicalized tool invocation rather than the raw text, so enforcement holds no matter how the command was assembled. And fail-closed has a softer edge than a hard stop: a cached last-known-good policy covers transient failures, so a blip in the policy store blocks the call rather than silently widening access. You can find these under Capabilities > Tools The layer worth spending time on is hooks. Allow and Ask answer "should this tool run." Hooks answer "should this specific call run, given exactly what it is about to do." A hook fires before the agent runs a tool and receives the actual call, parameters and all. Your code then decides the outcome and can reshape it: rewrite parameters before they are sent, inject extra context into the pipeline as a user message so the agent reconsiders before its next step, block the call outright, or redirect the agent toward a safer path. Because your code sees the real parameters, the decision can depend on anything you can express in code: which resource the call targets, whether a value falls outside an allowed range, the time of day, the result of an external policy lookup. This is where you write the rule the grid cannot. Two kinds of hook, mixable on the same agent. Command hooks are a script you write; reach for these when code is enough. Prompt hooks put a separate LLM in the loop as a judge that evaluates the call in context; reach for these when the decision needs reasoning rather than a fixed rule. A real example from our own internal test agent: when the agent tries to list files through the shell with ls or dir, a hook blocks the call. The agent absorbs the signal, reconsiders, and reaches for the ListDir tool instead. The hook did not argue with a human. It shaped what happened next. As with the grid, configure nothing and the agent behaves exactly as it does today. Both are additive. Authoring one is a short form. You name the hook, pick the event (Pre Tool Use, so it runs before the call), and set a tool matcher, either picked from the tool menu or written as a regex like (FetchWebpage|SearchMemory) with anchors and lookaheads when you need them, so the hook fires only on the calls you care about. You set a timeout and a fail mode (Block, so a hook that errors or hangs stops the call rather than waving it through), and you write the body in Bash or Python. A command hook reads the call as JSON on stdin, the event name, the tool name, its parameters, and the call id, and answers on stdout. Print nothing and exit zero to allow. Return a block decision with a reason to stop the call, and that reason is what the agent reads back. You can also substitute: run a cheaper or safer version yourself, block the real call, and hand your own output back as the result, so the agent never runs the expensive or risky original. #!/bin/bash input=$(cat) tool=$(echo "$input" | jq -r '.tool_name') # Block one tool, with a reason the agent will read if [ "$tool" = "ExampleToolName" ]; then echo '{"decision":"block","reason":"Blocked ExampleToolName by hook policy."}' exit 0 fi # Otherwise allow: print nothing and exit 0 exit 0 You can find these under Builder > Hooks Each layer holds on its own The layers stack. Identity is the floor: your RBAC assignments decide what the agent can reach at all. Permissions, the grid and hooks together, decide what it does with a tool. You author each layer, each one holds whether or not the layer above it behaves as expected, and all of it configures through the same ARM and Bicep surface your platform team already uses, reproducible the way the rest of your Azure estate is. The upgrade path is additive and non-breaking. Existing agents keep working. Turn on each control when you are ready, in the order your governance requires. There is more coming. We run Azure SRE Agent inside Microsoft on our own production workloads, so we feel the same gaps you do, and the next round is shaped by what we hear from teams running it in production today. Which control is doing the most for you, and which one are you still waiting on? Let us know and thank you! Getting started Create new SRE Agent — https://aka.ms/sreagent SRE Agent Documentation — https://aka.ms/sreagent/newdocs SRE Agent recipes — https://aka.ms/sreagent/recipes Build 2026 Announcement - https://aka.ms/Build26/blog/SREAgent208Views0likes0Comments
Is anyone building individual development plans inside Teams?
So hear me out. I discovered that if something is in a live document, sharepoint, etc, I've found that employees dont really check up on it or follow through with it unless they are regularly reminded. Same goes for any software we try to implement that requires a seperate login and lives in another app completely. Our employees spend most of their time communicating in Teams so I want to take our IDP process into Teams. Are there any decent talent or employee development apps for Teams that anyone can recommend for IDPs?17Views0likes0CommentsIntroducing Azure Container Apps Sandboxes: Secure Infrastructure for Agentic Workloads
Today we are announcing the public preview of Azure Container Apps Sandboxes - a new first-class resource type that gives you fast, secure, ephemeral compute environments with built-in suspend and resume. This is the underlying infrastructure on which products like Cloud sandboxes in GitHub Copilot, Foundry Hosted Agents, and Azure Container Apps Express are built, you now have the opportunity to build your solutions leveraging this infrastructure. Azure Container Apps Sandboxes unlocks two massive opportunities. For platform developers and ISVs, sandboxes give you the same isolated compute fabric that powers many Microsoft products. You get the building blocks to create your own multi-tenant platform on proven, enterprise-scale infrastructure. For AI agents, sandboxes become a self-configurable tool that lets agents extend their own capabilities on the fly. An agent can spin up a fresh sandbox in milliseconds and use it to execute untrusted code, compile source, test HTTP requests against a live app, launch a browser session, or tackle whatever needs a quick and scalable infrastructure. On one side it empowers humans to build platforms, on the other it empowers agents to build their own capabilities. Both get enterprise-grade isolation, instant startup, and snapshot-based persistence out of the box. We'll walk through the resource model, sandbox lifecycle, the features that set Sandboxes apart - like snapshots, lifecycle policies, network egress controls, volumes, and managed identities - and show you how to get started with the portal and CLI. What Are Container Apps Sandboxes? Container Apps Sandboxes are secure, isolated compute environments that start in sub-second time, scale to thousands, and cost nothing when idle. Each sandbox runs in its own hardware-isolated microVM boundary - fully separated from the host, the platform, and every other sandbox. You bring your own Open Container Initiative (OCI) image, and Sandboxes handle the rest: provisioning from prewarmed pools, strong multi-tenant isolation, and snapshot-based suspend/resume that preserves full memory and disk state across sessions. There are many ways Sandboxes can help you build your next project - here are a few: Your own build & test systems - wire a Sandbox into your CI/CD flow to run builds while your laptop stays cool. Agents that can run anything safely - an agent spawns a sandbox, executes work inside it, and returns the output with no agent host privileges required. Agent swarms - decompose a research question, spawn N sandbox workers in parallel (each pinned to its own image and egress policy), and synthesize the result. Early access customers are already unlocking significant benefits by leveraging Azure Container Apps Sandboxes. "With Azure Container Apps sandboxes, SitecoreAI can safely enable agents to take real action. The combination of multi-tenant isolation, rapid scale-out, and full automation allows Sitecore to run long-lived, autonomous agents that securely execute code, manage workflows, and interact with enterprise systems within secure, governed environments. With this foundation, we can build agents that do real work: assembling content, personalizing experiences, and optimizing campaigns in production. Agents that operate continuously, learn from results, and improve over time, so our customers get better outcomes without giving up control." - Mo Cherif, VP of AI and Innovation, Sitecore "We got early access to Azure Container Apps Sandboxes, and got the first prototype integrated with Atlas AI in hours, and it's already shaping a new Atlas AI capability that we plan to launch in preview in Q3. It gives every Atlas AI agent a safe, sandboxed workspace (file system, terminal, code execution) on a customer's live data in Cognite Data Fusion. The value: Industrial process, reliability, and production engineers spend days and weeks on questions like "which wells are underperforming and why?" These questions are tractable but expensive, so they are asked rarely and decisions are made on gut feel. With this, an agent pulls the data, runs the analysis, cross-references maintenance and inspection records, and returns a cited draft in minutes. Sandboxes make it practical: Aligned feature set, per-customer isolation, pause/resume across multi-day investigations, scale-to-zero economics." - Kelvin Sundli, Product manager, Atlas AI, Cognite Resource Model: Sandbox Groups and Sandboxes The top-level ARM resource is Microsoft.App/SandboxGroups. A Sandbox Group is the management boundary for a collection of sandboxes that share configuration - think of it like a Container Apps Environment, but purpose-built for sandboxes. When you create a Sandbox Group, you specify: Subscription, Resource Group, and Region Sandbox defaults (optional): default CPU, memory, disk, max sandbox count, and default idle timeout Networking: optionally deploy into a custom VNet with a dedicated subnet for private networking Identity: System or user assigned Entra identity. Individual sandboxes are created within a Sandbox Group. Each sandbox has its own source (disk image or snapshot), resource tier, lifecycle policy, network egress policy, environment variables, ports, volumes, and connections. Sandbox Lifecycle Sandboxes have a well-defined lifecycle with the following states: State Description Creating Provisioning the sandbox from a disk image or snapshot Running Actively executing - backed by a live microVM Idle System-suspended after inactivity; can auto-resume on the next request Suspended Full state (memory + disk) preserved as a snapshot; no compute costs Resuming Restoring from a suspended or idle state - sub-second for most workloads Stopped User-initiated stop; can be resumed Stopping Graceful shutdown in progress Deleting Teardown in progress The key insight here is the distinction between Idle and Suspended. When a sandbox goes idle (e.g., no traffic for a configured timeout), the system can automatically suspend it and capture a snapshot. When a new request arrives, the sandbox resumes transparently. This gives you scale-to-zero economics with stateful compute - something that wasn't possible before without significant custom engineering. Disk Images: Bring Your Own Container Sandboxes boot from Disk Images - Open Container Initiative (OCI) images converted into an optimized root filesystem format. You point to any OCI image (public or private registry), and the platform builds a bootable disk image from it. You can start with public, pre-built images maintained by the platform (for example, Ubuntu base images), or bring your own private images. For private registries, you can authenticate with username/token or use a user-assigned managed identity for Azure Container Registry (ACR) – integrated with Azure as you expect. Snapshots: Full-State Persistence Snapshots capture the complete state of a running sandbox - memory, disk, and all running processes. When you resume a sandbox from a snapshot, every process, open file handle, and in-memory data structure is restored exactly as it was. A snapshot captures the full state of a running sandbox: memory pages, disk, processes. Two ways to make one - automatically on suspend, or manually on demand. Three things they're great for: Checkpointing mid-task so a long-running agent can resume exactly where it left off Cloning an environment that's already warm - dependencies installed, caches populated, services running Shipping a "ready-to-go" state that resumes in sub-second instead of cold-booting Snapshots are free during the preview, after which they will be stored as Azure Blob Storage at standard rates. Each snapshot records the source sandbox, resource allocation (CPU, memory, disk), and container metadata - so what you get back is exactly what you snapshotted. Resource Tiers Every sandbox is assigned to a resource tier that determines its CPU, memory, and disk allocation: Tier CPU Memory Disk XS 0.25 vCPU 0.5 GB 5 GB S 0.5 vCPU 1 GB 10 GB M (default) 1vCPU 2 GB 20 GB L 2 vCPU 4 GB 40 GB XL 4 vCPU 8 GB 80 GB When creating a sandbox from a snapshot, the resource tier is inherited from the snapshot and cannot be changed - this ensures the restored environment has the exact resources it was running with when the snapshot was taken. Lifecycle Policies: Auto-Suspend and Auto-Delete Every sandbox can be configured with lifecycle policies that automate state transitions and cleanup: Auto-Suspend Idle timeout: How long a sandbox can sit idle before being suspended (configurable: 1m, 2m, 5m, 10m, 30m, 60m) Suspend mode: Disk + Memory (default): Full snapshot including memory state - resume picks up exactly where you left off, with all processes and in-memory data intact. Disk: Only the disk is preserved; the VM restarts fresh on resume. Useful when you only need file persistence, not process continuity. Auto-Delete Automatically delete sandboxes after a configurable number of days of inactivity Prevents accumulation of abandoned sandboxes that consume snapshot storage These lifecycle policies are what make Sandboxes economically viable at scale. A platform serving thousands of tenants can configure aggressive idle timeouts (say, 60 seconds) with Memory suspend mode, and each tenant's sandbox disappears from the billing meter almost immediately - but resumes in sub-second time the moment they return. Network Egress Policy For scenarios involving untrusted code - AI agents executing LLM-generated scripts, multi-tenant SaaS with user-submitted workloads - controlling outbound network access is critical. Sandboxes provide a per-sandbox Network Egress Policy: Default action: Allow or Deny all outbound traffic Host rules: Domain-pattern rules (e.g., *.github.com → Allow) to permit specific destinations Custom CIDR rules: Network-level rules for IP ranges (e.g., 10.0.0.0/8 → Deny) Skip egress proxy: Option to bypass the egress proxy entirely when custom VNet routing handles policy enforcement This means you can run a sandbox in a deny-by-default posture and allowlist only the specific endpoints it needs (your API server, a package registry, etc.) - without setting up NSGs or firewall appliances. Managed Volumes: Persistent and Shared Storage Sandboxes support two types of mountable volumes, both managed by Microsoft: Volume Type Backed By Best For Managed Azure Blob Azure Blob Storage Shared data across sandboxes, file uploads/downloads, persistent artifacts Managed Data Disk Azure Disk Storage High-performance storage for databases, build caches, large working sets - only available to one sandbox at a time Blob volumes come with a built-in file explorer in the portal - you can browse, upload, download, create folders, and drag-and-drop files directly. Data Disk volumes provide dedicated block storage with configurable sizes. Secrets and Identity Secrets Sandbox Groups support key-value secrets scoped to the group. Secrets can be created, edited, and referenced by sandboxes within the group. These secrets can be used in egress policies to modify requests with transform or header-injection rules, without exposing the secrets to code running inside the sandbox. Managed Identity Sandbox Groups support both system-assigned and user-assigned managed identities, with full RBAC role assignment management. This means your sandboxes can authenticate to Azure services (Key Vault, Storage, Cosmos DB, etc.) without managing credentials - the same identity model you use everywhere else in Azure. MCP Connectors and Triggers ACA Sandboxes now supports managed connectors through the Model Context Protocol (MCP), giving sandboxes access to external APIs - including Microsoft 365, Salesforce, ServiceNow, GitHub, and 1,400+ other systems - without managing credentials directly. Attach a Connector Gateway to your sandbox group, and every sandbox in the group can call external APIs through a standardized MCP interface at runtime. Pair connectors with triggers to build event-driven automation: route an Outlook email to a sandbox that triages it with an AI agent, or react to a SharePoint file upload by extracting and processing the document all without writing glue code. Triggers can fire a shell command inside a sandbox or invoke an HTTP endpoint the sandbox exposes, so your automation shapes fit naturally around your workload. The integration is built on the new Connector Namespace service (az connector-namespace), the same runtime behind Logic Apps and Power Platform connectors, now available as a programmable layer for sandboxes. See the end-to-end samples for runnable azd up-deployable examples covering email triage and document automation scenarios. The Portal Experience Azure Container Apps Sandboxes are only available in the new Azure Container Apps portal that provides a rich, IDE-like experience for working with sandboxes. Creating a Sandbox The portal offers multiple creation paths: Standard Sandbox - full configuration control over source, resources, lifecycle, networking, and volumes GitHub Copilot Sandbox - preset, Copilot CLI ready to go, GitHub credentials can be wired through the Access Token before the sandbox is created Claude Sandbox - Claude CLI pre-installed, ready for agentic coding inside the sandbox Using Coding Agents (Copilot CLI / Claude Code) If you live inside Copilot CLI or Claude Code, you don't need to learn a new CLI. Install the azure-sandbox skill once and your agent picks up the right skills: # GitHub Copilot CLI # Add as a plugin marketplace /plugin marketplace add microsoft/azure-container-apps # Install all skills /plugin install sandboxes@Azure-Container-Apps # Claude Code claude plugin add microsoft/azure-container-apps The skill runs prerequisite checks silently (az --version, az account show, node --version, aca --version), prompts only if something's missing, and maps natural-language asks to the right aca commands. Bundled runbooks cover Copilot CLI BYOK (bring your own Azure OpenAI key), the deploy-a-web-app walkthrough, and shell setup. Sandbox Detail Page Once your sandbox is running, the detail page gives you immediate access to the sandbox terminal and additional details, such as - Network Audit - real-time egress traffic log showing allowed and denied requests Monitor - live CPU, memory, disk, and network utilization charts Connectors - attached connections with an "Add" action Volumes - mounted volumes with an "Add" action Log Stream - streaming container logs Processes - running process list inside the sandbox Files - file explorer to browse the sandbox filesystem The toolbar actions let you manage the state of the sandbox - Resume or Stop. In the Ellipsis menu (⁝) you can find additional settings to manage network Egress Policy and ingress (Add port), take a Snapshot of the sandbox, Commit (save disk state as a new disk image), set Lifecycle Policy or permanently Delete the sandbox. Finally, you can see additional Details in a side panel. Getting Started with the CLI and Python SDK All sandbox and sandbox-group operations go through the aca CLI. There are no az containerapp sandbox commands, - az is only used for az login, az account show, and resource-group management. Install (CLI) # Mac, Linux curl -fsSL https://aka.ms/aca-cli-install | sh # Windows irm https://aka.ms/aca-cli-install-ps | iex Run aca --help to get started. Install (Python SDK) pip install azure-containerapps-sandbox For more details, quick start and examples on ACA CLI and Python SDK, please go to https://sandboxes.azure.com Evolution from Dynamic Sessions If you've used Azure Container Apps Dynamic Sessions, Sandboxes are the next evolution of that capability. Everything Sessions can do, Sandboxes can do - and significantly more: Capability Dynamic Sessions Sandboxes Sub-second startup ✓ ✓ Strong isolation ✓ ✓ Custom container images ✓ ✓ Custom VNet integration ✓ (Partial) ✓ Suspend/resume with Memory and Disk snapshots - ✓ Lifecycle policies (auto-suspend, auto-delete) - ✓ Network egress policy (per-sandbox) - ✓ Persistent managed volumes (Blob, Data Disk) - ✓ Managed identity (system + user-assigned) - ✓ Secrets management - ✓ Configurable resource tiers - ✓ Direct access to sandbox in Portal experience - ✓ We will continue to support Dynamic Sessions, but all new investment goes into Sandboxes. If you're building new workloads on isolated ephemeral compute, start with Sandboxes. How It All Fits Together ACA Sandboxes is a platform primitive. It's the foundation on which multiple Microsoft products are already built - including ACA Express, Cloud sandboxes in GitHub Copilot, and Foundry Hosted Agents. When you build on Sandboxes, you're building on the same infrastructure that powers Microsoft's own portfolio. This is the evolution of what we shared with Project Legion in 2024. Legion described the internal infrastructure; Sandboxes exposes it as a customer-facing primitive that you can use directly. What's Next • Deeper Azure integrations - first-class connectivity with Azure networking, identity, storage, and AI services • Enhanced SDK and CLI - richer programmatic experiences for managing sandboxes at scale • More Microsoft services built on Sandboxes - this is just the beginning Get Started Today • Portal: https://sandboxes.azure.com/ • Documentation: Azure Container Apps Sandboxes • Pricing: Azure Container Apps Pricing (per-second vCPU/memory billing, scale-to-zero, snapshots at Blob Storage rates) We'd love to hear your feedback. You can ask questions, or file issues on the Azure Container Apps GitHub (prefix with [Sandbox] for Sandboxes-specific issues).1.9KViews1like0CommentsHow ACR Runs Multi-Tenancy at Scale: Compute Stamp Rebalancing and Why You Never See It Happen
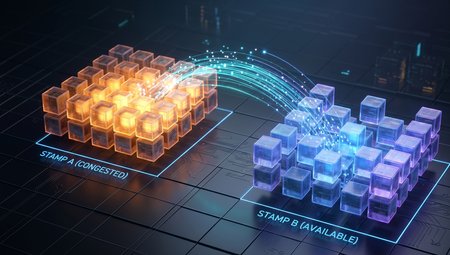
By Johnson Shi, Richard Yuan, Yi Zha, Susan Shi, Jeanine Burke, Bin Du, Clark Porter, Bernie Harris, Eric Du Introduction Two of the most common questions we hear from teams running container workloads at scale on Azure Container Registry (ACR) are: "How does ACR keep my registry's performance predictable when I'm sharing infrastructure with thousands of other tenants?" — Cloud services are inherently multi-tenant. What does ACR actually do to keep my workload from competing with my neighbors during high concurrency data plane API operations? "What happens when one tenant's workload grows large enough to affect the shared infrastructure?" — Is there an active intervention, or does the system just absorb the noise from concurrent registry operations? In this post, we clarify how ACR runs its multi-tenant fleet: the stamp architecture that underpins ACR's compute infrastructure in every Azure region, the practice of proactively rebalancing registries between compute stamps when one stamp gets hot from sustained registry data plane operations, and the additional stamp isolation options available for exceptional workloads. Running multi-tenancy well at scale isn't passive — it's an active operational practice, and customers benefit from it every day without seeing it happen. Key Takeaways An ACR registry can be geo-replicated: a registry can have geo-replicas (which are both read and write-enabled) in multiple Azure regions. Each geo-replica is served by an ACR compute stamp in a particular region — independent compute deployment units that underpin ACR regional infrastructure, each made up of VMSS-backed compute pools, that together serve many registry data plane operations belonging to many tenants. Compute stamps are simultaneously a compute capacity pool, a fault domain, and an update domain. Take note that compute stamps span only the compute component for ACR; ACR in each region maintains a separate pool of storage accounts shared across all compute stamps, which is not the focus of this post. When a compute stamp gets hot, ACR proactively rebalances by moving registries to a less-utilized stamp in the same region. The registry endpoint does not change; the move is transparent to the customer. For exceptional workloads where rebalancing alone would just transfer the problem, ACR can provide additional stamp isolation — placing registries on stamps with fewer co-tenants, providing better traffic isolation, fault domain separation, and update domain independence. This also structurally improves the stamps the tenant used to share with everyone else. ACR engineering uses a mix of reactive signals (outages, sustained errors, throttling, low throughput) and proactive signals (operational telemetry) to decide when to rebalance stamps. Hot-node P95 CPU, discussed in this post, is one of the proactive signals we use — for each 1-minute bin, take the hottest node's average CPU, then percentile across bins. Pool-average hides per-node hot-spotting; single-sample Max is too noisy. All of this is currently manual. Rebalancing decisions, migrations, and isolation provisioning are operator-driven today. We are actively investing in standardizing and automating the practice — automated stamp rebalancing and lifecycle management are on the roadmap. Background What is a stamp? A compute stamp is ACR's unit of compute deployment within a region. At a high level, ACR has the following compute components within a region to serve registry data plane operations: VMSS-backed compute pools. Virtual Machine Scale Sets are Azure's primitive for running a managed group of identical VMs that autoscale together. Each region has several compute stamps, each of which has a pool of VMs that handle registry data plane operations such as authentication, manifest operations, tag resolution, and registry-side metadata — the coordination layer of a container pull — plus a separate pool of VMs running the dataproxy component, which sits between clients and storage. For private endpoint pulls, when a client pulls a layer, the data proxy nodes of a compute stamp fetches from the regional storage pool (or from the data proxy's local compute cache) and streams the bytes back; it is effectively a private endpoint proxy and streaming compute cache layered together. Separately, each region has the following storage components shared across all stamps: A pool of storage accounts. Each ACR region has its own pool of Azure Storage accounts (currently shared across all compute stamps in the region) that hold the actual blob (layer) data and manifest content for the geo-replicas on residing them. Storage accounts are multi-tenant within a stamp and region — multiple registries' blobs may land in the same group of accounts, with strict multi-tenant isolation controls and authorization enforcement. Because the regional storage pool is not part of a compute stamp, a future blog post can cover how ACR is separately investing engineering resources to dynamically scale blobs hosted in a region's pool of storage accounts. Each ACR region typically contains multiple compute stamps serving many tenants' registries, all sharing a pool of storage accounts. For geo-replicated registries, a geo-replica in a region is bound to exactly one underlying ACR compute stamp and several underlying storage accounts. A geo-replicated registry's global endpoint (<registry>.azurecr.io), geo-replica regional endpoints, and geo-replica dedicated data endpoints are resolved via DNS — backed by ACR's own Traffic Manager profile — to a specific stamp serving that region's geo-replica. The stamp is ACR's unit of compute that handles a geo-replica's registry data plane operations and proxies requests to the underlying regional storage pool. The key conceptual point: an ACR compute stamp is simultaneously a capacity pool (autoscale operates on it), a fault domain (incidents on the stamp affect all its tenants), and an update domain (rollouts progress through update domains within the stamp). When we move a registry between compute stamps in the same region, we are moving it between all three at once — and the customer's endpoint URLs do not change. From the customer's perspective, the migration is fully seamless: there are no endpoint changes, no DNS updates to make, and no action required on their part. The registry continues to work exactly as before, and the customer does not need to know or care that the underlying stamp has changed. Why multi-tenancy at scale is an active practice The naive picture is: provision enough capacity, autoscale handles the rest. This works in steady state. It does not work when one tenant's workload grows enough to systematically influence stamp behavior, when traffic shape is bursty enough that averages understate peaks, or when a single large tenant's blast radius becomes uncomfortably concentrated on a shared stamp. None of these is something a passive autoscaler will fix. They require an operator decision: this registry would be better served on that stamp. ACR engineering does this continuously — from routine rebalancing to providing additional isolation for exceptional workloads. How We Do It: Stamp Rebalancing Stamp rebalancing — a recurring practice Several signals can trigger a stamp rebalancing decision — reactive signals such as sustained errors, outages, throttling that customers observe or that we observe in our own telemetry, low throughput on a stamp, or proactive signals like hot-node P95 CPU (described in this post below) breaching a threshold. The most recent rebalancing work used hot-node P95 as the proactive trigger; other rebalancing decisions have been driven by the reactive signals just listed. When any of these fires, ACR engineering identifies the registries contributing most to the problem and picks one or more to move to a less-utilized stamp in the same region. The mechanism is straightforward: we initiate elevated operator actions, the control plane re-binds the registry's home_stamp field, DNS routing follows, in-flight requests on the source stamp drain in 30–60 seconds, and new traffic lands on the destination stamp. The cutover takes minutes. The customer's registry endpoint does not change. Most customers never know it happened; the ones whose registry moved typically see better latency afterward. Rebalancing to an existing cooler stamp is a recurring practice that resolves most multi-tenant pressure. For exceptional workloads where rebalancing to another shared stamp would just transfer the problem, ACR may provide additional stamp isolation — placing registries on stamps with fewer co-tenants, giving the tenant better traffic isolation, fault domain separation, and update domain independence while also structurally improving the stamps that tenant used to share with everyone else. Rebalancing at different scales ACR applies rebalancing across a spectrum of scenarios, from moving a handful of registries to a cooler stamp to providing additional stamp isolation for exceptional workloads. The decision criterion is workload size relative to the shared fleet — if moving a tenant to a different shared stamp would just transfer the hot-stamp problem to the destination, additional stamp isolation is the right answer. For everyone else, rebalancing to an existing stamp is sufficient. Both are manual today; both stamp provisioning and rebalancing mechanisms described are on ACR's roadmap to be automated with less operator involvement. Hot-node P95: one of the signals we use proactively Rebalancing decisions are driven by a mix of reactive and proactive signals. Reactive signals — outages, sustained error rates, frequent throttling, low throughput that customers report or that we see in our own telemetry — are the obvious triggers. But waiting for these means waiting for a customer-visible problem. Proactive signals let us intervene before that happens. Hot-node P95 CPU, showcased in this post, is one of the proactive signals we use, and it was the primary signal for the most recent rebalancing work described in the example below. The choice of CPU metric matters. Three candidates: Pool-average CPU. Averages every node in the pool. Hides per-node hot-spotting — a pool with 6% average CPU can still have one node at 99%. Single-sample Max CPU. The highest 1-minute sample. Captures spikes, but is dominated by single-bin noise that doesn't represent sustained load. Hot-node P95 CPU. For each 1-minute bin, take the hottest node's average CPU. Then percentile across bins over a representative 12-hour peak window. This is "how hot is the worst node, most of the time." Hot-node P95 captures sustained per-node load without being noisy, and it tracks customer-visible behavior more closely than either alternative. A concrete illustration from a recent regional resize: on one shared stamp's dataproxy pool, Max CPU touched 96% — alarming if read alone. But hot-node P95 was 43%, meaning most of the time even the hottest node was comfortably loaded; the 96% was a single 1-minute spike. Using Max as the operating signal would have triggered an unnecessary intervention. Using pool-average would have missed real hot-spotting elsewhere. Hot-node P95 is the right operating point for this particular signal — and it is one input among several that feed the broader rebalancing decision. A Recent Example: Rebalancing Large AI Workloads for Additional Isolation We recently completed the rebalancing of registries belonging to one of the largest AI workloads in the region, providing additional isolation to address the scale of their traffic. The customer's workload had grown to the point where its presence on the shared stamps was systematically influencing stamp behavior — variability that affected their own pull latency, and variability that affected every other tenant on the same shared stamps. The customer had 40 registries homed across two shared stamps in the region, with a severely long-tailed traffic distribution: the top four registries carried 96.7% of the customer's traffic. When that much load is concentrated in four registries, the migration cannot proceed as one batch. We moved them in phases, smallest to largest, with observation windows between phases: Idle and small-traffic tail first — about thirty low-traffic registries, used to validate the cutover tooling against the destination stamp. Medium-traffic registries next — in sub-batches with 24 hours of observation between them. The top four, one at a time — each individually with 48 hours of observation between cutovers. Order: smallest to largest, so each cutover was a sanity check at increasing load. The cumulative effect on the shared stamps the customer had previously occupied: Shared stamp + pool Hot-Node P95 CPU change Max CPU change Stamp A — registry pool -7% flat Stamp A — dataproxy pool -34% 96% → 64% Stamp B — registry pool -33% -3 percentage points Stamp B — dataproxy pool -44% -5 percentage points Stamp A dataproxy is the headline. The hottest node went from briefly touching 96% to maxing out at 64%, with sustained hot-node P95 dropping from 43% to 28.5%. Every other tenant homed on Stamp A — most with no idea this rebalancing happened — now runs on a structurally healthier pool, with more headroom, lower tail latency under load, and lower risk of CPU-driven incidents during traffic spikes. Stamp B saw similar relief. After the rebalancing, we right-sized the shared stamps downward — lowering the VMSS minimum instance count on each to match the new traffic level. Hot-node P95 was the primary signal driving this resize work, the same proactive signal that motivated the rebalancing in the first place: when hot traffic leaves a shared stamp, capacity right-sizing follows. Findings ACR runs this recurring stamp rebalancing practice for one reason: to give customers more guaranteed performance — higher and more predictable pull throughput, lower tail latency, better fault and update isolation — whether through routine rebalancing or additional isolation for exceptional workloads. Every tenant on the rebalanced stamps gets more headroom, more predictable behavior under load, and a smaller blast radius for any single incident or rollout. Three things happen continuously in any ACR region to make this real: registries get rebalanced between stamps as load patterns shift, exceptional workloads get additional stamp isolation when no shared stamp can absorb them sustainably, and stamps get continuously right-sized when load enters or leaves. All three are operator-driven today, all three are being invested in for automation, and all three are guided by a combination of reactive signals (outages, errors, throttling) and proactive signals (hot-node P95 CPU is one of them). The thesis is straightforward: cloud multi-tenancy at scale is not a passive property of the architecture. It is an active operational practice that exists to give customers guaranteed performance and predictable behavior. The customers who benefit most from it are usually the customers who never notice it's happening. Summary Question Answer How does ACR keep multi-tenant performance predictable at scale? By actively moving registries between compute stamps as load shifts — rebalancing in the common case, providing additional isolation for exceptional workloads. What is a compute stamp? An ACR compute deployment unit within a region's geo-replica: VMSS-backed registry and data proxy compute pools. Simultaneously a compute capacity pool, fault domain, and update domain. A region typically contains multiple stamps. Take note that ACR maintains a separate pool of regional storage accounts shared across all compute stamps. Do customers see when their registry moves between stamps? No. Stamps are within a region; the global endpoint and any regional endpoint URLs do not change. The cutover takes minutes; in-flight requests drain in 30–60 seconds. Does providing additional isolation only help the isolated tenant? No — every other tenant who was sharing a stamp with that workload also benefits, because the largest source of variability has been removed from the shared fleet. What signals drive these decisions? A mix of reactive signals (outages, sustained errors, throttling, low throughput) and proactive signals from our own telemetry. Hot-node P95 CPU — the 95th percentile, across a 12-hour peak window, of the hottest node's CPU in each 1-minute bin — is one of the proactive signals, and it was the primary signal for the most recent rebalancing work. Is all of this automated? Not yet. Rebalancing, isolation provisioning, and migrations are operator-driven today. Standardizing and automating these practices is an active investment.296Views0likes0CommentsAzure Functions MCP extension now supports MCP Prompts
We are thrilled to announce that the MCP prompt trigger is now available in public preview in the Azure Functions MCP extension! With this release, the extension now supports all three core MCP server primitives - tools, resources, and prompts, giving you a complete platform for building rich MCP servers on Azure Functions. In case you missed it, the MCP resource trigger is generally available for serving resources and building interactive UIs in MCP Apps. What are MCP Prompts In the Model Context Protocol (MCP), prompts are reusable templates that allow server authors to provide parameterized prompts for a domain, or showcase how to best use the MCP server. Prompts are user-controlled in that they require explicit invocation rather than automatic triggering, and can be context-aware, referencing available resources and tools to create comprehensive workflows. Unlike tools (which are model-controlled) and resources (which are application-controlled), prompts are exposed from servers to clients so users can explicitly select them. Applications typically expose prompts through slash commands, command palettes, dedicated UI buttons, or context menus. How It Works In Python, defining a prompt is as simple as decorating a function. Here's a prompt that returns a code review checklist: app.mcp_prompt_trigger( arg_name="context", prompt_name="code_review_checklist", description="Returns a structured code review checklist prompt for evaluating code changes." ) def code_review_checklist(context: func.PromptInvocationContext) -> str: logging.info("Code review checklist prompt invoked.") return """You are a senior software engineer performing a code review. Use the following checklist to evaluate the code: 1. **Correctness** — Does the code do what it's supposed to? 2. **Error Handling** — Are edge cases and failures handled? 3. **Security** — Are there any vulnerabilities (injection, auth, secrets)? 4. **Performance** — Are there obvious inefficiencies? 5. **Readability** — Is the code clear and well-named? 6. **Tests** — Are there adequate tests for the changes? Provide your feedback in a structured format with a severity level (critical, warning, suggestion) for each finding.""" Prompts can accept arguments, allowing clients to customize the generated message. Here's a prompt that generates documentation with configurable parameters: app.mcp_prompt_trigger( arg_name="context", prompt_name="generate_documentation", prompt_arguments=[ func.PromptArgument("function_name", "The name of the function to document.", required=False), func.PromptArgument("style", "Documentation style: 'concise', 'detailed', or 'tutorial'.", required=False) ], description="Generates API documentation for a function. Arguments are configured in Program.cs." ) def generate_documentation(context: func.PromptInvocationContext) -> str: function_name = context.arguments.get("function_name", "(unknown)") style = context.arguments.get("style", "concise") logging.info(f"Generate docs prompt invoked for function: {function_name}") return f"""Generate API documentation for the function named **{function_name}**. Documentation style: **{style}** Include the following sections: - **Description** — What the function does. - **Parameters** — List each parameter with its type and purpose. - **Return Value** — What the function returns. - **Example Usage** — A short code example showing how to call it.""" Checkout the Get Started section for the complete sample and samples in different languages. Why Azure Functions Azure Functions is the ideal platform for hosting remote MCP servers because of its built-in MCP authentication, event-driven scaling from 0 to N, and serverless billing. This ensures your agentic tools are secure, cost-effective, and ready to handle any load. With the MCP extension, you focus on implementing the primitives you want to expose, tools, resources, and prompts, instead of worrying about MCP protocol details and server logistics. Get Started You can start building today using our quickstarts and samples: Python TypeScript .NET Java Documentation Azure Functions MCP extension overview Prompt trigger We'd Love to Hear from You! Let us know your thoughts about the new prompt trigger. What kinds of prompts are you building for your MCP servers? What would you like us to prioritize next? Share your feedback in our GitHub repo.393Views0likes0Comments