microsoft 365
5367 Topics
Unable to Open an Old OST File After Outlook Profile or Mailbox Changes
Hi everyone, I am looking for suggestions on handling an old OST file where the original Outlook profile or mailbox is no longer available. The situation is that an OST file contains important mailbox data, but Outlook cannot open it normally after changes to the user account or profile. This can happen after a Microsoft 365 mailbox change, Exchange migration, user account removal, or when an OST file becomes damaged. Since OST files are linked to the Outlook profile and mailbox that created them, simply moving the file to another system does not always make the data accessible. Before attempting any recovery approach, I would like to understand the recommended steps: Is there any Microsoft-recommended method to access an orphaned OST file? What checks should be performed before trying to recover data from the OST? How do administrators usually handle old OST files when the original mailbox is no longer available? What is the best way to validate recovered mailbox data? I would appreciate feedback from anyone who has handled similar Outlook OST recovery scenarios after Microsoft 365 or Exchange changes.236Views0likes5CommentsCopilot, Microsoft 365 & Power Platform Community call
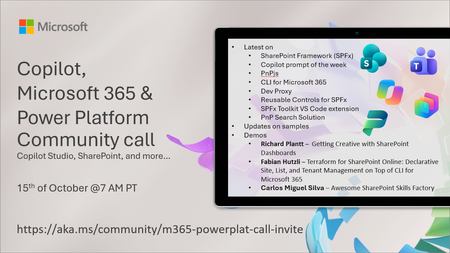
💡 Copilot, Microsoft 365 & Power Platform weekly community call focuses on different use cases and features within the Microsoft 365 and Power Platform - across Microsoft 365 Copilot, Copilot Studio, SharePoint, Power Apps and more. Demos in this call are presented by the community members. 👏 Looking to catch up on the latest news and updates, including cool community demos, this call is for you! 📅 On 15th of October we'll have following agenda: Latest on SharePoint Framework (SPFx) Latest on Copilot prompt of the week PnPjs CLI for Microsoft 365 Dev Proxy Reusable Controls for SPFx SPFx Toolkit VS Code extension PnP Search Solution Demos this time Richard Plantt – Getting Creative with SharePoint Dashboards Fabian Hutzli – Terraform for SharePoint Online: Declarative Site, List, and Tenant Management on Top of CLI for Microsoft 365 Carlos Miguel Silva – Awesome SharePoint Skills Factory 📅 Download recurrent invite from https://aka.ms/community/m365-powerplat-dev-call-invite 📞 & 📺 Join the Microsoft Teams meeting live at https://aka.ms/community/m365-powerplat-dev-call-join 💡 Building something cool for Microsoft 365 or Power Platform (Copilot, SharePoint, Power Apps, etc)? We are always looking for presenters - Volunteer for a community call demo at https://aka.ms/community/request/demo 👋 See you in the call! 📖 Resources: Previous community call recordings and demos from the Microsoft Community Learning YouTube channel at https://aka.ms/community/youtube Microsoft 365 & Power Platform samples from Microsoft and community - https://aka.ms/community/samples Microsoft 365 & Power Platform community details - https://aka.ms/community/home 🧡 Sharing is caring!43Views0likes0CommentsCopilot Extensibility community call - October 2026
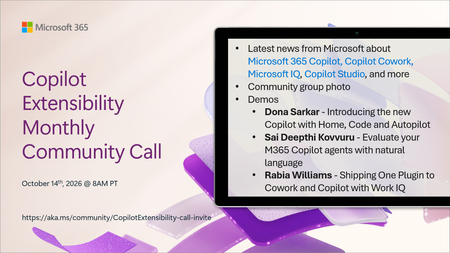
🚀 The Copilot Extensibility Monthly Community Call is a recurring virtual gathering designed to keep the global developer and maker community consistently connected, informed, and engaged with the latest advancements in Microsoft 365 Copilot, Copilot Cowork, Microsoft Scout, GitHub Copilot, Microsoft IQ, etc. and their extensibility ecosystem. 👏 Monthly Wednesday call is for all community members to see Microsoft PMs, engineering and Cloud Advocates showcasing the art of possible with the Microsoft AI technologies. 📅 On the 14th of October we'll have following agenda: News and updates from Microsoft Community group photo Dona Sarkar – Introducing the new Copilot with Home, Code and Autopilot Sai Deepthi Kovvuru - Evaluate your M365 Copilot agents with natural language Rabia Williams - Shipping One Plugin to Cowork and Copilot with Work IQ 📞 & 📺 Join the Microsoft Teams meeting live at https://aka.ms/community/CopilotExtensibility-call-join 🗓️ Download recurrent invite for this weekly call from https://aka.ms/community/CopilotExtensibility-call-invite 👋 See you in the call! 💡 Building something cool with Microsoft AI technologies (Copilot, Cowork, Copilot Studio, Microsoft IQ, etc)? We are always looking for presenters - Volunteer for a community call demo at https://aka.ms/community/request/demo 📖 Resources: Previous community call recordings and demos from the Microsoft Community Learning YouTube channel at https://aka.ms/community/youtube Labs and training material about Microsoft 365 Copilot Extensibility - https://aka.ms/copilotdevcamp Microsoft 365 & Power Platform samples from Microsoft and community - https://aka.ms/community/samples Microsoft 365 & Power Platform community details - https://aka.ms/community/home 🧡 Sharing is caring!41Views0likes0CommentsCopilot, Microsoft 365 & Power Platform product updates call
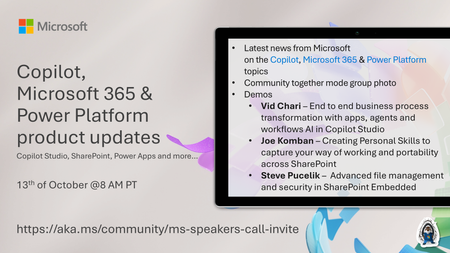
💡Copilot, Microsoft 365 & Power Platform product updates call concentrates on the different use cases and features within the Microsoft 365 and in Power Platform. Call includes topics like Microsoft 365 Copilot, Copilot Studio, Microsoft Teams, Power Platform, Microsoft Graph, Microsoft Viva, Microsoft Search, Microsoft Lists, SharePoint, Power Automate, Power Apps and more. 👏 Weekly Tuesday call is for all community members to see Microsoft PMs, engineering and Cloud Advocates showcasing the art of possible with Microsoft 365 and Power Platform. 📅 On the 13th of October we'll have following agenda: News and updates from Microsoft Together mode group photo Vid Chari – End to end business process transformation with apps, agents and workflows AI in Copilot Studio Joe Komban – Creating Personal Skills to capture your way of working and portability across SharePoint Steve Pucelik – Advanced file management and security in SharePoint Embedded 📞 & 📺 Join the Microsoft Teams meeting live at https://aka.ms/community/ms-speakers-call-join 🗓️ Download recurrent invite for this weekly call from https://aka.ms/community/ms-speakers-call-invite 👋 See you in the call! 💡 Building something cool for Microsoft 365 or Power Platform (Copilot, SharePoint, Power Apps, etc)? We are always looking for presenters - Volunteer for a community call demo at https://aka.ms/community/request/demo 📖 Resources: Previous community call recordings and demos from the Microsoft Community Learning YouTube channel at https://aka.ms/community/youtube Microsoft 365 & Power Platform samples from Microsoft and community - https://aka.ms/community/samples Microsoft 365 & Power Platform community details - https://aka.ms/community/home 🧡 Sharing is caring!55Views0likes0CommentsPut multiple values in one cell with lists and arrays in Excel
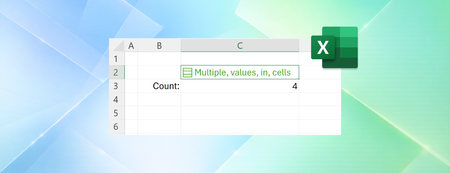
Throughout Excel's 40-year history, you've only been able to put one value per cell. In this announcement, we're excited to share how that's changing with the release of lists, arrays in cells, and nested arrays, initially to Microsoft Excel for Windows and Mac Beta Channels. Many workbooks already try to pack multiple values into one cell. A project might list "Carlos, Henrietta, Jacob" as three owners, or a Forms survey might return "2:00 PM; 2:30 PM; 3:00 PM" as one response. With lists, you can keep those values in one cell, while also keeping them separate for filtering, calculation and more. Later in this post, we'll explore arrays in cells and nested arrays in more depth. NOTE: These are preview features. Their behavior may change before general release based on your feedback. We don't recommend using them in important workbooks until they're generally available. Lists Lists let you put multiple values into one cell. You can create a list by selecting Insert > List or pressing Ctrl+J, then typing or pasting items separated by commas or semicolons, depending on your regional settings. Selecting the icon in the cell shows the individual values. You can add, remove, or edit list items by double-clicking the cell or pressing F2, just like other values. With lists, you can filter by one or more individual items instead of whole text entries. Referencing a list returns all its values for calculations. For example, =B2 spills those values into separate cells. Arrays in cells Lists are useful on their own, but they're part of a much broader change to Excel. For the first time in Excel, arrays can exist natively in cells as values or as formula results. They can be any size or shape and can even contain other arrays. You can now keep the result of any spilling formula in a single cell by "wrapping" the formula body with braces { }. Since the introduction of dynamic arrays, array results have spilled across cells – for example ={1;2;3}. Wrapping the original array with braces creates a 1x1 array around it, so instead of spilling to multiple cells, the array stays in a single cell. Braces have long been used to describe arrays in Excel and this extends that behavior by allowing multiple layers of braces. This gives you more flexibility when building spreadsheets. Instead of leaving room for a formula to spill, you can keep the result in one cell. Arrays inside arrays, or nested arrays Arrays can now also "nest" inside other arrays. For example: ={{1,2,3};{4,5,6}} Previously, a formula that produced an array of arrays would return a truncated result or #CALC! error. Now, supported formulas return the complete nested result. In the example below, you can see how TEXTSPLIT behaves with and without nested arrays. Without nested arrays, Excel only returns the first item for each row. With nested arrays, the result spills, one array per row. The arrays in each row can then be used in further calculations. Four new functions: FLATTEN, HAS, HASANY, HASALL To help you work with arrays more easily, we've added four functions. FLATTEN(array, [pad_value], [levels]) simplifies nested arrays by removing one or more levels of nesting. Continuing from the prior example, FLATTEN lets you simplify the nested array output, spilling the individual results into the grid. We used an empty string ("") for pad_value so rows with fewer items show blanks in the remaining columns. Three HAS functions check whether values are in an array: HAS(array, value) returns TRUE if value appears anywhere in array, and FALSE otherwise. HASANY(array, values) returns TRUE if any of the values appear anywhere in array, and FALSE otherwise. HASALL(array, values) returns TRUE if all of the values appear anywhere in array, and FALSE otherwise. Do more with spreadsheets using arrays in cells and nested arrays Arrays in cells open up spreadsheet designs that weren't practical before. The run tracker below captures split times (how long it takes to run each kilometer) in a table with one run per row. The number of splits depends on the length of the run. Stats for each run are calculated right in the same table. For more examples, I recommend looking to your favorite Excel communities on LinkedIn, YouTube, Reddit, or elsewhere. Enabling nested array calculations in a workbook Compatibility Version 3 will be released alongside arrays in cells and is required for most calculations involving nested arrays. You can set Compatibility Version for each workbook in by selecting Formula > Calculation Options. See compatibility versions for more information. Some existing formulas return different results in Compatibility Version 3. If your workbook doesn't behave as expected, you can keep it set to Compatibility Version 1 or 2. Known limitations As this feature rolls out to Beta Channel, the following limitations apply: Conditional formatting doesn't inspect array contents unless you use a formula Data validation can't use a list or array as dropdown items Charts don't expand an array into data points PivotTables don't read array values as source data Power Query doesn't load or emit array-valued columns Find & Replace can't replace list/array items Availability These improvements are rolling out to Beta Channel users running: Windows: Version 2610 (Build 20520.20000) or later Mac: Version 16.114 (Build 26092111) or later Features covered on this blog roll out over time to enable us to monitor quality and performance, so some preview features may not be available to you right away. Also note that features may be paused, adjusted, or removed as part of that process. Feedback Click Help > Feedback in Excel to tell us what you think.37KViews14likes54CommentsMicrosoft 365 Champion community call | September 2026 | AM
Join our next community call on September 22, 2026, to learn more about the OneDrive in mobile experience. Host: Tiffany Lee Guest: Lisa Miao Moderator: Jessie Hwang 📢 NOTE: our community call formats are Teams webinars so you must register at https://aka.ms/M365ChampionCallAM to receive the link to join. The join link will be sent to you in email with your webinar registration confirmation. 🗨️ Each call includes an open Q&A discussion section at the end, where you'll have a chance to ask your questions about Microsoft 365. 👋 Was this forwarded to you? Join the Microsoft 365 Champion program today! Champions combine technical acumen with people skills to drive meaningful change. Our community calls are open to everyone, but only Champion program members have access to the presentation resources (access link is in the initial welcome email and in the monthly newsletters). Join now: https://aka.ms/M365Champions. 🎥 The recording will be available on-demand on the Driving Adoption community and our YouTube Community Learning channel later in the week. Note: If you are unable to watch the recording on YouTube, try watching it here.534Views0likes0CommentsMicrosoft 365 Champion community call | September 2026 | PM
Join our next community call on September 22, 2026, to learn more about the OneDrive in mobile experience. Host: Tiffany Lee Guest: Lisa Miao Moderator: Jessie Hwang 📢 NOTE: our community call formats are Teams webinars so you must register at https://aka.ms/M365ChampionCallPM to receive the link to join. The join link will be sent to you in email with your webinar registration confirmation. 🗨️ Each call includes an open Q&A discussion section at the end, where you'll have a chance to ask your questions about Microsoft 365. 👋 Was this forwarded to you? Join the Microsoft 365 Champion program today! Champions combine technical acumen with people skills to drive meaningful change. Our community calls are open to everyone, but only Champion program members have access to the presentation resources (access link is in the initial welcome email and in the monthly newsletters). Join now: https://aka.ms/M365Champions. 🎥 The recording will be available on-demand on the Driving Adoption community and our YouTube Community Learning channel later in the week. Note: If you are unable to watch the recording on YouTube, try watching it here.361Views0likes0CommentsSharePoint HTML Pages with Copilot: Create, Upload, Edit and Publish
Hi everyone, SharePoint is adding support for HTML pages (Message Center ID: MC1479517). You can create an HTML page with Copilot in SharePoint or upload HTML from another source. Once the page is stored in the Site Pages library, you can render it as a page, edit it, publish it and share it alongside your existing ASPX pages. I recorded a full walkthrough with live demos, and I'd love to hear how you plan to use it. What's new - Create an HTML page from + New > HTML page on a SharePoint site - Create one from the floating Copilot button on a SharePoint site - Create one from the Publish landing page via + Create > HTML page - Describe the page in a prompt and attach files for additional context - Upload an existing .html file, or HTML pages and folders, from the Site Pages library - Edit text directly on the page, or use the Copilot chat pane for broader content and design changes Good to know - Publishing an HTML page does not grant new permissions. Existing SharePoint permissions decide who can see it. - Creating or editing a page with Copilot requires a Microsoft 365 Copilot license. Uploading, editing directly, publishing and viewing do not. - HTML pages are enabled by default. Site owners can control this with the "Allow HTML files" setting in the Site Pages library (File types). - The site-scoped Agent creation entry point is being removed from the + New menu on site pages. You can still create agents from the command bar of a document library or list, and from the context menu of selected files. Rollout - Public Preview: early October 2026 - General Availability (Worldwide): mid-November to late December 2026 No admin action is required before rollout. You may want to inform your SharePoint authors, update your internal page authoring guidance and review your Copilot license assignments. Resources - Official guide: https://support.microsoft.com/en-us/sharepoint/create-edit-publish-html-pages - More Microsoft 365 and Copilot content: https://youtube.com/@delucagiulian Questions for the community - Will you create HTML pages with Copilot, or upload your own HTML? - Which use cases are you most excited about: landing pages, dashboards, team hubs or something else? Looking forward to your thoughts! Giuliano78Views2likes2CommentsESPC Microsoft 365 and AI 2026 Event Guide
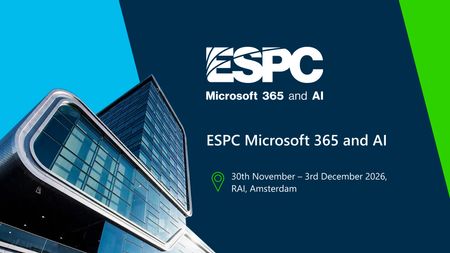
Event at a Glance ESPC is Europe's premier Microsoft 365 and AI conference. It brings together IT professionals, business leaders, developers, architects, partners, MVPs, community leaders, and Microsoft experts to learn, connect, and explore the latest innovations across Microsoft 365, Copilot, Teams, SharePoint, and more. Microsoft is a lead partner and headline sponsor, using ESPC as a key opportunity to engage with customers, partners, and the Microsoft community. Dates: November 30 - December 3, 2026 Location: RAI Amsterdam, Netherlands Venue: RAI Amsterdam, Europaplein 24, 1078 GZ Amsterdam, Netherlands (Entrance C) Hashtag: #ESPC26 Microsoft Role: Headline Sponsor Sessions: 35+ Microsoft-led Speakers: 100+ (MVPs, RDs, Microsoft and community members) Why Attend ESPC 2026? ESPC is where the Microsoft community comes together to learn, connect, and shape what’s next. From Microsoft keynotes and product-maker sessions to hands-on demos, community meetups, and networking opportunities, attendees gain direct access to the people building the technologies they use every day. ESPC is known for its welcoming community atmosphere, making it easy to learn from peers, share ideas, and build meaningful professional relationships. Learn from Microsoft - Hear directly from Microsoft leaders, engineers, product makers, and customer experience experts as they share the latest developments across Microsoft 365, Copilot, Teams, SharePoint, Power Platform, Security, Fabric, Azure, and AI. Explore What's New in AI and Copilot - Discover how organizations are adopting AI, deploying Copilot, building agents, and transforming productivity. Gain practical guidance, real-world insights, and technical knowledge you can take back to your team. Get Hands-On with Innovation - Visit the Microsoft Innovation Hub to experience live demos, engage with product experts, explore new capabilities, and participate in interactive experiences designed to help you learn by doing. Connect with the Community - Meet MVPs, partners, customers, developers, architects, IT professionals, and community leaders from around the world. Whether in a session, the Community Lounge, a meetup, or a networking event, ESPC creates opportunities to build lasting connections. Return with Actionable Ideas - Beyond inspiration, ESPC focuses on practical learning. Attendees leave with new skills, proven approaches, and fresh perspectives they can immediately apply to modernize collaboration, accelerate adoption, strengthen governance, and drive AI-powered transformation within their organizations Microsoft Presence Microsoft will have a significant presence throughout the conference, including: Microsoft keynotes and product announcements Product makers, engineers, and customer experience leaders Microsoft-led breakout sessions Innovation Hub experience on the expo floor Innovation Stage lightning talks Ask the Expert opportunities Executive engagement activities Women in Tech & Allies programming Community meetups and networking experiences Meet the Microsoft Keynote speakers Jeff Teper, Executive Vice President, Microsoft Apps & Agents Karuana Gatimu, Director, Microsoft SCALE Experience Group, AI & Collaboration Vesa Juvonen, Principal Product Manager Keynotes Microsoft Opening Keynote | Tuesday, December 1 | 9:00 AM The AI-Powered Enterprise Speaker: Jeff Teper, Executive Vice President, Microsoft Apps & Agents Microsoft's opening keynote will explore how the biggest AI value gains extend beyond individual applications and personal productivity gains. They emerge when organizations connect people, knowledge, business processes, data, workflows, and agents into a unified operating model. You can expect valuable insights into business transformation trends, product innovation, and demos to show how everyday work is evolving. Whether you're a decision maker, business leader, or technology professional, this session will offer practical perspectives on navigating the next wave of digital transformation. Demonstrations Miceile Barrett, Principal Group Product Manager, Michel Bouman, Senior Program Manager, Kendra Springer, Principal Group PM Manager Microsoft Product Keynote | Wednesday, December 2 | 9:00 AM Leading Through Change: Fireside Conversations on AI, Productivity, and Business Transformation Speaker: Karuana Gatimu, Director of the Microsoft SCALE Experience Group, AI & Collaboration A product-focused keynote highlighting customer adoption, community innovation, and practical approaches for leveraging Microsoft 365 Copilot, agents, and modern workplace technologies. Known for translating complex technology into actionable guidance, Karuana will share practical insights, real-world examples, and best practices that you can take back to your teams. From collaboration and productivity to AI-powered innovation, this keynote will provide valuable inspiration for organizations looking to maximize their Microsoft investments. Closing Keynote | Thursday, December 3 | 9:00 AM Crafting the Next Era of Work with AI and Empathy Speaker: Vesa Juvonen, Principal Product Manager, Microsoft As organizations continue to embrace AI, one question becomes increasingly important: how do we balance technological advancement with human connection? In this keynote, Vesa Juvonen will explore how innovation and empathy can work together to shape the future workplace. Through practical examples and relatable insights, Vesa will share ideas for embracing new technologies while keeping people at the center of transformation efforts. Whether you're leading organizational change, building solutions, supporting users, or exploring ways to work smarter, this session will provide actionable ideas to help you navigate the evolving world of work. Microsoft sessions Tuesday: 10:15-11:15 - Frontier transformation with Microsoft Copilot and Work IQ with John Mighell, Microsoft / Shanna Bosmans, Microsoft 10:15-11:15 - Microsoft Teams: Harnessing agents where work gets done with Matt Slomka, Microsoft 11:45-12:45 - Agent 365: Securing, Governing, and Managing the Agentic Enterprise with Sesha Mani, Microsoft / Vinod Kurpad, Microsoft 11:45-12:45 - Extending Microsoft Copilot: Understanding Your Options with Vesa Juvonen, Microsoft / Paolo Pialorsi, Microsoft 11:45-12:45 - OneDrive: Your Hub for Productivity and Collaboration Excellence (Product Team Overview) with Arjun Tomar, Microsoft / Lincoln DeMaris, Microsoft 14:00-15:00 - Harnessing Connectors to Power Intelligent Agents in Microsoft 365 with Manas Biswas, Microsoft 15:15-16:15 - Modernize Legacy Systems for the Copilot Era with SharePoint Embedded with Marc Windle, Microsoft / James Eccles, Microsoft 15:15-16:15 - Copilot Cowork in Action: What It Is, How to Get It & What You Can Do With It with Melissa Hale, Kerv / Daniel Laskewitz, Microsoft 16:45-17:45 - Giving your office eyes, ears and a brain with Michel Bouman, Microsoft / Matt Slomka, Microsoft 16:45-17:45 - Build Once, Ground Everywhere: Developing Agents with the WorkIQ API with Shyam Narayan, Microsoft / Yogesh Ratnaparkhi, Microsoft Wednesday: 10:15-11:15 - SharePoint: The Knowledge Platform for Copilot & Agents (Product Team Overview) with Zach Rosenfield, Microsoft / Miceile Barrett, Microsoft 11:45-12:45 - OneDrive: Your Hub for Productivity and Collaboration Excellence (Product Team Overview) with Arjun Tomar, Microsoft / Lincoln DeMaris, Microsoft 14:00-15:00 - Secure your Copilot Era: 3Rs you should care: Readiness-Relevancy-Resiliency with Brad Gussin, Microsoft / Kartik Pullabhotla, Microsoft 15:15-16:15 - Unlocking Business Value with Copilot, Agents, and Content Automation with Bryan Wofford, Microsoft / Karuana Gatimu, Microsoft 16:45-17:45 - Digital Me: Meet Your Microsoft Scout with TBA, Microsoft 16:45-17:45 - M365 Content Governing Agent powered by SAM. Governing Content at the Speed of AI with Sanjoyan Mustafi, Microsoft / Jill McClenahan, Microsoft Thursday: 11:45-12:45 - How to avoid “(fin)Ooops” in AI: practical tokenomics for Copilot agents with Hanna Engel, Microsoft 11:45-12:45 - MCP in Power Platform: One Year Later – Building Custom MCP Servers with Low Code with Daniel Laskewitz, Microsoft / Mats Necker, MVP, dhino 15:15-16:15 - From Conversation to Action: Building Copilot Apps That Transform Work with Vesa Juvonen, Microsoft / Bert Jansen, Microsoft Community Sessions There are over 100 sessions presented by the Microsoft Community – Microsoft Most Valuable Professionals (MVPs), Regional Directors, Microsoft Global Community Initiative Board Members and Regional Leads, Microsoft Partners and more. ESPC also has a Programme Team that curates all of the content for the event. Thank you Luise Freese, Maarten Eekels, Rik Hepworth, and Chris O’Brien for your curation, partnership and working so hard to architect a fabulous programme for 2026. Learn more about the team here: European SharePoint Conference 2026 | ESPC 2026 Microsoft Innovation Hub The Innovation Hub serves as Microsoft's home on the ESPC expo floor and gives attendees opportunities to interact directly with product teams through demos, conversations, and hands-on experiences. We are excited to announce that Dona Sarkar, Principal CX Program Manager, Microsoft will be leading a learning promptahon workshop in the Ideation Lab. More info and a few other activations with names you know to be announced. Innovation Hub Zones Innovation Stage Lightning talks Live demos Product-maker presentations Demo Stations Microsoft Copilot Copilot Studio and Agents OneDrive & SharePoint AI Adoption Surface + AI Skilling Bar Surface devices with AI integration AI skilling experiences Practical learning scenarios Ideation Lab Interactive workshops Community collaboration Future-of-work discussions Planned Hours Tuesday: 10:00 AM - 7:00 PM Wednesday: 10:15 AM - 6:00 PM Thursday: 10:00 AM - 3:00 PM Community Activities Microsoft is partnering closely with the broader Microsoft community to deliver: Community Lounge meetups Ask the Expert activities Microsoft Most Valuable Professional (MVP) engagement Microsoft Global Community Initiative (MGCI) engagement Innovation Stage presentations Community networking opportunities Community activities are integrated directly into the Innovation Hub and Community Lounge experience, creating opportunities for attendees to engage with Microsoft leaders, MVPs, partners, and community organizers. Women in Tech & Allies Activities WIT Community Lounge Meetup Calling all Women in Tech and Allies! Join us during lunch on the first day of ESPC to say hello, make new connections, and perhaps find an ESPC show buddy. This is a casual meetup with no formal agenda. Simply pick up your lunch and join us at the tables marked with WITA signs. Date: Tuesday, December 1 Time: 12:45 –2:00 PM CET Location: Community Lounge Inspire Stage breakout Leading with Allyship: Building Inclusive Communities in the Age of AI Date: Wednesday, December 2 Time: 10:15–11:15 AM CET Location: Inspire Stage Hosts: Heather Cook, Principal Customer Experience Manager, Microsoft and Femke Cornelissen, Chief AI Transformation Officer, Wortell Panelists: Jayshree Ostwal, MVP, Manager, AI Solution Architect, Avanade, Lindsay Shelton, MVP, Digital Workplace Advisor, Epiq, Merethe Stave, MVP, Chief Customer Officer and Senior Cloud Architect, CloudWay, Onyinye Madubuko,MVP, Senior M365 Consultant, Ergo, Reshmee Auckloo, MVP, Modern Workplace Associate Manager, Avanade Women in Tech & Allies Lunch Shaping the Future Together: Women in Tech and Allies Driving Change Date: Wednesday, December 2 Time: 12:45-2:00 PM CET Location: Elicium 1 Host: Heather Cook, Principal Customer Experience Manager, Microsoft Panelists: Danielle Moon, Sr. Specialist – AI Business Process, Women in Power Platform, Microsoft, Karuana Gatimu, Director of the Microsoft SCALE Experience Group, AI & Collaboration, Microsoft, Jessie Hwang, Customer Experience Product Manager, Microsoft, Hanna Engel, Cloud Solution Architect | Azure & AI, Microsoft, Dona Sarkar, Chief Troublemaker | Enterprise AI Advocacy, Microsoft, Ioana-Cristina Sbiera, Field Integrated Marketing Manager, Microsoft Microsoft Event Team Executive Producer - Heather Cook, Principal Customer Experience Manager, Microsoft Content Narrative Lead – Bryan Wofford, Principal Customer Experience Manager, Microsoft Community & Innovation Hub Lead – Jonathan Jones, Customer Experience Program Manager, Microsoft ESPC Organizers Thank you to our event producers: Bridgette Robertson, Partnership Development & Programme Executive, Ella Murphy, Marketing Manager, Joanne Mangan, Product & Partner Manager, John Carroll, Business Development Lead, Katie Boland, Events Administrator, Kevin Monahan, General Manager, Sarah Grech, Events Coordinator, Sean Colleran, Marketing Executive Links and Social Event Resources - ESPC Website Social Media Hashtag – #ESPC26 X/Twitter – ESPC Community LinkedIn – ESPC LinkedIn Instagram – ESPC_Community See you there! ESPC 2026 represents an important opportunity to connect product makers, customers, partners, MVPs, and the broader Microsoft community in one of the most engaged Microsoft ecosystems in the world. Across four days of learning, networking, hands-on experiences, and community-led conversations, Microsoft will showcase the latest innovations in Microsoft 365, Copilot, AI, Teams, SharePoint, Power Platform, Fabric, Security, and Azure while creating meaningful opportunities for attendees to learn, connect, and share what’s next. We look forward to welcoming the community to Amsterdam and making ESPC 2026 a memorable, inclusive, and impactful experience for everyone involved. See you at ESPC 2026. #ESPC2669Views0likes0Comments