copilot
1310 TopicsBuild Automated Agents, Workflows, and Apps - New in Copilot Studio
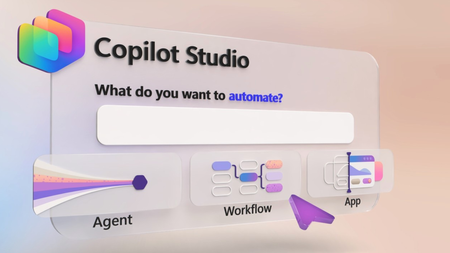
Describe the agent you need and generate its instructions and reusable skills, choose the model, connect MCP tools and specialist agents, then test its quality at scale with Evaluations. Trigger workflows from incoming email, classify submissions, hand work to your agents, and pause for human review on the decisions that need it. Track timing and paths for every step in the Activity tab. Then generate a full stack app on your Dataverse data so your team can filter, review, and approve every bid from one shared view. Jack Rowbotham, Copilot Studio Senior Product Manager, shares how to automate a procurement process for bids from multiple vendors, using agents that reason, route, and recommend. Describe the agent you need. Copilot Studio helps build it. See how it turns the requirements you provide into an agent, mapping out the instructions and creating reusable skills along the way. Start here. Test, refine, repeat. Run structured test sets with Evaluations in Copilot Studio, import your own test cases or generate them with AI, and compare results as you improve your agent. See how it works. Agents provide reasoning. Workflows provide consistency. Apps provide structure. Bring all three together in Copilot Studio to build end-to-end business solutions. Check it out. 👥 Who it’s for: IT admins, Power Platform makers, solution architects, and developers building agentic solutions, plus operations and procurement teams automating reviews and approvals. ⏱️ Chapters: 00:00 Build agents, workflows, and apps in one place 01:04 Automate a multi-vendor bid review end to end 02:18 Build an agent from a prompt 03:28 Add models, MCP tools, and specialist agents 04:13 Test the bid agent in Preview 05:05 Evaluations 05:59 Automated workflows 07:42 Track every run in the Activity tab 08:13 Build an app from a prompt 09:10 Approve bids from the team app 09:37 Get started with Copilot Studio Copilot Studio brings agents, workflows, and apps together in one place, all running on the GitHub Copilot harness. In this video, a supplier email triggers a workflow, a bid evaluation agent checks the bid against tender requirements, and the procurement team makes the final call in a shared app. Describe the agent you want, including the requirements to assess, the logic to apply, and the live data source to connect to. Copilot Studio reasons over your prompt, maps out its build steps, and generates the agent’s name, instructions, and skills for requirement coverage and evidence verification. Connect Work IQ for supplier emails and the Dataverse MCP server for bid data, keep Claude Sonnet as the reasoning model, ground the agent in an RFP example PDF, and add a Supplier Risk specialist agent. Test the agent in the Preview tab and watch its chain of thought as it flags gaps in certification, cold-chain handling, and insurance minimums. Then run Evaluations with your own conversations, auto-generated tests, or a CSV file. Here, 18 test cases met the evaluation criteria 89% of the time. In the Workflows tab, drag in an Outlook “When a new email arrives” trigger, a Classify step for RFP submissions, a Get Attachment connector, and an Agent step running the Bid Evaluation Agent. An if/else Human Review step brings in a person on flagged bids, and the Researcher agent and a recommendation agent finish the job before results land in Dataverse. Finish in Apps by describing a Bid Management App connected to your Dataverse table, or to sources like SharePoint through connectors. Apply company branding with a follow-up prompt, then filter bids that need human review and approve decisions from the app. Try it for yourself at copilotstudio.microsoft.com. Subscribe to Microsoft Mechanics for more videos like this. 🔗 Related links: — Get started with Copilot Studio: https://copilotstudio.microsoft.com Unfamiliar with Microsoft Mechanics? Microsoft’s Official Video Series for IT — Subscribe: https://www.youtube.com/c/MicrosoftMechanicsSeries — Microsoft Tech Community: https://techcommunity.microsoft.com/t5/microsoft-mechanics-blog/bg-p/MicrosoftMechanicsBlog — Podcast: https://microsoftmechanics.libsyn.com/podcast Join us on social: — https://twitter.com/MSFTMechanics — https://www.linkedin.com/company/microsoft-mechanics/ — https://www.instagram.com/msftmechanics/ — https://www.tiktok.com/@msftmechanics Video Transcript: -If you want to build agents that go beyond the standard chat interface that can work autonomously following your defined workflows, connecting to other agents and tools, and presenting information with new interactive app experiences, today, I’ll show you how Copilot Studio helps you do just that and more, and it’s even easier than you may think. Copilot Studio gives you what you need to build end-to-end solutions with agents, workflows, and apps in one place, without having to write a single line of code. You can build individual agents with your chosen model, expert skills, tools, including prebuilt connectors, APIs, and MCPs to your existing systems, as well as incorporating specialized knowledge, other agents, and memory, all now using the powerful GitHub Copilot harness under the covers. -You can integrate them with your defined multi-step workflows, which provide the correct path for consistency, and bring in other skilled agents or people as needed. And finally, build full-stack app experiences using natural language, so you can describe what you want and let AI generate the app for you. Now, to make this real, I’ll walk you through an agentic solution that accepts and reviews work bids from multiple vendors and then routes them for human approval. -Here’s what the process looks like in Copilot Studio. First, a supplier email arrives and automatically triggers a workflow. The workflow classifies the submission, retrieves the supporting documents, and passes everything to the bid evaluation agent. That agent then reviews the bid against the tender requirements, validates the evidence, and identifies any potential issues. If a decision requires human judgment, the workflow pauses and brings in the appropriate reviewer. A Microsoft Copilot Researcher agent can then gather the additional context and the recommendation agent then combines the findings into a final recommendation. It then passes status information to a data source connected to our app frontend, and this app will give the procurement team a shared place to track every bid, review those exceptions, and make decisions to move work forward. So, the workflow lays out all of the steps, the decisions, agent handoffs, and outcomes. -And in the next few minutes, I’ll retrace the simple steps to creating this agentic solution. We have multiple agents working together, so I’ll start by building our bid evaluation agent, which is our primary reasoning engine for this process. I’m in Copilot Studio, and all I need to do is describe the agent I want to build. -So here, I’ll tell it to create a Bid Evaluation Agent for the procurement team. Then I’ll tell it how to assess the bidding requirements, the logic it needs to incorporate, and even the live data source it needs to connect to. It needs to evaluate the request for proposal sent via email and then compare supplier responses against the requirements, and even provide a pass or fail verdict and a final recommendation. -So I’ll submit my detailed prompt and let it get to work. And you can see that it’s reasoning over everything I’ve asked it to do. It then maps out the process it will take through the steps you can see in the upper right. It looks over the information I pointed it to, and starts building out the agent. It’s also automatically creating skills as reusable instructions in this case so that the requirement coverage and the evidence verification will stay consistent. And these skills can also be reused across other agents or your teams in the future. -Now, with this agent complete, let’s look at what it’s created. We can see that it’s generated an agent name and detailed instructions automatically. And here, you can see the two skills that were added, where you can also upload your own skills or even create more with AI by simply describing what you want. It’s connected to tools already like Work IQ in this case for the Supplier Submission Emails and the Dataverse MCP with our Procurement and Bid Data to take action. -Here, too, you can also add more tools, like MCPs for both Microsoft and non-Microsoft data and services. And I can choose the model that best fits the task. In this case, I’ll keep Claude Sonnet as a good reasoning model. I can ground it in the knowledge across different online services. For this agent, I want to give it an RFP example, and I can even drag in the files from my local device like this PDF and attach that to the agent. -Additionally, I can bring in specialist agents for additional expertise, like this one for assessing Supplier Risk, which I’ll connect to now. I also have the option to maintain memory throughout an interaction and use that in future sessions. So, now, I’ve created my main agent. I’m ready to test it out in Copilot Studio. This time, starting from the agent’s Preview tab, I have an example email in my clipboard that I’m going to paste in and manually attach the work bid. -From there, I just need to submit it to trigger the evaluation process. We can see that the agent evaluates each requirement, reviews the supporting evidence, and identifies the gaps. We can even watch the chain-of-thought, and in this case, it flags that the supplier does not have the sufficient certification for medicine manufacturing. It also doesn’t meet the requirements for cold-chain handling. And its insurance does not meet the minimum requirements. Agentic processes like this one can take several minutes to complete, so to save a little time, I’ll skip ahead to the Final Recommendation. You’ll see that it recommends a human review and not to shortlist the supplier until it addresses the issues that I mentioned before, and it provides the specific details about this recommendation in the summary. -So, that was the result of a single preview run, and we can also test the agent quality at scale using Evaluations in Copilot Studio. Instead of spot-checking, I can now run structured tests against the agent and measure the performance over time. You can bring in your own conversations as test cases or use Copilot Studio to automatically generate 10 tests based on how you’ve built the agent. In this case, I’ve got the test cases ready, and I’ll simply pull them in as a CSV file. You see that this one contains 18 test cases containing sample requests. -Now, I’ll just give this evaluation a name, and then start it. Then it will run those and evaluate the general quality of the responses. They run sequentially, and you can click into each of them for details after they run. In reality, these 18 tests took just over 22 minutes to run, so I’ll jump straight into the results. You’ll see that these evaluations met our criteria 89% of the time. And scrolling down the individual test results, you can also see the outcome for each. -Now, with our agent working, I’ll create the automated workflow that does the work before and after the agent. I’m back in Copilot Studio in the Workflows tab, and adding steps is as easy as dragging in and dropping what you want onto the canvas. By default, the start trigger is set to Manual, but I want to change this process to trigger off an incoming email instead, so I’ll change the trigger type to Connector, then choose Outlook, and then When a new email arrives. This is set to an individual email account, but it could be a dedicated RFP intake account along with other parameters. -Then I’ll add a Classify step to evaluate the nature of the email using its subject and message body. I’ll just enter one here for RFP, but I can define multiple categories as well. At that point for the RFP path, I’ll add another step to get the attachment itself, where I’ll use the Connector again as the type and search for Get Attachment, and there it is. The attachment will be used as it processes the subsequent steps. That’s where our Bidding Evaluation Agent comes in to analyze the email attachment with the bid. -And so I’ll add an Agent step, then using the dropdown, I’ll choose the Bid Evaluation Agent that we just built. And from there, you’ll continue this process for all the branches of the workflow until it’s complete. I’ve added the rest of the steps to save a little bit of time. And you can see that I have a Human Review step added with an if/else decision. The agent can request human review when it flags that a bid needs attention from a person on the team before moving forward. Otherwise, it will proceed directly to the Researcher agent to gather additional information on the bid and bidder. -From there, it goes to the last agent in our workflow, which consumes all of the information from the previous steps, then assesses the bid and makes that final recommendation. It then creates a record as a new row in Dataverse, our backend data source for the process. Each step can be tested independently, making it easy to troubleshoot and iterate. -Now, to test this out, I’ve already started sending emails with attached bids, and we can see the results for each run. From the Activity tab in my workflow, you can see the timing per step and the path taken for an incoming RFP email. Clicking into any step will show its details, and here for our agent, we can see what it did along with its structured output. Looks like this one needed a human review. And once the reviewer took action, the process continued until the final recommendation was posted in Dataverse. Everything we’ve looked at so far runs as an automated process behind the scenes. That said, an app is where the people can view and find the details for each bid. Let’s build that. This time from Copilot Studio, I’ll start in Apps. Using natural language, I just need to describe the experience I want. -In this case, I want a Bid Management App to oversee multiple bids as they’re processed so that the team can track each bid with its details. I’m asking it to connect to my Dataverse table, and I could connect it to other data locations and types like SharePoint using connectors. Below that, you’ll see that I’ve described the app screens I wanted to make. And I’ll kick this off. This is another long-running process that can take several minutes, so I’ll skip ahead to the first iteration of my app. It’s already looking pretty good, a nice summary tiles at the top and the details per bid. I can use the additional prompts to refine the app, for example, updating it to my company branding. And in just a few moments, it applies the visual branding to match our company apps, and it’s ready to be tested. -In fact, I can switch over to the experience that the other people on the procurement team would see and use. I have a complete view of the Bid Queue, like we saw in the preview with the suppliers, the status, and the recommendation. I can easily filter down to the bids that need human review. And clicking into any one of these bids shows additional details and the actions I can take. From here, I can make a decision and decide whether to Approve, which I’ll do in this case. And then save to confirm. And everything is working end to end. -So, that’s agents, workflows, and apps working together in Copilot Studio. To get started, head to copilotstudio.microsoft.com and keep watching Microsoft Mechanics for the latest tech updates. Thanks for watching.17Views0likes0CommentsStudy and Learn Agent: Now in 50 Languages, images improvements, ready when you open Copilot
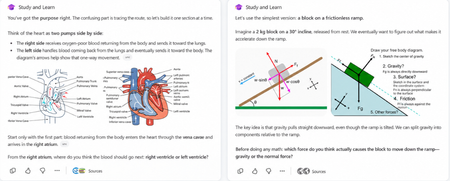
When we brought Study and Learn Agent to general availability, the promise was simple: the student does the thinking. Study and Learn asks before it tells. It pushes you to try. It makes learning interactive and quizzes you on what you missed. It lives at aka.ms/studyandlearn inside your Microsoft Education tenant. It coaches learners across any subject; explaining concepts, walking through problems step by step, supporting writing without doing the writing, and generating flashcards, quizzes, matching, and fill-in-the-blank activities from a learner's own materials. The design principle underneath all of it: preserve the productive effort that makes learning stick. The learner does the thinking. The agent coaches the thinking. 👥 Who can use it Study and Learn is available and pinned by default for every adult learner in a Microsoft Education tenant. No setup required — it's right there in the left navigation of Microsoft 365 Copilot. For K-12 students aged 13–17, there's one step first: Copilot Chat has to be enabled. Until it is, students in your tenant can't reach the agent. The good news is that it's a simple set of steps tutorial shows the exact enablement steps for IT admins. Watch the enablement walkthrough. 🎥 Full video tutorial If you want the full tour, Mike Tholfsen made an end-to-end tutorial that walks through every feature, start to finish. It's the fastest way to see the agent in action: Watch it here: ✨ Copilot Chat now opens with Study and Learn pre-selected For K-12 students who already have Copilot Chat enabled, Study and Learn is now pre-selected the moment they open Copilot Chat. The coach is right there, ready - no hunting through a menu, no wondering which agent to pick. Copilot Chat opens by default in the learning mode. A student who wants to work with something else can dismiss it in a tap. IT admins stay in control. The setting lives in the Education settings panel in the Microsoft 365 admin center. It's ON by default for K-12 and OFF by default for higher education, where admins can turn it on when they're ready. 🌍 Now available in 50 languages At GA, Study and Learn was optimized for English (US). Now it speaks the way your learners do. The agent is available in 50 languages beyond English. Set your browser or operating system to a supported locale and visit aka.ms/studyandlearn. The user experience and conversation are set in your language. The learning activities - flashcards, quizzes, matching, fill-in-the-blank - appear in your chosen app language. Additional language support is rolling out now and will be available to all users in the coming days. And you're not locked in. A learner can switch languages mid-conversation for a genuinely multilingual study session. Learning a new language and want the vocabulary words in the new language but the explanations in your native language? No problem. Want to switch languages to practice the vocabulary with Study and Learn, no problem, you can do that too. The coaching language follows you. For a student learning in their second language, or a family where the kitchen-table language isn't the classroom language this is the difference between a tool that talks at them and one that meets them where they are. 🖼️ Images that show, instead of just tell Some things are easier to see than to describe. A cell's structure. The layers of the atmosphere. Where the femur meets the hip. Study and Learn conversations can now include a carousel of relevant, web-safe images sourced through search, woven right into the flow of the agent's response. Each image supports the next step in a learner's understanding, a visual nudge toward the answer they're working out for themselves, without shortcutting the effort that gets them there. This is especially powerful for visual subjects like biology, geography, and chemistry, where a single well-placed image does what a paragraph can't. This experience will get better over time. It is rolling out now and will be available to all users in the coming days. You can always share feedback here. 💬 A prompt pack to help learners get started Here’s a prompt pack - a set of ready-to-use prompts that show learners exactly how to put the agent to work, organized around the moments they actually face: Understand a difficult topic — “Use these materials to find the most important ideas and help me understand them.”, “Explain [topic] step by step, then check my understanding.” Practice what you know — “Create a matching activity for the key terms in this chapter.”, “Make a fill-in-the-blanks activity from these materials.” Improve my work — “Review what I missed and explain the ideas I need to practice.”, “Help me understand why my answer was incorrect, then let me try again Work on an assignment — “Help me brainstorm ideas for this assignment.”, “Review my draft and help me find one area to strengthen.”, “Help me check whether my evidence supports my main point.” Get ready for a test — “Use these materials to identify the topics I should focus on.”, “Give me a five-minute review of these concepts I’m still struggling with.” Every prompt keeps the learner in the driver's seat — the agent helps them think and practice, never hands over the answer. Share the pack at the start of a unit and watch how it changes the way students engage. 📋 Coming soon: educators can assign the agent from Teams Everything so far puts the coach in the learner's hands. This next one puts it in the educator's. Rolling out soon, educators will be able to assign the use of Study and Learn Agent directly from a Teams assignment. Instead of a blanket "you can use this," you'll be able to point learners to the agent for a specific assignment built right into the assignment they're already opening. The through-line Every one of these (the languages, the pre-select, the prompt pack, the images, the assignments) meet the learner where they are. In their language. The moment they open Copilot. With the words to get started and the visuals to see it clearly. Pointed there, when it counts, by the educator who knows them. Open Microsoft 365 Copilot. Look in the left navigation. Then watch Mike's full tutorial and try it on the thing you're studying next. Educators can also access the full professional development course on Study and Learn complete with suggestions on introducing the agent to students. Try Study and Learn Agent · Microsoft Education license required. K-12 student access (ages 13–17) requires IT to enable Copilot Chat. Resources: Try Study and Learn in your tenant: https://aka.ms/studyandlearn Full tutorial on Study and Learn: https://aka.ms/studyandlearnvideo Professional development for educators: https://aka.ms/studyandlearnmodule Enable Copilot Chat: https://aka.ms/enablecopilotchatvideo Support documentation: https://aka.ms/studyandlearndocumentation Anoo Padte is Principal Product Manager for AI in Education at Microsoft.92Views0likes0Comments
OneDrive + Copilot event — Your file system and photo solution for the AI era
Your files are more than documents. They're the ideas, projects, and moments that move work and life forward. Discover how OneDrive is evolving for the AI era, helping you move from files to outcomes with intelligence built into the experiences you use every day. 🔴 LIVE AMA INCLUDED This event includes a live Ask Microsoft Anything (AMA). To submit your question, login or create an account and submit your question below as a Comment. Register here and explore OneDrive resources: https://aka.ms/OneDriveEvent Additional links: OneDrive Customer Office Hours: https://aka.ms/OneDriveOfficeHours Listen to the Sync Up podcast: https://aka.ms/SyncUp Explore the OneDrive community: https://aka.ms/OneDriveBlog #Microsoft #OneDrive #Copilot #DigitalEvent #OneDriveEvent439Views0likes0CommentsGetting Started with Copilot Skills in SharePoint: Reusable AI Workflows Without Code
Copilot in SharePoint is getting an interesting new capability: custom Skills. Instead of relying only on one-off prompts, Skills let us define reusable, multi-step instructions that Copilot can apply to common business processes within a SharePoint site. Some of the key capabilities I find particularly interesting: ✅ Create Skills using natural language ✅ Turn repeatable business processes into reusable AI instructions ✅ Store Skills as SKILL.md files in the site's Agent Assets library ✅ Allow Copilot to automatically select a relevant Skill based on the user's request, or invoke a Skill explicitly by name ✅ Reuse native Copilot in SharePoint capabilities for working with content, lists, files and folders ✅ Continue respecting existing SharePoint permissions From an administration and governance perspective, there are also some important considerations. Skills are stored under: /Agent Assets/Skills/<skill-name>/SKILL.md By default, users with Edit permissions on the site can create Skills, while standard SharePoint permissions and governance controls continue to apply. Skills also don't provide a way to execute custom code or connect directly to external systems. 💡 Why I think this is interesting For me, the real value isn't simply creating another AI prompt. It's the possibility of taking a process that an organization performs repeatedly and turning the instructions for that process into something reusable. For example: 📄 Reviewing documents against organizational standards 📋 Running repeatable document-review processes 📁 Organizing SharePoint content 🔄 Standardizing common Copilot workflows across a site 🎥 I created a hands-on video where I explore how Copilot Skills in SharePoint work, how a Skill is created, where it is stored, and some of the governance considerations administrators should be aware of. Watch the walkthrough here: 👉 https://youtu.be/TO8CyeC5fO0 Official Microsoft documentation: 👉 https://learn.microsoft.com/en-us/sharepoint/copilot-in-sharepoint-skills I'm particularly interested in how the Microsoft 365 community plans to use this capability. 💬 What business process would you turn into your first SharePoint Copilot Skill? I'd love to hear your ideas and use cases in the comments.136Views1like2CommentsWhat's new in Microsoft Planner | September 2026
Fall is officially here, and with it comes our first quarterly edition of What's New in Microsoft Planner! Each quarter, we'll bring the latest Planner updates together in one place. We're continuing to invest in Planner to help people work alongside AI to plan and get work done, whether you're tracking your own tasks or coordinating a shared plan across your team. This quarter's updates give you a clearer view of your work, new ways to save time keeping plans current, and more places to manage tasks where work already happens. Planner Agent is now built directly into basic plans, so you can ask questions about your plan, create and update tasks, and focus on your top priorities without leaving Planner. We're also making Planner Agent in Copilot more capable, with fuller answers on large, complex plans and faster, more reliable responses. You'll also find updates that bring Planner closer to where your team collaborates, from adding Planner as a tab in private and shared Teams channels to bringing your tasks and plans into Outlook. And the new Task Details Side Pane lets you update assignments, dates, and checklists without losing sight of the bigger picture. Read on to see everything that's new in Planner this quarter and share your feedback through the Planner Feedback Portal. Keep the details and bigger picture in view Task Details Side Pane Planner now offers a new way to view and edit task details without losing sight of the plan or task list. The Task Details Side Pane opens alongside Board, Grid, and My Tasks views. Assignees, dates, notes, and checklists can be updated without leaving that view. Seeing task details alongside the plan makes it easier to review assignments and dates without losing context. Planner now also remembers the preferred task details layout when the app is reopened. On smaller screens, task details automatically open in a dialog for a better fit. Save time planning and getting work done Chat with Planner Agent in Planner Planner Agent chat is available directly in basic plans. It allows teams to ask questions about the plan, create and update tasks, and filter the view to focus on the top priorities. With chat built into the plan, teams can now review tasks and make updates without leaving Planner to start a separate conversation in Copilot. Planner Agent in Microsoft Copilot More context for large plans: Planner Agent can now use more information from large and complex plans when answering questions. It leverages the latest frontier models for more in-depth reasoning and draws more effectively on work content. These improvements help find relevant tasks and include more supporting plan details in responses, giving teams a fuller picture of the work being reviewed. Create larger plans in Copilot: The previous 30-task limit when creating a plan has been removed, allowing Planner Agent to generate larger initial task lists without a limit. Teams can review the proposed tasks in Copilot before saving them to the plan. Improvements also extend beyond plan creation, with faster responses and fewer interruptions across the Planner Agent experience in Copilot. Assign tasks to team members: Users can set task owners by asking Planner Agent or using task cards in the agent's responses, without leaving the conversation in Copilot. Choose how Planner Agent responds: A new model selector offers Quick response, Think deeper, and Auto modes. Users can choose a quicker response, request more in-depth reasoning, or let Planner Agent select the mode automatically. Planner capabilities in Copilot Users can keep tasks current while handling other work in one conversation, without opening Planner or a separate Planner Agent chat. In Copilot Chat, users can now search for tasks and plans, get answers about their work, create or update tasks, and take action on plans. The same chat includes capabilities from Outlook, Excel, PowerPoint, and other apps. Users can access these alongside Planner capabilities without switching between agents. Manage work where it happens Planner in Outlook Planner is now available in Outlook, bringing tasks and plans, along with Planner Agent, into the inbox. This experience supports both personal task tracking and collaborative planning, so individual commitments and shared work can be managed in one place. With Planner in Outlook, people can track progress, coordinate responsibilities, and take action without leaving their inbox. To get started in Outlook on the web or the new Outlook for Windows, select Apps, search for Planner, then add and pin it for quick access. Planner tabs in Teams channels Planner can now be added as a tab in private and shared Team channels. Team members can create a new basic plan or select an existing plan shared with the group associated with the channel. Once added, the plan is easy to find in the channel where the team collaborates. Members can return to that dedicated space to review tasks and manage projects together.2.5KViews4likes2Comments
News to Know – Volume 3, Edition 10, September 2026
September brings practical updates that help you support survey participants, simplify administration, and keep up with changes across Viva Glint. This edition covers new Copilot experiences and survey improvements available this month, along with an early look at reporting and administration capabilities planned for upcoming releases. New on your Viva Glint platform This section highlights new capabilities now available on your Viva Glint platform this month. Handling data for deleted users. Starting October 1, 2026, we restarted the live processing of user delete signals received via Microsoft Entra as well as the processing of the delete signals that were generated since the beginning of the related planned maintenance window in June 2025. Users who were deleted from Microsoft Entra since June 2025 will be processed in Viva Glint and their data will be retained or deleted based on the user data configurations for your Viva Glint instance. Admins can now choose to retain a user's email address and employee ID after that user is removed from Glint, preserving historical reporting accuracy. Delete user data from Viva Glint | Microsoft Learn Copilot in Viva Glint: Admin Assistant. The first phase of the Viva Glint Admin Assistant is now generally available for commercial customers. Grounded in Microsoft Learn content and best practices, it provides contextual, step-by-step guidance for configuration tasks so you can complete common setup work without switching between the product and documentation. Coaching and action-taking capabilities are planned for future phases, and availability for government cloud environments is planned for future release. Survey administration: Multiple-choice list questions. You can now upload option lists from a CSV file when creating multiple-choice questions, with support for multilingual lists and up to 500 options. Survey participants can search and filter longer lists before selecting one or more responses, making complex questions easier to configure and complete. For more information see Multi-choice list questions. Product updates: In-product announcement access. Service administrators can now use a new announcement icon in the Viva Glint header to reach existing product updates, newsletters, and community posts. This gives you a more direct way to find information about recently released capabilities without first locating the relevant update channel. Stay updated with the Viva Glint newsletter | Microsoft Learn. Copilot in Viva Glint: Support for survey comments. Rolling out at the end of September for survey types other than 360s, authenticated survey participants can use Copilot to rewrite all or part of an open-text response when the experience is enabled by their organization. It can help people refine their wording and reduce recognizable writing patterns, supporting more confident and candid feedback while preserving the participant's intended meaning. Access to the feature is controlled by the new “Copilot in Viva Glint Survey Taking” VFAM control which is defaulted to an “OFF” state. Rewrite Comments with Copilot in Viva Glint | Microsoft Learn. Survey experience: Clearer navigation and automatic comment saving. Survey comments now save automatically as participants type, reducing the risk of lost feedback if a session is interrupted. A single Next button replaces separate Skip and Done actions, and updated scrolling keeps participants at the question they are editing instead of moving them unexpectedly to the end of the survey. These changes apply automatically, including surveys already in progress, and require no configuration or admin action. Improvements for Glint integration with Microsoft 365 Organizational Data Service: Clearer oversight of imports and configuration changes (Public Preview). You can now trace organizational-data imports with a consistent ingestion ID across activity logs, downloaded advisory and summary files, email notifications, and the validation experience. Audit events for imports data management enhanced to provide greater visibility into integration configuration changes, including downloadable details where available. Coming soon to Viva Glint The following section offers an early look at capabilities coming to Glint in upcoming releases. Continuous Engagement administration | Private preview in October. Private preview customers will be able to map survey questions to eligible workplace metrics directly in a simplified administration flow. A guided setup experience and summary page will reduce manual coordination and give administrators more control over which contextual metrics managers can review alongside survey results. Multi-attribute report exports | Private preview in October. We are extending Viva Glint's multi-attribute export beyond admins to managers, leaders, analysts, and HRBPs, so they can export filtered, grouped, cross-dimensional data (e.g., department + location + tenure) outside the app for flexible, personalized analysis. This will be available for Private Preview in October. Express interest to join preview here: Viva Glint Multi-Attribute Export – Private Preview Sign-Up form Program setup: Required-field indicators | Generally available in October. Visual indicators will identify required fields throughout program setup, with clearer treatment when a required value is missing. The update will help you understand what each step requires before moving forward, without changing which fields are required or optional. Glint integration with Microsoft 365 Organizational Data Service | Generally available in October. This capability will be available for all customers including GCC-M and customers with multiple instances of Viva Glint. GA release will enhance the capability with upload email notification management and enhanced user experience. Sign Up for Survey Owners Can View Survey Results by 2nd Oct | Private Preview. Survey Owners will automatically get access to the results of the surveys they own, without gaining broader access to other surveys in the tenant. Today, this access is largely role-based, often requiring survey creators to get special roles or admin help just to view their own results. With this feature, ownership moves to the survey level: owners can be assigned individually or by group, and access is scoped only to the surveys they own, with no extra administrative privileges. Private Preview is open now to participate use the link here. Action taking analysis report | Private Preview. A long-requested capability for listening program leaders will provide a report showing which leaders and managers have accessed their survey results and whether they've gone on to take action, such as holding team conversations. Instead of guessing whether results are landing, program owners will be able to see engagement directly and target support where follow-through is lagging. Private Preview is open now to a limited group of customers, with the opportunity to give feedback ahead of Public Preview. Express your interest here. See our public roadmap for more feature updates. Events and learning opportunities Recent EECC Customer Engagement Sessions: September 24th – Viva Glint Multi-Attribute and Comments Report Exports: Current Capabilities and Improvements on the Roadmap Target Audience: Viva Glint admins, HRBPs, analysts, managers, and leaders We invited EECC customers to discuss how Viva Glint's Multi-Attribute Report and Comments Report exports work today, along with a preview of where we're taking both. The session drew 45 live attendees representing 24 customer organizations, spanning healthcare, financial services, manufacturing, retail and logistics, and professional services. The conversation opened with a candid look at how customers use exports today, then moved into a live demo of upcoming Multi-Attribute Report changes and a design-stage preview of Comments export enhancements. Customers weighed in throughout on confidentiality safeguards, missing data dimensions, and gaps in in-app reporting. Key takeaways: Today's Multi-Attribute Report Export is admin-only and limited to three attributes and 12,000 value combinations. Several customers said the current output is difficult to read and interpret, leading many to rely on raw data exports and custom scripts instead. The planned update will open export access to non-admin roles under admin-controlled permissions, remove the three-attribute cap, raise the row ceiling to roughly one million, and add question-level filtering. A private preview is targeted for mid to late October. Customers were especially eager for in-app heat map and cross-tab views, such as comparing engagement scores by location and gender, rather than exporting and manually recombining data. Presenters flagged this as valuable input for future roadmap consideration. For Comments export, customers requested additional attribution dimensions, including worker type and region, while preserving group-level confidentiality suppression. Feedback was mixed on how broadly to open attribute-level access, with some customers preferring it remain limited to HR and analyst roles rather than extending to all managers. Connect with us Stay engaged with the Viva Glint & Pulse community through the Employee Experience Customer Connection (EECC) program. The Employee Experience Customer Connection (EECC) program offers our customers an opportunity to be part of a feedback community as employee experiences continue to evolve with Viva and Microsoft 365 Copilot. What the program provides: Product team engagement for Employee Experiences powered by Viva and M365Copilot Forums for you to influence product direction & unlock value for your organization Early insight into product roadmap Private preview engagement opportunities Connection with other enterprise customers If you’re interested in joining, please fill out this form so we can guide you through the enrollment process and help you get started. We look forward to partnering with you to build better products together.184Views0likes0Comments
Goodstack-Validated Nonprofit Rejected After Forced Resubmission — No Escalation Path
I am posting this because Microsoft Elevate frontline support told me there are no further escalation paths available, and I believe this may affect other nonprofits. Timeline of facts: - June 19, 2026: Goodstack, Microsoft's authorized validation partner, confirmed our nonprofit (Opera Verace Foundation, EIN 33-2305878, California 501(c)(3)) was approved for Microsoft nonprofit grants and discounts. - June 23, 2026: Microsoft Elevate support informed me the original application was in an unrecoverable system error state due to an unrecoverable error in their system, and they instructed me to resubmit under a different email address. I only had one email directed to my business email and asked if I could use a Yahoo email. - June 30, 2026: The same Elevate representative confirmed in email to me that using a Yahoo email address as a temporary workaround was fully supported and "the correct and supported path forward." - July 2026: A different Microsoft Validation Team (not the one I had worked with originally) rejected the resubmission (likely due to use of a yahoo.com email as my business email address) and demanded documents not listed in the published eligibility requirements, including a bank statement. They stated the original Goodstack approval cannot be reinstated. - When I pointed out that Goodstack's validation was never rescinded, that my organization's nonprofit status can be confirmed on propublica online, and that the resubmission existed solely due to Microsoft's own system error and instructions, I was told this was a determination of another team and no further escalation paths exist. The core issue: Goodstack validated our organization on Microsoft's behalf. Microsoft's own system error forced resubmission. Microsoft's own representative authorized the (incorrect) workaround in writing. The Validation Team is now treating the workaround submission as a brand new independent submission requiring extraordinary measures for re-validation, ignoring the Goodstack validation, ignoring the request to check propublica, and ignoring the fact that thier reuest for additional documents is nowhere to be found in Microsoft's own document requirements in Microsoft's published nonprofit eligibility policies. Ticket number: 2606210040000788 Is anyone at Microsoft able to escalate this to someone with authority over the Validation Team? Has anyone else encountered this after being directed to use a personal email for resubmission?310Views0likes1CommentCopilot, Microsoft 365 & Power Platform Community call
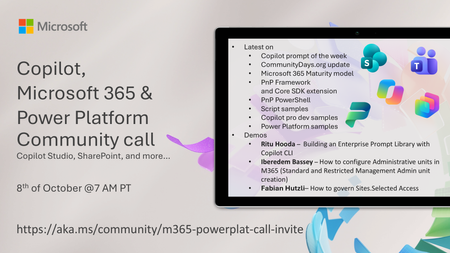
💡 Copilot, Microsoft 365 & Power Platform weekly community call focuses on different use cases and features within the Microsoft 365 and Power Platform - across Microsoft 365 Copilot, Copilot Studio, SharePoint, Power Apps and more. Demos in this call are presented by the community members. 👏 Looking to catch up on the latest news and updates, including cool community demos, this call is for you! 📅 On 8th of October we'll have following agenda: Latest news and events from Microsoft Topics Copilot prompt of the week CommunityDays.org update Microsoft 365 Maturity model PnP Framework and Core SDK extension PnP PowerShell Script samples Copilot pro dev samples Power Platform samples Demos this time Ritu Hooda – Building an Enterprise Prompt Library with Copilot CLI Iberedem Bassey – How to configure Administrative units in M365 (Standard and Restricted Management Admin unit creation) Fabian Hutzli – How to govern Sites.Selected Access 📅 Download recurrent invite from https://aka.ms/community/m365-powerplat-dev-call-invite 📞 & 📺 Join the Microsoft Teams meeting live at https://aka.ms/community/m365-powerplat-dev-call-join 💡 Building something cool for Microsoft 365 or Power Platform (Copilot, SharePoint, Power Apps, etc)? We are always looking for presenters - Volunteer for a community call demo at https://aka.ms/community/request/demo 👋 See you in the call! 📖 Resources: Previous community call recordings and demos from the Microsoft Community Learning YouTube channel at https://aka.ms/community/youtube Microsoft 365 & Power Platform samples from Microsoft and community - https://aka.ms/community/samples Microsoft 365 & Power Platform community details - https://aka.ms/community/home 🧡 Sharing is caring!58Views0likes0Comments