api
70 TopicsMicrosoft Agent 365 and Azure API Management integration for MCP governance
As agents gain access to enterprise tools, organizations need consistent ways to govern what those agents can access and enforce those decisions at runtime Today, we're announcing a new integration between Microsoft Agent 365 and Azure API Management now in public preview. The integration connects centralized governance in Agent 365 with runtime enforcement for MCP servers and tools through Azure API Management for V2 and AI Gateway tiers. With this integration, AI administrators can discover and govern gateway managed MCP servers and tools from Agent 365 and application platform teams use Azure API Management, to enforce those access decisions at runtime. Microsoft Defender and Microsoft Purview add additional layers of protection by evaluating tool requests and results for threats and sensitive information risks. Centralized governance, enforced at the gateway Agent 365 and Azure API Management play complementary roles. Agent 365 defines governance intent, maintains inventory, and manages access decisions. Azure API Management enforces those decisions inline for traffic to MCP servers and tools. Together, they connect the enterprise governance experience with the infrastructure platform teams already use to manage access to business systems. Administrators can make supported access decisions from Agent 365, while enforcement happens at the gateway in the customer's Azure environment. For agents already using a configured gateway endpoint, that connection remains in place. Customers can extend governance to their existing gateway-managed tools without rearchitecting those agents or moving tools out of their Azure subscriptions. Discover tools and control what agents can do The integration brings together four key capabilities: Discover existing gateways and MCP servers. After a one-time tenant-level consent, Agent 365 discovers supported Azure API Management resources and the MCP servers they expose, removing manual registration. Maintain a centralized inventory. Administrators can find gateway-managed MCP servers in Agent 365 and inspect available metadata, bringing these assets into a shared governance experience. Control access at the right level. Block or unblock an entire MCP server. With the Azure API Management AI Gateway tier (preview) they can apply more granular controls by blocking individual tools without disabling the server. Use runtime signals for oversight. Tool activity observability on AI Gateway tier supports monitoring, auditing, and incident investigation, connecting access decisions with what happens at runtime. Add protection before tools run and before results return Controlling which tools agents can access is one part of the governance model. Organizations also need protection for information flowing through those tools . The Agent 365 tool threat protection policy (supported in the AI Gateway tier) uses Microsoft Defender and Microsoft Purview capabilities to evaluate tool requests and results for risks such as malicious content, prompt injection, and exposure of sensitive information. Platform teams can configure evaluation before tool invocation, after invocation, or at both stages. With blocking configured, pre-invocation evaluation can prevent a disallowed call from executing. Post-invocation evaluation can withhold unsafe results before they reach the agent. Build on open standards and existing investments This integration connects centralized governance with enforcement where agents access tools, while building on the infrastructure organizations already operate. MCP provides a common interface for tool access. Azure API Management provides the gateway boundary for applying policy, security, and observability. Agent 365 brings those gateway-managed assets into a centralized governance experience, with Microsoft security capabilities adding protection along the tool-call path. The goal is not to make every agent use the same runtime. It is to help organizations apply governance to tools reached through supported gateway endpoints, bringing AI administrators, platform teams, and security teams closer together, while preserving the existing architecture. Get started API Management v2 tiers support centralized MCP inventory and server-level blocking and unblocking through Agent 365.The AI Gateway tier adds more granular capabilities including individual-tool blocking, tool activity observability, and tool threat protection . Start with the Agent 365 integration guide, explore tool threat protection with Defender and Purview, and configure your gateway in the AI Gateway portal.1.1KViews0likes4Comments
Update network rules for the API Management service tag
To improve Azure API Management resiliency and scalability, we’re expanding our infrastructure and adding control-plane IP addresses. These addresses are included in the ApiManagement service tag. If you use VNet internal or VNET external with the classic (v1) tiers, check your network security groups (NSGs), user-defined routes (UDRs), and firewalls. Replace hard-coded API Management IP addresses with the service tag wherever supported. Make this change by November 30, 2026, to avoid disruption to management access. If network rules block connectivity to the management endpoint after that date, you may be unable to manage your API Management configuration—such as APIs, operations, and policies—from the Azure portal or CLI. This change affects management-plane traffic only. Runtime traffic, including API calls to your services, is not impacted. Find the ApiManagement tag in Microsoft’s Azure service tags overview or the latest Azure IP Ranges and Service Tags JSON download. If your firewall doesn’t support service tags, use the published list and keep your IP rules synchronized with its latest version. Don’t rely on a fixed, point-in-time IP list. During the transition, the service tag includes both existing and new addresses. For reference: Use API Management in an internal virtual network
Migrate Data Ingestion from Data Collector to Log Ingestion - Part 2
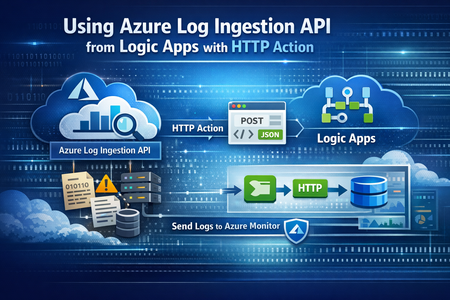
In Part1, we discussed how to use HTTP action to migrate from the deprecated Data Collector API to Log Ingestion API. However, since the deprecated Data Collector API was allowing message payload up to 30MB, some migration scenarios encountered issues; since the new Log Ingestion API has only 1MB payload limit. This applies to both HTTP action, and the preview (Log Ingestion connector) Azure Monitor service limits - Azure Monitor | Microsoft Learn When sending payload larger than 1MB, the HTTP action would fail with the error: In order to overcome this, we can chunk the array payload, before calling the Ingestion API. We need to chunk the array payload, so each produced chunk is around 800KB To do this, you can divide the size of your full payload, by the number of records it has, and this would give an average record size. Then divide 800,000 bytes with the average record size, and this will give you the chunk size. For example, if your payload size is 1,200,259 bytes, and the number of records is 2500, then the average record size is: 1,200,259 / 2,500 =~ 480 bytes To find the chunk size, we divide 800,000 bytes by 480 bytes 800,000 / 480 =~ 1666 records. So if we send around 1600 records, this should be less than 1MB. To chunk your array payload, we can use the chunk expression inside a compose action. You can use the expression below for chunking inside the compose action: After the compose action, add for-each action, and use the output of the compose action as an input: Inside the for-each, use the normal HTTP to send the logs, and in the body, choose the for-each current item237Views1like0CommentsAI Gateway tier of Azure API Management — August 2026 updates
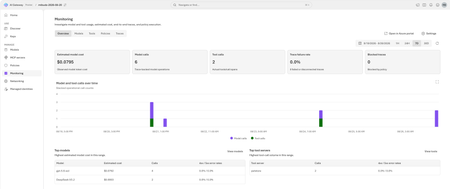
The August 2026 update for the AI Gateway tier (preview) of Azure API Management introduces new capabilities for observing AI workloads and governing model spend. Release highlights Richer OpenTelemetry observability: AI Gateway can now emit logs, distributed traces, token metrics, and estimated cost metrics through the OpenTelemetry Protocol. The built-in monitoring experience helps teams investigate model and MCP tool activity, policy execution, latency, errors, token consumption, and individual traces. Model cost monitoring and budget enforcement: Teams can review estimated model spend by API key and model, then use cost limit policies to set calendar-based budgets and block requests when configured limits are reached. The release also streamlines Microsoft Foundry model imports, refines provider onboarding, improves portal reliability and error guidance, expands Anthropic Messages compatibility, and adds an in-product What's new experience. For configuration guidance, important upgrade information, and the complete list of changes, read the full August 2026 release notes in the AI Gateway portal. Try the latest capabilities in the AI Gateway portal.852Views0likes0CommentsIntroducing APIOps CLI
APIOps CLI helps teams extract, version, review, preview, and publish Azure API Management configuration through source-controlled DevOps workflows. Today, we're excited to announce APIOps CLI, a new command-line experience designed to help organizations manage Azure API Management (APIM) using modern configuration-as-code and GitOps practices. As APIs become increasingly central to digital transformation, organizations need a reliable way to manage API definitions, policies, products, diagnostics, and gateway configuration across multiple environments. APIOps CLI provides a streamlined, developer-friendly approach to extract, version, review, and publish API Management configuration through familiar DevOps workflows. Why APIOps CLI? Traditional API management processes often rely on manual configuration changes, environment-specific customizations, and limited visibility into what changed and why. As API estates grow, these approaches become difficult to scale, audit, and govern. APIOps CLI addresses these challenges by enabling teams to manage API Management configuration as source-controlled artifacts. Every change can be reviewed through pull requests, tracked through Git history, and promoted consistently across development, test, and production environments. The result is improved governance, greater reliability, better collaboration between API developers and platform operators, and a simpler path toward enterprise-scale API operations. What APIOps CLI Enables APIOps CLI provides capabilities that help organizations adopt a true APIOps model: Extract API Management configuration into local artifact files Store and version configuration in Git repositories Review changes through standard pull request workflows Publish approved artifacts back into API Management environments Promote configuration consistently across environments Scaffold GitHub Actions and Azure DevOps pipelines Support automated CI/CD deployment patterns Enable auditable, repeatable API configuration management By treating API Management configuration as code, organizations gain the same operational excellence practices that software development teams have relied on for years. A Modern GitOps Workflow for APIs The APIOps CLI workflow follows a simple yet powerful pattern: Extract configuration from an existing API Management instance. Store the generated artifacts in source control. Review and approve changes through pull requests. Run automated validation and deployment pipelines. Publish approved configuration back to target API Management environments. This approach creates a clear separation between authoring, review, approval, and deployment while maintaining a complete audit trail of API platform changes. For organizations already practicing GitOps, APIOps CLI integrates naturally into existing development workflows and governance processes. Built for Real-World Enterprise Scenarios APIOps CLI is designed to support customers operating at enterprise scale. Common use cases include: Migrating away from manual API Management administration Standardizing deployments across multiple environments Establishing controlled promotion paths from development to production Implementing governance and compliance requirements Supporting platform engineering and API platform teams Managing large inventories of APIs, products, policies, and configurations Enabling self-service API development with centralized governance Whether you're operating a single API Management instance or managing a large multi-team API platform, APIOps CLI provides a foundation for consistent and repeatable operations. Integrated with Your Existing Toolchain APIOps CLI works alongside the tools teams already use: GitHub Azure DevOps Azure Pipelines GitHub Actions Azure CLI Existing Git repositories and branching strategies The tool can generate CI/CD scaffolding to accelerate adoption, helping teams move from manual operations to automated deployments with less effort. Open Source and Community Driven APIOps CLI is available as an open-source project under the Azure GitHub organization. The repository includes source code, architecture guidance, command documentation, CI/CD examples, walkthroughs, troubleshooting guidance, and reference material. By making the project open and community-driven, we are enabling customers, partners, and contributors to participate directly in the evolution of Azure API Management DevOps practices. Getting Started Getting started is straightforward: Install the APIOps CLI package. Authenticate with Azure. Extract an existing API Management instance into local artifacts. Commit those artifacts to a Git repository. Review and approve changes through pull requests. Publish approved changes back to Azure API Management. We recommend beginning with a non-production environment to establish your workflow, validate governance processes, and familiarize teams with the configuration-as-code model. Looking Ahead APIs have become a strategic asset for every organization. As API estates continue to expand, successful teams will increasingly adopt automation, governance, and GitOps practices to maintain speed without sacrificing control. APIOps CLI is an important step in that journey. It provides a modern foundation for managing Azure API Management configurations with the same rigor, automation, and reliability that organizations expect from modern software delivery practices. We invite you to explore APIOps CLI, try it in your environment, share feedback, and join us in shaping the future of API operations on Azure. Resources APIOps CLI GitHub repository: https://github.com/Azure/apiops-cli/tree/main Microsoft Learn: Manage API Management configuration with APIOps CLIBuild governed asynchronous APIs with Azure API Management and Azure Service Bus
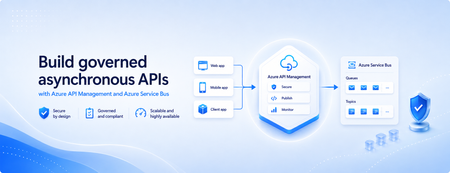
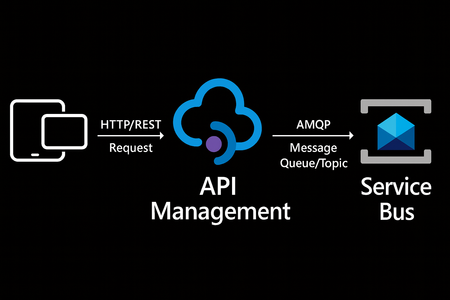
Many applications use Azure Service Bus to decouple services, handle traffic spikes, and process workloads asynchronously. However, securely exposing messaging capabilities to applications, partners, and internal teams can require custom middleware or messaging-specific client implementations. Today, we’re announcing the general availability of native Azure Service Bus integration in Azure API Management. With the send-service-bus-message policy, developers can publish messages directly from an Azure API Management gateway to an Azure Service Bus queue or topic. This provides a secure and governed HTTP interface for Service Bus workloads—without requiring teams to build and operate a separate adapter service. Connect APIs directly to Azure Service Bus Azure API Management can act as the governed entry point for applications that submit work to Azure Service Bus. A client sends a standard HTTP request to API Management. The gateway can authenticate and authorize the caller, validate or transform the request, and apply policies such as rate limits and quotas before publishing the message to a Service Bus queue or topic. Once the message is accepted, API Management can immediately respond to the caller while downstream services process the message asynchronously. Alternatively, message publication can be added to an existing API flow while the request continues to its primary backend. This integration brings together API governance in Azure API Management and reliable asynchronous messaging in Azure Service Bus—without adding another intermediary service. Greater control over Service Bus messages As part of general availability, we’re introducing additional controls for building production messaging workflows. 1. Control how messages are processed Developers can configure the following Service Bus message properties directly in the policy: Message IDs to correlate messages and support duplicate-detection or idempotent processing patterns. Session IDs to group related messages for ordered or stateful processing. Time-to-live to prevent messages from being processed after they are no longer relevant. These values can be generated dynamically using API Management policy expressions, allowing them to reflect request IDs, customer identifiers, transactions, or other application context. 2. Capture the send result The response-variable-name attribute captures information about the Service Bus send operation in an API Management context variable. Subsequent policies can use the result to add correlation information to an API response, emit telemetry, record an operational event, or apply conditional logic when a message cannot be sent. 3. Choose how failures affect the API Different messaging scenarios require different failure behavior. When publishing the message is the primary purpose of an API, a send failure can stop policy execution and invoke the API Management error-handling path. When publishing is secondary—such as sending an audit event or initiating optional downstream processing—the ignore-error option can allow the primary API request to continue. Information about the send operation remains available through the response variable for logging or subsequent policy logic. 4. Secure access with managed identity API Management authenticates to Azure Service Bus using a Microsoft Entra managed identity. Customers can use the system-assigned identity of the API Management service or specify a user-assigned managed identity. The selected identity is granted the Azure Service Bus Data Sender role for the appropriate namespace, queue, or topic. This removes the need to store Service Bus connection strings or shared access keys in API policies and makes it easier to apply least-privilege access using Azure role-based access control. Send a message with an API Management policy The following example sends the incoming request body to an orders queue. It assigns a message ID and expiration time, captures the result of the send operation, and treats successful publication as a required part of the API request. <send-service-bus-message queue-name="orders" namespace="contoso-messaging.servicebus.windows.net" message-id="@(context.RequestId.ToString())" time-to-live="00:10:00" response-variable-name="serviceBusResult" ignore-error="false"> <payload> @(context.Request.Body.As<string>(preserveContent: true)) </payload> </send-service-bus-message> A session ID can also be added when related messages need to be grouped for ordered or stateful processing. For a fully asynchronous API, the policy can be followed by return-response so that API Management acknowledges the request immediately after sending the message. For an existing API, the request can continue to its configured backend after the message is published. Common integration scenarios Create asynchronous APIs: Accept an order, document, or processing request through an HTTP API, publish it to a queue, and return immediately while downstream services complete the work. Govern partner integrations: Provide partners with a managed API contract instead of exposing the underlying Service Bus namespace. API Management can authenticate callers, validate requests, and apply quotas before publishing messages. Publish business events: Publish events to a Service Bus topic so multiple subscriptions and downstream services can process them independently. Handle bursts of incoming traffic: Use Service Bus to buffer messages when incoming API traffic temporarily exceeds the rate at which downstream services can process requests. Add events to existing API operations: Publish audit, notification, analytics, or workflow events while allowing the primary API request to continue to its configured backend. Preserve workflow affinity: Use Service Bus sessions to group related messages for ordered or stateful processing based on a customer, transaction, order, or workflow identifier. Get started To send messages from Azure API Management to Azure Service Bus: Create or select an Azure Service Bus queue or topic. Enable a system-assigned or user-assigned managed identity on the API Management service. Assign the identity the Azure Service Bus Data Sender role. Add the send-service-bus-message policy to an API operation. Configure the message payload, processing properties, output variable, and failure behavior. With native Azure Service Bus integration, Azure API Management provides a secure and governed way to connect HTTP APIs with asynchronous messaging workloads—without requiring additional middleware. Learn more Send Service Bus message policy reference Send messages to Azure Service Bus from Azure API Management Azure API Management June 2026 release notes Azure Service Bus documentation910Views0likes0CommentsBuilt-in gateway support for workspaces in Azure API Management
Workspaces in Azure API Management let platform teams hand off API ownership to individual API teams while keeping centralized governance. Until now, using them meant deploying a dedicated workspace gateway on the Premium tier — adding cost, operational overhead, and limiting regional availability. That requirement is going away. Workspaces can now be associated directly with the built-in gateway, and this capability is generally available. What changes Available in more tiers. Use workspaces on the built-in gateway in any API Management tier except Consumption. Available in every region. Create workspaces in any region where API Management is supported. All built-in gateway capabilities apply. Workspaces deployed with the built-in gateway inherit features that dedicated workspace gateways don't offer today, including multi-region deployments, custom hostnames, and Private Link connectivity. Availability Rolling out now to v2 tiers, with Azure portal UI support expected around July. Rollout to classic tiers (Developer, Basic, Standard, Premium) will begin by August and may take up to a few months to complete. Get started Learn more about workspaces and how to deploy them on the built-in gateway.1.9KViews3likes3CommentsZonal redundancy in API management Standard v2
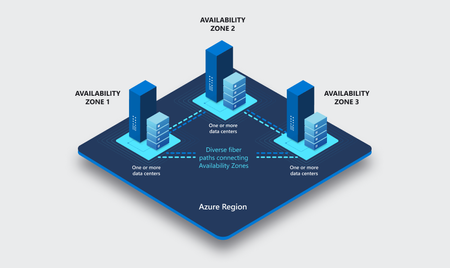
APIs are the backbone of modern applications, powering everything from mobile experiences and microservices to AI-driven applications and business-critical integrations. As customers continue to modernize their platforms on Azure, they increasingly expect their API infrastructure to remain available even in the face of datacenter-level disruptions. With zone redundancy in Standard v2, Azure API Management now enables customers to increase resilience against Availability Zone failures while continuing to benefit from the simplicity, performance, and cost efficiency of the v2 platform. Why Zone Redundancy Matters Azure Availability Zones are physically separate locations within an Azure region, each with independent power, cooling, and networking infrastructure. By distributing API Management resources across multiple zones, organizations can reduce the impact of a single datacenter failure and improve service continuity for their APIs. Until now, customers who required built-in zone-level resiliency often needed to evaluate higher-end deployment options. With this enhancement, Standard v2 customers can now deploy API gateways across Availability Zones and benefit from improved reliability while maintaining the streamlined operational model of the v2 platform. What’s New Zone Redundancy for Standard v2 extends the platform's resiliency by distributing service capacity across multiple Availability Zones within a supported Azure region. Key benefits include: Higher Availability: API traffic continues to flow even if a single Availability Zone experiences an outage. Built-in Resiliency: Redundancy is provided at the platform layer, reducing the need for customers to design and manage complex intra-region failover solutions. Production-Ready Reliability: Customers can confidently run critical API workloads on Standard v2 with stronger availability guarantees. Operational Simplicity: The service automatically manages capacity distribution, health monitoring, and recovery behavior across zones. Cost-Effective Resilience: Customers gain zone-level protection without requiring an enterprise-tier deployment model. Built on the Modern v2 Platform The v2 platform was designed from the ground up to provide a faster, more reliable, and more scalable API Management experience. Standard v2 already delivers capabilities such as rapid deployment, simplified networking, workspace support, and flexible scaling. Zone Redundancy further strengthens the platform by expanding its reliability story for production workloads. This announcement builds on our broader investment in making Azure API Management more accessible to a wider range of organizations, from digital-native startups to large enterprises modernizing their application estates. Ideal Scenarios Zone Redundancy in Standard v2 is particularly valuable for customers who: Run business-critical APIs that must remain available during datacenter incidents. Consolidate multiple application workloads behind a single API gateway. Expose APIs consumed by mobile, partner, and customer-facing applications. Support AI applications and agent-based architectures that depend on highly available API endpoints. For organizations adopting modern cloud and AI native architectures, this capability helps ensure that API infrastructure remains aligned with broader application resiliency strategies. A Foundation for Reliable AI and API Platforms As AI-powered applications continue to proliferate, APIs increasingly become the critical connection layer between models, agents, business systems, and data platforms. Downtime at the API layer can have a direct impact on application availability, customer experience, and business operations. By bringing zone redundancy to Standard v2, we are making it easier for organizations to build highly resilient API platforms that can serve as the foundation for next-generation AI and digital transformation initiatives. Getting Started Zone Redundancy for Standard v2 can be enabled in supported Azure regions, allowing customers to deploy API Management with built-in protection against Availability Zone failures. We recommend reviewing your application's overall resiliency architecture, including backend redundancy, traffic management, and disaster recovery requirements, to maximize the benefits of zone-resilient API infrastructure. Enable Zone Redundancy in the Azure Portal Getting started with Zone Redundancy in Azure API Management Standard v2 is straightforward and can be configured during service creation. Create a New Standard v2 Instance with Zone Redundancy Sign in to the Azure portal. Select Create a Resource and search for Azure API Management. Choose Standard v2 as the service tier. Select a region that supports Availability Zones. In the Availability Zones section, enable Zone Redundancy. Review and create the service. After deployment, Azure API Management automatically distributes service capacity across multiple Availability Zones within the selected region, helping maintain API availability during a zone-level outage. Looking Ahead This release represents another step in our ongoing investment in the Azure API Management v2 platform. We remain committed to delivering the reliability, scalability, security, and developer experiences that organizations expect from a modern API management service. We are excited to see what our customers build with a more resilient Standard v2 platform and look forward to your feedback as you continue modernizing and scaling your API ecosystems on Azure. Learn more by visiting the Azure API Management documentation and exploring the latest reliability guidance for API Management deployments.AI Gateway tier of API Management now in public preview
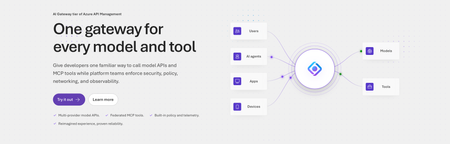
Today, we are introducing the AI Gateway tier of Azure API Management, now in public preview. It gives platform teams a purpose-built experience built specifically for AI workloads - publishing and governing models and MCP servers. Controls are configured through policy cards rather than XML and expressions, and the portal experience and control plane are structured around models, MCP servers, and tools rather than APIs. (For brevity, we refer to the AI Gateway tier as AI Gateway throughout the rest of this article.) AI Gateway is built on Azure API Management, bringing proven operational capabilities to AI workloads. The resource runs in your subscription, uses your Entra tenant, and sends telemetry to destinations you control. The operating model will be familiar to existing API Management customers, but the interface is built around AI workloads. The AI Gateway tier is intended for teams that want this focused experience; other API Management tiers remain the right choice when organizations also need general-purpose API management or capabilities not included in the AI Gateway experience. A practical model for platform teams The AI Gateway gives platform teams a shared place to manage models, MCP servers, policies, and observability destinations, with access controlled through Azure RBAC. For example, a central platform group can connect a set of approved models and tools and publish them for application teams. The application teams can test those assets in the test console and build against them without routing every change through the central group. The platform group still owns the shared guardrails and can see how the assets are being used. After an asset is published, developers can create a named runtime key and begin calling the gateway immediately. Bring the models and tools you already use Most organizations don't standardize on a single model provider. Different models are selected based on quality, latency, cost, geography, or specialized capabilities. The preview supports models from Microsoft Foundry including OpenAI, Anthropic, Mistral, and other Foundry hosted models, as well as models hosted in AWS Bedrock, Google Vertex AI, OpenAI, and Anthropic. A guided wizard simplifies importing models from Microsoft Foundry. Other providers can be added by configuring a connection, with backend authentication configured as part of that connection. All published models are available under the same stable endpoint. Applications continue to use supported API formats such as OpenAI Chat Completions and Responses or Anthropic Messages directly or via SDKs. The AI Gateway extends governance beyond models to the MCP servers and tools agents use to interact with enterprise systems. You can expose an existing MCP server over SSE or Streamable HTTP, turn all or selected operations from a REST API into an MCP server by uploading its OpenAPI specification, or use more than 1,400 connector-backed tools from the Power Platform and Logic Apps library. You can also federate multiple MCP servers behind a single server, so an agent connects once and sees the tools across those servers. Backend authentication supports an API key, OAuth client credentials, managed identity, or mTLS. Governance that's built in Organizations need consistent governance across models and MCP servers without requiring every application team to implement those capabilities independently. The AI Gateway portal presents governance policies through an intuitive card-based experience rather than requiring policy XML. The same policies are expressed as JSON properties, making them easy to manage as infrastructure as code and to audit and enforce across a fleet with Azure Policy. In the public preview, those cards cover request and token rate limits, token quotas, Azure AI Content Safety, and fallback to a secondary model. Policies are applied per asset, making it clear which controls protect each model or MCP server. OpenTelemetry-based token metrics The AI Gateway emits token-usage metrics through OpenTelemetry, with attributes following GenAI and cloud semantic conventions. Metrics can be sent to Application Insights, Datadog, Splunk, Grafana Cloud, or another OTLP endpoint. The portal provides a monitoring view over Application Insights data. Better together: Microsoft Foundry and AI Gateway With AI Gateway, teams can extend the same governance controls, for example token rate limits and quotas, across models hosted in Microsoft Foundry and models hosted elsewhere. Foundry and non-Foundry models are published through gateway-managed endpoints, giving applications and agents a consistent way to access governed models regardless of where they are hosted. Foundry-hosted agents can consume curated sets of tools from Foundry toolboxes, with access to the underlying MCP servers and APIs governed through AI Gateway. Together, Microsoft Foundry and AI Gateway cover the enterprise application lifecycle: Foundry for building and running AI applications, and AI Gateway for publishing, governing, and observing models, tools, and MCP servers across your AI estate. The new AI Gateway tier will soon be available through the gateway experience in Microsoft Foundry portal. We are working toward a seamless, integrated AI Gateway experience within Foundry portal and will share more about that work separately. Available today in public preview The AI Gateway tier is available today at no cost in public preview in East US 2 and Sweden Central. Pricing will be shared separately. To provision a resource, add a model or MCP server, and make a first call click this to go to the AI Gateway tier portal and try it. If you prefer to start from code, use a sample to deploy all the required resources for a Foundry-hosted agent configured to access its model and tools through AI Gateway. We look forward to your feedback as we continue to rapidly evolve AI Gateway.8.6KViews5likes10CommentsIntroducing native Service Bus message publishing from Azure API Management (Preview)
We’re excited to announce a preview capability in Azure API Management (APIM) — you can now send messages directly to Azure Service Bus from your APIs using a built-in policy. This enhancement, currently in public preview, simplifies how you connect your API layer with event-driven and asynchronous systems, helping you build more scalable, resilient, and loosely coupled architectures across your enterprise. Why this matters? Modern applications increasingly rely on asynchronous communication and event-driven designs. With this new integration: Any API hosted in API Management can publish to Service Bus — no SDKs, custom code, or middleware required. Partners, clients, and IoT devices can send data through standard HTTP calls, even if they don’t support AMQP natively. You stay in full control with authentication, throttling, and logging managed centrally in API Management. Your systems scale more smoothly by decoupling front-end requests from backend processing. How it works The new send-service-bus-message policy allows API Management to forward payloads from API calls directly into Service Bus queues or topics. High-level flow A client sends a standard HTTP request to your API endpoint in API Management. The policy executes and sends the payload as a message to Service Bus. Downstream consumers such as Logic Apps, Azure Functions, or microservices process those messages asynchronously. All configurations happen in API Management — no code changes or new infrastructure are required. Getting started You can try it out in minutes: Set up a Service Bus namespace and create a queue or topic. Enable a managed identity (system-assigned or user-assigned) on your API Management instance. Grant the identity the “Service Bus data sender” role in Azure RBAC, scoped to your queue/ topic. Add the policy to your API operation: <send-service-bus-message queue-name="orders"> <payload>@(context.Request.Body.As<string>())</payload> </send-service-bus-message> Once saved, each API call publishes its payload to the Service Bus queue or topic. 📖 Learn more. Common use cases This capability makes it easy to integrate your APIs into event-driven workflows: Order processing – Queue incoming orders for fulfillment or billing. Event notifications – Trigger internal workflows across multiple applications. Telemetry ingestion – Forward IoT or mobile app data to Service Bus for analytics. Partner integrations – Offer REST-based endpoints for external systems while maintaining policy-based control. Each of these scenarios benefits from simplified integration, centralized governance, and improved reliability. Secure and governed by design The integration uses managed identities for secure communication between API Management and Service Bus — no secrets required. You can further apply enterprise-grade controls: Enforce rate limits, quotas, and authorization through APIM policies. Gain API-level logging and tracing for each message sent. Use Service Bus metrics to monitor downstream processing. Together, these tools help you maintain a consistent security posture across your APIs and messaging layer. Build modern, event-driven architectures With this feature, API Management can serve as a bridge to your event-driven backbone. Start small by queuing a single API’s workload, or extend to enterprise-wide event distribution using topics and subscriptions. You’ll reduce architectural complexity while enabling more flexible, scalable, and decoupled application patterns. Learn more: Get the full walkthrough and examples in the documentation 👉 here5.4KViews4likes10Comments