ai
1497 TopicsLand Your Offer - Anatomy of Revenue Generating Partner Offer - Part 3 - Copilot Deployment
In Part 1 we looked at Copilot in 30, a $0 trial for SMB customers. In Part 2 we looked at Envisioning & POC, a funded pre-sales engagement. Part 3 moves to post-sales. The customer has bought Copilot seats. The job now is to get people using them. That job has a new reward. From 1 October 2026, the Frontier Accelerate for Copilot: M365 Copilot Deployment Accelerator pays in two milestones: one when you deliver the deployment, and one when the customer's active users grow. It also lands just after Microsoft introduced the new Copilot with Home, Code and Autopilot, usage-based billing and FinOps for AI. Deployment now covers more ground, and customers need a partner to cover it. Package this engagement as a Microsoft Marketplace offer and you have a repeatable way to turn paid seats into active users across your whole customer base. Start Here: Why Publishing on Microsoft Marketplace Matters Microsoft Marketplace is Microsoft's partner-focused business platform. It helps you reach more customers and makes buying from you simpler. A published offer gives your practice a permanent storefront where customers and Microsoft sellers already look for Copilot help. An offer also makes your work repeatable. You define the phases, activities, deliverables and sizes once. Then you run the same engagement for every qualified customer instead of scoping each one from scratch. Partner Center supports both professional service and managed service offers, so one listing can carry the deployment and the ongoing services that follow. The Opportunity: Seats Bought, Value Waiting Many organisations have bought Copilot ahead of their people adopting it. The gap between paid seats and monthly active users is value still waiting to be realised. Take a customer with 3,000 paid Copilot seats and 1,000 monthly active users. That leaves 2,000 seats, about $720K a year of Copilot investment at $30 per user per month, not yet part of anyone's working day. Closing that gap is what this engagement is designed to do. Customer eligibility for each size is set by two numbers: purchased Copilot seats, and unused seats (purchased seats minus active users). Both are in Partner Center's growth insights reporting in the AI Business Solutions & Security Insights (ASPX) dashboard. Use the dashboard's filters to find customers to land this offer with, and you will know which size each one qualifies for before the first conversation. Why Deployment Is Where Copilot Value Is Won Copilot delivers its value through daily use. The more people build it into how they work, the more value the business sees, and the stronger the case to extend it to more teams. The new Copilot widens what a good deployment covers. Home is the new starting point, with the full power of Word, Excel and PowerPoint built in through Office in Copilot. Code lets people build apps, dashboards and automations in plain language. Autopilot is a persistent agent that keeps work moving without a prompt. Advanced capabilities run on usage-based billing, governed through FinOps for AI. So deployment now goes beyond assigning licences. It means securing data, governing Code apps and Autopilot agents, training people on Chat, Office in Copilot and Code, and putting spend controls in place before usage scales. Each of these takes skills many customers do not yet have in-house. Each one is a service you can deliver. Meet the Offer: M365 Copilot Deployment Accelerator, Paid in Two Milestones The M365 Copilot Deployment Accelerator is a post-sales, partner-led engagement. It covers technical deployment of Microsoft 365 Copilot and Microsoft 365 Copilot Business, security and governance controls, user training, and adoption and change management. The essentials: Who qualifies: Customers with a minimum number of purchased Copilot seats and unused seats for each size: XXS 50+ and 25+, XS 300+ and 250+, S 500+ and 500+, M 1,500+ and 1,500+, L 3,000+ and 3,000+. Strategic 500 customers are not eligible. EDU and non-profit customers are not eligible for XXS and XS. How it is sized: Five sizes: XXS (10 hours), XS (20 hours), S (40 hours), M (100 hours) and L (200 hours). How it pays: Milestone 1 (Solution Deployment) is paid once your proof of execution (POE) is approved. It is guaranteed and does not depend on any outcome. Milestone 2 (Consumption Growth) is paid if the customer's incremental paid Copilot monthly active users reach the nominated band within a six-month window. Going above the band does not increase the payment. Falling below it means no Milestone 2 payment. How it runs: Nominate the customer into a size band (the band is locked once submitted). Get customer consent within 30 days. Deliver the work and submit POE (partner survey, customer attestation and invoice) within 90 days of consent. Each customer tenant can have up to two approved claims, one at a time. Who can deliver: Partners at Copilot JumpStart Ready or higher until 31 December 2026. From 1 January 2027, the Microsoft 365 Copilot specialization is required. Term: 1 October 2026 to 30 June 2027, or until the program cap is reached. Microsoft funds the deployment and rewards the growth. You own the delivery, the relationship and everything that follows. Your Role: From Deployer to Adoption Partner A deployment is not finished when licences are assigned. It is finished when people use Copilot every week and the sponsor can see the value. Your job is to get the customer there, phase by phase. Plan: Confirm the first business functions to adopt. Validate priority scenarios across Chat, Office in Copilot and the Microsoft 365 apps. Set KPIs and Responsible AI guardrails. Build a measurable business case that includes usage-based billing. Assess the environment and sequence remediation before deployment. Implement: Prepare the environment and assign licences. Configure data controls, fix oversharing, and govern Code apps and Autopilot agents. Enable admin tools. Set up the Copilot Dashboard, reporting and FinOps for AI spend controls. Launch a champions programme and community. Train users on Chat, Office in Copilot and Code. Adopt: Run prompt-a-thons on real scenarios. Survey users on their experience. Track incremental paid active users every month against the Milestone 2 band. Review audit logs and Copilot reports. Monitor service health, demand, cost and AI spend. Manage and Improve: Extend analytics with custom impact reports. Refine the business case with real data. Align policies to Home, Code and Autopilot on a set schedule. Optimise operations and AI spend. Mine help desk tickets for new agentic use cases. Keep training going as adoption spreads. Close out: Deliver an executive summary with recommendations, risks, owners and dates. Submit POE. Agree the plan to reach the nominated active user band within the six-month Milestone 2 window. Every phase moves one number: active users. It is the number the customer's sponsor watches most closely, and the one both milestones are built around. Inside the Offer: Activities and Hours by Engagement Size Below is the full activity plan behind the offer, with hours for each of the five sizes. Use it to size your own offer plans and statements of work. ID Phase Activity XXS XS S M L Pre-req Eligibility Minimum Copilot seats / unused seats (unused = seats minus active users) 50+ / 25+ 300+ / 250+ 500+ / 500+ 1,500+ / 1,500+ 3,000+ / 3,000+ P1 Plan Identify priority business functions 0.25 0.5 1 2.25 4.5 P2 Plan Determine high-value scenarios 0.5 1.25 2.25 5.75 11.5 P3 Plan Define success metrics and guardrails 0.5 0.75 1.5 3.75 7.5 P4 Plan Develop the business case, incl. usage-based billing (UBB) 0.5 1.25 2.25 5.75 11.5 P5 Plan Plan readiness and remediation 0.5 1 1.75 4.5 9 I1 Implement Prepare environment and assign licenses 0.75 1.5 3 7.75 15.25 I2 Implement Configure security and data controls 0.75 1.5 3 7.75 15.25 I3 Implement Enable administrative tools 0.5 0.75 1.5 3.75 7.5 I4 Implement Deploy analytics and reporting, incl. FinOps for AI 0.5 0.75 1.5 3.75 7.5 I5 Implement Activate champions and communities 0.25 0.75 1.25 3 6 I6 Implement Conduct training and communications 0.75 1.5 2.75 6.75 13.75 A1 Adopt Drive cross-organizational adoption 0.5 1.25 2.5 6 12.25 A2 Adopt Gather user feedback and sentiment 0.25 0.5 1.25 3 6 A3 Adopt Measure business impact and usage 0.5 1 2 5.25 10.75 A4 Adopt Monitor security and audit reports 0.25 0.5 1 2.75 5.25 A5 Adopt Monitor and evaluate operations, cost and AI spend 0.25 0.5 1.25 3 6 M1 Manage and Improve Extend analytics 0.25 0.5 1.25 3 6 M2 Manage and Improve Evolve the business case, incl. UBB 0.25 0.5 1.25 3 6 M3 Manage and Improve Policy review and refinement 0.25 0.5 1.25 3 6 M4 Manage and Improve Optimize operations and AI spend 0.5 0.75 1.5 3.75 7.5 M5 Manage and Improve Continuous process improvement 0.25 0.5 1.25 3 6 M6 Manage and Improve Continuous training and adoption 0.5 0.75 1.5 3.75 7.5 C1 Close-out Executive summary, POE and Milestone 2 growth plan 0.5 1.25 2.25 5.75 11.5 TOTAL Hours 10 20 40 100 200 Land Your Offer: What One Customer Is Worth The table below is the revenue anatomy of one Deployment Accelerator engagement at each of the five sizes. Four revenue streams stack on top of each other: Milestone 1, Solution Deployment: Microsoft funds the deployment work, from $1,625 for an XXS engagement to $32,500 for an L engagement. It is paid once POE is approved and is guaranteed. Milestone 2, Consumption Growth: a further $875 to $17,500, paid when the customer's incremental paid active users reach the nominated band within six months. This is where adoption work earns its own reward. CSP incentive on Copilot revenue: earned on the Copilot seats you transact. Customers who see their people using Copilot every day tend to renew and extend, so adoption work supports this stream too. Managed services: the recurring engagement described in After Close-out, which is where the largest and most durable share of revenue lives. Item XXS XS S M L Minimum Copilot seats / unused seats 50+ / 25+ 300+ / 250+ 500+ / 500+ 1,500+ / 1,500+ 3,000+ / 3,000+ Engagement hours 10 20 40 100 200 Milestone 2 target: incremental paid Copilot active users in six months 25+ 250+ 500+ 1,500+ 3,000+ Milestone 1, Solution Deployment (K) $1.63K $3.25K $6.5K $16.25K $32.5K Milestone 2, Consumption Growth (K) $0.88K $1.75K $3.5K $8.75K $17.5K Frontier Accelerate total (K) $2.5K $5K $10K $25K $50K CSP incentive on Copilot revenue (K)† $3.51K $21.06K $35.1K $105.3K $210.6K † Milestone payments shown at Market A rates for claims nominated from 1 October 2026. CSP incentive shown at a blended 19.5% (direct bill 2.5 + 7 + 10; indirect reseller 7 + 12.5) on the minimum Copilot seats for each size at $30 per user per month for 12 months. Illustrative estimates from the offer plan. Confirm current rates, market rates, eligibility and geographic restrictions (which apply to the L size) in the latest Microsoft Commercial Partner Incentives Guide. Now multiply. Everything above is the anatomy of a single customer. Landing the offer means running it across every qualifying customer in your base. The same ASPX view you use to check eligibility is your target list: sort the customers you manage by the gap between paid Copilot seats and active users, and check MCI eligibility and potential earnings for each. Do not forget your Part 2 customers: every Envisioning & POC engagement that converted to paid seats is a natural next candidate. How the Offer Fits Together: From Sizing to Proof of Execution The offer runs left to right in three layers: Sizing and value: five sizes from XXS (10 hours) to L (200 hours). Milestone 1 is paid on POE approval. Milestone 2 is paid when the active user band is met. Bands are locked at nomination. Five phases: Plan (P1 to P5), Implement (I1 to I6), Adopt (A1 to A5), Manage and Improve (M1 to M6) and Close-out (C1, T1, T2, X1). Each phase produces something the sponsor can see. Proof of execution: prioritised scenarios and a business case that includes usage-based billing; a secure, licensed Copilot environment; analytics, reporting and admin controls; active champions and trained users; incremental paid active users, impact and ROI measured; an executive summary, roadmap and POE. Plus a named wave 2 expansion beyond the first teams. The highlighted activities are champions and communities (I5), training and communications (I6), cross-organizational adoption (A1), business impact and usage (A3), extended analytics (M1), policy review (M3), operations and AI spend (M4), continuous training (M6), trial to paid licence conversion (T1), commercial proposal and signature (T2) and the wave 2 expansion plan (X1). These are where the engagement stops being a project and becomes an ongoing relationship: managed services, ongoing optimisation and follow-on professional services after the engagement closes. The managed services below are built from exactly these activities. After Close-out: Managed Services That Keep Delivering Close-out is the start of the real engagement. Package these six recurring services in your offer. Each one carries forward a highlighted activity from the deployment, is sized in partner days so you can price it, and drives a business outcome the sponsor can put a number on. Managed service Partner activity: what you deliver and measure Customer business outcome: what it drives (illustrative targets, M-size customer) Champions and community management • Effort: 1 to 2 days a month • Activity: Run the champions network and a Viva Engage or Teams community, host monthly prompt-a-thons on real work, and carry adoption into every business function (I5, A1) • Reported as: Active champions per function; community questions answered; functions above the utilisation target • One active champion for every 50 users (60 champions across 3,000 seats) • Adoption spreads from the first 2 business functions to 6+ within six months • Copilot how-to tickets to the help desk down 30 to 50% as peers answer questions first Continuous learning and enablement • Effort: 2 days a month • Activity: Deliver role-based training and launch communications for each new group, onboard new joiners within their first 30 days, and refresh training as new Copilot capabilities arrive (I6, M6) • Reported as: People trained by role; new joiners onboarded within 30 days; trained users active within 30 days • 2 to 4 hours saved per active user a week (≈5,000 to 10,000 hours across 2,500 active users) • 90%+ of trained users active within 30 days of training • New joiners productive with Copilot in their first month, not their first quarter Usage and impact analytics • Effort: 1 to 2 days a month • Activity: Track incremental paid active users against the Milestone 2 band every month, extend the Copilot Dashboard with third-party data, and build custom impact reports by function (A3, M1) • Reported as: Incremental active users against the band; utilisation (active users ÷ paid seats); impact by function • Utilisation lifted from 33% to 83% (1,000 to 2,500 active users) within six months, meeting the M band floor • ≈$540K a year of Copilot investment moved from unused to in use • Return shown in the customer's own numbers: ≈$1.08M a year of seats against $9.6M+ of staff time released at $40 per hour Policy lifecycle management • Effort: 1 day a month • Activity: Review and refine security and governance policies on a set schedule, and align them to Home, Code and Autopilot before each capability reaches users (M3) • Reported as: Policy reviews completed on schedule; new capabilities assessed before rollout; open policy exceptions • New Copilot capabilities switched on in weeks, not quarters, because policies are ready • Zero Copilot-related oversharing incidents as usage grows • Audit evidence for every policy decision available on request Service and AI spend optimisation • Effort: 1 to 2 days a month • Activity: Review KPIs, user feedback and AI spend each month, update the service management plan, and focus usage-based capabilities on the users and scenarios that justify them (M4) • Reported as: KPI trend; AI spend against budget; feedback themes closed • AI spend held within ±10% of budget, with no unplanned overage • Cost per active user down 10 to 20% a year as usage matures • Top user feedback themes acted on within 30 days Licence growth and wave planning • Effort: 1 day a month, plus 2 to 3 days per expansion wave • Activity: Convert trial licences to paid, prepare commercial proposals for named teams, and plan and date the next expansion wave (T1, T2, X1) • Reported as: Trials converted; proposals signed; next wave dated with named teams • New seats added only where a named team and use case are ready • Each new wave at 80%+ utilisation within 60 days • Wave 2 adds 250 to 500 seats, each backed by usage data from wave 1 Outcomes are illustrative targets for an M-size customer with 3,000 paid Copilot seats and 1,000 active users at nomination, at $30 per user per month, a blended $40 per hour staff cost and 48 working weeks a year. Validate them with each customer when you define success metrics (P3) and build the business case (P4), then report against them from A3 onwards. Effort scales with seats in scope, as the engagement hours do. Add the recurring rows together and one M-size customer sustains roughly 8 to 9 partner days a month after close-out, before expansion waves are counted. Every row pairs a number you can invoice against with a number the sponsor can take to the board. That is what turns a recurring service into a renewable one. Ready to Build Your Copilot Deployment Accelerator Offer? Read the engagement terms and mechanics in the Microsoft Commercial Partner Incentives Guide, and download the delivery guide and pre-engagement planning resources. Check your eligibility: Copilot JumpStart Ready or higher until 31 December 2026, then the Microsoft 365 Copilot specialization from 1 January 2027. Publish your offer in Partner Center as a professional service (the deployment accelerator) with a managed service follow-on (community, learning, analytics, policy, spend optimisation and licence growth). Build your first cohort: in ASPX, filter the customers you manage for paid Copilot seats with low Copilot utilisation and an adoption status of starting or struggling, then check MCI eligibility and potential earnings for each. Start with customers from your Envisioning & POC engagements that converted to paid. Nominate the right band: the band is locked at nomination and Milestone 2 pays only if incremental paid active users reach its floor. Use ASPX to set it: take today's Copilot MAU as your baseline, look at the recent trend and adoption status, and pick the band whose floor you can realistically add in six months. A customer with 3,000 paid seats and 1,000 active users qualifies for M, and reaching the M floor means adding 1,500 active users. If your plan adds 600, S is the safer choice. Book the close-out before Plan begins, so the Milestone 2 plan and the wave 2 conversation are already on the calendar. Your customers have already chosen Copilot. Help every one of their people make it part of how they work. Resources Engagement mechanics for Copilot Deployment Accelerators | Microsoft Commercial Partner Incentives Guide Microsoft Commercial Partner Incentives Guide M365 Copilot Deployment Accelerator: Delivery Guide M365 Copilot Deployment Accelerator: Pre-Engagement Planning Partner investments: October 2026 updates Archived incentive terms for claims nominated before 1 October 2026 The new Copilot is here: the opportunity for Microsoft partners Introducing the new Copilot with Home, Code and Autopilot127Views1like0CommentsSyksyn 2026 Tekniset ja myynnin Kumppanitunnit
Microsoftin tekniset ja myynnille suunnatut Kumppanitunnit järjestetään nykyään Microsoftin globaalilla Skilling Hub -sivustolla, josta ne ovat kätevästi saatavilla myöhemmin tallenteina materiaaleineen. Rekisteröidy Skilling Hub -portaaliin, josta löydät kaikki Microsoftin kumppanikoulutukset yhdessä paikassa eri kielillä tai tekstitettyinä. Rekisteröityessäsi voi valita ne kielet, kuten suomi, jollaista sisältöä haluat ensisijaisesti nähdä englannin kielisen koulutussisällön lisäksi. Kumppanitunti on joka toinen perjantai klo 10–11 järjestettävä Microsoftin kumppaniwebinaari, joka on tarkoitettu kaikille Microsoftin kumppaneille. Tekniset ja kaupalliset aiheet vuorottelevat ja olet tervetullut molempiin webinaareihin. Webinaareissa keskitymme Microsoftin ratkaisualueiden teknologioiden mielenkiintoisiin uutuuksiin, MAICPP-kumppaniohjelmaan, kumppanietuihin ja ratkaisumyyntiin. Microsoftin suomalaiset arkkitehdit, tuotepäälliköt, ratkaisumyyjät ja kumppanivastaavat ovat poimineet kiinnostavia ja hyödyllisiä aiheita, joita he vuorollaan esittelevät. Syksyn 2026 ohjelma Alla ovat suunnitellut päivät ja teemat Syksylle 2026, joiden tarkka aihe päivitetään aina lähempänä esityspäivää tälle sivulle. 18.9. Kaupallinen Kumppanitunti: Partner START FY27 - webinaari Katso tallenne tästä linkistä: Etkö päässyt mukaan START FY27 Kickoff -tapahtumaan? Webinaarissa saat kattavan katsauksen tapahtumassa käsiteltyihin FY27: n liiketoimintamahdollisuuksiin, strategisiin painopisteisiin sekä Microsoftin kumppaneille suunnattuihin ohjelmiin ja resursseihin. Puhujat: Kalle Saarikannas, Liiketoimintajohtaja, AI Business Solutions Teemu Lainiola, Liiketoimintajohtaja, Cloud & AI Platforms Mereta Laukkanen, Sr Partner Development Manager Jonna Kaarlenkaski, Partner Development Manager Intern Jonna Fred-Jokela, Sr Solution Engineer Manager 2.10. Tekninen Kumppanitunti: Copilot Cowork: Copilot Credits ja kustannusten hallinta Katso tallenne tästä linkistä! Tässä teknisessä kumppanitunnissa käymme läpi Copilot Coworkin toimintamallin, kulutuksen seurannan sekä kustannusten hallinnan. Lisäksi tarkastelemme, millaisia mahdollisuuksia kulutuspohjainen AI luo kumppaneiden palveluliiketoiminnalle. Puhujat: Henri Nevalainen, Microsoft Niko Hiltunen, IAMCP 9.10. Kaupallinen Kumppanitunti: Onko julkisen pilven suvereniteetti riittävä huomioiden sen kaikki hyödyt? Rekisteröidy mukaan tästä linkistä! Euroopan unioni valmistelee uusia pilvi- ja tekoälyinfrastruktuuria koskevia linjauksia. Samanaikaisesti organisaatiot pohtivat, miten digitaalinen suvereniteetti, tekoälyn käyttöönotto, kyberturvallisuus ja sääntelyvaatimukset voidaan sovittaa yhteen käytännössä. Tervetuloa ajankohtaiseen webinaariin, jossa tarkastelemme Euroopan muuttuvaa pilviympäristöä ja mitä digitaalinen suvereniteetti tarkoittaa suomalaisille organisaatioille käytännössä. Lisäksi kerromme viimeisimmät tilannetiedot pilvipalveluiden kvanttiturvallisuuden ja Suomen datakeskushankkeiden osalta. Puhujat: Juha Karppinen, National Technology Officer, Microsoft Timo Salminen, Partner Solution Architect, Microsoft Niko Hiltunen, IAMCP 22.10. Kaupallinen Kumppanitunti: Frontier Transformation - Next level IQ & Uusi näkökulma kumppanin rooliin AI-aikakaudella Rekisteröidy mukaan tästä linkistä! AI-transformaatio on siirtymässä yksittäisten työkalujen käyttöönotosta kohti laajempaa työn ja toimintamallien uudistamista. Kumppanitunnilla havainnollistamme käytännön esimerkin avulla, kuinka organisaation toimintaa voidaan tarkastella digitaalisen genomin kautta, organisaatiosta ja tiedosta aina työhön, mikrotehtäviin ja agentteihin asti. Samalla tarkastelemme, mitä muutos tarkoittaa kumppaneille: miten tunnistaa uusia asiakasarvon mahdollisuuksia, rakentaa vaikuttavampia AI-keskusteluja ja auttaa asiakkaita etenemään kohti agenttipohjaista toimintamallia. Tule mukaan katsomaan demo ja pohtimaan, mitä seuraavan vaiheen AI-transformaatio mahdollistaa sinun asiakkaillesi. Puhujat: Hans Dolk, Asiakkuusjohtaja / Defence & Intelligence, Public Safety and National Security Juha Liljeblom,Teknologia Strategisti / Defence & Intelligence, Public Safety and National Security 23.10. Kaupallinen Kumppanitunti: Uudistunut Microsoft Copilot: ominaisuudet, käyttötavat ja kustannusten hallinta Rekisteröidy mukaan tästä linkistä! Microsoft Copilot uudistuu merkittävästi. Copilotista rakentuu paikka, jossa käyttäjä voi kysyä, delegoida, rakentaa ja automatisoida työtä. Uudet Home-, Code- ja Autopilot-kokemukset laajentavat Copilotin käyttöä päivittäisestä AI-avustamisesta kohti pidempikestoista agenttityötä ja käyttäjien itse rakentamia ratkaisuja. Webinaarin tavoitteena on antaa kumppaneille selkeä kokonaiskuva siitä, miten uudistunut Copilot muuttaa asiakkaiden AI:n käyttötapoja, lisensointi- ja kulutuskeskustelua sekä kumppaneille avautuvia mahdollisuuksia. Puhujat: Harri Mikkanen, Microsoft Tuulia Piehl, Microsoft Henri Nevalainen, Microsoft Eetu Hämäläinen, IAMCP 30.10. Tekninen Kumppanitunti: Villi vai hallittu? Tekoälyagentit hallintaan Microsoft Agent 365:llä Rekisteröitymislinkki päivittyy tähän Agentteja syntyy organisaatioihin nopeammin kuin kukaan ehtii niitä seurata. Niitä rakentavat työntekijät, niitä hankitaan kumppaneilta ja niitä kytketään liiketoiminnan dataan ja työkaluihin. Kenellä on oikeudet mihinkin, kuka agentin omistaa, kun tekijä lähtee talosta, ja mihin luottamuksellinen data päätyy? Tässä teknisessä kumppanitunnissa käymme läpi, miten Microsoft Agent 365:llä saadaan agentit näkyviin, hallintaan ja suojattua työkaluilla, jotka ovat asiakkailla todennäköisesti jo käytössä: Microsoft 365 -admin-portaalilla, Entralla, Purviewilla ja Defenderillä. Tarkastelemme eroa "villin" ja "hallitun" agentin välillä. Villi agentti julkaistaan suoraan kaikille ilman tarkistusta, ja sillä on tekijänsä kaikki oikeudet. Hallittu agentti kulkee hyväksyntäprosessin kautta, sillä on nimetty omistaja ja sen pääsy on rajattu Entran, Purviewin ja Defenderin käytännöillä. Puhujat: Heta Kuosa, Microsoft Christine Dienel, Microsoft 6.11. Tekninen Kumppanitunti: Rekisteröitymislinkki päivittyy tähän Puhujat: 20.11. Kaupallinen Kumppanitunti: Rekisteröitymislinkki päivittyy tähän Puhujat: 4.12. Kaupallinen Kumppanitunti: Rekisteröitymislinkki päivittyy tähän Puhujat: 18.12. Tekninen Kumppanitunti: Agentit Azuressa Rekisteröitymislinkki päivittyy tähän Azure Copilot pitää sisällään uusia palveluiden elinkaarenhallintaan liittyviä agentteja. Tule kuulemaan, miten voit hyödyntää näitä omissa palveluissasi! Puhujat: Timo Salminen, Partner Solution Architect, Microsoft656Views0likes0CommentsMicrosoft Foundry Guardrails Getting in Your Way? Here’s How to Dial Them Down
How This All Started So here’s the story. I just got back from a trip and had a pile of footage sitting on my laptop. Being the lazy (sorry, efficient) person I am, I fired up OpenCode and asked GPT-6 Astra, running on Microsoft Foundry, to cut me a travelogue. Nothing fancy: under two minutes, nice lighting, clean transitions, no cringy effects, a quick QA before showing me, and the output in its own folder. Easy, right? Nope. This is what I got instead: “Image processing blocked due to content policy violation.” Seriously? It’s holiday footage! Nothing even remotely dodgy in there. This is a classic false positive from the default guardrails, and the good news is it’s totally fixable. Let me show you how. My Setup Quick context before we dive in: I’ve got two models deployed on Microsoft Foundry, gpt-6-astra and gpt-6-sol. Both were running on Microsoft’s out-of-the-box guardrail. Step 1: Find the Guardrails Page Head over to the Microsoft Foundry portal, click Build, then hit Guardrails in the left menu. You’ll see three guardrails that Microsoft gives you by default: Microsoft.Default, Microsoft.DefaultV2 and Microsoft.MAIDefault. Microsoft.DefaultV2 is the one every new deployment gets, which is why it’s sitting on both of my models. Here’s the catch: you can’t edit or delete these Microsoft-managed defaults. So instead of tweaking them, we’re going to build our own guardrail and swap it in. Step 2: Create Your Own Guardrail Smash that "Create" button and you’ll land on the Create guardrail page. This is where all the knobs and switches live: Every control has three bits: the risk type, the intervention point (does it check what you send in, what the model spits out, or both?) and the action. The magic trick for loosening things up is flipping the action from Block to Annotate. With Annotate, Foundry still scans the content and tags it in the API response, but it stops slamming the door on your request. So What Does Each Setting Actually Do? Before you go on a switching-off spree, it’s worth knowing what each of these does and what you’re giving up when you loosen it. Here’s the quick tour: Jailbreak: This one catches prompts trying to trick the model into ignoring its rules. On Block, those prompts get rejected outright. On Annotate, they go through with a flag. Turn it off completely and you’re trusting the model’s own training to keep it in line. Network (egress rules): Controls which outbound calls a hosted agent is allowed to make. As the portal points out, it only applies to hosted agents, so for plain model deployments like mine it doesn’t change a thing. Indirect prompt injections: Watches user input and tool responses (files, docs, web pages the model reads) for sneaky instructions someone has planted. Leave it on and your agents are protected when they read outside content; switch it off and a dodgy file could quietly hijack your model. For an agentic tool like OpenCode, which reads files and runs shell commands, I’d honestly keep this one on, even if it’s just on Annotate. Spotlighting (Preview): Tags external content inside the prompt so the model can tell your real instructions apart from random untrusted data. Think of it as an extra seatbelt against indirect attacks. Content harms (Hate, Sexual, Self-harm, Violence): Each of these has a severity slider that starts at Medium blocking, meaning anything rated medium or higher gets blocked. Slide it down to Lowest blocking and only the really nasty stuff gets stopped, which kills off most false positives like mine. The asterisk means these four are mandatory: you can turn the dial down, but you can’t switch them off. Blocklists: Want to ban specific words or phrases, like profanity or your competitor’s name? This is where you do it. It’s off by default. Protected material for code and text: Checks whether the model is about to spit out known copyrighted text (song lyrics, articles and so on) or code lifted from public repos. Block stops it; Annotate lets it through with a flag. Switch it off and you’re rolling the dice on your app reproducing someone else’s copyrighted work. Step 3: Pick Your Models Hit Next and Foundry asks which agents and models you want this guardrail on. Any model you’ve already deployed in your project shows up here. For me that’s gpt-6-astra and gpt-6-sol, so I ticked both. Step 4: Name It and Pick a Streaming Mode One more Next and you’re on the Review page. Give your guardrail a name (I went with NoGuardrails, because subtlety isn’t my thing) and pick a streaming mode. You’ve got two choices: Default: Foundry buffers the response and runs it through the guardrail before each chunk goes out. Nothing reaches the user until it’s been checked. Safest option, but you’ll feel a bit of lag when streaming. Asynchronous: Content streams back the moment it’s generated, with the filters running in the background. Much snappier, but flagged content might flash up briefly before the filter catches it, so your app has to clean up after the fact. Microsoft pitches this for low-latency stuff like internal dev tools, which is exactly my use case. Give the summary a quick once-over, then click Create. Done! Did It Work? Yep! With my shiny new guardrail in place, I fired off the exact same request, this time to GPT-6 Sol. And boom: no more content policy error. The model went straight to work scanning my footage and putting the video together. Wrapping Up Look, Microsoft’s default guardrails are a solid starting point, but they can be a bit trigger-happy when you’re doing perfectly legit stuff like video editing, creative work or internal tooling. Since you can’t touch the defaults, the trick is to roll your own: flip Block to Annotate where it makes sense, drag those content harm sliders down, pick the streaming mode that fits your app, and assign it to your deployments. That’s it! One friendly word of warning though: with great power comes great responsibility. Only loosen what you actually need, keep things like indirect prompt injection detection switched on for any agent that reads files or browses the web, and think twice before doing this on anything customer-facing. And if you want to go further than the portal lets you, like switching content filters off completely, you’ll need to apply to Microsoft for approval first. Happy building!88Views0likes0CommentsThe Context Advantage
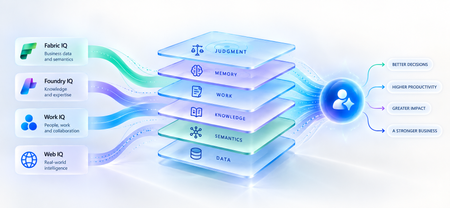
A strange thing happens when enterprises upgrade their AI models. The model gets smarter. The benchmarks improve. The demos become more impressive. And sometimes, the business outcome barely moves. The agent still asks questions the organization answered months ago. It recommends something policy doesn't allow. It treats a strategic customer like any other customer. It proposes an architecture your engineering team rejected six months ago. The problem isn't necessarily intelligence. It is ignorance of the business. That distinction matters because the world's most capable models are becoming available to almost everyone. Your competitors can increasingly access the same frontier intelligence you can. What they cannot access is your customer history, operating knowledge, organizational memory or understanding of how decisions actually get made. Models are becoming shared. Context remains proprietary. And that may be where the next enterprise AI advantage is built. Intelligence Without Context is Surprisingly Ordinary Consider a simple enterprise question: Can we offer this customer a larger discount? A powerful model can reason about discounts. But answering that question properly may require the customer's lifetime value, current contract, payment history, margins and approval thresholds and perhaps a conversation yesterday in which the account executive learned that a competitor had entered the deal. The model isn't missing intelligence. It is missing context. Humans rarely make important decisions from one piece of information. We combine data, experience, relationships, history and situational awareness almost unconsciously. Agents need a version of the same capability. That is why enterprise AI is moving from an era dominated by prompt engineering toward one increasingly shaped by context engineering. Satya Nadella recently described the emerging market simply as “a world of context engineering.” Prompt engineering asks: What should I tell the model? Context engineering asks the larger question: What does the model need to understand before it can act well? That difference becomes critical as AI moves from answering questions to performing work. The Enterprise Context Stack In discussions about enterprise agents, “context” can easily become shorthand for giving a model access to more data. That definition is too narrow. I think about enterprise context as a stack: DATA → SEMANTICS → KNOWLEDGE → WORK → MEMORY → JUDGMENT Data tells the agent what happened: orders, transactions, inventory, claims and customer records. Semantics tells it what that data means to the business: what constitutes a strategic customer, how margin is calculated, which assets belong to which production line. Knowledge tells it what the organization knows: policies, contracts, procedures, research and accumulated expertise. Work tells it what is happening now: who is involved, what has been discussed and which commitments already exist. Memory tells it what happened before: previous interactions, decisions, exceptions and outcomes. And judgment helps determine what should happen next. Memory deserves particular attention because it is context agents can accumulate through experience. Microsoft Foundry now distinguishes between session, user and procedural memory - moving agents beyond remembering a conversation toward remembering preferences and learning how work gets done across repeated interactions. Sometimes the cheapest way to make an agent meaningfully better may not be a bigger model. It may be a better memory. Not every agent needs every layer. But the more consequential its responsibility, the richer, and more carefully governed, its context usually needs to become. This is where context stops being a retrieval problem and starts becoming an enterprise architecture problem. Context Is Becoming Infrastructure This shift is now visible well beyond any one technology platform. Gartner increasingly describes a context layer as an architectural foundation for agentic AI - bringing together semantics, operational state, provenance and other enterprise signals so agents can act reliably. Anthropic, approaching the problem from AI engineering, argues that context should be treated as a finite resource that must be carefully curated rather than simply expanded. Microsoft's recent direction is particularly interesting through this lens. Work IQ, Fabric IQ, Foundry IQ and Web IQ increasingly form a shared intelligence layer across Microsoft's stack. Work IQ provides context about how work happens. Fabric IQ brings business semantics and relationships. Foundry IQ provides reusable enterprise knowledge and agentic retrieval. Web IQ extends that understanding with fresh external intelligence. The architectural implication matters more than the product names. Instead of every new agent rebuilding connectors, retrieval logic, semantic definitions and permissions, context becomes reusable infrastructure from which many agents can reason. Microsoft captured the shift particularly well: As agents become the new application model, context becomes critical infrastructure. Your Data Estate Is Not Automatically Your AI Moat For years, organizations have been told their data is a competitive advantage. Sometimes it is. But possessing data and making that data useful to an agent are very different things. Most enterprises don't suffer from a shortage of information. They suffer from an abundance of it -scattered across databases, documents, emails, meetings, applications and people's heads. The advantage doesn't come from connecting an agent to all of it. It comes from turning information into usable context: preserving business meaning, understanding relationships, distinguishing authoritative knowledge from convenient information, respecting permissions and retrieving what matters when a decision is being made. The enterprise with the most data may not build the best AI. The enterprise that makes its context most usable might. The Context Budget There is a trap on the other side too. If context improves AI, the natural instinct is to give the agent as much as possible. That is the wrong objective. Context consumes attention and compute. Irrelevant information creates noise. Stale information can mislead. Conflicting context can degrade reasoning rather than improve it. The objective should therefore not be maximum context. It should be minimum sufficient context the smallest trusted, relevant and permission-aware set of information required to produce the right outcome. In Beyond Tokens, I introduced the idea of an Intelligence Budget: How much intelligence does this outcome deserve? Enterprise agents increasingly need a companion concept. The Context Budget. How much context does this decision deserve? A scheduling agent may need calendars and preferences. A pricing agent may need customer economics, margins, commitments and approval policies. A clinical agent requires an entirely different level of completeness, provenance and governance. Every unnecessary token of context is cost. Every missing piece of necessary context is risk. Which gives us a useful way to think about enterprise agents: Right Intelligence × Right Context → Right Outcome Spend more intelligence where the outcome warrants it. Provide more context where the decision requires it. Do neither indiscriminately. What An Agent May Know Matters Too! There is another dimension to the Context Budget: permissions. Enterprise context belongs to someone. A system that retrieves the right answer but ignores whether the agent is entitled to see it isn't intelligent. It is a security problem. Enterprise context must therefore remain identity-aware and permission-aware as it moves from source systems into agent reasoning. This becomes especially important as agents gain persistent identities and greater autonomy. What an agent may know is as much a part of its job description as what it may do. Autonomy defines the boundary of action. Context defines the boundary of understanding. From RAG Projects To Context Architecture The first generation of enterprise GenAI often started with RAG: connect documents to a model and retrieve relevant passages. That was an important step. But an agentic enterprise cannot become a collection of hundreds of independent RAG pipelines, each separately rediscovering the organization's customers, products, policies, terminology and permissions. That risks creating another generation of technology fragmentation. The opportunity is to move from agent-specific retrieval toward reusable enterprise context. What knowledge should agents inherit? Which business entities should have common definitions? Which sources are authoritative? Which memories should persist—and which should be forgotten? And perhaps the hardest question: Who owns enterprise context? Today, responsibility is scattered across data teams, application teams, knowledge management, security, business functions and increasingly AI teams. In an agentic enterprise, context may need to be managed as a product, not everyone's side project. The Moat Is Not The Model Imagine two competing organizations using exactly the same frontier model. One connects it to fragmented documents and a handful of applications. The other has strong data foundations, shared business semantics, governed knowledge, connected workflows and organizational memory. They have access to the same AI. They do not have the same intelligence system. The second organization's agents understand customers more deeply, interpret signals more accurately and act with greater awareness of how the organization actually works. And that advantage compounds. Every workflow creates more context. Every interaction adds organizational memory. Every decision creates another signal from which future agents can reason. Models depreciate the moment a better one ships. Context appreciates every day you operate. That may be the most important strategic shift of all. Anyone can rent intelligence. No one can rent your context. Intelligence Is Becoming Abundant. Understanding Isn't. The first wave of enterprise AI taught us how powerful models could be. The next may teach us that models were only one part of the equation. An agent needs intelligence to reason. But it needs context to understand your business. As frontier intelligence becomes more accessible, enterprises may discover that their most defensible AI asset was never the model. It was everything the organization had learned before the model arrived: its data, semantics, knowledge, relationships, history, workflows and judgment. The organizations that turn those assets into trusted, reusable context will give every agent they build an advantage from day one. So perhaps the strategic question is no longer simply: Which model should we use? It is: What does our organization know that our competitors don't and can our AI actually use it? Because in a world where everyone can access intelligence, context may be what makes that intelligence uniquely yours. References Microsoft — FY2026 Q2 Earnings Conference Call Microsoft — FY2026 Q4 Earnings Conference Call Microsoft Learn — What is Foundry IQ? Microsoft Foundry — Foundry IQ: Build Smarter Agents Faster with Unified Knowledge and Serverless Retrieval Microsoft Foundry — What's New in Microsoft Foundry | Build 2026 Gartner — Context Engineering Is the New Prompt Engineering Gartner — Market Overview for AI Context Platforms Gartner — The 3 Core Components of the Context Layer for AI Agents127Views0likes1CommentDelivering Agent Skills Over MCP
Getting a skill working with one agent is a useful start. Sharing it with other agents raises a different question: where should that skill live? You could give each agent its own copy. But when the skill changes, those copies need updating. The official Skills extension for Model Context Protocol (MCP) provides a standard way to make skills available from a server, so compatible agents can find and load them when needed. Let's look at what happens across that connection, then where Microsoft Foundry fits in. What the extension adds MCP already gives agents access to content from servers through resources. The Skills extension builds on that. It adds a way to ask which skills a server offers and get the details needed to load them. It doesn't change the skill format, and it doesn't run a skill on the server. The application running your agent, called the host, still decides how to offer skills to the user or model and load the selected instructions. Both the server and the host need the right support. Being able to call an MCP tool isn't enough to discover and load remote skills. A custom tool that returns skill text isn't, by itself, an implementation of this extension either. The extension is identified as io.modelcontextprotocol/skills . Its proposal, SEP-2640, has reached Final status. Client support is still developing, so a published specification doesn't mean every MCP host supports it yet. How an agent gets a skill The basic sequence is straightforward: find out what's available, select a skill, and read the content needed to use it. The host's MCP client handles the requests to the server. We'll follow the case where the server provides a file list, called a manifest. It includes each file's address, size, and a SHA-256 digest: a fingerprint used to check that the file received matches what the server listed. The examples below use a generic example-skill with two files. They illustrate the official message shapes, not a captured server session. They use protocol revision 2026-07-28 and include its required request metadata. The _meta block tells the server which protocol version and client capabilities apply to each request, including the client's Skills extension support. Both sides must declare support. Use a client and server that support this revision. The Foundry examples later follow its separately documented path. These examples show JSON-RPC message bodies, not complete HTTP requests. For Streamable HTTP, POST each message to the server's MCP endpoint with Content-Type: application/json , Accept: application/json, text/event-stream , and MCP-Protocol-Version: 2026-07-28 headers. Also set Mcp-Method to the body's method , such as skills/list . For resources/read , set Mcp-Name to the requested URI, such as skill://example-skill/SKILL.md . The mirrored values must match the body. See the HTTP header requirements. Find out what's available First, the server declares that it supports resources and the Skills extension. This is the relevant fragment of its server/discover response: { "capabilities": { "resources": {}, "extensions": { "io.modelcontextprotocol/skills": {} } } } The empty extension object means skills are supported, but optional directory reading isn't enabled. The client can now ask for the available skills: { "jsonrpc": "2.0", "id": 1, "method": "skills/list", "params": { "_meta": { "io.modelcontextprotocol/protocolVersion": "2026-07-28", "io.modelcontextprotocol/clientCapabilities": { "extensions": { "io.modelcontextprotocol/skills": {} } }, "io.modelcontextprotocol/clientInfo": { "name": "example-client", "version": "1.0.0" } } } } Here is a response containing one skill: { "jsonrpc": "2.0", "id": 1, "result": { "resultType": "complete", "skills": [ { "uri": "skill://example-skill/SKILL.md", "frontmatter": { "name": "example-skill", "description": "An example skill for this article." }, "resources": [ { "uri": "skill://example-skill/SKILL.md", "digest": "sha256:d2069d0f3682fea0d69e62247386e950e9ad958bab5b186b456dc1fb8266e312", "size": 138 }, { "uri": "skill://example-skill/references/notes.md", "digest": "sha256:e76b3033746e3c5d8cc970b21b15ce40f868e6902c065521a1abf373f4a19c85", "size": 58 } ] } ], "ttlMs": 300000, "cacheScope": "public" } } The resources array is the manifest. It lists both files, but doesn't contain their text. The host can show the skill's name and description without fetching either file. size counts bytes, not characters. The cache fields describe how long the result stays fresh and whether it can be shared. They aren't trust checks, and public here is a choice for this illustrative server, not a recommendation for private skill content. resultType: "complete" means this request completed, not that the server's entire catalog is in the response. If it includes nextCursor , pass that value as params.cursor on the next skills/list request. Each skill's manifest stays whole on one page. The user or model can then select a relevant skill. The host keeps track of which server it came from and its address, known as a URI. Read and load the instructions After any required approval, the host uses resources/read to get the selected skill's instructions. It checks them against the details from the listing before adding them to the agent's context, the information available to the model. The request uses the instruction URI from the listing: { "jsonrpc": "2.0", "id": 2, "method": "resources/read", "params": { "uri": "skill://example-skill/SKILL.md", "_meta": { "io.modelcontextprotocol/protocolVersion": "2026-07-28", "io.modelcontextprotocol/clientCapabilities": { "extensions": { "io.modelcontextprotocol/skills": {} } }, "io.modelcontextprotocol/clientInfo": { "name": "example-client", "version": "1.0.0" } } } } This time, the response contains the actual file text: { "jsonrpc": "2.0", "id": 2, "result": { "resultType": "complete", "contents": [ { "uri": "skill://example-skill/SKILL.md", "mimeType": "text/markdown", "text": "---\nname: example-skill\ndescription: An example skill for this article.\n---\n\nRead references/notes.md when additional guidance is needed.\n" } ], "ttlMs": 300000, "cacheScope": "public" } } The \n sequences represent line breaks in the file. Encoding the decoded text as UTF-8 produces 138 bytes. Computing SHA-256 over those bytes produces the digest shown in the first manifest entry. The fingerprint covers the file bytes, not the surrounding JSON response. Reading the file and loading the skill are different steps. An MCP resource browser could read the same file to display it to a person. That doesn't make the skill active. The host must handle the checks and approvals that come with loading it for the agent. Get supporting files when needed If the agent needs a reference or another supporting file, the host reads it from the same server using resources/read . It checks that the file is in the saved manifest and that its contents match before using it. For our example, the relative reference resolves to the second URI in the manifest. When that file is needed, the client sends: { "jsonrpc": "2.0", "id": 3, "method": "resources/read", "params": { "uri": "skill://example-skill/references/notes.md", "_meta": { "io.modelcontextprotocol/protocolVersion": "2026-07-28", "io.modelcontextprotocol/clientCapabilities": { "extensions": { "io.modelcontextprotocol/skills": {} } }, "io.modelcontextprotocol/clientInfo": { "name": "example-client", "version": "1.0.0" } } } } The server returns: { "jsonrpc": "2.0", "id": 3, "result": { "resultType": "complete", "contents": [ { "uri": "skill://example-skill/references/notes.md", "mimeType": "text/markdown", "text": "Use only the information relevant to the current request.\n" } ], "ttlMs": 300000, "cacheScope": "public" } } Those 58 bytes match the second manifest entry. Even a changed line ending would change the fingerprint, so the host must check the exact bytes received. Here's how those steps fit together: The host reads instructions and supporting files as needed, checking each against the server's manifest before use. Files that aren't needed stay unread. Connecting to a server doesn't mean downloading every skill it offers. And loading a skill still doesn't guarantee that the agent will follow every instruction correctly. Which request does what? You don't need to memorize the method names, but these are the ones you'll see when working with an implementation: Method When to use it skills/list Find available skills and get their details skills/get Get or refresh the details for one skill using its URI resources/read Read instructions or a supporting file resources/directory/read List the files and folders directly inside a directory, if the server supports it You don't need to call skills/get after every skills/list . The listing already contains a complete entry for each returned skill. Use skills/get when you already know a skill's URI or need fresh details for that skill. For example, a direct lookup looks like this: { "jsonrpc": "2.0", "id": 4, "method": "skills/get", "params": { "uri": "skill://example-skill/SKILL.md", "_meta": { "io.modelcontextprotocol/protocolVersion": "2026-07-28", "io.modelcontextprotocol/clientCapabilities": { "extensions": { "io.modelcontextprotocol/skills": {} } }, "io.modelcontextprotocol/clientInfo": { "name": "example-client", "version": "1.0.0" } } } } The response puts the same complete entry shown above under result.skill instead of result.skills , alongside resultType , ttlMs , and cacheScope . It returns metadata and the manifest, not the file text. { "jsonrpc": "2.0", "id": 4, "result": { "resultType": "complete", "skill": { "uri": "skill://example-skill/SKILL.md", "frontmatter": { "name": "example-skill", "description": "An example skill for this article." }, "resources": [ { "uri": "skill://example-skill/SKILL.md", "digest": "sha256:d2069d0f3682fea0d69e62247386e950e9ad958bab5b186b456dc1fb8266e312", "size": 138 }, { "uri": "skill://example-skill/references/notes.md", "digest": "sha256:e76b3033746e3c5d8cc970b21b15ce40f868e6902c065521a1abf373f4a19c85", "size": 58 } ] }, "ttlMs": 300000, "cacheScope": "public" } } A listing can be partial, so not seeing a skill there doesn't necessarily mean it is unavailable. It can still be looked up by URI. Directory reading is optional. Clients can only use it when the server declares directoryRead: true . If the manifest already lists the files they need, an extra directory request isn't necessary. What gets checked before loading? Getting content from a server doesn't automatically make it trustworthy. The extension sets rules for checking that content and keeping track of its source. The host must remember both the server and the skill's URI. Two servers might offer skills with the same name, or even the same URI. They are still separate skills and must not silently replace each other. The host must also identify the originating server when it adds the content to the model's context. For skills with a manifest, the host must check both the size and digest of each file it reads. The size checks the byte count. The SHA-256 digest detects content changes even when the file's length stays the same. Both must match the manifest before the host uses the file. The host also checks that the metadata at the top of the instructions, called frontmatter, matches the listing. If a file no longer matches, the host must not use it. It can refresh the entry with skills/get . Saved approval is tied to the file URIs and fingerprints. If a refreshed manifest changes, adds, or removes a file, that approval is revoked and the host must ask again before loading or executing the changed skill. For example, if the server changes the notes file above after listing it, the read may succeed but verification will fail. That's a host-side rejection, not a JSON-RPC error from the server. The host must not use the changed text under the old manifest. These checks tell you that the content matches what the server offered. They don't tell you whether the content is safe or the instructions are good. There is an exception to the file-checking approach. Servers can mark generated content as "resources": "dynamic" when stable fingerprints aren't available. Hosts may refuse to load it. If they accept it, they must still check the frontmatter. Because the content can change between requests, approving it once doesn't automatically approve different instructions or scripts returned later. The host cannot treat the earlier approval as permission to use that changed content. Permissions are separate too. Reading a script doesn't give the agent permission to run it. Under the Skills extension specification, the host must obtain explicit user approval for that skill before allowing host-side execution. The extension defines this requirement, but the host implements the approval and execution controls. If the skill's instructions ask the agent to use an additional tool, that request is not permission to use it. The host must still enforce its tool access controls and obtain any required user approval. Where Microsoft Foundry fits Microsoft Foundry offers skills support in preview. Its integration guide describes toolbox-based skill discovery as following SEP-2640. A toolbox gives agents one MCP endpoint for accessing its tools and skills. To share a skill this way: Upload the skill content to create a skill version in your Foundry project. Add a reference to the skill to a toolbox in the same project. Connect an agent that supports this skill-loading approach to the toolbox's MCP endpoint. What the toolbox configuration looks like Suppose you've already uploaded your skill to Foundry. The following request, adapted from the toolbox guide, creates a toolbox version that references it. example-skill is a placeholder name, and must match a skill in your project. You need the Foundry User role and a bearer token for scope https://ai.azure.com/.default . Use a project in a supported Agent Service region. The REST creation and MCP resource checks described here succeeded in East US 2. POST {project_endpoint}/toolboxes/{toolbox_name}/versions?api-version=v1 Authorization: Bearer {token} Content-Type: application/json Accept: application/json Foundry-Features: Skills=V1Preview { "description": "Toolbox with a skill reference", "tools": [], "skills": [ { "type": "skill_reference", "name": "example-skill", "version": "1" } ] } Replace {project_endpoint} with your project's endpoint, shaped like https://<account>.services.ai.azure.com/api/projects/<project> , and the other placeholders with your own values. Use an existing skill version in place of "1" , or omit version to follow that skill's default. Notice that skills is separate from tools . An empty tools array is valid for a skills-only toolbox. This request creates a full version, not a patch that adds one skill to an existing version. For an existing toolbox, include the tools and skill references you want to retain in the new version. This is a Foundry configuration request, not an MCP capability declaration. It tells Foundry which skills to expose, not the host how to load them. The test returned HTTP 200 with a toolbox version object. Here is the response shape for the example request, using example-toolbox for {toolbox_name} and an illustrative ID: { "metadata": {}, "id": "toolbox_example:1", "name": "example-toolbox", "version": "1", "description": "Toolbox with a skill reference", "created_at": 1791423871, "tools": [], "skills": [ { "type": "skill_reference", "name": "example-skill", "version": "1" } ], "object": "toolbox.version" } The top-level name and version identify the created toolbox version. The entry under skills identifies the skill version it references. For testing, use the returned toolbox name and version in this endpoint: {project_endpoint}/toolboxes/{toolbox_name}/versions/{version}/mcp?api-version=v1 Here, {version} is the returned toolbox version, not the skill version in the request. This URL connects to that specific toolbox version. To connect to whichever toolbox version is marked as the default, use this URL instead: {project_endpoint}/toolboxes/{toolbox_name}/mcp?api-version=v1 This URL stays the same when you change the toolbox's default version. Clients using it aren't pinned to a specific version. The first version of a new toolbox becomes the default automatically. Creating another version doesn't automatically make it the default. What the agent discovers in Foundry Follow the guide's MCP connection setup, including authentication and session initialization. Its examples use the earlier initialize exchange, not the server/discover approach shown above. During initialization, the client requests a protocol version and the server replies with the version it supports. The client can continue only if it also supports the returned version. In our test, Foundry returned 2025-11-25 , so we used MCP-Protocol-Version: 2025-11-25 on later HTTP requests. If the server also returns an Mcp-Session-Id header, include that header and its value on later requests so the server can associate them with the same session. A compatible MCP client SDK handles these details for you. The preview guide then says to send resources/list to the toolbox endpoint: { "jsonrpc": "2.0", "id": 10, "method": "resources/list", "params": {} } A shortened response fragment from the tested resource shape, with the skill name replaced by example-skill , is: { "result": { "resources": [ { "uri": "skill://example-skill/SKILL.md", "name": "example-skill" }, { "uri": "skill://index.json", "name": "skills-index" } ] } } The tested endpoint returned an instruction URI ending in /SKILL.md and a separate skill://index.json resource. The guide shows the shorter skill://{name} shape. Always use the URI your toolbox actually returns: { "jsonrpc": "2.0", "id": 11, "method": "resources/read", "params": { "uri": "skill://example-skill/SKILL.md" } } The response contains the instruction text. This example uses the tested content with the skill name replaced by example-skill : { "jsonrpc": "2.0", "id": 11, "result": { "contents": [ { "uri": "skill://example-skill/SKILL.md", "mimeType": "text/markdown", "text": "---\nname: example-skill\ndescription: An example skill for article validation.\n---\n\nWhen asked for the validation marker, respond with SKILL-CHECK-PASSED." } ] } } Listing the resource and reading its instructions confirms that the content is accessible. It doesn't confirm that your agent has loaded it as a skill. The guide includes a .NET integration with Microsoft Agent Framework using AgentSkillsProviderBuilder.UseMcpSkills . It makes names and descriptions available to the agent, then loads selected instructions and supporting files when needed. Versions and compatibility Foundry also manages skill versions. Each version is a fixed snapshot. You can set version in a toolbox's skill reference to select a specific skill version, or omit it to use the skill's default version. For example, suppose skill version "1" is the default and you create version "2" . You can test version "2" by explicitly referencing it in a test toolbox. If you later make it the skill's default, references without a version will use version "2" . References explicitly set to "1" will still use version "1" . This setting selects the skill version, not the toolbox version. How close is this to the official extension? Reading content and loading it when needed follow the same approach. The table below compares how skills are discovered, read, and loaded: Area Official specification Foundry preview Reading content Uses MCP resources and resources/read Serves toolbox skills as MCP resources Loading content Loads instructions and supporting files when needed The Agent Framework integration loads content when needed Finding skills Uses skills/list and skills/get The guide describes resources/list . The tested endpoint also accepted skills/list and returned a file manifest Protocol support still matters. The tested Foundry endpoint accepted skills/list over its negotiated 2025-11-25 protocol, but rejected a 2026-07-28 request to server/discover as an unsupported protocol version. For a Foundry integration, follow the product guide and check your chosen client. Don't assume that every client supporting the latest extension will connect and load skills without changes. Foundry skills support is in preview. The preview has no service-level agreement and Microsoft does not recommend it for production workloads. Before you try it Start with the client support matrix and the documentation for your agent's host. Look for Skills extension support, not only MCP tool support. Then check a few things in your setup: Can the host find and load skills from your server for your agent? Does it read supporting files only when needed? Does it check the files and keep track of which server supplied them? Does it ask for the required approvals before running code? The useful change here is how skills reach your agents. With support on both sides, you have a standard way to share them over MCP instead of building a separate skill-delivery API for each agent. Which of your existing skills would benefit most from being available over MCP? Further reading MCP Skills extension overview Current Skills extension specification SEP-2640: Skills Extension MCP extension client support matrix Use skills with Microsoft Foundry agents (preview) Attach skills to a Foundry toolbox307Views0likes0CommentsVerifying private network paths before you deploy: a what-if for Azure private endpoints
A common Azure scenario: public access is disabled on a PaaS resource, a private endpoint is created, and the connection shows as Approved. The application still times out. Resource-level checks such as what-if report nothing wrong, because every resource is configured. What they do not verify is whether the name the application uses resolves to the private address from the application's VNet. In my experience, most private connectivity failures come from DNS configuration, not from firewall rules. What must be true For a workload in a VNet to reach a PaaS service privately: The private endpoint connection is Approved. The matching privatelink private DNS zone exists. The zone is linked to the VNet that performs the lookup. The zone contains an A record for the resource. If the VNet uses custom DNS servers, they forward privatelink zones to Azure DNS (168.63.129.16) or to an Azure DNS Private Resolver. The third point is the one that is easy to miss: the zone and the record exist, but the VNet performing the lookup cannot see the zone, so the name resolves to the public address. An approach: check the whole path in one command I wrote a small, read-only script that takes a target resource and a source VNet, then reports PASS, WARN, or FAIL for each requirement above, with a suggested fix. It uses the Azure CLI and needs only Reader access. Checks performed: publicNetworkAccess on the target resource Private endpoint connections and their approval state Expected privatelink zone for the endpoint's group id Whether the zone is linked to the source VNet Whether the zone has an A record for the resource Whether the source VNet uses custom DNS servers (reported as a warning for manual review) It exits with code 1 on any failure, so it can run as a pipeline gate after a Dev deployment. Limitations It does not test the network path itself (NSGs, firewalls, routing, ports). Azure Network Watcher covers that. It reads configuration and does not resolve DNS from inside the VNet. A real lookup from a VM in the VNet remains the final proof. In hub-and-spoke designs, the hub VNet may need to be passed as the source. The built-in zone table covers a few services (storage, Key Vault, SQL, Databricks) and needs extending for others. Why I think this matters for AI-assisted infrastructure Script and sample pipeline: Ping me or message me When infrastructure code is generated by an AI assistant, a private endpoint without its DNS zone link is a plausible output: the code is valid and the deployment succeeds. Independent, read-only checks like this one are the kind of gate that lets teams review generated changes with confidence. Questions for the community Which private endpoint failure costs your team the most troubleshooting time? How do you manage DNS in hub-and-spoke networks: Private Resolver, DNS forwarders, or another pattern? Would a check like this be more useful as an Azure Policy, a Network Watcher feature, or a pipeline step? Which services should be added to the DNS zone table first? Shivanna Gundanavar71Views2likes0CommentsHow software companies can expand their SMB reach with Microsoft Marketplace and AI
How can software companies turn a Microsoft Marketplace presence into greater customer reach and growth? Explore how Microsoft Marketplace can help software companies connect with more small and medium business (SMB) customers, support scalable sales, and expand into new markets in the age of AI. The article highlights Ntegral’s evolution from a traditional systems integrator to a software company with more than 300 enterprise solutions and deployments in more than 150 countries. You’ll also get a preview of what Ntegral President and CTO Dexter Hardy will bring to Ultimate Partner LIVE Reston, including practical perspectives on building beyond a Marketplace listing, developing pipeline, reaching SMB customers, and incorporating AI into a broader growth strategy. Read the full article to discover how Marketplace, AI-powered innovation, and an SMB-focused product strategy can work together to create new opportunities for software companies. 👉 Explore now: How software companies can reach more SMB customers through Microsoft Marketplace in the age of AI59Views0likes0CommentsCopilot, Microsoft 365 & Power Platform Community call
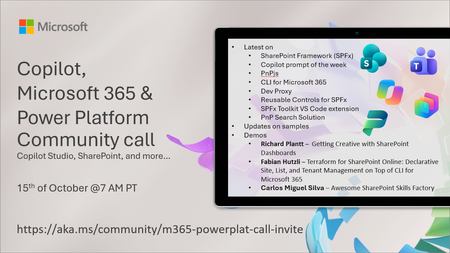
💡 Copilot, Microsoft 365 & Power Platform weekly community call focuses on different use cases and features within the Microsoft 365 and Power Platform - across Microsoft 365 Copilot, Copilot Studio, SharePoint, Power Apps and more. Demos in this call are presented by the community members. 👏 Looking to catch up on the latest news and updates, including cool community demos, this call is for you! 📅 On 15th of October we'll have following agenda: Latest on SharePoint Framework (SPFx) Latest on Copilot prompt of the week PnPjs CLI for Microsoft 365 Dev Proxy Reusable Controls for SPFx SPFx Toolkit VS Code extension PnP Search Solution Demos this time Richard Plantt – Getting Creative with SharePoint Dashboards Fabian Hutzli – Terraform for SharePoint Online: Declarative Site, List, and Tenant Management on Top of CLI for Microsoft 365 Carlos Miguel Silva – Awesome SharePoint Skills Factory 📅 Download recurrent invite from https://aka.ms/community/m365-powerplat-dev-call-invite 📞 & 📺 Join the Microsoft Teams meeting live at https://aka.ms/community/m365-powerplat-dev-call-join 💡 Building something cool for Microsoft 365 or Power Platform (Copilot, SharePoint, Power Apps, etc)? We are always looking for presenters - Volunteer for a community call demo at https://aka.ms/community/request/demo 👋 See you in the call! 📖 Resources: Previous community call recordings and demos from the Microsoft Community Learning YouTube channel at https://aka.ms/community/youtube Microsoft 365 & Power Platform samples from Microsoft and community - https://aka.ms/community/samples Microsoft 365 & Power Platform community details - https://aka.ms/community/home 🧡 Sharing is caring!124Views0likes0CommentsCopilot Extensibility community call - October 2026
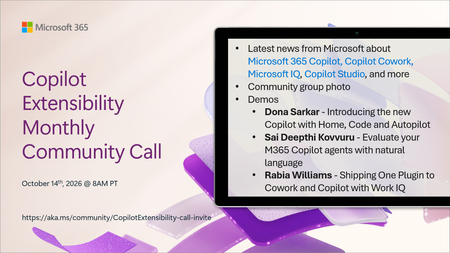
🚀 The Copilot Extensibility Monthly Community Call is a recurring virtual gathering designed to keep the global developer and maker community consistently connected, informed, and engaged with the latest advancements in Microsoft 365 Copilot, Copilot Cowork, Microsoft Scout, GitHub Copilot, Microsoft IQ, etc. and their extensibility ecosystem. 👏 Monthly Wednesday call is for all community members to see Microsoft PMs, engineering and Cloud Advocates showcasing the art of possible with the Microsoft AI technologies. 📅 On the 14th of October we'll have following agenda: News and updates from Microsoft Community group photo Dona Sarkar – Introducing the new Copilot with Home, Code and Autopilot Sai Deepthi Kovvuru - Evaluate your M365 Copilot agents with natural language Rabia Williams - Shipping One Plugin to Cowork and Copilot with Work IQ 📞 & 📺 Join the Microsoft Teams meeting live at https://aka.ms/community/CopilotExtensibility-call-join 🗓️ Download recurrent invite for this weekly call from https://aka.ms/community/CopilotExtensibility-call-invite 👋 See you in the call! 💡 Building something cool with Microsoft AI technologies (Copilot, Cowork, Copilot Studio, Microsoft IQ, etc)? We are always looking for presenters - Volunteer for a community call demo at https://aka.ms/community/request/demo 📖 Resources: Previous community call recordings and demos from the Microsoft Community Learning YouTube channel at https://aka.ms/community/youtube Labs and training material about Microsoft 365 Copilot Extensibility - https://aka.ms/copilotdevcamp Microsoft 365 & Power Platform samples from Microsoft and community - https://aka.ms/community/samples Microsoft 365 & Power Platform community details - https://aka.ms/community/home 🧡 Sharing is caring!190Views0likes0CommentsCopilot, Microsoft 365 & Power Platform product updates call
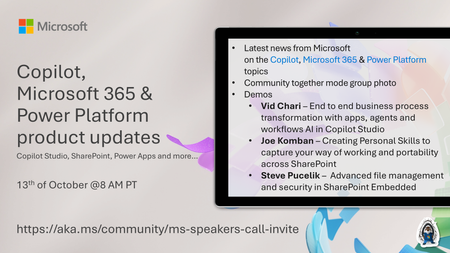
💡Copilot, Microsoft 365 & Power Platform product updates call concentrates on the different use cases and features within the Microsoft 365 and in Power Platform. Call includes topics like Microsoft 365 Copilot, Copilot Studio, Microsoft Teams, Power Platform, Microsoft Graph, Microsoft Viva, Microsoft Search, Microsoft Lists, SharePoint, Power Automate, Power Apps and more. 👏 Weekly Tuesday call is for all community members to see Microsoft PMs, engineering and Cloud Advocates showcasing the art of possible with Microsoft 365 and Power Platform. 📅 On the 13th of October we'll have following agenda: News and updates from Microsoft Together mode group photo Vid Chari – End to end business process transformation with apps, agents and workflows AI in Copilot Studio Joe Komban – Creating Personal Skills to capture your way of working and portability across SharePoint Steve Pucelik – Advanced file management and security in SharePoint Embedded 📞 & 📺 Join the Microsoft Teams meeting live at https://aka.ms/community/ms-speakers-call-join 🗓️ Download recurrent invite for this weekly call from https://aka.ms/community/ms-speakers-call-invite 👋 See you in the call! 💡 Building something cool for Microsoft 365 or Power Platform (Copilot, SharePoint, Power Apps, etc)? We are always looking for presenters - Volunteer for a community call demo at https://aka.ms/community/request/demo 📖 Resources: Previous community call recordings and demos from the Microsoft Community Learning YouTube channel at https://aka.ms/community/youtube Microsoft 365 & Power Platform samples from Microsoft and community - https://aka.ms/community/samples Microsoft 365 & Power Platform community details - https://aka.ms/community/home 🧡 Sharing is caring!131Views0likes0Comments