proxy
23 TopicsDefender for Endpoint and disconnected environments. Which proxy configuration wins?
This article is a follow-up to a previous one discussing conflicting proxy configurations and how Microsoft Defender for Endpoint behaves in these situations. The first article can be found in here. In this article we'll explore how Defender for Endpoint network traffic flows depending on which proxy configuration is in use, as well as what network traffic looks like when all three proxy configurations are set.Add SOCKS5 (+ Authentication) support to Edge insider browser
Hi, Please consider adding SOCKS5 proxy support and Authentication (username and password) to the new Edge browser. currently only Firefox has that capability (without Auth). Microsoft Edge insider is using the same networking settings as google chrome which is not ideal and heavily relies on extensions and 3rd party programs. please create a separate proxy settings page that only effects Edge browser (like Firefox) and Not the whole Windows OS, and add SOCKS5 support to it. Thanks71KViews5likes5Comments
Solving Network Connectivity for MDE and MDI
Hi, I’m Will Sykes, a Senior Security Researcher in Microsoft IR. My colleagues and I specialize in helping customers with incident response and compromise recovery. In our work with customers who’ve been the victim of cyberattack, we often must solve connectivity issues to support tools in a hybrid cloud configuration. Hybrid Cloud Challenges In today’s IT world we’re now implementing and integrating services that leverage cloud computing components. Correctly securing this often defies the adage of “never allow internet connectivity to sensitive systems” and can pose challenges to security and systems administrators to find a solution. In this article we’re going to cover a potential solution to allow the communication traffic for Microsoft Defender for Endpoint (MDE) and Microsoft Defender for Identity (MDI) in a more secure manner, while simultaneously disallowing the operating system to reach the internet. MDE and MDI MDE and MDI are both cloud powered solutions that need to run on all assets (MDE) and Tier 0 assets (MDI). To function these products must be connected to Azure endpoints, however the number of endpoints (MDI, MDE) can be large. This poses a challenge to traditional firewalls that can’t do address-based filtering and rely on IP filtering. In addition, both services cannot function in an environment where SSL inspection is done on the traffic. Thankfully both solutions support a proxy server, and the greatest advantage here is that the proxy can be configured at the MDE/MDI application level and not at the operating system level. During an incident response (IR), Microsoft DART will often deploy MDE and MDI to support real time monitoring and automatic actions to evict threat actors. Depending on the current state of the organization it may not be possible to reconfigure existing firewalls or proxies to support the new configuration. Because of the rapid nature of an IR and the need to have clear consistent network communication data from our toolset we needed an “in a box” solution. The Proxy Solution Because it’s possible to configure MDE and MDI to use a proxy without relying on the system configuration we developed a preconfigured Squid proxy solution that can be deployed automatically via a shell script in a fully configured setup. Let’s look at the parts of this solution. Operating System and Software To use the proxy, you’ll need to create an Ubuntu Linux server. Any version greater than 18.04 will do, and this can be physical or virtual. You’ll need to size the machine based on your expected load; in our experience we’ve run tens of thousands of endpoints through a proxy with 4 CPU cores and 16 GB of memory. The automation script will enable the Uncomplicated Firewall (UFW) and allow ports 22 for SSH and 3128 for Squid. The Squid install is basic; the configuration and the tuning is done via the script. The deploy script will build an endpoint file at /etc/squid/mdemdi.conf which contains the list of required cloud endpoints for MDE and MDI. It then creates a squid configuration file at /etc/squid/squid.conf with some defaults and lockdowns: The hosts allowed to use the firewall are the RFC 1918 internal networks. This can be scoped down or reconfigured depending on your network needs. The only destinations allowed by the proxy are in the mdemdi.conf file, every other destination is denied and only HTTP/HTTPS is allowed. Lastly the script will add some operating system tuning to support deployments in large environments based on our IR experiences. Internal Network Configuration Once you have the proxy configured, you’ll need to ensure that it can connect outbound to the internet unfiltered. If you have SSL filtering enabled on the proxy this will still cause MDE and MDI to fail communications. The proxy is configured to deny all internet destinations not needed by MDE and MDI, so this is a compensating control to avoid having unfiltered internet access. Of course, you can also add the identical filters to the network security devices allowing the proxy outbound internet. The next configuration step is to allow your internal networks to communicate to the proxy on TCP 3128, which is the configured listener for Squid. Configuring MDE and MDI MDE and MDI Version 3 To configure MDE you can use Group Policy to either use the native template or to manage the underlying Windows registry values. The setting can be found at Administrative Templates > Windows Components > Microsoft Defender Antivirus > Define proxy server for connecting to the network. And at Administrative Templates > Windows Components > Data Collection and Preview Builds > Configure connected user experiences and telemetry If you need to configure devices not managed by Group Policy you can manage the following registry values: HKLM\Software\Policies\Microsoft\Windows Defender\ProxyServer This is a registry value of type REG_SZ and takes the following string format: http://<server name or IP>:<port> HKLM\Software\Policies\Microsoft\Windows\DataCollection\TelemetryProxyServer This is a registry value of type REG_SZ and takes the following string format: servername:port or ip:port That’s it! Once that’s done you can confirm connectivity in the Windows Event View in the Applications and Services Logs -> Microsoft -> Windows -> Windows Defender -> Operational log. MDI Version 2 MDI can be installed directly with the proxy, however this must be done on the command line and not through the GUI. To do this add the ProxyUrl=" http://<server name or IP>:<port>" option the installer parameters. If you’ve already installed MDI and need to reconfigure the proxy that’s perfectly fine! You can use the handy MDI PowerShell Module's Set-MDISensorProxyConfiguration cmdlet or the built in utility Microsoft.Tri.Sensor.Deployment.Deployer.exe. Conclusion Based on our experiences in incident response, connectivity issues can slow or block vital security tools. The proxy solution allows network administrators to utilize a pre-configured appliance type solution to support MDE and MDI without having to modify existing security rulesets. A systems administrator can simplify their deployment of MDE or MDI by including the proxy solution as part of the application bundle, where its lifecycle can be tracked in lockstep with the application. Now the moment you’ve all been waiting for! The script can be downloaded at https://github.com/mswillsykes/squidmdemdi. Disclaimer The sample scripts are not supported under any Microsoft standard support program or service. The sample scripts are provided AS IS without warranty of any kind. Microsoft further disclaims all implied warranties including, without limitation, any implied warranties of merchantability or of fitness for a particular purpose. The entire risk arising out of the use or performance of the sample scripts and documentation remains with you. In no event shall Microsoft, its authors, or anyone else involved in the creation, production, or delivery of the scripts be liable for any damages whatsoever (including, without limitation, damages for loss of business profits, business interruption, loss of business information, or other pecuniary loss) arising out of the use of or inability to use the sample scripts or documentation, even if Microsoft has been advised of the possibility of such damages.Scaling Write Throughput in Azure Database for MySQL Using Application-Level Sharding
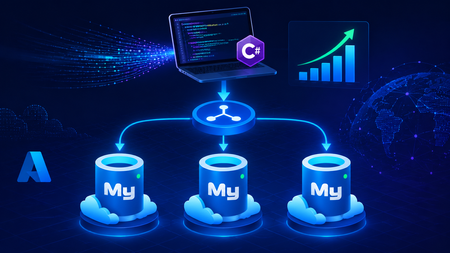
This blog post walks through scaling write throughput in Azure Database for MySQL using application level sharding. It starts with the why behind sharding and then builds a complete C# implementation that spreads writes across three Azure Database for MySQL Flexible Servers. Why Shard in the First Place? This post focuses specifically on scaling write throughput. A well-tuned single primary node can take you remarkably far, and techniques such as indexing strategies, write batching, redo log optimization, and vertical compute scaling each deliver real, lasting value. For many workloads, these optimizations are all you will ever need. That said, as write volume continues to grow, a single primary eventually approaches its practical capacity, and at that point the most durable way to keep scaling is to distribute the write workload across multiple primary instances. This architecture is what we call sharding. When you reach this inflection point, there are two primary patterns for managing multiple write nodes: Proxy or Middleware Layer Sharding: A sharding aware proxy sits between the application and a pool of Azure Database for MySQL instances, routing queries based on a shard key. While this abstracts the underlying topology from the application layer, it introduces an additional, complex component to operate, secure, scale, and patch. Application Layer Sharding: The application itself resolves the destination shard key and determines which of the N Azure Database for MySQL instances should receive a write before ever opening a database connection. Each backend target remains a completely standard, independent Azure Database for MySQL instance. This post explores the second approach. The core appeal of application layer sharding is architectural simplicity: it introduces zero infrastructure overhead and eliminates an extra network hop. Every shard behaves exactly like a standalone instance, meaning your existing backup, restore, monitoring pipelines, and the Azure portal function seamlessly without modification. The explicit tradeoff is that you forgo cross shard joins and distributed transactions in exchange for absolute predictability and control over data access patterns. The Plan We will build a small order management service that distributes its data across three Azure Database for MySQL instances that already exist. The application, written in C# on .NET 8, owns the partitioning logic. The premise: the three servers are already provisioned, the firewalls are configured, the network paths are established, and each server has its own administrative credentials. We are not provisioning infrastructure in this post. we are writing the application code that consumes it. mysql-shard-0.mysql.database.azure.com user: shard0_admin pwd: <secret-0> mysql-shard-1.mysql.database.azure.com user: shard1_admin pwd: <secret-1> mysql-shard-2.mysql.database.azure.com user: shard2_admin pwd: <secret-2> Each server hosts an identical appdb database with the same schema: CREATE TABLE users ( user_id BIGINT NOT NULL PRIMARY KEY, email VARCHAR(255) NOT NULL, created_at DATETIME NOT NULL DEFAULT CURRENT_TIMESTAMP, UNIQUE KEY uq_email (email) ); CREATE TABLE orders ( order_id BIGINT NOT NULL PRIMARY KEY, user_id BIGINT NOT NULL, amount_cents INT NOT NULL, created_at DATETIME NOT NULL DEFAULT CURRENT_TIMESTAMP, KEY ix_user (user_id) ); Two design decisions in this schema warrant explanation: No AUTO_INCREMENT for user_id or order_id. Two shards would otherwise generate the same value 42 independently. Instead, we assign identifiers in the application, using a scheme such as Snowflake, ULID, or UUIDv7. orders carries user_id, and we route by it. This is the single most important rule of sharding: choose a shard key that keeps related data colocated, so that the common queries remain on a single shard. A note on UNIQUE KEY uq_email. A unique index enforces uniqueness only within a single physical shard. Because we route by user_id, two users with different IDs and the same email may land on different shards, and both inserts will succeed. If you require globally unique emails, two options exist: (a) maintain a separate email → user_id lookup table on a single "directory" server and write to it first within an idempotent flow, or (b) shard the users table by a hash of email instead. We retain user_id routing throughout this post because it is the correct choice for orders, and we treat per shard email uniqueness as a best effort guard rather than a hard global invariant. How the Partitioning Works The naive approach to sharding is shard = hash(key) % N. This works until you need to add a fourth server, at which point roughly 75% of your data must move. In any system of meaningful size, that is prohibitively expensive. The established solution is virtual buckets. You hash the key into a large, fixed bucket space (here, 1024), then map buckets to physical shards. When you add capacity, you relocate only buckets; you never rehash the entire dataset. In production, the bucket_to_shard_map typically resides in a system such as Azure App Configuration or etcd, so that you can rebalance without redeploying. For this post, we keep it as an in-memory array seeded at startup, which is straightforward to replace later. The Project ShardingDemo/ ├── ShardingDemo.csproj ├── appsettings.json ├── Models.cs ├── ShardRouter.cs ├── UserRepository.cs └── Program.cs ShardingDemo.csproj <Project Sdk="Microsoft.NET.Sdk"> <PropertyGroup> <OutputType>Exe</OutputType> <TargetFramework>net8.0</TargetFramework> <Nullable>enable</Nullable> <ImplicitUsings>enable</ImplicitUsings> </PropertyGroup> <ItemGroup> <PackageReference Include="MySqlConnector" Version="2.6.0" /> <PackageReference Include="Microsoft.Extensions.Hosting" Version="8.0.0" /> <PackageReference Include="Microsoft.Extensions.Configuration.Binder" Version="8.0.0" /> </ItemGroup> <ItemGroup> <Content Include="appsettings.json" CopyToOutputDirectory="PreserveNewest" /> </ItemGroup> </Project> appsettings.json Shards is an ordered list, and a shard's position in the array is its logical ID. { "Shards": [ { "Host": "mysql-shard-0.mysql.database.azure.com", "Database": "appdb", "User": "shard0_admin", "Password": "REPLACE_ME_0" }, { "Host": "mysql-shard-1.mysql.database.azure.com", "Database": "appdb", "User": "shard1_admin", "Password": "REPLACE_ME_1" }, { "Host": "mysql-shard-2.mysql.database.azure.com", "Database": "appdb", "User": "shard2_admin", "Password": "REPLACE_ME_2" } ] } Models.cs namespace ShardingDemo; public sealed record User(long UserId, string Email, DateTime CreatedAt); public sealed record Order(long OrderId, long UserId, int AmountCents, DateTime CreatedAt); public sealed class ShardConfig { public required string Host { get; init; } public required string Database { get; init; } public required string User { get; init; } public required string Password { get; init; } } ShardRouter.cs using System.Security.Cryptography; using System.Text; using MySqlConnector; namespace ShardingDemo; public sealed class Shard : IAsyncDisposable { public int Id { get; } public MySqlDataSource DataSource { get; } public Shard(int id, ShardConfig cfg) { Id = id; var csb = new MySqlConnectionStringBuilder { Server = cfg.Host, Port = 3306, Database = cfg.Database, UserID = cfg.User, Password = cfg.Password, SslMode = MySqlSslMode.Required, Pooling = true, MinimumPoolSize = 2, MaximumPoolSize = 100, ConnectionTimeout = 10, DefaultCommandTimeout = 30, }; DataSource = new MySqlDataSourceBuilder(csb.ConnectionString).Build(); } public ValueTask DisposeAsync() => DataSource.DisposeAsync(); } public sealed class ShardRouter : IAsyncDisposable { private const int VirtualBuckets = 1024; private readonly IReadOnlyList<Shard> _shards; private readonly int[] _bucketToShardId; public ShardRouter(IEnumerable<ShardConfig> configs) { _shards = configs.Select((c, i) => new Shard(i, c)).ToList(); // Even distribution. Replace with a map loaded from your control plane for live rebalancing. _bucketToShardId = new int[VirtualBuckets]; for (int i = 0; i < VirtualBuckets; i++) _bucketToShardId[i] = i % _shards.Count; } public IReadOnlyList<Shard> AllShards => _shards; private static int BucketFor(long shardKey) { byte[] hash = MD5.HashData(Encoding.ASCII.GetBytes(shardKey.ToString())); // Use the first byte pair as an unsigned value, then map it into the bucket space. int value = (hash[0] << 8) | hash[1]; return value % VirtualBuckets; } public Shard ShardForKey(long shardKey) { int bucket = BucketFor(shardKey); return _shards[_bucketToShardId[bucket]]; } public async ValueTask DisposeAsync() { foreach (var s in _shards) await s.DisposeAsync(); } } UserRepository.cs Observe that every per user method calls ShardForKey(userId), even when inserting an order. This is the colocation rule at work. An order and its owning user always reside on the same shard, so queries for a single user only ever reach one shard. Only the cross-shard aggregate (TotalRevenueCentsAsync) must fan out. using MySqlConnector; namespace ShardingDemo; public sealed class UserRepository { private readonly ShardRouter _router; public UserRepository(ShardRouter router) { _router = router; } public async Task CreateUserAsync(long userId, string email, CancellationToken ct = default) { var shard = _router.ShardForKey(userId); await using var conn = await shard.DataSource.OpenConnectionAsync(ct); await using var cmd = conn.CreateCommand(); cmd.CommandText = "INSERT INTO users (user_id, email) VALUES (@id, Email)"; cmd.Parameters.AddWithValue("@id", userId); cmd.Parameters.AddWithValue("@email", email); await cmd.ExecuteNonQueryAsync(ct); } public async Task<User?> GetUserAsync(long userId, CancellationToken ct = default) { var shard = _router.ShardForKey(userId); await using var conn = await shard.DataSource.OpenConnectionAsync(ct); await using var cmd = conn.CreateCommand(); cmd.CommandText = "SELECT user_id, email, created_at FROM users WHERE user_id = ID"; cmd.Parameters.AddWithValue("@id", userId); await using var reader = await cmd.ExecuteReaderAsync(ct); if (!await reader.ReadAsync(ct)) return null; return new User(reader.GetInt64(0), reader.GetString(1), reader.GetDateTime(2)); } public async Task AddOrderAsync(long orderId, long userId, int amountCents, CancellationToken ct = default) { // Routed by user_id, so orders colocate with their owning user. var shard = _router.ShardForKey(userId); await using var conn = await shard.DataSource.OpenConnectionAsync(ct); await using var cmd = conn.CreateCommand(); cmd.CommandText = """ INSERT INTO orders (order_id, user_id, amount_cents) VALUES (@oid, @uid, amt) """; cmd.Parameters.AddWithValue("@oid", orderId); cmd.Parameters.AddWithValue("@uid", userId); cmd.Parameters.AddWithValue("@amt", amountCents); await cmd.ExecuteNonQueryAsync(ct); } public async Task<IReadOnlyList<Order>> GetOrdersForUserAsync(long userId, CancellationToken ct = default) { var shard = _router.ShardForKey(userId); await using var conn = await shard.DataSource.OpenConnectionAsync(ct); await using var cmd = conn.CreateCommand(); cmd.CommandText = """ SELECT order_id, user_id, amount_cents, created_at FROM orders WHERE user_id = @uid """; cmd.Parameters.AddWithValue("@uid", userId); var list = new List<Order>(); await using var reader = await cmd.ExecuteReaderAsync(ct); while (await reader.ReadAsync(ct)) { list.Add(new Order( reader.GetInt64(0), reader.GetInt64(1), reader.GetInt32(2), reader.GetDateTime(3))); } return list; } /// <summary>Cross shard fanout.</summary> public async Task<long> TotalRevenueCentsAsync(CancellationToken ct = default) { var tasks = _router.AllShards.Select(async shard => { await using var conn = await shard.DataSource.OpenConnectionAsync(ct); await using var cmd = conn.CreateCommand(); cmd.CommandText = "SELECT COALESCE(SUM(amount_cents), 0) FROM orders"; var result = await cmd.ExecuteScalarAsync(ct); return Convert.ToInt64(result); }); var perShard = await Task.WhenAll(tasks); return perShard.Sum(); } } Program.cs using Microsoft.Extensions.Configuration; using Microsoft.Extensions.DependencyInjection; using Microsoft.Extensions.Hosting; using ShardingDemo; var builder = Host.CreateApplicationBuilder(args); // Bind Shards:[] from appsettings.json (override with user-secrets / env vars / Key Vault) var shardConfigs = builder.Configuration .GetSection("Shards") .Get<List<ShardConfig>>() ?? throw new InvalidOperationException("No 'Shards' section configured."); if (shardConfigs.Count == 0) throw new InvalidOperationException("At least one shard must be configured."); builder.Services.AddSingleton(_ => new ShardRouter(shardConfigs)); builder.Services.AddSingleton<UserRepository>(); using var host = builder.Build(); var repo = host.Services.GetRequiredService<UserRepository>(); var router = host.Services.GetRequiredService<ShardRouter>(); (long Id, string Email)[] users = { (1001, "ada@example.com"), (2002, "linus@example.com"), (3003, "grace@example.com"), (4004, "alan@example.com"), }; foreach (var (id, email) in users) { await repo.CreateUserAsync(id, email); Console.WriteLine($"user {id} -> shard {router.ShardForKey(id).Id}"); } await repo.AddOrderAsync(orderId: 9001, userId: 1001, amountCents: 4999); await repo.AddOrderAsync(orderId: 9002, userId: 1001, amountCents: 1299); await repo.AddOrderAsync(orderId: 9003, userId: 2002, amountCents: 8800); Console.WriteLine($"\nAda: {await repo.GetUserAsync(1001)}"); Console.WriteLine($"Ada's orders: {(await repo.GetOrdersForUserAsync(1001)).Count}"); Console.WriteLine($"\nTotal revenue across 3 shards: " + $"${await repo.TotalRevenueCentsAsync() / 100m:F2}"); await router.DisposeAsync(); Tracing One Request End to End Consider GetOrdersForUserAsync(1001): ShardForKey(1001) → MD5("1001") → first two bytes as a number → % 1024 → a bucket in the range 0..1023. bucket % 3 → a physical shard → for example mysql-shard-2.mysql.database.azure.com. The MySqlDataSource provides a pooled, TLS encrypted connection authenticated as shard2_admin. The query runs against shard 2's local ix_user index, with no fan out and at single server speed. Every call with userId = 1001, whether GetUser, AddOrder, or GetOrdersForUser, lands on the same shard. That is why orders JOIN users ON orders.user_id = users.user_id WHERE user_id = 1001 executes within a single shard, with no cross-shard traffic. Conclusion The essential point is this. Once a single primary can no longer absorb your write load, sharding becomes a durable answer, and implementing it at the application layer keeps every part of the system explicit and comprehensible. When write volume or dataset size outgrows a single primary, application layer sharding provides several benefits. N independent Azure Database for MySQL instances, each absorbing 1/N of the write traffic. Queries by user that remain on a single shard and behave like an ordinary, modestly sized database. A bucket map approach that allows you to add a fourth, fifth, or Nth shard later by relocating slices of data rather than rehashing the entire dataset. A failure of one shard that affects 1/N of your users rather than all of them. These benefits come at a genuine cost. You must generate identifiers in the application, global uniqueness requires a secondary lookup table, and aggregate queries fan out across shards. A cross shard write, one that must atomically update data on two different shards, can no longer rely on a single database transaction. Instead it needs an orchestrated sequence of local transactions, where each step carries a compensating action that undoes its effect if a later step fails. None of these are insurmountable. They are simply responsibilities you now assume. Sharding is a deliberate step to take only once a single primary has genuinely exhausted its write headroom. When you reach that point, the implementation in this post is a representative blueprint. Stay Connected We welcome your feedback and invite you to share your experiences or suggestions at AskAzureDBforMySQL@service.microsoft.com Thank you for choosing Azure Database for MySQL!236Views2likes0Comments
Block Teams web client whilst allowing Teams desktop client - using proxy
[UPDATE 29/09] We have identified that the Teams desktop client puts a Teams entry in the user-agent string and use a specific Chrome version that is different to the Chrome the users have so we are using this to block traffic to teams.microsoft.com and seems to working so far. Not all traffic has the user-agent though i.e. video. Initially we blocked teams.microsoft.com except user-agent Teams* but this blocked video. Does anyone have detail on Teams video traffic so we can investigate further options? ------------------------------------------------------------------------------------------------- Is there a way to identify traffic from Teams web client, distinct from Teams desktop client so we can use proxy config to block Teams web client whilst allowing Teams desktop client? The reasons for this specific ask and consideration of other options are below: we are deploying Microsoft 365 in an environment for which a new tenant (tenant A) has been set up. The environment has on-prem Win 10 devices managed via SCCM and the devices currently don't have Teams or Outlook desktop clients installed. The environment is locked down with access to teams.microsoft.com currently blocked using proxy config to prevent users getting to Teams via the browser (and users don't even have the desktop client, which this would also block). Users currently have access to email on the parent company's tenant (tenant B), using their separate parent company creds signing into outlook for the web in the browser. This is the extent of their use of M365 cloud services - Outlook on the Web to parent company tenant. As part of rolling out Teams, the Teams client is being deployed and the proxy block of teams.microsoft.com is being removed. RestrictTeamsSignInToAccountsFromTenantList registry setting is implemented so users can only sign-in to tenant A from Teams desktop client. sign-in to tenant B Teams or indeed any tenant is possible via the web client however and there is a requirement to block this so the users can't use the Teams web client. We can't use tenant restrictions i.e. Restrict-Access-To-Tenants header in proxy to tenant A (https://docs.microsoft.com/en-us/azure/active-directory/manage-apps/tenant-restrictions) as the users need to be able to get to parent company tenant B for email We can't configure tenant B e.g. Conditional access to block Teams for a group as the global team who manage tenant B don't engage for these type of point solutions - to keep their tenant maintainable. Due to the above constraints we think identifying some specific urls in proxy might be our best route but open to other suggestions on how to to block Teams web client whilst allowing Teams desktop client.10KViews1like4Comments