mw365
14 TopicsMicrosoft 365 Copilot Brand Kits: Making On-Brand Content Easier to Create
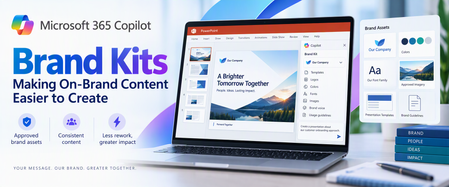
Creating a presentation should begin with the message, not with searching for the latest logo, confirming the correct font, or finding a slide deck that looks close enough to the corporate standard. AI can accelerate content creation, but speed alone does not solve brand consistency. Without the right assets and guidance, the result can still require significant cleanup before it is ready to share. Microsoft 365 Copilot Brand Kits bring approved brand assets and guidance into the content creation experience. Employees gain a clearer starting point, while brand managers and IT can control which organizational branding is available and who can manage it. The opportunity is straightforward: make approved branding easier to use, reduce avoidable rework, and help people focus on what they want to communicate. This article explains what Brand Kits include, how personal, shared, and official kits differ, how templates and organizational asset libraries affect PowerPoint results, and what administrators should configure before a pilot. Readers who are evaluating the experience can begin with the PowerPoint and template sections; administrators can start with setup, governance, and storage. What is a Copilot Brand Kit? A Brand Kit is a managed collection of approved brand assets and guidance—such as logos, colors, fonts, imagery, templates, and tone—that helps people create content aligned with an organization’s identity. In Microsoft 365 Copilot, Brand Kits provide a consistent starting point for branded content while allowing organizations to control how those assets are created, shared, and published. A Brand Kit brings together the elements that define an organization’s visual and verbal identity. Depending on how it is configured, that can include: Logos: Primary, secondary, and approved variations. Colors and fonts: Brand palettes and typography. Images and icons: Approved photography, illustrations, and visual assets. Templates and layouts: Reusable structures for creating content. Brand voice: Guidance on tone, terminology, and communication style. Usage guidelines: Rules for how brand elements should—and should not—be used. These elements help connect content creation to the organization’s standards rather than leaving each employee to assemble their own interpretation. For organizations with multiple brands, business units, or product identities, separate kits can help keep the right assets associated with the right content. Think of a Brand Kit as a managed starting point, not a guarantee that every generated result will be publication-ready. Personal, shared, and official: Understanding the three kit types Brand Kits support three different scopes of use. Personal Brand Kits: Personal kits are available only to their creator. They support individual work without exposing those assets across the organization. Creation rights still depend on organizational policy. “Personal” describes the kit’s audience—not an exemption from administrative controls. Shared Brand Kits: Shared kits make assets available to selected people based on the permissions assigned by the creator. They can support a department, project, or other defined group. Giving someone edit permission on a shared kit does not bypass the organization’s restrictions on who may create or edit kits. Official Brand Kits: Official kits are managed by designated brand managers and made available across the tenant. They provide an organization-wide option for approved corporate branding. This distinction matters: a kit shared with a team is not automatically an official organizational kit. How Brand Kits help in PowerPoint For PowerPoint, a Brand Kit provides access to approved assets and presentation templates that help guide generated content. Users can select an available Brand Kit when creating content and ask Copilot to incorporate relevant brand imagery. They can also start from an approved presentation or template. A practical approach is to: Choose the appropriate published Brand Kit. Use an approved template suited to the presentation. Describe the audience, purpose, and desired structure. Generate the content. Review the result for accuracy, readability, accessibility, and brand alignment. Selecting a Brand Kit does not automatically restyle existing slides. If the goal is to update an existing presentation, explicitly request or apply the branding changes. Copilot supports PowerPoint on Windows, Mac, and the web; availability also depends on licensing and organizational settings. Your template is as important as your assets A complete logo library cannot compensate for a weak PowerPoint template. Templates must show how the organization presents information, not merely define a color palette. Representative slides demonstrate how titles, text, images, charts, and other objects work together in realistic layouts. Include representative sample slides You do not need one sample slide for every possible layout. Instead, provide examples that reflect common and specialized presentation needs. A practical collection might include: A title slide and section divider. A straightforward content slide. An image-led slide. A chart or table. A process or timeline. A summary and next-steps slide. Choose examples that reflect how people actually communicate in your organization. A sales presentation and a technical briefing may need different patterns. Make placeholders intentional Copilot uses placeholder type, position, and size to understand the layout. Placeholder text is not a hidden instruction channel. Writing “Insert an executive summary here” inside a placeholder does not make that wording a semantic instruction to Copilot. Use the prompt to explain the communication goal. Use the template to demonstrate the presentation structure. Prepare for varying amounts of content Copilot does not resize the font or placeholder when generated text needs more space. Instead, it may add design elements to accommodate the content. That makes review important. Check for overcrowded slides, awkward text flow, and content that would be clearer if split across multiple slides. Keep instructions separate where possible Instructional slides can remain when they use reusable layouts, but mixing template guidance with normal presentation content can produce unintended results. A better practice is to keep reusable sample slides focused on the desired output and maintain detailed authoring instructions separately. Both .pptx and .potx files are supported as Brand Kit templates. Administrative setup Microsoft’s setup guidance directs administrators to configure the brand manager policy in the Microsoft 365 Apps admin center (config.office.com) using a tenant-wide policy and the designated security group. The setting appears as Elevated role for Brand Managers. Allow up to 24 hours for policy changes to take effect before treating a missing capability as a configuration failure. Restricting kit creation does not prevent users from accessing and using published official kits. Group membership matters Official editing and publishing rights are granted to members of the configured mail-enabled security group. Being a group owner is not enough. If an owner also needs to manage official Brand Kits, ensure that person is a member as well. Governance: Two permission checks, not one One of the most important administrative details is the relationship between two controls: Restrict brand kit creation governs who can create and edit kits. Enterprise Brand Manager governs publishing and management of official kits. When creation restrictions are enabled, a user needs the appropriate permissions under both controls to create and publish an official kit. For example, a person with Enterprise Brand Manager rights who is not in the permitted creation group cannot create or edit kits under that restriction. Conversely, someone allowed to create kits does not automatically have permission to publish an official kit. Storage and organizational asset libraries The implementation guidance supplied with this article describes Brand Kit data as stored in SharePoint Embedded containers: Personal and shared kits use user-based containers. Official kits use the official Brand Kit container. Organizations should verify which governance, labeling, retention, and access controls apply to their SharePoint Embedded containers and configuration. SharePoint Embedded storage does not by itself establish that every policy used for a conventional SharePoint site applies in the same way. An organizational asset library, or OAL, has a related but different role. An OAL can hold approved assets that a Brand Kit references. This lets organizations reuse an established asset collection rather than treating every kit as a separate collection of uploaded files. For PowerPoint, the important distinction is: In PowerPoint, users select the published Brand Kit, while the organizational asset library can supply assets referenced by that kit. Referencing assets also makes source accessibility important. If an asset cannot be found, check that the referenced OAL content remains accessible. Uploading the asset into the kit may be an alternative where appropriate. A practical way to get started Start with a focused pilot rather than loading every brand asset your organization owns into the first kit. Choose one presentation scenario Select a common use case, such as customer updates, internal briefings, or project reviews. This gives the team a concrete way to assess whether generated content meets real needs. Agree on ownership Identify who approves the assets, who maintains the template, who publishes the kit, and who manages the supporting permissions. A clear owner makes it easier to keep the kit current after launch. Prepare the template Review sample slides, placeholders, theme colors, fonts, and reusable layouts. Remove outdated examples and separate instructional material from production-ready samples where possible. Assemble the assets and guidance Include the approved logos, imagery, colors, fonts, and brand guidance needed for the pilot. Use compatible asset formats and sensibly sized images. Avoid unnecessarily large files—particularly images over 10 MB—as a performance precaution, not as a stated product upload limit. Configure permissions and publish Confirm both creation/editing permissions and official publishing rights. Check actual group membership rather than assuming that ownership or another administrative role provides access. Test with realistic prompts Evaluate more than whether the logo appears. Check layout selection, content density, imagery, readability, tone, and factual accuracy. Use the results to improve the kit and template before expanding adoption. An example prompt After selecting the appropriate Brand Kit, try a prompt such as: Create a presentation introducing our proposed customer onboarding approach to business stakeholders. Use the selected Brand Kit and its approved presentation template. Include the business problem, proposed approach, implementation stages, responsibilities, and next steps. Keep each slide focused on one main idea, use approved brand imagery where relevant, and add speaker notes. Do not invent metrics or customer examples; identify any missing information. The prompt explains the audience, purpose, and structure. The selected kit supplies the approved brand context. Four reliable ways to apply branding Choose the method that matches the task: use the organization theme for standard defaults, begin with a seed file when the presentation needs established structure, apply a named theme when that theme is available, or select a brand directly in PowerPoint. Frequently asked questions Do we need a sample slide for every layout? No. Prioritize representative examples across the slide types and specialized scenarios your organization actually uses. Can placeholder text tell Copilot what to generate? Not as semantic guidance. Placeholder type, position, and size inform layout; placeholder wording can influence styling but is not treated as an instruction. What happens when text does not fit? Copilot does not change the font size or placeholder size. It may add design elements. Review the result and simplify or split content where needed. Which template formats are supported? Both .pptx and .potx. Can instructional slides stay in the template? They can, when they use reusable layouts. However, keeping instructions separate reduces the risk of guidance appearing as presentation content. Can existing OAL assets be used? Yes. A Brand Kit can reference approved OAL assets. For PowerPoint Brand Kit selection, publish the kit rather than relying on the OAL alone. Why can a brand manager not create or publish an official kit? Check both permission controls. When creation restrictions are enabled, Enterprise Brand Manager rights alone are insufficient if the person is outside the permitted creation group. Also confirm that the person is a member, not only an owner, of the relevant group. Does selecting a kit update an existing presentation? No. Explicitly request or apply branding to existing slides. What should we check when assets are missing? Confirm that the kit is published, the expected assets are included, and referenced OAL content is accessible. Where appropriate, upload the assets directly into the kit. What most affects the quality of the output? The completeness of the kit and the quality of its template—especially representative sample slides, usable placeholders, and consistent theme settings. The bottom Line Microsoft 365 Copilot Brand Kits can make approved branding easier to use in everyday content creation. The strongest approach combines three things: a well-prepared kit, a well-designed template, and clear ownership. Start with a focused scenario, test realistic output, and refine the underlying assets and guidance. Human review remains essential, but a stronger starting point lets people spend less time correcting formatting and more time communicating clearly. References Create and manage official Brand kits in the Microsoft Copilot app | Microsoft Support Edit with Copilot in PowerPoint | Microsoft Support Use branded templates in the Microsoft Copilot app | Microsoft Support Enterprise brand manager policy setup | Microsoft Learn Set Up the Restrict Brand Kit Creation Policy in Microsoft Copilot | Microsoft Learn Keep your presentation on-brand with Copilot | Microsoft SupportManaging SharePoint Online Version History at Scale to Recover Storage
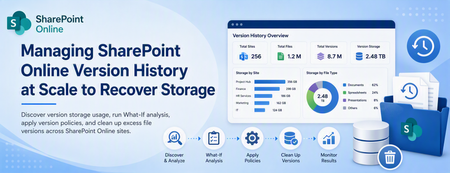
Summay SharePoint Online version history is one of those features that users love, but admins eventually have to govern. Versioning protects users from accidental edits, bad changes, and overwritten content. It gives people a way to restore previous versions of documents without opening a ticket. That is a good thing. But at tenant scale, version history can also consume a surprising amount of storage. Highly active libraries, large Office files, frequent edits, migrations, sync activity, and years of retained versions can quietly add up. Eventually, admins need to answer a few practical questions: How many file versions do we have? How much storage are those versions consuming? Which sites would benefit most from cleanup? What policy should we apply going forward? How much space could we recover before making changes? How do we clean up versions safely across many sites? That is why I built this tool: SPOVersions-ApplicationTools The main script is: Apply-SPOVersions-Tool.ps1 Why version history planning matters Microsoft's official guidance for SharePoint version storage makes an important point: version limits should support your organization's recovery objectives while also controlling storage consumption. Microsoft documents this here: Plan version storage for document libraries in SharePoint The key idea is balance. If you keep too many versions for too long, storage consumption can grow quickly. If you trim too aggressively, users may lose the ability to recover from accidental or unwanted changes. A good version history strategy needs to consider both: Goal Why it matters Recovery Users need enough version history to restore useful prior versions. Storage control Admins need to prevent version history from consuming excessive quota. Consistency Tenant defaults and site-level policies should be understandable and repeatable. Exceptions Some business areas may need different version retention behavior. Safe cleanup Existing versions should be analyzed before deletion jobs are created. The goal is not simply to delete versions. The goal is to understand version storage, set the right policy, and clean up intentionally. What Microsoft recommends admins consider Microsoft's documentation calls out three major planning questions: Determine the default version history limits for new document libraries. Identify exceptions needed from organization default limits. Decide whether existing content should be updated to align with the organization limits. That third point is where many admins need tooling. It is one thing to configure a tenant default for new libraries. It is another thing to understand what already exists across hundreds or thousands of sites. Existing content is often where the storage opportunity is. Automatic vs. manual version limits SharePoint provides different ways to manage version history. Mode What it does Best fit Automatic SharePoint uses intelligent trimming based on version age. Recent versions are preserved more densely, while older versions are thinned over time. Recommended default for many organizations that want Microsoft-managed optimization. Manual with count and expiration Admins specify how many major versions to keep and how long versions should remain. Useful when you want more direct control and predictable cleanup. Manual with count only Admins keep a configured number of versions without age-based expiration. Useful when a fixed restore count matters, but it can consume more storage. Microsoft's guidance highlights that automatic trimming is designed to preserve high-value versions while optimizing storage. Manual policies can be useful, but they require careful planning because low limits or short expiration windows can affect restore scenarios. That is why I wanted this tool to include reporting and What-If analysis before cleanup. What the tool does Apply-SPOVersions-Tool.ps1 is an interactive PowerShell tool built with PnP PowerShell to help admins manage SharePoint Online version policies across multiple site collections. At a high level, the tool helps admins: Audit current version policies across sites. Apply automatic or manual version limits. Review version policy status. Generate version history reports. Run What-If analysis to estimate storage recovery. Create batch delete jobs for cleanup. Monitor cleanup job status. Set tenant-level defaults for new sites. This makes it useful for both planning and implementation. Why I built it as an admin workflow Version cleanup should not start with deletion. The safer workflow is: Discover current settings. Generate version history reports. Estimate storage recovery. Decide the right policy. Apply policy to selected sites. Queue cleanup jobs. Monitor job status. Repeat as part of governance. That is how the tool is structured. It is not just a cleanup script. It is a planning and execution tool. Site discovery options The tool can work from a defined list of site URLs or discover sites automatically. For larger tenants, I usually prefer a site list because it gives admins better control over rollout scope. You can start with a pilot group, validate results, then expand. For smaller tenants or discovery scenarios, auto-discovery can be useful. The tool supports: SharePoint sites OneDrive for Business sites Exclusion of common system sites Confirmation before processing discovered sites That confirmation step matters. When a script can operate across many sites, admins should have a checkpoint before changes are made. Key operations: Get current version policies Before changing anything, admins can retrieve current version policy settings for all selected sites. This helps answer: Which sites already use automatic trimming? Which sites use manual limits? Which sites have inconsistent settings? Which sites may need exceptions? This is useful for building a baseline. Set version policies across sites After planning, admins can apply version policies across site collections. The tool supports: Automatic version trimming Manual major version limits Optional expiration after a specified number of days Automatic trimming is useful when you want SharePoint to optimize storage intelligently. Manual limits are useful when the organization has a defined policy, such as keeping a specific number of major versions or expiring versions after a specific period. Check version policy status Policy changes may take time to apply. The tool can check propagation status, so admins can verify whether pending changes are completed successfully. This is important during staged rollouts because you want to confirm policy state before moving on to cleanup. Generate version history reports This is one of the most important parts of the workflow. The tool can submit version history report jobs for each site. Those reports are written to a dedicated document library created by the tool: Admin_SiteCollection_VersionReport_DONOTDELETE Using a dedicated library avoids some of the issues that can happen when report files are written into normal user-facing document libraries. The reports provide the raw data needed to understand version storage usage. Run What-If analysis This is the feature I think most admins should start with. The What-If analysis downloads completed version history reports and simulates a version policy without making changes. That means admins can estimate: Total versions analyzed Versions that would be deleted Total version storage Storage that could be recovered Percent of version storage that could be freed Per-site savings This gives admins data before they commit to a cleanup policy. For example, a What-If analysis might show that one site can recover a large amount of storage while another site has very little benefit. That helps prioritize action. Create batchdeletejobs Once the admin understands the impact and chooses a policy, the tool can create batch delete jobs to remove excess versions. This is the destructive part of the workflow, so it should come after reporting and What-If analysis. Admins can use automatic or manual cleanup criteria depending on the desired policy. Important reminder: deleted versions are not recovered from the Recycle Bin. Treat batch delete jobs as permanent cleanup operations. Monitor batchdeletejob status After cleanup jobs are created, admins need to know whether they completed and how much storage was released. The tool can check batch delete job status across sites, including completion state and storage released where available. This closes the loop from planning to execution. Tenant-level defaults vs. existing content One important distinction in SharePoint version management is the difference between tenant-level defaults and existing content. Tenant-level settings affect new sites or new libraries going forward. Existing sites and existing file versions may need additional steps. Microsoft's guidance describes multiple approaches: Scenario What it means Apply defaults to new libraries only Least disruptive; existing settings and versions remain unchanged. Update existing library settings without trimming versions Future versions follow the new policy, but existing versions are not deleted. Update settings and trim existing versions Aligns current and future behavior but requires careful planning and cleanup jobs. This tool helps with the third scenario, where admins need to understand and manage existing version storage across sites. A practical rollout approach For most tenants, I would not recommend starting with the entire environment. A safer rollout looks like this: Phase Action Phase 1: Baseline Get current version policies across a small set of sites. Phase 2: Report Generate version history reports for pilot sites. Phase 3: What-If Estimate storage recovery under automatic or manual policies. Phase 4: Decide Choose default policy and identify exceptions. Phase 5: Apply Apply policy to selected pilot sites. Phase 6: Cleanup Queue batch delete jobs only after review. Phase 7: Monitor Check job status and storage released. Phase 8: Expand Repeat across additional sites or workloads. This creates a defensible admin process instead of a one-time cleanup event. Where this helps most This tool is especially useful in tenants with: Large document libraries Heavy collaboration sites Long-running project sites Migration history Large Office files with frequent edits Storage pressure Inconsistent site-level version policies Need for tenant-wide governance reporting It can also help organizations that want to move toward automatic trimming but need to understand the impact first. Permissions and prerequisites The tool uses PnP PowerShell and interactive authentication. Typical prerequisites include: PowerShell 5.1 or later PnP.PowerShell 3.1.0 or later SharePoint Administrator role Entra ID app registration Delegated SharePoint permissions required for version policy and report operations Important: Ensure that the account running this tool has site collection admin rights on all sites If you need to add your Admin account to all OneDrive and SPO sites, check out this scripts: Add-GroupToSPOSites.ps1 Add-GroupToOneDriveSites.ps1 The repository README includes setup details and permission guidance: Apply-SPOVersions-Tool README As always, review permissions carefully before using any tenant-wide admin automation. Safety notes Version cleanup can permanently remove version history. Before creating cleanup jobs: Run reports first. Run What-If analysis. Start with pilot sites. Review business requirements. Identify exceptions. Communicate expected behavior to site owners. Keep exported results for audit and planning. Avoid opening or modifying report CSV files while report jobs are still running. The tool is designed to support safe planning, but admins still need to make policy decisions carefully. Why this belongs in your governance toolkit SharePoint storage management is not just about quota. Version history touches: User recovery expectations Records and retention requirements Collaboration patterns Site lifecycle Migration cleanup Storage forecasting Governance consistency If version history is unmanaged, storage growth can feel mysterious. Once you report on it, it becomes something you can plan and control. That is the point of this tool: help admins move from guessing to measuring, then from measuring to controlled action. Final thoughts SharePoint version history is valuable, but it needs governance at scale. Microsoft provides flexible version storage options, including automatic trimming and manual limits. The challenge for admins is understanding what exists today and how much storage could be recovered before applying changes. Apply-SPOVersions-Tool.ps1 helps with that process by combining policy discovery, report generation, What-If analysis, policy application, cleanup jobs, and job monitoring into a single admin workflow. More Information You can find the tool here: SPOVersions-ApplicationTools Microsoft's official planning guidance is here: Plan version storage for document libraries in SharePoint Suggested Reading for More Information: SharePoint Automatic Version History Cleanup (Intelligent Versioning)730Views0likes0CommentsThe new sharing experience is coming to SharePoint Online: What admins need to know
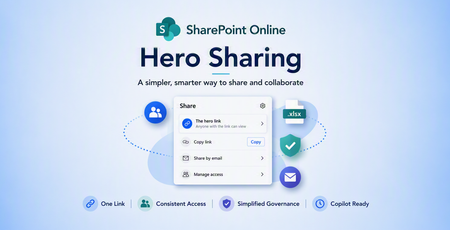
Microsoft 365 is introducing a simpler sharing experience centered around a reusable hero link. Here’s what SharePoint Online and Microsoft 365 admins should know about the new interface, key behavior changes, rollout preparation, and end-user communications.2.5KViews0likes1Comment
VDI, Teams, and what’s changing in 2026: VBSS becomes VMSS, and eCDN lands in the core license
Audience: Mission Critical customers running Microsoft Teams on virtualized desktop platforms (Citrix, AVD, Windows 365, VMware/Omnissa Horizon). TL;DR: Two Teams-on-VDI changes are converging: VMSS is already in Public Preview today as the successor to VBSS in the new VDI solution for Teams (Microsoft Learn - Screen sharing), and Microsoft eCDN is now included in Teams core license. This post previews the guidance our Support for Mission Critical (SfMC) Cloud Solution Architects (CSAs) are already walking customers through - because the cost of finding these issues in production is always higher than finding them in a pilot. Why we’re flagging this now SfMC exists to get ahead of changes like these. The SfMC CSA role is built on a simple principle: be a trusted advisor embedded alongside the customer team, not a reactive support line. SfMC CSAs work hand-in-hand with platform, network, security and service-ownership teams to build a deep “know-me” picture of the customer - their gold-image strategy, their VDI vendors, their peering topology, their CAB cadence, the history of what was tried and what didn’t stick. That context is the reason a readiness review lands in weeks, not months: your SfMC CSA isn’t starting from zero, they’re starting from knowing the estate. Goodbye VBSS, hello VMSS - and it’s here now Teams on VDI has used Video Based Screen Sharing (VBSS) for years - an efficient, encoded video stream for screen shares. That approach is being replaced by Virtual Machine Screen Sharing (VMSS) as part of Microsoft’s New VDI solution for Teams. This isn’t a future roadmap item - VMSS is available in Public Preview today across Azure Virtual Desktop, Windows 365, Citrix and Amazon WorkSpaces, with Omnissa following. Microsoft’s guidance and support matrix is live on Microsoft Learn: New VDI solution for Teams - Screen sharing. If you have users on a pilot ring on VDI, you can light this up now, simply by activating Public Preview for them. Support depends on three things moving together: the Teams client on the session host, the virtualization vendor’s optimization component (Citrix HDX / AVD Multimedia Redirection / VMware-Omnissa Media Optimization), and the endpoint client (Windows App, Citrix Workspace App, Horizon Client). Where any one of those lags, screen share quietly falls back to a lesser modality - users don’t raise tickets, they just tolerate worse quality. Because VMSS is already in preview, there’s a real window to get this right before it becomes the default path. On Mission Critical engagements, SfMC CSAs are already sitting with customer teams on VMSS readiness reviews: confirming client and plugin versions across the gold-image estate, rebuilding CQD dashboards so the baseline survives the cutover, and flagging any inline network appliance that still assumes the old VBSS flow. The “know-me” picture the SfMC CSA has built up makes that work fast - they already know which plugin versions the desktop team is running and which CAB window the next image refresh lands in. Microsoft eCDN is now in the core Teams license Microsoft eCDN - previously a paid add-on - is now included in the Microsoft Teams core license. It’s a WebRTC-based peer-to-peer mesh that offloads large-scale town halls and live events from the corporate WAN by peering video between clients on the same site. If the business case for the add-on never cleared, that objection is gone. But “included” doesn’t mean “working”. The failure mode we see is consistent: customers enable eCDN because “it’s free now”, but the peering never works - because the client-to-client path is blocked by security controls nobody remembers adding. The town hall runs, the WAN still saturates, the CIO asks why the thing that was supposed to fix it didn’t. The VDI infrastructure question Both changes elevate something that has always mattered but rarely been tested: VDI-to-VDI network reachability. The new Teams client needs to talk to Microsoft 365 media endpoints (usually already open) and to other VDI instances on the same site for eCDN peering. That second requirement is where customers are consistently caught out. Most VDI builds treat each session host as an island - east-west traffic between session hosts is blocked by NSG, hypervisor firewall, or micro-segmentation policy, because it was never needed. With eCDN in the box, it is now needed - and the blocks are often in places the virtualization team doesn’t own. This is where working hand-in-hand with the customer team pays off. The SfMC CSA convenes the platform, network, and security owners, translates the platform change into each team’s language, and makes sure nothing falls through the gaps between them. The specific hostnames, IP ranges, UDP/TCP port requirements, and peering-group configuration are all on Microsoft Learn (links below) - the hard work is operationalizing them against your estate, and that’s the work your SfMC CSA is built to drive. If two or more of these apply to your estate, book the conversation with your SfMC CSA now: Client version sprawl - multiple Teams versions in flight across gold images, or a long tail of unpatched Citrix Workspace App / Windows App / Horizon Client. Missing or partial CQD data - gaps in building/subnet mapping, “unknown” network location for a meaningful share of streams, dashboards still filtered on legacy VBSS modality tags. Recent east-west firewall changes - new micro-segmentation rollout, zero-trust project, or NSG rule consolidation in the last 12 months. Recent live-event pain - WAN saturation, buffering, or join failures on the last town hall. No eCDN subnet map, or a map that predates your current site/subnet topology. Proxy or TLS-inspection changes forcing Teams media through an inspection device rather than bypassing it. VPN full-tunnel without eCDN VPN exclusion. Upcoming large broadcast in the next 90 days. Closing thought VMSS is in Public Preview today and eCDN is already in your Teams license. The window to pilot, validate and harden is open right now - and it closes the moment either of these becomes the default path for your users. That’s what Support for Mission Critical is built for: Cloud Solution Architects working shoulder-to-shoulder with your team as trusted advisors, investing the time to genuinely know your estate - your platforms, your people, your change windows, your risks - so that when a shift like VMSS or eCDN arrives, the remediation plan is already half-written. Not a ticket-shop. A partnership. If you’re running Teams on VDI at scale and you haven’t had the VMSS + eCDN conversation with your SfMC CSA yet - that’s the next call to book. References New VDI solution for Teams - Screen sharing (VMSS, Public Preview) - https://learn.microsoft.com/en-us/microsoftteams/vdi-2#screen-sharing New VDI solution for Teams (overview) - https://learn.microsoft.com/en-us/microsoftteams/vdi-2 Microsoft Teams for VDI - install requirements - https://learn.microsoft.com/en-us/microsoftteams/teams-client-vdi-requirements-deploy Microsoft eCDN networking requirements - https://learn.microsoft.com/en-us/ecdn/technical-documentation/network-requirements eCDN peering groups and restrictions - https://learn.microsoft.com/en-us/ecdn/how-to/set-up-peering-groups Microsoft 365 URLs and IP address ranges - https://learn.microsoft.com/en-us/microsoft-365/enterprise/urls-and-ip-address-ranges544Views0likes0CommentsEnterprise Security Assessment: A Strategic Lens for Mission Critical Environments
Understanding Enterprise Security at Scale Understanding security posture at scale requires more than isolated control reviews or point‑in‑time assessments. The Enterprise Security Assessment (ESA) helps organizations understand their security posture across Azure, Microsoft 365, and hybrid environments from a true enterprise perspective. Instead of assessing individual services or workloads in isolation, ESA provides a single, enterprise‑wide view of security. By examining identity, data security, endpoints, threat protection, and cloud infrastructure together, ESA helps uncover gaps that often span multiple teams and platforms. This broader perspective enables clearer prioritization, stronger alignment across security teams, and a more resilient foundation for long‑term security improvement. ESA complements other Microsoft assessments, such as workload‑specific reviews, by connecting the bigger picture - to align security priorities across teams and platforms, fostering a more cohesive and resilient security approach. From Standard Engagement to Strategic Partnership An Enterprise Security Assessment is typically delivered as a focused engagement designed to establish an enterprise‑wide view of security posture. At Microsoft, we begin by reviewing Secure Score insights, analyzing a defined set of core security datasets, and correlating those signals across Azure and Microsoft 365. For many organizations, this approach works well. Collecting and evaluating these datasets provides a high‑level understanding of security posture, highlights common gaps, and identifies priority improvement areas. In standard enterprise environments, ESA delivers actionable insights with minimal disruption and sets a solid foundation for security improvements. How ESA Evolves in Mission‑Critical Environments In large or mission‑critical environments, security is often distributed across multiple teams and tools. Operational constraints, regulatory requirements, and business dependencies introduce complexity that standard assessments cannot fully capture. For mission‑critical customers, ESA goes beyond a baseline review and becomes more consultative. This typically includes: 📝 Structured discovery sessions across multiple security domains 🤝 Deep‑dive workshops with specialized teams 🎯 Validation of findings against real‑world operating models 🔄 Iterative analysis to validate findings against real operational conditions This ensures recommendations reflect how security is actually managed, not just how it is documented. Why Going Deeper Matters to Customers For organizations operating at scale, this consultative ESA approach delivers significantly more than a standard readout: A realistic, enterprise‑wide understanding of security posture, grounded in actual configurations and operating models Clear visibility into cross‑team dependencies and systemic risks Prioritized recommendations aligned to existing licenses, third‑party tools, and regulatory requirements A realistic, phased security roadmap focused on adoption, not theory The result is a clear starting point for security improvements that teams can execute with confidence. A Continuous Improvement Model ESA is not a one‑time exercise. For most customers, it becomes the foundation for ongoing security maturity. Once a baseline is established, future ESAs are faster and more efficient, allowing organizations to track progress, validate improvements, and maintain alignment as environments evolve. Over time, ESA functions as an annual enterprise security health check, supported by follow‑up reviews and continuous improvement. In mission‑critical environments, this means: The first ESA requires deeper engagement investment Building cross-team alignment takes time Future assessments become smoother and more efficient once a baseline is established Over time, ESA functions as an enterprise security health check that supports continuous improvement. It works best when treated as a starting point for continuous improvement, and Enterprise Security Alignment. What Customers Gain from an Enterprise Security Assessment A true enterprise view Visibility across identity, data, devices, cloud workloads, and threat signals - without losing sight of critical details. A customized security roadmap Recommendations aligned to existing licenses, third‑party tools, hybrid footprints, and regulatory requirements - making adoption realistic, not aspirational. Momentum and measurability Many organizations track progress using dashboards or scorecards to measure improvement and sustain focus over time. Repeatability Once a baseline is established, future ESAs become easier and more efficient - serving as a regular health check rather than a brand‑new effort. A consultative model ESA delivers far more value than a one‑time assessment by fostering collaboration, shared understanding, and long‑term alignment. A Foundation for Continuous Improvement Enterprise security is complex, especially at scale. In mission‑critical environments, security success depends on embracing complexity, aligning teams, and moving beyond a standard assessment playbook. An Enterprise Security Assessment is more than a snapshot. It’s an opportunity to build alignment, inform strategy, and create a resilient security foundation that evolves with the organization.1.6KViews3likes0CommentsLegacy SharePoint Authentication (IDCRL) Is Retiring — What to Do Before May 1, 2026
Audience: SharePoint admins, M365 admins, and anyone running automations that access SharePoint Online/OneDrive. This post explains what’s changing, how to detect legacy sign-ins, and the practical steps to move to modern authentication (OAuth) before the cutoff dates. Microsoft is turning off a legacy SharePoint sign-in method called IDCRL (Identity Client Run Time Library). If you only access SharePoint and OneDrive through the browser or Microsoft 365 apps, you’re probably fine—but if you run scripts, Power BI refreshes, Power Automate flows, or third-party tools that store a username/password, you’ll want to update those connections to Modern Authentication (OAuth/OpenID Connect) now to avoid outages. TL:DR (What you need to know) Who’s most affected: Any non-interactive connection that stores a SharePoint username/password (scripts, scheduled jobs, Power BI refreshes, Power Automate flows, and third-party tools). What’s changing: Microsoft is retiring legacy SharePoint authentication (IDCRL) for SharePoint Online and OneDrive for Business. What to do: Move those connections to modern authentication (OAuth/OpenID Connect) using supported connectors, modules, or app registrations. Key dates: Mid-February 2026 (legacy logins blocked by default), April 30, 2026 (last day an admin extension can keep legacy auth temporarily allowed), and May 1, 2026 (IDCRL fully retired and cannot be re-enabled). Quick checklist Inventory: list SharePoint connections you own (scripts, Power BI, Power Automate, third-party tools). Spot legacy auth: saved passwords, “Basic” auth, or PowerShell -Credential/SharePointOnlineCredentials. Migrate: switch to Modern Authentication (OAuth) using supported connectors/modules. Test: run the script/refresh/flow end-to-end and confirm it still works. Finish early: complete updates ahead of mid-February 2026, and no later than May 1, 2026. What Is IDCRL and Why Is It Going Away? IDCRL (Identity Client Run Time Library) is an older SharePoint sign-in approach used by some legacy apps and scripts. In plain terms, it’s the “just pass a username and password” style of authentication. While most interactive sign-ins moved to modern authentication years ago, some behind-the-scenes tools still use IDCRL—often without the person who set them up realizing it. Why is Microsoft retiring it? Because password-based legacy flows are harder to protect and don’t align well with today’s security controls. Modern Authentication uses OpenID Connect and OAuth 2.0 with short-lived tokens (not stored passwords) and works cleanly with protections like MFA and Conditional Access. This is part of Microsoft’s broader “secure by default” direction—and it reduces risk for both individual accounts and the organization. From Microsoft’s guidance, the main shift is stop sending passwords to SharePoint and start acquiring OAuth access tokens via the Microsoft identity platform. For custom solutions, that typically means using MSAL (Microsoft Authentication Library) and either an interactive sign-in (delegated permissions) or an app-only approach (application permissions) depending on your scenario. Key Dates and Impact on Users Here’s the timeline Microsoft shared for SharePoint Online and OneDrive for Business: mid-February 2026 is when remaining legacy (IDCRL) logins will be blocked by default. If customers need additional time to complete migration, tenant admins can temporarily allow legacy authentication again (extension) until April 30, 2026. Then, on May 1, 2026, IDCRL is fully retired and cannot be re-enabled. In other words, anything still connected with an embedded username/password is likely to break. The risk is concentrated in custom integrations and automations (scripts, refreshes, flows, vendor tools) that still rely on legacy auth. How Do I Know If I’m Using Legacy Authentication? If you only access SharePoint/OneDrive through the browser, Microsoft 365 apps, or standard Microsoft connectors, you’re typically already using modern authentication. A simple rule of thumb: if a script, dataset, flow, or tool stores a SharePoint username/password, plan to modernize it. For the most common patterns and what to switch to, see How to Transition to Modern Authentication (Action Plan) below. Check Microsoft Purview audit logs (recommended) If you want a definitive answer (beyond “does this script store a password?”), review your tenant’s activity in Microsoft Purview audit and search for IDCRLSuccessSignIn events. Open the Microsoft Purview portal and go to Audit. Run an Audit search for an appropriate time range (start with the last 30–60 days). Under Activities (operations name), select IDCRLSuccessSignIn. Submit the search, review results, then export (download) the results for deeper filtering in Excel. What to look for in the export For IDCRLSuccessSignIn results, focus on the user/account, time pattern, and any available client/app details (for example, user agent, application name, or client IP) to pinpoint what’s generating the legacy sign-ins. Look for patterns that match automation: recurring events (hourly/daily), service accounts, or sign-ins that line up with scheduled refreshes/flows. Then map those timestamps back to likely owners: Power BI datasets, Power Automate flows, scripts, or vendor tools. If your export includes client/app identifiers, note any unexpected apps accessing SharePoint; those are the best candidates to validate and migrate first. Cross-check suspicious entries with your inventory (scripts, Power BI datasets, Power Automate flows, vendor tools) and then update the matching connection to OAuth. Not sure whether something you own is using legacy auth? A good starting point is to check how the connection was set up: if it relies on a stored password, plan to update it. If you’re still unsure, reach out to IT support or the vendor/developer of the tool—many providers have already published “modern auth” upgrade steps. How to Transition to Modern Authentication (Action Plan) If you own anything that connects to SharePoint behind the scenes, the goal is simple: move every connection to Modern Authentication and test it end-to-end well before the cutoff. Below are the most common “legacy” patterns and what to switch to. Common legacy scenarios (and modern replacement) 1) PowerShell scripts or custom code that pass a username/password If you’re using older SharePoint Online PowerShell patterns like -Credential, Get-Credential or SharePointOnlineCredentials, plan to update. Use updated modules that default to OAuth or use PnP PowerShell with interactive sign-in or an Entra app (certificate/client ID) rather than stored credentials. Additionally, according to Microsoft’s announcement in the M365 admin center (MC1188595), the Microsoft.Online.SharePoint.PowerShell module (version 16.0.26712.12000 or newer) supports app-only authentication with a certificate and an Entra app registration (instead of legacy username/password patterns), using Connect-SPOService. For custom apps, adopt token-based auth via MSAL and supported SharePoint libraries. Example: $appID = "1e499dc4-1988-48ef-8f4f-9756f4f04548" # This is your Entra App ID $tenant = "9cfc52cb-53da-4154-67e9-b20b170b7ba3" # This is your Tenant ID $thumbprint = "6EAD7303b5C7E27Dc4245989AD554642940BA093" # This is certificate thumbprint $cert = Get-ChildItem Cert:\LocalMachine\My\$thumbprint Connect-SPOService -Url 'https://contoso-admin.sharepoint.com' -Certificate $cert -ClientId $appID -TenantId $tenant 2) Power BI reports that connect to SharePoint using “Basic” credentials In Power BI Desktop, open Data source settings for SharePoint connections and switch the authentication method to Microsoft (Organizational) Account / OAuth2. After updating, re-publish and confirm scheduled refresh still works. 3) Power Automate flows (or workflows) that store a username/password Prefer the official SharePoint connector (modern auth by default) over custom HTTP calls with stored credentials. For custom connectors, use an Azure AD app registration and configure OAuth 2.0 so the flow uses tokens, not passwords. 4) Third-party tools (migration/sync/reporting) that use “other user” or stored credentials Update the tool to the latest version and confirm it supports modern authentication for SharePoint Online. Run a full test (connect, read/write, scheduled jobs) well before the cutoff dates. A few best practices while you’re updating Don’t delay: Modernize your connections before mid-February 2026 (when legacy logins are blocked by default), and no later than May 1, 2026. Extension (if needed): If you need more time, tenant admins can temporarily allow legacy authentication until April 30, 2026. Treat this as short-term mitigation while your complete migration and validation—not a long-term solution. Use official solutions: Where possible, use Microsoft’s supported clients and connectors (like updated SharePoint PowerShell modules, Power BI’s OAuth login, and Power Automate SharePoint actions) instead of hard-coding credentials. These default options are already used by modern auth and will help ensure access continues. Improve security: Embrace modern authentication to benefit from better security (support for MFA, conditional access, etc.) and to eliminate reliance on outdated passwords or legacy API calls. Get help if needed: If you’re unsure how to update a specific application or script, contact your IT support team or the vendor/developer of the tool. PowerShell: temporarily allow legacy authentication (extension) If an extension is required, tenant admins can use SharePoint Online PowerShell to temporarily allow legacy authentication by setting AllowLegacyAuthProtocolsEnabledSetting and LegacyAuthProtocolsEnabled to $true. Set-SPOTenant -AllowLegacyAuthProtocolsEnabledSetting $true Set-SPOTenant -LegacyAuthProtocolsEnabled $true Recommendation: Block time now to inventory and modernize your SharePoint connections, then run a full end-to-end test. Doing this early helps you avoid last-minute troubleshooting when a refresh, script, or workflow suddenly fails. Next steps (recommended) Run a Purview audit search for IDCRLSuccessSignIn (last 30–60 days) and identify the owners of each recurring legacy sign-in. Prioritize and modernize the highest-impact items first (scheduled Power BI refreshes, production automations, service accounts, and vendor tools), then test end-to-end. If you must use the temporary extension, set a firm internal deadline to turn it back off and complete migration before May 1, 2026. Helpful Resources and Support For further reading and technical guidance, please see the following official resource: Microsoft 365 Developer Blog – Migrating from IDCRL to Modern Authentication in SharePoint – Explains the retirement decision and provides developer-oriented steps for migrating code and scripts to MSAL/OAuth. Conclusion and call to action IDCRL retirement is one of those changes that is easy to miss until something breaks—because the impact shows up in background jobs, not in day-to-day browser use. The good news is that the fix is straightforward: identify anything still using stored credentials and move it to modern authentication (OAuth) well before the deadline. Inventory: list every script, dataset, flow, and vendor tool that connects to SharePoint/OneDrive. Modernize: replace embedded usernames/passwords with OAuth via supported connectors, updated modules, or an Entra app registration. Test: run each workload end-to-end (including scheduled runs) and confirm it behaves as expected. Timeline reminder: legacy logins are blocked by default in mid-February 2026, extensions (if used) run through April 30, 2026, and IDCRL is fully retired on May 1, 2026. Q&A Q: Will this impact end users who only use SharePoint in a browser or the Microsoft 365 apps? A: Typically, no. Most interactive sign-ins already use modern authentication. The main risk is with background processes that still send stored usernames/passwords. Q: What’s most likely to break? A: Anything non-interactive that connects to SharePoint/OneDrive using embedded credentials—PowerShell scripts, scheduled jobs, Power BI refreshes configured with “Basic” credentials, Power Automate flows/custom connectors that store passwords, and some third-party tools. Q: How can I confirm whether my tenant is still using IDCRL? A: Use Microsoft Purview audit and search for IDCRLSuccessSignIn. Export the results and look for recurring patterns (service accounts, scheduled times, consistent client/app details) to identify the source. Q: What happens in mid-February 2026 vs. May 1, 2026? A: In mid-February 2026, legacy (IDCRL) logins are blocked by default—so legacy-dependent workloads may start failing unless updated (or temporarily re-enabled). On May 1, 2026, IDCRL is fully retired and cannot be re-enabled. Q: We need more time—what does the “extension” do? A: It temporarily allows legacy authentication again through April 30, 2026 while you complete migration. You can enable it with: Set-SPOTenant -AllowLegacyAuthProtocolsEnabledSetting $true Set-SPOTenant -LegacyAuthProtocolsEnabled $true Use this as a short-term mitigation and set a firm plan to turn it back off after you modernize. Q: What’s the recommended modern auth approach for PowerShell? A: Use modern modules and token-based sign-in (OAuth). For automation, use an Entra app registration with a certificate (app-only) where appropriate. The updated Microsoft.Online.SharePoint.PowerShell module (v16.0.26712.12000+) also supports Connect-SPOService with certificate-based app-only authentication. Q: What should I do for Power BI datasets that connect to SharePoint? A: In Power BI Desktop, update the SharePoint data source authentication to Microsoft (Organizational) Account / OAuth2, then republish and validate that scheduled refresh succeeds. Q: What about Power Automate flows or custom connectors? A: Prefer the built-in SharePoint connector (modern auth by default). If you’re using custom HTTP actions or custom connectors, update them to use OAuth 2.0 with an Entra app registration rather than stored credentials. Admin email template (notify owners identified in Purview) Use the template below to contact the user/account you found in your IDCRLSuccessSignIn audit export. Copy/paste it into Outlook, then fill in the placeholders (timestamps, site, and any client details) so the recipient can quickly identify the workload. Subject: Action required: Update a SharePoint/OneDrive connection using legacy authentication (IDCRL) Hi <Name>, We’re reaching out because Microsoft is retiring legacy SharePoint authentication (IDCRL). Our audit review indicates a legacy sign-in associated with your account. If the underlying workload isn’t updated, it may fail when legacy authentication is blocked/retired. What we observed (from Microsoft Purview audit) User/account: <UPN or service account> Activity: IDCRLSuccessSignIn Timestamp(s): <YYYY-MM-DD HH:MM TZ> (add 2–3 examples if recurring) SharePoint site (if known): <site URL> Client details (if available): <client/app, user agent, IP> What we need from you Please confirm what workload is generating this sign-in (for example: Power BI dataset refresh, Power Automate flow, PowerShell script, scheduled job, or a third-party tool). If you’re not the owner, please reply with the correct owner/contact (a team name or distribution list is fine). Timeline Mid-February 2026: legacy logins blocked by default May 1, 2026: IDCRL fully retired (cannot be re-enabled) Note: if an extension is used, it is temporary and runs through April 30, 2026. How we can help We can help update the connection to modern authentication (OAuth). In many cases this is as simple as re-authenticating with “Microsoft (Organizational) Account”/OAuth (Power BI), using the SharePoint connector (Power Automate), or updating scripts to use an Entra app registration with certificate-based authentication. Please reply by: <target response date> Thanks, <Your name> <Team/Role> <Contact info> Tip: Consider including 2–3 sample timestamps from the export (especially recurring ones) and, if you have it, the dataset/flow name or server/job name that matches the schedule. If you don’t get a response, follow up with the user’s manager or the owning team for the workload, and consider using the temporary extension only as a short-term mitigation while ownership is confirmed.34KViews3likes7Comments
SharePoint and OneDrive Site User ID Mismatch Explored
In this post, we walk through why users who look ‘healthy’ on the surface can still experience issues, and we cover practical ways to prevent and fix them across identity lifecycle management, rehire scenarios, tenant changes, and operational hygiene. Who this is for Microsoft 365 / SharePoint admins troubleshooting unexpected Access denied issues in SharePoint or OneDrive. Identity admins managing offboarding, rehiring, account restores, or account recreation in Microsoft Entra ID. Migration teams performing tenant-to-tenant migrations, domain changes, or identity consolidation. Background Design Explained When a user is created in Microsoft Entra ID, there is no guarantee that the User Principal Name (UPN) is unique so there is a unique id (historically known as PUID) that is created and passed to SharePoint. When a user is granted permission to a SharePoint or OneDrive Site or file explicitly the user information is added to a hidden list User Information List (UIL) that stores basic details about the users. Note: For users that are given permission via Office 365 Group, Security group, sharing link, the user profile information is not added until the first time the user interacts with the site or file. The users unique id, UPN, and other user information will be added to the UIL. Note: The User Information List (UIL) is maintained per site collection and is separate from Microsoft Entra ID and SharePoint User Profile Service. As part of authorization, the unique id that is found in the UIL is evaluated to the unique id that is passed via the authentication token and if they do not match then the authorization fails and the user receives “Access Denied”. Scenario: Taylor Smith (UPN taylor.smith@contoso.com) has confidential SharePoint/OneDrive access. Sometime after Taylor leaves the company, a new user joins the company with the same name and is assigned the same UPN. The new Taylor should not inherit the former Taylor’s access or content. SharePoint prevents this by checking a unique identifier via the User Information List (UIL), ensuring only matching IDs can access content. Considerations for users removed from Entra ID It’s common to notice users removed from Entra ID still showing up in SharePoint or OneDrive. SharePoint intentionally retains these accounts in the site’s User Information List to preserve: Document meta data such as “Created By” or “Modified By” information Audit and compliance records Legacy permission references Sharing and version history integrity As a result, terminated or mail-disabled users may still appear in: Site People lists (e.g., _layouts/15/people.aspx) Group‑connected site membership views SharePoint user pickers This visibility is expected and not a security risk because: A disabled or deleted Entra ID account cannot authenticate SharePoint permissions are not re‑granted The presence of the user record does not re‑enable access Preventive Measures to Avoid Site User ID Mismatches Preventing Site ID mismatches is largely about identity management. The goal is to avoid situations where a SharePoint site has one ID for a user and Entra ID has another. Here are strategies to minimize the chances of a mismatch occurring: Identity lifecycle best practices Avoid reusing a former employee’s UPN: If possible, do not create a new account with the same username. If you must reuse, ensure you’ve cleaned up the old account’s SharePoint presence (see next points) before the new user starts using SharePoint. Rehire scenarios Leverage account restores when rehiring: If an employee returns within Entra ID’s 30-day soft-delete window, restore the original account in Entra ID instead of creating a new one. This way, the user’s PUID is the same, and no mismatch will occur because as far as SharePoint is concerned it’s the same account. If outside the 30 days, restoration isn’t possible then extra cleanup will be needed. Educate and coordinate with HR/IT for re-hires: Often, IT might not realize that creating a returning employee’s account from scratch can cause access issues. Train staff on Site ID mismatches so they know to restore the old account when possible or run diagnostics/cleanup quickly after creating a new account. A standard operating procedure for rehired employee account setup that includes checking for SharePoint conflicts is valuable. Change UPNs by renaming, not recreating: If you need to change a user’s UPN (for example, after a name change or domain change), rename the existing account (Plan and troubleshoot User Principal Name changes in Microsoft Entra ID) rather than delete and create new. Entra ID allows updating the UPN of a user. SharePoint will typically update the user info entry’s UPN on next sync. This way, the user’s PUID stays consistent. Documentation: How UPN changes affect OneDrive - SharePoint in Microsoft 365 | Microsoft Learn Change your SharePoint domain name - SharePoint in Microsoft 365 | Microsoft Learn Tenant/domain changes Gracefully handle corporate domain transitions: In tenant-to-tenant migrations or domain swaps (such as consolidating two Entra ID tenants), be aware of PUIDs. Use migration tools that map old IDs to new ones or plan to run the fixes post-migration if users receive new IDs. If user/profile mapping isn’t available, treat it like bulk rehiring. Operational hygiene Implement a UPN reuse delay or alteration: Some organizations choose to alter the UPN of departing users for a period to prevent accidental reuse (for example, rename jdoe@company.com to jdoe_deactivated@company.com) before deletion. If your policies allow, avoiding UPN reuse entirely is the simplest way to prevent identity confusion. Maintain documentation of user’s site access: Knowing which sites a user previously accessed makes it easier to clean up conflicts and restore access for legitimate rehires. Centralized, group-based permission management can also simplify re-permissioning once the mismatch is fixed. We have seen this accomplished in the following ways: Microsoft Graph Data Connect for SharePoint Custom scripts and Tools Third Party Tools Clear SharePoint user info on departure (if feasible): For users who are permanently gone, you can remove them from SharePoint site collections, so old UIL entries don’t linger and later conflict with a reused UPN. This cleanup can be part of an offboarding checklist when appropriate. The cleanup will be 2 steps: Locate which sites a user previously had access to: If the user has been deleted from Entra then the use of custom scripts will be needed to identify sites that the user previously had access to. Example Script SPO-Sharing-Scripts/Readme-FindAccess-SPO.md at main · mikelee1313/SPO-Sharing-Scripts · GitHub If the user still exists in Entra, use the SharePoint Data Access Governance reports to locate sites accessible for a given user. Data access governance reports - get site permission report for given users Once you have a list of sites that the user has accessed, you will need to remove them from that site. Create a script utilizing remove-spouser (Remove users from SharePoint) for all sites that the user had access to previously. Process for guest users: If you remove guest users, consider also cleaning them from site permissions if they might be re-invited later. Cleanup Site User ID Mismatches Once there is a user encountering a Site User ID Mismatch then you will have to do a cleanup reactively. Review the article and use the tools outlined to address the OneDrive site as well as critical sites. If you do not need an inventory of sites, the user had access to previously to facilitate restoring access to those files/sites then you could do a cleanup of the user through script. The following is an example of such a script: If a user encounters a Site User ID Mismatch, follow these steps to resolve the issue: Review the article "Fix site user ID mismatch in SharePoint or OneDrive" for guidance on addressing mismatches. Use the tools outlined in the article to fix issues with the OneDrive site and any other critical sites. If you do not need an inventory of sites the user previously accessed, proceed with cleaning up the user using a script. Refer to SPO-Sharing-Scripts/Readme-SPOUserRemover.md at main · mikelee1313/SPO-Sharing-Scripts · GitHub for details that could be used. Use this option if restoring access to those files or sites is not required. If you need an inventory of sites that the user previously had access to provide access later, then you will need a script or report of the permission inventory for the site prior to removing the user from the site. Users can then move forward with sharing or resharing content/sites to the new user instance, which will write a new entry to the user information list, with the correct unique ID, allowing access. Summary User Site ID mismatches occur when a user is recreated with the same UPN but a different underlying identity, leading to SharePoint or OneDrive access issues. SharePoint authorizes access using a unique ID (PUID) stored per site in the User Information List (UIL), not just the users' UPN. Disabled or deleted users may still appear in SharePoint by design to preserve audit history and document ownership—this is not a security issue. Prevention focuses on avoiding UPN reuse through process changes. Resolution options depend on the scenario: admins can either remove the old user entry directly if access history is not needed, or inventory and clean up affected sites before resharing content to the new account, so the correct ID is written. Further Reading Fix site user ID mismatch in SharePoint or OneDrive - SharePoint Remove users from SharePoint This script will create a report containing OD4B sites and the value of the AadObjectId stored in SharePoint and Azure Active Directory. This data can be used to help detect Site ID mismatches of OD4B site owners. · GitHub SPO-Sharing-Scripts/Readme-SPOUserRemover.md at main · mikelee1313/SPO-Sharing-Scripts · GitHub4.8KViews3likes2CommentsFinding and Remediating EWS App Usage Before Retirement
In this post, we wanted to share a practical walk-through of discovering which Azure AD app registrations are still using Exchange Web Services (EWS), plus what the Kiosk/Frontline license changes mean as you plan your move to Microsoft Graph. Microsoft has announced that Exchange Online EWS blocking with start on October 1, 2026. If you have line-of-business apps, third-party tools, or automation that still depends on EWS, you need two things: (1) an inventory of what’s using EWS today, and (2) a migration plan to supported alternatives – typically Microsoft Graph. What’s changing (and why you should care now) EWS retirement in Exchange Online: Microsoft will start blocking EWS requests to Exchange Online on October 1, 2026. The guidance is to migrate integrations to Microsoft Graph. EWS access changes for Kiosk / Frontline licenses: Starting at the end of June 2026, Microsoft will start blocking EWS access for users without license rights to EWS (for example, certain Kiosk and Frontline Worker license types). This can cause EWS-based integrations for such licensed users to fail before the broader October retirement date. Even if you plan to complete your Graph migration well ahead of October 2026, the end-of-June 2026 licensing-related blocks mean you should validate whether any users with those licenses assigned use EWS. That’s where the Exchange-App-Usage-Reporting script is useful: it helps you find app registrations with EWS permissions and correlate them with recent sign-in activity so you can prioritize remediation. Start here: check your Message Center first The first thing you can do is to check your tenant Message Center (you need either Global Admin or Privacy Reader roles) and search for "Update active Exchange Web Services Applications" in Inbox or Archive. If you do not have such messages, you likely do not have EWS usage in your tenant and are not impacted by this deprecation. We started to send EWS usage messages to all tenants in late December 2025. What the Exchange-App-Usage-Reporting script does The script is designed to answer a practical question: Which Azure AD app registrations in my tenant have EWS permissions, and are they still being used? At a high level, it: Discovers application registrations that have permissions associated with Exchange/EWS-related access. Queries sign-in activity for those applications to determine active applications. Queries audit logs for EWS activity within the tenant. Outputs report files that you can sort and share with app owners. Outputs a user license report to help identify kiosk or frontline workers. How the script complements the Microsoft 365 admin center EWS usage report For customers in our WW service, the Microsoft 365 admin center EWS usage report is a great starting point because it summarizes EWS activity across your tenant and breaks down which EWS SOAP actions are being called and their volumes over time. That helps you quantify overall EWS dependency and spot the heaviest EWS workloads. Where teams often get stuck is turning that usage signal into an actionable remediation plan (for example, identifying the exact Entra ID app registration/service principal, determining whether it is still actively used, and finding the people and mailboxes affected). Exchange-App-Usage-Reporting script is intended to bridge that gap by adding identity and operational context around EWS usage by: App registration and ownership context: identifies Entra ID app registrations/service principals with EWS-related permissions so you can immediately pivot from “an app is calling EWS” to “this is the app object to remediate,” then route it to the right owner/team. Recency and “is it still used?” signals: correlates apps to sign-in activity so you can prioritize the apps that are actively authenticating today versus stale registrations that may be safe to validate/decommission. Authentication + permission model visibility: helps you distinguish whether usage is tied to application permissions versus delegated patterns, which matters for choosing the right Microsoft Graph migration approach and designing least-privilege access. Mailbox population risk (Kiosk/Frontline): adds a user license report so you can quickly identify whether the EWS-dependent workflow touches mailboxes that may lose EWS access earlier (end of June 2026). Exportable, app-centric worklists: produces CSVs you can sort/share (for example, by last sign-in) to drive an engineering backlog: confirm owner, confirm scenario, map EWS operations to Graph endpoints, and track progress to zero. In practice, use the admin center report to understand what EWS operations are happening and at what scale, then use this script to determine which app registrations are responsible, who owns them, whether they’re still active, and which mailbox/license populations are most likely to experience impact first. Customers with tenants that are not in our WW cloud should rely heavily on the script as admin center reports are not available. Step-by-step: run the script and generate the report 1) Download the code The repository for this solution can be found here Note: The following permissions are required for the application: AuditLogsQuery.ReadAll to query the audit logs for EWS activity Application.Read.All to locate app registrations AuditLogs.Read.All to query sign-in activity Directory.Read.All to query user license information Read this to create the Entra Admin Center application for the script. 2) Get active applications Open a PowerShell session and change to the folder where you downloaded the script. You may need to unblock the files (for example, by using Unblock-File) before execution. Run the script with the following example syntax: .\Find-EwsUsage.ps1 -OutputPath C:\Temp\Output -OAuthCertificate 8865BEC624B02FA0DE9586D13186ABC8BE265917 -CertificateStore CurrentUser -OAuthClientId 7a305061-1343-49c3-a469-378de4dbd90d -OAuthTenantId 9101fc97-5be5-4438-a1d7-83e051e52057 -PermissionType Application -Operation GetEwsActivity The output provides a list of applications with EWS permissions and the last sign-in for the associated service principal. A CSV file called App-SignInActivity-yyyyMMddhhmm will be created in the specified output path. 3) Get sign-in activity report for an application Use the output from the previous step to get the sign-in activity for an application (you need to run this step for each application). Depending on the size of your tenant, you may also need to adjust the StartDate, EndDate, and have the Interval be 1 hour. .\Find-EwsUsage.ps1 -OutputPath C:\Temp\Output -OAuthCertificate 8865BEC624B02FA0DE9586D13186ABC8BE265917 -CertificateStore CurrentUser -OAuthClientId 7a305061-1343-49c3-a469-378de4dbd90d -OAuthTenantId 9101fc97-5be5-4438-a1d7-83e051e52057 -PermissionType Application -Operation GetAppUsage -QueryType SignInLogs -Name TJM-EWS-SoftDelete-Script -AppId 86277a5c-d649-46fc-8bf6-48e2a684624b -StartDate (Get-Date).AddDays(-30) -EndDate (Get-Date).AddDays(-14) -Interval 8 The output provides a list of users that have signed into the application in the specified period requested. A CSV file called <AppId>-SignInEvents-yyyyMMddhhmm will be created in the specified output path. 4) Get user license information (Kiosk and Frontline identification) For those organizations that have users with licenses that may be impacted by the upcoming enforcement in June, a report of user licenses can also be generated to help identify potential impact. The output from the previous step can be used to generate this license report. A single CSV file with the results from each application can also be merged into a single user license report. .\Find-EwsUsage.ps1 -OutputPath C:\Temp\Output -OAuthCertificate 8865BEC624B02FA0DE9586D13186ABC8BE265917 -CertificateStore CurrentUser -OAuthClientId 7a305061-1343-49c3-a469-378de4dbd90d -OAuthTenantId 9101fc97-5be5-4438-a1d7-83e051e52057 -PermissionType Application -Operation GetUserLicenses -AppUsageSignInCsv C:\Temp\Output\86277a5c-d649-46fc-8bf6-48e2a684624b-SignInEvents-20260203122538.csv How to interpret the output (and prioritize fixes) Once you have the output files, sort by “last sign-in”. Apps with recent activity are your highest priority because they’re more likely to break production workloads when EWS is blocked. Apps with no sign-in data may be dormant, misconfigured, or retired—treat these as “needs validation,” not automatically “safe to ignore.” Identify the owner of each app registration (or the business system it belongs to). Confirm the workload: mailbox access patterns (read, send, calendar, contacts, etc.) and whether it uses application or delegated access. Check mailbox populations the app touches—especially if any are assigned Kiosk / Frontline licenses that may lose EWS access at the end of June 2026. Choose the migration target: Microsoft Graph API equivalents, supported Exchange Online features, or a vendor upgrade that removes EWS dependency. Don’t miss the Kiosk / Frontline Worker EWS blocks (end of June 2026) Recommended validation playbook: Use the script output to build a shortlist of actively used EWS-enabled apps. For each app, determine which mailboxes it accesses (application access policies, RBAC, service accounts, shared mailboxes, or user populations). Cross-check those mailboxes’ license assignments for Kiosk / Frontline SKUs that may not include EWS rights. Run a controlled test (non-production where possible) to confirm whether the integration depends on EWS for those mailboxes and whether the vendor has a Graph-based update available. Evaluate if adding a different type of license for specific users is needed (for example, adding an Exchange Online Plan 1 or 2, which can still use EWS until October deprecation.) Remediation options (what to do when you find an EWS dependency) Upgrade or reconfigure the product: Many vendors have already moved to Microsoft Graph. Engage the vendor and request their Graph migration guidance and timelines. Refactor custom code: Map EWS operations (mail, calendar, contacts) to Microsoft Graph endpoints and re-test auth flows, throttling, and permissions. More information on mappings can be found here. Reduce blast radius: If an app truly must remain temporarily, scope it tightly using least-privilege permissions and (where applicable) scope the mailbox it has access to using RBAC—then treat it as a short-term exception with an expiration date. Quick checklist Run Exchange-App-Usage-Reporting and identify apps with recent EWS sign-in activity. Track down app owners and document which mailboxes/workloads each app touches. Assess exposure to the end-of-June 2026 licensing-related EWS blocks (Kiosk/Frontline). Prioritize migrations to Microsoft Graph and validate functionality end-to-end. Re-run the report periodically to confirm EWS usage is trending to zero.1.5KViews0likes0CommentsCreate an Organizational Assets Library (including Multi-Geo & Information Barriers guidance)
Overview This guide walks through a practical approach to setting up SharePoint Online (SPO) Organizational Assets Libraries (OAL). It includes optional guidance for more complex tenants—such as Multi-Geo and Information Barriers (IB) - because those scenarios are often under-documented. What you’ll accomplish: Create and register Organizational Assets Libraries so templates, fonts, and brand images are available in Office apps, with notes for Multi-Geo, Information Barriers, Brand Center, and Copilot integration where applicable. Applies to: Standard (single-geo) tenants, Multi-Geo tenants, tenants with Information Barriers, and environments using Brand Center and/or Copilot features for organizational assets. Quick start (standard single-geo tenant) Create a SharePoint site to host Organizational Assets Libraries (often the Brand Center site). Create three document libraries (typical): ImageAssets, DocumentAssets (templates), FontAssets. Grant your intended audience Read access (commonly Everyone except external users via the site’s Visitors group). Enable the SharePoint Online Public CDN (tenant setting). Add a Public CDN origin for each library path (one origin per library). Upload approved assets (images, templates, fonts) into their respective libraries. Register each library with Add-SPOOrgAssetsLibrary (repeat per library). Validate registration and end-user experience, then allow up to 24 hours for Office apps to reflect changes. If you’re Multi-Geo or using Information Barriers: follow the same flow, but repeat per geo and complete registration while the site is in Open IB mode (details below). Key constraints and gotchas Multi-Geo: plan a repeatable per-geo pattern (typically one Org Assets site + matching libraries per geo) and keep naming consistent. Information Barriers (IB): Add-SPOOrgAssetsLibrary cannot be run when the target site is segmented—create and register libraries first (site in Open mode), then segment if needed. The “Everyone except external users” principal may be hidden by default, but it’s still commonly used for broad read access. Brand Center: many orgs host Org Assets Libraries in the Brand Center site; if Brand Center is created after libraries exist, it typically detects and uses them automatically. A public CDN must be enabled to support Organizational Assets Libraries. The “Everyone except external users” principal may be hidden by default, but it’s still commonly used for broad read access. Brand Center: many orgs host Org Assets Libraries in the Brand Center site; if Brand Center is created after libraries exist, it typically detects and uses them automatically. A public CDN must be enabled to support Organizational Assets Libraries. Implementation steps Prerequisites: SharePoint Online Management Shell access (or equivalent), permission to manage tenant settings, and the ability to create sites and libraries in each geo. Create a site to host your Organizational Assets Libraries (many orgs use a communication site). For ease of support, keep the site name, library names, and structure consistent over time. Note: A Communication site is recommended, but a Team site can also work. Example site URLs: In a standard tenant you’ll have one site; in Multi-Geo you’ll typically use one per geo. Primary geo: https://contoso.sharepoint.com/sites/BrandCenter EUR geo: https://contosoEUR.sharepoint.com/sites/BrandCenter APC geo: https://contosoAPC.sharepoint.com/sites/BrandCenter If your tenant uses Information Barriers, keep each site in Open IB mode while creating the Org Assets Libraries. You can segment the site later (if required) after libraries are created. Configure a public CDN (required) To use Brand Center and Organizational Assets Libraries, configure SharePoint Online to use a Public CDN. Set-SPOTenantCdnEnabled -CdnType Public -Enable $true Example output: Public CDN enabled locations: SITES/BRANDCENTER/FONTS */MASTERPAGE (configuration pending) */STYLE LIBRARY (configuration pending) */CLIENTSIDEASSETS (configuration pending) Note: You will see the new CDN is in a pending state until complete. This will take some time. Wait for the CDN to finish provisioning. Re-run the status/list commands until “pending” entries clear. Get-SPOTenantCdnEnabled -CdnType Public Get-SPOTenantCdnOrigins -CdnType Public Add CDN origins for each library Add allowed CDN origins for each asset library path (typically one origin per library). Example: Add-SPOTenantCdnOrigin -OriginUrl sites/BrandCenter/ImageAssets -CdnType Public Add-SPOTenantCdnOrigin -OriginUrl sites/BrandCenter/TemplateAssets -CdnType Public Add-SPOTenantCdnOrigin -OriginUrl sites/BrandCenter/FontAssets -CdnType Public Set permissions (required for broad consumption) To ensure most users can consume the assets, grant Everyone except external users (often abbreviated as EEEU) Read access (commonly via the site’s Visitors group). Example: add Everyone except external users to the Visitors group of the Organizational Assets site. Connect-SPOService -Url 'https://contoso-admin.sharepoint.com' $tenant = "9cfc42cb-51da-4055-87e9-b20a170b6ba3" $site = Get-SPOSite -Identity "https://contoso.sharepoint.com/sites/BrandCenter" $group = Get-SPOSiteGroup $site -Group "BrandCenter Visitors" Add-SPOUser -LoginName ("c:0-.f|rolemanager|spo-grid-all-users/" + $tenant) -Site $site -Group $group.Title Note: Organizational Assets Libraries respect SharePoint security trimming. If you need a narrower audience, grant Read to the appropriate groups instead of tenant-wide access. In many environments, Everyone except external users is required during registration (Add-SPOOrgAssetsLibrary) so Office can enumerate the library—test and confirm in your tenant before removing broad access. Create libraries and upload assets Create a document library for each asset type you plan to publish (for example: images, Office templates, fonts). For example: Upload your assets into the appropriate libraries. Example: Register each library using Add-SPOOrgAssetsLibrary. For this to work, Everyone except external users must already have access to the site (for example, via the Visitors group). Office Template Library Example: Add-SPOOrgAssetsLibrary -LibraryUrl 'https://contoso.sharepoint.com/sites/BrandCenter/DocumentAssets' -OrgAssetType OfficeTemplateLibrary Image Document Library Example: Add-SPOOrgAssetsLibrary -LibraryUrl 'https://contoso.sharepoint.com/sites/BrandCenter/ImageAssets' -OrgAssetType ImageDocumentLibrary Font Document Library Example: Add-SPOOrgAssetsLibrary -LibraryUrl 'https://contoso.sharepoint.com/sites/BrandCenter/FontAssets' -OrgAssetType OfficeFontLibrary -CdnType Public Optional: Enable Copilot support for an image library (only applicable to ImageDocumentLibrary). Set-SPOOrgAssetsLibrary -LibraryUrl 'https://contoso.sharepoint.com/sites/BrandCenter/ImageAssets' -OrgAssetType ImageDocumentLibrary -CopilotSearchable $true Multi-Geo mini runbook (recommended pattern) Use this as a simple tracking sheet so each geo ends up with a complete, consistent setup. Geo Site URL Libraries CDN origins added Libraries registered Primary https://<tenant>.sharepoint.com/sites/<BrandCenterOrAssetsSite> ImageAssets / DocumentAssets / FontAssets Yes/No Yes/No EUR https://<tenant>EUR.sharepoint.com/sites/<BrandCenterOrAssetsSite> ImageAssets / DocumentAssets / FontAssets Yes/No Yes/No APC https://<tenant>APC.sharepoint.com/sites/<BrandCenterOrAssetsSite> ImageAssets / DocumentAssets / FontAssets Yes/No Yes/No Naming standard (strongly recommended): keep the same site path and the same library names in every geo (for example, always ImageAssets, DocumentAssets, FontAssets). This minimizes per-geo scripting differences and reduces support effort. Wrap-up At this point, each geo should have its own site, libraries, CDN origins, and registered Organizational Assets Libraries. From here, focus on governance (who can publish/approve assets), naming standards, and ongoing lifecycle management (retire old templates/fonts and keep branding current). Validate configuration Admin checks (PowerShell) Confirm the Public CDN is enabled. Confirm CDN origins include one entry per assets library path. List registered Org Assets Libraries and verify each URL + type is present. Get-SPOTenantCdnEnabled -CdnType Public Get-SPOTenantCdnOrigins -CdnType Public Get-SPOOrgAssetsLibrary End-user checks (Office apps) In PowerPoint/Word, confirm organizational templates appear in the template picker (if you registered an OfficeTemplateLibrary). In Office font lists, confirm your org fonts appear (if you registered an OfficeFontLibrary). For image libraries, confirm approved brand images appear in supported pickers; if you enabled -CopilotSearchable, confirm images are discoverable as expected. Timing: New registrations and updates can take up to 24 hours to appear in Office apps. If you updated content, run Set-SPOOrgAssetsLibrary for each changed library, then wait for propagation. Updating content in existing Org Assets Libraries If you already have Organizational Assets Libraries registered and you need to publish updated templates, fonts, or images, use the process below. The high-level flow is: update content → run Set-SPOOrgAssetsLibrary (per library) → wait for propagation. Replace or update content in each library. Upload the new versions of templates/fonts/images into the appropriate library (and remove/retire older versions if needed). If Multi-Geo applies, repeat per geo. Update the matching libraries in each geo’s site so users in each geo get the same (or intentionally regional) set of assets. Run Set-SPOOrgAssetsLibrary for each updated library. Execute the cmdlet against the library URL to refresh the configuration after content changes (run it once per library you updated). Wait for Office app propagation. Allow up to 24 hours for updates to begin showing in Office apps. Example: Set-SPOOrgAssetsLibrary -LibraryUrl 'https://contoso.sharepoint.com/sites/BrandCenter/DocumentAssets' -OrgAssetType OfficeTemplateLibrary Notes: If your site is segmented by Information Barriers, confirm the cmdlet behavior in your environment before making changes, and prefer performing registration/updates while the site is in Open mode when possible. For image libraries, if you are using Copilot integration settings (for example -CopilotSearchable), keep the setting consistent when you run Set-SPOOrgAssetsLibrary. Make sure the intended audience still has Read access to the site/library; otherwise users may not see updates due to security trimming. Please note: After registering (or updating) your assets libraries, it can take up to 24 hours before changes become available in Office apps. Once fully enabled, Office apps will surface your templates and fonts. Below is an example. Example of interacting with Org Assets from M365 Apps Org Fonts from PowerPoint: From SharePoint: From Office Apps: Troubleshooting tips If Add-SPOOrgAssetsLibrary fails, confirm the site is not segmented by Information Barriers (Open mode during setup). If assets don’t appear in Office apps, wait for propagation (up to 24 hours) and re-check that the library was registered successfully. If CDN commands show “pending”, allow time for provisioning and re-run the status command. If users can’t see assets, verify the site/library permissions include Everyone except external users (or the intended audience group). Guidance: Using the SharePoint Online Public CDN Enabling the SharePoint Online Public CDN is a required and supported configuration for Organizational Assets Libraries, Brand Center, and related Office experiences. While the word “public” can sound concerning, it’s important to understand what is (and is not) exposed. We take great care to protect the data that runs your business. Data stored in the Microsoft 365 CDN is encrypted both in transit and at rest, and access to data in the Microsoft 365 SharePoint CDN is secured by Microsoft 365 user permissions and token authorization. Requests for data in the Microsoft 365 SharePoint CDN must be referred (redirected) from your Microsoft 365 tenant or an authorization token won't be generated. See: Content delivery networks - Microsoft 365 Enterprise | Microsoft Learn What “Public CDN” actually means Only explicitly approved library paths are cached The CDN does not expose your entire tenant. Administrators must explicitly register CDN origins (specific library paths). If a library is not registered as a CDN origin, it is not served via the CDN. No new content types are exposed The CDN is intended for static, non-sensitive assets such as: Brand images Office templates Fonts It is not designed for documents containing confidential or regulated data. Why Microsoft requires a Public CDN for Org Assets? Performance and reliability Office clients worldwide retrieve assets faster using geographically distributed edge caching. This avoids repeated downloads from SharePoint origin sites. Consistent Office app experiences PowerPoint, Word, Excel, and Copilot rely on CDN-backed delivery to surface: Templates Fonts Brand images Without a public CDN, these features may not function correctly or at all. Best practices Use the practices below to keep Organizational Assets Libraries reliable, secure, and easy for end users to adopt. Where relevant, notes call out additional considerations for Multi-Geo, Information Barriers, Brand Center, and Copilot. Governance and ownership checklist Owners/publishers: named group who can add/change assets (limited membership). Approvals: defined review/approval step before publishing new templates/fonts/images. Versioning/retention: how you retire old assets and prevent outdated branding from appearing in pickers. Rollback plan: how to revert a bad template/font/image quickly. Change communication: how you notify users about new/updated assets and expected timing (up to 24 hours). Assign clear owners (typically Brand/Comms) and a small admin group (typically IT) for each geo’s library and site. Decide what is “approved” vs “draft” content, and enforce it with a simple publishing process (for example, a review checklist or an approvals flow). Version and retire assets deliberately: keep one “current” template set and archive old assets to prevent users from picking outdated branding. Information architecture and naming Keep library names and structures consistent across geos (same library names, same folder conventions) to simplify support and documentation. Use descriptive filenames users can recognize in pickers (for example, “Contoso_Proposal_Template_v3”). Prefer a small number of clearly defined libraries by asset type (images, templates, fonts) rather than many small libraries. Permissions and access Ensure your intended audience has at least Read access to the site and libraries; Organizational Assets still follow SharePoint security trimming. If you use broad access (for example, Everyone except external users), document it and pair it with tight contributor permissions so only approved publishers can change assets. Avoid breaking inheritance in ways that make troubleshooting difficult—keep permissions simple and predictable whenever possible. CDN configuration Plan CDN changes ahead of time: enabling and provisioning can take time, and changes may not be immediate. Register only the origins you need (one per assets library path) and keep them consistent across environments. After changes, allow for propagation time before validating in Office apps. Multi-Geo and Brand Center Use a repeatable pattern: one site + matching libraries per geo, with the same structure and operational runbook. Be aware Brand Center is created in the primary geo; confirm how your org wants to manage global vs regional assets. Document which assets are global (shared everywhere) vs regional (geo-specific) to avoid confusion for publishers and users. Information Barriers (IB) sequencing Create and register Org Assets Libraries before segmenting the site when IB is enabled (create while the site is in Open mode, then segment later if required). After segmentation, re-validate that the right audience can still read the libraries (and that publishers can still manage content). Copilot readiness (image libraries) Use consistent, high-quality metadata for images (titles, descriptions, and tags). Copilot search quality depends heavily on this. If enabling image tagging integration, standardize on a tagging vocabulary (for example, brand terms, campaigns, departments, regions) so results are predictable. Only enable Copilot searchable settings on libraries where content is approved and intended for broad reuse. Q&A Q: What is an Organizational Assets Library (OAL)? A: It’s a SharePoint document library (or set of libraries) that you register so Office apps can surface approved templates, fonts, and images to users directly within the app experience. Q: Do I need SharePoint Brand Center to use OAL? A: No. You can use Organizational Assets Libraries without Brand Center. Brand Center can make asset management more accessible, for example, allowing SharePoint sites to use organizational branding, but OAL can be configured on its own. Q: Why is a “Public CDN” required, and is it safe? A: Office experiences rely on CDN-backed delivery for performance and reliability. “Public CDN” does not mean your whole tenant is exposed—only the specific library paths you register as CDN origins are cached. Access is still governed by Microsoft 365 authentication, token authorization, and SharePoint permissions. Q: Can I use this guide in a standard (single-geo) tenant? A: Yes. In a standard tenant you usually create one site and one set of libraries. The Multi-Geo guidance is only needed if your tenant is Multi-Geo (in which case you’ll typically repeat the pattern per geo). Q: How do Information Barriers (IB) affect setup? A: If a site is segmented, Add-SPOOrgAssetsLibrary cannot register the library. Create the site and register the libraries while the site is in Open mode, then segment afterward if required. Q: Why does “Everyone except external users” (EEEU) matter? A: In many environments, EEEU is required during library registration so Office can enumerate the library. However, OAL still respects SharePoint security trimming. If broad internal availability is the goal, a common pattern is to grant EEEU Read (often via the Visitors group) so Office apps can surface the assets to most internal users. If you need a narrower audience, use a group instead. Q: How long until assets show up (or update) in Office apps? A: It can take up to 24 hours for new registrations or updates to propagate. If you replaced content in an existing library, run Set-SPOOrgAssetsLibrary for each updated library, then allow time for Office apps to refresh. Q: How do I update content in an existing Org Assets Library? A: Replace the files in the library (and repeat across geos if applicable), then run Set-SPOOrgAssetsLibrary against each library you updated. After that, allow up to 24 hours for the updated assets to start showing in Office apps. Q: Do I need to run Set-SPOOrgAssetsLibrary every time I replace files? A: If you want Office apps to reliably pick up changes, run Set-SPOOrgAssetsLibrary after you update content (especially when publishing new/updated templates, fonts, or images). Treat it as the “refresh” step, then wait for propagation. Q: When should I enable Copilot support (CopilotSearchable) for an image library? A: Enable it only for libraries that contain approved, broadly reusable images and have strong metadata (title/description/tags). This helps ensure search results are on-brand and reduces the chance of surfacing unreviewed content. Q: Can I undo this later? A: Yes. You can unregister an Organizational Assets Library using SharePoint Online PowerShell (for example, Remove-SPOOrgAssetsLibrary) and remove CDN origins if you no longer need them. Plan governance so you can retire assets cleanly without disrupting users. Q: Users can’t see the assets (or updates)—what should I check first? A: Start with (1) permissions to the site/library (security trimming), (2) successful registration via Add-SPOOrgAssetsLibrary, (3) if you’re expecting an update, confirm you ran Set-SPOOrgAssetsLibrary for that library, (4) CDN provisioning status and configured origins, and (5) propagation time (up to 24 hours). Additional Reading Create an organization assets library - SharePoint in Microsoft 365 | Microsoft Learn Connect organizational asset libraries to Copilot for an on-brand experience - SharePoint in Microsoft 365 | Microsoft Learn Connect organizational asset libraries to PowerPoint for an on-brand experience - SharePoint in Microsoft 365 | Microsoft Learn Set up and connect organizational asset library (OAL) with image tagging to Copilot search | Microsoft Learn Add-SPOOrgAssetsLibrary (Microsoft.Online.SharePoint.PowerShell) | Microsoft Learn SharePoint Brand Center - SharePoint in Microsoft 365 | Microsoft Learn How to Enable Enterprise Brand Images with PowerPoint Copilot - SharePoint in Microsoft 365 | Microsoft Learn Office 365 Content Delivery Network (CDN) Quickstart - Microsoft 365 Enterprise | Microsoft Learn Use Office 365 Content Delivery Network (CDN) with SharePoint Online - Microsoft 365 Enterprise | Microsoft Learn Content delivery networks - Microsoft 365 Enterprise | Microsoft Learn Multi-Geo Capabilities in OneDrive and SharePoint - Microsoft 365 Enterprise | Microsoft Learn Use Information Barriers with SharePoint | Microsoft Learn2.8KViews3likes0CommentsLarge Mailbox Migration to Exchange Online
Migrating large mailboxes is challenging for enterprise Exchange teams, especially when mailboxes are over 100 GB or contain extensive recoverable items. Using Exchange Messaging Records Management (MRM) to reduce mailbox size before migration can speed up moves to Exchange Online. Why Use MRM Before a Large Mailbox Migration? Many organizations place mailboxes on litigation hold or in-place hold, causing the recoverable items in these mailboxes to grow significantly, often exceeding the 100 GB quota in Exchange Online. Quota adjustments can be requested, allowing up to about 240 GB for the combined size of the primary mailbox and recoverable items. Still, it's common for recoverable items alone to surpass this limit. MRM lets you move content from the primary mailbox to an archive mailbox, reducing the primary's overall size. The archive mailbox may be hosted on-premises or in Exchange Online. Setting up the archive in Exchange Online is usually simpler, reducing the need for additional mailbox migrations. Occasionally, this process can result in the archive mailbox's recoverable items exceeding the 240 GB cap. Therefore, creating the archive in Exchange Online remains the most efficient solution. Prerequisites Archive mailbox created in Exchange Online The archive mailbox must have the correct routing domain configured as the ArchiveDomain value OAuth enabled in Exchange AutoExpandingArchiveEnabled must be enabled for either mailbox or entire organization MRM Configuration The required retention policy tag is dependent upon where the data is located within the mailbox. Our primary focus is on recoverable items for mailboxes on holds; therefore, we need to create a tag to move recoverable items older than x number of days to archive. New-RetentionPolicyTag -Name RecoverableItems_31_MoveToArchive -MessageClass * -RetentionAction MoveToArchive -AgeLimitForRetention 31.0:0:0 -Type RecoverableItems -RetentionEnabled:$True -Comment "Archive all items from the Recoverable Items over 31 days" This tag must be added to a retention policy, and the retention policy must be assigned to the user being migrated. Once this is done, you can start the managed folder assistant (MFA) to move items into the remote archive. Start-ManagedFolderAssistant user@contoso.com Note: A new retention policy may need to be created specifically for these larger mailboxes. Speed up expanded archives One issue with migrating large mailboxes is the delay caused by auto-expanding archives. Thankfully, this delay depends on Exchange processes, which we can observe and activate manually when needed. The first thing to do is keep an eye on your archive mailbox size. Once it hits 90GB, auto-expansion should kick in. To track this, check the mailbox statistics for the archive mailbox. Get-MailboxStatistics <guid of MainArchive shard of MailUser> | fl *itemCount,*ItemSize AssociatedItemCount 6 DeletedItemCount 290041 ItemCount 2 TotalDeletedItemSize 100 GB (107,374,646,793 bytes) TotalItemSize 557.2 MB (584,222,341 bytes) The results indicate that the TotalDeletedSize has reached 100GB, which is the established quota limit. At this threshold, the auxiliary archive should trigger the next time the managed folder assistant (MFA) runs against the mailbox. Manually start the MFA to expedite this process: Start-ManagedFolderAssistant <guid of MainArchive shard of MailUser> Confirm MFA has completed by checking the ELCLastSuccessTimestamp: (Export-MailboxDiagnosticLogs -Identity <guid of MainArchive shard of MailUser> -ExtendedProperties).mailboxlog | Select-Xml -XPath "//MailboxTable/*" | select -ExpandProperty Node | ? {$_.name -like "ELC*"} Once the auxiliary archive becomes available, Exchange will initiate the process of copying data into the new mailbox. The MFA must be triggered again to start copying data. Then we can proceed to verify whether any folders have been ghosted using the following steps: $folders = Get-MailboxFolderStatistics -FolderScope recoverableitems <guid of MainArchive shard of MailUser> $folders | ?{-Not $_.ContentFolder -and $_.VisibleItemsInFolder} | Sort-Object LastMovedTimeStamp | ft FolderSize,LastMoved*,Content* FolderSize LastMovedTimeStamp ContentFolder ContentMailboxGuid 17.79 GB 11/28/2024 10:25:07 PM False GUID of Aux archive 12.95 GB 11/28/2024 10:25:07 PM False GUID of Aux archive 1.371 MB 11/28/2024 10:25:07 PM False GUID of Aux archive 11.14 GB 11/28/2024 10:25:07 PM False GUID of Aux archive These folders have been copied to an auxiliary archive but are not yet expired on the MainArchive, leaving about 43GB of storage pending release. MFA will free this space after its next run, once five days have passed since "11/28/2024 10:25:07 PM". Our monitoring speeds up the process since MFA may take several days to finish. After five days from the LastMovedTimeStamp, we manually start the MFA using the following command: Start-ManagedFolderAssistant <guid of MainArchive shard of MailUser> You will notice these folders shrinking and the primary archive gaining free space. If there are no ghosted folders and the mailbox is full or exceeds 90GB of recoverable items, start MFA to trigger expansion. It may help to run MFA more than once and confirm that it completed successfully. Conclusion Using Messaging Records Management (MRM) ahead of a large mailbox migration helps reduce primary mailbox and recoverable items pressure by moving older content into the archive, improving the likelihood of staying within Exchange Online limits and accelerating move performance. With the right prerequisites in place, you can actively monitor archive growth and expansion. When the archive approaches capacity or when ghosted folders are older than five days, targeted monitoring and triggering MFA against a mailbox can accelerate expansion and free space sooner—keeping migrations on track. Use MRM to move Recoverable Items older than your chosen threshold into the archive before starting migrations. Track archive statistics (especially TotalDeletedItemSize/TotalDeletedSize) to anticipate auto-expansion and identify bottlenecks. Monitor ghosted folders and run MFA after the relevant LastMovedTimeStamp interval to accelerate cleanup.1.2KViews0likes0Comments