ml catalog
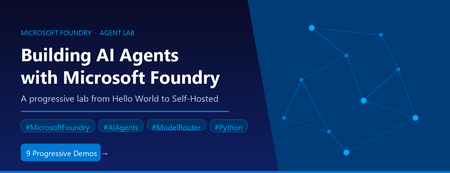
17 TopicsBuilding AI Agents with Microsoft Foundry: A Progressive Lab from Hello World to Self-Hosted
AI agent development has a steep on-ramp. The combination of new SDKs, tool-calling patterns, model selection decisions, retrieval-augmented generation, and deployment concerns means most developers spend more time wiring things together than actually building anything useful. The Microsoft Foundry Agent Lab is a structured, open-source demo series designed to change that — nine self-contained demos, each adding exactly one new concept, all built on the same Microsoft Foundry SDK and a single model deployment. This post walks through what the lab contains, how each demo works under the hood, and the architectural decisions that make it a useful reference for AI engineers building production agents. Why a Progressive Lab? Agent frameworks can be overwhelming. A developer who opens a rich example with RAG, tool-calling, streaming, and a custom UI all at once has no clear line of sight to which parts are essential and which are embellishments. The Foundry Agent Lab takes the opposite approach: start with the absolute minimum and introduce one new primitive per demo. By the time you reach Demo 8, you have seen every major capability — not in one monolithic sample, but in a layered sequence where each addition is visible and understandable. # Demo New Concept Tool Used UX 0 hello-demo Agent creation, Responses API, conversations None Terminal 1 tools-demo Function calling, tool-calling loop, live API FunctionTool Terminal 2 desktop-demo UI decoupling — same agent, different surface None Desktop (Tkinter) 3 websearch-demo Server-side built-in tools, no client loop WebSearchTool Terminal 4 code-demo Code execution in sandbox, Gradio web UI CodeInterpreterTool Web (Gradio) 5 rag-demo Document upload, vector stores, RAG grounding FileSearchTool Terminal 6 mcp-demo MCP servers, human-in-the-loop approval MCPTool Terminal 7 toolbox-demo Centralized tool governance, Toolbox versioning Toolbox Terminal 8 hosted-demo Self-hosted agent with Responses protocol Custom server Terminal + Agent Inspector The Model Router: One Deployment to Rule Them All Before diving into the demos, it is worth understanding the one architectural decision that ties the entire lab together: every agent uses model-router as its model deployment. MODEL_DEPLOYMENT=model-router Model Router is a Microsoft Foundry capability that inspects each request at inference time and routes it to the optimal available model — weighing task complexity, cost, and latency. A simple factual question goes to a fast, cheap model. A complex tool-calling chain with code generation gets routed to a frontier model. You write zero routing logic. The lab's MODEL-ROUTER.md file contains empirical observations from running all nine demos. A sample of what the router selected: Demo Query Task Type Model Selected hello "What's the capital of WA state?" Factual recall grok-4-1-fast-reasoning hello "Summarize our conversation" Summarization gpt-5.2-chat-2025-12-11 tools "What's the weather in Seattle?" Tool-using gpt-5.4-mini-2026-03-17 code Data analysis with code generation Code generation + execution gpt-5.4-2026-03-05 rag HR policy document question Retrieval + synthesis gpt-5.3-chat-2026-03-03 This is the strongest signal in the lab: you do not need to reason about model selection. You declare what your agent needs to do; the router handles the rest, and it chooses correctly. Demo 0: The Minimum Viable Agent The hello-demo establishes the baseline pattern used by every subsequent demo. Two files: one to register the agent, one to chat with it. Registering the agent from azure.identity import DefaultAzureCredential from azure.ai.projects import AIProjectClient from azure.ai.projects.models import PromptAgentDefinition credential = DefaultAzureCredential() project = AIProjectClient(endpoint=PROJECT_ENDPOINT, credential=credential) agent = project.agents.create_version( agent_name=AGENT_NAME, definition=PromptAgentDefinition( model=MODEL_DEPLOYMENT, instructions="You are a helpful, friendly assistant.", ), ) Authentication uses DefaultAzureCredential , which works with az login locally and with managed identity in production — no API keys anywhere in the code. Chatting with the agent # Create a server-side conversation (persists history across turns) conversation = openai.conversations.create() # Each turn sends the user message; the agent sees full history response = openai.responses.create( input=user_input, conversation=conversation.id, extra_body={"agent_reference": {"name": AGENT_NAME, "type": "agent_reference"}}, ) print(response.output_text) The conversation object is server-side. You pass its ID on every turn; the history lives in Foundry, not in a local list. This is the Responses API pattern — distinct from the older Completions or Chat Completions APIs. Demo 1: Function Tools and the Tool-Calling Loop Demo 1 adds function calling against a real weather API. The key insight here is that the model does not execute the function — it requests the execution, and your code executes it locally, then feeds the result back. Declaring a function tool from azure.ai.projects.models import FunctionTool, PromptAgentDefinition func_tool = FunctionTool( name="get_weather", description="Get the current weather for a given city.", parameters={ "type": "object", "properties": {"city": {"type": "string", "description": "City name"}}, "required": ["city"], }, strict=True, ) agent = project.agents.create_version( agent_name=AGENT_NAME, definition=PromptAgentDefinition( model=MODEL_DEPLOYMENT, tools=[func_tool], instructions="You are a weather assistant...", ), ) The tool-calling loop response = openai.responses.create(input=user_input, conversation=conversation.id, ...) # Loop while the model is requesting tool calls while any(item.type == "function_call" for item in response.output): input_list = [] for item in response.output: if item.type == "function_call": args = json.loads(item.arguments) result = get_weather(args["city"]) # execute locally input_list.append(FunctionCallOutput(call_id=item.call_id, output=result)) # Send results back to the agent response = openai.responses.create(input=input_list, conversation=conversation.id, ...) print(response.output_text) The strict=True parameter on FunctionTool enforces structured outputs — the model must return arguments that match the declared JSON schema exactly. This eliminates argument parsing errors in production. Demo 2: UI Is Not Your Agent Demo 2 runs the exact same agent as Demo 1 but surfaces it in a Tkinter desktop window. The point is pedagogical: your agent definition, conversation management, and tool-calling logic are entirely independent of your UI layer. Swapping from terminal to desktop requires changing only the presentation code — nothing in the agent or conversation path changes. This is a principle worth internalising early: agent logic and UI logic should never be entangled. The lab enforces this separation structurally. Demo 3: Server-Side Built-In Tools The web search demo introduces a sharp contrast with Demo 1. With WebSearchTool , the tool-calling loop disappears entirely from client code: from azure.ai.projects.models import WebSearchTool agent = project.agents.create_version( agent_name="Search-Agent", definition=PromptAgentDefinition( model=MODEL_DEPLOYMENT, tools=[WebSearchTool()], instructions="You are a research assistant...", ), ) The agent decides when to search, executes the search server-side, and returns a grounded response with citations. Your client code looks identical to Demo 0 — a simple responses.create() call with no tool loop. The distinction matters architecturally: Function tools (Demo 1) — tool execution happens on your client; you control the code, the API call, the error handling. Built-in tools (Demo 3+) — tool execution happens inside Foundry; you get results without managing execution. Demo 4: Code Interpreter and the Gradio Web UI Demo 4 attaches CodeInterpreterTool , which gives the agent a sandboxed Python execution environment inside Foundry. The agent can write code, run it, observe output, and iterate — all server-side. Combined with a Gradio web interface, this demo shows an agent that can perform data analysis, generate charts, and explain results through a browser UI. Model Router is particularly interesting here: the empirical data shows it selects a more capable frontier model ( gpt-5.4-2026-03-05 ) for code-generation tasks, while simpler conversational turns stay on lighter models. Demo 5: Retrieval-Augmented Generation with FileSearchTool Demo 5 introduces RAG. The setup phase uploads a document, creates a vector store, and attaches it to the agent: # Upload document and create a vector store vector_store = openai.vector_stores.create(name="employee-handbook-store") with open("data/employee-handbook.md", "rb") as f: openai.vector_stores.files.upload_and_poll( vector_store_id=vector_store.id, file=f ) # Attach the vector store to the agent agent = project.agents.create_version( agent_name="RAG-Agent", definition=PromptAgentDefinition( model=MODEL_DEPLOYMENT, tools=[FileSearchTool(vector_store_ids=[vector_store.id])], instructions="Answer questions using only the provided documents...", ), ) At query time, the agent embeds the question, searches the vector store semantically, retrieves matching chunks, and generates an answer grounded in the retrieved content — entirely server-side. The client code remains a plain responses.create() call. An important detail: the .vector_store_id file is written to disk during setup and read back during the chat session, so the demo survives process restarts without re-uploading the document. The .gitignore excludes this file from source control. Demo 6: Model Context Protocol Demo 6 connects the agent to a GitHub MCP server, giving it access to repository and issue data via the open Model Context Protocol standard. MCP servers expose tools over a standardised wire protocol; the agent discovers and calls them without any client-side function declarations. The demo also demonstrates human-in-the-loop approval: before executing any MCP tool call, the agent surfaces the proposed action and waits for the user to confirm. This is an important safety pattern for agents that can trigger side effects on external systems. Demo 7: Toolbox — Centralised Tool Governance Where Demo 6 connects to a single MCP server directly, Demo 7 uses a Toolbox — a managed Microsoft Foundry resource that bundles multiple tools into a single, versioned, MCP-compatible endpoint. The Toolbox in this demo exposes both GitHub Issues and GitHub Repos tools, curated into an immutable versioned snapshot. This pattern is significant for production multi-agent systems: Centralised governance — one team owns the tool definitions; all agents consume them via a single endpoint. Versioned snapshots — promoting a new Toolbox version is explicit; agents pin to a version and upgrade intentionally. MCP compatibility — any MCP-capable agent or framework can connect, not just Foundry SDK agents. from azure.ai.projects.models import McpTool toolbox_tool = McpTool( server_label="toolbox", server_url=TOOLBOX_ENDPOINT, allowed_tools=[], # empty = all tools in the Toolbox version headers={"Authorization": f"Bearer {token}"}, ) Demo 8: Self-Hosted Agent with the Responses Protocol The final demo departs from the prompt-agent pattern. Instead of registering a declarative agent in Foundry, Demo 8 implements a custom agent server using the Responses protocol. The server exposes a streaming HTTP endpoint; Foundry's Agent Inspector can connect to it and route user turns to it just as it would to a hosted prompt agent. This demo includes a Dockerfile and an agent.yaml , enabling deployment to Foundry's container hosting service. It uses gpt-4.1-mini directly rather than the model router, because the custom server owns the entire inference path. When to consider this pattern: Your agent requires custom pre- or post-processing logic that cannot be expressed in a system prompt. You need to integrate with infrastructure that is not reachable through MCP or built-in tools. You want to own the inference call for cost control, A/B testing, or compliance reasons. You are building a multi-agent orchestrator that needs to expose itself as an agent to other orchestrators. Getting Started The lab requires Python 3.10 or higher, an Azure subscription with a Microsoft Foundry project, and the Azure CLI. 1. Clone and set up the virtual environment git clone https://github.com/microsoft-foundry/Foundry-Agent-Lab.git cd Foundry-Agent-Lab # Create and activate the virtual environment python -m venv .venv # Windows Command Prompt .venv\Scripts\activate.bat # Windows PowerShell .venv\Scripts\Activate.ps1 # macOS / Linux source .venv/bin/activate pip install -r requirements.txt 2. Configure a demo copy hello-demo\.env.sample hello-demo\.env # Edit hello-demo\.env and set PROJECT_ENDPOINT Your PROJECT_ENDPOINT is on the Overview page of your Foundry project in the Azure portal. It takes the form https://your-resource.ai.azure.com/api/projects/your-project . 3. Run the demo az login 0-hello-demo Each numbered batch file at the root activates the virtual environment, runs create_agent.py , and launches chat.py . Append log to capture the full session transcript: 0-hello-demo log Reset between runs hello-demo\reset.bat Every demo includes a reset.bat that deletes the registered agent and any associated resources (vector stores, uploaded files). Demos are fully repeatable. Architecture Principles Demonstrated Across the nine demos, the lab illustrates a set of design principles that apply directly to production agent systems: Keyless authentication throughout Every demo uses DefaultAzureCredential . No API keys appear anywhere in the code. Locally, az login provides credentials. In production, managed identity takes over automatically — same code, no secrets to rotate. Server-side conversation state The Responses API stores conversation history server-side. Your application passes a conversation ID; Foundry maintains the thread. This eliminates the common bug of truncating history due to local list management and makes multi-process or multi-instance deployments straightforward. Client-side vs server-side tool execution The lab makes the distinction explicit. Function tools execute in your process — you control the code, the external call, and the error handling. Built-in tools (WebSearch, CodeInterpreter, FileSearch) execute inside Foundry — you get results without managing execution infrastructure. MCP tools (Demo 6, 7) fall between these: they execute in a separately deployed server, with the protocol mediating the call. Progressive tool introduction Each demo's create_agent.py registers the agent once. The chat.py file handles the conversation loop. These two responsibilities are always separate, making it easy to update agent definitions without modifying conversation logic, and vice versa. Security Considerations When building agents for production, keep the following in mind: Never commit .env files. The .gitignore excludes them, but verify this before pushing. Use Azure Key Vault or environment variable injection in CI/CD pipelines. Use managed identity in production. DefaultAzureCredential automatically picks up managed identity when deployed to Azure, eliminating the need for any stored credentials. Apply human-in-the-loop for side-effecting tools. Demo 6 demonstrates this pattern for MCP tool calls. Any agent that can modify external state (create issues, send emails, write files) should surface proposed actions for confirmation. Validate tool outputs before use. Treat data returned by external tools (weather APIs, search results, document retrieval) as untrusted input. Prompt injection through tool results is a real attack surface; grounding instructions in your system prompt reduce but do not eliminate this risk. Scope Toolbox permissions narrowly. When using a Toolbox (Demo 7), use allowed_tools to restrict which tools the agent can call, rather than granting access to all tools in a Toolbox version. Key Takeaways Start with the minimum. A prompt agent with no tools requires fewer than 30 lines of code using the Foundry SDK. Add tools only when the use case demands them. Use model-router unless you have a specific reason not to. The empirical data in the lab shows the router selects appropriate models across all task types — factual, creative, tool-calling, RAG, and code generation. Understand the client/server tool boundary. Function tools give you control; built-in tools give you simplicity. MCP and Toolbox give you governance and interoperability. Choose based on where you need control and where you need scale. Conversation state belongs on the server. Do not maintain conversation history in application memory if you can avoid it. The Responses API conversation object is designed for this. The hosted-demo pattern is for when you need to own the inference path. For most use cases, a declarative prompt agent is sufficient and far simpler to operate. Next Steps Explore the repo: github.com/microsoft-foundry/Foundry-Agent-Lab Microsoft Foundry SDK documentation: learn.microsoft.com/azure/ai-studio/ Responses API quickstart: Prompt agent quickstart Model Router conceptual documentation: Model Router for Microsoft Foundry Model Context Protocol: modelcontextprotocol.io Azure Identity SDK (DefaultAzureCredential): azure-identity Python SDK The Foundry Agent Lab is open source under the MIT licence. Contributions, bug reports, and feature requests are welcome through GitHub Issues. See CONTRIBUTING.md for guidelines.Accelerate the development of Generative AI application with GitHub Models
Introducing GitHub Models, a new feature for over 100 million developers to become AI engineers using top AI models. Access models like Llama 3.1, GPT-4o, GPT-4o mini, Phi 3, and Mistral Large 2 through a built-in playground on GitHub. Test prompts and model settings for free. When ready, seamlessly integrate models into Codespaces and VS Code. For production, Azure AI offers responsible AI, enterprise-grade security, data privacy, and global availability. Models are accessible in over 25 Azure regions with provisioned throughput. Now, building and running your AI application is easier than ever.4.4KViews0likes0CommentsAI Toolkit for Visual Studio Code Now Supports NVIDIA NIM Microservices for RTX AI PCs
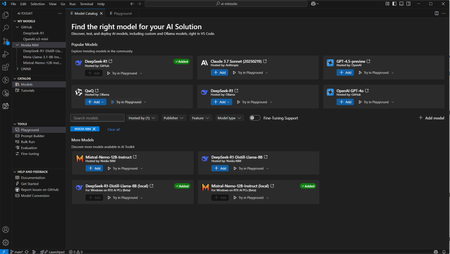
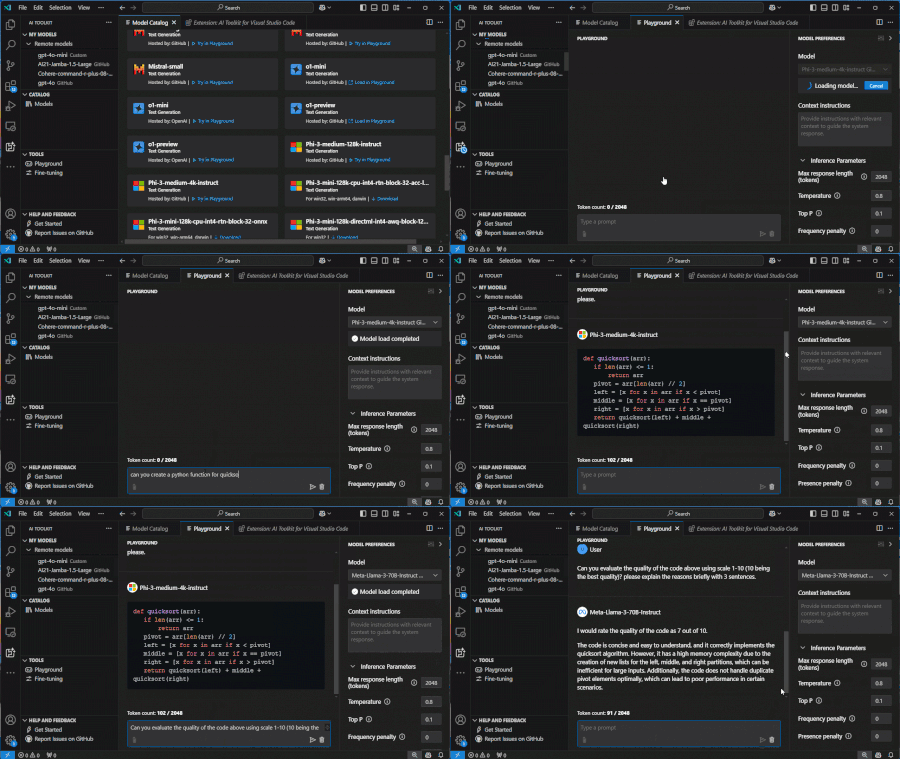
AI Toolkit now supports NVIDIA NIM™ microservice-based foundation models for inference testing in the model playground and advanced features like bulk run, evaluation and building prompts. This collaboration helps AI Engineers streamline development processes with foundational AI models. About AI Toolkit AI Toolkit is a VS Code extension for AI engineers to build, deploy, and manage AI solutions. It includes model and prompt-centric features that allow users to explore and test different AI models, create and evaluate prompts, and perform model finetuning, all from within VS Code. Since its preview launch in 2024, AI Toolkit has helped developers worldwide learn about generative AI models and start building AI solutions. NVIDIA NIM Microservices This January, NVIDIA announced that state-of-the-art AI models spanning language, speech, animation and vision capabilities - offered as NVIDIA NIM microservices - can now run locally on NVIDIA RTX AI PCs. These microservices prepackage optimized AI models with all the necessary runtime components for deployment across NVIDIA GPUs. Developers can now develop and deploy anywhere with the same unified experience and software stack across RTX AI PCs and workstations to the cloud. Developers can jumpstart their AI development journey by downloading and running NIM containers quickly on Windows 11 PCs with GeForce RTX GPUs using Windows Subsystem for Linux (WSL2). The Power of Collaboration Integrating AI Toolkit with NIM provides AI engineers with a more cohesive and efficient workflow: Seamlessly integrate AI Toolkit with NIM to create a unified development environment without the need to switch context. Users can access any NIM supported models from AI Toolkit. Leverage the combined capabilities of both tools to streamline workflows and accelerate AI solution development process around foundation AI models, from within VS Code. How to get started Follow these steps to begin leveraging the power of NIM on AI Toolkit: Download and install the latest version of AI Toolkit for VS Code. Install NIM pre-requisites on RTX PCs using the instructions here. Select a NIM model from the model catalog on AI Toolkit and load it in Playground. Optionally, you can also add your NIM model hosted in the cloud to AI Toolkit by URL Explore NIM models from the playground Start developing prompts with new NIM models in AI Toolkit! Looking Forward We invite you to explore the possibilities of this integration and take your development projects to new heights! Try AI Toolkit today – and please continue sharing your feedback. Stay tuned for more updates and detailed tutorials on how to maximize the benefits of this exciting new collaboration. Together, we are shaping the future of AI development!AI Toolkit for Visual Studio Code: October 2024 Update Highlights
The AI Toolkit’s October 2024 update revolutionizes Visual Studio Code with game-changing features for developers, researchers, and enthusiasts. Explore multi-model integration, including GitHub Models, ONNX, and Google Gemini, alongside custom model support. Dive into multi-modal capabilities for richer AI testing and seamless multi-platform compatibility across Windows, macOS, and Linux. Tailored for productivity, the enhanced Model Catalog simplifies choosing the best tools for your projects. Try it now and share feedback to shape the future of AI in VS Code!3.2KViews4likes0CommentsEssential Microsoft Resources for MVPs & the Tech Community from the AI Tour
Unlock the power of Microsoft AI with redeliverable technical presentations, hands-on workshops, and open-source curriculum from the Microsoft AI Tour! Whether you’re a Microsoft MVP, Developer, or IT Professional, these expertly crafted resources empower you to teach, train, and lead AI adoption in your community. Explore top breakout sessions covering GitHub Copilot, Azure AI, Generative AI, and security best practices—designed to simplify AI integration and accelerate digital transformation. Dive into interactive workshops that provide real-world applications of AI technologies. Take it a step further with Microsoft’s Open-Source AI Curriculum, offering beginner-friendly courses on AI, Machine Learning, Data Science, Cybersecurity, and GitHub Copilot—perfect for upskilling teams and fostering innovation. Don’t just learn—lead. Access these resources, host impactful training sessions, and drive AI adoption in your organization. Start sharing today! Explore now: Microsoft AI Tour Resources.Week 2 . Microsoft Agents Hack Online Events and Readiness Resources
https://aka.ms/agentshack 2025 is the year of AI agents! But what exactly is an agent, and how can you build one? Whether you're a seasoned developer or just starting out, this FREE three-week virtual hackathon is your chance to dive deep into AI agent development. Register Now: https://aka.ms/agentshack 🔥 Learn from expert-led sessions streamed live on YouTube, covering top frameworks like Semantic Kernel, Autogen, the new Azure AI Agents SDK and the Microsoft 365 Agents SDK. Week 2 Events: April 14th-18th Day/Time Topic Track 4/14 08:00 AM PT Building custom engine agents with Azure AI Foundry and Visual Studio Code Copilots 4/15 07:00 AM PT Your first AI Agent in JS with Azure AI Agent Service JS 4/15 09:00 AM PT Building Agentic Applications with AutoGen v0.4 Python 4/15 12:00 PM PT AI Agents + .NET Aspire C# 4/15 03:00 PM PT Prototyping AI Agents with GitHub Models Python 4/16 04:00 AM PT Multi-agent AI apps with Semantic Kernel and Azure Cosmos DB C# 4/16 06:00 AM PT Building declarative agents with Microsoft Copilot Studio & Teams Toolkit Copilots 4/16 07:00 AM PT Prompting is the New Scripting: Meet GenAIScript JS 4/16 09:00 AM PT Building agents with an army of models from the Azure AI model catalog Python 4/16 12:00 PM PT Multi-Agent API with LangGraph and Azure Cosmos DB Python 4/16 03:00 PM PT Mastering Agentic RAG Python 4/17 06:00 AM PT Build your own agent with OpenAI, .NET, and Copilot Studio C# 4/17 09:00 AM PT Building smarter Python AI agents with code interpreters Python 4/17 12:00 PM PT Building Java AI Agents using LangChain4j and Dynamic Sessions Java 4/17 03:00 PM PT Agentic Voice Mode Unplugged Python1.5KViews0likes0CommentsExploring Azure AI Model Inference: A Comprehensive Guide
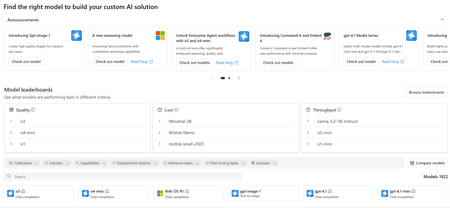
Azure AI model inference provides access to a wide range of flagship models from leading providers such as AI21 Labs, Azure OpenAI, Cohere, Core42, DeepSeek, Meta, Microsoft, Mistral AI, and NTT Data https://learn.microsoft.com/azure/ai-foundry/model-inference/concepts/models . These models can be consumed as APIs, allowing you to integrate advanced AI capabilities into your applications seamlessly. Model Families and Their Capabilities Azure AI Foundry categorises its models into several families, each offering unique capabilities: AI21 Labs: Known for the Jamba family models, which are production-grade large language models (LLMs) using AI21's hybrid Mamba-Transformer architecture. These models support chat completions, tool calling, and multiple languages including English, French, Spanish, Portuguese, German, Arabic, and Hebrew. https://learn.microsoft.com/azure/ai-foundry/model-inference/concepts/models Azure OpenAI: Offers diverse models designed for tasks such as reasoning, problem-solving, natural language understanding, and code generation. These models support text and image inputs, multiple languages, and tool calling https://learn.microsoft.com/azure/ai-foundry/model-inference/concepts/models Cohere: Provides models for embedding and command tasks, supporting multilingual capabilities and various response formats https://learn.microsoft.com/azure/ai-foundry/model-inference/concepts/models Core42: Features the Jais-30B-chat model, designed for chat completions https://learn.microsoft.com/azure/ai-foundry/model-inference/concepts/models DeepSeek: Includes models like DeepSeek-V3 and DeepSeek-R1, focusing on advanced AI tasks https://learn.microsoft.com/azure/ai-foundry/model-inference/concepts/models Meta: Offers the Llama series models, which are instruction-tuned for various AI tasks https://learn.microsoft.com/azure/ai-foundry/model-inference/concepts/models Microsoft: Provides the Phi series models, supporting multimodal instructions and vision tasks https://learn.microsoft.com/azure/ai-foundry/model-inference/concepts/models Mistral AI: Features models like Ministral-3B and Mistral-large, designed for high-performance AI tasks https://learn.microsoft.com/azure/ai-foundry/model-inference/concepts/models NTT Data: Offers the Tsuzumi-7b model, focusing on specific AI capabilities https://learn.microsoft.com/azure/ai-foundry/model-inference/concepts/models Deployment and Integration Azure AI model inference supports global standard deployment, ensuring consistent throughput and performance. Models can be deployed in various configurations, including regional deployments and sovereign clouds such as Azure Government, Azure Germany, and Azure China https://learn.microsoft.com/azure/ai-foundry/model-inference/concepts/models To integrate these models into your applications, you can use the Azure AI model inference API, which supports multiple programming languages including Python, C#, JavaScript, and Java. This flexibility allows you to deploy models multiple times under different configurations, providing a robust and scalable solution for your AI needs https://learn.microsoft.com/en-us/azure/ai-foundry/model-inference/overview Conclusion Azure AI model inference in Azure AI Foundry offers a comprehensive solution for integrating advanced AI models into your applications. With a wide range of models from leading providers, flexible deployment options, and robust API support, Azure AI Foundry empowers you to leverage cutting-edge AI capabilities without the complexity of hosting and managing the infrastructure. Explore the Azure AI model catalog today and unlock the potential of AI for your business. Join the Conversation on Azure AI Foundry Discussions! Have ideas, questions, or insights about AI? Don't keep them to yourself! Share your thoughts, engage with experts, and connect with a community that’s shaping the future of artificial intelligence. 👉 Click here to join the discussion!Building an Offline AI Interview Coach with Foundry Local, RAG, and SQLite
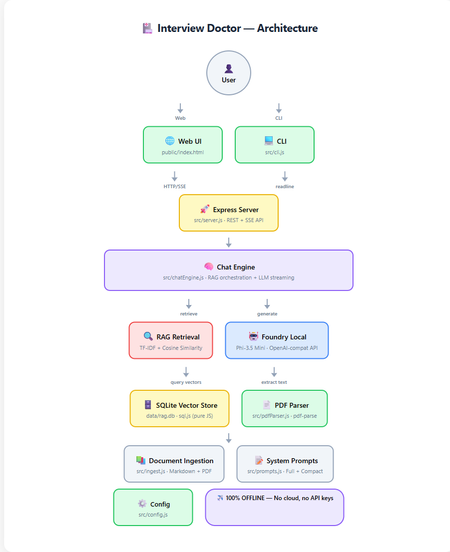
How to build a 100% offline, AI-powered interview preparation tool using Microsoft Foundry Local, Retrieval-Augmented Generation, and nothing but JavaScript. Foundry Local 100% Offline RAG + TF-IDF JavaScript / Node.js Contents Introduction What is RAG and Why Offline? Architecture Overview Setting Up Foundry Local Building the RAG Pipeline The Chat Engine Dual Interfaces: Web & CLI Testing Adapting for Your Own Use Case What I Learned Getting Started Introduction Imagine preparing for a job interview with an AI assistant that knows your CV inside and out, understands the job you're applying for, and generates tailored questions, all without ever sending your data to the cloud. That's exactly what Interview Doctor does. Interview Doctor's web UI, a polished, dark-themed interface running entirely on your local machine. In this post, I'll walk you through how I built an interview prep tool as a fully offline JavaScript application using: Foundry Local — Microsoft's on-device AI runtime SQLite — for storing document chunks and TF-IDF vectors RAG (Retrieval-Augmented Generation) — to ground the AI in your actual documents Express.js — for the web server Node.js built-in test runner — for testing with zero extra dependencies No cloud. No API keys. No internet required. Everything runs on your machine. What is RAG and Why Does It Matter? Retrieval-Augmented Generation (RAG) is a pattern that makes AI models dramatically more useful for domain-specific tasks. Instead of relying solely on what a model learned during training (which can be outdated or generic), RAG: Retrieves relevant chunks from your own documents Augments the model's prompt with those chunks as context Generates a response grounded in your actual data For Interview Doctor, this means the AI doesn't just ask generic interview questions, it asks questions specific to your CV, your experience, and the specific job you're applying for. Why Offline RAG? Privacy is the obvious benefit, your CV and job applications never leave your device. But there's more: No API costs — run as many queries as you want No rate limits — iterate rapidly during your prep Works anywhere — on a plane, in a café with bad Wi-Fi, anywhere Consistent performance — no cold starts, no API latency Architecture Overview Complete architecture showing all components and data flow. The application has two interfaces (CLI and Web) that share the same core engine: Document Ingestion — PDFs and markdown files are chunked and indexed Vector Store — SQLite stores chunks with TF-IDF vectors Retrieval — queries are matched against stored chunks using cosine similarity Generation — relevant chunks are injected into the prompt sent to the local LLM Step 1: Setting Up Foundry Local First, install Foundry Local: # Windows winget install Microsoft.FoundryLocal # macOS brew install microsoft/foundrylocal/foundrylocal The JavaScript SDK handles everything else — starting the service, downloading the model, and connecting: import { FoundryLocalManager } from "foundry-local-sdk"; import { OpenAI } from "openai"; const manager = new FoundryLocalManager(); const modelInfo = await manager.init("phi-3.5-mini"); // Foundry Local exposes an OpenAI-compatible API const openai = new OpenAI({ baseURL: manager.endpoint, // Dynamic port, discovered by SDK apiKey: manager.apiKey, }); ⚠️ Key Insight Foundry Local uses a dynamic port never hardcode localhost:5272 . Always use manager.endpoint which is discovered by the SDK at runtime. Step 2: Building the RAG Pipeline Document Chunking Documents are split into overlapping chunks of ~200 tokens. The overlap ensures important context isn't lost at chunk boundaries: export function chunkText(text, maxTokens = 200, overlapTokens = 25) { const words = text.split(/\s+/).filter(Boolean); if (words.length <= maxTokens) return [text.trim()]; const chunks = []; let start = 0; while (start < words.length) { const end = Math.min(start + maxTokens, words.length); chunks.push(words.slice(start, end).join(" ")); if (end >= words.length) break; start = end - overlapTokens; } return chunks; } Why 200 tokens with 25-token overlap? Small chunks keep retrieved context compact for the model's limited context window. Overlap prevents information loss at boundaries. And it's all pure string operations, no dependencies needed. TF-IDF Vectors Instead of using a separate embedding model (which would consume precious memory alongside the LLM), we use TF-IDF, a classic information retrieval technique: export function termFrequency(text) { const tf = new Map(); const tokens = text .toLowerCase() .replace(/[^a-z0-9\-']/g, " ") .split(/\s+/) .filter((t) => t.length > 1); for (const t of tokens) { tf.set(t, (tf.get(t) || 0) + 1); } return tf; } export function cosineSimilarity(a, b) { let dot = 0, normA = 0, normB = 0; for (const [term, freq] of a) { normA += freq * freq; if (b.has(term)) dot += freq * b.get(term); } for (const [, freq] of b) normB += freq * freq; if (normA === 0 || normB === 0) return 0; return dot / (Math.sqrt(normA) * Math.sqrt(normB)); } Each document chunk becomes a sparse vector of word frequencies. At query time, we compute cosine similarity between the query vector and all stored chunk vectors to find the most relevant matches. SQLite as a Vector Store Chunks and their TF-IDF vectors are stored in SQLite using sql.js (pure JavaScript — no native compilation needed): export class VectorStore { // Created via: const store = await VectorStore.create(dbPath) insert(docId, title, category, chunkIndex, content) { const tf = termFrequency(content); const tfJson = JSON.stringify([...tf]); this.db.run( "INSERT INTO chunks (...) VALUES (?, ?, ?, ?, ?, ?)", [docId, title, category, chunkIndex, content, tfJson] ); this.save(); } search(query, topK = 5) { const queryTf = termFrequency(query); // Score each chunk by cosine similarity, return top-K } } 💡 Why SQLite for Vectors? For a CV plus a few job descriptions (dozens of chunks), brute-force cosine similarity over SQLite rows is near-instant (~1ms). No need for Pinecone, Qdrant, or Chroma — just a single .db file on disk. Step 3: The RAG Chat Engine The chat engine ties retrieval and generation together: async *queryStream(userMessage, history = []) { // 1. Retrieve relevant CV/JD chunks const chunks = this.retrieve(userMessage); const context = this._buildContext(chunks); // 2. Build the prompt with retrieved context const messages = [ { role: "system", content: SYSTEM_PROMPT }, { role: "system", content: `Retrieved context:\n\n${context}` }, ...history, { role: "user", content: userMessage }, ]; // 3. Stream from the local model const stream = await this.openai.chat.completions.create({ model: this.modelId, messages, temperature: 0.3, stream: true, }); // 4. Yield chunks as they arrive for await (const chunk of stream) { const content = chunk.choices[0]?.delta?.content; if (content) yield { type: "text", data: content }; } } The flow is straightforward: vectorize the query, retrieve with cosine similarity, build a prompt with context, and stream from the local LLM. The temperature: 0.3 keeps responses focused — important for interview preparation where consistency matters. Step 4: Dual Interfaces — Web & CLI Web UI The web frontend is a single HTML file with inline CSS and JavaScript — no build step, no framework, no React or Vue. It communicates with the Express backend via REST and SSE: File upload via multipart/form-data Streaming chat via Server-Sent Events (SSE) Quick-action buttons for common follow-up queries (coaching tips, gap analysis, mock interview) The setup form with job title, seniority level, and a pasted job description — ready to generate tailored interview questions. CLI The CLI provides the same experience in the terminal with ANSI-coloured output: npm run cli It walks you through uploading your CV, entering the job details, and then generates streaming questions. Follow-up questions work interactively. Both interfaces share the same ChatEngine class, they're thin layers over identical logic. Edge Mode For constrained devices, toggle Edge mode to use a compact system prompt that fits within smaller context windows: Edge mode activated, uses a minimal prompt for devices with limited resources. Step 5: Testing Tests use the Node.js built-in test runner, no Jest, no Mocha, no extra dependencies: import { describe, it } from "node:test"; import assert from "node:assert/strict"; describe("chunkText", () => { it("returns single chunk for short text", () => { const chunks = chunkText("short text", 200, 25); assert.equal(chunks.length, 1); }); it("maintains overlap between chunks", () => { // Verifies overlapping tokens between consecutive chunks }); }); npm test Tests cover the chunker, vector store, config, prompts, and server API contract, all without needing Foundry Local running. Adapting for Your Own Use Case Interview Doctor is a pattern, not just a product. You can adapt it for any domain: What to Change How Domain documents Replace files in docs/ with your content System prompt Edit src/prompts.js Chunk sizes Adjust config.chunkSize and config.chunkOverlap Model Change config.model — run foundry model list UI Modify public/index.html — it's a single file Ideas for Adaptation Customer support bot — ingest your product docs and FAQs Code review assistant — ingest coding standards and best practices Study guide — ingest textbooks and lecture notes Compliance checker — ingest regulatory documents Onboarding assistant — ingest company handbooks and processes What I Learned Offline AI is production-ready. Foundry Local + small models like Phi-3.5 Mini are genuinely useful for focused tasks. You don't need vector databases for small collections. SQLite + TF-IDF is fast, simple, and has zero infrastructure overhead. RAG quality depends on chunking. Getting chunk sizes right for your use case is more impactful than the retrieval algorithm. The OpenAI-compatible API is a game-changer. Switching from cloud to local was mostly just changing the baseURL . Dual interfaces are easy when you share the engine. The CLI and Web UI are thin layers over the same ChatEngine class. ⚡ Performance Notes On a typical laptop (no GPU): ingestion takes under 1 second for ~20 documents, retrieval is ~1ms, and the first LLM token arrives in 2-5 seconds. Foundry Local automatically selects the best model variant for your hardware (CUDA GPU, NPU, or CPU). Getting Started git clone https://github.com/leestott/interview-doctor-js.git cd interview-doctor-js npm install npm run ingest npm start # Web UI at http://127.0.0.1:3000 # or npm run cli # Interactive terminal The full source code is on GitHub. Star it, fork it, adapt it — and good luck with your interviews! Resources Foundry Local — Microsoft's on-device AI runtime Foundry Local SDK (npm) — JavaScript SDK Foundry Local GitHub — Source, samples, and documentation Local RAG Reference — Reference RAG implementation Interview Doctor (JavaScript) — This project's source codeAI Toolkit for VS Code January Update
AI Toolkit is a VS Code extension aiming to empower AI engineers in transforming their curiosity into advanced generative AI applications. This toolkit, featuring both local-enabled and cloud-accelerated inner loop capabilities, is set to ease model exploration, prompt engineering, and the creation and evaluation of generative applications. We are pleased to announce the January Update to the toolkit with support for OpenAI's o1 model and enhancements in the Model Playground and Bulk Run features. What's New? January’s update brings several exciting new features to boost your productivity in AI development. Here's a closer look at what's included: Support for OpenAI’s new o1 Model: We've added access to GitHub hosted OpenAI’s latest o1 model. This new model replaces the o1-preview and offers even better performance in handling complex tasks. You can start interacting with the o1 model within VS Code for free by using the latest AI Toolkit update. Chat History Support in Model Playground: We have heard your feedback that tracking past model interactions is crucial. The Model Playground has been updated to include support for chat history. This feature saves chat history as individual files stored entirely on your local machine, ensuring privacy and security. Bulk Run with Prompt Templating: The Bulk Run feature, introduced in the AI Toolkit December release, now supports prompt templating with variables. This allows users to create templates for prompts, insert variables, and run them in bulk. This enhancement simplifies the process of testing multiple scenarios and models. Stay tuned for more updates and enhancements as we continue to innovate and support your journey in AI development. Try out the AI Toolkit for Visual Studio Code, share your thoughts, and file issues and suggest features in our GitHub repo. Thank you for being a part of this journey with us!