microsoft foundry
18 TopicsIntroducing Inside Microsoft Foundry: Quickstart 🎬
Discover Inside Microsoft Foundry: Quickstart, a new video series for developers building AI agents. Starting with "What does it really take to ship an AI agent?", the series explores real-world challenges such as model selection, grounding agents in data, evaluation, deployment, observability, and governance. Follow along as we show how the Microsoft Foundry ecosystem helps developers move from prototype to production, with new episodes released in the coming weeks.Distributing Agents to Microsoft Teams and Microsoft 365 Copilot Part 4/5
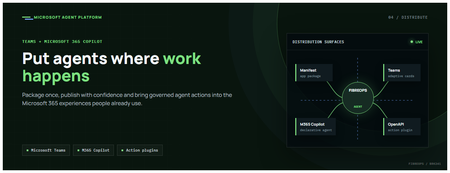
This is the fourth post in our series on the Microsoft agent platform. We cover the Distribute in M365 pillar — publishing your agents to Microsoft Teams and Microsoft 365 Copilot so they reach users where they already work. All examples reference the FibreOps repository, demonstrated at Microsoft Build BRK241. The Distribution Story Building a great agent is only half the challenge. The other half is getting it into the hands of users without asking them to learn a new tool, visit a new URL, or change their workflow. Microsoft 365 Copilot and Microsoft Teams are where enterprise users already spend their day, making them the natural distribution surface for agents. With the GA release, publishing an agent to Teams and M365 Copilot is a single command. No separate app registration portal, no manual manifest assembly, no multi-step approval workflow for development and testing. Publishing to Microsoft 365 Copilot (GA) FibreOps ships as a declarative agent + action plugin ready for sideload. A single CLI command produces the complete package: python -m fibreops.demo publish-m365 --out dist/m365 # Output: # ✓ wrote dist/m365/declarativeAgent.json # ✓ wrote dist/m365/fibreops-action.json # ✓ wrote dist/m365/manifest.json # ✓ wrote dist/m365/color.png (192x192) # ✓ wrote dist/m365/outline.png ( 32x32) # ✓ wrote dist/m365/fibreops-copilot.zip What Gets Generated File Purpose declarativeAgent.json Defines the agent's persona, capabilities, and conversation starters for M365 Copilot fibreops-action.json Action plugin that proxies tool calls to the deployed FastAPI backend via OpenAPI manifest.json Teams app manifest with publisher metadata, permissions, and capabilities color.png / outline.png App icons for Teams and M365 surfaces fibreops-copilot.zip Ready-to-upload package for Teams Admin Center Configuration Set the base URL to your deployed FastAPI app before publishing — the action plugin uses this to resolve the OpenAPI runtime: # Set the public HTTPS hostname of the deployed FastAPI app $env:M365_ACTION_BASE_URL = "https://fibreops-demo.azurewebsites.net" # Optional: customise publisher metadata $env:M365_PUBLISHER_NAME = "Contoso Network Operations" $env:M365_PUBLISHER_WEBSITE = "https://contoso.com/noc" # Generate the package python -m fibreops.demo publish-m365 --out dist/m365 Environment Variable Purpose M365_ACTION_BASE_URL Public HTTPS root for the FastAPI /openapi.json (e.g., Container Apps FQDN) M365_APP_ID Override the generated Teams app GUID (default: deterministic per repo) M365_PUBLISHER_NAME Publisher name shown in M365 Admin Center M365_PUBLISHER_WEBSITE Publisher website link Uploading the Package Upload the generated fibreops-copilot.zip through either path: Teams Admin Center → Manage apps → Upload new app M365 Admin Center → Integrated apps → Upload custom apps Once uploaded, the declarative agent: Inherits the publisher metadata you configured Advertises conversation starters from the FibreOps deck (e.g., "What is the current outage status?", "Dispatch an engineer to FN-LDN-001") Proxies tool calls to the deployed FastAPI app via the action plugin Appears in Microsoft 365 Copilot as a specialised agent users can invoke How Declarative Agents Work A declarative agent in Microsoft 365 Copilot is defined by metadata rather than code running in the M365 surface. The intelligence lives in your backend — Copilot handles the conversational UX, tool orchestration schema, and user authentication. The flow: User invokes the agent in Microsoft 365 Copilot or Teams Copilot renders conversation starters and accepts natural language input When the agent needs to act, Copilot calls the action plugin (your OpenAPI endpoint) Your FastAPI backend processes the request using the full agent pipeline Results return to the user in the Copilot/Teams UX This architecture means your agent logic stays in one place — the backend. The M365 surface is purely a distribution and interaction layer. Action Plugins and OpenAPI The action plugin ( fibreops-action.json ) references your FastAPI app's /openapi.json endpoint. FibreOps exposes a JSON API that the action plugin can call: /api/runs — List and query agent runs /api/optimiser — Get optimizer scores and suggestions /sdk/chat — Natural language interaction with the agent system /healthz — Liveness probe Because FastAPI auto-generates OpenAPI schemas from your typed Python endpoints, the action plugin gets accurate parameter descriptions, response schemas, and error codes without any manual specification work. Publishing as Autopilots (Public Preview) Autopilots take distribution one step further — agents that operate autonomously without requiring a user to initiate each interaction. An Autopilot can: React to events (e.g., a critical telemetry signal) without human initiation Take actions within defined guardrails Notify users only when human intervention is needed Operate continuously across Microsoft 365 surfaces For FibreOps, an Autopilot would monitor the Event Hub stream continuously and only surface to the NOC team when an incident exceeds automated resolution capability — a fully autonomous operations agent. Teams Adaptive Cards FibreOps posts rich Adaptive Card notifications to Microsoft Teams throughout the agent pipeline. This is separate from the declarative agent — it is a push notification channel for real-time operational awareness. # The NetOps agent posts an outage notice via Incoming Webhook def post_outage_notice(incident_id, node_id, severity, summary, engineer=None): card = { "type": "AdaptiveCard", "body": [ {"type": "TextBlock", "text": f"🚨 Outage: {node_id}", "weight": "Bolder", "size": "Large"}, {"type": "FactSet", "facts": [ {"title": "Severity", "value": severity.upper()}, {"title": "Incident", "value": incident_id}, {"title": "Summary", "value": summary}, ]}, ], "actions": [ {"type": "Action.OpenUrl", "title": "View in NOC Console", "url": f"{base_url}/runs/{incident_id}"} ] } # POST to Teams webhook or append to outbox for offline mode ... If TEAMS_WEBHOOK_URL is not configured, cards are appended to state/teams_outbox.jsonl for review in the NOC console's Teams panel. End-to-End: From Code to Copilot Here is the complete flow from development to distribution: Build — Develop agents with Microsoft Agent Framework, test locally with python -m fibreops.demo --backend local Publish agents — python -m fibreops.demo publish creates hosted Prompt Agents in Foundry Deploy infrastructure — azd up provisions App Service, ACR, Event Hub, Key Vault, and Application Insights Deploy hosted agent — azd env set FIBREOPS_DEPLOY_HOSTED true && azd up Generate M365 package — python -m fibreops.demo publish-m365 --out dist/m365 Upload to Teams — Upload fibreops-copilot.zip via Teams Admin Center Users interact — The agent is now available in Microsoft 365 Copilot and Teams Security Considerations Managed Identity — The deployed app uses system-assigned managed identity for all Azure service access. No secrets in code. Least privilege — Each role grant is scoped to the minimum required (Event Hubs Data Owner, Key Vault Secrets User, AcrPull, Azure AI Developer). Authentication — The M365 Copilot surface handles user authentication; your backend receives authenticated requests. Guardrails — Autopilots operate within defined boundaries; human-in-the-loop escalation is built into the Routine and agent decision logic. Key Takeaways Publishing to Teams and M365 Copilot is GA — a single command generates the complete package. Declarative agents separate distribution (M365) from intelligence (your backend). Action plugins leverage your existing FastAPI OpenAPI schema — no manual specification needed. Autopilots (Public Preview) enable fully autonomous operation within guardrails. Adaptive Cards provide real-time push notifications alongside the conversational agent surface. The same backend serves the NOC console, the Copilot SDK, and the M365 declarative agent. Next Steps Explore the FibreOps repository — try python -m fibreops.demo publish-m365 Microsoft 365 Copilot extensibility documentation Next in this series: Voice Live and Observability for Production Agent SystemsBuilding Autonomous Agents with Microsoft Agent Framework and GitHub Copilot SDK Part 2/5
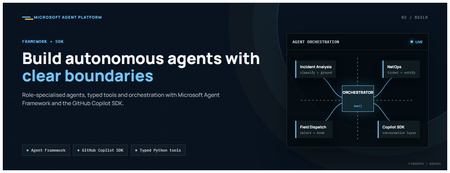
This is the second post in our series on the Microsoft agent platform. Here we dive deep into building autonomous agents, the development experience, the Microsoft Agent Framework, tool design patterns, and how the GitHub Copilot SDK brings conversational AI to your agent system. All examples reference the FibreOps repository, an autonomous fibre outage response system demonstrated at Microsoft Build BRK241. The Microsoft Agent Framework The Microsoft Agent Framework (now GA) provides a unified programming model for building agents. It supports multiple backends through a single .run() contract: Hosted — FoundryAgent connected to a Prompt Agent published to Microsoft Foundry Agent Service. Foundry — Agent + FoundryChatClient with the definition resolved locally (ideal for prompt iteration). Local — Deterministic LocalAgent for offline development and testing. This design means your orchestration code never changes regardless of where the agent runs. The factory pattern in FibreOps selects the backend at startup: # src/fibreops/agents/factory.py — simplified from agent_framework_foundry import FoundryAgent from agent_framework import Agent, FoundryChatClient def build_agent(role: str, backend: str, config: Config): if backend == "hosted": return FoundryAgent(agent_id=config.foundry_agents[role]) elif backend == "foundry": return Agent( instructions=get_instructions(role), chat_client=FoundryChatClient(endpoint=config.endpoint), tools=get_tools(role), ) else: return LocalAgent(role=role) Set FIBREOPS_AGENT_BACKEND to override the backend, or leave it as auto for intelligent detection. Designing Role-Specialised Agents FibreOps demonstrates a key pattern: role specialisation. Rather than one monolithic agent, the system uses three focused agents, each with a clear responsibility boundary: Agent Role Tools Available IncidentAnalysisAgent Classify severity, find root cause, retrieve SOP Knowledge (SOPs + topology), Web IQ, Work IQ NetOpsCoordinatorAgent File D365 incident, post Teams notice Ticketing, Teams, Memory FieldDispatchAgent Select engineer, book resource, update team Dispatch, Teams, Voice Why Role Specialisation? Focused system prompts — Each agent has a tightly scoped instruction set, reducing hallucination and improving reliability. Independent evaluation — You can score each agent separately against role-specific criteria. Parallel development — Teams can iterate on agents independently. Selective upgrade — Swap one agent's model or implementation without touching others. Tool Design: Typed Python Functions Tools in the Microsoft Agent Framework are typed Python functions that the runtime supplies to the hosted agent definition. FibreOps demonstrates several tool categories: Knowledge Tools # src/fibreops/tools/knowledge.py — simplified def sop_lookup(node_id: str, signal_type: str) -> dict: """Retrieve the Standard Operating Procedure for a given signal type. Args: node_id: The fibre node identifier (e.g., FN-LDN-001) signal_type: The type of signal (loss_of_light, high_ber, signal_degradation) Returns: SOP with steps, escalation path, and estimated resolution time. """ # Load from local markdown SOPs or Foundry IQ ... def web_iq_search(query: str, *, limit: int = 5) -> list[dict]: """Search public web for context relevant to the incident. Grounding against roadworks, weather, power outages, splice guidance. Falls back to deterministic fixtures when endpoint is unset. """ ... def work_iq_search(query: str, *, limit: int = 5) -> list[dict]: """Search enterprise knowledge for context relevant to the incident. Site surveys, SLA tiers, competency matrix, MTTR trends. """ ... Integration Tools # src/fibreops/tools/teams.py — simplified def post_outage_notice( incident_id: str, node_id: str, severity: str, summary: str, engineer: str | None = None, ) -> dict: """Post an Adaptive Card outage notice to the configured Teams channel. If TEAMS_WEBHOOK_URL is not set, appends to state/teams_outbox.jsonl for offline review. """ card = build_adaptive_card(incident_id, node_id, severity, summary, engineer) if config.teams_webhook_url: requests.post(config.teams_webhook_url, json=card) else: append_to_outbox(card) return {"status": "posted", "incident_id": incident_id} Design Principles for Agent Tools Typed parameters with docstrings — The runtime uses type hints and docstrings to generate the tool schema for the LLM. Graceful degradation — Every tool works offline by falling back to local fixtures or file-based state. Idempotent where possible — Tools that create resources return existing records if called with the same parameters. Observable — Every tool invocation emits an OpenTelemetry span for tracing and debugging. The Orchestrator Pattern The orchestrator drives signals through the agent pipeline. It is deliberately simple — a linear flow with error handling: # src/fibreops/orchestrator.py — simplified async def handle_signal(signal: TelemetrySignal) -> RunResult: """Process a telemetry signal through the agent pipeline.""" # Stage 1: Incident Analysis analysis = await incident_agent.run( f"Analyse this signal: {signal.model_dump_json()}" ) # Stage 2: NetOps Coordination coordination = await netops_agent.run( f"Coordinate response for: {analysis.summary}" ) # Stage 3: Field Dispatch dispatch = await dispatch_agent.run( f"Dispatch engineer for incident: {coordination.incident_id}" ) return RunResult( signal=signal, analysis=analysis, coordination=coordination, dispatch=dispatch, ) The orchestrator honours the same contract regardless of backend — hosted , foundry , or local — because all backends implement await agent.run(prompt) . GitHub Copilot SDK Integration (GA) The GitHub Copilot SDK enables conversational interaction with your agent system. FibreOps implements FibreOpsCopilotClient with the same interface as github/copilot-sdk : # src/fibreops/sdk/__init__.py — simplified from fibreops.sdk.client import FibreOpsCopilotClient client = FibreOpsCopilotClient() session = client.create_session() # Query agent status response = session.send_and_wait("status") print(response.text) # Human-readable summary print(response.data) # Structured JSON # Inject a telemetry signal via conversation response = session.send_and_wait(json.dumps({ "signal_id": "sig-demo", "node_id": "FN-LDN-001", "signal_type": "loss_of_light", "severity": "critical" })) The adapter routes prompts by shape: JSON signal-shaped dicts — Forwarded to the orchestrator for processing. Free-form text — Answered by a deterministic responder ( help , status , nodes , engineers , optimiser , dispatch ). Drive it from the terminal: python -m fibreops.demo chat "help" python -m fibreops.demo chat "status" python -m fibreops.demo chat '{"signal_id":"sig-demo","node_id":"FN-LDN-001","signal_type":"loss_of_light","severity":"critical"}' Or hit the embedded HTTP endpoint when the NOC console is running: Invoke-RestMethod -Method Post http://127.0.0.1:8800/sdk/chat -Body '{"prompt":"status"}' -ContentType application/json Development Workflow with Foundry Toolkit for VS Code The Foundry Toolkit for VS Code provides an integrated development experience: Author prompts — Edit system instructions with live preview and token counting. Test locally — Run against the foundry backend with FoundryChatClient pointing at your development model. Iterate fast — The foundry backend resolves definitions locally, so prompt changes take effect immediately without republishing. Publish when ready — python -m fibreops.demo publish creates hosted Prompt Agents in Foundry. Multi-Model Support The Microsoft Agent Framework supports multiple models. FibreOps defaults to gpt-4.1-mini (the model available in most demo Foundry accounts), but any chat-completions deployment works: # .env AZURE_AI_MODEL_DEPLOYMENT=gpt-4.1-mini # or gpt-4o-mini, gpt-4o, gpt-4.1 The framework also supports Claude Code connectors and Magentic-One for multi-agent collaboration scenarios. Testing Strategy FibreOps demonstrates a layered testing approach: Unit tests — Test tools in isolation with mocked dependencies. Local backend tests — Run the full pipeline with LocalAgent for deterministic assertions. Integration tests — Run against real Foundry agents with pytest -q . Rubric evaluation — The optimizer scores every run against defined criteria. # Run the test suite .\.venv\Scripts\python.exe -m pytest -q Key Takeaways The Microsoft Agent Framework provides a unified .run() contract across hosted, foundry, and local backends. Role specialisation keeps agents focused, testable, and independently evolvable. Tools are typed Python functions with docstrings — the runtime generates schemas automatically. The GitHub Copilot SDK (GA) enables conversational interaction with any agent system. Graceful degradation means the entire system works offline for development. The factory pattern lets you switch backends without changing orchestration code. Next Steps Clone the FibreOps repository and run python -m fibreops.demo --signals 3 Microsoft Agent Framework documentation Next in this series: Running Hosted Agents in Microsoft Foundry Agent ServiceBuilding and Deploying Microsoft Hosted Agents to Microsoft Teams
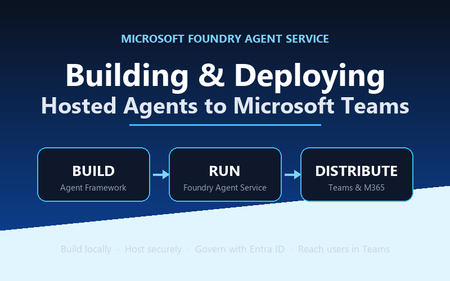
A practical, engineer-to-engineer guide to taking an AI agent from a developer laptop, into Microsoft Foundry Agent Service, and out to end users inside Microsoft Teams and Microsoft 365 — using the BRK241 FibreOps reference implementation as a worked example. Introduction: the hard part is no longer building the agent Two years ago, wiring an LLM to a couple of tools felt like the summit. It isn't any more. Frameworks, hosted models, and function-calling have made the build step almost routine. The problem has quietly moved downstream. The genuinely hard questions today are operational: Where does the agent run when it's no longer on your machine? What identity does it use to call enterprise systems, and who granted it? How does a platform team scale, monitor, and roll it back? How do business users actually reach it without learning a new tool? Who signed off on it touching production data? A prototype answers none of these. A production agent platform answers all of them, repeatably, for every agent an organisation ships. That shift — from a clever notebook to a governed, observable service that lands in the tools people already use — is the subject of this article. We'll use a single narrative to keep it concrete: FibreOps, the BRK241 "Autonomous Fibre Outage Response" system. It ingests optical line terminal (OLT) telemetry, analyses incidents, files tickets in Dynamics 365 Field Service, posts Adaptive Cards to Microsoft Teams, and dispatches engineers — all through role-specialised agents. The full source is on GitHub. The story runs on three verbs: Build → Run → Distribute. Section 1: Building the agent An agent is not one mega-prompt. FibreOps is deliberately factored into three role-specialised agents behind a single orchestrator, each with its own tool surface, its own system instructions, and a strict output contract: IncidentAnalysisAgent — classifies severity, finds probable cause, and pulls the correct standard operating procedure (SOP). NetOpsCoordinatorAgent — files the D365 incident and posts the Teams outage notice. FieldDispatchAgent — selects the best engineer by skill, region and shift, books the resource, and updates Teams. The Coordinator hands off to Dispatch with a literal HANDOFF:DISPATCH token rather than a fuzzy "I think we should…". Hard contracts between agents are how you stop them inventing work. Microsoft Agent Framework The agents are built with the Microsoft Agent Framework (MAF). The key design decision in the reference implementation is that all three backends honour one contract — await agent.run(prompt) -> response — so the orchestrator never knows or cares where reasoning actually happens: local — a deterministic LocalAgent shim with no LLM, so the demo runs with zero Azure credentials. foundry — agent_framework.Agent + FoundryChatClient , definition resolved locally. Ideal while iterating on prompts. hosted — agent_framework_foundry.FoundryAgent bound to a Prompt Agent published to Foundry Agent Service. This is the production path. Building a Foundry-backed agent is just a client plus instructions plus typed tools: from agent_framework import Agent from agent_framework_foundry import FoundryChatClient from azure.identity import DefaultAzureCredential client = FoundryChatClient( project_endpoint=settings.azure_ai_project_endpoint, model=settings.azure_ai_model_deployment, # e.g. gpt-4.1-mini credential=DefaultAzureCredential(), # no connection strings, ever ) agent = Agent( client=client, instructions=INCIDENT_ANALYSIS_INSTRUCTIONS_V1, name="IncidentAnalysisAgent", tools=[lookup_sop, recall, remember, web_iq_search, work_iq_search], ) Note the DefaultAzureCredential . There are no keys or connection strings anywhere in the reasoning path — identity flows from Microsoft Entra ID. Keep that in mind; it becomes the backbone of the governance story later. Tool calling and MCP Every tool is a typed Python function. Foundry sees the JSON schema derived from the signature; the runtime executes the Python. That separation matters: the published agent definition stores only the model and instructions, while the implementations are supplied by the runtime on every call. The same in-process tools (Teams, D365, dispatch, knowledge, memory) run identically whether the agent is local or hosted. Beyond your own functions, Foundry agents can draw on hosted toolbox tools ( web_search , code_interpreter ) and Model Context Protocol (MCP) servers. MCP is the open standard for exposing tools, resources and prompts to agents over a uniform protocol, so an enterprise can stand up an MCP server once and let every agent consume it. In FibreOps this is config-gated — set FIBREOPS_FOUNDRY_TOOLBOX=1 and the incident analyst gains live web search alongside its Web IQ / Work IQ connectors, with no code change. Grounding strategies FibreOps grounds reasoning three ways, in layers: Retrieval over owned knowledge — SOPs (markdown) and the fibre-node topology graph, looked up by the analysis agent. Foundry IQ — Web IQ for public context (roadworks, weather, power) and Work IQ for enterprise context (site surveys, SLA tiers, competency matrix). Procedural memory — prior incidents for a node, recalled before analysis so the agent learns from history. Crucially, when the IQ endpoints are unset the tools fall back to deterministic fixtures so the agent always grounds. Grounding that silently fails is worse than no grounding; design your fallbacks explicitly. Local development, testing and evaluation The whole system runs from one command with no cloud dependency: # Deterministic local backend — no Azure credentials required python -m fibreops.demo --signals 3 --backend local Every run is persisted as a JSON document — the input signal, every agent step, every tool call, every output, every ticket. That single artefact shape feeds three consumers: structured logs, the local optimiser, and Foundry Evaluators. The optimiser scores each run against a five-criterion rubric (was the analysis complete, was severity consistent with customer impact, did a ticket land, did dispatch policy match severity, was an SOP cited) and writes back concrete improvement suggestions. That evaluation loop — not the first working demo — is what turns a prototype into a system you can keep improving. Section 2: Deploying to Microsoft Foundry Agent Service Microsoft Foundry Agent Service is the managed runtime that hosts your agents. It gives you a secure, isolated execution environment, an agent runtime that speaks the OpenAI-compatible Responses API, plus hosted memory, toolboxes, knowledge integrations, and observability — without you operating any of it. FibreOps demonstrates the two hosting shapes Foundry offers. Shape 1 — Prompt Agents A Prompt Agent stores a model deployment plus system instructions as an immutable, versioned definition in Foundry. Publishing is a one-time step per change: from azure.ai.projects import AIProjectClient from azure.ai.projects.models import PromptAgentDefinition from azure.identity import DefaultAzureCredential pc = AIProjectClient(endpoint=endpoint, credential=DefaultAzureCredential(), allow_preview=True) pc.agents.create_version( agent_name="fibreops-incident-analysis", definition=PromptAgentDefinition( model=model_deployment, instructions=INCIDENT_ANALYSIS_INSTRUCTIONS_V1, ), description="FibreOps incident analysis agent", ) At run time you bind to the published version with a FoundryAgent , and — as noted above — the runtime supplies the tool implementations. Prompt versioning ( instructions_v1 , _v2 , _v3 ) is where the optimiser's suggestions land, closing the improvement loop inside the platform. Shape 2 — Containerised hosted agents The BRK241 hero path packages the entire analyse → coordinate → dispatch flow as a single hosted agent: a container that serves the Responses /responses contract on port 8088, deployed straight into your Foundry project. The Agent Framework agent is wrapped by ResponsesHostServer : from agent_framework_foundry_hosting import ResponsesHostServer def main() -> None: server = ResponsesHostServer(build_system_agent()) # Foundry sets the reserved PORT env var inside the sandbox server.run(host="0.0.0.0", port=8088) The container is declared in agent.yaml — kind: hosted , the image reference, the per-session sandbox size (0.5/1 Gi, 1/2 Gi or 2/4 Gi), the protocol version, and only user-declared environment variables. You never hard-code FOUNDRY_* values or the Application Insights connection string; the platform injects those at run time. Deployment registers the image as an immutable version and polls until active : details = pc.agents.create_version( agent_name="fibreops-outage-response", definition=HostedAgentDefinition( protocol_versions=[ProtocolVersionRecord( protocol=AgentProtocol.RESPONSES, version="1.0.0")], cpu="1", memory="2Gi", container_configuration=ContainerConfiguration(image=image), environment_variables={"MODEL_DEPLOYMENT_NAME": model_deployment}, ), ) From local execution to managed hosting The migration path is deliberately gentle because the contract never changes. A developer iterates locally against LocalAgent , moves to the foundry backend to test real prompts, then publish es Prompt Agents or builds and deploy-hosted s the container. The orchestrator code is byte-for-byte identical across all three. That property — same code path local for dev, hosted in Foundry for prod — is the single most important thing to preserve when designing your own agents. Scaling, memory, toolboxes, knowledge and observability Scaling — Foundry provisions a per-session sandbox and a dedicated Entra agent identity per hosted-agent version; you size the sandbox in agent.yaml and let the platform handle isolation. Memory — set FOUNDRY_MEMORY_STORE_NAME and a FoundryMemoryProvider is attached as a context provider so agents read and write learned procedures in Foundry's hosted store; unset, they use local SQLite. No code change. Toolboxes & knowledge — hosted web_search , code interpreter, MCP, and Web/Work IQ connectors are curated per role and merged with your Python tools. Observability — the agent emits OpenTelemetry spans; set APPLICATIONINSIGHTS_CONNECTION_STRING (injected by the platform for hosted agents) and every agent decision, tool call and latency is queryable in Application Insights. Section 3: IT and development responsibilities Successful agent deployments need both developer velocity and platform governance. The failure mode at either extreme is familiar: developers who can't ship because every request routes through a ticket queue, or a free-for-all where nobody can say what identity an agent runs as. The workable model draws a clean line of responsibility. Concern Developer / Agent team IT / Platform team Identity Use DefaultAzureCredential ; never embed secrets; declare the scopes the agent needs Provision the managed / Entra agent identity; own the app registration and consent Access control Request least-privilege roles for the tools the agent calls Grant RBAC at the correct scope; run role-assignment scripts; enforce approvals Security Validate inputs, handle tool failures cleanly, avoid data exfiltration in prompts Disable ACR admin, enforce managed-identity pulls, network controls, Key Vault for secrets Compliance Keep decisions explainable and replayable (the JSON run record) Data-residency, retention, audit, Responsible AI review sign-off Monitoring Emit structured traces + OTel spans; define the rubric Own Application Insights / Log Analytics, alerting, dashboards, SLOs Cost Right-size the sandbox and model deployment; cache grounding Budgets, quota, token-consumption monitoring, chargeback Lifecycle Version prompts and images; feed the optimiser back into new versions Environment promotion (dev → test → prod), rollback, deprecation The reference implementation encodes this split honestly. The Bicep template does not create role assignments, because most deployers only hold Contributor . Instead a subscription Owner runs scripts/grant-mi-roles.ps1 once to grant the App Service's identity exactly the roles it needs — Event Hubs Data Owner, Key Vault Secrets User, AcrPull, Azure AI Developer, and Cognitive Services OpenAI User — and no more. That is least privilege made operational. Section 4: Publishing to Microsoft Teams and Microsoft 365 An agent nobody can reach has no value. The final verb — Distribute — puts the agent where users already work. FibreOps reaches Teams two ways. The lightweight path: Adaptive Cards via Incoming Webhook The NetOps coordinator posts outage notices and status updates to a Teams channel as Adaptive Cards through an Incoming Webhook. Any unconfigured channel is logged to state/teams_outbox.jsonl , so the same code runs in a demo and in production — you only change the webhook target. This is the fastest way to get agent output into Teams and is ideal for notifications and human-in-the-loop review. The rich path: a declarative agent for Microsoft 365 Copilot To make the agent conversational and discoverable across Teams, Microsoft 365 Copilot and copilot.microsoft.com, FibreOps ships as a declarative agent plus an API plugin action. One command builds the sideload-ready package: python -m fibreops.demo publish-m365 --out dist/m365 # wrote declarativeAgent.json (name, description, conversation starters) # wrote fibreops-action.json (API plugin -> {base_url}/openapi.json) # wrote manifest.json (Teams app manifest) # wrote color.png / outline.png (icons) # wrote fibreops-copilot.zip (upload this) The declarative agent declares metadata, conversation starters and a capability set; the action plugin proxies tool calls to the deployed FastAPI app via its OpenAPI document. Set M365_ACTION_BASE_URL to the app's public HTTPS root before publishing — the CLI warns when the placeholder is still in effect. That single environment variable is the only thing that flips the package from demo to production. The end-to-end distribution workflow Conceptually, the artefact travels a fixed pipeline: Developer laptop │ build + test (local backend) → publish Prompt Agent / deploy hosted container ▼ Microsoft Foundry Agent Service │ hosted agent, secure sandbox, Entra agent identity, observability ▼ Teams App package (fibreops-copilot.zip) │ Teams Admin Center → Manage apps → Upload (or M365 Admin Center → Integrated apps) ▼ Microsoft 365 tenant │ admin approval, availability policy, targeted rollout ▼ End user in Teams / M365 Copilot Enterprise rollout is rarely "publish to everyone". The realistic pattern is a staged one: sideload to a pilot group, gather feedback and optimiser scores, then widen availability through Teams app-permission and app-setup policies to department, then tenant. Because the package carries publisher metadata and the declarative schema, IT can review it exactly like any other line-of-business app. Section 5: Enterprise governance Governance is not a bolt-on; in this architecture it's a property of the platform. The pillars: Entra ID integration and agent identity — every hosted agent version gets a dedicated Entra agent identity. Nothing authenticates with a shared key. DefaultAzureCredential means the same code picks up a developer's identity locally and the managed identity in production. RBAC at the right scope — roles are granted to identities, not baked into images. Deploying a hosted agent requires Azure AI Project Manager at project scope; the Foundry project identity needs AcrPull on the registry to pull the container. Least privilege is enforced, not assumed. Auditability — the JSON run record plus OpenTelemetry spans in Application Insights give you a replayable, per-incident audit trail. You can reconstruct exactly which SOP was cited, which engineer was chosen, and why severity was escalated. Data boundaries — the mock D365 is a drop-in for a real Dataverse environment; grounding sources are enterprise connectors (Work IQ) kept inside the tenant boundary. Nothing leaves the subscription without an explicit connector. Responsible AI — the Adaptive Card JSON can be pasted into the Adaptive Cards designer for governance review; the evaluation rubric makes quality measurable; explicit grounding fallbacks prevent silent failure. Production readiness — immutable versioning, one-command rollback (delete a version), managed-identity-only image pulls, and disabled ACR admin credentials are all first-class in the reference deployment. Section 6: Reference architecture The following diagram shows the production topology — users on the left, enterprise systems and controls on the right, with Foundry Agent Service at the centre hosting the agent. flowchart LR User["NOC operator / business user"] subgraph M365["Microsoft 365 tenant"] Teams["Microsoft Teams(Adaptive Cards + declarative agent)"] Copilot["Microsoft 365 Copilot"] end subgraph Foundry["Microsoft Foundry Agent Service"] Hosted["Hosted AgentOutage Response System(secure per-session sandbox)"] Runtime["Agent runtime(Responses API)"] Memory["Hosted memory + toolboxes"] end subgraph Enterprise["Enterprise data & tools"] MCP["MCP servers / web_search"] D365["Dynamics 365 Field Service"] EventHub["Azure Event Hubs(OLT telemetry)"] Knowledge["SOPs + topology + Web/Work IQ"] end subgraph Ops["Cross-cutting"] Obs["ObservabilityApp Insights / OTel"] Gov["GovernanceEntra ID · RBAC · audit"] end User --> Teams User --> Copilot Teams --> Runtime Copilot --> Runtime Runtime --> Hosted Hosted --> Memory Hosted --> MCP Hosted --> Knowledge Hosted --> D365 EventHub --> Hosted Hosted -.->|Adaptive Cards| Teams Hosted --> Obs Gov -.->|identity & policy| Foundry Gov -.->|identity & policy| Enterprise Read the solid arrows as the control/orchestration flow and the dashed arrows as governance and outbound notifications. The point of the diagram is that governance (Entra ID, RBAC, audit) applies across every component, and observability captures every agent decision — neither is optional plumbing. Section 7: What production looks like Picture the FibreOps rollout at a national fibre operator, with the four personas doing their part: Developers build the three agents and the orchestrator on their laptops against the local backend — no cloud, no credentials, deterministic tests. They tune prompts against the foundry backend, watch the optimiser rubric climb from 0.90 to 1.0 as they add the ">5,000 customers ⇒ escalate to critical" rule, and commit a new instruction version. The platform team deploys the container to Foundry Agent Service via scripts/deploy-hosted-agent.ps1 , which builds the image in ACR, pushes it, and registers an immutable version. They provision the Event Hub, Key Vault, Log Analytics and Application Insights from Bicep, and size the sandbox at 1 vCPU / 2 GiB. IT approves the workload: a subscription Owner grants the managed identity its five least-privilege roles, hardens the App Service to pull via managed identity, disables ACR admin, and signs off the Responsible AI review using the replayable run records and the Adaptive Card previews. They sideload fibreops-copilot.zip to a pilot channel first. Business users consume it inside Teams. When an OLT in London loses light, an Adaptive Card appears in the NOC channel within seconds — severity, probable cause, ticket ID, and the dispatched engineer's ETA — with no human having read a dashboard, opened a ticket, or phoned a dispatcher. If Foundry ever wobbles, the same system falls back to the deterministic local agent with an identical trace shape. Every integration but D365 is live in the demo, and D365 is a one-variable swap to a real Dataverse endpoint. That is the whole point: the demo and production differ by configuration, not by code. Key takeaways Design for one contract. If agent.run(prompt) behaves identically local, foundry-backed and hosted, migration to production is configuration, not a rewrite. Factor agents by role with hard handoff contracts. Literal tokens like HANDOFF:DISPATCH beat fuzzy natural-language handoffs and stop agents inventing work. Never embed secrets. DefaultAzureCredential + Entra agent identities give you keyless auth that works the same everywhere. Make every run replayable. A single JSON artefact that feeds logs, evaluation and audit is worth more than any dashboard. Ground explicitly, and design your fallbacks. Grounding that fails silently is a liability; deterministic fixtures keep the agent honest. Split responsibility cleanly. Developers own velocity and quality; the platform team owns identity, scale, cost and promotion. Encode the split in scripts, not tribal knowledge. Version prompts and images immutably. Rollback should be "delete a version", and the optimiser's suggestions should land as the next version. Distribute where users already are. Adaptive Cards for notifications, a declarative agent for conversation and discovery across Teams and M365 Copilot. Roll out in stages. Pilot channel → department → tenant, gated by app policies and real optimiser scores. Resources Reference implementation: github.com/leestott/BRK241-frontier Microsoft Agent Framework overview Microsoft Foundry Agent Service Hosted agents in Foundry Agent Service · Deploy a hosted agent Microsoft Teams developer platform Declarative agents for Microsoft 365 Copilot Model Context Protocol GitHub Copilot Clone the repo, run python -m fibreops.demo --signals 3 --backend local , and watch the analyse → coordinate → dispatch loop close. Then wire in your own Foundry project and take it all the way to Teams. Go build something.Your Entire Agentic AI Workflow, Now Inside VS Code: New Course Available
If you build with AI, you know the tax: jumping between a browser portal to pick a model, a terminal to run it, a separate playground to test a prompt, and finally your editor to write the code. Every context switch is a small drain on focus—and it adds up. What if the whole loop lived in the one tool you never leave? That's the promise of the Foundry Toolkit for Visual Studio Code, and it's exactly what our new VS Code Learn: Foundry Toolkit video series is here to show youRound Table: Building Browser-Capable Agents with the Browser Automation Tool
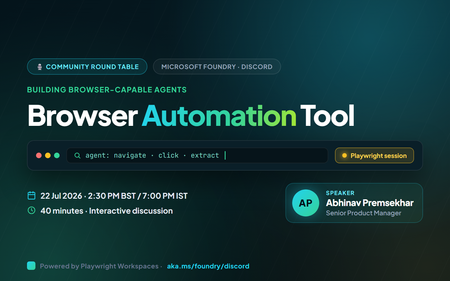
Some of the most valuable work still lives inside a browser: booking a class, pulling a figure off a dashboard, filling in a portal form, gathering research across a dozen tabs. These are exactly the tasks people wish an agent could just do. On 22 July 2026 at 2:30 PM BST (7:00 PM IST), the Microsoft Foundry community is running a 40‑minute Discord round table on the Browser Automation tool : how how it helps agents complete real browser workflows, where you see risk or friction, and what samples, docs, and product improvements would help you adopt it. This is a discussion, not a slideshow. Bring your real projects : the the web workflows you'd love to hand off, and the guardrails you'd want first. Join us in the Microsoft Foundry Discord community. Please arrive at the scheduled time for a quick tech check. Event at a glance What: Microsoft Foundry Discord Community Round Table : Building Browser-Capable Agents with the Browser Automation Tool When: 22 July 2026, 2:30 PM BST / 7:00 PM IST (40 minutes) Where: https://aka.ms/foundry/discord Event link https://discord.gg/Z8JZsrP5P5?event=1527676149264679013 Format: Interactive discussion : voice and chat, live polls, and a short prioritisation exercise voice and chat, live polls, and a short prioritisation exercise Who it's for: AI engineers and developers building agents that need to act on the web Opening question we'll start with: "What browser-based task would you love an AI agent to automate for you today?" The problem: the last mile of automation still runs in a browser Most real-world workflows eventually hit a website with no clean API , such as a supplier portal, an internal admin console, a booking page, or a legacy dashboard a supplier portal, an internal admin console, a booking page, a legacy dashboard. Traditional scripting can automate these, but selectors break, pages change, and every new site means another brittle script to maintain. What developers actually want is an agent that can look at a page, decide what to do, and do it : navigate, read, click, type, and hand back a structured result navigate, read, click, type, and hand back a structured result. That's the gap the Browser Automation tool in Microsoft Foundry is built to close , and doing it responsibly and doing it responsibly, with the right safeguards, is a big part of why we want your feedback. What is the Browser Automation tool? The Browser Automation Tool (BAT) gives Foundry agents the ability to drive a real browser to complete web workflows. It's available as an MCP tool, and it uses Playwright Workspaces , a generally available, cloud-scale service, a generally available, cloud-scale service : navigating, clicking at coordinates, typing, and applying filters as its headless browser infrastructure. When an agent gets a request, Foundry spins up an isolated, sandboxed browser session per interaction, so each run is private and segregated. How agents actually interact with a page BAT runs a perception–action loop. The model receives the current state of the page (including screenshots), decides the next action, and BAT executes it in the sandbox using Playwright and real oversight navigating, clicking at coordinates, typing, applying filters. After each action, BAT captures the updated state and sends it back to the model, repeating until the goal is met or the user stops. Because the model can parse HTML into a DOM, it can reason about the page rather than follow a fixed script. It also supports multi-turn conversations, so you can refine a request mid-flow to complete form-filling or scraping scenarios. Built for real use : watch the automation happen in real time for debugging. and real oversight Live View : a human-in-the-loop override for ambiguous or sensitive steps. watch the automation happen in real time for debugging. Take Control : each interaction gets its own sandboxed browser. a human-in-the-loop override for ambiguous or sensitive steps. Isolated sessions : for reliability, optimisation, and audit. each interaction gets its own sandboxed browser. Built-in observability : for internal systems (private preview). for reliability, optimisation, and audit. Private website browsing : Python, C#, JavaScript, Java, and the REST API. for internal systems (private preview). Broad SDK support , and the agent can make mistakes or be misled by malicious page content Python, C#, JavaScript, Java, and the REST API. A word on responsible use. BAT is powerful precisely because an AI can use credentials you share with it to reach email, financial, enterprise, or social accounts , watching for and the agent can make mistakes or be misled by malicious page content. You're responsible for reviewing your applications, scoping which credentials you provide, and adding your own mitigations. See the Foundry Agent Service transparency note. This is exactly the kind of trade-off we want to talk through together. Example scenario A user asks: "Report the year-to-date percent change of Microsoft's stock price." The agent navigates to a finance site, enters MSFT in the search bar, opens the stock page, clicks the YTD view on the chart, reads the value, and returns a clean, structured answer ; that's the no bespoke scraper, no hard-coded selectors, and a full trace of what it did. Discussion prompt: "Where would browser automation fit into your current projects or workflows?" How setup works (the short version) You'll want to understand the wiring before you scale, so it's worth a look ahead of the session. There are two moving parts: Create a Playwright Workspace in the Azure portal, enable the access token auth method, and grab the wss:// browser endpoint. Give your project identity a Contributor (or custom) role on the workspace. Connect the tool in Foundry under Build > Tools: create a toolbox, add Browser Automation, point it at your Playwright workspace and auth type, and publish. Copy the Project connection ID from the tool's details page : how agents interact with the web, example use cases, and responsible use. that's the BROWSER_CONNECTION_ID in your code. What we'll cover in the 40 minutes Welcome & opening question (0:00–0:03) : navigate, gather, interact, and return a structured result, end to end. the browser task you'd most love to automate. What is Browser Automation (0:03–0:07) : the workflows you're building, public vs. internal targets, and where you'd pick automation over scripting. how agents interact with the web, example use cases, and responsible use. Scenario walkthrough (0:07–0:12) : what agents may do autonomously, what needs approval, and the observability and enterprise safeguards you'd require. navigate, gather, interact, return a structured result : your biggest adoption blockers, missing docs, and the SDK samples and demos you'd prioritise. end to end. Use cases & opportunities (0:12–0:22) : vote live on top use cases, challenges, and feature requests. the workflows you're building, public vs. internal targets, and where you'd pick automation over scripting. Trust, security & governance (0:22–0:31) , and which would benefit most from a capable agent. what agents may do autonomously, what needs approval, and the observability and enterprise safeguards you'd require. Developer experience feedback (0:31–0:36) ; which should always require approval. your biggest adoption blockers, missing docs, and the SDK samples and demos you'd prioritise. Prioritisation & next steps (0:36–0:40) , sometimes with credentials, vote live on top use cases, challenges, and feature requests. Come prepared to talk about The browser-based workflows you're building today : navigation, data gathering, form filling, and research, via an MCP tool powered by Playwright Workspaces. and which would benefit most from a capable agent. Whether your scenarios target public websites, internal systems, or both. Why you'd choose browser automation over traditional scripting. Which actions you'd let an agent perform autonomously : a perception-action loop with screenshots and DOM parsing handles pages that break brittle scripts. and which should always require approval. The observability, audit, and enterprise safeguards you'd expect before running this in production. The examples, samples, and tutorials that would help you get started fastest. Responsible and secure by design Because BAT lets an agent take real actions on live websites : isolated sessions, Live View, Take Control, and observability for reliability and audit. sometimes with credentials : scope credentials carefully and add your own mitigations; the tool is powerful and in preview. governance is a first-class part of the conversation, not a footnote. Isolated per-session sandboxes, Live View, Take Control human-in-the-loop, and built-in observability are there so you can see, pause, and audit what an agent does. Bring your trust concerns, required guardrails, and governance requirements: they directly shape the roadmap. Note: the Browser Automation tool is in preview; APIs and capabilities may change, and it isn't recommended for production workloads yet. Key takeaways Browser Automation lets Foundry agents complete real web workflows : this round table feeds directly into the engineering and product teams. navigation, data gathering, form filling, research , and arrive on time for the tech check. via an MCP tool powered by Playwright Workspaces. Agents reason, not just replay , and browser-capable agents are how we cross it. a perception–action loop with screenshots and DOM parsing handles pages that break brittle scripts. Oversight is built in: isolated sessions, Live View, Take Control, and observability for reliability and audit. Responsibility is shared: scope credentials carefully and add your own mitigations; the tool is powerful and in preview. Your feedback shapes the product: this round table feeds directly into the engineering and product teams. Save your spot Add it to your calendar: 22 July 2026, 2:30 PM BST / 7:00 PM IST, and arrive on time for the tech check. Join the community: https://aka.ms/foundry/discord Prep with the sample: explore the browser automation sample in foundry-samples. Read the docs: Automate browser tasks with Foundry agents and the hosted-agent quickstart. Event registration link https://discord.gg/Z8JZsrP5P5?event=1527676149264679013 The last mile of automation still runs in a browser, and browser-capable agents are how we cross it. Come tell us what you'd automate, where you'd draw the line, and what you'd need to trust it in production. See you on 22 July.Building Agents in Production with Toolbox, Skills, and Tool Search
If you are shipping AI agents beyond a demo, you have felt the pain: every agent needs the same tools, each with its own authentication, and the tool list keeps growing until your prompt is bloated and the model picks the wrong one. On 22 July 2026 at 5:00 PM BST, the Microsoft Foundry community is running a 40-minute Discord round table to talk about exactly this, and to gather your feedback on three capabilities built to fix it: Toolbox, Skills, and Tool Search. This is a discussion, not a slideshow. Bring your real projects, including tool sprawl, duplicated skills, and authentication headaches, and help shape where these features go next. Join us in the Microsoft Foundry Discord community. Event at a glance What: Microsoft Foundry Discord Community Round Table: Building Agents in Production with Foundry Toolbox, Skills, and Tool Search When: 22 July 2026, 5:00 PM BST (40 minutes) Where: https://aka.ms/foundry/discord Event Link https://discord.gg/Z8JZsrP5P5?event=1527379174061379584 Format: Interactive discussion with voice and chat, live polls, and a short prioritisation exercise Who it's for: AI engineers and developers building and scaling agents in production Opening question we'll start with: "As your agents grow, how do you decide which tools to give them, and how do they pick the right one at runtime?" The problem: agents don't scale by hard-wiring every tool When several agents, or a mix of Foundry hosted agents, Microsoft Agent Framework, LangGraph, and Copilot SDK apps, need the same governed set of tools, you do not want to re-wire those tools and their authentication into every one. Two things break as you grow: Integration sprawl: the same tool gets wired, authenticated, and versioned separately in every agent. Tool overload: sending every tool definition to the model on every turn is slow, expensive, and hurts selection accuracy. The pattern that scales: package the tools once behind a single versioned, governed MCP endpoint, make them discoverable, and let every runtime consume them from the same URL. That is what Toolbox, Skills, and Tool Search deliver together. The three concepts we'll discuss Toolbox: build once, govern centrally, consume anywhere A Toolbox is a reusable, centrally managed bundle of tools exposed through a single MCP-compatible endpoint. Because it is a managed resource, you can add, remove, or reconfigure tools without changing agent code because every agent connects to the same endpoint. Immutable versioning gives you safe, atomic rollouts: build and test a new version on its pinned URL, then promote it to default, and every consumer picks it up with no redeployment. Skills: reusable, composable capabilities A Skill is a reusable, published set of behavioural instructions (a SKILL.md file following the open Agent Skills spec) that is registered once and reused across toolboxes and agents, for example, "summarize document" or "create calendar event". In a toolbox, a skill is not a callable tool: it surfaces as an MCP Resource on the same endpoint, so clients discover and read it with plain resources/list and resources/read, with no Foundry SDK required. Tool Search: runtime discovery instead of hard-wiring A real toolbox can hold dozens or hundreds of tools. Tool Search keeps that cheap for the model through progressive disclosure: instead of listing every tool, Foundry shows the model just two meta-tools, tool_search and call_tool, plus any pinned tools. The model searches for a capability by intent, Foundry ranks the toolbox's tools by match on name and description, and returns only the hits. The prompt stays small no matter how many tools the toolbox holds. How they fit together: Skills and tools live in a Toolbox; Tool Search lets agents scale to many tools without prompt bloat or manual wiring. You manage all of it from the Foundry portal or the Foundry Toolkit extension in VS Code. The scenario we'll walk through A user asks an agent to "summarize this email and schedule a follow-up." The agent uses Tool Search to find the right tools ("email summarization" and "calendar scheduling") from a shared Toolbox, chains them, and returns a result with no per-agent integration and no hard-coded tool list. Discussion prompt: "At what point does the number of tools in your agent start to hurt, and would Tool Search help?" A peek at the code (so you arrive ready) The full, runnable walkthrough lives in the Mastering Foundry Toolbox notebook in the microsoft-foundry/forgebook repo. The core spine is short. First, build a versioned toolbox from typed tool objects plus an optional list of skills: # Build an immutable toolbox version from typed tools + skills version = project.toolboxes.create_version( name=TOOLBOX_NAME, description="Search, code, knowledge, and connection-backed tools.", tools=tools, # e.g. WebSearchToolboxTool(...), AzureAISearchToolboxTool(...) skills=skills or None, # ToolboxSkillReference(name=..., version=...) - SEPARATE from tools ) print(f"Created {TOOLBOX_NAME} version {version.version}") Then turn the same tools into a search-first toolbox by adding the Tool Search meta-tool and pinning only your one or two hottest tools: from azure.ai.projects.models import ToolboxSearchPreviewToolboxTool, ToolConfig # Pin the hottest tool so it's always exposed; everything else is search-gated. tool_configs = {"web_search": ToolConfig(pin=True)} search_version = project.toolboxes.create_version( name=TOOLBOX_NAME, tools=tools + [ToolboxSearchPreviewToolboxTool(tool_configs=tool_configs)], skills=skills or None, ) Every consumer talks to the same MCP endpoint: one URL, any framework: # The default (promoted) version is served from one stable consumer URL def consumer_mcp_url(name): return f"{PROJECT_ENDPOINT.rstrip('/')}/toolboxes/{name}/mcp?api-version=v1" # Microsoft Agent Framework speaks MCP natively - just point it at the URL. # LangGraph (AzureAIProjectToolbox) and the GitHub Copilot SDK consume the same endpoint. How Toolbox simplifies the auth and identity flow This is one of the most important things to understand before you scale agents, and it is a great topic to bring questions on. A toolbox tool reaches a downstream system through a project connection, and the connection's authentication type decides whose identity is used. Get this right once and every consumer inherits correct, least-privilege access automatically, without writing OAuth or token-exchange plumbing in your agent code. Running a toolbox behind a hosted agent puts two identities in play, and the platform wires them together for you: Agent -> Toolbox (the trust boundary). The hosted agent authenticates to the toolbox MCP endpoint with its own agent identity, which holds the Foundry user role on the project. If the agent doesn't have access, the toolbox rejects the agent. This gates access to the toolbox itself, independent of any single tool. Toolbox -> Tool (the end-user passthrough). For oauth2 authentication, the agent forwards the caller's end-user Entra token, and the toolbox uses that token (on-behalf-of) to reach the downstream tool. The tool then acts on behalf of the real end user, providing per-user, least-privilege access with correct downstream audit. For non-passthrough authentication types (none, custom-keys, project-managed-identity, and agentic-identity), the toolbox authenticates using the connection's configured identity, and the agent never sees the secret. That is the "better-together" story: a stable, governable managed identity to the toolbox, plus true end-user identity on the downstream data call. What we'll cover in the 40 minutes https://discord.gg/Z8JZsrP5P5?event=1527379174061379584 Welcome & framing (0:00-0:08): what Toolbox, Skills, and Tool Search are, and how they fit together. Scenario walkthrough (0:08-0:13): the "summarize email, schedule follow-up" flow, end to end. Use cases & opportunities (0:13-0:22): which capabilities you would package as reusable Skills, how many tools your agents carry, and where Tool Search would help. Trust, security & governance (0:22-0:31): what you are comfortable exposing through a shared endpoint, how to scope which tools an agent may discover, authentication models, and the observability you need. Developer experience feedback (0:31-0:36): your biggest adoption blockers, missing docs, and the SDK samples and end-to-end demos you would prioritise. Prioritisation & next steps (0:36-0:40): vote live on the top use cases, challenges, and feature requests. Come prepared to talk about What tools and skills your agents use today, and how they're wired up. Which capabilities you'd turn into reusable, composable Skills shared across agents. How many tools your agents carry, and whether you hit prompt-size or tool-selection accuracy issues. Which tools you'd expose through a shared endpoint, and which need tighter scoping. How you want to control what an agent is allowed to discover and invoke with Tool Search. The examples, samples, and tutorials that would help you get started fastest. Responsible and secure by design Because these features let agents discover and invoke tools dynamically, governance is a first-class part of the conversation. Foundry toolboxes are governed by default: you can screen every tool's inputs and outputs with an RAI guardrail, front your MCP servers with a bring-your-own AI gateway (APIM), scope which tools are discoverable, and use least-privilege identity passthrough so downstream calls carry the real user's permissions and audit trail. Bring your enterprise safeguard requirements because they directly shape the roadmap. Note: Toolbox, Tool Search, and Skills are in preview; APIs and headers may change. Key takeaways Toolbox packages tools once behind a single governed, versioned MCP endpoint, so you can build once and consume from any framework. Skills are reusable, composable capabilities you register once and chain across agents. Tool Search uses two meta-tools and progressive disclosure so agents scale to hundreds of tools without prompt bloat. Auth is simplified: the agent's managed identity gates the toolbox, while end-user token passthrough gives correct, least-privilege downstream access with no OAuth plumbing in your code. Your feedback shapes the product because this round table feeds directly into the engineering and product teams. Save your spot Add it to your calendar: 22 July 2026, 5:00 PM BST. Join the community: https://aka.ms/foundry/discord Prep with the sample: run the Mastering Foundry Toolbox notebook to build, search, and consume a toolbox end to end. Read the docs: Toolbox, Tool Search, and Skills. Agents get more capable as they gain access to more tools and skills, but only if you can build, govern, and scale those capabilities without drowning in integration and prompt bloat. Come and share how you are doing it today, and help shape how Foundry does it next. See you on 22 July.Creating Autonomous Teams Agents Using OpenClaw, MCP, and Azure Container Apps
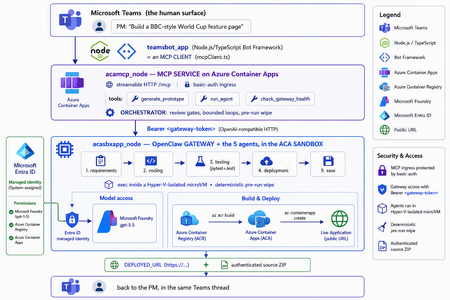
The one shift that changes everything For two years, "AI coding" meant autocomplete. A suggestion appears in your editor, you hit tab, you move on. The agent only existed while you were actively typing. That is no longer the only model. A new category of tools runs asynchronously and autonomously: you message the agent from a chat window — Teams, Slack, Telegram — describe what you want, and walk away. The agent plans, writes code, runs tests, deploys, and hands you back a result. Some of them never sleep: they hold a persistent memory, load their own skills, and act on a schedule without being prompted. This is the world of OpenClaw, Hermes Agent, and the other long-running autonomous agents that exploded across developer culture in 2026. OpenClaw alone crossed 377,000 GitHub stars and millions of active users, becoming — for a while — the most-starred project on GitHub. You install it with one line, connect a channel, and start delegating from your phone. The workflow moves from pair programming to delegation and review. The interactive copilot asks, "What should I write next?" The autonomous agent asks, "What do you need done?" And that reframing is exactly why three questions now keep architects awake: Is it safe? You are handing a self-driving process the ability to run shell commands, touch files, and call APIs. One community report memorably described these agents as a teammate in your group chat who happens to have root access to your codebase. That is not a compliment — it is a threat model. Can it fit into real multi-agent work? A single agent is a demo. Production is a fleet — specialists that hand off to each other with gates in between. Is it flexible and controllable? Autonomy is thrilling right up until the agent packages last week's stale files into this week's deliverable, or loops forever on a failing test. This post answers all three — not with hand-waving, but with a working reference implementation you can clone today: CustomCodingAgentApp in the Multi-AI-Agents-Cloud-Native repo, an "Agentic Prototype Factory" that turns a plain-language idea into a tested, live-on-Azure prototype without leaving the chat window. A product manager types "Build a BBC-style World Cup feature page" in Microsoft Teams. Minutes later they get back a running HTTPS URL and a downloadable source ZIP. Under the hood, five specialized OpenClaw agents powered by Microsoft Foundry gpt-5.5 collaborate in a shared sandbox, run real pytest/Jest suites, and ship the result to Azure Container Apps — all orchestrated behind a Model Context Protocol (MCP) service so any MCP client (GitHub Copilot, Claude, the Teams bot) can drive it. We'll build up to that architecture in the order you should learn it. Part 1 — Long-running autonomous agents, and their two hard problems What actually makes them different A traditional chatbot is text in, text out. It waits for you. An autonomous agent inverts that: Property Traditional chatbot Long-running autonomous agent Execution Responds to a prompt Acts proactively (a "heartbeat" wakes it on a schedule) Scope Words Files, shell, browser, APIs — the real machine Memory This session only Persistent across sessions Interface A web box Any chat channel + the terminal Autonomy None Plans and takes multi-step action on its own Architecturally, OpenClaw is not a library you import — it's a runtime. A single long-running process (the Gateway) bridges your messaging channels to an LLM backend, keeps sessions alive, queues work in ordered lanes, and drives the classic agent loop: call the model → execute the tool calls it asks for → feed results back → repeat until done. There is no rigid step-planner; the model itself steers. That is what makes it feel magical — and what makes it hard to contain. That containment problem has two faces. Hard problem #1 — Security The same properties that make an autonomous agent useful make it dangerous. Full system access + proactive execution + a 32,000-server tool ecosystem is a large, self-driving attack surface. OpenClaw's own short history is the cautionary tale: a critical one-click remote-code-execution CVE early in its life, hundreds of malicious community "skills" discovered on its marketplace, and tens of thousands of gateways found exposed on the open internet. None of this means "don't use autonomous agents." It means: never run one with ambient credentials on a machine you care about. The agent belongs in a box with a hard wall around it. Hard problem #2 — Persistence and continuity Real agent work is long. Refactoring a codebase, researching across dozens of pages, building-testing-deploying an app — these take minutes to hours, far past a single request/response. So the runtime needs durable sessions, a place to keep state, and a workspace that survives across steps. But a persistent workspace that is reused creates its own hazard: state leakage. Files from yesterday's task can contaminate — or get shipped inside — today's result. Continuity and cleanliness pull in opposite directions, and you have to engineer the tension out. One agent is a demo; production is a fleet A single monolithic agent asked to "gather requirements, write the code, test it, deploy it, and package it" will do all four mediocrely and blur the boundaries between them. The production pattern is orchestrator-worker: specialized agents, each with one job, handing off to the next through explicit gates. OpenClaw supports exactly this — it can spawn sub-agents and even dispatch external coding harnesses, acting as a meta-orchestrator rather than a single model. The open question is never whether to go multi-agent; it's where the seams and the guardrails go. The answer to "is it safe?": put the agent in a microVM If the agent needs root to be useful, then give it root — inside a disposable microVM, not on your host. In 2026 there are several credible ways to do this: Kata Containers on AKS — each pod gets its own lightweight VM boundary and guest kernel. Hyperlight Wasm — per-call, snapshot-restored Wasm microVMs for running LLM-generated code. Azure Container Apps dynamic sessions — prewarmed, Hyper-V-isolated sandboxes that start in milliseconds, scale to thousands, and are purpose-built for "secure execution of custom code" and "running LLM-generated scripts." That last one — the ACA sandbox — is the sweet spot for a chat-driven agent factory: strong isolation without you operating a Kubernetes cluster, and an exec API to run commands inside the box. It's what the reference implementation uses. Part 2 — Putting OpenClaw into the ACA sandbox Here is where the repo stops being a diagram and becomes running code. The Agentic Prototype Factory decomposes the "idea → live app" job into five specialized OpenClaw agents that run in sequence, all inside the sandbox: requirements → coding → testing → deployment → save Each is addressable as its own model target on the OpenClaw gateway's OpenAI-compatible API: model value Routes to openclaw / openclaw/default Default agent openclaw/requirements-agent Requirement Agent openclaw/coding-agent Coding Agent openclaw/testing-agent Testing Agent openclaw/deployment-agent Deployment Agent openclaw/save-agent Save & download Agent Control, not vibes: review gates with feedback loops Autonomy without gates is how you get an agent that confidently deploys a broken app. The orchestrator wires the five agents into a graph with hard, bounded gates: Every knob is explicit and lives in server.py: _MAX_TEST_ROUNDS = 3, _MAX_DEPLOY_REVIEW = 2, _DEPLOY_POLL_ATTEMPTS = 12, _DEPLOY_POLL_DELAY_S = 20. The Testing Agent must end each turn with a literal TESTS_PASSED / TESTS_FAILED verdict; the orchestrator won't declare success until it HTTP-checks the deployed URL and inspects the response body — because a ResourceNotFound can happily return an HTTP 200. That is what "flexible and controllable" looks like in practice: the LLM drives creatively inside a deterministic state machine. The deterministic pre-run wipe (solving state leakage) Because the sandbox is reused across runs (fast, cheap), the orchestrator does something disciplined before every run: it wipes all lingering agent workspaces. Stale files from a previous task can never leak into — or be packaged as — the new result. This is the engineered answer to Hard Problem #2. Working with the sandbox's limits, not against them The ACA sandbox exec API is hard-capped at ~120 seconds — shorter than a cold az acr build plus az containerapp create. A naive agent would time out and report failure. The clever bit: those commands finish server-side on Azure even after the client exec disconnects. So deployment is split in two: deploy-build <dir> <app> — installs the deploy helpers, writes a tight .dockerignore, and kicks off the ACR build tagged <app>:latest. If the client drops at ~120s, the image still lands in ACR. deploy-finish <app> — idempotent, polled up to 12×. It reports STILL_BUILDING until the image exists, then fires a --no-wait containerapp create, and finally returns DEPLOYED_URL=https://<fqdn>. This is the single most important lesson of the whole sample: an autonomous agent doesn't need a longer timeout — it needs to understand the durability semantics of the platform it runs on. Part 3 — MCP, and why its security is the whole ballgame The five-agent workflow is powerful, but it would be a silo if the only way to reach it were a bespoke API. Instead, the repo wraps the entire orchestration as a Model Context Protocol (MCP) service (acamcp_node) exposed over streamable HTTP at /mcp, with a tiny, legible tool surface: MCP tool What it does generate_prototype Run the full five-agent workflow end to end run_agent Invoke a single named agent check_gateway_health Liveness / readiness of the OpenClaw gateway The payoff is enormous: any MCP client can now drive the factory — GitHub Copilot, Claude, or the Teams bot we're about to meet. One protocol, many front-ends. But MCP is not just an integration convenience — it's a control plane, and every MCP tool is a privileged capability. In an ecosystem with 32,000+ community servers, "just add an MCP server" is a supply-chain decision. A tool call is code execution by another name. So the security posture has to be deliberate. Here is how the reference implementation hardens it — and the principles are portable to any MCP deployment: Auth in front of the protocol. The MCP ingress sits behind basic auth (MCP_BASIC_AUTH_PASSWORD); the gateway itself requires the gateway token as a bearer credential (Authorization: Bearer <token>). No anonymous tool calls. A tiny, named allowlist — not a blank check. The gateway routes only to six explicit model targets. There is no "run arbitrary agent" escape hatch; the routing table is the allowlist. No secrets in the workload. There are no model API keys anywhere in the running containers — model access is brokered entirely through Entra ID managed identities. The gateway token is stored as a Kubernetes secret and never baked into an image. Private by default. The gateway's OpenAI-compatible endpoint is operator-level access — it stays on private ingress, with TLS and authentication added before anything is ever exposed publicly. Least privilege at the identity layer. The gateway is granted exactly the Foundry roles it needs (Cognitive Services User / Cognitive Services OpenAI User) on the Foundry resource — nothing more. The takeaway for MCP is the same as for the agent itself: treat the protocol as a doorway, and put a guard on the door. Authentication, an explicit allowlist, private ingress, and brokered identity turn MCP from an open blast radius into a governed control plane. Part 4 — The complete solution: Teams + MCP on ACA + OpenClaw on the ACA sandbox Now assemble the three deployable components into one loop: The request lifecycle, end to end A PM sends one sentence in Teams. The teamsbot_app bot — acting as an MCP client via mcpClient.ts — opens an MCP handshake and calls generate_prototype. The MCP service on ACA (acamcp_node) runs the orchestrator: pre-run wipe, then requirements → coding → testing. The OpenClaw gateway in the ACA sandbox (acasbxapp_node) executes each agent, talking to Foundry gpt-5.5 through a managed identity — no keys in the box. Real pytest + Jest suites run inside the sandbox. Fail → loop back (bounded). Pass → deploy. Deployment uses the build + poll split to survive the ~120s exec cap; the app lands in Azure Container Apps and is health-checked body-aware at its live URL. The Save Agent produces an authenticated ZIP download URL. The bot streams each agent's progress back into the Teams thread and returns the running HTTPS URL + source ZIP — optionally auto-opening the project in VS Code Insiders. How the architecture answers the three questions The question How this solution answers it Is it safe? The autonomous agent runs in a Hyper-V-isolated ACA sandbox, not on anyone's laptop. No model keys in the workload — Entra ID managed identity brokers Foundry. MCP behind basic auth; gateway behind a bearer token on private ingress; token as a secret, never in an image. A deterministic pre-run wipe removes cross-run leakage. Does it fit multi-agent work? It is a multi-agent system — five specialist OpenClaw agents with A2A hand-offs and review gates — and because it's exposed via MCP, any client (Copilot, Claude, Teams) can orchestrate it. Is it flexible and controllable? Creativity lives inside a deterministic state machine: explicit TESTS_PASSED/FAILED verdicts, bounded retry loops (_MAX_TEST_ROUNDS, _MAX_DEPLOY_REVIEW), body-aware health checks, and a human approving in the Teams thread. Deploy it yourself The repo ships scripts for all three tiers (the gateway uses the platform's managed identity to reach Foundry — no key handling, no image rebuild): # 1) OpenClaw gateway + the 5 agents (acasbxapp_node) cd acasbxapp_node cp .env.example .env # gateway token, Foundry endpoint, sandbox ids ./scripts/build-openclaw-image.sh # build + push the OpenClaw image to ACR ./scripts/deploy-aks-gateway.sh # grant Foundry roles + deploy # 2) MCP service (acamcp_node) cd ../acamcp_node cp .env.example .env # ACR + cluster; gateway token read from ../acasbxapp_node/.env ./scripts/build-images.sh # build + push the MCP image ./scripts/deploy-aks.sh # secret + manifests to the openclaw namespace ./scripts/smoke-check.sh # verify the MCP handshake # 3) Teams bot (teamsbot_app) — Node.js/TypeScript MCP client cd ../teamsbot_app # configure + run per the folder README, then sideload the Teams app package The reference implementation targets Azure (ACA + AKS) — the OpenClaw gateway and MCP service run as containers, and the code-execution sandbox uses the ACA dynamic-sessions exec API. Keep the gateway on private ingress and add TLS before any public exposure. Final thought Strip away the World Cup demo and a reusable pattern remains — a blueprint for running any long-running autonomous agent in the enterprise: A message-driven agent (OpenClaw / Hermes) + a microVM sandbox (Azure Container Apps dynamic sessions) + an MCP control plane with auth + enterprise identity (Entra ID managed identity) + a human surface (Microsoft Teams). The autonomy that made these agents go viral is the same autonomy that makes security teams nervous. You don't resolve that tension by slowing the agent down — you resolve it by giving it a box with a hard wall, a control plane with a guard on the door, an identity instead of a secret, and a human in the loop. Do that, and "your PM types a sentence, Azure ships an app" stops being a scary demo and becomes something you can actually put in production. Clone it, break it, harden it further: kinfey/Multi-AI-Agents-Cloud-Native → code/CustomCodingAgentApp The chat window is the new terminal. Let's make it a safe one.1.3KViews2likes0CommentsEnterprise-ready Claude Desktop with Entra ID, APIM, and Microsoft Foundry (No Backend Required)
How I put corporate sign-in in front of Claude Desktop without writing a single line of backend code. TL;DR — In this post, I show how to securely enable Claude Desktop in enterprise environments using Microsoft Entra ID, Azure API Management, and Microsoft Foundry — without deploying a custom backend. This approach removes API keys from endpoints, enforces per-user identity, and aligns fully with Zero Trust principles. Who this is for: Enterprise architects evaluating secure AI client patterns Developers enabling Claude Desktop in regulated environments Platform teams standardizing identity and governance for LLM access Why this post exists: Microsoft Learn's Configure Claude Desktop with Foundry Models only shows the API-key path — a shared key pasted into every user's Claude Desktop config. That's fine for a quick demo, but it's a non-starter for most enterprises (no per-user identity, no MFA / Conditional Access, hard to revoke, hard to audit). This post fills that gap: same Foundry backend, but with Microsoft Entra ID SSO in front via Azure API Management, so each user signs in with their corporate identity and zero secrets land on the laptop. The problem For many teams experimenting with Claude Desktop, the blocker isn't capability — it's enterprise readiness. How do you enforce identity, eliminate shared secrets, and apply governance without standing up a custom backend service to sit in front of the model? If your team wants to use Claude Desktop with your own Anthropic deployment running on Microsoft Foundry, but with a few non-negotiable requirements: No shared API keys floating around on developer laptops. Per-user identity — every request must be attributable to a real person. MFA and Conditional Access must apply, the same way they do for every other internal app. Central rate-limiting and logging — a centralized control plane for governance. Claude Desktop 1.5+ supports a "Gateway SSO" mode where it can sign each user in with OpenID Connect and forward their token to a custom LLM gateway. Azure API Management (APIM) is a perfect fit for that gateway role: it validates the user's Entra ID token, then re-authenticates itself to Foundry behind the scenes. APIM acts as a centralized policy enforcement layer, enabling identity validation, traffic governance, and secure re-authentication to backend AI services without custom code. The end-to-end flow looks like this: %%{init: {'flowchart': {'nodeSpacing': 60, 'rankSpacing': 80, 'useMaxWidth': true}, 'themeVariables': {'fontSize':'16px'}} }%% flowchart TB User([Corporate user]) Claude["Claude Desktop"] Entra["Microsoft Entra ID<br/>(OIDC + MFA + Conditional Access)"] APIM["Azure API Management<br/>validate-jwt → rewrite headers<br/>(policy gateway)"] Foundry["Microsoft Foundry<br/>Claude deployment"] User -- "1. Sign in (browser PKCE)" --> Entra Entra -- "2. ID token" --> Claude Claude -- "3. POST /v1/messages<br/>Authorization: Bearer ID token" --> APIM APIM -- "4. OIDC discovery / JWKS" --> Entra APIM -- "5. x-api-key (or Managed Identity)" --> Foundry Foundry -- "6. Response" --> APIM APIM -- "7. Response" --> Claude classDef azure fill:#0a4d8c,stroke:#0a3a6b,color:#ffffff; classDef client fill:#f3f3f3,stroke:#888,color:#222; class Entra,APIM,Foundry azure; class Claude,User client; Or in plain text: Claude Desktop │ Authorization: Bearer <Entra ID token from the user's browser sign-in> ▼ Azure API Management (<your-apim>) │ ① validate-jwt → verifies user's Entra ID token │ ② re-auths to Foundry with an API key from a Named value │ Authorization stripped, x-api-key injected ▼ Microsoft Foundry /anthropic/v1/messages │ runs Claude (<your-deployment>) ▼ Response back to the user There are no API keys on user devices. Foundry's key lives only inside APIM. And every request carries the user's oid claim, so I can build dashboards and per-user quotas later. What you need before starting An Azure subscription with a Microsoft Foundry (AI Services) account and a Claude deployment. (Throughout this post I'll just call it Foundry.) An API Management instance, any tier. Permission to register applications in Entra ID for your tenant. Claude Desktop 1.5.0 or later. Azure CLI installed locally. Throughout this post I'll use placeholders for resource names: <apim-name> — your API Management service name <resource-group> — the resource group that holds it <foundry-account> — your Foundry account name <deployment-name> — the name of the Claude model deployment on Foundry Step 1 — Register an Entra ID app for Claude Desktop This is the OIDC client Claude Desktop signs users into. Claude Desktop requires a single-tenant, public PKCE client (no client secret) with a loopback redirect URI, configured under the Mobile and desktop applications platform in Entra ID — the only platform that allows any loopback port. I scripted it so the setup is one command and idempotent: # scripts/register-claude-entra-app.ps1 [CmdletBinding()] param( [string] $TenantId = '<your-tenant-id>', [string] $SubscriptionId = '<your-subscription-id>', [string] $ResourceGroup = '<resource-group>', [string] $ApimName = '<apim-name>', [string] $AppDisplayName = 'Claude Cowork gateway', [string] $RedirectUri = 'http://127.0.0.1/callback' ) az account set --subscription $SubscriptionId | Out-Null # 1. Create (or reuse) the app registration $appId = az ad app list --display-name $AppDisplayName --query "[0].appId" -o tsv if (-not $appId) { $appId = az ad app create --display-name $AppDisplayName ` --sign-in-audience AzureADMyOrg --query appId -o tsv } # 2. Configure as public PKCE client with the Mobile/Desktop redirect URI $objectId = az ad app show --id $appId --query id -o tsv $patch = @{ publicClient = @{ redirectUris = @($RedirectUri) } isFallbackPublicClient = $true } | ConvertTo-Json -Depth 5 -Compress az rest --method PATCH ` --uri "https://graph.microsoft.com/v1.0/applications/$objectId" ` --headers "Content-Type=application/json" --body $patch | Out-Null # 3. Ensure a service principal exists $sp = az ad sp list --filter "appId eq '$appId'" --query "[0].id" -o tsv if (-not $sp) { az ad sp create --id $appId | Out-Null } # 4. Push two Named values into APIM for the validate-jwt policy az apim nv create -g $ResourceGroup --service-name $ApimName ` --named-value-id entra-tenant-id --display-name entra-tenant-id ` --value $TenantId --secret false az apim nv create -g $ResourceGroup --service-name $ApimName ` --named-value-id entra-client-id --display-name entra-client-id ` --value $appId --secret false "Client ID: $appId" Run it once. The output prints the client ID you'll need in Claude Desktop later, and it leaves two Named values in APIM ( entra-tenant-id , entra-client-id ) that the gateway policy will reference. ⚠️ Common pitfall: if the redirect URI ends up under the Web platform instead of Mobile and desktop applications, Entra will demand a client secret on token exchange — Claude won't send one and you'll get Token exchange failed (HTTP 401) . The app type can't be changed after creation, so create a new app if that happens. Step 2 — Create the API in APIM In the portal under APIM → APIs → + Add API → HTTP: Field Value Display name Anthropic API Name anthropicapi Web service URL https://<foundry-account>.services.ai.azure.com/anthropic API URL suffix claude Subscription required Off (Entra ID is our only credential) Add two operations under it: Method URL Display name POST /v1/messages Create message GET /v1/models List models The /v1/models operation isn't strictly needed (Foundry's Anthropic surface doesn't implement it), but having it registered means you can decide later whether to stub it out or proxy it. Step 3 — Add an API key for Foundry as a Named value APIM → Named values → + Add: Name: foundry-key Type: Secret Value: paste a key from the Foundry account's Keys and Endpoint blade. This is the only place the key ever lives. Clients never see it. Alternative — keyless with Entra ID (managed identity): If you prefer not to manage a Foundry key at all, enable the APIM instance's system-assigned managed identity (APIM → Identity → System assigned → On), then grant that identity the Foundry User role on the Foundry account (role ID 53ca6127-db72-4b80-b1b0-d745d6d5456d — previously named Azure AI User; Microsoft renamed it but the ID and permissions are unchanged). In Step 4, replace the set-header that injects x-api-key with: <authentication-managed-identity resource="https://cognitiveservices.azure.com" output-token-variable-name="foundry-token" /> <set-header name="Authorization" exists-action="override"> <value>@("Bearer " + (string)context.Variables["foundry-token"])</value> </set-header> Then you can skip the foundry-key Named value entirely. Don't use the legacy Cognitive Services User role — per the Foundry RBAC doc, roles starting with Cognitive Services don't apply to Foundry scenarios. Step 4 — Write the gateway policy This is the core enforcement layer in the architecture. Open APIs → anthropicapi → All operations → Inbound processing → </> and paste: <policies> <inbound> <base /> <!-- USER → APIM: verify Entra ID token from Claude Desktop --> <validate-jwt header-name="Authorization" failed-validation-httpcode="401" failed-validation-error-message="Unauthorized" require-scheme="Bearer"> <openid-config url="https://login.microsoftonline.com/{{entra-tenant-id}}/v2.0/.well-known/openid-configuration" /> <audiences> <audience>{{entra-client-id}}</audience> </audiences> <issuers> <issuer>https://login.microsoftonline.com/{{entra-tenant-id}}/v2.0</issuer> </issuers> </validate-jwt> <!-- APIM → Foundry --> <set-backend-service base-url="https://<foundry-account>.services.ai.azure.com/anthropic" /> <set-header name="x-api-key" exists-action="override"> <value>{{foundry-key}}</value> </set-header> <set-query-parameter name="api-version" exists-action="skip"> <value>2024-05-01-preview</value> </set-query-parameter> </inbound> <backend><base /></backend> <outbound><base /></outbound> <on-error><base /></on-error> </policies> Two things to notice: validate-jwt uses the OIDC discovery URL — JWKS keys are fetched and cached automatically. It rejects any token whose aud claim is not the client ID of our Entra app, which is exactly what we want. The Authorization header from the user is not forwarded — once validate-jwt succeeds, the request is re-authenticated to Foundry with x-api-key . No user token ever leaves APIM. APIM becomes the security boundary — user identity is validated at the edge, and downstream services never see or rely on user tokens. Step 5 — Configure Claude Desktop Open Claude Desktop → Configure third-party inference and fill it in like this: Field Value Connection Gateway Credential kind Interactive sign-in Gateway base URL https://<apim-name>.azure-api.net/claude Client ID (the appId your script printed) Issuer URL https://login.microsoftonline.com/<tenant-id>/v2.0 Authorization URL / Token URL leave empty Bearer token ID token (default) Scopes leave default ( openid profile email offline_access ) Redirect port leave empty (ephemeral) Model discovery Off Model list → Model ID <deployment-name> (your Foundry deployment name) ℹ️ Why Model discovery is Off — Claude Desktop's discovery uses GET /v1/models , and the Foundry /anthropic surface doesn't implement that endpoint, so it 404s. Listing the model manually skips the call entirely. If you want to leave Model discovery On, stub /v1/models in APIM. Add a GET /v1/models operation to your API and give it this inbound policy that returns an Anthropic-shaped response without ever hitting the backend: <policies> <inbound> <base /> <return-response> <set-status code="200" reason="OK" /> <set-header name="Content-Type" exists-action="override"> <value>application/json</value> </set-header> <set-body>@{ return new JObject( new JProperty("data", new JArray( new JObject( new JProperty("id", "<deployment-name>"), new JProperty("type", "model"), new JProperty("display_name", "Claude on Foundry"), new JProperty("created_at", "2026-01-01T00:00:00Z") ) )), new JProperty("has_more", false), new JProperty("first_id", "<deployment-name>"), new JProperty("last_id", "<deployment-name>") ).ToString(); }</set-body> </return-response> </inbound> <backend><base /></backend> <outbound><base /></outbound> <on-error><base /></on-error> </policies> Add one entry per deployment you want to expose. The benefit of stubbing rather than turning discovery off is that adding new models becomes a policy edit — no need to re-export and redeploy Claude Desktop config to every user. Click Apply Changes then Sign in to your organization. Your browser opens to the normal Entra sign-in page; once approved you're returned to the app, and a quick connection test runs. The success indicator is a small green banner: ✅ Inference — 1-token completion in 1449 ms · via identity provider For broader rollout, hit the Export button at the top of the configuration window — it produces a .mobileconfig (macOS) or .reg (Windows) you can push via Intune / Jamf to every user's machine. Step 6 — Verify both hops In APIM → APIs → anthropicapi → Test → POST /v1/messages I sent: Headers: anthropic-version: 2023-06-01 Body: { "model": "<deployment-name>", "max_tokens": 64, "messages": [{"role":"user","content":"hi"}] } Click Send → Trace, and look at two places: Inbound → validate-jwt: should say succeeded and show the decoded claims (your oid , email , etc.). Backend → Request: outbound URL is https://<foundry-account>.services.ai.azure.com/anthropic/v1/messages?api-version=2024-05-01-preview , with x-api-key: **** present and Authorization absent. Backend → Response: 200, with a Claude message JSON body. That confirms both halves of the chain. Bumps I hit along the way A few common issues encountered during setup — sharing so you can skip them: Symptom Cause Fix Claude shows "Your provider's model list hasn't loaded yet" and /v1/models returns 404 Foundry's Anthropic surface doesn't implement that endpoint Turn Model discovery OFF in Claude Desktop and add the deployment name manually Claude shows "Authentication failed" even though sign-in worked The APIM API still had Subscription required = ON, blocking the call before validate-jwt ran with 401: Access denied due to missing subscription key Uncheck Subscription required on the API Portal Test panel shows "Cannot read properties of undefined (reading 'statusCode')" The test console doesn't attach an Entra token, so validate-jwt 401s and the panel's JavaScript crashes Comment out <validate-jwt> temporarily for portal testing, or test via curl with a real token OIDC discovery failed (HTTP 404) in Claude Desktop Pasted the metadata URL into Issuer URL Issuer must end at /v2.0 , not at /.well-known/openid-configuration Token exchange failed (HTTP 401) App registered under Web platform instead of Mobile and desktop applications Create a new app with the right platform — it can't be changed Where this leaves us This pattern is small in moving parts but has outsized architectural impact: Zero secrets on endpoints. Eliminates API-key sprawl across laptops, MDM profiles, and shared vaults. The Foundry key lives only inside APIM — or disappears entirely when you switch APIM to managed identity. Identity, not credentials. Every Claude Desktop user authenticates against Entra ID in their browser, the same as Office or Teams. MFA, Conditional Access, and Entra ID Protection apply automatically — no parallel auth story to maintain. Per-user observability built in. APIM logs carry the user's Entra oid , email , and group claims. That unlocks per-user dashboards, cost allocation, and abuse detection without any client-side instrumentation. Aligned with Zero Trust. Strong identity at the edge, no implicit trust between hops, single policy chokepoint for inspection and rate-limiting, and full revocability through a single Enterprise Application. Optional but trivial keyless path. Flip APIM to system-assigned managed identity + <authentication-managed-identity resource="https://cognitiveservices.azure.com" /> and one Foundry User role assignment (role ID 53ca6127-db72-4b80-b1b0-d745d6d5456d , formerly Azure AI User) on the Foundry account. See the Foundry RBAC doc — don't use any Cognitive Services * roles for Foundry. What I'd add next llm-token-limit and llm-emit-token-metric policies for per-user quotas and cost visibility. App Insights wiring on the API, with a workbook that pivots on the oid claim. Assignment required = Yes on the Entra Enterprise Application + a security group, so only approved users can sign in. Intune deployment of the exported .reg / .mobileconfig so the gateway URL and client ID land on devices automatically. But that's all incremental. The hard part — getting Claude Desktop, Entra ID, APIM, and Foundry to agree on who's allowed to talk to whom — is done. Total elapsed: about an afternoon, most of it spent learning where each portal hides its switches. Useful links Gateway single sign-on with your identity provider — Claude.ai Documentation Configure Claude Desktop with Foundry Models — Microsoft Learn Role-based access control for Microsoft Foundry — Microsoft Learn2.6KViews0likes3CommentsJoin our free livestream series on using Microsoft IQ with Python
Join us for a new 3-part livestream series where we take a deep technical look at Microsoft IQ, the knowledge layer for the next generation of AI experiences. You'll learn how Foundry IQ, Work IQ, and Fabric IQ can be used to ground AI systems in organizational knowledge, workplace context, and structured business data. Our series will cover: Foundry IQ for multi-source agentic retrieval on search indexes, SharePoint, websites, and more Work IQ for user-specific retrieval of M365 data, like Teams chats, emails, and calendar events Fabric IQ for retrieval of data stored in OneLake, via Fabric ontologies and data agents Building agents with Microsoft Agent Framework to connect to Foundry IQ, Fabric IQ, and Work IQ Throughout the series, we’ll use Python for all examples and share full code so you can run everything yourself in your own Foundry projects. 👉 Register for the full series. In addition to the live streams, you can also join the Microsoft Foundry Discord to ask follow-up questions after each stream. If you are new to generative AI with Python, start with our 9-part Python + AI series, which covers topics such as LLMs, embeddings, RAG, tool calling, MCP, and agents. If you are new to Microsoft Agent Framework, watch our 6-part Python + Agent series which dives deep into agents and workflows. To learn more about each live stream or register for individual sessions, scroll down: Day 1: Foundry IQ 28 July, 2026 | 5:00 PM - 6:00 PM (UTC) Coordinated Universal Time Register for the stream on Reactor In the first session of our Microsoft IQ Deep Dive with Python series, we’ll kick things off with an introduction to the Microsoft IQ family: Foundry IQ, Work IQ, Fabric IQ, and Web IQ. We’ll then take a deeper look at Foundry IQ (Azure AI Search), exploring how it helps agents and applications work with curated knowledge and organizational context. We'll build a knowledge base and connect it to multiple knowledge sources, including the new IQs, MCP servers, and search indexes built from ingested data. Then we'll perform multi-source agentic retrieval on the knowledge base, which executes queries in parallel and merges the results with state-of-the-art ranking models. Finally, we will build an agent in Python using Microsoft Agent Framework and ground the agent's responses in results from the Foundry IQ knowledge base. All code demos will use Python and will be available in an open-source repository for you to deploy yourself. After the stream, join office hours in the Microsoft Foundry Discord to ask follow-up questions. Day 2: Work IQ 29 July, 2026 | 5:00 PM - 6:00 PM (UTC) Coordinated Universal Time Register for the stream on Reactor In the second session of our Microsoft IQ Deep Dive with Python series, we’ll focus on Work IQ and how it brings workplace context into AI-powered experiences. We’ll explore how developers can use Work IQ through APIs, A2A patterns, MCP integration, and tool-based workflows. We’ll look at two practical tool examples, then show how Work IQ can be used from Copilot and from a Microsoft Agent Framework agent. All code demos will use Python and will be available in an open-source repository for you to deploy yourself. After the stream, join office hours in the Microsoft Foundry Discord to ask follow-up questions. Day 3: Fabric IQ 30 July, 2026 | 5:00 PM - 6:00 PM (UTC) Coordinated Universal Time Register for the stream on Reactor In the final session of our Microsoft IQ Deep Dive with Python series, we’ll explore Fabric IQ and how it connects AI experiences to structured business data. We’ll introduce the key concepts behind Fabric IQ, including ontologies and data agents, and show how they help describe, organize, and reason over operational data stored in OneLake. We’ll use the Microsoft Fabric API SDK in Python to connect to Fabric IQ, so that we can programmatically configure ontologies and answer questions about our data. All code demos will use Python and will be available in an open-source repository for you to deploy yourself. After the stream, join office hours in the Microsoft Foundry Discord to ask follow-up questions.