microsoft foundry
14 TopicsAdding a Fallback Model to Hermes with Microsoft Foundry
So the plan was simple. Leave the Bedrock configuration untouched, then wire Microsoft Foundry in behind it as a fallback, so Hermes always has somewhere else to go when the primary provider is not responding. A few other reasons pushed me towards Foundry in particular: Redundancy that does not need me. If Bedrock is throttled or out of quota, I want Hermes to fail over on its own rather than waiting for me to notice. A catalogue I already pay for. Foundry puts the latest GPT models next to open-weight and partner models in one place, so I can pick a model that suits the task instead of settling for whatever a single provider happens to offer. Enterprise controls out of the box. Region pinning, private networking, content filters and per-deployment quota all sit in the same portal, which makes the setup far easier to defend to a security reviewer. Learning the mechanics before I need them. Working out how Hermes handles a provider chain is much nicer on a quiet Tuesday than during a live outage. Here is the short version, if you are deciding whether to read on. Time: about thirty minutes if nothing goes wrong. Cost: pay-as-you-go tokens only, and none at all while the fallback sits idle. Result: an assistant that keeps answering when your primary provider stops. Before you start, you will need three things: a machine with Hermes already installed and a working primary provider configured, an Azure subscription with access to Microsoft Foundry in a region you can actually deploy into, and enough quota in that region to create a deployment. One thing that made this easy to justify: Foundry deployments bill per token on the standard pay-as-you-go tier. A fallback provider that never gets invoked costs nothing beyond the requests it actually serves, so the insurance is close to free until the day you need it. Chat surface (CLI, messaging) → Hermes Gateway → Primary Amazon Bedrock → Fallback Microsoft Foundry Figure 1: Where the fallback sits. Every request goes through the Hermes gateway to the primary provider; only when that provider is unavailable does the chain continue to Microsoft Foundry. Part 1: Deploying a Model on Microsoft Foundry The first half of this job happens entirely inside the Microsoft Foundry portal and has nothing to do with Hermes yet. All you are really doing here is making sure your Azure subscription can serve a model, and that you hold an endpoint and key Hermes can authenticate with later. 1. Deploy model in Foundry → 2. Copy endpoint + key → 3. hermes fallback add → 4. Authenticate → 5. Select models, test Figure 2: The whole setup in five moves. The first two happen in the Microsoft Foundry portal (orange); the rest happen on the Hermes machine (blue). Go to Microsoft Foundry > Build > Models > Deploy > Deploy a base model. You can deploy a fine-tuned model instead if you already have one, which works just as well with Hermes. Check the region shown at the top of the portal before you commit, because both model availability and deployment quota differ from one region to the next. Then deploy the model you have selected: In this case I deployed gpt-5.6-sol, which is the model Hermes will fall back to. The choice was deliberate rather than exciting. My primary model on Bedrock is a general-purpose chat model, and a fallback is only useful if the answers it gives feel like a continuation of the same conversation rather than a different assistant wearing the same name. The gpt-5.6-sol deployment matches that behaviour closely, it was available in the region I wanted to pin, and the quota I was granted comfortably covers a day of normal use. If a fallback surprises you the first time it fires, it is the wrong fallback. Once the deployment finishes, open it and take note of two values: the target endpoint URI and the API key. Copy both somewhere safe now, because you will be pasting them into Hermes in the next part. If your organisation rotates keys on a schedule, use a key with the longest life you are allowed, since a fallback secured with a credential that expires quietly stops being a fallback. What to copy Where it lives in the portal Where Hermes asks for it Target endpoint URI Deployment > Endpoint > Target URI "Endpoint" prompt in hermes fallback add API key Deployment > Endpoint > Key "API key" prompt, or choose Entra ID instead Deployment name Deployment > Details > Name Shown in the model list Hermes returns Region Top of the portal, next to the resource Must match the region you deployed into Figure 3: Everything Hermes will ask for, and where to find each value before you leave the portal. Part 2: Adding Foundry to Hermes as a Fallback With the Foundry side sorted, everything from here happens in the Hermes CLI. One thing worth knowing before you start: this is the fallback command, not the primary model command, so your existing Bedrock configuration is left completely alone. Nothing in this section can break what is already working, which makes it a good one to try on a live setup. Run the Hermes fallback command: When Hermes asks which provider to add, choose Azure Foundry. The picker still carries the old name; it is the same service that the portal now calls Microsoft Foundry. Paste the target endpoint URI from your deployment, then authenticate with the API key you copied earlier. Hermes also offers Microsoft Entra ID at this prompt, which is the better option if your organisation would rather not have a static key sitting on the machine. If authentication fails here, check the endpoint before you start suspecting the key. In my experience the endpoint is wrong far more often than the credential is, usually because the deployment name at the end of the URI does not match the deployment you actually created. Once authentication succeeds, Hermes lists the deployments your Foundry resource exposes and asks which ones you want to use. You can select more than one, and the order is not cosmetic: Hermes walks down the chain from top to bottom whenever the provider above is unavailable. Treat that list as a priority order, not a shopping basket. What happens to the primary What Hermes does What you see in the chat Responds normally Routes every request to the primary and never touches the chain Nothing. The fallback stays idle Throttled or out of quota Retries the next provider down the chain on the same request A reply, served by the fallback model Endpoint unreachable Keeps failing over on each new request until the primary recovers Slightly different tone and latency, but a working assistant Every provider fails Returns the error rather than hanging An error worth chasing with hermes status Figure 4: The chain in practice. The fallback only earns its keep in the middle two rows, which is exactly why it is easy to forget you configured it. Part 3: Promoting Foundry to the Primary Model At this stage Foundry is sitting in the back seat as a backup. I wanted to reverse the arrangement and make Foundry the primary while Bedrock slides down into the fallback slot, partly because I preferred keeping day-to-day traffic inside my Azure subscription, and partly because I wanted proof the chain works in both directions. Before promotion After promotion Primary: Amazon Bedrock → Primary: Microsoft Foundry Fallback: Microsoft Foundry → Fallback: Amazon Bedrock Figure 5: The promotion, in effect. Nothing is added or removed; the two providers simply trade places in the chain. There is no dedicated "promote" command in Hermes, so the manual route is a short sequence of steps rather than a single instruction: Select the fallback provider/model as the new primary: hermes model Remove the now-duplicate model from the fallback chain: hermes fallback remove Optionally add the old primary model as a fallback: hermes fallback add Restart the messaging gateway: hermes gateway restart Verify the result: hermes status / hermes fallback list That sequence works, and it is good to know what is happening underneath. But since I already had a working provider configured, I would rather just ask Hermes to rearrange itself. This is the part I genuinely enjoy about the tool: the configuration is something you can talk to, not only something you type commands at. Prompt: Okay now please make the model I configured on Microsoft Foundry into the main model, and make the Bedrock one the fallback model! Hermes rewrites the provider chain on its own and confirms the swap once it is done, which is a great deal less error-prone than running the five commands by hand. Part 4: Testing the Switch Configuration you have not tested is just an assumption with extra steps, so the next thing is to confirm Hermes really is talking to Foundry. Type /model when running Hermes to bring up the model picker. You will be prompted to select a provider first. Pick the Microsoft Foundry entry, then choose the specific deployment from the list underneath it. The active model should switch straight away. Send it a plain "Hello" to check that the deployment actually responds, rather than just looking correct in the menu. Appearing in a dropdown and serving a request are two very different things. A second test is worth the thirty seconds it costs: run hermes status to confirm which provider is live, then hermes fallback list to confirm the chain is ordered the way you intended. The picker tells you what you selected; those two commands tell you what Hermes will actually do at three in the morning. Part 5: The Obstacle, and What It Actually Taught Me Every walkthrough has the part the author quietly leaves out. Here is mine: the wrinkle was not the model, it was capacity. My first attempt deployed into the region closest to me out of habit, and the portal turned it down because there was no capacity left for that model at the tier I asked for. The model was clearly listed in the catalogue; being listed and being deployable in your region, on your subscription, at your quota, are three separate questions. Redeploying in a different region fixed it in a couple of minutes, but it meant the endpoint URI changed, which in turn meant the value I had already pasted into Hermes was stale. Re-running hermes fallback add against the new endpoint sorted it out. The lesson is cheap enough to hand over for free: check quota and regional capacity for your specific subscription before you design a walkthrough, a demo or a production fallback around one deployment. In the Foundry portal, Management then Quota shows exactly what you have been granted per region and per model family, which is the only list that matters. Symptom Likely cause Fix Deployment rejected in the portal No capacity for that model at the tier you asked for, in that region Deploy in another region, or drop to a smaller tier Hermes rejects the credential Endpoint URI does not match the deployment you created Re-copy the target URI from the deployment, not the resource Provider authenticates but lists nothing Key belongs to a different Foundry resource Check you are in the right resource, then re-run hermes fallback add Fallback never fires Chain ordered the wrong way round hermes fallback list, then reorder Figure 6: The four things that went wrong, or nearly did, and what fixed each one. There is a silver lining worth stating plainly. Because the fallback chain was already in place, a deployment that refused to come up did not take the assistant down with it. That is precisely the scenario this whole exercise was meant to cover, and it turned up on day one without me having to simulate it. Command Cheat Sheet Everything used in this walkthrough, collected in one place: hermes fallback add: attach a provider to the fallback chain hermes fallback remove: drop a provider from the chain hermes fallback list: show the chain in priority order hermes model: set the primary model hermes gateway restart: restart the messaging gateway after a change hermes status: confirm which provider is currently live /model: switch models from inside a running session Conclusion Adding Microsoft Foundry as a fallback behind my existing Bedrock setup took an afternoon, and most of that was spent recovering from a regional capacity limit I should have checked first. The work itself is small: deploy a model, copy the endpoint and key, run hermes fallback add, authenticate, pick your deployments. The payoff is that Hermes no longer depends on one provider staying healthy. Three things are worth carrying away from this: Check quota, not just the catalogue. The Foundry catalogue shows what Microsoft offers. It does not show what your subscription and region can actually deploy today. Confirm that first, before you build anything on top of a specific deployment. Order your fallback chain deliberately. Hermes works down the list from top to bottom, so the sequence you choose during setup is the failover policy you are going to live with. Put the model you actually trust at the top. Treat the endpoint as part of the credential. Redeploying in a new region changes the endpoint URI, and a fallback pointed at an endpoint that no longer exists is not a fallback. Re-run the setup whenever the deployment moves. The switch from Bedrock primary to Foundry primary also proved the chain runs in both directions, which is the real point. Provider redundancy is only useful if you have watched it work. Next on my list is deliberately breaking the primary provider to confirm the failover triggers on its own, without me typing a single command. If you run this against a different model, region or provider pairing, I would genuinely like to know how it went, particularly if your quota experience was better than mine. Drop it in the comments.23Views0likes0CommentsSet Up Plaud Note Pro with Microsoft Foundry
Prerequisites Riffado, up and running: follow the setup guide in the official Riffado repository to get it going with Docker Compose. A Microsoft Foundry (formerly Azure AI Foundry) resource, with the models you want deployed; in my case, whisper for transcription and o3-mini for summaries. A Plaud device, or any audio recordings you can import into Riffado. Once Riffado is up, head to the Settings page > Providers > Add Provider, and select Custom. This is where the Azure details will go. Why "OpenAI-compatible" isn’t one thing on Microsoft Foundry Azure AI Foundry exposes two different API surfaces on the same resource, and which one serves your model depends on the model: Surface Path shape Serves OpenAI-compatible? v1 route /openai/v1/… gpt-4o-transcribe, gpt-4o-mini-transcribe, chat models, embeddings Yes: Bearer auth, model in the body, no api-version needed Classic route /openai/deployments/{name}/… Whisper (and other legacy audio) No: deployment name lives in the URL, and ?api-version= is mandatory A generic OpenAI client (Riffado's included) can only speak the first dialect. It has nowhere to put a deployment name in the path and no way to append a query parameter. That single fact drives everything below. Part 1 - Transcription Whisper and the DeploymentNotFound mystery Symptom My very first transcription attempt in Riffado failed with 404 Resource not found. Off to a flying start. Configured provider: base URL https://<resource>.services.ai.azure.com, model whisper. Dead end #1: the missing path The first bug was mine: the base URL had no path. Riffado's OpenAI client appends /audio/transcriptions to whatever you give it, so requests were hitting https://<resource>…/audio/transcriptions, a path that doesn't exist on the resource at all. Fixing the base URL to end in /openai/v1 got us to a more interesting error: POST /openai/v1/audio/transcriptions · model=whisper {"error":{"code":"DeploymentNotFound","message":"The API deployment for this resource does not exist. If you created the deployment within the last 5 minutes, please wait a moment and try again."}} Dead end #2: catalog ≠ deployment Worth checking before anything else: selecting a model in the Foundry catalog is not deploying it. GET /openai/v1/models lists everything you could deploy; only Deployments → Deploy model creates an endpoint that answers. If you get DeploymentNotFound, first confirm a deployment actually exists (the listing below requires only the API key): enumerate real deployments (classic control-plane, key auth) curl -s -H "api-key: $KEY" \ "https://<resource>.openai.azure.com/openai/deployments?api-version=2023-03-15-preview" # → {"data":[{"id":"whisper","model":"whisper","status":"succeeded",…}]} The actual cause Here is the part that nearly drove me mad: the deployment existed and was succeeded, yet the v1 route still said DeploymentNotFound. Because Whisper deployments are not served on the v1 route at all. They only answer on the classic path. Verified side by side with the same tiny WAV file: Request Result POST /openai/v1/audio/transcriptions · model=whisper · Bearer 404 DeploymentNotFound POST /openai/deployments/whisper/audio/transcriptions?api-version=2024-06-01 · Bearer 200 {"text":"you"} Same classic path, without ?api-version= 404 Resource not found Three constraints, then: Whisper needs the classic path; the classic path needs api-version; Riffado can send neither. One piece of good news hiding in the table: the classic route accepts Authorization: Bearer, not just Azure's api-key header, so the shim doesn't have to touch auth at all. The fix: a Caddy shim Drop a stock caddy:2-alpine container into the Compose network. Riffado points at it as if it were OpenAI; the shim rewrites the path, injects api-version, and proxies to Azure. The Bearer header passes through untouched. azure-shim.Caddyfile { admin off auto_https off } :80 { @transcribe path /v1/audio/transcriptions /audio/transcriptions handle @transcribe { rewrite * /openai/deployments/whisper/audio/transcriptions?api-version=2024-06-01 reverse_proxy https://<resource>.services.ai.azure.com { header_up Host <resource>.services.ai.azure.com } } handle { respond "azure-shim ok" 200 } } docker-compose.yml (added service) azure-shim: image: caddy:2-alpine restart: unless-stopped volumes: - ./azure-shim.Caddyfile:/etc/caddy/Caddyfile:ro Riffado's provider settings become: Field Value Base URL http://azure-shim/v1 Model whisper (must equal the deployment name) API key the Azure resource key (forwarded as Bearer) Verified From inside the Riffado container: POST http://azure-shim/v1/audio/transcriptions → 200 {"text":"…"}. Transcription works end-to-end in the UI. Part 2 · Summaries & titles o3-mini and the empty answer Symptom The summary button showed "An unexpected error occurred." The container logs were more honest: riffado-app logs Error generating title: TypeError: undefined is not an object (evaluating 'C.choices[0]') Riffado calls chat/completions and reads choices[0] without checking whether the response was an error. So anything the API refuses becomes "an unexpected error." What was it refusing? Cause 1: reasoning models reject the classic knobs o3-mini belongs to Azure/OpenAI's o-series reasoning models, which hard-reject parameters every classic chat client sends. Riffado sends temperature: 0.7 and max_tokens: 50 for titles (0.5 / 2000 for summaries), and o3-mini answers: POST /openai/v1/chat/completions · model=o3-mini HTTP 400 {"error":{"message":"Unsupported parameter: 'max_tokens' is not supported with this model. Use 'max_completion_tokens' instead.", …}} # and with max_tokens fixed: HTTP 400 {"error":{"message":"Unsupported parameter: 'temperature' is not supported with this model.", …}} Cause 2: reasoning tokens starve the output Stripping the bad params gets you to 200, and then comes a subtler failure, my personal favourite of this whole saga. Reasoning models spend completion tokens on internal "thinking" before emitting a single visible character. Riffado's 50-token title budget is consumed entirely by reasoning, and the reply comes back syntactically valid and empty: max_completion_tokens reasoning_effort finish_reason content 50 not set length "" (all 50 spent reasoning) 2000 not set stop "Q3 Budget Planning Strategy Meeting" 2000 low stop same, less reasoning overhead The fix: a Node shim that rewrites the request body Caddy can rewrite paths but not JSON bodies, so this shim is ~60 lines of dependency-free Node on node:20-alpine. Per request it: converts max_tokens → max_completion_tokens, strips temperature / top_p / penalties, floors the token budget at 4000, sets reasoning_effort: "low", maps /v1/* → /openai/v1/*, and forwards to the Azure resource. o3-shim.js const http = require('http'); const https = require('https'); const UPSTREAM_HOST = '<resource>.services.ai.azure.com'; // Params o-series reasoning models reject on chat/completions. const STRIP = ['temperature','top_p','presence_penalty', 'frequency_penalty','logprobs','top_logprobs']; const server = http.createServer((req, res) => { const chunks = []; req.on('data', c => chunks.push(c)); req.on('end', () => { let body = Buffer.concat(chunks); // Riffado's base_url is http://o3-shim/v1 → map to Azure's /openai/v1 let path = req.url; if (path.startsWith('/v1/')) path = '/openai' + path; const ct = (req.headers['content-type'] || '').toLowerCase(); if (ct.includes('application/json') && body.length) { try { const j = JSON.parse(body.toString('utf8')); if (j && typeof j === 'object' && !Array.isArray(j)) { if ('max_tokens' in j) { if (!('max_completion_tokens' in j)) j.max_completion_tokens = j.max_tokens; delete j.max_tokens; } // Reasoning spends tokens before any visible output; small // budgets (Riffado sends 50 for titles) return empty strings. if (Array.isArray(j.messages)) { j.max_completion_tokens = Math.max(Number(j.max_completion_tokens) || 0, 4000); if (!('reasoning_effort' in j)) j.reasoning_effort = 'low'; } for (const k of STRIP) delete j[k]; body = Buffer.from(JSON.stringify(j)); } } catch (_) { /* not JSON - forward untouched */ } } const headers = { ...req.headers, host: UPSTREAM_HOST, 'content-length': Buffer.byteLength(body) }; const up = https.request( { host: UPSTREAM_HOST, port: 443, method: req.method, path, headers }, upRes => { res.writeHead(upRes.statusCode, upRes.headers); upRes.pipe(res); } ); up.on('error', e => { res.writeHead(502, {'content-type':'application/json'}); res.end(JSON.stringify({error:{message:'o3-shim upstream error: '+e.message}})); }); up.end(body); }); }); server.listen(80, () => console.log('o3-shim listening on :80')); docker-compose.yml (added service) o3-shim: image: node:20-alpine restart: unless-stopped working_dir: /app command: ["node", "/app/o3-shim.js"] volumes: - ./o3-shim.js:/app/o3-shim.js:ro Add a second provider in Riffado (base URL http://o3-shim/v1, model o3-mini, the resource's API key) and set it as the default enhancement provider (summaries/titles), keeping the Whisper one as default for transcription. Riffado's exact title request (temperature: 0.7, max_tokens: 50) through the shim → 200, finish_reason: stop, real title text. A full meeting-transcript summary returns structured key points and action items. The final shape Reading it left to right: Riffado never talks to Azure directly. Transcription requests pass through azure-shim, a stock Caddy container that rewrites each request onto Whisper's classic deployment path and injects the mandatory api-version parameter. Summary and title requests pass through o3-shim, a tiny Node server that rewrites the request body into the shape o3-mini accepts and floors the token budget so the model's internal reasoning cannot starve the actual answer. As far as Riffado is concerned, it is simply talking to two ordinary OpenAI providers. Both shims live on the Compose network only; nothing is exposed publicly. Riffado is unmodified. Verification checklist Each layer, testable in isolation. Run these before blaming the app: smoke tests # 1. Key + resource alive? (v1 models listing, Bearer auth) curl -s -H "Authorization: Bearer $KEY" \ https://<resource>.services.ai.azure.com/openai/v1/models | head -c 200 # 2. Whisper answers on the classic path? curl -s -H "Authorization: Bearer $KEY" -F file=@test.wav \ "https://<resource>.services.ai.azure.com/openai/deployments/whisper/audio/transcriptions?api-version=2024-06-01" # 3. Shim translates correctly? (from inside the compose network) docker exec riffado-app node -e "fetch('http://azure-shim/') .then(r=>r.text()).then(console.log)" # 4. o3-mini via shim, sending the params Riffado sends? # (temperature + max_tokens:50; the shim must absorb both) If you'd rather not run shims Both shims exist because of the specific models chosen. Pick models that live natively on the v1 route and Riffado connects directly, with base URL https://<resource>.services.ai.azure.com/openai/v1 and zero extra containers: Transcription: deploy gpt-4o-mini-transcribe (or gpt-4o-transcribe) instead of Whisper. Summaries: deploy a non-reasoning chat model such as gpt-4o-mini, which happily accepts temperature and max_tokens. The shim approach earns its keep when you're standardized on specific models (Whisper's transcription quality, o3-mini's reasoning), or when you want a control point to add logging, retries, or budget caps later. For reference, this is what the finished setup looks like on Riffado's side. Each shim is registered as a plain Custom provider. Here is the whisper provider pointing at azure-shim, with Use for transcription ticked: And once both are saved, they sit side by side in the providers list, whisper tagged for transcription and o3-mini tagged for enhancement: A quick look at the Foundry portal In the Microsoft Foundry portal, head over to Models > AI Services and you will find a pleasant surprise: fifteen AI service models already deployed and ready to use, covering the Azure Speech family (including Voice Live and Speech to Text), Azure Translator, Azure Language, and Content Understanding: You can of course deploy another model for this, but the pre-deployed ones are a handy cost-saving option. Click on the Azure Speech – Voice Live radio button and you will be shown the Base URL and API Key, which you can then paste into the provider settings on Riffado's Settings page. A quick note on cost: these services are not free. They are billed pay-as-you-go based on usage. Azure Speech transcription is charged per audio hour, and Voice Live pricing is tiered by the model you choose. The free tier does include a monthly allowance, though. Check the Azure Speech pricing page before committing. And if you would rather deploy a dedicated transcription model such as whisper, Foundry gives you the flexibility to do just that. Open the model page in the catalogue, click Deploy, and go with Default settings unless you need custom quotas or guardrails: Let's test the setup On your Plaud device, just tap to start recording. The little LED bars light up to show it is listening: Or skip the device entirely and upload an audio file straight into Riffado using the Upload Audio button. Either way, the recording lands on the Recordings page; hit Transcribe and let the spinner do its thing: As you can see below, whisper, the transcription model we deployed earlier, even managed to transcribe a recording in Malay without a hitch. My 3:32 test clip came back as 186 words of clean Malay, with the language correctly detected and tagged: I have also set o3-mini as the enhancement provider, and it enhanced the transcription with a proper summary, key points, and title as well! The Meeting Notes-style summary came straight out of o3-mini through the shim, with zero manual prompting. Wrapping up What started as a TikTok-fuelled impulse buy nearly killed off by subscription pricing ended up as a fully self-hosted pipeline: Plaud for recording, Riffado as the interface, and Microsoft Foundry serving whisper and o3-mini behind two tiny shims. The total extra infrastructure came to two containers and roughly sixty lines of code, and not a single monthly subscription in sight. If you try this setup and run into a failure mode I have not covered here, do share it in the comments. Half the fun is in the debugging.190Views0likes0CommentsBuilding a hands-free voice concierge with Microsoft Foundry Voice Live and a Hosted Agent
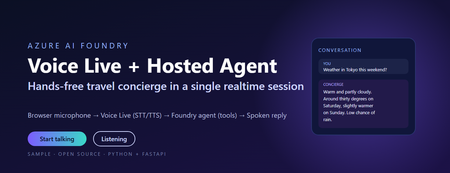
This post walks through a small, working sample that wires the browser microphone to Azure AI Speech Voice Live, binds the realtime session to a Foundry hosted agent, and lets the agent answer travel questions using tool calls. The full source, infrastructure, and labs live in the repository linked at the end. Why this combination matters Voice user interfaces have historically been hard to build well. Streaming audio, partial transcripts, barge-in, voice activity detection, tool dispatch, and audio playback have traditionally meant stitching together five or six services. The combination of Voice Live and a Foundry hosted agent collapses that into one realtime WebSocket session with a single binding field. Voice Live owns the audio loop: speech to text, neural text to speech, semantic turn detection, noise suppression, and echo cancellation. The Foundry hosted agent owns the brain: instructions, memory, model selection, evaluators, and tool calling. The link between them is one query parameter on the WebSocket URL. What this means in practice: the browser never sees a model API key, never instantiates a tool, and never owns the agent prompt. The browser does microphone capture and audio playback. Everything else lives server-side. The scenario The sample is called Contoso Travel Concierge. The user is mid-journey, hands and eyes busy, and wants to ask things like: What is the weather in Tokyo this weekend? Is BA005 from Heathrow on time? What time is check-in at the Marriott Marquis? Each question triggers a tool call on the hosted agent. The reply is short, speakable, and synthesised back to the user in under a second on a warm connection. Architecture There are four moving parts. Three of them are managed Azure services. Only the broker is your code. Browser client – captures PCM16 audio at 24 kHz and streams it over a WebSocket to the broker. Plays back audio chunks the broker forwards from Voice Live. Session broker (FastAPI) – authenticates to Azure with DefaultAzureCredential , builds the Voice Live WebSocket URL with a short-lived bearer token, and relays frames in both directions. Voice Live – the Azure AI Speech realtime endpoint. Transcribes the user, hands the text to the bound agent, and synthesises the agent’s reply. Foundry hosted agent – a prompt-kind agent in Azure AI Foundry with instructions, tool definitions, and the microsoft.voice-live.enabled metadata flag set to true . Two design choices are worth calling out. The broker is small on purpose. It does authentication, URL construction, and WebSocket relay. It does not transcode audio, run business logic, or hold conversation state. Voice Live and the agent already do those things well. The agent binding is a URL query parameter, not an SDK call. There is no per-turn HTTP request to the agent runtime. Voice Live opens a session against the agent once and streams turns through it for the lifetime of the WebSocket. That is what keeps latency low. The Voice Live URL contract This is the single most important thing to get right. The public Microsoft sample that ships under liupeirong/ai-foundry-voice-agent targets a different URL shape ( services.ai.azure.com host, agent-id + agent-access-token parameters, an Authorization header). That shape is rejected by Foundry resources that expose voice-live-enabled agents. The shape below is the one the portal itself uses, and the one this sample dials. Three details cause most failures: The host must be <resource>.cognitiveservices.azure.com , not services.ai.azure.com . The broker rewrites this automatically from VOICE_LIVE_ENDPOINT . The bearer token travels in the authorization query parameter, URL-encoded, with a literal Bearer prefix and a + (or %20 ) before the token. No Authorization header is sent. agent-name and model are both the agent’s display name. agent-version is empty when you want the latest published version. Walkthrough: from clone to spoken reply Prerequisites Python 3.11 or later (the sample is developed on 3.13). The Azure CLI, signed in with az login --tenant <your-tenant-id> . An Azure AI Foundry project in a Voice Live region ( eastus2 , swedencentral , or westus2 ). A deployed prompt-kind agent in that project with Enable Voice Live turned on. The Cognitive Services User role on the Foundry resource for the identity the broker will use. Configure the broker Copy .env.sample to .env and fill in four values: AZURE_AI_PROJECT_ENDPOINT=https://<your-resource>.services.ai.azure.com AZURE_AI_PROJECT_NAME=<your-foundry-project-name> VOICE_LIVE_ENDPOINT=wss://<your-resource>.services.ai.azure.com/voice-live/realtime VOICE_LIVE_API_VERSION=2025-10-01 FOUNDRY_AGENT_ID=<your-agent-name> The agent name is what the Foundry portal shows on the agent card. The broker uses it for both the agent-name and model query parameters. Install and run python -m venv .venv .\.venv\Scripts\Activate.ps1 pip install -r requirements.txt .\scripts\start-local.ps1 The broker exposes three endpoints: GET /healthz – liveness probe. GET /config – returns the session.update the browser sends as its first frame. WS /ws – the bi-directional relay to Voice Live. Smoke test .\scripts\test-session.ps1 A successful run prints: [OK] /ws upgraded -> sent session.update <- {"type":"session.created",…} <- {"type":"session.updated",…} [OK] session.updated received -- E2E works This confirms the entire chain: local broker, DefaultAzureCredential token, Foundry Portal URL shape, Voice Live handshake, and the bound agent acknowledging the session. Open the browser UI Browse to http://localhost:8000/ , click Start talking, and ask one of the sample questions. Transcripts appear in real time and the spoken reply plays back through the audio context. Inside the broker The relay logic is tiny – the heavy lifting is the URL construction. The function below is the canonical reference; copy it if you are porting the pattern to another language. def build_voice_live_ws_url(agent_access_token: str) -> str: """ Build the Foundry Portal style Voice Live WebSocket URL. Auth lives in the query string only. No Authorization header is sent. """ host = _ws_host_from_endpoint(VOICE_LIVE_ENDPOINT) qs = urlencode( { "trafficType": "FoundryPortal", "agent-name": FOUNDRY_AGENT_ID, "agent-version": "", "agent-project-name": AZURE_AI_PROJECT_NAME, "api-version": VOICE_LIVE_API_VERSION, "model": FOUNDRY_AGENT_ID, "client-request-id": str(uuid.uuid4()), "authorization": f"Bearer {agent_access_token}", }, quote_via=quote, ) return f"wss://{host}/voice-live/realtime?{qs}" The relay itself is a pair of asyncio tasks: one forwarding browser frames upstream, one forwarding Voice Live frames back. Audio bytes are passed straight through – the broker never decodes them. Deploying the hosted agent The most reliable way to create a voice-live-enabled agent is the Foundry portal. Agents created via the Assistants v2 SDK do not carry the required metadata by default and will be rejected by the Voice Live URL shape above. The portal steps are: Open the Foundry project, go to Agents, and click New agent. Choose Prompt agent as the kind, name it (for example travel-concierge ), and pick a model deployment. Paste the contents of agent/src/prompts/system.txt into the instructions box. On the Voice tab, switch Enable Voice Live on. This is what sets the microsoft.voice-live.enabled = true metadata. Add the three tools ( get_weather , get_flight_status , get_hotel_info ) from agent/agent.yaml on the Tools tab. Publish the version and write the agent name back to .env as FOUNDRY_AGENT_ID . The full deployment guide, including how to host the broker on Azure Container Apps with a managed identity, is in docs/deployment.md in the repository. Three lessons from getting this to production 1. Voice output must be written for speech, not for screens Foundry agents tend to format answers in markdown with citations like ([data.jma.go.jp](https://…)) . When Voice Live synthesises that text, the user hears the URL read aloud, character by character. The fix is to write the agent instructions so the spoken text never contains URLs, markdown, or symbols. A short block at the end of the agent instructions does the job: Voice output rules - This output is read aloud by TTS. Never include URLs, domain names, or citation markers like "(source.com)" in your reply. Cite by speakable source name only. - Never use markdown for formatting. No asterisks, brackets, backticks, bullets, or hashes. Write in plain spoken sentences. - Keep numbers speakable: say "thirty degrees Celsius", not "30C / 86F". - Keep replies under about 40 words unless the user asks for detail. The browser transcript can still render markdown for the eyes. The sample does so with a small, escaping markdown renderer that whitelists bold, italic, code, and http(s) links only, so the same agent reply looks polished on screen even though the spoken version contains none of it. 2. Identity is simpler than it looks The broker uses DefaultAzureCredential and requests the https://ai.azure.com/.default scope. Locally that resolves to your az login credentials. In Azure Container Apps it resolves to the user-assigned managed identity. In both cases the only role assignment you need on the Foundry account is Cognitive Services User. There is no API key path on the working URL shape – it is bearer tokens all the way down. 3. The wrong sample wastes a day If you start from the public liupeirong/ai-foundry-voice-agent repository against a portal-provisioned voice-live agent, the WebSocket either returns HTTP 400 or closes silently with code 1006. The cause is the URL shape, not your code. The reference probe in scripts/probe_portal_shape.py is the single source of truth for the working contract – keep it as a regression test. Responsible AI and security notes Credentials never reach the browser. Tokens are minted server-side and travel only on the upstream Voice Live URL. No secrets in source. The .env file is gitignored. The .env.sample contains only placeholders. Markdown rendering is escape-first. The browser HTML-escapes the agent reply before applying its small markdown whitelist, and links are restricted to http(s) URLs so the rule cannot emit javascript: hrefs. Tool calls are auditable. Every turn shows up as a run in the Foundry portal under the agent, with the prompt, model output, and tool inputs and outputs visible for review. Voice biometric considerations. If you plan to handle account verification by voice, plug in dedicated speaker recognition rather than relying on the conversational model. Key takeaways Voice Live plus a Foundry hosted agent is a session-level integration, not an API integration. One URL, one binding field, one WebSocket. The browser is a thin client. Authentication, URL construction, and relay all live in a small FastAPI broker. Get the URL shape right ( cognitiveservices.azure.com , token in the query string, agent-name equals model equals the agent display name) and the rest is plumbing. Use the Foundry portal to create the agent so the voice-live metadata is set correctly. Write agent instructions for the ear, not the eye, then layer screen formatting on top in the browser. Get the code and try it Repository: github.com/microsoft/foundry-agent-voice-mode-sample Deployment guide: docs/deployment.md in the repository. Labs: three progressive workshops under labs/ – basic voice, adding tools, and binding a hosted agent. Reference docs: Voice Live in Azure AI Speech and Agents in Microsoft Foundry. If you build something on top of this pattern, open an issue or pull request on the repository. The sample is intentionally small so it stays easy to fork.348Views0likes0CommentsHybrid AI Agents in Python: Routing Between Foundry Local and Microsoft Foundry
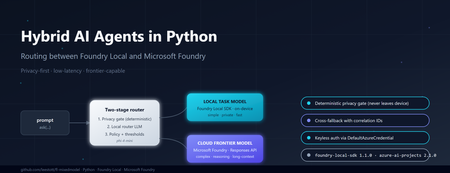
Why hybrid, and why now If you build AI features today, you are caught between three forces. Users want low latency and strong privacy. Product teams want frontier reasoning capability. Finance teams want predictable cost. No single model satisfies all three. Run everything on a small on-device model and you bottleneck on complex questions. Send everything to a frontier cloud model and you pay for trivial requests, leak sensitive data across a network boundary, and add hundreds of milliseconds of latency to greetings. The pragmatic answer is hybrid inference: a lightweight local model classifies every request first, simple or sensitive ones stay on the device, and only the genuinely hard or frontier-capability requests escalate to the cloud. Microsoft now ships both halves of that pattern as supported Python SDKs — foundry-local-sdk for on-device inference and azure-ai-projects for Microsoft Foundry cloud models. This post walks through a working reference implementation that combines them behind a single ask() call. The full source is at github.com/leestott/fl-mixedmodel. It is Python-only, secretless by design, and ships with a Gradio diagnostics UI, a CLI demo mode, and a full pytest suite. The contract: one schema, two paths The most important architectural decision is that callers never know which path served a request. Every response, local or cloud, returns the same dataclass: class InferencePath(str, Enum): LOCAL = "local" CLOUD = "cloud" LOCAL_FALLBACK = "local_fallback" # cloud attempted, fell back to local CLOUD_FALLBACK = "cloud_fallback" # local attempted, fell back to cloud @dataclass class AgentResponse: answer: str path: InferencePath model: str reason: str confidence: float latency_ms: float correlation_id: str prompt_tokens: Optional[int] = None completion_tokens: Optional[int] = None fallback: bool = False fallback_reason: Optional[str] = None metadata: dict = field(default_factory=dict) This is what makes the design honest. The router can change, the cloud model can be swapped from gpt-4o to gpt-5.4 , fallback policies can flip — and the calling code never breaks. The four InferencePath values give you full observability without leaking implementation details into the API surface. Architecture in one diagram ┌─────────────┐ prompt ┌──────────────────────────┐ │ caller │ ──────────► │ HybridAgentService │ └─────────────┘ │ .ask(prompt) │ └────────────┬─────────────┘ │ ┌────────────▼─────────────┐ │ RoutingPolicy │ │ 1. Heuristic gate │ │ 2. Local router LLM │ │ 3. Hard policy gates │ └─────┬─────────────┬──────┘ │ │ LOCAL ◄┘ └► CLOUD │ │ ┌──────────▼──┐ ┌──────▼───────┐ │ Foundry │ │ Microsoft │ │ Local SDK │ │ Foundry │ │ (phi-4-mini)│ │ (gpt-5.4) │ └─────────────┘ └──────────────┘ Best practice: the two-stage router pattern Before walking through the implementation, it is worth stating the design pattern explicitly, because it is the part that generalises beyond this specific repo. The cleanest design for hybrid inference is a two-stage router. Stage 1 — local router. A small local model performs intent and complexity classification first. It does not answer the question; it decides where the question should go. Stage 2 — route the answer. If the prompt is simple, private, latency-sensitive, or clearly within local capability, route to a local task model on the device. If the prompt is complex, needs deeper reasoning, a larger context window, or a capability unavailable locally, escalate to a cloud frontier model in Microsoft Foundry. Microsoft's current guidance for the cloud side is to use the Responses API and choose one of two control modes: Pass a specific deployment name (for example gpt-5.4 ) when you want deterministic control over which model serves the request, which is the right choice for regulated workloads, repeatable evaluations, or cost ceilings. Pass model-router as the deployment when you want Microsoft Foundry to automatically select the best available cloud model for each request. This is a sensible default for general-purpose agents where you would rather let the platform optimise the model choice as new ones are released. The reference repo exposes both as environment variables so you can switch without code changes: # .env.example FOUNDRY_CLOUD_MODEL_DEPLOYMENT=gpt-5.4 # deterministic FOUNDRY_CLOUD_ROUTER_DEPLOYMENT=model-router # auto-select Best practice: pin the right SDK versions Two SDKs do the heavy lifting and both have had recent breaking changes, so version discipline matters. Local development — foundry-local-sdk . The current public guidance is to use the Foundry Local SDK package foundry-local-sdk , which provides model discovery, download, cache, load, unload, chat completions, embeddings, audio transcription, and an optional built-in web service. Use version 1.1.0, released on 5 May 2026. Earlier versions used an OpenAI-compatible client surface that has since been replaced by the FoundryLocalManager → load_model → get_chat_client → complete_chat chain shown above. Pin it explicitly: # requirements.txt foundry-local-sdk>=1.1.0 Cloud orchestration and agents — azure-ai-projects . For cloud-side orchestration, Microsoft's current Python guidance is to use azure-ai-projects , which the docs describe as part of the Microsoft Foundry SDK and as the entry point for agents, deployments, connections, datasets, evaluations, and an OpenAI-compatible client returned by get_openai_client() . The current PyPI listing shows azure-ai-projects 2.1.0. Pin it explicitly: # requirements.txt azure-ai-projects>=2.1.0 azure-identity>=1.17.0 If you find yourself reading old samples that import azure.ai.inference as the cloud entry point, or that initialise Foundry Local through a raw openai.OpenAI(base_url=...) client, you are looking at pre-2026 patterns. The current shape is what the reference repo uses: FoundryLocalManager.initialize(Configuration(...)) for the device and AIProjectClient(...).get_openai_client() for the cloud. Stage 1: a deterministic privacy gate Before any model touches a prompt, a deterministic heuristic classifier scans for sensitive patterns — passwords, API keys, SSN/NHS numbers, PII signals, explicit "do not share" flags. If the heuristic returns PrivacyClass.RESTRICTED , the prompt is forced local. The router LLM is not called. The cloud provider is not called. The decision is auditable from a single regex pass. # app/routing/policy.py def decide(self, prompt: str, correlation_id: str = "") -> RoutingDecision: hint, privacy, complexity, h_reason = self._heuristic.classify(prompt) # Hard gate: restricted content never leaves the device if privacy == PrivacyClass.RESTRICTED: return self._make_decision( target=RouteTarget.LOCAL, confidence=1.0, reason=f"Policy hard-gate: {h_reason}", privacy=privacy, complexity=complexity, deterministic=True, correlation_id=correlation_id, ) # Hard gate: very high complexity always goes to cloud if complexity == ComplexityBand.VERY_HIGH: return self._make_decision( target=RouteTarget.CLOUD, confidence=1.0, reason="Policy hard-gate: very_high complexity requires frontier model", ... ) This is the most important responsible-AI control in the whole system. If your privacy review depends on an LLM correctly classifying every prompt, you do not have a privacy control — you have a probability distribution. Deterministic gates first, model judgement second. Stage 2: a local LLM as the router For everything that passes the privacy gate, a small local model classifies whether the prompt needs frontier capability. This is the bit that surprises most engineers: you can do useful routing with a 4B parameter model running on a laptop CPU. The router does not need to answer the question. It only needs to classify it. The reference implementation uses phi-4-mini via Foundry Local. Initialising it is two lines: # app/providers/local_provider.py (excerpt) from foundry_local import FoundryLocalManager from foundry_local.models import Configuration self._manager = FoundryLocalManager.initialize( Configuration(app_name="hybrid-agent") ) self._router_model = self._manager.load_model(self._config.local_router_alias) self._chat_client = self._router_model.get_chat_client() response = self._chat_client.complete_chat( messages=[ {"role": "system", "content": ROUTER_SYSTEM_PROMPT}, {"role": "user", "content": prompt}, ], ) The router prompt asks for a strict JSON response: { "target": "local|cloud", "confidence": 0.0-1.0, "complexity": "low|medium|high|very_high", "reason": "..." } . The application parses it, applies the confidence threshold from config (default 0.6), and falls back to the heuristic decision if the router LLM is unsure or its JSON is malformed. The router never blocks the answer path — that is a deliberate reliability choice. Cloud inference via Microsoft Foundry When the policy returns RouteTarget.CLOUD , the request goes through AIProjectClient , which gives you an openai.OpenAI -compatible client wired to your Foundry project with DefaultAzureCredential . No API keys. No secrets in .env . # app/providers/cloud_provider.py (excerpt) from azure.ai.projects import AIProjectClient from azure.identity import DefaultAzureCredential self._project = AIProjectClient( endpoint=self._config.foundry_project_endpoint, credential=DefaultAzureCredential(), ) self._openai_client = self._project.get_openai_client() response = self._openai_client.chat.completions.create( model=self._config.foundry_cloud_model_deployment, # e.g. "gpt-5.4" messages=messages, max_completion_tokens=max_tokens, ) A subtle gotcha worth flagging: gpt-5 and o-series deployments reject the legacy max_tokens parameter and require max_completion_tokens . They also reject custom temperature values. The reference repo handles this by trying the new parameter first and falling back to the legacy one only when the API returns the specific unsupported parameter error. That keeps the same code working against older deployments without forking the provider. Graceful degradation: the fallback paths Hybrid systems fail in interesting ways. The cloud can be down. The local model can throw because the GPU ran out of memory. A reasoning model can return an empty completion. The service handles all of these by attempting the alternative path and labelling the response so observability stays honest: Cloud route fails → local fallback. The response carries path=LOCAL_FALLBACK , fallback=true , and a populated fallback_reason . The user gets an answer instead of an error. Local route fails → cloud fallback, but only if privacy class is not RESTRICTED. A sensitive prompt that the local model could not handle never leaks to the cloud as a fallback. It returns a clear error instead. This is the second hard gate in the system. Both fail. A structured error response with a correlation ID, never a stack trace. That last rule — fallback respects privacy class — is the kind of decision that is easy to skip and impossible to bolt on later. Encode it once in the service layer and your privacy reviewers will thank you. What it looks like in practice The diagnostics panel in the Gradio UI shows the routing decision live: path, model, confidence, latency, privacy class, complexity band, and the full JSON response. Five canonical scenarios shake out the entire decision tree: "hello" → path=local, confidence=1.0, complexity=low . Heuristic only. No router LLM call. ~3 seconds end-to-end with phi-4-mini cached. "explain transformer self-attention in depth with maths" → path=cloud, model=gpt-5.4, complexity=high . Router LLM classifies, hard gate confirms. "my password is hunter2, suggest a stronger one" → path=local, privacy=restricted, deterministic=true . Privacy gate fires before any model sees it. "summarise this 8 KB document" with cloud unavailable → path=cloud_fallback (local handles it, response is labelled). Complex prompt with local model error → path=local_fallback , fallback_reason populated. You can reproduce all five without any models installed by running python -m app.main --demo . The demo mode swaps the providers for deterministic stubs so you can validate the routing logic and the response schema in under a second on any machine. Operational lessons learned Some things the reference implementation only gets right because it got them wrong first: Pick a non-reasoning model for the router. Reasoning-tuned local models (Phi-4-reasoning, o-style) wrap their output in <think> blocks and blow your JSON parser. phi-4-mini is faster and more reliable for classification. Cache the local model. First load can take 30–60 seconds while Foundry Local downloads weights. Initialise the service once at process startup, not per request. Use correlation IDs everywhere. The service attaches one per request and the structured JSON logger emits it on every event. When you are debugging a fallback path across two model providers, this is the difference between five minutes and five hours. Run the privacy heuristic on every fallback path too. A naive implementation might route locally, fail, and then send the same sensitive prompt to the cloud as a "graceful" fallback. That is not graceful, it is a data leak. Keep configuration in .env and out of code. Privacy mode, fallback toggles, confidence threshold, model aliases — all environment-driven. The config.py module is the only place that reads them. Responsible AI in a hybrid topology Hybrid does not make responsible AI harder, but it does make it different. Three controls earn their keep: Data residency by default. The local path keeps prompts and answers on the device. For RESTRICTED content this is mandatory; for everything else it is a free latency and cost win. Auditability. Every routing decision is logged with the deterministic reason, the heuristic class, the router LLM output, the confidence, and the correlation ID. You can answer "why did this prompt go to the cloud?" months later. Keyless auth. DefaultAzureCredential means there is no API key to leak, rotate, or commit by accident. The repo's .gitignore , SECURITY.md , and pre-push checklist enforce this end-to-end. Try it Five minutes, no Azure account needed for the demo: git clone https://github.com/leestott/fl-mixedmodel.git cd fl-mixedmodel python -m venv .venv .venv\Scripts\activate # Windows # source .venv/bin/activate # macOS / Linux pip install -r requirements.txt python -m app.main --demo # all five scenarios, no models required To run with real models, install Foundry Local, copy .env.example to .env , set your FOUNDRY_PROJECT_ENDPOINT , then: az login python -m app.main --ui --port 7860 Where to go next Repository: github.com/leestott/fl-mixedmodel — full source, tests, specification, screenshots. Foundry Local SDK: pypi.org/project/foundry-local-sdk and the Foundry Local docs. Azure AI Projects SDK: pypi.org/project/azure-ai-projects and the Microsoft Foundry docs. Azure Identity: DefaultAzureCredential reference. Phi-4-mini: Phi-4-mini on Hugging Face. Key takeaways The best-practice pattern is a two-stage router: local model classifies first, then either a local task model or a Microsoft Foundry cloud model answers. For cloud control, use the Responses API with either a named deployment (deterministic) or model-router (auto-select). Pin foundry-local-sdk >= 1.1.0 (5 May 2026) and azure-ai-projects >= 2.1.0 . The 2026 SDK surfaces are not backwards-compatible with pre-2026 samples. Hybrid inference is a routing problem, not a model problem. A small local model is enough to classify the request. Deterministic privacy gates beat probabilistic ones. Code the rules; let the LLM judge only what is left. Return the same response schema from every path. Label fallbacks honestly. Carry a correlation ID everywhere. Keep auth keyless with DefaultAzureCredential and your .env out of git. Test the routing decisions, not just the model outputs. Demo mode and a strong pytest suite pay back every time you swap a model. Hybrid AI is not a compromise between local and cloud. It is the supervisor pattern applied to inference — fast and private where you can be, frontier where you have to be, observable everywhere. The hard part is the contract, not the models.459Views1like0CommentsCI/CD for AI Agents on Microsoft Foundry
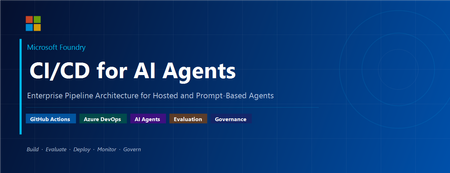
Introduction Building an AI agent is the straightforward part. Shipping it reliably to production with version control, evaluation-driven quality gates, multi-environment promotion, and enterprise governance is where most teams run into friction. Microsoft Foundry changes this. It is Microsoft's AI app and agent factory: a fully managed platform for building, deploying, and governing AI agents at scale. It provides a first-class agent runtime with built-in lifecycle management, making it possible to apply the same CI/CD rigour you already use for application software to AI agents — regardless of whether you are building containerised hosted agents or declarative prompt-based agents. This post walks through a complete, production-ready reference architecture for doing exactly that. You will find the GitHub Actions workflow, the Azure DevOps pipeline YAML, and the architecture diagram linked throughout. Reference implementation repository: foundry-agents-lifecycle and CI/CD for AI Agents on Microsoft Foundry Why Agent CI/CD Is Different Traditional software pipelines gate releases on test pass/fail. Agent pipelines require an additional, critical layer: evaluation-driven quality gates. Before any agent version can be promoted to the next environment, it must pass three categories of evaluation: Quality — answer correctness, task completion rate, hallucination rate Safety — grounded responses, policy compliance, tool usage validation Performance — token usage per query, p95 response latency A second key difference is the deployment unit. You are not deploying a binary or a container tag in isolation. You are deploying an agent version — an immutable artefact that bundles the model selection, system instructions, tool definitions, and configuration together. This is what enables deterministic promotion and full auditability across environments. "Agents follow a standard CI/CD pattern, but with a critical shift: promotion happens at the agent version level, and release gates are driven by evaluation outcomes, not just test results." Reference Architecture Figure 1: End-to-end CI/CD reference architecture for hosted and prompt-based agents on Microsoft Foundry. The architecture has five logical layers, flowing from developer commit to production monitoring: Layer 1 — Developer Layer The developer layer is a standard source-controlled repository in GitHub or Azure DevOps. It contains: Agent code written in Python or .NET agent.yaml or prompt definition files for prompt-based agents Tool configurations: MCP servers, REST API connectors, or other integrations Infrastructure as Code: Bicep or ARM templates for provisioning the Foundry project and dependencies Layer 2 — CI Pipeline (Build · Validate · Evaluate) Every push or pull request triggers the CI pipeline. It performs five steps: Docker build — for hosted agents, build and tag the container image Static checks — lint with ruff , security scan with bandit , agent YAML schema validation Unit and tool tests — pytest suites covering agent logic and tool integrations Evaluation gate — run evaluation datasets; fail the pipeline if thresholds are breached Image push — push the validated container to Azure Container Registry (ACR) Prompt-based agents skip the Docker build step. Instead, the YAML definition and prompt bundle are validated against schema and evaluated against golden datasets. Layer 3 — CD Pipeline (Multi-stage Promotion) A single agent version is promoted through three Foundry project environments: Stage Environment Activities Gate Stage 1 Dev Foundry Project Deploy vNext version, smoke tests, developer evals Eval quality thresholds Stage 2 Test / QA Foundry Project Scenario tests, HITL validation, safety evaluation Eval gates + human approval Stage 3 Production Foundry Project Promote version, enable endpoint, post-deploy smoke test Required reviewer approval Rollback is straightforward: switch the active version pointer back to the previous agent version. No re-deployment is needed. Layer 4 — Microsoft Foundry Agent Service The Foundry Agent Service runtime provides: Hosted agent runtime — managed container execution supporting Agent Framework, LangGraph, Semantic Kernel, or custom code Prompt-based agent runtime — declarative agent definitions, no container required Built-in lifecycle operations — version, start, stop, rollback Entra Agent Identity — each deployed version receives a dedicated Microsoft Entra managed identity RBAC and policy enforcement — Azure role-based access controls per project Observability — distributed traces, structured logs, and evaluation signals Layer 5 — Monitoring, Governance, and Control Plane Foundry control plane: agent registry, environment configuration, version history OpenTelemetry forwarded to Azure Monitor and Application Insights Continuous evaluation pipelines for ongoing quality, grounding, and safety monitoring Azure Policy and RBAC enforcement at the platform level Environment Topology There are two topology options. We recommend Option A for all production workloads: Option Structure Best for Trade-off A — Recommended Dev Project → Test Project → Prod Project (separate Foundry projects) Enterprise workloads Full isolation, clean RBAC boundaries, easier governance B — Lightweight Single Foundry project with agent version tags (dev/test/prod) Small teams, prototyping Simpler setup, but weaker environment separation Separate projects mean separate RBAC policies, separate connection strings, and separate evaluation signals. A developer service principal has access only to the Dev project; the CI/CD identity has restricted access to promote to Test and Production. Evaluation Gates — The Core Difference Evaluation gates transform a standard software pipeline into an AI-safe deployment pipeline. They run at two points: pre-merge (CI) and pre-promotion (CD). Defining the Gates Category Metric CI threshold Prod threshold Quality Hallucination rate < 5% < 3% Quality Task completion rate > 90% > 95% Safety Grounded response rate > 95% > 98% Safety Policy violations 0 0 Performance p95 latency < 4 000 ms < 3 000 ms Cost Token usage per query Track only Alert on > 20% regression Gate Enforcement (Python) import json import sys def check_gates(results_path: str) -> None: with open(results_path) as f: results = json.load(f) failures = [] if results["hallucination_rate"] > 0.05: failures.append(f"Hallucination rate {results['hallucination_rate']:.1%} exceeds 5% threshold") if results["task_completion_rate"] < 0.90: failures.append(f"Task completion {results['task_completion_rate']:.1%} below 90% threshold") if results["latency_p95_ms"] > 4000: failures.append(f"p95 latency {results['latency_p95_ms']}ms exceeds 4000ms threshold") if results.get("policy_violations", 0) > 0: failures.append(f"Policy violations detected: {results['policy_violations']}") if failures: for f in failures: print(f"GATE FAILED: {f}", file=sys.stderr) sys.exit(1) print("All evaluation gates passed — proceeding to deployment") if __name__ == "__main__": check_gates(sys.argv[1]) Hosted vs Prompt-Based Agents — Pipeline Differences Capability Hosted Agents Prompt-Based Agents Deployment unit Container image + agent definition YAML / prompt configuration bundle Build step required Yes — Docker build + ACR push No — YAML validation only Supported frameworks Agent Framework, LangGraph, Semantic Kernel, custom Foundry declarative runtime Promotion artefact Versioned agent with container image reference Versioned prompt/config bundle CI focus Code quality, tool tests, evaluation Prompt schema validation, evaluation Rollback mechanism Switch active agent version Switch active agent version Runtime management Foundry manages container lifecycle Foundry manages declarative runtime CI Pipeline Walkthrough The following steps are representative of the full GitHub Actions workflow available in github-actions-pipeline.yml alongside this post. Hosted Agent CI # 1. Static checks ruff check . bandit -r src/ -ll python scripts/validate_agent_config.py --config agent.yaml # 2. Tests pytest tests/unit/ -v --tb=short pytest tests/tools/ -v --tb=short # 3. Evaluation gate python scripts/run_evaluations.py \ --dataset eval/datasets/golden_set.jsonl \ --output eval/results/results.json python scripts/check_eval_gates.py \ --results eval/results/results.json \ --max-hallucination 0.05 \ --min-task-completion 0.90 \ --max-latency-p95 4000 # 4. Push container image az acr build \ --registry myregistry.azurecr.io \ --image "myagent:$SHA" \ --file Dockerfile . Prompt-Based Agent CI # Validate YAML / prompt definitions python scripts/validate_agent_config.py --config agent.yaml # Evaluation against golden dataset python scripts/run_evaluations.py \ --dataset eval/datasets/golden_set.jsonl \ --output eval/results/results.json python scripts/check_eval_gates.py \ --results eval/results/results.json CD Pipeline Walkthrough Stage 1 — Dev Deployment python scripts/deploy_agent.py \ --env dev \ --image "myregistry.azurecr.io/myagent:$SHA" \ --foundry-endpoint $FOUNDRY_ENDPOINT_DEV \ --agent-config agent.yaml # Returns the new agent version ID, stored for promotion AGENT_VERSION=$(python scripts/get_active_version.py --env dev) Stage 2 — Promote to Test (after approval gate) python scripts/promote_agent.py \ --from-env dev \ --to-env test \ --agent-version $AGENT_VERSION \ --foundry-endpoint $FOUNDRY_ENDPOINT_TEST # Run scenario tests and safety evaluation python scripts/run_evaluations.py \ --dataset eval/datasets/scenario_set.jsonl \ --output eval/results/test-results.json python scripts/check_eval_gates.py \ --results eval/results/test-results.json \ --max-hallucination 0.03 \ --min-task-completion 0.95 Stage 3 — Promote to Production (after required reviewer approval) python scripts/promote_agent.py \ --from-env test \ --to-env prod \ --agent-version $AGENT_VERSION \ --foundry-endpoint $FOUNDRY_ENDPOINT_PROD # Enable the production endpoint python scripts/enable_agent_endpoint.py \ --agent-version $AGENT_VERSION \ --foundry-endpoint $FOUNDRY_ENDPOINT_PROD Rollback # Switch the active version to the previous known-good version python scripts/promote_agent.py \ --from-env prod \ --to-env prod \ --agent-version $PREVIOUS_AGENT_VERSION \ --foundry-endpoint $FOUNDRY_ENDPOINT_PROD # OR delete the failing version python scripts/delete_agent_version.py \ --agent-version $AGENT_VERSION \ --foundry-endpoint $FOUNDRY_ENDPOINT_PROD Deployment Using the Azure AI Projects SDK The azure-ai-projects SDK provides programmatic control over the full agent lifecycle. This is the recommended approach for CI/CD scripts where you need deterministic, scriptable deployment. from azure.identity import DefaultAzureCredential from azure.ai.projects import AIProjectClient # Connect to the Foundry project client = AIProjectClient( endpoint=FOUNDRY_PROJECT_ENDPOINT, credential=DefaultAzureCredential() ) # List existing agents (useful for idempotent deploy scripts) for agent in client.agents.list(): print(f"Agent: {agent.name} version: {agent.id}") # Create a new agent version (hosted agent) agent = client.agents.create_agent( model="gpt-4o", name="my-enterprise-agent", instructions="You are a helpful assistant ...", tools=[...], # tool definitions metadata={"version": GIT_SHA, "environment": "dev"} ) print(f"Created agent version: {agent.id}") For hosted agents, the SDK call also references the container image pushed to ACR. Refer to the Deploy a hosted agent — Microsoft Foundry documentation for the full SDK flow including container image registration and version polling. Reference Implementation Stack Concern Technology Source control and pipelines GitHub Actions or Azure DevOps Pipelines Infrastructure and agent deployment Azure Developer CLI ( azd up ) Programmatic agent lifecycle azure-ai-projects Python SDK Agent evaluation azure-ai-evaluation Python SDK Agent runtime Microsoft Foundry Agent Service Container registry Azure Container Registry (hosted agents only) Observability OpenTelemetry, Azure Monitor, Application Insights Identity and access Microsoft Entra (Agent ID, OIDC workload identity federation) Governance Azure Policy, RBAC, Foundry control plane Governance and Responsible AI Shipping AI agents at enterprise scale requires governance beyond what a traditional CI/CD pipeline provides. Microsoft Foundry addresses this at the platform level: RBAC per environment — each Foundry project has independent access controls. Developers deploy to Dev; only CI/CD service principals (with audited OIDC tokens) can promote to Test and Production. Agent registry and audit trail — the Foundry control plane records which agent version is active in each environment, who deployed it, and when. This satisfies enterprise audit requirements without additional tooling. Content safety and policy enforcement — Azure Policy governs model access, data handling, and content safety rules at the infrastructure level, not just at the application code level. Policy violations block deployment automatically. Entra Agent Identity — each deployed agent version receives a dedicated, short-lived managed identity. Agents authenticate to downstream services using least-privilege credentials scoped to that specific deployment. Continuous evaluation in production — evaluation pipelines run on sampled production traffic, alerting when quality, safety, or cost metrics drift from their baseline. A key trade-off to be transparent about: evaluation datasets must be maintained and updated as the agent's tasks evolve. Stale datasets produce misleading pass/fail signals. Treat your golden evaluation set as a first-class engineering artefact alongside the agent code itself. Pipeline Files Two pipeline files accompany this reference architecture. Both implement the same four-stage pipeline (CI Build, CI Evaluate, CD Dev, CD Test, CD Production) with environment-appropriate approval gates. github-actions-pipeline.yml — GitHub Actions workflow. Uses GitHub Environments for approval gates and OIDC Workload Identity Federation for passwordless Azure authentication. No stored Azure credentials required. azure-devops-pipeline.yml — Azure DevOps multi-stage YAML pipeline. Uses ADO Environments with required approvers and variable groups per environment. Both pipelines share these security practices: OIDC / Workload Identity Federation — no long-lived Azure credentials stored in pipeline secrets Per-environment variable groups, each with scoped connection strings and endpoints Evaluation quality gates enforced before every promotion step Mandatory human approval before production deployment Summary The full pipeline in one view: Developer commit | CI Pipeline ├── Docker build (hosted agents) / YAML validation (prompt agents) ├── Static checks + unit tests + tool tests └── Evaluation gate ← quality · safety · performance | Agent Version created ← immutable, versioned artefact | CD Pipeline ├── Deploy to Dev → smoke tests + eval gate ├── Promote to Test → scenario tests + HITL + approval gate └── Promote to Prod → enable endpoint + monitoring | Microsoft Foundry Agent Service └── Versioned runtime · Entra identity · RBAC · Observability | Control Plane └── Agent registry · Governance · Continuous evaluation Microsoft Foundry provides the platform primitives — versioned agent deployments, multi-environment Foundry projects, built-in lifecycle management, and an enterprise observability stack — needed to operate AI agents with the same confidence as any production software system. The key takeaway: treat the agent version as your deployment artefact, and evaluation outcomes as your release gate. The rest follows familiar CI/CD patterns you already know and trust. Next Steps Clone the CI/CD Repo at leestott/foundry-cicd Clone the reference demo: foundry-agents-lifecycle on GitHub Set up your environment: Set up your environment for Foundry Agent Service Deploy your first hosted agent: Quickstart: Deploy your first hosted agent Understand hosted agent concepts: Foundry Hosted Agents concepts Automate deployments in CI/CD: Automate deployment of Microsoft Foundry agents Manage agent versions: Manage hosted agents — Microsoft Foundry Deploy via SDK: Deploy a hosted agent — Microsoft Foundry SDK and endpoint reference: Microsoft Foundry SDK and Endpoints reference Azure AI Projects SDK: azure-ai-projects Python SDK Azure Developer CLI: Azure Developer CLI (azd) overview Microsoft Foundry documentation hub: Microsoft Foundry on Microsoft Learn14KViews8likes0CommentsSigning in to Microsoft Foundry from OpenClaw using Azure AD: a smoother way to bring your models in
This post is a quick update to walk through the new flow. If you read the previous one, think of this as the easier path I wish I had the first time round. If you have not seen the original, you can find it here: Integrating Microsoft Foundry with OpenClaw: Step by Step Model Configuration | Microsoft Community Hub Pre-requisite: You will need the Azure CLI (azure-cli) installed on your machine. The official install guide for Linux is here: https://learn.microsoft.com/en-us/cli/azure/install-azure-cli-linux?view=azure-cli-latest I am on Linux so I went the Homebrew route, which keeps things simple. The formula is here: https://formulae.brew.sh/formula/azure-cli Microsoft also has official docs covering the Homebrew/Linuxbrew install: https://learn.microsoft.com/en-us/cli/azure/install-azure-cli-macos?view=azure-cli-latest#install-with-homebrew Once Homebrew is ready, run this in your terminal: brew install azure-cli Why this matters: Before this update, every Foundry model you wanted to use in OpenClaw needed its own API key and endpoint pasted into the config. It worked, but it was tedious, and keys are easy to leak if you are copying them around. The Azure AD path solves both problems. You authenticate as yourself (or a service principal), OpenClaw asks Azure for the list of Foundry resources you have access to, and it brings the models in automatically. Signing in to Microsoft Foundry from OpenClaw via Azure AD A device-code OAuth handshake replaces the old static-API-key flow. OpenClaw delegates auth to the local Azure CLI; the CLI handles the browser-side sign-in, holds the resulting tokens, and refreshes them silently. OpenClaw then walks the Azure resource graph, subscriptions → Foundry resources → model deployments and registers each model into its own config. No API keys move through OpenClaw at any point. Sequence diagram of the OAuth 2.0 device-authorization flow as orchestrated by OpenClaw. Phases 1–3 establish identity (the developer authenticates once, in a real browser, against Azure AD). Phases 4–5 perform service discovery (OpenClaw walks the ARM resource hierarchy, subscriptions → Foundry accounts → model deployments and persists the result to a local provider config). After registration, every model call OpenClaw makes against Foundry reuses the same Azure-CLI-managed token cache: tokens refresh transparently, and access is gated by the Foundry resource's RBAC assignments rather than a static API key. Dashed lines denote return values; the teal line in step 7 marks the single token-issuance event the rest of the system pivots on. Walking through the new flow: Start with the command to onboard openclaw as if you were setting up OpenClaw for the first time: openclaw onboard Kick things off with the OpenClaw onboard command, the same one you would use when setting up OpenClaw for the first time. When it prompts you, choose update values. Next, you will be asked to configure your models. Scroll down a little and you will see Microsoft Foundry listed as a supported provider. Pick it. From here, you have two options. You can sign in with an API key, which is what I covered in the previous blog post, or you can sign in through Azure AD. The Azure AD path is easier and more secure, so that is the one we will use. OpenClaw will give you a URL and a device code. Copy the URL into your browser and use the code to complete the sign in. (This is where the az CLI from the pre-requisite section earns its keep.) If everything worked, you should see a success prompt similar to this: Once you are signed in, OpenClaw will ask you to pick the Azure subscription that your Microsoft Foundry resource lives in. Pick the subscription, then pick the Foundry resource where your models are deployed. And that is pretty much it. All the models you have deployed to that Foundry resource get pulled into OpenClaw automatically. Compared to the old way of pasting API keys and endpoints one by one, this is a huge time saver, and you do not have to babysit any keys. From here you can start using your Foundry-deployed models inside OpenClaw straight away: Wrapping up The Azure AD sign-in option in OpenClaw is one of those small updates that quietly removes a real pain point. If you have ever juggled multiple Foundry endpoints and rotated keys across them, you already know why. With this flow, you sign in once, your models show up, and you can get back to actually building. If you have not tried OpenClaw with Microsoft Foundry yet, this is a good time to give it a go. And if you were holding off because of the key management overhead, that excuse is gone now. References Previous post on integrating Microsoft Foundry with OpenClaw using API keys: Integrating Microsoft Foundry with OpenClaw: Step by Step Model Configuration | Microsoft Community Hub Install the Azure CLI on Linux: https://learn.microsoft.com/en-us/cli/azure/install-azure-cli-linux?view=azure-cli-latest Install the Azure CLI on macOS: https://learn.microsoft.com/en-us/cli/azure/install-azure-cli-macos?view=azure-cli-latest#install-with-homebrew Homebrew formula for azure-cli: https://formulae.brew.sh/formula/azure-cli335Views0likes0Comments
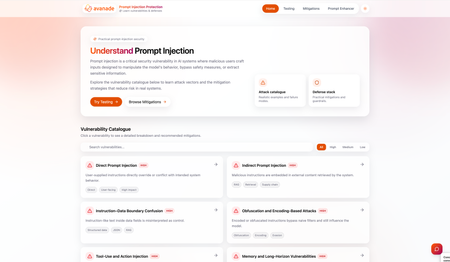
Building the Solution Teams Need to Secure AI Against Prompt Injection
As artificial intelligence continues to evolve, teams are prioritising rapid advancements and deployment of applications while often overlooking security considerations. Emerging threats such as prompt injection remain poorly understood, and this is putting systems, users, and infrastructure at serious risk. Much of the expertise required to mitigate these risks is currently fragmented and inaccessible, concentrated among a small group of cybersecurity specialists. Meanwhile, developers, under pressure to ship quickly, often lack both the tools and frameworks needed to systematically test their AI systems for vulnerabilities. This disconnect is creating a significant gap between the development and security assurance of AI applications. To address this gap, we developed a unified Prompt Injection Testing Platform and knowledge base, powered by Microsoft Foundry, designed to make LLM security testing accessible, structured, and understandable for developers. Project Overview Developers are rapidly integrating LLMs and agents into applications, but: Security testing is not standardised Prompt injection risks are increasingly understood in research, but poorly mitigated in practice by developers There is a lack of accessible, actionable tooling This creates a dangerous gap: applications are being deployed faster than they are being secured. As part of our UCL Industry Exchange Network (IXN) project in collaboration with Avanade, we built a Prompt Injection Testing Platform designed to solve this exact issue by: Providing a knowledge base of vulnerabilities and mitigations Helping teams identify vulnerabilities within their AI systems Enabling custom and automated testing pipelines Integrating tools like Garak for adversarial testing With this, we aim to make prompt injection testing accessible, standard, and understandable. Project Journey We divided our project into several phases: Phase 1: Understanding our Users’ Needs. We began by identifying the core users of our platform: AI developers and broader stakeholders across development, security, and safety disciplines integrating LLMs into their applications. By meeting with them, we uncovered a few key challenges: Developers have limited awareness of prompt injection risks There is a generalised lack of accessible tools for testing This first exploration set a core principle: We must build a developer-first solution which does not depend on extensive technical knowledge to be used. We concluded that to be as useful as possible, our solution should not require prior prompt injection knowledge. In order to solve the two challenges presented by our users, we concluded a platform would be the best approach, as it enables us to centralise fragmented knowledge while providing a structured, scalable environment for testing LLM vulnerabilities in practice. Phase 2: Understanding the Threat Landscape Building on our user research, we focused on developing a deep understanding of the prompt injection threat landscape to inform the design of our platform. This phase involved researching: Different types of prompt injection vulnerabilities Common attack scenarios and override techniques Existing mitigation strategies used in practice Tools and methodologies for prompt injection security testing The most widely used models to ensure our platform would be compatible with real-world systems. We consolidated these findings into a structured technical report, designed to be shared with developers, security testers, and semi-technical stakeholders. The goal was not only to guide our own implementation, but also to contribute to making prompt injection more standard and understandable. From our research, we realised prompt injection is not a single vulnerability, but a rapidly evolving attack surface that requires continuous, scalable testing rather than one-time validation. Phase 3: Building the Platform Guided by both our user insights and the threat landscape analysis, we moved to designing and developing a unified prompt injection testing platform and knowledge base. To do this, we defined three core principles: Developer first: no deep security knowledge would be required Unified: combines education (knowledge base) and execution (testing tools) Scalable: Expert users could extend the platform by bringing their own models, tests, and mitigations. During this stage, we built a platform which allows teams to: Connect their own LLM endpoints Run custom prompt injection tests Execute automated adversarial testing through Garak Access a centralised knowledge base of vulnerabilities and mitigation strategies. Export knowledge base information and test results as PDFs. By the end, we had developed a unified platform that enables developers to systematically test, understand, and mitigate prompt injection vulnerabilities in their AI applications. To understand how our platform works in practice, you can view our demo video. Platform home interface presenting an overview of prompt injection concepts and a structured vulnerability catalogue for exploring attack types and mitigation strategies. Key Features Model Integration and Configuration Users can use models included in the platform or connect their own LLM endpoints, allowing the platform to work across different providers: Supports multiple model providers through Microsoft Foundry Supports custom model integration via HTTP endpoints Enables model configurations such as custom system prompts and mitigation layers. Ensures flexibility as new models and mitigations emerge Testing Suite The platform allows users to create and run custom prompt injection tests tailored to their applications. This involves: Creating and executing targeted prompts Simulating real-world attack scenarios Running predefined adversarial testing suites (integrating NVIDIA Garak) Testing interface showing configuration of prompt injection tests and execution of automated scans, with results and risk evaluation displayed. Knowledge Base A core component of our platform is a structured knowledge base, which is designed to make prompt injection concepts accessible and understandable. This is divided into two key areas: Vulnerabilities: Provides information on different types of prompt injection attacks, including explanations of how each vulnerability works, with real-world examples and scenarios, as well as references to reputable external sources Mitigations: Focuses on how to defend against these vulnerabilities, and it includes clear implementation strategies and code examples demonstrating how to integrate each mitigation. To support exploration, we also included a chatbot interface, which answers questions using knowledge base data and trusted sources. This helps users quickly navigate vulnerabilities and mitigation strategies by providing contextual, reliable information and redirecting users to the appropriate page of our platform. Figure 3: Direct prompt injection analysis view, where users can explore attack techniques, observe unsafe model responses, and review corresponding mitigation approaches. Prompt Enhancer In addition to testing and learning, our platform integrates a prompt enhancer, designed to help users actively improve the security of their system prompts. It works in the following way: Takes an existing prompt as input Draws on the knowledge base insights and best practices Restructures the prompt to improve clarity and robustness Incorporates selected prompt-layer mitigations to reduce prompt injection risk Prompt Enhancer interface showing the application of prompt-layer mitigations (e.g. delimiter tokens, instruction hierarchy enforcement) to restructure and secure a system prompt against prompt injection attacks. Technical Details To support a flexible and scalable testing system, we designed our platform with a modular, layered architecture. This allows different components to operate independently while remaining integrated through clearly defined interfaces, ensuring both extensibility and maintainability. System Architecture We divided our platform into four main layers: Frontend Layer An interactive user interface that allows developers to: Explore the prompt injection knowledge base Configure and run tests View results and vulnerability analysis API Layer The API layer acts as the orchestration and communication layer between the frontend and the core system. Handles requests from the frontend to create and run tests. Provides frontend with available models, mitigations, and configurations. Ensures any newly added models and mitigations can be automatically reflected in the frontend without requiring manual updates. Domain Layer The layer which defines the core structure and logic of the system: Defines interfaces for key components such as mitigations, models, and test runners Establishes the test structure and data models Encapsulates logic to ensure consistency Integration Layer The layer which implements the abstractions defined in the domain layer and connects the platform to external services Implements model providers such as OpenAI, Anthropic, and other external HTTP-based endpoints Implements test runners, including custom prompt runners and external tools such as Garak. Implements database connections and repository classes. Results and Outcomes Through the research and development of our platform, we were able to gain several key insights into the behaviour and security of LLM-based applications: Prompt injection vulnerabilities are more prevalent than expected. Even simple prompts with carefully crafted inputs can unsafely manipulate a model’s behaviour. Lack of structured testing leads to hidden risks. Without a systematic approach, many vulnerabilities remain undetected. It is sometimes time consuming to manually craft unsafe prompts. Combining custom testing with framework-based testing improves coverage. Using both custom prompts (targeted and application-specific scenarios) and framework-driven testing (e.g. Garak) enables a more comprehensive evaluation of model safety, as both expected and unexpected vulnerabilities can be captured Structured prompts can significantly improve robustness. We observed that prompts with a clear structure and embedded mitigations are less susceptible to injection attacks. By the end of our project, we successfully developed a platform that: Bridges the gap between prompt injection knowledge and practical testing. Enables repeatable and structured testing of prompt injection vulnerabilities Provides a unified workflow for learning, testing, and improving prompt security. Supports multiple models and testing approaches, to cover the entire vulnerability safety. We demonstrated that prompt injection risks can be systematically identified, tested, and mitigated through a structured and repeatable approach. Lessons Learned Throughout the project, we identified several key insights that shaped both our technical approach and our understanding of AI security. AI is rapidly evolving, and systems must be designed accordingly. AI models and attack techniques are advancing extremely fast. As a result, static solutions are quickly becoming obsolete. We learned that it is essential to design a platform that is modular, extensible and adaptable. Through well-defined interfaces and generic services, we ensured our platform can evolve alongside attacks and mitigations. Security must be built into development, not considered at testing. Many developers are focusing on functionality first and security often takes a backseat. In the context of LLMs, vulnerabilities can fundamentally affect the security of the system and its users. As such, security should be treated as a core part of the development cycle. Models and external tools should only be connected if their safety is guaranteed. Bridging the gap between developers and security testers is necessary. We identified a major disconnect between developers building AI applications and the security testers evaluating them. These groups often operate with different priorities and levels of knowledge. We are bridging this gap by making prompt injection knowledge more accessible and creating workflows that are usable by developers while still grounded in robust security practices. Further Development While our platform provides a strong foundation for prompt injection testing and knowledge, there are several areas for future exploration: Expanding our testing framework integrations, by adding a broader coverage of attack techniques Integration with MCP servers and external systems, supporting interactions with tools, APIs and external data sources. Addressing additional indirect prompt injection vulnerabilities, including file uploads, website scraping, and multi-step workflows. Looking ahead, we also aim to integrate our platform more deeply into development workflows by introducing CI/CD integrations for continuous security testing and versioned tracking of model robustness over time. Our goal is to evolve the platform into a comprehensive security layer, capable of testing entire AI-driven systems in dynamic, real-world contexts. Conclusion As AI becomes increasingly integrated into real-world applications, ensuring their security is essential. As our research highlights, current practices have not kept pace with the rapid evolution of AI systems and attack techniques. Through our work, we demonstrated that prompt injection risks can be systematically identified, tested, and mitigated using a structured approach. By combining a unified knowledge base with a flexible testing platform powered by Microsoft Foundry, we are taking a step towards making AI systems safer and more reliable. More importantly, our project reinforces a broader idea: a developer-first approach to security, supported by collaboration across development, security, and safety disciplines, is essential for building AI at scale. Security should not remain confined to specialist teams but should be embedded directly into the development process, alongside practices such as red-teaming and continuous testing. Our project empowers teams with the knowledge and tools they need to build safer and more reliable AI systems. If you’re interested in building more secure AI systems or exploring prompt injection in practice, we invite you to join us through the Foundry Community on the 3rd of June at 2pm BST, when we will be showcasing our platform live, walking through real-world examples, and discussing how teams can integrate prompt injection testing into their development workflows. Team Teo Montero Bonet, UCL Computer Science Mario Mojarro Ruiz, UCL Computer Science David Thomas Garcia, UCL Computer Science Nathaniel Gibbon, UCL Computer Science With support from Josh McDonald, Avanade409Views0likes0CommentsBuild and Deploy a Microsoft Foundry Hosted Agent: A Hands-On Workshop
Agents are easy to demo, hard to ship. Most teams can put together a convincing prototype quickly. The harder part starts afterwards: shaping deterministic tools, validating behaviour with tests, building a CI path, packaging for deployment, and proving the experience through a user-facing interface. That is where many promising projects slow down. This workshop helps you close that gap without unnecessary friction. You get a guided path from local run to deployment handoff, then complete the journey with a working chat UI that calls your deployed hosted agent through the project endpoint. What You Will Build This is a hands-on, end-to-end learning experience for building and deploying AI agents with Microsoft Foundry. The lab provides a guided and practical journey through hosted-agent development, including deterministic tool design, prompt-guided workflows, CI validation, deployment preparation, and UI integration. It’s designed to reduce setup friction with a ready-to-run experience. It is a prompt-based development lab using Copilot guidance and MCP-assisted workflow options during deployment. It’s a .NET 10 workshop that includes local development, Copilot-assisted coding, CI, secure deployment to Azure, and a working chat UI. A local hosted agent that responds on the responses contract Deterministic tool improvements in core logic with xUnit coverage A GitHub Actions CI workflow for restore, build, test, and container validation An Azure-ready deployment path using azd, ACR image publishing, and Foundry manifest apply A Blazor chat UI that calls openai/v1/responses with agent_reference A repeatable implementation shape that teams can adapt to real projects Who This Lab Is For AI developers and software engineers who prefer learning by building Motivated beginners who want a guided, step-by-step path Experienced developers who want a practical hosted-agent reference implementation Architects evaluating deployment shape, validation strategy, and operational readiness Technical decision-makers who need to see how demos become deployable systems Why Hosted Agents Hosted agents run your code in a managed environment. That matters because it reduces the amount of infrastructure plumbing you need to manage directly, while giving you a clearer path to secure, observable, team-friendly deployments. Prompt-only demos are still useful. They are quick, excellent for ideation, and often the right place to start. Hosted agents complement that approach when you need custom code, tool-backed logic, and a deployment process that can be repeated by a team. Think of this lab as the bridge: you keep the speed of prompt-based iteration, then layer in the real-world patterns needed to run reliably. What You Will Learn 1) Orchestration You will practise workflow-oriented reasoning through implementation-shape recommendations and multi-step readiness scenarios. The lab introduces orchestration concepts at a practical level, rather than as a dedicated orchestration framework deep dive. 2) Tool Integration You will connect deterministic tools and understand how tool calls fit into predictable execution paths. This is a core focus of the workshop and is backed by tests in the solution. 3) Retrieval Patterns (What This Lab Covers Today) This workshop does not include a full RAG implementation with embeddings and vector search. Instead, it focuses on deterministic local tools and hosted-agent response flow, giving you a strong foundation before adding retrieval infrastructure in a follow-on phase. 4) Observability You will see light observability foundations through OpenTelemetry usage in the host and practical verification during local and deployed checks. This is introductory coverage intended to support debugging and confidence building. 5) Responsible AI You will apply production-minded safety basics, including secure secret handling and review hygiene. A full Responsible AI policy and evaluation framework is not the primary goal of this workshop, but the workflow does encourage safe habits from the start. 6) Secure Deployment Path You will move from local implementation to Azure deployment with a secure, practical workflow: azd provisioning, ACR publishing, manifest deployment, hosted-agent start, status checks, and endpoint validation. The Learning Journey The overall flow is simple and memorable: clone, open, run, iterate, deploy, observe. clone -> open -> run -> iterate -> deploy -> observe You are not expected to memorize every command. The lab is structured to help you learn through small, meaningful wins that build confidence. Your First 15 Minutes: Quick Wins Open the repo and understand the lab structure in a few minutes Set project endpoint and model deployment environment variables Run the host locally and validate the responses endpoint Inspect the deterministic tools in WorkshopLab.Core Run tests and see how behaviour changes are verified Review the deployment path so local work maps to Azure steps Understand how the UI validates end-to-end behaviour after deployment Leave the first session with a working baseline and a clear next step That first checkpoint is important. Once you see a working loop on your own machine, the rest of the workshop becomes much easier to finish. Using Copilot and MCP in the Workflow This lab emphasises prompt-based development patterns that help you move faster while still learning the underlying architecture. You are not only writing code, you are learning to describe intent clearly, inspect generated output, and iterate with discipline. Copilot supports implementation and review in the coding labs. MCP appears as a practical deployment option for hosted-agent lifecycle actions, provided your tools are authenticated to the correct tenant and project context. Together, this creates a development rhythm that is especially useful for learning: Define intent with clear prompts Generate or adjust implementation details Validate behaviour through tests and UI checks Deploy and observe outcomes in Azure Refine based on evidence, not guesswork That same rhythm transfers well to real projects. Even if your production environment differs, the patterns from this workshop are adaptable. Production-Minded Tips As you complete the lab, keep a production mindset from day one: Reliability: keep deterministic logic small, testable, and explicit Security: Treat secrets, identity, and access boundaries as first-class concerns Observability: use telemetry and status checks to speed up debugging Governance: keep deployment steps explicit so teams can review and repeat them You do not need to solve everything in one pass. The goal is to build habits that make your agent projects safer and easier to evolve. Start Today: If you have been waiting for the right time to move from “interesting demo” to “practical implementation”, this is the moment. The workshop is structured for self-study, and the steps are designed to keep your momentum high. Start here: https://github.com/microsoft/Hosted_Agents_Workshop_Lab Want deeper documentation while you go? These official guides are great companions: Hosted agent quickstart Hosted agent deployment guide When you finish, share what you built. Post a screenshot or short write-up in a GitHub issue/discussion, on social, or in comments with one lesson learned. Your example can help the next developer get unstuck faster. Copy/Paste Progress Checklist [ ] Clone the workshop repo [ ] Complete local setup and run the agent [ ] Make one prompt-based behaviour change [ ] Validate with tests and chat UI [ ] Run CI checks [ ] Provision and deploy via Azure and Foundry workflow [ ] Review observability signals and refine [ ] Share what I built + one takeaway Common Questions How long does it take? Most developers can complete a meaningful pass in a few focused sessions of 60-75 mins. You can get the first local success quickly, then continue through deployment and refinement at your own pace. Do I need an Azure subscription? Yes, for provisioning and deployment steps. You can still begin local development and testing before completing all Azure activities. Is it beginner-friendly? Yes. The labs are written for beginners, run in sequence, and include expected outcomes for each stage. Can I adapt it beyond .NET? Yes. The implementation in this workshop is .NET 10, but the architecture and development patterns can be adapted to other stacks. What if I am evaluating for a team? This lab is a strong team evaluation asset because it demonstrates end-to-end flow: local dev, integration patterns, CI, secure deployment, and operational visibility. Closing This workshop gives you more than theory. It gives you a practical path from first local run to deployed hosted agent, backed by tests, CI, and a user-facing UI validation loop. If you want a build-first route into Microsoft Foundry hosted-agent development, this is an excellent place to start. Begin now: https://github.com/microsoft/Hosted_Agents_Workshop_Lab696Views0likes0CommentsStep-by-Step: Deploy the Architecture Review Agent Using AZD AI CLI
Building an AI agent is easy; operating it is an infrastructure trap. Discover how to use the azd ai CLI extension to streamline your workflow. From local testing to deploying a live Microsoft Foundry hosted agent and publishing it to Microsoft Teams—learn how to do it all without writing complex deployment scripts or needing admin permissions.806Views1like0CommentsProvePresent: Ending Proxy Attendance with Azure Serverless & Azure OpenAI
Problem Most schools use a smart‑card‑based attendance system where students tap their cards on a reader. However, this method is unreliable because students can give their cards to friends or simply tap and leave immediately. Teachers cannot accurately assess real student performance—whether high‑performing students are genuinely attending class or whether poor performance is due to actual absence. Another issue is that even if students are physically present in a lecture, teachers still cannot tell whether they are paying attention to the projector or actually learning. The current workaround is for teachers to override the attendance record by calling each student one by one, which is time‑consuming in large lectures and adds little educational value. It is also only a one‑time check, meaning students can still leave the lecture room immediately afterwards. Another issue is that we have many out‑of‑school activities such as site visit, and the school needs to ensure everyone’s presence promptly in each check point. This kind of problem isn’t unique to schools. It’s a common challenge for event organizers, where verifying attendee presence is essential but often slow, causing long queues. Organizers usually rely on a few mobile scanners to check in attendees one by one. Solution ProvePresent is an AI tool designed to verify attendance and create real‑time challenges for participants, ensuring that attendance records are authentic and that attendees remain focused on the presentation. It uses OTP login with school email. Check-in and Check-out With a Real‑time QR Code The code refreshes every 25 seconds, and the presenter can display it on the projector for everyone to scan when checking in at the beginning and checking out at the end of the session. However, this alone cannot prevent someone from capturing the code and sending it to others who are not in the room, or from using two devices to help someone else scan for attendance—even if geolocation checks are enabled. We will explain this next. This check‑in and check‑out process is highly scalable, and no one needs to queue while waiting for someone to scan their QR code! Organizers can set geolocation restrictions to prevent anyone from checking in remotely in a simple manner. Keep Attendee Alive with Signalr The SignalR live connection allows the presenter to create real‑time challenges for attendees, helping to verify their presence and ensure they are genuinely focused on the presentation. AI Powered Live Quiz The presenter shares their presentation screen, and two Microsoft Foundry agents with Azure OpenAI Chatgpt 5.3 —ImageAnalysisAgent, which extracts key information from the shared screen, and QuizQuestionGenerator, which generates simple questions based on the current slide—work together to create challenges. The question is broadcast to all online attendees, who must answer within 20 seconds. This feature keeps attendees on the webpage and prevents them from doing anything unrelated to the presentation. Detailed report can be downloaded for further analysis. Attendee Photo Capture Request all online students to capture and upload photos of their venue view. The system will analyze the images to estimate seating positions using Microsoft Foundry agents with Azure OpenAI ChatGPT 5.3 PositionEstimationAgent and complete an image challenge. When the presenter clicks Capture Attendee Photos, all online attendees are prompted to take a photo and upload it to blob storage. The PositionEstimationAgent then analyzes the image to estimate their seating location, which can provide insights into student performance. Analysis Notes: Analyzed 13 students in 2 overlapping batches. Batch 1: The venue is a computer lab with the projector screen at the front center, whiteboards on the left, and cabinets on the right. Relative depth was estimated mainly from screen size and number of monitor rows visible ahead. Column estimates were inferred from screen angle and side-room features, with lower confidence for the rotated side-view image. Batch 2: These six photos appear to come from the same computer lab with the projector at the front center. Relative depth was estimated mainly from projector size and number of visible desk/monitor rows ahead. Left-right placement was inferred from projector skew and side-wall visibility. Within this batch, 240124734 and 240167285 seem closest to the front, 240286514 and 240158424 are slightly farther back, 240293498 is farther back again, and 240160364 appears furthest. Pass around the QR code attendance sheet Traditionally, the attendance sheet is circulated for attendees to sign, but this method is unreliable because no one monitors the signing process, allowing one attendee to sign for someone who is absent. It is also slow and not scalable for large groups. The QR Code attendance sheet functions as a chain. The presenter randomly distributes a short‑lived, one‑time QR code—representing a virtual attendance sheet—to any number of attendees, just like handing out multiple physical sheets. Each attendee must find another participant to scan their code to record attendance, continuing the chain until the final group of attendees. The presenter then verifies the last group’s presence. The first chain is a dead chain because that student left the venue and cannot find another student to scan his QR code. The second chain contains 20 student attendance records. It also provides useful insights into their friendship and seating patterns. Architecture This project is built using Vibe Coding, so we will not share highly technical details in this post. If you'd like to learn more, leave a comment, and we will write another blog to cover the specifics. GitHub Repo https://github.com/wongcyrus/ProvePresent Conclusion ProvePresent demonstrates how Azure serverless technology and Azure OpenAI can work together to solve a long‑standing problem in education: verifying genuine student presence and engagement. By combining real‑time QR code verification, SignalR‑powered live interactions, AI‑generated quizzes, and intelligent photo‑based seating analysis, we created a system where “being present” is no longer just a checkbox—it becomes a verifiable, interactive, and meaningful part of the learning experience. Instead of relying on outdated smart‑card systems or manual roll calls, educators gain a dynamic tool that keeps students attentive, provides insight into classroom behavior, and produces useful analytics for improving teaching outcomes. Students, in turn, benefit from an engaging, modern attendance experience that aligns with how digital‑native learners expect classes to operate. This is only the beginning. With Microsoft Foundry agents and the flexibility of Azure Functions, there are many opportunities to extend ProvePresent further—richer analytics, smarter engagement models, and seamless integration with LMS platforms. If there’s interest, we’re happy to share more technical details, architectural deep dives, and future roadmap ideas in a follow‑up post. Thank you for the contribution of Microsoft Student Ambassadors Hong Kong Institute of Information Technology (HKIIT) Wong Wing Ho, CHAN Sham Jayson, Pang Ho Shum, and Chan Ka Chun. They are major in Higher Diploma in Cloud and Data Centre Administration. About the Author Cyrus Wong is the senior lecturer of Hong Kong Institute of Information Technology (HKIIT) @ IVE(Lee Wai Lee).and he focuses on teaching public Cloud technologies. He is a passionate advocate for the adoption of cloud technology across various media and events. With his extensive knowledge and expertise, he has earned prestigious recognitions such as AWS Builder Center, Microsoft MVP- Microsoft Foundry, and Google Developer Expert for Google Cloud Platform & AI.278Views0likes0Comments