azure
248 Topics
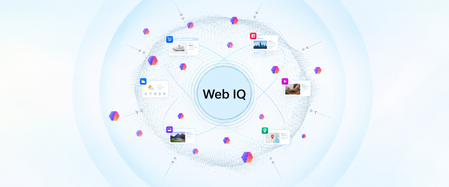
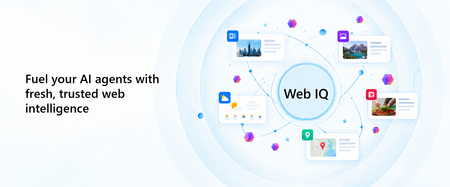
Web IQ: Web Search and Grounding APIs for AI Agents
Web IQ gives AI agents current, citable evidence from across the web. We explain what it is, how its four layers (Bing's web substrate, Harrier embeddings, DiskANN, and structured evidence) work together, and how it pairs with Microsoft IQ to ground agents in web and enterprise context.SQL developer tools at SQL Modernization Day
SQL developers can now do most of their database work without leaving VS Code. The MSSQL extension ships updates every month, GitHub Copilot understands your schema, and the Microsoft SQL drivers keep pace with SQL Server 2025. And new Microsoft SQL skills, now in public preview, let your coding agent assess and migrate SQL Server to Azure SQL. Here's what's new across the toolchain, and where to see it in action at SQL Modernization Day on October 20. What's new in the MSSQL extension for VS Code The MSSQL extension connects to SQL Server, Azure SQL and SQL database in Fabric from the editor you already use. It now covers far more than connecting and running queries. Versions 1.40 and 1.41 added the following. Generally available Database management. Backup and restore, plus dialogs to create, rename and drop databases. View and edit data directly in the table view. DACPAC and BACPAC extract, deploy, import and export for moving databases between environments. Fabric integration to browse workspaces and provision SQL databases in Fabric. SQL database projects with a publish dialog and code analysis. Azure Data Studio migration toolkit that brings over your connections, settings and key bindings. Public preview Query Profiler for real-time activity monitoring with Extended Events. Flat file import to turn a CSV or TXT file into a new table. Database object search across tables, views, stored procedures and more, with scripting options. SQL Notebooks that mix SQL and Python kernels in one notebook. Schema Designer and data API design with GitHub Copilot, plus an application quickstart. Need a local database? The extension can spin up a SQL Server 2025 container in a few clicks. It checks prerequisites, sets up the container and adds the connection to Object Explorer for you. Build with GitHub Copilot and your schema GitHub Copilot is built into the MSSQL extension. In agent mode it reads your actual tables, columns and relationships, along with your workspace and open files. It uses the same connection and permissions as the extension, and it asks you to approve tool actions before they run. Here's some of what you can hand off: Chat with the mssql participant for SQL guidance, or let agent mode connect, list servers and run queries. Generate tables and relationships, then review them as a diff before anything reaches the database. Write T-SQL or ORM queries from plain language, and get explanations of stored procedures, views and complex joins. Generate realistic test data from your current schema. Configure Data API builder in natural language to expose tables as REST, GraphQL or MCP endpoints. Try it: from idea to an AI-ready app The library app sample walks through a full build in three steps: Spin it up. Create a local SQL Server 2025 container from the extension and seed the database. Wire it up. Have Copilot turn hardcoded app data into new tables and relationships, generate test data, and stand up a read-only REST API with Data API builder. Light it up. Add a native VECTOR column, generate embeddings, and use VECTOR_DISTANCE for semantic search behind a RAG chatbot. The repo includes a PRD and GitHub Copilot custom instructions, so Copilot follows your naming conventions and targets SQL Server without repeating yourself in every prompt. Coming next: Azure SQL Developer runs the Azure SQL Database engine locally for development, so you can build in your inner loop and deploy to Azure with no code changes. It's in gated preview, and you can sign up at aka.ms/azuresql-developer. Assess and migrate with Microsoft SQL skills Microsoft SQL skills, now in public preview, bring SQL Server migration expertise to the coding agent you already use. Skills are packaged instructions and scripts that an agent loads when a task calls for them. You ask for an assessment or a migration in plain language, and the agent picks the right skill for each step. The skills live in one central library, so they work the same way in GitHub Copilot, VS Code, Claude and Cursor. They cover the whole journey: Assess readiness, blockers and dependencies. Recommend a target, SKU and cost. Plan prerequisites and remediation. Migrate with BACPAC, or with Log Replay Service (LRS) and managed identity. Validate with post-move checks and guided fixes. You stay in control the whole way. The agent asks before it runs commands, and you approve its recommendation before anything moves. An assessment you can act on The assessment skills look at your estate through four lenses and turn discovery data into an Azure SQL recommendation you can defend. Lens Question What it checks Compatibility Can the workload move? Feature support, breaking changes, blockers and the remediation path Assessability Is there enough evidence? Inventory coverage, assessment status, data freshness and confidence gaps Sizing What capacity does it need? CPU, memory, I/O and storage demand, mapped to a compute tier with headroom Pricing What will it cost? SKU and service tier, region, licensing including Azure Hybrid Benefit, and a monthly estimate Here's how that plays out. Ask GitHub Copilot in VS Code to assess a SQL Server 2016 instance for Azure SQL Database Hyperscale. The agent checks that the Azure CLI and its data migration extension are installed, runs the assessment and reports readiness database by database. A database that uses Service Broker gets flagged, since Azure SQL Database doesn't support it, along with the fix. You also get an HTML report that compares Hyperscale, Azure SQL Managed Instance and SQL Server on Azure VMs, with a monthly cost estimate and a SKU recommendation for each database. A migration that picks up where it left off Next, ask the agent to migrate one of those databases. It confirms SqlPackage is installed, checks that the source is online and builds a migration plan. The plan names the source and target servers and the method, an offline BACPAC export and import. It creates a new database and never overwrites an existing one, and the source isn't modified. If the export fails, the agent saves a checkpoint and diagnostics. Once you fix the source, it retries only the failed step instead of starting over, then validates the result. Explore the skills at aka.ms/microsoftsql-skills. For the full set of migration tools, including Azure Migrate, Azure Database Migration Service and migration through Azure Arc, see the database migration guide. Microsoft SQL skills are in public preview. Preview features are provided without a service level agreement and aren't recommended for production workloads. Put your database under source control with SQL projects SDK-style SQL projects (Microsoft.Build.Sql) treat your database like any other codebase. A build produces a .dacpac you can deploy to new or existing databases across SQL Server, Azure SQL and SQL database in Fabric. You can work with SQL projects in VS Code, SSMS and Visual Studio. Cross-platform builds with plain dotnet build. Every .sql file in the folder is included by default. Code analysis on build with 14 default rules. Add custom rule sets as package references, and promote any rule to a build error. Package references for shared objects and cross-database references, so objects that rarely change don't slow down every build. Extract an existing database into a SQL project with SqlPackage, installed as a dotnet tool. Schema compare across databases, SQL projects and .dacpac files. A typical pipeline looks like this: A developer proposes a change in a pull request. CI builds the project and runs code analysis. The team approves and merges to main. The pipeline calculates a deployment plan against staging or production. Someone reviews the plan as a script or deploy report and approves the release. GitHub environments and Azure DevOps approvals handle that last gate. SQL projects also help as AI agents write more of your code. Every database change lands as a reviewable diff, and changes from several agents or teammates merge like any other code. Get started at aka.ms/sqlprojects or work through the SQL DevOps workshop. What's new in the Microsoft SQL drivers The Microsoft SQL drivers all shipped new releases, including several of the fixes the community asked for most. Driver Release Highlights Microsoft.Data.SqlClient (.NET) 7.0 The core package drops its Azure dependencies. Entra auth moves to Microsoft.Data.SqlClient.Extensions.Azure with no code changes. New pluggable SSPI auth, .NET 10 support, and ActiveDirectoryPassword marked obsolete. JDBC 13.4 FLOAT16 vector support for embeddings, a new performance logger, Java 25 LTS and SQL Server 2025 support. mssql-python 1.4 A public bulk copy API with a Rust-powered core, spatial types, and type hints for mypy and Pyright. mssql-django 1.7 Django 6.0 and Python 3.14, composite primary keys, SQL Server 2025, and ODBC Driver 18 as the default. PHP (sqlsrv, pdo_sqlsrv) 5.13 PHP 8.4 and 8.5, SQL Server 2025, newer Linux and macOS platforms, and a fix for a Fabric connectivity crash. New to the Python driver? Start with the mssql-python quickstart. See it live at SQL Modernization Day Amit Khandelwal's session, Migrate to Azure SQL. Then Build Something New., puts these tools together at 10:00 AM PT on Tuesday, October 20. He covers the path off on-premises SQL Server, then builds on Azure SQL Database with VS Code, GitHub Copilot, the latest drivers and the SQL MCP Server. Expect demos of the developer workflow, not only the migration. SQL Modernization Day is a free livestream on Microsoft Reactor with eight sessions from the Microsoft SQL team. Register at aka.ms/SQLModernizationDay2026.Sending Email from an AKS Pod Without a Single Secret
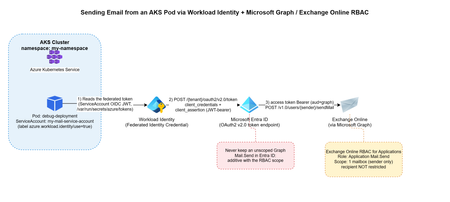
The problem You have a workload running in AKS that occasionally needs to send an email — a notification, an alert, a report. The obvious options all come with baggage: An SMTP relay means yet another credential to store, rotate, and eventually leak. A shared "app password" mailbox account means an identity nobody really owns, that can authenticate as itself forever. Granting Mail.Send as a Microsoft Graph application permission is tempting — until you realize it lets your app send email as any mailbox in the entire tenant, not just the one you intended. This post walks through a pattern that avoids all three: Azure Workload Identity for the pod, Microsoft Graph for sending, and Exchange Online RBAC for Applications to scope the identity down to exactly one authorized mailbox. No secrets stored anywhere in the cluster, and no tenant-wide send permission. Architecture Pod (AKS) -- federated OIDC token --> Workload Identity Workload Identity -- client_credentials + client_assertion--> Microsoft Entra ID Entra ID -- access token (aud=Graph) --> Pod Pod -- POST /v1.0/users/{sender}/sendMail (Bearer token)--> Microsoft Graph --> Exchange Online The pod never handles a password or a client secret. It reads a federated identity token that Azure Workload Identity's webhook mounts automatically, exchanges it with Entra ID for a Graph access token, and calls sendMail directly. The only thing that determines which mailbox it's allowed to send as is a role assignment on the Exchange Online side — not anything configured in Kubernetes. Step 1 — Get a Workload Identity bound to your namespace This is a platform-team request, not something you self-service from inside the cluster: you need a Managed Identity (or App Registration) with a Federated Identity Credential issued for your specific Kubernetes namespace and ServiceAccount subject. Give your platform/identity team: The target namespace (e.g. my-namespace) The target ServiceAccount name (e.g. my-mail-service-account) The intended use case (application email via Microsoft Graph) They hand you back a Client ID — that's all your manifest needs. One important thing to not ask for: don't request the Graph Mail.Send application permission on this identity. That permission, if granted directly in Entra ID, is unscoped — it lets the identity send as anyone. The actual sending restriction is going to live in Exchange, not in Entra ID (see Step 2). Step 2 — Restrict sending to one mailbox with Exchange Online RBAC for Applications Microsoft's currently recommended way to scope application email-sending rights is RBAC for Applications in Exchange Online — the modern replacement for the deprecated Application Access Policies. The short version: The Managed Identity gets no unscoped Graph Mail.Send grant in Entra ID. (Entra ID and Exchange RBAC authorizations are additive — if you leave an unscoped grant in place, it defeats the whole point.) Exchange Online registers a pointer to the Managed Identity's service principal (New-ServicePrincipal), then assigns it the Application Mail.Send role, scoped to a Management Scope that resolves to exactly one mailbox (or one security group of mailboxes). The identity can now call /users/{authorized-mailbox}/sendMail and get a 202. Any other mailbox returns 403. This part is usually owned by whoever administers your Exchange Online tenant, not by the application team — it's a five-minute PowerShell runbook for them (New-ManagementScope, New-ServicePrincipal, New-ManagementRoleAssignment), fully documented in Microsoft's RBAC for Applications docs. For reference, here's the actual runbook: # 0. Make sure no unscoped Graph Mail.Send grant exists on the identity first $mi = Get-EntraServicePrincipal -ServicePrincipalId $MiObjectId $graphSp = Get-EntraServicePrincipal -Filter "appId eq '00000003-0000-0000-c000-000000000000'" $mailSendRole = $graphSp.AppRoles | Where-Object { $_.Value -eq "Mail.Send" -and $_.AllowedMemberTypes -contains "Application" } Get-EntraServicePrincipalAppRoleAssignment -ServicePrincipalId $mi.Id | Where-Object { $_.ResourceId -eq $graphSp.Id -and $_.AppRoleId -eq $mailSendRole.Id } | ForEach-Object { Remove-EntraServicePrincipalAppRoleAssignment -ServicePrincipalId $mi.Id -AppRoleAssignmentId $_.Id } # 1. Connect to Exchange Online Connect-ExchangeOnline # 2. Scope to exactly one mailbox (filter on ExternalDirectoryObjectId, not SMTP address) $mbx = Get-EXORecipient -Identity $AllowedMailbox -Properties ExternalDirectoryObjectId New-ManagementScope -Name $ScopeName ` -RecipientRestrictionFilter "ExternalDirectoryObjectId -eq '$($mbx.ExternalDirectoryObjectId)'" # 3. Register the service principal pointer (this is NOT a new identity, just a reference) $exoSp = New-ServicePrincipal -AppId $MiAppId -ObjectId $MiObjectId -DisplayName $MiDisplayName # 4. Assign exclusively Application Mail.Send, scoped New-ManagementRoleAssignment -Name $AssignmentName ` -App $exoSp.ObjectId -Role "Application Mail.Send" -CustomResourceScope $ScopeName # 5. Validate both directions Test-ServicePrincipalAuthorization -Identity $exoSp.ObjectId -Resource $AllowedMailbox # expect InScope = True Test-ServicePrincipalAuthorization -Identity $exoSp.ObjectId -Resource $BlockedMailbox # expect InScope = False Two things that trip people up here: -App in step 3/4 expects the Object ID of the Enterprise application / service principal, not the App Registration object — and never fall back to Application Mail Full Access or an exclusive management scope, since Microsoft explicitly notes exclusive scopes don't restrict application access. Worth calling out explicitly: this RBAC scope restricts the sender only. It has no concept of a recipient allowlist. Once your identity is authorized to send as a mailbox, it can send to anyone, inside or outside your tenant. If you need recipient-side restrictions, that has to be application logic — Exchange RBAC won't do it for you. Step 3 — The Kubernetes manifest Three resources: a ServiceAccount annotated with the Client ID from Step 1, a ConfigMap holding the send script, and a Deployment that mounts it. Here's the complete manifest: --- apiVersion: v1 kind: ServiceAccount metadata: annotations: azure.workload.identity/client-id: <CLIENT-ID-FROM-YOUR-IDENTITY-TEAM> name: my-mail-service-account namespace: my-namespace --- apiVersion: v1 kind: ConfigMap metadata: name: send-email namespace: my-namespace data: send-email.sh: | #!/bin/bash set -euo pipefail if [ $# -lt 2 ]; then echo "Usage: $0 <sender-email> <recipient-email> [recipient-email...]" exit 1 fi SENDER_EMAIL="$1" shift RECIPIENTS=("$@") TENANT_ID="${AZURE_TENANT_ID:-}" CLIENT_ID="${AZURE_CLIENT_ID:-}" FEDERATED_TOKEN_FILE="${AZURE_FEDERATED_TOKEN_FILE:-}" if [ -z "$TENANT_ID" ] || [ -z "$CLIENT_ID" ] || [ -z "$FEDERATED_TOKEN_FILE" ]; then echo "ERROR: Workload Identity variables not set" exit 1 fi FEDERATED_TOKEN=$(cat "$FEDERATED_TOKEN_FILE") TOKEN_RESPONSE=$(curl -s -X POST \ "https://login.microsoftonline.com/${TENANT_ID}/oauth2/v2.0/token" \ -H "Content-Type: application/x-www-form-urlencoded" \ -d "client_id=${CLIENT_ID}" \ -d "scope=https://graph.microsoft.com/.default" \ -d "client_assertion_type=urn:ietf:params:oauth:client-assertion-type:jwt-bearer" \ -d "client_assertion=${FEDERATED_TOKEN}" \ -d "grant_type=client_credentials") ACCESS_TOKEN=$(echo "$TOKEN_RESPONSE" | grep -o '"access_token":"[^"]*' | cut -d'"' -f4) if [ -z "$ACCESS_TOKEN" ]; then echo "ERROR: Failed to get token" echo "$TOKEN_RESPONSE" exit 1 fi RECIPIENTS_JSON="" for r in "${RECIPIENTS[@]}"; do if [ -n "$RECIPIENTS_JSON" ]; then RECIPIENTS_JSON="${RECIPIENTS_JSON}," fi RECIPIENTS_JSON="${RECIPIENTS_JSON}{\"emailAddress\":{\"address\":\"${r}\"}}" done cat > /tmp/email.json <<EOF { "message": { "subject": "Test from AKS", "body": { "contentType": "Text", "content": "Test email from Workload Identity" }, "toRecipients": [${RECIPIENTS_JSON}] }, "saveToSentItems": "true" } EOF HTTP_CODE=$(curl -s -w "%{http_code}" -o /tmp/response.json \ -X POST "https://graph.microsoft.com/v1.0/users/${SENDER_EMAIL}/sendMail" \ -H "Authorization: Bearer ${ACCESS_TOKEN}" \ -H "Content-Type: application/json" \ -d @/tmp/email.json) if [ "$HTTP_CODE" -eq 202 ]; then echo "Email sent successfully" else echo "ERROR: HTTP ${HTTP_CODE}" cat /tmp/response.json exit 1 fi --- apiVersion: apps/v1 kind: Deployment metadata: name: debug-deployment namespace: my-namespace labels: app: debug azure.workload.identity/use: "true" # Required. Only pods with this label can use workload identity. spec: replicas: 1 selector: matchLabels: app: debug template: metadata: labels: app: debug azure.workload.identity/use: "true" # Required. Only pods with this label can use workload identity. spec: serviceAccount: my-mail-service-account serviceAccountName: my-mail-service-account containers: - name: debug image: <your-registry>/az-init:0.1 command: ["sleep", "3600"] readinessProbe: exec: command: ["ls"] livenessProbe: exec: command: ["ls"] resources: requests: memory: "256Mi" cpu: "250m" limits: memory: "512Mi" cpu: "500m" volumeMounts: - name: script mountPath: "/script" volumes: - name: script configMap: name: send-email defaultMode: 0555 Two details that will bite you if you skip them: /me/sendMail doesn't work here. In a client_credentials flow (app-only, no signed-in user), /me returns 400 BadRequest: /me request is only valid with delegated authentication flow. You must call /users/{sender}/sendMail and name the sender explicitly. configMap.defaultMode matters. 0500 only grants execute to the file's owner (root); if your container runs as non-root, you'll get a Permission denied on exec. Use 0555. Step 4 — Test it kubectl apply -f email-pod.yaml kubectl exec -n my-namespace -it deploy/debug-deployment -- \ /script/send-email.sh authorized-sender@yourcompany.com \ recipient1@yourcompany.com recipient2@yourcompany.com A 202 and Email sent successfully means it worked. Try it again with a sender mailbox that isn't in your RBAC scope — you should get a clean 403. If you don't, go back and check that no unscoped Graph Mail.Send grant is still sitting on the identity in Entra ID; that's the most common way this containment silently fails. Conclusion This solution addresses an application email-sending need without introducing static credentials into the cluster or broadening permissions beyond what is strictly necessary. Full cloud, with no on-premises dependency or manually managed secret: No password, API key, or certificate is stored in Kubernetes (Secret, ConfigMap, or anywhere else). Authentication relies entirely on OIDC federation between the Kubernetes ServiceAccount and Microsoft Entra ID (Workload Identity) — the federated token is issued and mounted automatically by the webhook, never manually generated or distributed. The entire authentication and sending chain (Entra ID, Microsoft Graph, Exchange Online) goes through Microsoft-managed HTTPS endpoints; no on-premises component is involved in the application path (section A.3 covers a pitfall related to Exchange hybrid setups on the target mailbox side, not the authentication path itself). Provisioning the sender mailbox and the RBAC configuration are themselves managed natively within Microsoft 365 / Exchange Online, with no extra script or infrastructure to maintain on the client side. Secure by design (least privilege): The OIDC federated token is short-lived (limited lifetime, automatically renewed by the webhook) and scoped to the my-mail-service-account ServiceAccount in the my-namespace namespace — it cannot be reused outside this specific context. No tenant-wide Microsoft Graph Mail.Send permission is granted to the identity: without this precaution, the identity could send as any mailbox in the tenant. Exchange Online RBAC for Applications carries the real authorization, strictly scoped to the mailboxes that are members of the dedicated Exchange group. The containment is verified both positively and negatively before going to production — not only tested on the case that must succeed. Known and documented limitation: this RBAC model restricts only the sender, never the recipient — application-side control is still required if recipient restriction is ever needed. See You in the Cloud JamesdldSecuring AI Agent Tool Calls in Azure: Identity, Authorization, and Verified Execution
When an agent can use tools, untrusted content can influence requests to access sensitive data or change external systems. A retrieved document might tell the agent to send a file to an external address. An attacker-controlled log field might suggest disabling a security setting. A tool result might redirect the next action. The application must establish who is acting, authorize each requested operation, constrain execution, and verify what happened. System instructions, content filters, and model evaluations help reduce unsafe proposals. Token validation, retrieval permissions, business authorization, execution limits, and disclosure checks govern what the application actually permits. This article uses an Agent Control Loop as a design-review framework for placing those checks at five observable handoffs: Input → Context → Tool Request → Execution → Output Tool results return to Context because they can influence another model decision. They need the same attention to source permissions, provenance, and untrusted content as retrieved documents. The framework should fit the workload. A read-only assistant needs strong retrieval and disclosure checks when it handles sensitive information. A routine transaction may need only service-side authorization and safe retry handling. A delayed, high-impact operation may also need approval, expiry, current-state checks, and recovery procedures. Choose safeguards according to data sensitivity, action scope, reversibility, delay, and the consequence of failure. In this article: Input | Context | Tool Request | Execution | Output | Review questions Guide and test the model's proposals Model behavior remains an important part of the design: Guide the model with system instructions, task boundaries, and a limited tool set. Ground its decisions in permitted sources with provenance metadata. Review observable artifacts such as tool arguments, citations, assumptions, uncertainty, and concise decision summaries. Test behavior with offline evaluations and adversarial regression tests. These measures reduce the likelihood of a poor proposal. The receiving service must still validate its arguments and authorize the requested operation. Authorization also has limits. A request can satisfy business rules while conflicting with the user's intent. Narrow workflow scope, cumulative action limits, and review when consequences justify it help address that remaining risk. Token validation, authorization rules, and execution limits must run outside model-controlled context. Every path to a protected capability—including direct API calls, background jobs, and retries—must pass through the applicable checks. 1. Input: validate identity and enforce request limits Input includes the user's prompt, attachments, conversation state, and request metadata. For an authenticated enterprise workflow, establish the caller's identity before loading protected conversation state or retrieving enterprise data. Validate the token's signature, issuer, audience, and lifetime. Check the expected tenant, client application, and required claims. Derive the acting principal and tenant from validated identity information, and resolve application permissions through trusted server logic. Keep this authorization context separate from model-editable content. A tenant name in a prompt or a role asserted in an attachment must not change the caller's permissions. Apply request-size limits, attachment-type restrictions, rate limits, and relevant data-handling rules before content reaches the model. These checks protect application capacity and reduce avoidable exposure of sensitive content. Microsoft Entra ID can authenticate users and workloads. Azure API Management can enforce token-validation policies, required claims, quotas, and rate limits. Azure AI Content Safety Prompt Shields can add detection for direct prompt attacks. A detection result may trigger rejection, isolation, or additional review. Passing that check does not authorize a later tool call. A missed attack must still encounter the tool service's argument validation and authorization checks. Authentication establishes who submitted the request. It does not establish that the request is accurate, appropriate, or within the caller's business authority. 2. Context: enforce retrieval permissions and preserve provenance Context can contain system instructions, retrieved documents, database records, conversation history, memory, and tool results. These sources have different trust properties. For example, an Azure log record may have authenticated provenance while containing a filename, URI, process argument, or user-agent string chosen by an attacker. The logging service can accurately preserve that value without making it a valid instruction. A registered tool can return the same kind of content. Its response may include attacker-controlled text, unrelated sensitive information, or evidence that contradicts another source. Enforce source permissions before content enters model context. Scope retrieval to the authorized tenant and permitted documents or records. Limit tables, indexes, fields, result counts, and time windows. Construct security filters from trusted identity information, and prevent model-generated queries from removing mandatory restrictions. For Azure AI Search, use supported document-level access controls or security filters enforced by the application. Authentication to the search service alone does not establish permission to read every document in an index. Microsoft documents this distinction in its security-filter guidance. For Azure Monitor and other query tools, constrain the accessible resources and query scope through service permissions and application logic. Query templates should parameterize permitted inputs while preserving mandatory tenant and resource restrictions. Preserve source identifiers, timestamps, classification, and tenant metadata. Keep application instructions separate from retrieved evidence, and label externally influenced text as untrusted data. These labels help the model interpret content; retrieval authorization remains the service's responsibility. Require citations when conclusions depend on retrieved evidence. For consequential decisions, verify that the cited material supports the conclusion and corroborate it against another source or current system state where practical. Prompt Shields can add detection for indirect prompt attacks in document content. Microsoft Purview classification can inform filtering and disclosure decisions where classification is available and integrated into the application. Retrieved content may inform a proposed action. It must not modify the caller's identity, broaden retrieval permissions, or grant authority to another tool. 3. Tool Request: validate arguments and authorize the exact action The model produces an observable request: a tool name, target, and arguments. The receiving service must decide whether that exact request is permitted. Use a narrow tool definition. For example, a refund tool can accept an order identifier and an amount without accepting an arbitrary payment destination or caller-selected authorization limit. The following function-definition fragment describes a workflow for USD refunds. Amounts use integer cents: JSON | Refund tool definition { "name": "issue_refund", "description": "Request a USD refund to the order's original payment method.", "strict": true, "parameters": { "type": "object", "additionalProperties": false, "required": ["order_id", "amount_minor"], "properties": { "order_id": { "type": "string", "description": "The order identifier." }, "amount_minor": { "type": "integer", "description": "The refund amount in USD cents." } } } } The surrounding API format and supported schema constraints depend on the provider and model. Azure's structured-output guidance and OpenAI's guidance document different support for some constraints. Confirm compatibility with the deployment, and enforce all required validation in the receiving service. Here is an illustrative Pydantic v2 validation and authorization fragment. It assumes that principal comes from trusted authentication and permission resolution, and that order is loaded from the authoritative store through a tenant-scoped lookup. Python | Request validation and refund authorization from pydantic import BaseModel, ConfigDict, Field class RefundRequest(BaseModel): model_config = ConfigDict(extra="forbid", strict=True) order_id: str = Field(pattern=r"^ord_[A-Za-z0-9]{12}$") amount_minor: int = Field(gt=0, le=50_000) # USD cents: at most $500 class AuthorizationError(Exception): pass def authorize_refund(request: RefundRequest, principal, order) -> None: if order.tenant_id != principal.tenant_id or order.id != request.order_id: raise AuthorizationError("order is outside the requested scope") if not principal.can_issue_refunds: raise AuthorizationError("caller cannot issue refunds") if order.customer_id != principal.customer_id: raise AuthorizationError("caller does not own the order") if order.currency != "USD": raise AuthorizationError("this workflow supports USD orders only") if not order.is_refundable or order.account_fraud_blocked: raise AuthorizationError("order is not eligible for a refund") if request.amount_minor > principal.refund_limit_usd_minor: raise AuthorizationError("amount exceeds caller authority") if request.amount_minor > order.remaining_refundable_minor: raise AuthorizationError("amount exceeds the refundable balance") The service must parse the incoming arguments with RefundRequest.model_validate(...) before calling this function. The example assumes a customer refund workflow; a support-agent workflow would use its own delegated permissions and order-access rules. The payment destination comes from the authoritative payment record and must satisfy the refund policy. It is not selected from model-generated arguments. These checks do not reserve funds or prevent concurrent refunds. The service must couple authorization to an atomic transaction or conditional reservation so competing requests cannot consume the same refundable balance. For systems that allow partial refunds, the available balance should account for both completed refunds and active reservations. Derive the acting principal and allowed scope from trusted server context. If a tool accepts a target user or tenant, treat that value as an untrusted target selector and authorize it independently. Authenticating a workload also does not establish the authority of the user it represents. A domain service must enforce either the represented user's permissions or an explicitly defined service workflow's authority. An Azure Function, App Service API, or another domain service can perform these checks. An external policy engine can help when rules need independent ownership or consistent reuse. Azure RBAC separately limits which Azure operations the executor's identity can perform. 4. Execution: bind approval, recheck state, and constrain privileges An authorized request can become stale before execution. The caller's permissions may change, a refund balance may shrink, or a resource may be modified while a request waits for approval. For an immediate operation within one transactional system, authorize and apply the change in the same transaction where possible. An external API call introduces a separate failure boundary and may require idempotency and reconciliation. When human approval is required, store an approval record that binds the decision to the exact operation, canonical target, parameters, requester, tenant, and expiry. Validate the approver's authority, and require a new decision if the approved action changes. Before execution, check approval validity where applicable, re-evaluate current authorization, and re-read the state relevant to the operation. Use conditional writes when the target API supports the required concurrency condition. A single-use approval claim prevents approval reuse. It does not by itself prevent duplicate external effects. A worker can submit a payment and crash before recording the result. Where supported, bind a downstream idempotency key to the authorized action and reuse that key for retries. If the outcome is uncertain, reconcile with the downstream system before submitting another operation. Use an executor identity with only the resource scope and API permissions the workflow requires. A separate managed identity is useful when execution needs privileges that the model-facing component should not hold. Restrict outbound destinations and the data that may be sent to each destination. Example: verify an Azure Storage configuration change The following execution fragment changes one Storage account property. It assumes that the service has already loaded a trusted execution record, validated any required approval, and authorized the exact subscription and resource target. The expected state comes from that record. Python | Azure Storage execution and verification import os from azure.identity import ManagedIdentityCredential from azure.mgmt.storage import StorageManagementClient from azure.mgmt.storage.models import StorageAccountUpdateParameters def disable_public_network_access(command): client = StorageManagementClient( credential=ManagedIdentityCredential( client_id=os.environ["EXECUTOR_MANAGED_IDENTITY_CLIENT_ID"] ), subscription_id=command.subscription_id, ) before = client.storage_accounts.get_properties( command.resource_group, command.account_name, ) if before.public_network_access != command.expected_public_network_access: raise RuntimeError("resource state changed after authorization") client.storage_accounts.update( command.resource_group, command.account_name, StorageAccountUpdateParameters(public_network_access="Disabled"), ) after = client.storage_accounts.get_properties( command.resource_group, command.account_name, ) return { "operation": "storage.disable_public_network_access", "target": after.id, "status": ( "configuration_verified" if after.public_network_access == "Disabled" else "verification_pending" ), "observed_public_network_access": after.public_network_access, } This verifies the property reported by the management API. It does not establish that every access path is blocked. Azure documents that previously configured trusted-service and resource-instance exceptions can remain effective, and that Storage firewall restrictions apply to data-plane operations. If the objective is containment, verification must also account for the relevant exceptions and access paths. See Storage network-security limitations. The Storage Accounts Update reference for API version 2025-08-01 does not document an If-Match header. The initial read can detect a difference from the expected state, but another writer can still change the resource between that read and the update. The example does not provide an atomic compare-and-update operation. If verification remains pending or a network failure obscures the result, retain the action record and reconcile current state. Do not report verified completion or blindly resubmit a new action. The Azure services involved each have a specific role: Managed identities provide credentials without embedding application secrets. Azure RBAC limits resource scope and permitted operations. A broad resource-write permission may still allow more property changes than this function exposes. Azure Policy deny rules can reject covered resource changes that violate configured policies. Private endpoints and egress restrictions constrain connectivity; application logic must still authorize destinations and payloads. Durable Functions can coordinate an approval wait and execution workflow. Cosmos DB conditional writes can protect an approval claim or action record against competing updates. The domain service remains responsible for deciding whether the business action is permitted. Workflow coordination and restricted credentials do not replace that decision. 5. Output: verify outcomes, authorize disclosure, and record evidence Output includes the tool result returned to the model, the final user response, and operational evidence. Each has a different audience and disclosure policy. Keep separate records of what the model requested, what the service authorized, what a human approved when required, what the downstream API returned, and what verification subsequently observed. A successful API response may describe an intermediate state. A refund may be accepted but not settled. A message may be queued but not delivered. A resource property may be updated while the broader containment objective remains unverified. Define the postcondition for the workflow and report the state actually observed. Use explicit statuses such as submitted, pending verification, completed, failed, or outcome unknown. For delayed outcomes, retain the action identifier and update its status as evidence becomes available. Authorize disclosure before returning data to the model or user. Apply equivalent checks before tools transmit data to another service. A response filter cannot recover information already sent in an outbound tool request. Remove secrets and unrelated personal or tenant data from tool responses, final answers, and telemetry. Collect the identifiers, decision reasons, timestamps, and verification results needed to investigate the action without retaining unrestricted prompts or credentials. Read target state through the relevant API and correlate the result with Azure Monitor or Application Insights telemetry. Microsoft Sentinel can consume the evidence when the workflow supports security operations. Use access-controlled or immutable records where audit requirements justify them. Recovery must reflect the consequence of the action. Retrying an idempotent evidence write can be appropriate. Automatically reversing a containment action because a later annotation failed can create a new security problem. Preserve partial failures and uncertain outcomes so operators can make an informed recovery decision. Logs record observations. They do not establish every aspect of the real-world outcome. State what was verified, when it was observed, and what remains unresolved. Review the five handoffs For an agentic application, ask: Input: Which token checks establish the caller, and which request limits apply? Context: Which retrieval permissions restrict the evidence, and how are its source and trust represented? Tool Request: Which argument checks and business rules authorize this operation, target, amount, and acting principal? Execution: Are approval and authorization still valid, how are competing actions and retries handled, and what can the executor change or transmit? Output: Which postcondition was observed, who may receive the result, and what evidence remains available? Continue improving the model's instructions, grounding, and evaluations. At each handoff, make the responsible service and its checks explicit. The model proposes; trusted services validate requests, authorize actions, constrain execution, and verify outcomes.Introducing Inside Microsoft Foundry: Quickstart 🎬
Discover Inside Microsoft Foundry: Quickstart, a new video series for developers building AI agents. Starting with "What does it really take to ship an AI agent?", the series explores real-world challenges such as model selection, grounding agents in data, evaluation, deployment, observability, and governance. Follow along as we show how the Microsoft Foundry ecosystem helps developers move from prototype to production, with new episodes released in the coming weeks.Distributing Agents to Microsoft Teams and Microsoft 365 Copilot Part 4/5
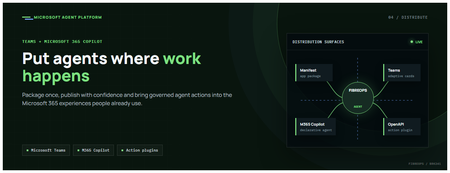
This is the fourth post in our series on the Microsoft agent platform. We cover the Distribute in M365 pillar — publishing your agents to Microsoft Teams and Microsoft 365 Copilot so they reach users where they already work. All examples reference the FibreOps repository, demonstrated at Microsoft Build BRK241. The Distribution Story Building a great agent is only half the challenge. The other half is getting it into the hands of users without asking them to learn a new tool, visit a new URL, or change their workflow. Microsoft 365 Copilot and Microsoft Teams are where enterprise users already spend their day, making them the natural distribution surface for agents. With the GA release, publishing an agent to Teams and M365 Copilot is a single command. No separate app registration portal, no manual manifest assembly, no multi-step approval workflow for development and testing. Publishing to Microsoft 365 Copilot (GA) FibreOps ships as a declarative agent + action plugin ready for sideload. A single CLI command produces the complete package: python -m fibreops.demo publish-m365 --out dist/m365 # Output: # ✓ wrote dist/m365/declarativeAgent.json # ✓ wrote dist/m365/fibreops-action.json # ✓ wrote dist/m365/manifest.json # ✓ wrote dist/m365/color.png (192x192) # ✓ wrote dist/m365/outline.png ( 32x32) # ✓ wrote dist/m365/fibreops-copilot.zip What Gets Generated File Purpose declarativeAgent.json Defines the agent's persona, capabilities, and conversation starters for M365 Copilot fibreops-action.json Action plugin that proxies tool calls to the deployed FastAPI backend via OpenAPI manifest.json Teams app manifest with publisher metadata, permissions, and capabilities color.png / outline.png App icons for Teams and M365 surfaces fibreops-copilot.zip Ready-to-upload package for Teams Admin Center Configuration Set the base URL to your deployed FastAPI app before publishing — the action plugin uses this to resolve the OpenAPI runtime: # Set the public HTTPS hostname of the deployed FastAPI app $env:M365_ACTION_BASE_URL = "https://fibreops-demo.azurewebsites.net" # Optional: customise publisher metadata $env:M365_PUBLISHER_NAME = "Contoso Network Operations" $env:M365_PUBLISHER_WEBSITE = "https://contoso.com/noc" # Generate the package python -m fibreops.demo publish-m365 --out dist/m365 Environment Variable Purpose M365_ACTION_BASE_URL Public HTTPS root for the FastAPI /openapi.json (e.g., Container Apps FQDN) M365_APP_ID Override the generated Teams app GUID (default: deterministic per repo) M365_PUBLISHER_NAME Publisher name shown in M365 Admin Center M365_PUBLISHER_WEBSITE Publisher website link Uploading the Package Upload the generated fibreops-copilot.zip through either path: Teams Admin Center → Manage apps → Upload new app M365 Admin Center → Integrated apps → Upload custom apps Once uploaded, the declarative agent: Inherits the publisher metadata you configured Advertises conversation starters from the FibreOps deck (e.g., "What is the current outage status?", "Dispatch an engineer to FN-LDN-001") Proxies tool calls to the deployed FastAPI app via the action plugin Appears in Microsoft 365 Copilot as a specialised agent users can invoke How Declarative Agents Work A declarative agent in Microsoft 365 Copilot is defined by metadata rather than code running in the M365 surface. The intelligence lives in your backend — Copilot handles the conversational UX, tool orchestration schema, and user authentication. The flow: User invokes the agent in Microsoft 365 Copilot or Teams Copilot renders conversation starters and accepts natural language input When the agent needs to act, Copilot calls the action plugin (your OpenAPI endpoint) Your FastAPI backend processes the request using the full agent pipeline Results return to the user in the Copilot/Teams UX This architecture means your agent logic stays in one place — the backend. The M365 surface is purely a distribution and interaction layer. Action Plugins and OpenAPI The action plugin ( fibreops-action.json ) references your FastAPI app's /openapi.json endpoint. FibreOps exposes a JSON API that the action plugin can call: /api/runs — List and query agent runs /api/optimiser — Get optimizer scores and suggestions /sdk/chat — Natural language interaction with the agent system /healthz — Liveness probe Because FastAPI auto-generates OpenAPI schemas from your typed Python endpoints, the action plugin gets accurate parameter descriptions, response schemas, and error codes without any manual specification work. Publishing as Autopilots (Public Preview) Autopilots take distribution one step further — agents that operate autonomously without requiring a user to initiate each interaction. An Autopilot can: React to events (e.g., a critical telemetry signal) without human initiation Take actions within defined guardrails Notify users only when human intervention is needed Operate continuously across Microsoft 365 surfaces For FibreOps, an Autopilot would monitor the Event Hub stream continuously and only surface to the NOC team when an incident exceeds automated resolution capability — a fully autonomous operations agent. Teams Adaptive Cards FibreOps posts rich Adaptive Card notifications to Microsoft Teams throughout the agent pipeline. This is separate from the declarative agent — it is a push notification channel for real-time operational awareness. # The NetOps agent posts an outage notice via Incoming Webhook def post_outage_notice(incident_id, node_id, severity, summary, engineer=None): card = { "type": "AdaptiveCard", "body": [ {"type": "TextBlock", "text": f"🚨 Outage: {node_id}", "weight": "Bolder", "size": "Large"}, {"type": "FactSet", "facts": [ {"title": "Severity", "value": severity.upper()}, {"title": "Incident", "value": incident_id}, {"title": "Summary", "value": summary}, ]}, ], "actions": [ {"type": "Action.OpenUrl", "title": "View in NOC Console", "url": f"{base_url}/runs/{incident_id}"} ] } # POST to Teams webhook or append to outbox for offline mode ... If TEAMS_WEBHOOK_URL is not configured, cards are appended to state/teams_outbox.jsonl for review in the NOC console's Teams panel. End-to-End: From Code to Copilot Here is the complete flow from development to distribution: Build — Develop agents with Microsoft Agent Framework, test locally with python -m fibreops.demo --backend local Publish agents — python -m fibreops.demo publish creates hosted Prompt Agents in Foundry Deploy infrastructure — azd up provisions App Service, ACR, Event Hub, Key Vault, and Application Insights Deploy hosted agent — azd env set FIBREOPS_DEPLOY_HOSTED true && azd up Generate M365 package — python -m fibreops.demo publish-m365 --out dist/m365 Upload to Teams — Upload fibreops-copilot.zip via Teams Admin Center Users interact — The agent is now available in Microsoft 365 Copilot and Teams Security Considerations Managed Identity — The deployed app uses system-assigned managed identity for all Azure service access. No secrets in code. Least privilege — Each role grant is scoped to the minimum required (Event Hubs Data Owner, Key Vault Secrets User, AcrPull, Azure AI Developer). Authentication — The M365 Copilot surface handles user authentication; your backend receives authenticated requests. Guardrails — Autopilots operate within defined boundaries; human-in-the-loop escalation is built into the Routine and agent decision logic. Key Takeaways Publishing to Teams and M365 Copilot is GA — a single command generates the complete package. Declarative agents separate distribution (M365) from intelligence (your backend). Action plugins leverage your existing FastAPI OpenAPI schema — no manual specification needed. Autopilots (Public Preview) enable fully autonomous operation within guardrails. Adaptive Cards provide real-time push notifications alongside the conversational agent surface. The same backend serves the NOC console, the Copilot SDK, and the M365 declarative agent. Next Steps Explore the FibreOps repository — try python -m fibreops.demo publish-m365 Microsoft 365 Copilot extensibility documentation Next in this series: Voice Live and Observability for Production Agent SystemsBuilding Autonomous Agents with Microsoft Agent Framework and GitHub Copilot SDK Part 2/5
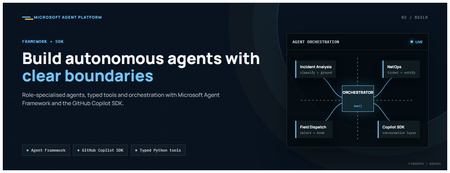
This is the second post in our series on the Microsoft agent platform. Here we dive deep into building autonomous agents, the development experience, the Microsoft Agent Framework, tool design patterns, and how the GitHub Copilot SDK brings conversational AI to your agent system. All examples reference the FibreOps repository, an autonomous fibre outage response system demonstrated at Microsoft Build BRK241. The Microsoft Agent Framework The Microsoft Agent Framework (now GA) provides a unified programming model for building agents. It supports multiple backends through a single .run() contract: Hosted — FoundryAgent connected to a Prompt Agent published to Microsoft Foundry Agent Service. Foundry — Agent + FoundryChatClient with the definition resolved locally (ideal for prompt iteration). Local — Deterministic LocalAgent for offline development and testing. This design means your orchestration code never changes regardless of where the agent runs. The factory pattern in FibreOps selects the backend at startup: # src/fibreops/agents/factory.py — simplified from agent_framework_foundry import FoundryAgent from agent_framework import Agent, FoundryChatClient def build_agent(role: str, backend: str, config: Config): if backend == "hosted": return FoundryAgent(agent_id=config.foundry_agents[role]) elif backend == "foundry": return Agent( instructions=get_instructions(role), chat_client=FoundryChatClient(endpoint=config.endpoint), tools=get_tools(role), ) else: return LocalAgent(role=role) Set FIBREOPS_AGENT_BACKEND to override the backend, or leave it as auto for intelligent detection. Designing Role-Specialised Agents FibreOps demonstrates a key pattern: role specialisation. Rather than one monolithic agent, the system uses three focused agents, each with a clear responsibility boundary: Agent Role Tools Available IncidentAnalysisAgent Classify severity, find root cause, retrieve SOP Knowledge (SOPs + topology), Web IQ, Work IQ NetOpsCoordinatorAgent File D365 incident, post Teams notice Ticketing, Teams, Memory FieldDispatchAgent Select engineer, book resource, update team Dispatch, Teams, Voice Why Role Specialisation? Focused system prompts — Each agent has a tightly scoped instruction set, reducing hallucination and improving reliability. Independent evaluation — You can score each agent separately against role-specific criteria. Parallel development — Teams can iterate on agents independently. Selective upgrade — Swap one agent's model or implementation without touching others. Tool Design: Typed Python Functions Tools in the Microsoft Agent Framework are typed Python functions that the runtime supplies to the hosted agent definition. FibreOps demonstrates several tool categories: Knowledge Tools # src/fibreops/tools/knowledge.py — simplified def sop_lookup(node_id: str, signal_type: str) -> dict: """Retrieve the Standard Operating Procedure for a given signal type. Args: node_id: The fibre node identifier (e.g., FN-LDN-001) signal_type: The type of signal (loss_of_light, high_ber, signal_degradation) Returns: SOP with steps, escalation path, and estimated resolution time. """ # Load from local markdown SOPs or Foundry IQ ... def web_iq_search(query: str, *, limit: int = 5) -> list[dict]: """Search public web for context relevant to the incident. Grounding against roadworks, weather, power outages, splice guidance. Falls back to deterministic fixtures when endpoint is unset. """ ... def work_iq_search(query: str, *, limit: int = 5) -> list[dict]: """Search enterprise knowledge for context relevant to the incident. Site surveys, SLA tiers, competency matrix, MTTR trends. """ ... Integration Tools # src/fibreops/tools/teams.py — simplified def post_outage_notice( incident_id: str, node_id: str, severity: str, summary: str, engineer: str | None = None, ) -> dict: """Post an Adaptive Card outage notice to the configured Teams channel. If TEAMS_WEBHOOK_URL is not set, appends to state/teams_outbox.jsonl for offline review. """ card = build_adaptive_card(incident_id, node_id, severity, summary, engineer) if config.teams_webhook_url: requests.post(config.teams_webhook_url, json=card) else: append_to_outbox(card) return {"status": "posted", "incident_id": incident_id} Design Principles for Agent Tools Typed parameters with docstrings — The runtime uses type hints and docstrings to generate the tool schema for the LLM. Graceful degradation — Every tool works offline by falling back to local fixtures or file-based state. Idempotent where possible — Tools that create resources return existing records if called with the same parameters. Observable — Every tool invocation emits an OpenTelemetry span for tracing and debugging. The Orchestrator Pattern The orchestrator drives signals through the agent pipeline. It is deliberately simple — a linear flow with error handling: # src/fibreops/orchestrator.py — simplified async def handle_signal(signal: TelemetrySignal) -> RunResult: """Process a telemetry signal through the agent pipeline.""" # Stage 1: Incident Analysis analysis = await incident_agent.run( f"Analyse this signal: {signal.model_dump_json()}" ) # Stage 2: NetOps Coordination coordination = await netops_agent.run( f"Coordinate response for: {analysis.summary}" ) # Stage 3: Field Dispatch dispatch = await dispatch_agent.run( f"Dispatch engineer for incident: {coordination.incident_id}" ) return RunResult( signal=signal, analysis=analysis, coordination=coordination, dispatch=dispatch, ) The orchestrator honours the same contract regardless of backend — hosted , foundry , or local — because all backends implement await agent.run(prompt) . GitHub Copilot SDK Integration (GA) The GitHub Copilot SDK enables conversational interaction with your agent system. FibreOps implements FibreOpsCopilotClient with the same interface as github/copilot-sdk : # src/fibreops/sdk/__init__.py — simplified from fibreops.sdk.client import FibreOpsCopilotClient client = FibreOpsCopilotClient() session = client.create_session() # Query agent status response = session.send_and_wait("status") print(response.text) # Human-readable summary print(response.data) # Structured JSON # Inject a telemetry signal via conversation response = session.send_and_wait(json.dumps({ "signal_id": "sig-demo", "node_id": "FN-LDN-001", "signal_type": "loss_of_light", "severity": "critical" })) The adapter routes prompts by shape: JSON signal-shaped dicts — Forwarded to the orchestrator for processing. Free-form text — Answered by a deterministic responder ( help , status , nodes , engineers , optimiser , dispatch ). Drive it from the terminal: python -m fibreops.demo chat "help" python -m fibreops.demo chat "status" python -m fibreops.demo chat '{"signal_id":"sig-demo","node_id":"FN-LDN-001","signal_type":"loss_of_light","severity":"critical"}' Or hit the embedded HTTP endpoint when the NOC console is running: Invoke-RestMethod -Method Post http://127.0.0.1:8800/sdk/chat -Body '{"prompt":"status"}' -ContentType application/json Development Workflow with Foundry Toolkit for VS Code The Foundry Toolkit for VS Code provides an integrated development experience: Author prompts — Edit system instructions with live preview and token counting. Test locally — Run against the foundry backend with FoundryChatClient pointing at your development model. Iterate fast — The foundry backend resolves definitions locally, so prompt changes take effect immediately without republishing. Publish when ready — python -m fibreops.demo publish creates hosted Prompt Agents in Foundry. Multi-Model Support The Microsoft Agent Framework supports multiple models. FibreOps defaults to gpt-4.1-mini (the model available in most demo Foundry accounts), but any chat-completions deployment works: # .env AZURE_AI_MODEL_DEPLOYMENT=gpt-4.1-mini # or gpt-4o-mini, gpt-4o, gpt-4.1 The framework also supports Claude Code connectors and Magentic-One for multi-agent collaboration scenarios. Testing Strategy FibreOps demonstrates a layered testing approach: Unit tests — Test tools in isolation with mocked dependencies. Local backend tests — Run the full pipeline with LocalAgent for deterministic assertions. Integration tests — Run against real Foundry agents with pytest -q . Rubric evaluation — The optimizer scores every run against defined criteria. # Run the test suite .\.venv\Scripts\python.exe -m pytest -q Key Takeaways The Microsoft Agent Framework provides a unified .run() contract across hosted, foundry, and local backends. Role specialisation keeps agents focused, testable, and independently evolvable. Tools are typed Python functions with docstrings — the runtime generates schemas automatically. The GitHub Copilot SDK (GA) enables conversational interaction with any agent system. Graceful degradation means the entire system works offline for development. The factory pattern lets you switch backends without changing orchestration code. Next Steps Clone the FibreOps repository and run python -m fibreops.demo --signals 3 Microsoft Agent Framework documentation Next in this series: Running Hosted Agents in Microsoft Foundry Agent ServiceVector search finds candidates. Reranking decides what your RAG app reads
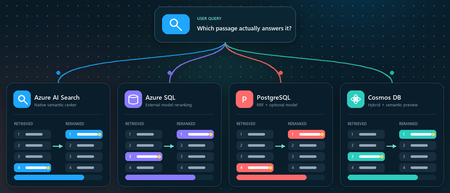
You ask a retrieval-augmented generation (RAG) application a question. Vector search returns ten passages that are clearly related to the topic. The passage that actually contains the answer, however, is ranked seventh, while the language model receives only the first five. Retrieval did not completely fail. It found the evidence, but ordered it below less useful context. Reranking addresses that gap between a passage that is semantically similar and a passage that is relevant to the user's specific question. This article demonstrates that pattern in four Azure services using the Stanford Question Answering Dataset (SQuAD). The goal is not to declare a winning service or publish a quality benchmark. It is to show where retrieval, rank fusion, and model-based reranking run in each architecture, and to illustrate how the position of a known source passage can change. What this demonstration establishes The examples show rank movement for three selected questions. They do not establish that one reranker or service is universally more accurate. A production decision requires a larger, representative query set and aggregate relevance, latency, and cost measurements. Get the full Python implementation: pauldj54/azure-vector-reranking-squad Retrieval and reranking are different stages A production search pipeline commonly uses two stages: Retrieve for recall. Fast retrieval narrows a large corpus to a bounded candidate set. It can use vector search, keyword search, or both. Rerank for precision. A more expensive model evaluates only those candidates against the original query and produces the final order. Reciprocal Rank Fusion (RRF) belongs between those two ideas. RRF is a model-free rank aggregation method that merges independent result lists, usually vector and keyword results. For a document d, a typical score is: RRF(d) = ∑ r ∈ R 1 k + rank r (d) Here, R is the set of ranked lists and k is commonly 60. RRF works with positions rather than raw scores, so it can combine signals such as cosine distance and BM25 without pretending their score scales are comparable. This gives a clearer three-part vocabulary: Stage Purpose Typical mechanism Retrieve Find broad candidate set Vector search, BM25, filters Fuse Combine independent rankings RRF Rerank Reassess query-document relevance Semantic ranker or cross-encoder RRF often improves hybrid retrieval when exact names, dates, identifiers, or terms matter. A learned reranker can then read the query and each candidate together, capturing interactions that separately generated embeddings can miss. The learned stage costs more, so it should operate on tens of candidates rather than the whole corpus. The following image describes the general process: Why use SQuAD for this demonstration? SQuAD 1.1 contains crowd-written questions over more than 500 Wikipedia articles. Its packaged splits contain 87,599 training rows and 10,570 validation rows. Each row includes a question, a context passage, and one or more answer spans inside that passage. That source-context mapping gives this demonstration a useful label: the context associated with a question is treated as its gold passage. We can then inspect whether each search stage moves that passage up or down. This is convenient, but it is not a perfect passage-ranking benchmark. SQuAD was designed for extractive question answering, and another passage in the corpus might also answer a question. The gold context is therefore a reproducible reference, not proof that every other passage is irrelevant. The results shown here use the 2,067 unique contexts in the SQuAD validation split and 1,536-dimensional embeddings. The repository default should be set to the same corpus size before treating the screenshots or rank transitions as directly reproducible. Three illustrative questions Question Expected answer Gold context According to game stats, which Super Bowl 50 quarterback had his worst year since his first NFL season? Peyton Manning 12, Super Bowl 50 What else did Tesla do for work at this time? Various electrical repair jobs 165, Nikola Tesla Who acts as laborer, paymaster, and design team for a renovation project? The property owner 1306, Construction Each notebook selects a seeded demonstration question when it runs. The three saved examples were collected across separate runs; the current notebooks do not execute all three questions in one pass. A benchmark harness should iterate over a fixed question list and save all stage results in one structured output. Capability boundaries at a glance Service Retrieval and Fusion Learned Reranking Boundary to Keep in Mind Azure AI Search Native keyword and vector retrieval with native RRF Built-in semantic ranker Semantic ranking only reorders the retrieved top 50 Azure SQL Database Exact vector retrieval in the current notebook External Cohere model invoked through native REST procedure SQL issues the HTTPS request; Foundry performs inference PostgreSQL Flexible Server pgvector plus hand-written SQL RRF over full-text search Optional external Cohere call from Python Retrieval primitives are native; this RRF query and Cohere path are application code Azure Cosmos DB for NoSQL Native vector search and native hybrid RRF SDK-integrated Semantic Reranker, currently preview Reranking is a separate inference call over at most 50 supplied documents Azure AI Search: native hybrid retrieval and semantic ranking How it works: Azure AI Search provides the most integrated pipeline in this demonstration. A hybrid query runs keyword and vector retrieval, combines the lists with RRF, and passes up to the top 50 results to the built-in semantic ranker. The semantic ranker assigns @search.rerankerScore values from 0 to 4 and can return extractive captions and answers. The semantic configuration identifies the fields that carry the meaning of each document: semantic_search = SemanticSearch( configurations=[ SemanticConfiguration( name=SEMANTIC_CONFIG, prioritized_fields=SemanticPrioritizedFields( title_field=SemanticField(field_name="title"), content_fields=[SemanticField(field_name="content")], ), ) ] ) This tells the semantic ranker which text fields to evaluate. The query then enables semantic ranking after hybrid retrieval: results = search_client.search( search_text=question, vector_queries=[vector_query], query_type="semantic", semantic_configuration_name=SEMANTIC_CONFIG, top=10, ) The important constraint is candidate recall. Semantic ranking does not search the corpus again. If the correct passage is absent from the hybrid top 50, the semantic stage cannot recover it. See 01_azure_ai_search_reranking.ipynb for the complete setup and query path. Test results for Azure AI Search These examples show that semantic reranking improves relevance selectively, not universally. It strongly helps the construction query, moving the correct passage from rank 4 to rank 1, but slightly degrades the Super Bowl and Tesla queries by one position. This reinforces that semantic ranking should be evaluated across a representative query set using aggregate metrics such as MRR or NDCG, rather than judged from a single result. Azure SQL Database: vector retrieval plus external Cohere reranking How it works. The Azure SQL notebook retrieves 20 candidates with exact cosine distance and sends their text to Cohere Rerank v4.0 Fast through sys.sp_invoke_external_rest_endpoint. The vector column and query vector must have the same dimensions. This repository uses 1,536-dimensional embeddings: SELECT TOP (@ candidate_count) context_id, title, content, 1 - VECTOR_DISTANCE( 'cosine', CAST(@ query_vector AS VECTOR(1536)), embedding ) AS similarity FROM dbo.documents ORDER BY similarity DESC; For reranking, we selected Cohere Rerank v4.0 Fast (Cohere-rerank-v4.0-fast), a fast version of Cohere’s fourth-generation relevance-ranking model. The model is deployed in Microsoft Foundry, where its Azure Direct inference endpoint is available in the deployment details within the Foundry portal. Azure SQL can call REST APIs directly using sp_invoke_external_rest_endpoint. Because Azure SQL allowlists Azure AI’s *.cognitiveservices.azure.com domain, we translate the equivalent Foundry endpoint from *.services.ai.azure.com while preserving the Cohere reranking route. from urllib.parse import urlsplit, urlunsplit def sql_compatible_endpoint(endpoint: str) -> str: """Convert an Azure Direct endpoint to Azure SQL's allowed hostname.""" parts = urlsplit(endpoint) if parts.hostname.endswith(".services.ai.azure.com"): resource = parts.hostname.removesuffix(".services.ai.azure.com") hostname = f"{resource}.cognitiveservices.azure.com" elif parts.hostname.endswith(".cognitiveservices.azure.com"): hostname = parts.hostname else: raise ValueError("Expected an Azure AI Services endpoint.") return urlunsplit( (parts.scheme, hostname, parts.path, parts.query, "") ) Then I defined a re-rank with cohere function, starting by loading the endpoint and setting the authentication: def rerank_with_cohere( cursor, question: str, candidates: list[dict], top_n: int = 10, ) -> list[dict]: """ Rerank candidate documents by calling Cohere through Azure SQL. Each candidate must contain a 'content' field. """ if not candidates: return [] sql_endpoint = sql_compatible_endpoint( os.environ["COHERE_RERANK_ENDPOINT"] ) model = os.environ["COHERE_RERANK_MODEL"] access_token = credential.get_token( "https://cognitiveservices.azure.com/.default" ).token headers = json.dumps({"Authorization": f"Bearer {access_token}"}) payload = json.dumps( { "model": model, "query": question, "documents": [row["content"] for row in candidates], "top_n": min(k, len(candidates)), }, ensure_ascii=False, ) cursor.execute( """ DECLARE @url NVARCHAR(4000) = CAST(? AS NVARCHAR(4000)); DECLARE @headers NVARCHAR(4000) = CAST(? AS NVARCHAR(4000)); DECLARE Payload NVARCHAR(MAX) = CAST(? AS NVARCHAR(MAX)); DECLARE Response NVARCHAR(MAX); DECLARE @status INT; EXEC @status = sys.sp_invoke_external_rest_endpoint @url = @url, @method = 'POST', @headers = @headers, Payload = Payload, @timeout = 60, @retry_count = 2, Response = Response OUTPUT; SELECT @status, Response; """, sql_endpoint, headers, payload, ) status, response_text = cursor.fetchone() if status != 0: raise RuntimeError(f"Reranker endpoint returned HTTP status {status}.") response = json.loads(response_text)["result"] You can see the complete implementation in the 02_azure_sql_reranking.ipynb notebook. Test results for Azure SQL Db Across the three sample questions, Cohere reranking consistently moved the correct SQuAD passage closer to the top: from rank 5 to 1 for the Super Bowl question, 3 to 2 for the Tesla question, and 8 to 1 for the construction question. These examples show how vector search provides a strong candidate set, while reranking applies deeper query-document relevance scoring to improve the final ordering. The results are illustrative rather than a complete quality benchmark, so broader evaluation across many queries is still recommended. Azure Database for PostgreSQL flexible server: pgvector, SQL RRF, and an optional model How it works: PostgreSQL makes the pipeline components explicit. The notebook uses pgvector for vector similarity, PostgreSQL full-text search for keyword retrieval, and SQL to implement RRF. Vector retrieval uses cosine distance: SELECT context_id, title, content, 1 - (embedding <= > % (query_vector) s:: vector) AS similarity FROM squad_docs ORDER BY embedding <= > % (query_vector) s:: vector LIMIT % (candidate_count) s; The hybrid query independently ranks vector and keyword hits, then combines positions rather than raw scores: SELECT d.context_id, COALESCE(1.0 / (60 + v.rank), 0) + COALESCE(1.0 / (60 + k.rank), 0) AS rrf_score FROM squad_docs AS d LEFT JOIN vector_hits AS v USING (context_id) LEFT JOIN keyword_hits AS k USING (context_id) WHERE v.context_id IS NOT NULL OR k.context_id IS NOT NULL ORDER BY rrf_score DESC; This is not a built-in PostgreSQL RRF operator. It is transparent, hand-written SQL over native retrieval primitives, which makes weighting and debugging flexible but leaves implementation and tuning with the application team. The notebook's optional learned stage sends the vector candidates from Python to a Foundry deployment of Cohere Rerank v4.0 Fast. This path was chosen because the tested Flexible Server azure_ai extension version expected the older serverless reranking endpoint contract. Microsoft documentation still describes azure_ai.rank() as a preview function whose default model is Cohere Rerank v3.5, even though that model retired on May 14, 2026. Treat this as a version-specific compatibility issue and verify current extension behavior before selecting an architecture. Azure HorizonDB is a different product path. Its AI Model Management feature can provision Cohere Rerank v4.0 Fast as default-reranker, but that management feature is currently a limited preview. It should not be described as a generally available Flexible Server capability. See 03_azure_postgres_reranking.ipynb for the full SQL and optional external model path. Test results for Azure SQL for PostgreSQL Flexible Server The tests show that PostgreSQL vector search provides a useful candidate set, SQL RRF can substantially improve results when keyword evidence is strong, and the Cohere semantic reranker is the most consistent overall: it moved the correct passage to rank 1 in two tests and from rank 3 to rank 2 in the Tesla test. RRF produced the biggest gain for the construction question, moving the correct passage from outside the vector top five to rank 1, but did not improve every query. The scores across stages are not directly comparable because cosine similarity, RRF score, and Cohere relevance use different scales. Azure Cosmos DB for NoSQL: hybrid search with built-in RRF How it works: Azure Cosmos DB for NoSQL supports native hybrid ranking with VectorDistance, FullTextScore, and RRF inside ORDER BY RANK: SELECT TOP K C.context_id, c.title, c.text FROM c ORDER BY RANK RRF( VectorDistance(c.vector, @query_vector), FullTextScore(c.text, @term1, @term2, @term3) ) The notebook extracts distinct terms from the question before building the full-text part of the query. That token selection is application logic and can materially affect the hybrid ranking, so production evaluation should test analyzers, languages, term extraction, and optional RRF weights. Cosmos DB Semantic Reranker is an SDK-integrated preview feature. The application first runs a query, serializes the resulting documents, and submits those documents with the user's context string: result = container.semantic_rerank( context=question, documents=documents, options={ "return_documents": False, "top_k": min(k, len(documents)), "sort": True, "document_type": "json", "target_paths": "title,text", }, ) The service accepts at most 50 documents per rerank call and returns relevance scores from 0 to 1, plus inference latency and token usage. It uses the Microsoft semantic ranking model also used by Azure AI Search. The reranking call requires Microsoft Entra authentication, the appropriate Semantic Reranker role, and an account-linked inference endpoint. The 04_azure_cosmosdb_reranking.ipynb in the shared repo contains and end-to-end implementation. Test results for Azure Cosmos Db The results show that vector search provides a strong baseline, while hybrid RRF and semantic reranking improve different queries in different ways. Hybrid RRF helps when exact keywords matter, moving the construction answer into the top results, while the semantic reranker delivers the strongest overall ordering, promoting the correct construction passage from hybrid rank 3 to rank 1 and improving the Super Bowl answer from rank 5 to rank 2. However, it does not always place the gold passage first, as seen in the Tesla example, confirming that reranking improves relevance but is query-dependent and should be evaluated across a larger test set. What the examples do and do not show The four services expose different ownership boundaries: • Azure AI Search owns hybrid fusion and learned semantic ranking inside the search service. • Azure SQL owns vector retrieval and outbound REST invocation in this example, while Foundry owns model inference. • PostgreSQL supplies vector and full-text primitives; the application owns the RRF SQL and optional Cohere call. • Cosmos DB provides native hybrid RRF and integrates a separate preview inference call through its SDK. Across three selected questions, the known source passage often moved substantially. That supports the practical value of testing a second-stage ranker. It does not prove that semantic reranking always improves top-1 accuracy, that RRF is universally beneficial, or that scores from different stages can be compared directly. Cosine similarity, RRF score, Azure AI Search reranker score, Cohere relevance, and Cosmos DB semantic relevance all have different definitions and scales. Compare rank positions and task-level metrics, not raw values across systems. Turn the demonstration into an evaluation For a production RAG system, convert the notebook pattern into a repeatable evaluation harness: Build a representative labeled query set from real user tasks. Freeze corpus, chunking, embedding model, dimensions, and candidate counts for each run. Record ranks after retrieval, fusion, and learned reranking. Measure Recall@k or Hit@k to verify that retrieval finds relevant evidence. Measure Mean Reciprocal Rank (MRR) when the position of the first relevant result matters. Use NDCG when judgments include multiple passages or graded relevance. Record latency percentiles, inference usage, request cost, and failure rates. Evaluate the generated answer separately for correctness, citation support, and refusal behavior. Also test the operational cases that a three-question demonstration cannot cover: empty keyword results, missing gold passages, long documents, multilingual text, filters, partial outages, token expiration, throttling, model retirement, and low-confidence scores. Practical guidance Retrieve broadly enough that the correct evidence can reach the learned stage. Use RRF when vector and keyword retrieval provide complementary signals. Rerank a bounded candidate set, commonly 20 to 50 passages, and measure the latency cost. Keep citations and source identifiers through every rank transformation. Version the corpus, embedding model, dimensions, query set, and reranker deployment. Do not hard-code assumptions about model endpoints or lifecycle dates. Verify current service documentation and the deployed extension or SDK version. Add thresholds or fallback behavior only after calibrating scores on your own data. Judge the full RAG chain. Better passage order is valuable only when it improves grounded answers for users. Vector search is built to find plausible candidates quickly. Rank fusion can reconcile retrieval signals, and a learned reranker can decide which candidates best address the question. The right architecture depends on where your data lives, which service boundaries you want to operate, and what your evaluation says about quality, latency, and cost. Resources Companion repository Azure AI Search semantic ranker Azure SQL VECTOR_DISTANCE Azure SQL sp_invoke_external_rest_endpoint Azure Database for PostgreSQL AI functions Microsoft Foundry model retirement schedule Azure Cosmos DB hybrid search Azure Cosmos DB Semantic Reranker SQuAD dataset card Dataset attribution Rajpurkar, P., Zhang, J., Lopyrev, K., and Liang, P. (2016). SQuAD: 100,000+ Questions for Machine Comprehension of Text. EMNLP 2016. SQuAD 1.1 is distributed under CC BY-SA 4.0.