agentic ai
8 TopicsAdding a Fallback Model to Hermes with Microsoft Foundry
So the plan was simple. Leave the Bedrock configuration untouched, then wire Microsoft Foundry in behind it as a fallback, so Hermes always has somewhere else to go when the primary provider is not responding. A few other reasons pushed me towards Foundry in particular: Redundancy that does not need me. If Bedrock is throttled or out of quota, I want Hermes to fail over on its own rather than waiting for me to notice. A catalogue I already pay for. Foundry puts the latest GPT models next to open-weight and partner models in one place, so I can pick a model that suits the task instead of settling for whatever a single provider happens to offer. Enterprise controls out of the box. Region pinning, private networking, content filters and per-deployment quota all sit in the same portal, which makes the setup far easier to defend to a security reviewer. Learning the mechanics before I need them. Working out how Hermes handles a provider chain is much nicer on a quiet Tuesday than during a live outage. Here is the short version, if you are deciding whether to read on. Time: about thirty minutes if nothing goes wrong. Cost: pay-as-you-go tokens only, and none at all while the fallback sits idle. Result: an assistant that keeps answering when your primary provider stops. Before you start, you will need three things: a machine with Hermes already installed and a working primary provider configured, an Azure subscription with access to Microsoft Foundry in a region you can actually deploy into, and enough quota in that region to create a deployment. One thing that made this easy to justify: Foundry deployments bill per token on the standard pay-as-you-go tier. A fallback provider that never gets invoked costs nothing beyond the requests it actually serves, so the insurance is close to free until the day you need it. Chat surface (CLI, messaging) → Hermes Gateway → Primary Amazon Bedrock → Fallback Microsoft Foundry Figure 1: Where the fallback sits. Every request goes through the Hermes gateway to the primary provider; only when that provider is unavailable does the chain continue to Microsoft Foundry. Part 1: Deploying a Model on Microsoft Foundry The first half of this job happens entirely inside the Microsoft Foundry portal and has nothing to do with Hermes yet. All you are really doing here is making sure your Azure subscription can serve a model, and that you hold an endpoint and key Hermes can authenticate with later. 1. Deploy model in Foundry → 2. Copy endpoint + key → 3. hermes fallback add → 4. Authenticate → 5. Select models, test Figure 2: The whole setup in five moves. The first two happen in the Microsoft Foundry portal (orange); the rest happen on the Hermes machine (blue). Go to Microsoft Foundry > Build > Models > Deploy > Deploy a base model. You can deploy a fine-tuned model instead if you already have one, which works just as well with Hermes. Check the region shown at the top of the portal before you commit, because both model availability and deployment quota differ from one region to the next. Then deploy the model you have selected: In this case I deployed gpt-5.6-sol, which is the model Hermes will fall back to. The choice was deliberate rather than exciting. My primary model on Bedrock is a general-purpose chat model, and a fallback is only useful if the answers it gives feel like a continuation of the same conversation rather than a different assistant wearing the same name. The gpt-5.6-sol deployment matches that behaviour closely, it was available in the region I wanted to pin, and the quota I was granted comfortably covers a day of normal use. If a fallback surprises you the first time it fires, it is the wrong fallback. Once the deployment finishes, open it and take note of two values: the target endpoint URI and the API key. Copy both somewhere safe now, because you will be pasting them into Hermes in the next part. If your organisation rotates keys on a schedule, use a key with the longest life you are allowed, since a fallback secured with a credential that expires quietly stops being a fallback. What to copy Where it lives in the portal Where Hermes asks for it Target endpoint URI Deployment > Endpoint > Target URI "Endpoint" prompt in hermes fallback add API key Deployment > Endpoint > Key "API key" prompt, or choose Entra ID instead Deployment name Deployment > Details > Name Shown in the model list Hermes returns Region Top of the portal, next to the resource Must match the region you deployed into Figure 3: Everything Hermes will ask for, and where to find each value before you leave the portal. Part 2: Adding Foundry to Hermes as a Fallback With the Foundry side sorted, everything from here happens in the Hermes CLI. One thing worth knowing before you start: this is the fallback command, not the primary model command, so your existing Bedrock configuration is left completely alone. Nothing in this section can break what is already working, which makes it a good one to try on a live setup. Run the Hermes fallback command: When Hermes asks which provider to add, choose Azure Foundry. The picker still carries the old name; it is the same service that the portal now calls Microsoft Foundry. Paste the target endpoint URI from your deployment, then authenticate with the API key you copied earlier. Hermes also offers Microsoft Entra ID at this prompt, which is the better option if your organisation would rather not have a static key sitting on the machine. If authentication fails here, check the endpoint before you start suspecting the key. In my experience the endpoint is wrong far more often than the credential is, usually because the deployment name at the end of the URI does not match the deployment you actually created. Once authentication succeeds, Hermes lists the deployments your Foundry resource exposes and asks which ones you want to use. You can select more than one, and the order is not cosmetic: Hermes walks down the chain from top to bottom whenever the provider above is unavailable. Treat that list as a priority order, not a shopping basket. What happens to the primary What Hermes does What you see in the chat Responds normally Routes every request to the primary and never touches the chain Nothing. The fallback stays idle Throttled or out of quota Retries the next provider down the chain on the same request A reply, served by the fallback model Endpoint unreachable Keeps failing over on each new request until the primary recovers Slightly different tone and latency, but a working assistant Every provider fails Returns the error rather than hanging An error worth chasing with hermes status Figure 4: The chain in practice. The fallback only earns its keep in the middle two rows, which is exactly why it is easy to forget you configured it. Part 3: Promoting Foundry to the Primary Model At this stage Foundry is sitting in the back seat as a backup. I wanted to reverse the arrangement and make Foundry the primary while Bedrock slides down into the fallback slot, partly because I preferred keeping day-to-day traffic inside my Azure subscription, and partly because I wanted proof the chain works in both directions. Before promotion After promotion Primary: Amazon Bedrock → Primary: Microsoft Foundry Fallback: Microsoft Foundry → Fallback: Amazon Bedrock Figure 5: The promotion, in effect. Nothing is added or removed; the two providers simply trade places in the chain. There is no dedicated "promote" command in Hermes, so the manual route is a short sequence of steps rather than a single instruction: Select the fallback provider/model as the new primary: hermes model Remove the now-duplicate model from the fallback chain: hermes fallback remove Optionally add the old primary model as a fallback: hermes fallback add Restart the messaging gateway: hermes gateway restart Verify the result: hermes status / hermes fallback list That sequence works, and it is good to know what is happening underneath. But since I already had a working provider configured, I would rather just ask Hermes to rearrange itself. This is the part I genuinely enjoy about the tool: the configuration is something you can talk to, not only something you type commands at. Prompt: Okay now please make the model I configured on Microsoft Foundry into the main model, and make the Bedrock one the fallback model! Hermes rewrites the provider chain on its own and confirms the swap once it is done, which is a great deal less error-prone than running the five commands by hand. Part 4: Testing the Switch Configuration you have not tested is just an assumption with extra steps, so the next thing is to confirm Hermes really is talking to Foundry. Type /model when running Hermes to bring up the model picker. You will be prompted to select a provider first. Pick the Microsoft Foundry entry, then choose the specific deployment from the list underneath it. The active model should switch straight away. Send it a plain "Hello" to check that the deployment actually responds, rather than just looking correct in the menu. Appearing in a dropdown and serving a request are two very different things. A second test is worth the thirty seconds it costs: run hermes status to confirm which provider is live, then hermes fallback list to confirm the chain is ordered the way you intended. The picker tells you what you selected; those two commands tell you what Hermes will actually do at three in the morning. Part 5: The Obstacle, and What It Actually Taught Me Every walkthrough has the part the author quietly leaves out. Here is mine: the wrinkle was not the model, it was capacity. My first attempt deployed into the region closest to me out of habit, and the portal turned it down because there was no capacity left for that model at the tier I asked for. The model was clearly listed in the catalogue; being listed and being deployable in your region, on your subscription, at your quota, are three separate questions. Redeploying in a different region fixed it in a couple of minutes, but it meant the endpoint URI changed, which in turn meant the value I had already pasted into Hermes was stale. Re-running hermes fallback add against the new endpoint sorted it out. The lesson is cheap enough to hand over for free: check quota and regional capacity for your specific subscription before you design a walkthrough, a demo or a production fallback around one deployment. In the Foundry portal, Management then Quota shows exactly what you have been granted per region and per model family, which is the only list that matters. Symptom Likely cause Fix Deployment rejected in the portal No capacity for that model at the tier you asked for, in that region Deploy in another region, or drop to a smaller tier Hermes rejects the credential Endpoint URI does not match the deployment you created Re-copy the target URI from the deployment, not the resource Provider authenticates but lists nothing Key belongs to a different Foundry resource Check you are in the right resource, then re-run hermes fallback add Fallback never fires Chain ordered the wrong way round hermes fallback list, then reorder Figure 6: The four things that went wrong, or nearly did, and what fixed each one. There is a silver lining worth stating plainly. Because the fallback chain was already in place, a deployment that refused to come up did not take the assistant down with it. That is precisely the scenario this whole exercise was meant to cover, and it turned up on day one without me having to simulate it. Command Cheat Sheet Everything used in this walkthrough, collected in one place: hermes fallback add: attach a provider to the fallback chain hermes fallback remove: drop a provider from the chain hermes fallback list: show the chain in priority order hermes model: set the primary model hermes gateway restart: restart the messaging gateway after a change hermes status: confirm which provider is currently live /model: switch models from inside a running session Conclusion Adding Microsoft Foundry as a fallback behind my existing Bedrock setup took an afternoon, and most of that was spent recovering from a regional capacity limit I should have checked first. The work itself is small: deploy a model, copy the endpoint and key, run hermes fallback add, authenticate, pick your deployments. The payoff is that Hermes no longer depends on one provider staying healthy. Three things are worth carrying away from this: Check quota, not just the catalogue. The Foundry catalogue shows what Microsoft offers. It does not show what your subscription and region can actually deploy today. Confirm that first, before you build anything on top of a specific deployment. Order your fallback chain deliberately. Hermes works down the list from top to bottom, so the sequence you choose during setup is the failover policy you are going to live with. Put the model you actually trust at the top. Treat the endpoint as part of the credential. Redeploying in a new region changes the endpoint URI, and a fallback pointed at an endpoint that no longer exists is not a fallback. Re-run the setup whenever the deployment moves. The switch from Bedrock primary to Foundry primary also proved the chain runs in both directions, which is the real point. Provider redundancy is only useful if you have watched it work. Next on my list is deliberately breaking the primary provider to confirm the failover triggers on its own, without me typing a single command. If you run this against a different model, region or provider pairing, I would genuinely like to know how it went, particularly if your quota experience was better than mine. Drop it in the comments.82Views0likes0CommentsModel Mondays S2E11: Exploring Speech AI in Azure AI Foundry
1. Weekly Highlights This week’s top news in the Azure AI ecosystem included: Lakuna — Copilot Studio Agent for Product Teams: A hackathon project built with Copilot Studio and Azure AI Foundry, Lakuna analyzes your requirements and docs to surface hidden assumptions, helping teams reflect, test, and reduce bias in product planning. Azure ND H200 v5 VMs for AI: Azure Machine Learning introduced ND H200 v5 VMs, featuring NVIDIA H200 GPUs (over 1TB GPU memory per VM!) for massive models, bigger context windows, and ultra-fast throughput. Agent Factory Blog Series: The next wave of agentic AI is about extensibility: plug your agents into hundreds of APIs and services using Model Connector Protocol (MCP) for portable, reusable tool integrations. GPT-5 Tool Calling on Azure AI Foundry: GPT-5 models now support free-form tool calling—no more rigid JSON! Output SQL, Python, configs, and more in your preferred format for natural, flexible workflows. Microsoft a Leader in 2025 Gartner Magic Quadrant: Azure was again named a leader for Cloud Native Application Platforms—validating its end-to-end runway for AI, microservices, DevOps, and more. 2. Spotlight On: Azure AI Foundry Speech Playground The main segment featured a live demo of the new Azure AI Speech Playground (now part of Foundry), showing how developers can experiment with and deploy cutting-edge voice, transcription, and avatar capabilities. Key Features & Demos: Speech Recognition (Speech-to-Text): Try real-time transcription directly in the playground—recognizing natural speech, pauses, accents, and domain terms. Batch and Fast transcription options for large files and blob storage. Custom Speech: Fine-tune models for your industry, vocabulary, and noise conditions. Text to Speech (TTS): Instantly convert text into natural, expressive audio in 150+ languages with 600+ neural voices. Demo: Listen to pre-built voices, explore whispering, cheerful, angry, and more styles. Custom Neural Voice: Clone and train your own professional or personal voice (with strict Responsible AI controls). Avatars & Video Translation: Bring your apps to life with prebuilt avatars and video translation, which syncs voice-overs to speakers in multilingual videos. Voice Live API: Voice Live API (Preview) integrates all premium speech capabilities with large language models, enabling real-time, proactive voice agents and chatbots. Demo: Language learning agent with voice, avatars, and proactive engagement. One-click code export for deployment in your IDE. 3. Customer Story: Hilo Health This week’s customer spotlight featured Helo Health—a healthcare technology company using Azure AI to boost efficiency for doctors, staff, and patients. How Hilo Uses Azure AI: Document Management: Automates fax/document filing, splits multi-page faxes by patient, reduces staff effort and errors using Azure Computer Vision and Document Intelligence. Ambient Listening: Ambient clinical note transcription captures doctor-patient conversations and summarizes them for easy EHR documentation. Genie AI Contact Center: Agentic voice assistants handle patient calls, book appointments, answer billing/refill questions, escalate to humans, and assist human agents—using Azure Communication Services, Azure Functions, FastAPI (community), and Azure OpenAI. Conversational Campaigns: Outbound reminders, procedure preps, and follow-ups all handled by voice AI—freeing up human staff. Impact: Hilo reaches 16,000+ physician practices and 180,000 providers, automates millions of communications, and processes $2B+ in payments annually—demonstrating how multimodal AI transforms patient journeys from first call to post-visit care. 4. Key Takeaways Here’s what you need to know from S2E11: Speech AI is Accessible: The Azure AI Foundry Speech Playground makes experimenting with voice recognition, TTS, and avatars easy for everyone. From Playground to Production: Fine-tune, export code, and deploy speech models in your own apps with Azure Speech Service. Responsible AI Built-In: Custom Neural Voice and avatars require application and approval, ensuring ethical, secure use. Agentic AI Everywhere: Voice Live API brings real-time, multimodal voice agents to any workflow. Healthcare Example: Hilo’s use of Azure AI shows the real-world impact of speech and agentic AI, from patient intake to after-visit care. Join the Community: Keep learning and building—join the Discord and Forum. Sharda's Tips: How I Wrote This Blog I organize key moments from each episode, highlight product demos and customer stories, and use GitHub Copilot for structure. For this recap, I tested the Speech Playground myself, explored the docs, and summarized answers to common developer questions on security, dialects, and deployment. Here’s my favorite Copilot prompt this week: "Generate a technical blog post for Model Mondays S2E11 based on the transcript and episode details. Focus on Azure Speech Playground, TTS, avatars, Voice Live API, and healthcare use cases. Add practical links for developers and students!" Coming Up Next Week Next week: Observability! Learn how to monitor, evaluate, and debug your AI models and workflows using Azure and OpenAI tools. Register For The Livestream – Sep 1, 2025 Register For The AMA – Sep 5, 2025 Ask Questions & View Recaps – Discussion Forum About Model Mondays Model Mondays is your weekly Azure AI learning series: 5-Minute Highlights: Latest AI news and product updates 15-Minute Spotlight: Demos and deep dives with product teams 30-Minute AMA Fridays: Ask anything in Discord or the forum Start building: Register For Livestreams Watch Past Replays Register For AMA Recap Past AMAs Join The Community Don’t build alone! The Azure AI Developer Community is here for real-time chats, events, and support: Join the Discord Explore the Forum About Me I'm Sharda, a Gold Microsoft Learn Student Ambassador focused on cloud and AI. Find me on GitHub, Dev.to, Tech Community, and LinkedIn. In this blog series, I share takeaways from each week’s Model Mondays livestream.418Views0likes0CommentsModel Mondays S2E9: Models for AI Agents
1. Weekly Highlights This episode kicked off with the top news and updates in the Azure AI ecosystem: GPT-5 and GPT-OSS Models Now in Azure AI Foundry: Azure AI Foundry now supports OpenAI’s GPT-5 lineup (including GPT-5, GPT-5 Mini, and GPT-5 Nano) and the new open-weight GPT-OSS models (120B, 20B). These models offer powerful reasoning, real-time agent tasks, and ultra-low latency Q&A, all with massive context windows and flexible deployment via the Model Router. Flux 1 Context Pro & Flux 1.1 Pro from Black Forest Labs: These new vision models enable in-context image generation, editing, and style transfer, now available in the Image Playground in Azure AI Foundry. Browser Automation Tool (Preview): Agents can now perform real web tasks—search, navigation, form filling, and more—via natural language, accessible through API and SDK. GitHub Copilot Agent Mode + Playwright MCP Server: Debug UIs with AI: Copilot’s agent mode now pairs with Playwright MCP Server to analyze, identify, and fix UI bugs automatically. Discord Community: Join the conversation, share your feedback, and connect with the product team and other developers. 2. Spotlight On: Azure AI Agent Service & Agent Catalog This week’s spotlight was on building and orchestrating multi-agent workflows using the Azure AI Agent Service and the new Agent Catalog. What is the Azure AI Agent Service? A managed platform for building, deploying, and scaling agentic AI solutions. It supports modular, multi-agent workflows, secure authentication, and seamless integration with Azure Logic Apps, OpenAPI tools, and more. Agent Catalog: A collection of open-source, ready-to-use agent templates and workflow samples. These include orchestrator agents, connected agents, and specialized agents for tasks like customer support, research, and more. Demo Highlights: Connected Agents: Orchestrate workflows by delegating tasks to specialized sub-agents (e.g., mortgage application, market insights). Multi-Agent Workflows: Design complex, hierarchical agent graphs with triggers, events, and handoffs (e.g., customer support with escalation to human agents). Workflow Designer: Visualize and edit agent flows, transitions, and variables in a modular, no-code interface. Integration with Azure Logic Apps: Trigger workflows from 1400+ external services and apps. 3. Customer Story: Atomic Work Atomic Work showcased how agentic AI can revolutionize enterprise service management, making employees more productive and ops teams more efficient. Problem: Traditional IT service management is slow, manual, and frustrating for both employees and ops teams. Solution: Atomic Work’s “Atom” is a universal, multimodal agent that works across channels (Teams, browser, etc.), answers L1/L2 questions, automates requests, and proactively assists users. Technical Highlights: Multimodal & Cross-Channel: Atom can guide users through web interfaces, answer questions, and automate tasks without switching tools. Data Ingestion & Context: Regularly ingests up-to-date documentation and context, ensuring accurate, current answers. Security & Integration: Built on Azure for enterprise-grade security and seamless integration with existing systems. Demo: Resetting passwords, troubleshooting VPN, requesting GitHub repo access—all handled by Atom, with proactive suggestions and context-aware actions. Atom can even walk users through complex UI tasks (like generating GitHub tokens) by “seeing” the user’s screen and providing step-by-step guidance. 4. Key Takeaways Here are the key learnings from this episode: Agentic AI is Production-Ready: Azure AI Agent Service and the Agent Catalog make it easy to build, deploy, and scale multi-agent workflows for real-world business needs. Modular, No-Code Workflow Design: The workflow designer lets you visually create and edit agent graphs, triggers, and handoffs—no code required. Open-Source & Extensible: The Agent Catalog provides open-source templates and welcomes community contributions. Real-World Impact: Solutions like Atomic Work show how agentic AI can transform IT, HR, and customer support, making organizations more efficient and employees more empowered. Community & Support: Join the Discord and Forum to connect, ask questions, and share your own agentic AI projects. Sharda's Tips: How I Wrote This Blog Writing this blog is like sharing my own learning journey with friends. I start by thinking about why the topic matters and how it can help someone new to Azure or agentic AI. I use simple language, real examples from the episode, and organize my thoughts with GitHub Copilot to make sure I cover all the important points. Here’s the prompt I gave Copilot to help me draft this blog: Generate a technical blog post for Model Mondays S2E9 based on the transcript and episode details. Focus on Azure AI Agent Service, Agent Catalog, and real-world demos. Explain the concepts for students, add a section on practical applications, and share tips for writing technical blogs. Make it clear, engaging, and useful for developers and students. After watching the video, I felt inspired to try out these tools myself. The way the speakers explained and demonstrated everything made me believe that anyone can get started, no matter their background. My goal with this blog is to help you feel the same way—curious, confident, and ready to explore what AI and Azure can do for you. If you have questions or want to share your own experience, I’d love to hear from you. Coming Up Next Week Next week: Document Processing with AI! Join us as we explore how to automate document workflows using Azure AI Foundry, with live demos and expert guests. 1️⃣ | Register For The Livestream – Aug 18, 2025 2️⃣ | Register For The AMA – Aug 22, 2025 3️⃣ | Ask Questions & View Recaps – Discussion Forum About Model Mondays Model Mondays is a weekly series designed to help you build your Azure AI Foundry Model IQ with three elements: 5-Minute Highlights – Quick news and updates about Azure AI models and tools on Monday 15-Minute Spotlight – Deep dive into a key model, protocol, or feature on Monday 30-Minute AMA on Friday – Live Q&A with subject matter experts from Monday livestream Want to get started? Register For Livestreams – every Monday at 1:30pm ET Watch Past Replays to revisit other spotlight topics Register For AMA – to join the next AMA on the schedule Recap Past AMAs – check the AMA schedule for episode specific links Join The Community Great devs don't build alone! In a fast-paced developer ecosystem, there's no time to hunt for help. That's why we have the Azure AI Developer Community. Join us today and let's journey together! Join the Discord – for real-time chats, events & learning Explore the Forum – for AMA recaps, Q&A, and Discussion! About Me I'm Sharda, a Gold Microsoft Learn Student Ambassador interested in cloud and AI. Find me on GitHub, Dev.to, Tech Community, and LinkedIn. In this blog series, I summarize my takeaways from each week's Model Mondays livestream.389Views0likes0CommentsBuild and Deploy a Microsoft Foundry Hosted Agent: A Hands-On Workshop
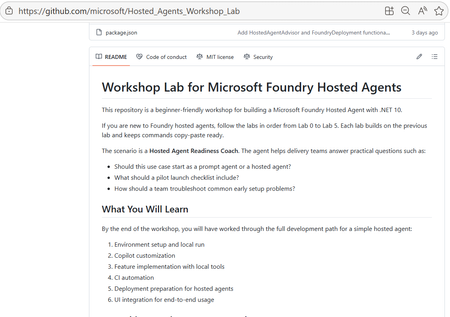
Agents are easy to demo, hard to ship. Most teams can put together a convincing prototype quickly. The harder part starts afterwards: shaping deterministic tools, validating behaviour with tests, building a CI path, packaging for deployment, and proving the experience through a user-facing interface. That is where many promising projects slow down. This workshop helps you close that gap without unnecessary friction. You get a guided path from local run to deployment handoff, then complete the journey with a working chat UI that calls your deployed hosted agent through the project endpoint. What You Will Build This is a hands-on, end-to-end learning experience for building and deploying AI agents with Microsoft Foundry. The lab provides a guided and practical journey through hosted-agent development, including deterministic tool design, prompt-guided workflows, CI validation, deployment preparation, and UI integration. It’s designed to reduce setup friction with a ready-to-run experience. It is a prompt-based development lab using Copilot guidance and MCP-assisted workflow options during deployment. It’s a .NET 10 workshop that includes local development, Copilot-assisted coding, CI, secure deployment to Azure, and a working chat UI. A local hosted agent that responds on the responses contract Deterministic tool improvements in core logic with xUnit coverage A GitHub Actions CI workflow for restore, build, test, and container validation An Azure-ready deployment path using azd, ACR image publishing, and Foundry manifest apply A Blazor chat UI that calls openai/v1/responses with agent_reference A repeatable implementation shape that teams can adapt to real projects Who This Lab Is For AI developers and software engineers who prefer learning by building Motivated beginners who want a guided, step-by-step path Experienced developers who want a practical hosted-agent reference implementation Architects evaluating deployment shape, validation strategy, and operational readiness Technical decision-makers who need to see how demos become deployable systems Why Hosted Agents Hosted agents run your code in a managed environment. That matters because it reduces the amount of infrastructure plumbing you need to manage directly, while giving you a clearer path to secure, observable, team-friendly deployments. Prompt-only demos are still useful. They are quick, excellent for ideation, and often the right place to start. Hosted agents complement that approach when you need custom code, tool-backed logic, and a deployment process that can be repeated by a team. Think of this lab as the bridge: you keep the speed of prompt-based iteration, then layer in the real-world patterns needed to run reliably. What You Will Learn 1) Orchestration You will practise workflow-oriented reasoning through implementation-shape recommendations and multi-step readiness scenarios. The lab introduces orchestration concepts at a practical level, rather than as a dedicated orchestration framework deep dive. 2) Tool Integration You will connect deterministic tools and understand how tool calls fit into predictable execution paths. This is a core focus of the workshop and is backed by tests in the solution. 3) Retrieval Patterns (What This Lab Covers Today) This workshop does not include a full RAG implementation with embeddings and vector search. Instead, it focuses on deterministic local tools and hosted-agent response flow, giving you a strong foundation before adding retrieval infrastructure in a follow-on phase. 4) Observability You will see light observability foundations through OpenTelemetry usage in the host and practical verification during local and deployed checks. This is introductory coverage intended to support debugging and confidence building. 5) Responsible AI You will apply production-minded safety basics, including secure secret handling and review hygiene. A full Responsible AI policy and evaluation framework is not the primary goal of this workshop, but the workflow does encourage safe habits from the start. 6) Secure Deployment Path You will move from local implementation to Azure deployment with a secure, practical workflow: azd provisioning, ACR publishing, manifest deployment, hosted-agent start, status checks, and endpoint validation. The Learning Journey The overall flow is simple and memorable: clone, open, run, iterate, deploy, observe. clone -> open -> run -> iterate -> deploy -> observe You are not expected to memorize every command. The lab is structured to help you learn through small, meaningful wins that build confidence. Your First 15 Minutes: Quick Wins Open the repo and understand the lab structure in a few minutes Set project endpoint and model deployment environment variables Run the host locally and validate the responses endpoint Inspect the deterministic tools in WorkshopLab.Core Run tests and see how behaviour changes are verified Review the deployment path so local work maps to Azure steps Understand how the UI validates end-to-end behaviour after deployment Leave the first session with a working baseline and a clear next step That first checkpoint is important. Once you see a working loop on your own machine, the rest of the workshop becomes much easier to finish. Using Copilot and MCP in the Workflow This lab emphasises prompt-based development patterns that help you move faster while still learning the underlying architecture. You are not only writing code, you are learning to describe intent clearly, inspect generated output, and iterate with discipline. Copilot supports implementation and review in the coding labs. MCP appears as a practical deployment option for hosted-agent lifecycle actions, provided your tools are authenticated to the correct tenant and project context. Together, this creates a development rhythm that is especially useful for learning: Define intent with clear prompts Generate or adjust implementation details Validate behaviour through tests and UI checks Deploy and observe outcomes in Azure Refine based on evidence, not guesswork That same rhythm transfers well to real projects. Even if your production environment differs, the patterns from this workshop are adaptable. Production-Minded Tips As you complete the lab, keep a production mindset from day one: Reliability: keep deterministic logic small, testable, and explicit Security: Treat secrets, identity, and access boundaries as first-class concerns Observability: use telemetry and status checks to speed up debugging Governance: keep deployment steps explicit so teams can review and repeat them You do not need to solve everything in one pass. The goal is to build habits that make your agent projects safer and easier to evolve. Start Today: If you have been waiting for the right time to move from “interesting demo” to “practical implementation”, this is the moment. The workshop is structured for self-study, and the steps are designed to keep your momentum high. Start here: https://github.com/microsoft/Hosted_Agents_Workshop_Lab Want deeper documentation while you go? These official guides are great companions: Hosted agent quickstart Hosted agent deployment guide When you finish, share what you built. Post a screenshot or short write-up in a GitHub issue/discussion, on social, or in comments with one lesson learned. Your example can help the next developer get unstuck faster. Copy/Paste Progress Checklist [ ] Clone the workshop repo [ ] Complete local setup and run the agent [ ] Make one prompt-based behaviour change [ ] Validate with tests and chat UI [ ] Run CI checks [ ] Provision and deploy via Azure and Foundry workflow [ ] Review observability signals and refine [ ] Share what I built + one takeaway Common Questions How long does it take? Most developers can complete a meaningful pass in a few focused sessions of 60-75 mins. You can get the first local success quickly, then continue through deployment and refinement at your own pace. Do I need an Azure subscription? Yes, for provisioning and deployment steps. You can still begin local development and testing before completing all Azure activities. Is it beginner-friendly? Yes. The labs are written for beginners, run in sequence, and include expected outcomes for each stage. Can I adapt it beyond .NET? Yes. The implementation in this workshop is .NET 10, but the architecture and development patterns can be adapted to other stacks. What if I am evaluating for a team? This lab is a strong team evaluation asset because it demonstrates end-to-end flow: local dev, integration patterns, CI, secure deployment, and operational visibility. Closing This workshop gives you more than theory. It gives you a practical path from first local run to deployed hosted agent, backed by tests, CI, and a user-facing UI validation loop. If you want a build-first route into Microsoft Foundry hosted-agent development, this is an excellent place to start. Begin now: https://github.com/microsoft/Hosted_Agents_Workshop_Lab700Views0likes0CommentsIntegrating Microsoft Foundry with OpenClaw: Step by Step Model Configuration
Step 1: Deploying Models on Microsoft Foundry Let us kick things off in the Azure portal. To get our OpenClaw agent thinking like a genius, we need to deploy our models in Microsoft Foundry. For this guide, we are going to focus on deploying gpt-5.2-codex on Microsoft Foundry with OpenClaw. Navigate to your AI Hub, head over to the model catalog, choose the model you wish to use with OpenClaw and hit deploy. Once your deployment is successful, head to the endpoints section. Important: Grab your Endpoint URL and your API Keys right now and save them in a secure note. We will need these exact values to connect OpenClaw in a few minutes. Step 2: Installing and Initializing OpenClaw Next up, we need to get OpenClaw running on your machine. Open up your terminal and run the official installation script: curl -fsSL https://openclaw.ai/install.sh | bash The wizard will walk you through a few prompts. Here is exactly how to answer them to link up with our Azure setup: First Page (Model Selection): Choose "Skip for now". Second Page (Provider): Select azure-openai-responses. Model Selection: Select gpt-5.2-codex , For now only the models listed (hosted on Microsoft Foundry) in the picture below are available to be used with OpenClaw. Follow the rest of the standard prompts to finish the initial setup. Step 3: Editing the OpenClaw Configuration File Now for the fun part. We need to manually configure OpenClaw to talk to Microsoft Foundry. Open your configuration file located at ~/.openclaw/openclaw.json in your favorite text editor. Replace the contents of the models and agents sections with the following code block: { "models": { "providers": { "azure-openai-responses": { "baseUrl": "https://<YOUR_RESOURCE_NAME>.openai.azure.com/openai/v1", "apiKey": "<YOUR_AZURE_OPENAI_API_KEY>", "api": "openai-responses", "authHeader": false, "headers": { "api-key": "<YOUR_AZURE_OPENAI_API_KEY>" }, "models": [ { "id": "gpt-5.2-codex", "name": "GPT-5.2-Codex (Azure)", "reasoning": true, "input": ["text", "image"], "cost": { "input": 0, "output": 0, "cacheRead": 0, "cacheWrite": 0 }, "contextWindow": 400000, "maxTokens": 16384, "compat": { "supportsStore": false } }, { "id": "gpt-5.2", "name": "GPT-5.2 (Azure)", "reasoning": false, "input": ["text", "image"], "cost": { "input": 0, "output": 0, "cacheRead": 0, "cacheWrite": 0 }, "contextWindow": 272000, "maxTokens": 16384, "compat": { "supportsStore": false } } ] } } }, "agents": { "defaults": { "model": { "primary": "azure-openai-responses/gpt-5.2-codex" }, "models": { "azure-openai-responses/gpt-5.2-codex": {} }, "workspace": "/home/<USERNAME>/.openclaw/workspace", "compaction": { "mode": "safeguard" }, "maxConcurrent": 4, "subagents": { "maxConcurrent": 8 } } } } You will notice a few placeholders in that JSON. Here is exactly what you need to swap out: Placeholder Variable What It Is Where to Find It <YOUR_RESOURCE_NAME> The unique name of your Azure OpenAI resource. Found in your Azure Portal under the Azure OpenAI resource overview. <YOUR_AZURE_OPENAI_API_KEY> The secret key required to authenticate your requests. Found in Microsoft Foundry under your project endpoints or Azure Portal keys section. <USERNAME> Your local computer's user profile name. Open your terminal and type whoami to find this. Step 4: Restart the Gateway After saving the configuration file, you must restart the OpenClaw gateway for the new Foundry settings to take effect. Run this simple command: openclaw gateway restart Configuration Notes & Deep Dive If you are curious about why we configured the JSON that way, here is a quick breakdown of the technical details. Authentication Differences Azure OpenAI uses the api-key HTTP header for authentication. This is entirely different from the standard OpenAI Authorization: Bearer header. Our configuration file addresses this in two ways: Setting "authHeader": false completely disables the default Bearer header. Adding "headers": { "api-key": "<key>" } forces OpenClaw to send the API key via Azure's native header format. Important Note: Your API key must appear in both the apiKey field AND the headers.api-key field within the JSON for this to work correctly. The Base URL Azure OpenAI's v1-compatible endpoint follows this specific format: https://<your_resource_name>.openai.azure.com/openai/v1 The beautiful thing about this v1 endpoint is that it is largely compatible with the standard OpenAI API and does not require you to manually pass an api-version query parameter. Model Compatibility Settings "compat": { "supportsStore": false } disables the store parameter since Azure OpenAI does not currently support it. "reasoning": true enables the thinking mode for GPT-5.2-Codex. This supports low, medium, high, and xhigh levels. "reasoning": false is set for GPT-5.2 because it is a standard, non-reasoning model. Model Specifications & Cost Tracking If you want OpenClaw to accurately track your token usage costs, you can update the cost fields from 0 to the current Azure pricing. Here are the specs and costs for the models we just deployed: Model Specifications Model Context Window Max Output Tokens Image Input Reasoning gpt-5.2-codex 400,000 tokens 16,384 tokens Yes Yes gpt-5.2 272,000 tokens 16,384 tokens Yes No Current Cost (Adjust in JSON) Model Input (per 1M tokens) Output (per 1M tokens) Cached Input (per 1M tokens) gpt-5.2-codex $1.75 $14.00 $0.175 gpt-5.2 $2.00 $8.00 $0.50 Conclusion: And there you have it! You have successfully bridged the gap between the enterprise-grade infrastructure of Microsoft Foundry and the local autonomy of OpenClaw. By following these steps, you are not just running a chatbot; you are running a sophisticated agent capable of reasoning, coding, and executing tasks with the full power of GPT-5.2-codex behind it. The combination of Azure's reliability and OpenClaw's flexibility opens up a world of possibilities. Whether you are building an automated devops assistant, a research agent, or just exploring the bleeding edge of AI, you now have a robust foundation to build upon. Now it is time to let your agent loose on some real tasks. Go forth, experiment with different system prompts, and see what you can build. If you run into any interesting edge cases or come up with a unique configuration, let me know in the comments below. Happy coding!12KViews2likes2CommentsCreating a Fun Multi-Agent Content Strategy System with Microsoft Agent Framework
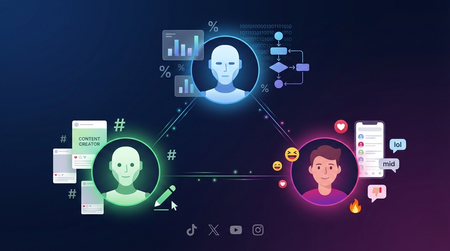
This tutorial walks you through building a multi-agent content strategy system using Microsoft's AutoGen framework. Three specialised AI agents — a Content Creator, an Algorithm Simulator, and an Audience Persona — collaborate to help gaming content creators pressure-test their social media posts before publishing. Using live Google Trends data and platform-specific scoring rubrics for TikTok, Twitter/X, YouTube, and Instagram, the system generates content, predicts how each platform's algorithm would distribute it, and simulates authentic audience reactions. The tutorial covers core multi-agent patterns including role specialisation, structured evaluation, iterative feedback loops, and resilient tool integration — all running on GitHub Models' free tier.990Views0likes0CommentsAdvanced Function Calling and Multi-Agent Systems with Small Language Models in Foundry Local
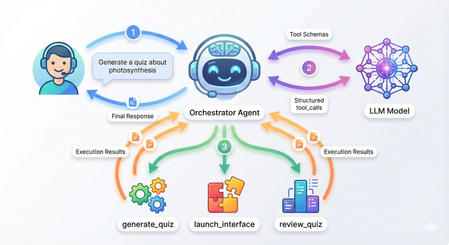
Advanced Function Calling and Multi-Agent Systems with Small Language Models in Foundry Local In our previous exploration of function calling with Small Language Models, we demonstrated how to enable local SLMs to interact with external tools using a text-parsing approach with regex patterns. While that method worked, it required manual extraction of function calls from the model's output; functional but fragile. Today, I'm excited to show you something far more powerful: Foundry Local now supports native OpenAI-compatible function calling with select models. This update transforms how we build agentic AI systems locally, making it remarkably straightforward to create sophisticated multi-agent architectures that rival cloud-based solutions. What once required careful prompt engineering and brittle parsing now works seamlessly through standardized API calls. We'll build a complete multi-agent quiz application that demonstrates both the elegance of modern function calling and the power of coordinated agent systems. The full source code is available in this GitHub repository, but rather than walking through every line of code, we'll focus on how the pieces work together and what you'll see when you run it. What's New: Native Function Calling in Foundry Local As we explored in our guide to running Phi-4 locally with Foundry Local, we ran powerful language models on our local machine. The latest version now support native function calling for models specifically trained with this capability. The key difference is architectural. In our weather assistant example, we manually parsed JSON strings from the model's text output using regex patterns and frankly speaking, meticulously testing and tweaking the system prompt for the umpteenth time 🙄. Now, when you provide tool definitions to supported models, they return structured tool_calls objects that you can directly execute. Currently, this native function calling capability is available for the Qwen 2.5 family of models in Foundry Local. For this tutorial, we're using the 7B variant, which strikes a great balance between capability and resource requirements. Quick Setup Getting started requires just a few steps. First, ensure you have Foundry Local installed. On Windows, use winget install Microsoft.FoundryLocal , and on macOS, use bash brew install microsoft/foundrylocal/foundrylocal You'll need version 0.8.117 or later. Install the Python dependencies in the requirements file, then start your model. The first run will download approximately 4GB: foundry model run qwen2.5-7b-instruct-cuda-gpu If you don't have a compatible GPU, use the CPU version instead, or you can specify any other Qwen 2.5 variant that suits your hardware. I have set a DEFAULT_MODEL_ALIAS variable you can modify to use different models in utils/foundry_client.py file. Keep this terminal window open. The model needs to stay running while you develop and test your application. Understanding the Architecture Before we dive into running the application, let's understand what we're building. Our quiz system follows a multi-agent architecture where specialized agents handle distinct responsibilities, coordinated by a central orchestrator. The flow works like this: when you ask the system to generate a quiz about photosynthesis, the orchestrator agent receives your message, understands your intent, and decides which tool to invoke. It doesn't try to generate the quiz itself, instead, it calls a tool that creates a specialist QuizGeneratorAgent focused solely on producing well-structured quiz questions. Then there's another agent, reviewAgent, that reviews the quiz with you. The project structure reflects this architecture: quiz_app/ ├── agents/ # Base agent + specialist agents ├── tools/ # Tool functions the orchestrator can call ├── utils/ # Foundry client connection ├── data/ ├── quizzes/ # Generated quiz JSON files │── responses/ # User response JSON files └── main.py # Application entry point The orchestrator coordinates three main tools: generate_new_quiz, launch_quiz_interface, and review_quiz_interface. Each tool either creates a specialist agent or launches an interactive interface (Gradio), handling the complexity so the orchestrator can focus on routing and coordination. How Native Function Calling Works When you initialize the orchestrator agent in main.py, you provide two things: tool schemas that describe your functions to the model, and a mapping of function names to actual Python functions. The schemas follow the OpenAI function calling specification, describing each tool's purpose, parameters, and when it should be used. Here's what happens when you send a message to the orchestrator: The agent calls the model with your message and the tool schemas. If the model determines a tool is needed, it returns a structured tool_calls attribute containing the function name and arguments as a proper object—not as text to be parsed. Your code executes the tool, creates a message with "role": "tool" containing the result, and sends everything back to the model. The model can then either call another tool or provide its final response. The critical insight is that the model itself controls this flow through a while loop in the base agent. Each iteration represents the model examining the current state, deciding whether it needs more information, and either proceeding with another tool call or providing its final answer. You're not manually orchestrating when tools get called; the model makes those decisions based on the conversation context. Seeing It In Action Let's walk through a complete session to see how these pieces work together. When you run python main.py, you'll see the application connect to Foundry Local and display a welcome banner: Now type a request like "Generate a 5 question quiz about photosynthesis." Watch what happens in your console: The orchestrator recognized your intent, selected the generate_new_quiz tool, and extracted the topic and number of questions from your natural language request. Behind the scenes, this tool instantiated a QuizGeneratorAgent with a focused system prompt designed specifically for creating quiz JSON. The agent used a low temperature setting to ensure consistent formatting and generated questions that were saved to the data/quizzes folder. This demonstrates the first layer of the multi-agent architecture: the orchestrator doesn't generate quizzes itself. It recognizes that this task requires specialized knowledge about quiz structure and delegates to an agent built specifically for that purpose. Now request to take the quiz by typing "Take the quiz." The orchestrator calls a different tool and Gradio server is launched. Click the link to open in a browser window displaying your quiz questions. This tool demonstrates how function calling can trigger complex interactions—it reads the quiz JSON, dynamically builds a user interface with radio buttons for each question, and handles the submission flow. After you answer the questions and click submit, the interface saves your responses to the data/responses folder and closes the Gradio server. The orchestrator reports completion: The system now has two JSON files: one containing the quiz questions with correct answers, and another containing your responses. This separation of concerns is important—the quiz generation phase doesn't need to know about response collection, and the response collection doesn't need to know how quizzes are created. Each component has a single, well-defined responsibility. Now request a review. The orchestrator calls the third tool: A new chat interface opens, and here's where the multi-agent architecture really shines. The ReviewAgent is instantiated with full context about both the quiz questions and your answers. Its system prompt includes a formatted view of each question, the correct answer, your answer, and whether you got it right. This means when the interface opens, you immediately see personalized feedback: The Multi-Agent Pattern Multi-agent architectures solve complex problems by coordinating specialized agents rather than building monolithic systems. This pattern is particularly powerful for local SLMs. A coordinator agent routes tasks to specialists, each optimized for narrow domains with focused system prompts and specific temperature settings. You can use a 1.7B model for structured data generation, a 7B model for conversations, and a 4B model for reasoning, all orchestrated by a lightweight coordinator. This is more efficient than requiring one massive model for everything. Foundry Local's native function calling makes this straightforward. The coordinator reliably invokes tools that instantiate specialists, with structured responses flowing back through proper tool messages. The model manages the coordination loop—deciding when it needs another specialist, when it has enough information, and when to provide a final answer. In our quiz application, the orchestrator routes user requests but never tries to be an expert in quiz generation, interface design, or tutoring. The QuizGeneratorAgent focuses solely on creating well-structured quiz JSON using constrained prompts and low temperature. The ReviewAgent handles open-ended educational dialogue with embedded quiz context and higher temperature for natural conversation. The tools abstract away file management, interface launching, and agent instantiation, the orchestrator just knows "this tool launches quizzes" without needing implementation details. This pattern scales effortlessly. If you wanted to add a new capability like study guides or flashcards, you could just easily create a new tool or specialists. The orchestrator gains these capabilities automatically by having the tool schemas you have defined without modifying core logic. This same pattern powers production systems with dozens of specialists handling retrieval, reasoning, execution, and monitoring, each excelling in its domain while the coordinator ensures seamless collaboration. Why This Matters The transition from text-parsing to native function calling enables a fundamentally different approach to building AI applications. With text parsing, you're constantly fighting against the unpredictability of natural language output. A model might decide to explain why it's calling a function before outputting the JSON, or it might format the JSON slightly differently than your regex expects, or it might wrap it in markdown code fences. Native function calling eliminates this entire class of problems. The model is trained to output tool calls as structured data, separate from its conversational responses. The multi-agent aspect builds on this foundation. Because function calling is reliable, you can confidently delegate to specialist agents knowing they'll integrate smoothly with the orchestrator. You can chain tool calls—the orchestrator might generate a quiz, then immediately launch the interface to take it, based on a single user request like "Create and give me a quiz about machine learning." The model handles this orchestration intelligently because the tool results flow back as structured data it can reason about. Running everything locally through Foundry Local adds another dimension of value and I am genuinely excited about this (hopefully, the phi models get this functionality soon). You can experiment freely, iterate quickly, and deploy solutions that run entirely on your infrastructure. For educational applications like our quiz system, this means students can interact with the AI tutor as much as they need without cost concerns. Getting Started With Your Own Multi-Agent System The complete code for this quiz application is available in the GitHub repository, and I encourage you to clone it and experiment. Try modifying the tool schemas to see how the orchestrator's behavior changes. Add a new specialist agent for a different task. Adjust the system prompts to see how agent personalities and capabilities shift. Think about the problems you're trying to solve. Could they benefit from having different specialists handling different aspects? A customer service system might have agents for order lookup, refund processing, and product recommendations. A research assistant might have agents for web search, document summarization, and citation formatting. A coding assistant might have agents for code generation, testing, and documentation. Start small, perhaps with two or three specialist agents for a specific domain. Watch how the orchestrator learns to route between them based on the tool descriptions you provide. You'll quickly see opportunities to add more specialists, refine the existing ones, and build increasingly sophisticated systems that leverage the unique strengths of each agent while presenting a unified, intelligent interface to your users. In the next entry, we will be deploying our quizz app which will mark the end of our journey in Foundry and SLMs these past few weeks. I hope you are as excited as I am! Thanks for reading.613Views0likes0CommentsAI Agents in Production: From Prototype to Reality - Part 10
This blog post, the tenth and final installment in a series on AI agents, focuses on deploying AI agents to production. It covers evaluating agent performance, addressing common issues, and managing costs. The post emphasizes the importance of a robust evaluation system, providing potential solutions for performance issues, and outlining cost management strategies such as response caching, using smaller models, and implementing router models.1.6KViews3likes1Comment