My first impressions on the CNTK and a comparison with Google’s TensorFlow. by Microsoft Student Partner at University College London.

About me
My name is Warren Park who is a first-year computer science student at UCL. My particular interest is in Artificial Intelligence (AI), in various applications with various approaches. One of the parts in AI that I focus on nowadays is machine learning, and I usually use TensorFlow (in case I need to use GPGPU) or plain NumPy to construct an Artificial Neural Network (ANN).
Since I like interdisciplinary research, I have done a personal research in astronomy combined with machine learning in January and written a draft paper. During this summer, I am planning to either improve the quality of the research that I have previously done or planning to start a new research in machine learning. My previous research used Python with TensorFlow to construct a fully connected neural network.
This blog post…
In this blog post, I would like to introduce how easily a student with a limited experience could start machine learning experiments by using Microsoft Cognitive Toolkit (CNTK). I will also describe some aspects that CNTK and TensorFlow differs and will provide some reasons to prefer CNTK.
Microsoft Cognitive Toolkit (CNTK)
CNTK is one of the most widely known machine learning frameworks in the market, which is developed by Microsoft that features great compatibility and effective use of computational resources.
Machine learning framework is a library for the programming languages that provides an ability to construct a machine learning model, train, test, and evaluate the defined model. Although without frameworks machine learning can be done, often, frameworks are used since they show better-optimised execution of the machine learning tasks. Additionally, using machine learning frameworks save time since they are tested, and designed carefully to enable developers to use machine learning easily.
To enable beginner developers to use well-known machine learning models, Microsoft provides CNTK model gallery [1], that developers can download predefined models for certain tasks in case they are unfamiliar with the idea of machine learning. There are also some predefined models in the CNTK package which are ready to use.
How can a student use CNTK?
To start using CNTK, it is good to follow the CNTK lab [2]. The CNTK lab instructs a student to train the predefined CNTK model with MNIST dataset and test the trained model with the given test dataset as well as a dataset that can be created by the student.
MNIST dataset [3] is a set of 60,000 training set images and 10,000 test set images of handwritten digits from 0 to 9. Since all the images have 28X28 dimensions which are greyscaled, and as the images are simple, the MNIST dataset is frequently used as many machine learning frameworks’ “Hello World!” project.
Using the predefined model, a student would easily be able to have CNTK experience with the real-life datasets and would be able to utilise the model for other tasks in the future.
To show how easy it is to start using CNTK, I will now explain how I was able to complete the lab exercises.
Prerequisite for the lab exercises
All the things that student need to know to complete the lab exercises would be some basic Linux or Windows command line prompt commands. Nearly neither knowledge about machine learning nor coding is required to complete the lab exercises, although some knowledge about machine learning would be required to comprehend the meaning of the tasks. A computer with either 64-bit Windows or 64-bit Linux is also required.
Step 1: Installation of the CNTK
I have a Windows PC, so followed the instructions given for the Windows. Installing CNTK for Windows PC is just slightly harder than installing other software on the market. Instead of double-clicking .exe file, what I needed to do was double-click the install.bat.
The installation batch file had to be downloaded from https://cntk.ai/dlwc-2.5.1.html .
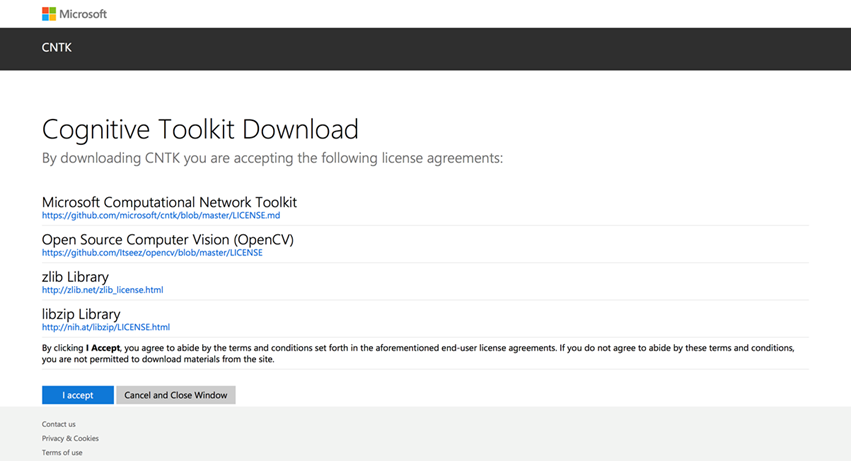
By clicking I accept, I was able to download a compressed .zip file containing all the resources. Then, I have executed the install.bat batch file, which was found in a cntk->Scripts->install->windows folder. When I double-clicked the file, the window below has shown.

I just had to press 1 and enter to continue the installation. It installed various software including Anaconda that can make CNTK run on a computer.
During the installation, the command prompt occasionally showed “Do you want to continue? (y/n)”. In this case, I have typed “y” followed by an enter key.
After the installation, the installation page showed a command needed to activate the CNTK depending on the installed Python version, for example:
To activate the CNTK Python environment and set the PATH to include CNTK, start a command shell and run
C:\Users\username\Desktop\cntk\scripts\cntkpy35.bat
This command needed to be copied, and whenever I wanted to use the CNTK, the copied command had to be copied to the command prompt and executed.
Step 2: Download, flatten and label the MNIST data
This step also uses a program in the cntk folder that has been downloaded. In the command prompt, I had to go to the directory where cntk folder exists. Then,
cd Examples\Image\DataSets\MNIST
python install_mnist.py
needed to be executed.

After doing this, there were two files generated in the MNIST folder. One file was a dataset for the training and the other was the test dataset. Both of them were the set of texts representing images flattened and labelled. For each image, a line of data was added to train or test dataset text file depending on which file (uncompressed folder) each image was coming from, and the line of data was:
| labels <One hot encoded row vector> | features <Flattened image data>
One hot encoded means converting a number in a form of data (in this case, form of a row vector) that has all elements 0 except the position corresponds to the number, which would be 1. For example, 2 will be converted to 0000000100 and 0 will be converted to 0000000001 in case there are only 10 possible digits.
Image flattening happens by appending the next height level pixels’ data row vector to the previous height level pixel’s data. Therefore, per image, a very long row vector (1X784) will be produced after the flattening. Flattening is useful as it enables batch training since many row vectors can form a matrix that the batch training steps can be done with a simple matrix multiplication.
Step 3: Collect some test data (Used my own hand writing)
The MNIST dataset has a test dataset given separately, but it would also be interesting to use my handwriting. In this step, I will explain how I collected, labelled, and flattened the test data.
First, a python program with a sample test dataset had to be downloaded from: https://a4r.blob.core.windows.net/public/cntk-resources.zip
This had to be uncompressed.
Second, a handwriting data needed to be collected. The data had to have a size of 28X28 px and was able to be prepared in various ways. In my case, I have used a “Paint” application on Windows.

Each image has to be saved in the uncompressed downloaded file’s input-images folder. Two images per digit was recommended to be added and each image had to have file name <digit>-01.png or <digit>-02.png or <digit>-03.png e.g. 3-02.
From the uncompressed downloaded file, I executed images2cntk.py. I have done this by typing python images2cntk.py on the command prompt from the folder where the Python file was stored in.
As a result, labelled, flattened data was saved as Custom-Test-28x28_cntk_text.txt file.
Step 4: Fully connected neural network with one hidden layer
Now, I will explain how I trained and tested the machine learning model that has one hidden layer. Before I explain how I have done the task, I would like to mention how Microsoft has predefined the model in 01_OneHidden.cntk:
01_OneHidden.cntk had a typical connected neural network configured. As an optimiser, it used a Stochastic Gradient Descent (SGD) with learning rate 0.01 for first 5 epochs and 0.005 for the other 5 epochs. The hidden layer had 200 nodes and ReLU had been used as an activation function, with a Softmax at the output layer.
This means the network is configured like this:

In reality, images are flattened so the information about above and below pixels would be ignored. Each output will also be a row vector instead of a column vector.
This information could be a little bit difficult for the students who have limited experiences. Therefore, CNTK provides a predefined model, which means students do not need to even think about the underlying structure of the machine learning model.
In order for me to use a machine learning model, I only had to 1) activate the CNTK on the command prompt by typing the command given at the installation time e.g. C:\Users\username\Desktop\cntk\scripts\cntkpy35.bat 2) move to the cntk\Examples\Image\GettingStarted folder on the command prompt and 3) type cntk configFile=01_OneHidden.cntk.
Then the machine learning had started.
If I wanted to use the data collected in Step 3, what I needed to do was to change the file variable value below the #TEST CONFIG in the 01_OneHidden.cntk file found in the cntk\Examples\Image\GettingStarted folder.
|
|

As a result of the tasks, I have got:
For the MNIST dataset test data:
Minibatch[1-10]: errs = 1.760% * 10000; ce = 0.05873108 * 10000
Final Results: Minibatch[1-10]: errs = 1.760% * 10000; ce = 0.05873108 * 10000; perplexity = 1.06049001
Which means the percentage of an incorrect outcome was 1.76% and for the test data that I have made:
Minibatch[1-1]: errs = 30.000% * 30; ce = 1.68806547 * 30
Final Results: Minibatch[1-1]: errs = 30.000% * 30; ce = 1.68806547 * 30; perplexity = 5.40900667
Meaning that 30.00% of the data was misclassified.
Although the percentage error was quite high, it is reasonable since the machine learning model was just a fully connected neural network with only one hidden layer.
Step 5: One convolutional layered neural network
A Convolutional Neural Network (CNN) often shows better performance compared to the normal connected neural network since it preserves the dimensions e.g. colours (channel), and above and below pixel relationships. Because of this reason, CNN is one of the most popular neural network used for many applications including image recognition and speech recognition.
CNN is a neural network which is formed by having convolutional layers [1] . Pooling layers can also be used in a sequence of convolutional layer-activation function-pooling layer. At the end of all the layers, typical affine layers (dense layers) would be added.
As mentioned, each convolutional layer has pooling layer next to it (after the activation function applied) which is normally a max pool. Each convolutional layer applies a filter to the input data and pooling layer reduces the dimensions of the input. Pooling layer reduces the dimensions by using a requested feature, for example, if max pool is used, in a certain part (e.g. 2X2 matrix in the upper left corner) of the input matrix, the maximum element among them will be the representative for the part and will only be preserved whereas all others that are smaller than the selected element and within the dimension that is being investigated will be lost. The requested dimension of the unit part for the evaluation will move with a certain distance to cover all the parts of the input, and that distance is called a stride. Strides need to be defined before the training starts.
CNN with one convolutional layer predefined in 02_OneConv is like this:
|
|

02_OneConv.cntk used configuration of layers illustrated above. Like 01_OneHidden, it used the SGD as an optimiser but with 0.001 for first five epochs and 0.0005 for the rest (10 epochs) as a learning rate. Similar to 01_OneHidden, #TEST CONFIG test file path was able to be modified to make the CNTK test the trained model with the data that I have produced.
From the training, I have got:
Using MNIST test sets:
Minibatch[1-10]: errs = 1.010% * 10000; ce = 0.03236526 * 10000
Final Results: Minibatch[1-10]: errs = 1.010% * 10000; ce = 0.03236526 * 10000; perplexity = 1.03289471
Which means there was only 1.01% error, and using my data:
Minibatch[1-1]: errs = 23.333% * 30; ce = 0.57137871 * 30
Final Results: Minibatch[1-1]: errs = 23.333% * 30; ce = 0.57137871 * 30; perplexity = 1.77070666
This means there was 23.33% of misclassified images.
Compared to the result from 01_OneHidden (See the table below), it was clear that CNN can perform better on the image classification.
|
|
01_OneHidden |
02_OneConv |
Winner |
|
MNIST test data |
1.760% |
1.010% |
02_OneConv |
|
My test data |
30.000% |
23.333% |
02_OneConv |
Lab summary
The CNTK lab was very intuitively designed that I think this lab resources can be used for any person studying any subject area. One of the impressive thing for me was that the CNTK lab does not require any prerequisite knowledge to complete. In other machine learning frameworks case, predefined models can be found, but in order to train them, they require some extra coding, unless the publisher of the model also distributes a software that uses the model. However, I have seen that in CNTK’s case, if there is a predefined model given as a .cntk file, training and testing can occur without any coding.
Since the model is not fully restrictive on the data, I think a student in another disciplinary area can also do a machine learning classification project very easily provided that the input data has a dimension of 28X28 or 1X784 with 10 classification classes. If a student can do some linear algebra, which is the subject that people commonly studies, altering the dimension of the model will also be possible that I think the CNTK’s predefined models could serve as a machine learning model for numerous projects in various fields.
Comparisons with TensorFlow
I have coded the model with the same layer configurations on Python using TensorFlow to do some comparisons and I have discovered several things. Below are some screenshots of the program that I have developed:


One of the interesting thing that I have got from this experiment was that if I use even the smallest learning rate used during the training of the corresponding CNTK’s model (i.e. 0.05 in the above example), on the model that I have developed by using TensorFlow, severe overfitting problem happened (All the classifications resulted in 1). Due to that problem, I have reduced the learning rate to 0.0001 and was able to get 8.77% percentage error for one hidden layered fully connected neural network with the MNIST test dataset.
Although the percentage is high, I do not think this means TensorFlow is bad in terms of accuracy. If the better configuration of layers or another implementation technique was being used, the result could have been different. Especially, I have used a different mini-batch size (I have used 100 but the predefined model used 64), which could have been resulted in a difference.
Anyway, during the coding experiences, I have discovered some aspects that show how nicely CNTK itself is designed. I have some reasons to suggest that.
Firstly, mini-batch training can be defined from the optimiser definitions in CNTK, by just providing parameters to the functions, whereas in TensorFlow, it is done by for loops or by using a separate function.
For example, to code the above program, I used for loops to set the mini-batch training:

(I have removed stochastically choosing a mini batch part to make the implementation simple)
Or I could have used a separate input function:

Whereas in CNTK:

Which means the mini batches are defined within an optimiser definition.
In many cases, above example shows that a student has to learn more in order to get started with TensorFlow, which could delay the development process. CNTK programming, on the other hand, can be started sooner due to the less required learning.
Secondly, I was impressed by the method that the CNTK defines a layer. In order to define a layer in CNTK, dimensions of the layer i.e. a number of nodes, an activation function and a previous layer need to be given. In TensorFlow, all three things mentioned need to be defined separately, and all the calculations between the layers need to be defined to connect each other.
For example, for the program described above, I had to use:

Since this is sometimes difficult, there is an additional library called Keras [1] which enables TensorFlow to be used easily. Keras handles the addition of layers by model.add() function. Although this is easy, if the neural network gets complicated, it becomes harder to manage the layers. CNTK, on the other hand, makes the layer to be added easily while making sure the previous layer that each layer is connected to.
On 01_OneHidden.cntk, construction of layers has been done by:

which is much shorter but still can be managed easily since all the previous layers are described e.g. (h1) after the {labelDim}.
Therefore, it makes programming to be done easily and also makes the layer management to happen efficiently.
In CNN’s case, the difference becomes a little bit less obvious as CNN has different kinds of layers, but still apparent:
In TensorFlow:

So, every convolutional layer and pooling layers need to be defined separately, whereas in CNTK:

Which also need to define each layer, but they can be defined under the same model, which means the code becomes more manageable.
Thirdly, CNTK provides faster computational speed. According to the research conducted in 2015 [2], it has been proven that CNTK has the fastest computational speed among five different machine learning frameworks in case 4 GPUs have been used. Although I could not carry out a test at this time since I do not have access to a machine that has 4 GPUs, provided that the research is correct and the efficiency of CNTK is improving, it would be reasonable to recommend CNTK to be used for the large-scale deep learning projects. Below is the graph that shows the performance comparisons between five machine learning frameworks [2]:

Therefore, I am able to say that if I have used CNTK to complete my personal project, I could have finished it earlier, while saving times on both learning and machine learning model training. This suggests that CNTK is more preferable for the computer scientists.
Conclusion
My experience with the CNTK lab has shown how easy a machine learning tasks can be done by students with a limited experience. By providing easy interfaces for machine learning, I am quite sure that students from many disciplines including me can utilise CNTK to complete their projects using machine learning, without much additional knowledge.
Additionally, in this blog post, I have mentioned about the advantages of using CNTK instead of TensorFlow. As CNTK provided an intuitive way to build the model while providing a facility to manage the structure of the model, I think CNTK could be a great alternative for TensorFlow.
Therefore, I would recommend any computer scientists to use CNTK.
Thank you for reading this blog post.
Bibliography
|
[1] |
Keras, "Keras: The Python Deep Learning library," [Online]. Available: https://keras.io. [Accessed 4 June 2018]. |
|
[2] |
X. Huang, "Microsoft Computational Network Toolkit offers most efficient distributed deep learning computational performance," 7 December 2015. [Online]. Available: https://www.microsoft.com/en-us/research/blog/microsoft-computational-network-toolkit-offers-most-efficient-distributed-deep-learning-computational-performance/. [Accessed 4 June 2018]. |
|
[3] |
Microsoft, "Azure Labs," [Online]. Available: https://github.com/Microsoft/computerscience/tree/master/Labs. [Accessed 4 June 2018]. |
|
[4] |
Microsoft, "Cognitive Toolkit Model Gallery," [Online]. Available: https://www.microsoft.com/en-us/cognitive-toolkit/features/model-gallery/. [Accessed 4 June 2018]. |
|
[5] |
Yann LeCun et al., "THE MNIST DATABASE," [Online]. Available: http://yann.lecun.com/exdb/mnist/. [Accessed 4 June 2018]. |
[1] Convolutional layer processes a convolutional arithmetic, which corresponds to the filter arithmetic in image processing.
 Microsoft