windows server
256 TopicsSome tools and techniques for hardening Windows Server
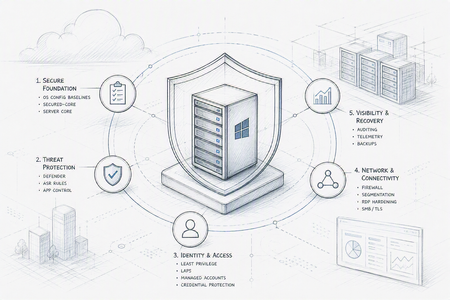
In this post I go over some tools and techniques exist for hardening Windows Server. As always, apply controls according to the server's role, test them against representative workloads before production rollout, document approved exceptions, and maintain tested console and recovery access in case a security control affects management or application compatibility. Apply the role-specific Windows Server 2025 baseline with OSConfig Security baselines turn hundreds of individual security decisions into a consistent, role-aware desired state. Using OSConfig reduces exposure caused by insecure defaults, legacy protocols, inconsistent administrator choices, and configuration drift that attackers can exploit for credential theft, lateral movement, or persistence. You can use use OSConfig at build time to apply the Microsoft security baseline that matches the server role: SecurityBaseline/WindowsServer/2025/MemberServer , SecurityBaseline/WindowsServer/2025/DomainController , or SecurityBaseline/WindowsServer/2025/WorkgroupMember . The baseline contains more than 300 settings covering network exposure, credentials, lateral movement, persistence resistance, and auditing. It can be managed through PowerShell, Windows Admin Center, or Azure Policy for Azure Arc-enabled servers. You can keep OSConfig drift control enabled so unauthorized or accidental changes are detected and corrected. Pilot the baseline with each workload, record required exceptions, and manage those exceptions centrally rather than weakening the baseline broadly. Implementation steps: Identify the server's role and the management authority that will own its settings, install the OSConfig PowerShell module, review the matching scenario, and apply it first to a representative test server. Validate application and management access, deploy the scenario in controlled rings, schedule and complete the restart required after applying the baseline, verify the desired configuration and compliance results, enable drift control, and record any approved exceptions and recovery procedures. Possible drawbacks: A baseline can disrupt legacy applications, authentication methods, network flows, or management tools that depend on weaker settings. Drift control can also reverse intentional emergency changes if they aren't recorded through the correct authority, so staged testing, documented exceptions, and tested recovery access are essential. Documentation on Learn: OSConfig security configuration for Windows Server | Deploy Windows Server 2025 security baselines with OSConfig | OSConfig security settings repository Use Secured-core hardware and enable platform security Windows Server secured-core combines hardware, firmware, virtualization, and operating-system protections to establish trust before Windows starts and preserve that trust while it runs. These controls mitigate bootkits, malicious or vulnerable kernel drivers, direct memory access attacks, firmware tampering, and attempts to extract credentials from the operating system. You deploy on hardware or virtual machines that support TPM 2.0, UEFI Secure Boot, virtualization-based security, DMA protection, and the other Secured-core requirements. Enable the OSConfig SecuredCore scenario and verify that Credential Guard, hypervisor-protected code integrity, kernel protections, and the signed boot chain are active. You need to keep system firmware, TPM firmware, hypervisor components, and hardware drivers current. Test older drivers before enabling enforcement because incompatible kernel drivers can prevent security features from activating or can affect boot reliability. Implementation steps: Confirm that the physical server or virtual-machine platform meets the Secured-core requirements, update firmware and drivers, and enable TPM 2.0, Secure Boot, virtualization extensions, and DMA or IOMMU protection in the platform configuration. Apply the OSConfig SecuredCore scenario or configure the features through Windows Admin Center, restart as required, verify that each protection is active, record evidence of the hardware capabilities and running Windows protections rather than only the assigned policy, and monitor for driver or workload compatibility issues. Possible drawbacks: Secured-core features require compatible hardware, firmware, hypervisors, and signed drivers, which can increase procurement costs or rule out older systems. Virtualization-based protections can introduce a workload-dependent performance impact, and incompatible drivers or firmware can cause application failures, feature activation problems, or difficult boot recovery. Documentation: What is Secured-core server? | Configure Secured-core server | Windows Server 2025 secured-core hardware requirements Deploy Server Core and minimize installed components Attack-surface reduction removes code, services, interfaces, and utilities that an attacker could exploit or misuse after gaining access. A minimal Server Core deployment lowers the number of vulnerabilities that require patching and reduces opportunities for interactive attacks, malicious browsing, persistence, and abuse of unnecessary administrative tools. Install Server Core unless a supported workload specifically requires Desktop Experience. Server Core has a smaller local interface and component footprint, reducing exposed code, maintenance requirements, and opportunities for interactive misuse. Windows Server 2025 can't convert between Server Core and Server with Desktop Experience after installation, so changing this choice later requires a clean installation. Install only the roles, features, management agents, and application components required for the server's purpose. Remove obsolete utilities and unused software, avoid browsing the web from servers, and disable unnecessary services only after confirming role and application dependencies. Where practical, dedicate each server to a single security or workload role. Implementation steps: Confirm that the workload and vendor support Server Core, formally record the installation-option decision before deployment, select Server Core during installation, and define the minimum roles, features, agents, and software required for the server's purpose. Install only those components, configure remote management and recovery access, remove or disable unused components after dependency testing, and verify that the application, monitoring, backup, patching, and support processes still function. Possible drawbacks: Server Core can make local troubleshooting less familiar and increases reliance on remote management, automation, and command-line skills. Some vendor applications, support tools, or administrators require Desktop Experience, and removing roles or disabling services without dependency testing can break workloads, monitoring, backup, or recovery operations. Documentation: What is the Server Core installation option? | Server Core and Desktop Experience installation options Ensure rapid patching and continuous vulnerability management Patching and vulnerability management identify and close known weaknesses before attackers can reliably exploit them. This practice reduces exposure to remote-code execution, privilege escalation, ransomware, vulnerable drivers, compromised third-party components, and attacks that target publicly documented vulnerabilities soon after disclosure. Make sure you are aware if any of your server workloads have not got the latest security updates deployed Maintain an inventory of operating-system, application, driver, firmware, and management-agent versions. Use deployment rings to test updates quickly, meet defined remediation deadlines, install out-of-band security updates when required, and monitor update compliance and pending restarts. Azure Update Manager can provide centralized assessment and orchestration for Azure and Azure Arc-enabled servers. Use Microsoft Defender Vulnerability Management or an equivalent platform to discover exposures, prioritize remediation by exploitability and business impact, and verify that fixes actually remove the vulnerability. Patching Windows while leaving internet-facing applications, drivers, or firmware obsolete does not adequately harden the server. Implementation steps: Inventory servers and every supported update source, define remediation deadlines and deployment rings, and configure Azure Update Manager or another actively developed orchestration platform. Windows Server Update Services remains supported and available but is deprecated and should be treated as a legacy option rather than the preferred platform for a new long-term design. Run vulnerability assessments, prioritize exposed and actively exploited weaknesses, test updates, deploy them with coordinated reboots, verify compliance after installation, and maintain rollback and exception procedures. Possible drawbacks: Updates can require reboots, consume maintenance windows, or introduce application, driver, and performance regressions. Vulnerability scanners and management agents also consume resources and can generate false positives, so organizations need test rings, rollback procedures, maintenance coordination, and a risk-based process for temporary deferrals. Documentation: Azure Update Manager overview | Cloud-native patch management for Azure Arc-enabled servers | Microsoft Defender Vulnerability Management | Deprecated Windows Server features Implement Microsoft Defender Antivirus and endpoint detection and response Antivirus and endpoint detection and response combine prevention with behavioral monitoring and investigation. They mitigate malicious files, ransomware, web and network-delivered payloads, suspicious process activity, persistence mechanisms, credential theft, and attacks that evade simple signature-based detection. Run Microsoft Defender Antivirus in active mode unless a documented and tested security architecture requires another antimalware product. Enable real-time protection, behavior monitoring, cloud-delivered protection, automatic sample submission, and frequent security-intelligence updates. Use the OSConfig Defender/Antivirus/WindowsServer/2025 scenario as the recommended Server 2025 configuration starting point. Onboard servers to Microsoft Defender for Endpoint or Microsoft Defender for Servers for endpoint detection and response, investigation, and centralized visibility. Enable tamper protection and keep exclusions narrow, workload-specific, and regularly reviewed; broad path, process, or extension exclusions create useful hiding places for attackers. Implementation steps: Confirm licensing, connectivity, proxy, and third-party antivirus requirements, then apply the OSConfig Defender Antivirus scenario or an equivalent centrally managed policy. Enable real-time, behavior, cloud-delivered, sample-submission, and tamper protections; onboard the server to Defender for Endpoint or Defender for Servers; review Microsoft's built-in, automatic server-role, and workload-specific exclusions before adding any manual exclusion; verify sensor health, signature currency, alert delivery, and investigation access; and periodically confirm that every manual exclusion remains necessary. Possible drawbacks: Real-time scanning and endpoint telemetry can add CPU, memory, disk I/O, network, and licensing costs, particularly on high-throughput workloads. False positives or quarantine actions can interrupt services, while cloud-delivered capabilities can raise connectivity, privacy, or data-residency considerations; performance exclusions must therefore be tested and kept narrowly scoped. Documentation: Microsoft Defender Antivirus in Windows | Microsoft Defender for Endpoint on Windows | Defender Antivirus exclusions | Protect against security-setting tampering Deploy attack surface reduction and network protection on your Windows Server workloads Attack surface reduction rules prevent high-risk behaviors rather than waiting for a specific malicious file to be identified, while network protection blocks access to known or suspicious destinations. Together they mitigate ransomware, credential theft, malicious scripts, abuse of trusted tools, vulnerable drivers, command-and-control traffic, and payload delivery. Configure Microsoft Defender attack surface reduction rules to block common behaviors used by ransomware, credential theft, malicious scripts, vulnerable signed drivers, and executable content. Begin with audit or warning mode, review telemetry for legitimate workload dependencies, create narrowly scoped exclusions, and then move suitable rules to block mode on a defined schedule. Enable network protection where supported to prevent processes from reaching malicious or untrusted destinations. Manage these controls centrally through Group Policy, Microsoft Defender for Endpoint security settings management, or another supported policy platform. Implementation steps: Inventory server workloads and make a rule-by-rule applicability decision for each server role rather than reusing a generic workstation ASR profile unchanged. Create a centrally managed ASR and network-protection policy that initially uses audit or warning mode, collect and review events, confirm business-critical dependencies, create narrowly scoped exclusions, move applicable rules to block mode through deployment rings, verify that protected applications remain functional, and continuously review detections and exception use. Possible drawbacks: ASR rules can block legitimate automation, administrative tools, installers, scripts, or line-of-business applications that exhibit high-risk behavior. Audit mode can produce substantial telemetry, and broad exclusions can undermine the protection, so successful deployment requires workload testing, event review, careful exception design, and ongoing tuning. Documentation: Attack surface reduction capabilities | Evaluate Microsoft Defender Antivirus and ASR rules using Group Policy Allow only trusted code with App Control for Business Application control changes the execution model from allowing everything except known malware to allowing only code that satisfies an approved policy. This technique mitigates unknown malware, ransomware, unauthorized administrative utilities, malicious scripts, unapproved drivers, and opportunistic payloads that antivirus has not yet classified. Use App Control for Business to define which executables, scripts, installers, libraries, and drivers may run. Windows Server 2025 includes OSConfig scenarios for Microsoft's default policy and application blocklist. Start in audit mode, collect Code Integrity event ID 3076, create required supplemental allow policies, and move to enforcement only after representative workload testing. There are some good GUI tools written by MVPs published on GitHub that make this very easy. https://github.com/HotCakeX/Harden-Windows-Security Monitor blocked-code event ID 3077 after enforcement and maintain a controlled process for policy updates and emergency recovery. Application allowlisting is substantially stronger than relying only on malware signatures because unapproved code is prevented from running even when it has not yet been classified as malicious. Implementation steps: Verify that the device is running a production-signed Windows Server 2025 build because the OSConfig default policy doesn't permit flight-signed binaries. Inventory approved applications, scripts, drivers, publishers, and update mechanisms, then deploy the default policy and application blocklist through OSConfig in audit mode. Collect event ID 3076, build and deploy required supplemental policies, and sign policies only when the additional tamper resistance is required and certificate lifecycle, policy servicing, removal, and offline recovery have been tested. Test application updates and recovery, move the policy to enforcement in stages, and monitor event ID 3077 and policy health after deployment. Possible drawbacks: Poorly designed policies can block legitimate applications, updates, scripts, drivers, or boot-critical components and can cause a severe service outage. Maintaining allow policies creates operational overhead, especially for frequently changing software, and approved tools can still be abused, so audit-mode deployment, controlled updates, and offline recovery procedures are necessary. Signed policies provide stronger tamper resistance but are intentionally harder to remove, including during recovery. Documentation: Configure App Control for Business by using OSConfig | App Control for Business Keep Windows Defender Firewall enabled with restrictive rules A host firewall limits which systems and applications can communicate with the server, even when upstream network controls are absent or bypassed. Restrictive rules reduce exposure to service exploitation, scanning, lateral movement, remote administration abuse, command-and-control traffic, and accidental publication of listening services. Enable Windows Defender Firewall on Domain, Private, and Public profiles. Retain the default block for unsolicited inbound traffic and create only the rules required by the server role. Scope rules by program or service, protocol, local port, remote address, interface, and profile rather than creating broad port-based or any-source exceptions. Log dropped packets and successful connections where operationally appropriate, centrally monitor policy changes, and review stale rules. Apply explicit outbound restrictions to high-value or tightly controlled servers where feasible, especially when they should communicate with only a small set of update, identity, management, and application endpoints. Implementation steps: Inventory listening services and required inbound and outbound flows, enable the firewall on all profiles, and create narrowly scoped rules for the server role. Decide whether locally created rules may merge with centrally deployed rules for each profile, verify the effective policy on representative servers, remove obsolete or duplicate rules, test application, domain, cluster, backup, and management traffic, enable appropriate logging, deploy the policy centrally, and monitor rule changes and blocked connections before introducing selective outbound restrictions. Possible drawbacks: Incorrect firewall rules can interrupt application traffic, clustering, domain operations, monitoring, backup, or remote management and can make diagnosis difficult. Detailed connection logging consumes storage, while restrictive outbound policies require continuous maintenance as service endpoints change, so rules should be documented, tested, and deployed with recovery access. Documentation: Windows Firewall rule recommendations | OSConfig baseline network protections Harden Remote Desktop and remote administration Remote administration exposes privileged authentication and interactive control paths that are attractive targets for brute-force attacks, credential theft, session hijacking, and exploitation of internet-facing services. Gateways, multifactor authentication, encrypted sessions, restricted source networks, and credential isolation reduce the likelihood that a stolen password or exposed management port leads directly to server compromise. Disable Remote Desktop Services when it is not required. When it is required, use a VPN or Remote Desktop Gateway, require multifactor authentication and Network Level Authentication, restrict source networks and authorized groups, use trusted TLS certificates, and configure sensible idle and disconnected-session limits. Disable clipboard, drive, printer, port, and device redirection unless the operational need outweighs the data-transfer risk. Use Remote Credential Guard only for compatible direct RDP administration of Active Directory-joined targets using Kerberos so credentials aren't sent to the remote host. Remote Credential Guard isn't supported through Remote Desktop Gateway or Remote Desktop Connection Broker. For helpdesk access to a potentially compromised host, use Restricted Admin mode instead of Remote Credential Guard. Never expose TCP port 3389 directly to the internet, and avoid using saved privileged credentials on ordinary administrator workstations. Implementation steps: Disable RDP on servers that don't require it. For brokered or externally initiated access, place RDP behind a VPN or MFA-protected Remote Desktop Gateway and restrict permitted users and source networks. For compatible direct RDP administration of Active Directory-joined targets, configure Remote Credential Guard separately; use Restricted Admin mode for appropriate helpdesk scenarios. Configure Network Level Authentication, trusted TLS certificates, session limits, and required redirection controls, test routine and emergency access, and monitor remote logons and gateway activity. Possible drawbacks: Gateways, VPNs, MFA services, and secure administrative hosts add licensing, infrastructure, and support dependencies, and their outage can block legitimate administration. Device-redirection restrictions can hinder support workflows, while Network Level Authentication and Remote Credential Guard have compatibility and delegation limitations; a separately secured emergency access path is therefore required. Documentation: Plan multifactor authentication for Remote Desktop Services | Remote Credential Guard Enforce least privilege and separate administrative identities Least privilege limits each identity and session to the minimum actions required for its task. Separating standard and privileged accounts constrains the damage caused by phishing, token or password theft, malicious insiders, vulnerable administrative tools, and compromised lower-trust devices, while reducing opportunities for privilege escalation and persistence. Give administrators standard user accounts for routine work and separate privileged accounts for administrative duties. Minimize membership of local Administrators, Domain Admins, Enterprise Admins, and other powerful groups; review membership and assigned user rights regularly; and prevent highly privileged identities from signing in to lower-trust servers and workstations. Use Just Enough Administration endpoints, Windows Admin Center role-based access control, and time-limited elevation where possible. Delegate specific tasks rather than granting unrestricted interactive or PowerShell access, and maintain separately protected emergency accounts for identity-service outages. Implementation steps: Inventory privileged human accounts, service principals, managed identities, service and automation credentials, scheduled tasks, local group membership, duties, and logon locations. Create separate standard and administrative identities, remove unnecessary standing memberships, delegate tasks through role groups, JEA endpoints, Windows Admin Center RBAC, or time-limited elevation, restrict high-tier logons to secured administrative hosts, test that each role can perform its approved duties, and monitor privileged-group, role, automation, and emergency-account use. Possible drawbacks: Designing roles, JEA endpoints, approval processes, and time-limited access requires ongoing engineering and governance. Excessively narrow delegation can delay troubleshooting or incident response, while separate accounts add friction for administrators, so permissions should be tested against real duties and emergency access should remain tightly controlled but usable. Documentation: Just Enough Administration | Windows Admin Center user access options | Enterprise access model Deploy Windows LAPS for local administrator credentials Windows LAPS replaces shared or manually maintained local administrator passwords with unique, random, automatically rotated credentials. It mitigates password reuse, pass-the-hash attacks, credential dumping, and broad lateral movement in which compromise of one server's local administrator credential grants access to many others. Use Windows Local Administrator Password Solution to assign a unique, random, automatically rotated local administrator password to every server. The backup destination depends on join state: Active Directory-only devices can use only Active Directory, Microsoft Entra-only devices can use only Microsoft Entra ID, and hybrid-joined devices can use either destination but not both simultaneously. Tightly restrict and audit password retrieval, configure password history and post-authentication rotation, and monitor policy-processing failures. Never reuse a common local administrator password across servers because one compromised password or hash can enable broad lateral movement. OSConfig provides the LAPS/WindowsServer/2025/MemberServer scenario for member servers. Workgroup systems can be managed through LAPS for Azure Arc, which Microsoft currently documents as a preview feature. On domain controllers, use Windows LAPS to manage the Directory Services Restore Mode password where appropriate. Implementation steps: Select the password-backup destination permitted by the device's join state, prepare Active Directory or Microsoft Entra ID, and identify the local account to manage. For workgroup systems, evaluate the operational and support implications of the preview LAPS for Azure Arc service before adoption. Configure password length, complexity, age, history, and post-authentication actions through policy or OSConfig; configure DSRM password management for applicable domain controllers; delegate password read and reset permissions to a small approved group; pilot the policy; verify password backup and rotation; test authorized recovery; and monitor LAPS processing and retrieval events. Possible drawbacks: LAPS introduces directory, policy, permissions, auditing, and recovery dependencies that must be designed correctly. Scripts or applications that rely on a fixed local password can fail, password rotation can disrupt active sessions or automation, and overly broad rights to retrieve stored passwords can create a new privileged credential repository for attackers to target. Documentation: What is Windows LAPS? | OSConfig Windows LAPS scenario | LAPS for Azure Arc Replace static service-account passwords with managed service accounts Managed service accounts replace human-managed, long-lived service passwords with complex credentials that Active Directory changes automatically. This reduces exposure to password theft, reuse, weak password selection, expired credentials, secrets embedded in scripts, and persistence based on service accounts whose passwords are rarely rotated. Use group managed service accounts for supported Windows services, scheduled tasks, and application pools in Active Directory environments. gMSAs provide automatic password management and reduce the need to store or manually rotate long-lived service credentials. Windows Server 2025 also introduces delegated Managed Service Accounts for supported migrations from traditional service accounts. A dMSA binds authentication to approved machine identities, uses managed randomized keys, and disables use of the original service-account password. dMSA deployment requires a discoverable Windows Server 2025 domain controller, and an existing gMSA can't be migrated to a dMSA. Grant each gMSA only the logon rights, resource permissions, and password-retrieval scope it requires. Do not make service accounts members of privileged groups unless unavoidable, prohibit interactive sign-in, remove obsolete accounts promptly, and monitor changes to the hosts permitted to retrieve each managed password. Implementation steps: Inventory service identities and application dependencies, then select a gMSA for supported services that can directly use a managed account or evaluate a dMSA for a supported Windows Server 2025 migration from a traditional service account. For a gMSA, confirm Active Directory and key-distribution prerequisites, limit which hosts may retrieve its password, assign only required logon rights, permissions, and service principal names, install and test the account on approved hosts, migrate the service or task, and disable or remove the former static-password account. For a dMSA, confirm a discoverable Windows Server 2025 domain controller and follow the documented migration and rollback process. Possible drawbacks: Managed service accounts depend on Active Directory and are not supported by every application, installer, or cross-platform workload. Migration can involve service-principal-name, delegation, permission, and clustering changes, while an overly broad password-retrieval scope allows additional hosts to use the identity. dMSA also requires Windows Server 2025 domain-controller availability and has migration rules that differ from gMSA, so compatibility, rollback, and access boundaries require careful testing. Documentation: Secure group managed service accounts | Delegated Managed Service Accounts overview | Delegated Managed Service Accounts FAQ Protect credentials and phase out legacy authentication Credential isolation and modern authentication reduce the value of secrets that an attacker can extract or relay. Credential Guard, LSA protection, Kerberos AES, and retirement of weak authentication mitigate memory scraping, pass-the-hash, pass-the-ticket, NTLM relay, downgrade attacks, and cracking of obsolete password representations. Verify that Credential Guard and Local Security Authority protection are active where hardware and workload compatibility permit. Windows Server 2025 enables Credential Guard by default on eligible domain-joined systems that aren't domain controllers, but the state should still be verified and centrally enforced where required. Use Negotiate with Kerberos and modern AES encryption for domain authentication, prevent storage of LM hashes or reversibly encrypted passwords, and keep delegated credentials non-exportable. NTLMv1 is removed in Windows Server 2025, and deprecated NTLMv2 should be treated only as a temporary compatibility fallback rather than an end state. Audit NTLM and other legacy authentication dependencies before restricting or disabling them, then remove those dependencies in a controlled sequence. Do not disable legacy protocols blindly on production servers, but do not leave them enabled indefinitely solely because their consumers have not been inventoried. Implementation steps: Confirm hardware and driver support, verify the default Credential Guard state, and use OSConfig or centrally managed policy to enforce Credential Guard and LSA protection where required. Enable NTLM auditing, inventory clients and services using legacy authentication, configure Negotiate and Kerberos AES, update affected service accounts, remediate dependencies, assign an owner and retirement date to every NTLMv2 exception, introduce NTLM restrictions in stages, and monitor authentication failures before broader enforcement. Possible drawbacks: Virtualization-based credential protection requires compatible hardware and can have a workload-dependent performance or compatibility impact. Legacy devices, applications, trusts, or service configurations may still depend on NTLM or weaker cryptography, and disabling them without complete auditing can cause widespread authentication failures or outages. Documentation: Credential Guard overview | OSConfig baseline credential protections | Deprecated Windows Server features Harden SMB and file-server access SMB hardening protects Windows file sharing and related management traffic against protocol downgrade, relay attacks, on-path tampering, brute-force authentication, guest access, data disclosure, and exploitation of obsolete implementations such as SMBv1. Signing verifies message integrity, while encryption protects sensitive content in transit. Remove SMBv1, prevent insecure guest logons, retain and verify the Windows Server 2025 default requirement for inbound and outbound SMB signing, use SMB encryption for sensitive or untrusted network paths, and use SMB 3.x for modern file services. Treat any relaxation of signing for an incompatible third-party device as a documented, isolated, and time-bound exception. Windows Server 2025 also provides SMB authentication rate limiting and stronger signing and encryption capabilities that should be retained unless a documented compatibility requirement exists. Restrict TCP port 445 to approved clients and servers, apply share and NTFS permissions according to least privilege, enable access-based enumeration where appropriate, and audit access to sensitive shares. Do not publish traditional SMB directly to the internet; use a supported secure access design such as SMB over QUIC when its requirements and threat model fit. Implementation steps: Inventory SMB clients, servers, protocol versions, shares, and access requirements, then remove SMBv1 and insecure guest access. Verify that inbound and outbound signing remain required, document and isolate any temporary third-party compatibility exception, configure encryption, authentication rate limiting, and firewall scope according to the workload, review share and NTFS permissions, pilot changes with older clients and high-throughput workloads, and monitor SMB security, authentication, and performance events after enforcement. Possible drawbacks: Mandatory SMB signing and encryption consume processor resources and can reduce throughput or increase latency on demanding file workloads. Older storage appliances, scanners, applications, or clients might not support modern SMB requirements, and overly restrictive port or permission changes can disrupt file access, administration, Group Policy, or backup operations. Documentation: SMB security hardening | Secure SMB traffic in Windows Server Require modern TLS and manage certificates securely Modern TLS protects application and management traffic by authenticating endpoints and encrypting data in transit. Requiring current protocol versions, strong cipher suites, and trusted certificates mitigates eavesdropping, man-in-the-middle attacks, protocol downgrade, weak-cryptography attacks, and impersonation using invalid or compromised certificates. Require TLS 1.2 or later and prefer TLS 1.3 where the application stack supports it. Windows Server 2025 disables TLS 1.0 and TLS 1.1 by default; verify that these protocols and obsolete SSL versions remain disabled and prevent unauthorized re-enablement. Disable weak cipher suites and obsolete hashes through a tested baseline rather than ad hoc registry changes. Inventory old agents, middleware, and network appliances first so incompatible dependencies can be upgraded instead of becoming permanent exceptions. Use certificates from a trusted public or enterprise certification authority, protect private keys with restrictive access control, select appropriate key sizes and algorithms, monitor expiration, and automate renewal. After dependency review, remove expired, untrusted, orphaned, or unnecessary certificates from server stores. Implementation steps: Inventory listening services, clients, protocol versions, cipher dependencies, and installed certificates, then replace weak or expiring certificates and confirm application support for modern TLS. Verify that TLS 1.0 and TLS 1.1 remain disabled, apply tested Schannel or OSConfig settings in stages, disable other legacy protocols and weak ciphers, validate every client and integration, rescan the endpoints, remove only certificates confirmed to be unnecessary, and implement automated certificate enrollment, renewal, expiration alerting, and private-key access review. Possible drawbacks: Disabling old protocols and ciphers can break legacy clients, middleware, monitoring agents, or network devices with no modern TLS support. Certificate issuance, private-key protection, renewal automation, and revocation checking add operational complexity, and an expired or incorrectly deployed certificate can cause a complete service outage. Documentation: TLS/SSL and Schannel overview | OSConfig baseline protocol protections | Deprecated Windows Server features Encrypt operating-system and data volumes with BitLocker BitLocker encrypts data at rest so possession of a disk or offline copy does not provide immediate access to its contents. It mitigates data theft from lost or stolen servers, removed drives, improperly decommissioned hardware, offline password-reset attacks, and attempts to read files by booting an alternate operating system. Enable BitLocker on operating-system and data volumes, using TPM-backed protectors and additional startup authentication where the physical threat model and availability requirements justify it. Use virtual TPMs and supported host or cloud protections for virtual machines. Encryption protects data on removed drives, decommissioned hardware, stolen systems, and offline copies. Escrow recovery information in a protected, recoverable directory or management service before enforcement. Limit access to recovery keys, audit retrieval, include key recovery in incident procedures, and test recovery on representative systems so encryption does not become an availability risk. Implementation steps: Inventory operating-system and data volumes, confirm TPM or virtual TPM readiness, select protectors that meet the physical and availability threat model, and configure a protected recovery-key escrow location. Enable BitLocker in controlled stages, verify encryption and key backup, test normal reboot and recovery scenarios, document break-glass procedures, and continuously monitor encryption and protector compliance. Suspend protection for firmware or boot-chain maintenance only through an approved procedure, then verify that BitLocker protection resumes afterward. Possible drawbacks: Lost recovery material can make encrypted data permanently inaccessible, while firmware, TPM, boot, or hardware changes can unexpectedly trigger recovery. Encryption can add some performance and operational overhead, and startup PINs can conflict with unattended reboot requirements, so protector selection, key escrow, and recovery testing must reflect the server's availability needs. Documentation: BitLocker planning guide | BitLocker operations guide | BitLocker recovery overview Configure detailed auditing and protect local logs Detailed auditing records security-relevant activity so suspicious behavior can be detected, investigated, and attributed. Authentication, privilege, process, PowerShell, policy, and firewall logs help expose brute-force attempts, credential misuse, privilege escalation, persistence, defense evasion, and attacker efforts to alter system configuration. Enable advanced audit policy for successful and failed logons, credential validation, account and group changes, sensitive privilege use, process creation with command-line capture, policy changes, removable storage, file shares, firewall activity, and other events relevant to the server role. The OSConfig baseline enables a broad audit configuration and increases important log sizes to improve forensic coverage. Enable PowerShell module and script block logging, and use protected event logging where appropriate because command content can contain sensitive data. Increase log capacity and retention for the expected event volume, restrict permissions to clear or modify logs, monitor audit-policy changes, and synchronize time with trusted sources. Implementation steps: Define the activities and events required for detection, investigation, and compliance, then apply advanced audit policy through OSConfig or Group Policy. Enable process command-line and PowerShell logging, measure event volume during a representative pilot, size and protect each log and forwarding path from the observed rates, configure trusted time synchronization, generate representative test events to confirm collection, and review event volume, retention, and policy health regularly. Possible drawbacks: Detailed auditing can generate large volumes of events, consume storage and processing resources, and overwhelm analysts with noise if collection isn't tuned. Command-line and PowerShell logs can contain credentials or other sensitive data, while undersized logs may overwrite useful evidence, so access, retention, filtering, and capacity require deliberate design. Documentation: OSConfig baseline auditing and visibility | Recommended audit policy for Windows Event Forwarding | PowerShell logging on Windows Centralize security telemetry and alert on suspicious activity Centralized telemetry moves evidence away from the system that generated it and correlates activity across servers, identities, and networks. This improves detection of distributed attacks, limits an intruder's ability to erase local evidence, and shortens response time for credential attacks, lateral movement, persistence, defense evasion, and destructive actions. Forward security-relevant logs away from each server using Windows Event Forwarding, Azure Monitor, Microsoft Defender, a SIEM such as Microsoft Sentinel, or another protected collection platform. Include Security, System, Windows Defender, PowerShell, Code Integrity, Windows Firewall, Windows LAPS, and role-specific operational logs. Create actionable alerts for repeated authentication failures, new or changed administrators, unexpected service or scheduled-task creation, security-control changes, Defender detections, App Control blocks, log clearing, unusual remote administration, and backup deletion. Restrict access to collectors and retention systems so an attacker who compromises a server cannot erase the centralized evidence. Implementation steps: Select Windows Event Forwarding, Azure Monitor, Microsoft Defender, a SIEM, or a combination; define prioritized detection use cases and role-specific retention before selecting log channels and verbosity; design resilient collectors, access control, and capacity; and deploy the required agents or subscriptions. Onboard the prioritized channels, verify end-to-end ingestion and timestamps, create and test high-value detections and notifications, restrict access to the monitoring platform, and continuously monitor collection health and tune noisy rules. Possible drawbacks: Central collection introduces bandwidth, storage, ingestion, licensing, retention, and analyst costs and can expose sensitive operational data if the monitoring platform is poorly secured. Collector failures create visibility gaps, while poorly tuned rules produce false positives and alert fatigue, so the design needs resilience, health monitoring, access controls, and continuous tuning. Documentation: Use Windows Event Forwarding for intrusion detection | Microsoft Defender for Endpoint security capabilities Maintain ransomware-resilient backups and test recovery Ransomware-resilient backups preserve a trustworthy recovery path when production data, operating systems, or identity services are encrypted, deleted, or corrupted. Isolated and immutable copies mitigate ransomware, destructive administrators, compromised backup credentials, accidental deletion, hardware failure, and attacks intended to eliminate both systems and their recovery data. Keep multiple protected backup copies, including a copy that is offline, immutable, or otherwise isolated from normal server and domain administrator credentials. Use separate backup administration identities, multifactor authorization for destructive operations, encryption, soft delete or immutability controls, and alerts for policy changes or mass deletion. Hypervisor snapshots alone are not an adequate backup strategy. Back up application data and configuration as well as system state and bare-metal recovery data where required by the server role. Define recovery-point and recovery-time objectives, test file, application, system-state, and full-server restoration regularly, and record the evidence. Domain controllers, certificate authorities, and other identity infrastructure require workload-aware recovery procedures. Implementation steps: Classify workloads and define recovery-point and recovery-time objectives, then select local, offsite, offline, and immutable backup targets appropriate to the risk. Use separate backup identities and MFA, schedule application data, configuration, system-state, and bare-metal backups as required, enable encryption and deletion protections, and monitor every job and policy change. Perform regular isolated restore tests that verify application consistency and role-specific recovery semantics for identity systems, not only successful restoration of files or virtual disks, and maintain documented recovery runbooks. Possible drawbacks: Multiple isolated copies, immutable storage, long retention, and regular restore exercises increase storage, network, licensing, staffing, and operational costs. Backups can create false confidence when they are incomplete, stale, infected, or untested, and strong credential separation can slow routine administration, so restore validation and lifecycle management are as important as backup creation. Documentation: Design a ransomware-resilient backup architecture | Azure Backup security best practices | Back up Windows Server system state --- This isn't everything you can do, but it's a start. What other techniques do you use to harden your Windows Server deployments?3.5KViews1like1CommentInternet Information Services Learning Path
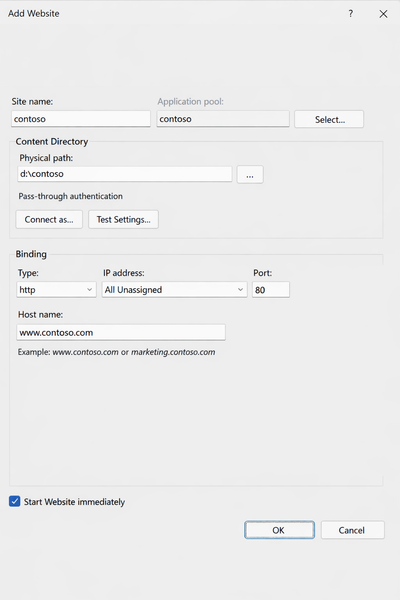
Internet Information Services (IIS) is the modular web server and application platform that first shipped as an optional add-on for Windows NT 3.51 in 1995, evolving from basic HTTP and FTP services into a full-featured web stack tightly integrated with Windows Server and Client operating systems. Today, IIS remains a core component of Windows Server and client editions, used to host legacy and modern web applications, APIs, and services in on-premises and hybrid environments alongside newer cloud-native options. The following training modules on Microsoft Learn provide you with a structured curriculum to learn how to manage and maintain Internet Information Services. It's relevant to almost all supported versions of IIS, but also includes coverage of some functionality that is available with Windows Server 2025. The modules in this learning path are as follows: Deploy and configure Internet Information Services. Understand how to configure, administer, and validate an IIS installation on Windows Server. Configure Internet Information Services websites and applications. Create and configure websites, web applications, and virtual directories in IIS. Manage Internet Information Services. Scripting bulk configuration changes, watching worker processes for signs of trouble, or run health checks to keep your IIS environment running reliably. Secure and harden Internet Information Services. Authentication, authorization, and other security best practices to protect the server and websites. Troubleshoot and optimize IIS performance. Learn how to troubleshoot IIS problems with logs, tracing, and performance counters, then apply tuning changes to improve reliability and throughput. The Administer Internet Information Services learning path collects all these modules together, providing you with a comprehensive guide to managing and maintaining Internet Information Services.843Views1like0CommentsFoundry Local Web UI for IIS
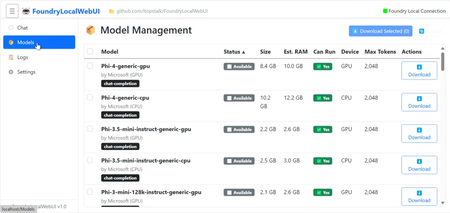
If you've been exploring local AI with Microsoft Foundry Local, you've learned that running a chatbot frontend on Windows Server or Windows Client that you can access over the network comes with a challenging set of dependencies. FoundryLocalWebUI is a simple, self-contained web frontend for Foundry Local that runs on IIS, works on both Windows Server and Windows Client, and uses common Windows ecosystem components. You can find the project on GitHub: https://github.com/itopstalk/FoundryWebUI Here is an explanatory video here: https://youtu.be/IGWNhSQziZI FoundryLocalWebUI is a lightweight web application designed to be hosted on IIS, which is already available to Windows Server and can be enabled on Windows Client with a few clicks. There is no need to install a separate web server, worry about a package manager, or spin up a Windows Subsystem for Linux environment. FoundryLocalWebUI is an experimental proof of concept. It doesn't support multiple users and just provides basic chatbot functionality. It's suitable if: You're evaluating Foundry Local and want a quick, no-fuss frontend to test models through a browser rather than the command line. You want to keep your deployment footprint small and your dependencies minimal. You're running Windows Client and want a local chat interface without the overhead of heavier solutions. The setup process is intentionally straightforward. Make sure that Git is installed: winget install --id Git.Git -e --accept-source-agreements --accept-package-agreements Clone the repo and run the installer (you'll have to use set-executionpolicy to allow the PowerShell script to run) cd C:\Projects git clone https://github.com/itopstalk/FoundryWebUI.git FoundryLocalWebUI cd FoundryLocalWebUI # Windows Server 2025: .\Install-FoundryWebUI.ps1 # Windows 10/11: .\Install-FoundryWebUI-Desktop.ps1 Full setup details are in the GitHub repo, and the walkthrough video covers the process end to end if you'd rather follow along visually. This is still early days for the project, and I'd love to hear from the community. Local AI is becoming a real option for organizations that need to keep data on-premises and maintain control over their infrastructure. Spin up a WS 2025 eval edition VM and give it a go.686Views2likes0CommentsConfigure a log analytics workspace to collect Window Server Event log, IIS and performance data.
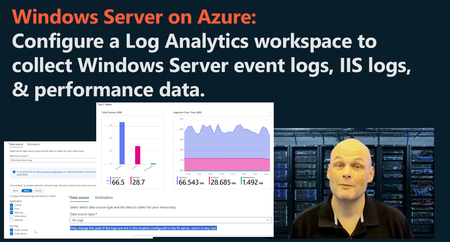
Configuring Azure Monitor with Log Analytics for IIS Servers Azure Monitor combined with Log Analytics provides centralized telemetry collection for performance metrics, event logs, and application logs from Windows-based workloads. This guide demonstrates how to configure data collection from IIS servers using Data Collection Rules (DCRs). Create the Log Analytics Workspace Navigate to Log Analytics workspaces in the Azure portal Select Create Choose your resource group (e.g., Zava IIS resource group) Provide a workspace name and select your preferred region Select Review + Create, then Create After deployment, configure RBAC permissions by assigning the Contributor role to users or service principals that need to interact with the workspace data. Configure Data Collection Infrastructure Create a Data Collection Endpoint: Navigate to Azure Monitor in the portal Select Data Collection Endpoints, then Create Specify the endpoint name, subscription, resource group, and region (match your Log Analytics workspace region) Create the endpoint Create a Data Collection Rule: Navigate to Data Collection Rules and select Create Provide a rule name, resource group, and region Select Windows as the platform type Choose the data collection endpoint created in the previous step Skip the Resources tab initially (you'll associate VMs later) Configure Data Sources Add three data source types to capture comprehensive telemetry: Performance Counters: On the Collect and Deliver page, select Add data source Choose Performance Counters as the data source type Select Basic for standard CPU, memory, disk, and network metrics (or Custom for specific counters) Set the destination to Azure Monitor Logs and select your Log Analytics workspace Windows Event Logs: Add another data source and select Windows Event Logs Choose Basic collection mode Select Application, Security, and System logs Configure severity filters (Critical, Error, Warning for Application and System; Audit Success for Security) Specify the same Log Analytics workspace as the destination IIS Logs: Add a final data source for Internet Information Services logs Accept the default IIS log file paths or customize as needed Set the destination to your Log Analytics workspace After configuring all data sources, select Review + Create, then Create the data collection rule. Associate Resources Navigate to your newly created Data Collection Rule Select Resources from the rule properties Click Add and select your IIS servers (e.g., zava-iis1, zava-iis2) Return to Data Collection Endpoints Select your endpoint and add the same IIS servers as resources This two-step association ensures proper routing of telemetry data. Query Collected Data After allowing time for data collection, query the telemetry: Navigate to your Log Analytics workspace Select Logs to open the query editor Browse predefined queries under Virtual Machines Run the "What data has been collected" query to view performance counters, network metrics, and memory data Access Insights to monitor data ingestion volumes You can create custom KQL queries to analyze specific events, performance patterns, or IIS log entries across your monitored infrastructure. Find out more at: https://learn.microsoft.com/en-us/azure/azure-monitor/fundamentals/overview1KViews0likes0CommentsDeploy and configure an Azure Application Gateway for load balancing and website protection.
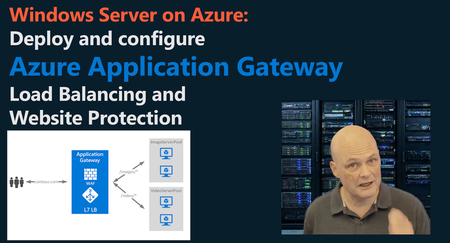
Azure Application Gateway provides layer 7 load balancing with integrated Web Application Firewall (WAF) capabilities, enabling traffic distribution across backend servers while protecting against common web exploits like SQL injection and DDoS attacks. This guide walks through deploying an Application Gateway to front-end two Windows Server IIS instances in an availability set. Network Infrastructure Configuration The first step you need to take is to prepare your Azure network infrastructure for Azure Application Gateway deployment. You can do this by performing the following steps: Create Application Gateway Subnet Navigate to Virtual Networks and select your IIS VNet Select Subnets > Add Subnet Configure the subnet: Name: app-GW-subnet Starting address: 10.0.1.0 (or next available subnet range) Leave other settings at defaults (no private endpoint policies or subnet delegation required)app-gateway-iis-vms-narrated-itopstalk.txt Configure NSG Rules for Backend Traffic Select the first IIS VM's Network Security Group Create an inbound rule: Source: Application Gateway subnet (10.0.1.0/24) Service: HTTP Provide priority and descriptive name Repeat for the second IIS VM's NSG to allow traffic from the Application Gateway subnet on port 80app-gateway-iis-vms-narrated-itopstalk.txt Application Gateway Deployment Once the Azure network infrastructure is prepared, you can then deploy the application gateway and configure network traffic protection policies. Basic Configuration Search for Application Gateways in the Azure Portal Click Create > Application Gateway Configure basic settings: Resource Group: Same as IIS VMs Name: (e.g., ZAVA-app-GW2) Region: Same as IIS VMs Tier: Standard V2 IP Address Type: IPv4 only Select Configure Virtual Network and choose the IIS VNet Select the Application Gateway subnet created earlier Create a new public IPv4 address for the gateway frontend. Backend Pool Configuration On the Backends page, select Add a backend pool Provide a pool name Add both IIS VM private IP addresses to the pool. Routing Rule Configuration On the Configuration page, select Add a routing rule Configure the listener: Provide a rule name Create a listener with a descriptive name Protocol: HTTP Port: 80 Listener type: Basic Configure backend targets: Target type: Backend pool Backend pool: Select the pool created in the previous step Create new backend settings with port 80 Configure optional settings (cookie affinity, connection draining) as needed Specify a priority for the routing rule Complete the wizard to deploy the gatewayapp-gateway-iis-vms-narrated-itopstalk.txt Verification and Testing Navigate to Application Gateways and select your deployed gateway Copy the Public IP Address from the overview page Access the public IP in a browser and refresh multiple times to observe load balancing between IIS-1 and IIS-2 Navigate to Backend Pools to view backend health status for troubleshooting. Web Application Firewall Protection In your Application Gateway, navigate to Web Application Firewall Select Create a web application firewall policy Provide a policy name Enable Bot Protection for enhanced security Save the policy Review the policy's Managed Rules to confirm OWASP Core Rule Set and bot protection rules are active. The Application Gateway now distributes traffic across your IIS availability set while providing enterprise-grade security protection through integrated WAF capabilities. Find out more at: https://learn.microsoft.com/en-us/azure/application-gateway/overview526Views2likes0CommentsDeploying Windows Servers in an Azure Availability Set
Deploying Windows Servers in an Azure Availability Set This guide demonstrates deploying Windows Server an Azure Availability Set for Windows Server IIS workloads. An availability set logically groups virtual machines across fault domains and update domains within a single Azure data center. Fault domains provide physical hardware isolation (separate racks, power, and network switches), while update domains ensure Azure staggers platform maintenance, rebooting only one domain at a time with 30-minute recovery windows. VMs must be assigned to availability sets during creation and you cannot add existing VMs later. Creating the First VM Navigate to Azure Portal > Virtual Machines > Create Create a new resource group (e.g., "Zava IIS") Name the VM (e.g., "Zava IIS 1") and select region (e.g., East US 2) Under Availability Options, select "Availability set" > Create New Name the availability set and accept defaults (2 fault domains, 2 update domains) Configure local admin account (avoid using "Administrator") Select "No inbound ports" for security Enable Azure Hybrid Benefit if you have existing Windows Server licenses Verify Premium SSD is selected under Disks (required for 99.95% SLA) Note the virtual network name for subsequent VMs Under Management, disable automatic shutdown and hotpatch Under Monitoring, disable boot diagnostics Review and create the VMAvailability-Set-Audio-Pre-avatar.txt Creating the Second VM Return to Virtual Machines > Create Use the same resource group Name the second VM (e.g., "Zava IIS 2") Select the existing availability set created in step 4 above Match all settings from the first VM (admin account, no inbound ports, hybrid benefit, Premium SSD) Ensure the VM connects to the same virtual network as the first VM Disable auto shutdown, hotpatch, and boot diagnostics Review and create Ensure that the VMs are configured with Premium SSD to achieve the highest possible SLA of 99.999%. In a future post, we’ll cover how to configure Azure Application Gateway to load balance traffic across computers in an availability set as well as protecting against DDoS and OWASP top 10 attacks Learn more about Azure Availability Sets 391Views1like0Comments
Microsoft Entra Domain Services: Deploy, Join a VM, and Use Classic AD Tools
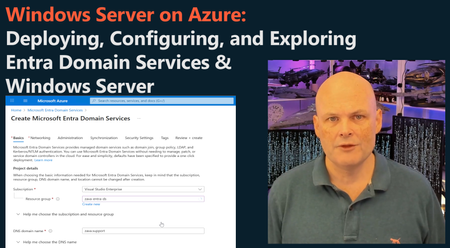
Microsoft Entra Domain Services (Entra DS) provides you with the functionality of managed domain controllers in Azure. This allows you to domain-join Windows Server VMs, use Group Policy, and manage DNS on a specially prepared vNet subnet without deploying and patching your own DC VMs. This post walks through: • Preparing your virtual network • Deploying Entra DS • Configuring DNS • Joining a Windows Server VM to the managed domain • Using AD DS and Windows Server DNS tools from that VM Prerequisites • An Azure subscription. • A Microsoft Entra tenant with a custom DNS domain verified (for example, zava.support). Entra DS uses this custom domain as the managed domain name. • Permission to create resource groups, VNets, and Entra DS. • Permission to manage Entra groups in the tenant (add administrators/configure RBAC). Step 1 – Create a resource group and virtual network 1. Create a new resource group in your chosen region to hold all Entra DS resources and VMs. 2. Create a virtual network (for example, zava-entra-dsvn) in that resource group (for example, address space: 172.16.0.0/16 (or a range that fits your environment). 3. Add a subnet dedicated to the Entra DS domain controllers (for example, zava-entra-dc). This subnet will host the managed domain controller resources created by Entra DS and you won’t actually deploy VMs there. Important Keep this DC subnet separate from your workload subnets. You can use NSGs, but avoid blocking Entra DS management traffic. Step 2 – Add a workload subnet for VMs 1. In the same virtual network, create a second subnet (for example, zava-domain-vms) for domain-joined workloads such as IIS VMs. This special subnet is where you’ll deploy the Windows Server VM that joins the Entra DS domain. Step 3 – Deploy Microsoft Entra Domain Services In the Azure portal, create a new Microsoft Entra Domain Services managed domain by performing the following steps: 1. Select the resource group you created earlier. 2. Confirm the DNS domain name (for example, zava.support)—this comes from your Entra tenant’s custom domain. 3. Choose the region (same region as the virtual network). 4. Keep the default Enterprise SKU unless you have a specific need for another. 5. On the Networking page: · Select the virtual network you created. · Select the DC subnet for the managed domain controllers. 6. On the Administration page note that the AAD DC Administrators group (legacy name shown in the portal) is effectively the Domain Admins equivalent for the managed domain. Any user you add to this group in Entra becomes a domain admin in Entra DS. 7. Configure synchronization scope between Entra and Entra DS. · All accounts (default) – synchronizes both cloud-only and synchronized users. · Cloud-only accounts – useful when you’re already syncing on-prem identities and you only want specific cloud accounts in Entra DS. 8. Review the Security settings page. By default: · NTLMv1 disabled. · You can enable/disable NTLM password sync, or effectively disable NTLM entirely. · RC4 encryption disabled by default. · Kerberos armoring enabled by default. · LDAP signing and LDAP channel binding enabled by default. 9. Review your configuration and create the Entra DS managed domain. Note after deployment, you cannot change: • The managed domain DNS name • Subscription • Resource group • Virtual network and subnet used by Entra DS Step 4 – Fix virtual network DNS with Entra DS health checks 1. Once deployment completes, open the Entra DS resource and go to View health. 2. Run the health checks. If the diagnostic reports that the virtual network DNS servers are not set to the Entra DS managed DC IPs, select Fix to automatically configure the VNet’s DNS servers. · In Entra DS, note the DNS server IPs (for example, 172.16.0.4 and 172.16.0.5). · In the virtual network’s DNS settings, confirm these IPs are configured as custom DNS servers. Tip Any VM in this virtual network that needs to join the managed domain must use these Entra DS DNS addresses. Step 5 – Add administrators to the AAD DC Administrators group 1. In the Entra admin center, go to Groups > All groups and locate AAD DC Administrators. 2. Open the group and add your primary admin account (for example, prime@zava.support) and add a dedicated domain admin–style account (for example, adds.prime@zava.support) to be the primary administrator for the managed domain. Important note: You’ll need to change the password of any Entra account you want to use in the managed AD DS domain after deploying Entra DS. This will configure password synchronization between Entra and Entra DS, allowing you to use the Entra account. If you don’t change the password, you’ll be unable to use the account with Entra DS even though it will function normally in other parts of Azure. This trips a lot of people up. Step 6 – Create a Windows Server IaaS VM on the workload subnet 1. In the Azure portal, create a new Windows Server VM (for example, an IIS server): 1. Place it in the same resource group. 2. Select the virtual network you created earlier. 3. Attach it to the workload subnet (for example, zava-domain-vms). 4. Configure a local administrator account (for example, username prime with a strong password). 2. On the Management blade, note the option “Login with Microsoft Entra ID”: 1. This enables direct Entra login to the VM but does not join the VM to the Entra DS domain. 2. For this walkthrough, you’ll join the VM to Entra DS using classic domain join so don’t need to enable this option. 3. Complete the wizard and deploy the VM. Step 7 – Connect to the VM and verify DNS 1. Once the VM is deployed, open the VM in the portal and select Connect > RDP. 1. Request a JIT RDP port opening if required. 2. Download the RDP file and open it with Remote Desktop Connection. 2. Sign in with the local administrator account you configured when deploying the VM and not your Entra account. 3. In the VM, open a command prompt and run: ipconfig /all 1. Confirm that the DNS servers are the Entra DS managed IPs (for example, 172.16.0.4 and 172.16.0.5). If DNS is wrong Double-check the VNet’s DNS settings and ensure the VM is attached to the correct virtual network and subnet, then restart the VM. Step 8 – Join the VM to the Entra DS domain 1. On the VM, open Server Manager and select Local Server. 2. Next to Workgroup, select the workgroup name to open System Properties (Computer Name tab). 3. Select Change… and then: · Under Member of, select Domain. · Enter the Entra DS domain name (for example, zava.support). 4. When prompted for credentials, use an account that’s a member of AAD DC Administrators, such as adds.prime@zava.support, and enter the password. 5. When you receive the confirmation that the computer has joined the domain, restart the VM. Step 9 – Sign in with an Entra DS domain account 1. After the VM restarts, reconnect via RDP using the VM’s public IP and: · Username: your domain UPN (for example, adds.prime@zava.support). · Password: the account’s password. 2. Confirm that you are signed in as a domain user in the Entra DS managed domain. Step 10 – Use AD DS and DNS tools on the domain-joined VM 1. Install and open Active Directory Users and Computers (RSAT) on the VM. · Browse the managed domain structure. · Notice containers such as AADDC Computers, AADDC Users, and groups like Domain Admins that map back to Entra groups. 2. Create an organizational unit (OU), for example IIS Servers, to contain IIS VMs. 3. Open Group Policy Management and: · Create a Group Policy Object targeting the IIS Servers OU. · Link and configure settings as required (hardening, IIS config, etc.). 4. Open the DNS Manager console on the VM, which now connects to the Entra DS–managed DNS servers. 5. Create a new Host (A) record, for example: · Name: iis3 · FQDN: iis3.zava.support · IP address: the appropriate internal address. 6. Open a command prompt and verify DNS resolution with: nslookup iis3.zava.support • Confirm it returns the correct IP address. Entra DS gives you familiar AD capabilities—domain join, Group Policy, and DNS—without the overhead of running and maintaining your own DC VMs in Azure. You can find out more at: https://learn.microsoft.com/en-us/entra/identity/domain-services/overview1.1KViews1like0CommentsGetting Started with Windows Admin Center Virtualization Mode
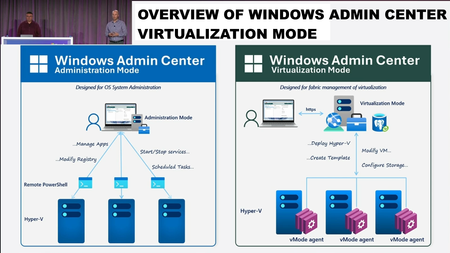
Getting Started with Windows Admin Center Virtualization Mode Windows Admin Center (WAC) Virtualization Mode is a new, preview experience for managing large Hyper-V virtualization fabrics—compute, networking, and storage—from a single, web-based console. It’s designed to scale from a handful of hosts up to thousands, centralizing configuration and day-to-day operations. This post walks through: • What Virtualization Mode is and its constraints • How to install it on a Windows Server host • How to add an existing Hyper-V host into a resource group Prerequisites and Constraints Before you begin, note the current preview limitations: • The WAC Virtualization Mode server and the Hyper-V hosts it manages must be in the same Active Directory domain. • You cannot install Virtualization Mode side-by-side with a traditional WAC deployment on the same server. • Do not install Virtualization Mode directly on a Hyper-V host you plan to manage. – You can install it on a VM running on that host. • Plan for at least 8 GB RAM on the WAC Virtualization Mode server. For TLS, the walkthrough assumes you have an Enterprise CA and are deploying domain-trusted certificates to servers, so browsers automatically trust the HTTPS endpoint. You can use a self signed certificate, but you’ll end up with all the fun that entails when you use WAC-V from a host on which the self signed cert isn’t installed. Given the domain requirements of WAC-V and the hosts it manages, going the Enterprise CA method seemed the path of least resistance. Step 1 – Install the C++ Redistributable On your Windows Server 2025 host that will run WAC Virtualization Mode: 1. Open Windows Terminal or PowerShell. 2. Use winget to search for the VC++ redistributable: powershell winget search "VC Redist" 3. Identify the package corresponding to “Microsoft Visual C++ 2015–2022 Redistributable” (or equivalent). 4. Install it with winget, for example: powershell winget install "Microsoft.VC++2015-2022Redist-x64" This fulfills the runtime dependency for the WAC Virtualization Mode installer. Step 2 – Install Windows Admin Center Virtualization Mode 1. Download the installer 1. Download the Windows Admin Center Virtualization Mode installer from the Windows Insider Preview location provided in the official documentation. Save it to a local folder on the WAC host. 2. Run the setup wizard 1. Double-click the downloaded binary. 2. Approve the UAC prompt. 3. In the Welcome page, proceed as with traditional WAC setup. 3. Accept the license and choose setup type 1. Accept the license agreement. 2. Choose Express setup (suitable for most lab and PoC deployments). 4. Select a TLS certificate 1. When prompted for a TLS certificate: 1. Select a certificate issued by your Enterprise CA that matches the server name. 2. Using CA-issued certs ensures all domain-joined clients will trust the site without manual certificate import. 5. Configure PostgreSQL for WAC 1. Virtualization Mode uses PostgreSQL as its configuration and state database. 2. When prompted: 1. Provide a strong password for the database account WAC will use. 2. Record this securely if required by your org standards. 6. Configure update and diagnostic settings 1. Choose how WAC should be updated (manual/automatic). 2. Set diagnostic data preferences according to your policy. 7. Complete the installation 1. Click Install to deploy: 1. The WAC Virtualization Mode web service 2. The PostgreSQL database instance 2. When installation completes, click Finish. Step 3 – Sign In to Virtualization Mode 1. Open a browser on a domain-joined machine and browse to the WAC URL (for example, https://wac-vmode01.contoso.internal). 2. Sign in with your domain credentials that have appropriate rights to manage Hyper-V hosts (for example, DOMAIN\adminuser). 3. You’ll see the new Virtualization Mode UI, which differs significantly from traditional WAC and is optimized for fabric-wide management. Step 4 – Create a Resource Group Resource groups help you logically organize Hyper-V servers you’ll manage (for example, by site, function, or cluster membership). 1. In the Virtualization Mode UI, select Resource groups. 2. Click Create resource group. 3. Provide a name, such as Zava-Nested-Vert. 4. Save the resource group. You now have a logical container ready for one or more Hyper-V hosts. Step 5 – Prepare the Hyper-V Host Before adding an existing Hyper-V host: 1. Ensure the host is: 1. Running Hyper-V and reachable by FQDN (for example, zava-hvA.zavaops.internal). 2. In the same AD domain as the WAC Virtualization Mode server. 2. Temporarily open File and Printer Sharing from the Hyper-V host’s firewall to the WAC Virtualization Mode server: 1. This is required for initial onboarding. 2. After onboarding, you can re-lock firewall rules according to your security baseline. Step 6 – Add a Hyper-V Host to the Resource Group 1. In the WAC Virtualization Mode UI, go to your resource group. 2. Click the ellipsis (…) and choose Add resource. 3. On the Add resource page, select Compute (you’re adding a Hyper-V server, not a storage fabric resource). 4. Enter the Hyper-V host’s FQDN (for example, zava-hvA.zavaops.internal). 5. Confirm the host resolves correctly and proceed. Configure Networking Template 1. On the Networking page, assign fabric roles to NICs using the network template model: 1. Each NIC can be tagged for one or more roles: 1. Compute 2. Management 3. Storage 2. In a simple, single-NIC lab scenario, you may assign Compute, Management, and Storage all to Ethernet0. 3. All three roles must be fully assigned across available adapters before you can proceed. Configure Storage 1. On the Storage page, specify the storage model: 1. For an existing host using local disks, choose Use existing storage. 2. In future, you can select SAN or file server storage when those options are available and configured in your environment. Configure Compute Properties 1. On the Compute page, configure host-level defaults: 1. Enable or disable Enhanced Session Mode. 2. Set the maximum concurrent live migrations. 3. Confirm or update the default VM storage path. 2. Review the configuration, click Next, then Submit. 3. The Hyper-V host is registered into the resource group and becomes manageable via Virtualization Mode. Step 7 – Verify Host and VM Management With the host onboarded: 1. Open the resource group and select the Hyper-V host. 2. You’ll see a streamlined view similar to traditional WAC, with nodes for: 1. Event logs 2. Files 3. Networks 4. Storage 5. Windows Update 6. Virtual Machines 3. To validate functionality, create a test VM: 1. Go to Virtual Machines → Add. 2. Provide a VM name (for example, WS25-temp). 3. Set vCPUs (for example, 2). 4. Optionally enable nested virtualization. 5. Select the appropriate virtual switch. 6. Click Create, then attach an ISO or existing VHDX and complete OS setup. ▶️ Public Preview: https://aka.ms/WACDownloadvMode ▶️ Documentation: https://aka.ms/WACvModeDocs3.6KViews2likes6CommentsAzure File Sync with ARC... Better together.
Hello Folks! Managing file servers across on-premises datacenters and cloud environments can be challenging for IT professionals. Azure File Sync (AFS) has been a game-changer by centralizing file shares in Azure while keeping your on-premises Windows servers in play. With AFS, a lightweight agent on a Windows file server keeps its files synced to an Azure file share, effectively turning the server into a cache for the cloud copy. This enables classic file server performance and compatibility, cloud tiering of cold data to save local storage costs, and capabilities like multi-site file access, backups, and disaster recovery using Azure’s infrastructure. Now, with the introduction of Azure Arc integration for Azure File Sync, it gets even better. Azure Arc, which allows you to project on-prem and multi-cloud servers into Azure for unified management, now offers an Azure File Sync agent extension that dramatically simplifies deployment and management of AFS on your hybrid servers. In this post, I’ll explain how this new integration works and how you can leverage it to streamline hybrid file server management, enable cloud tiering, and improve performance and cost efficiency. You can see the E2E 10-Minute Drill - Azure File sync with ARC, better together episode on YouTube below. Azure File Sync + Azure Arc: Better Together Azure File Sync has already enabled a hybrid cloud file system for many organizations. You install the AFS agent on a Windows Server (2016 or later) and register it with an Azure Storage Sync Service. From that point, the server’s designated folders continuously sync to an Azure file share. AFS’s hallmark feature is cloud tiering, older, infrequently used files can be transparently offloaded to Azure storage, while your active files stay on the local server cache. Users and applications continue to see all files in their usual paths; if someone opens a file that’s tiered, Azure File Sync pulls it down on-demand. This means IT pros can drastically reduce expensive on-premises storage usage without limiting users’ access to files. You also get multi-site synchronization (multiple servers in different locations can sync to the same Azure share), which is great for branch offices sharing data, and cloud backup/DR by virtue of having the data in Azure. In short, Azure File Sync transforms your traditional file server into a cloud-connected cache that combines the performance of local storage with the scalability and durability of Azure. Azure Arc comes into play to solve the management side of hybrid IT. Arc lets you project non-Azure machines (whether on-prem or even in other Clouds) into Azure and manage them alongside Azure VMs. An Arc-enabled server appears in the Azure portal and can have Extensions installed, which are components or agents that Azure can remotely deploy to the machine. Prior to now, installing or updating the Azure File Sync agent on a bunch of file servers meant handling each machine individually (via Remote Desktop, scripting, or System Center). This is where the Azure File Sync Agent Extension for Windows changes the game. Using the new Arc extension, deploying Azure File Sync is as easy as a few clicks. In the Azure Portal, if your Windows server is Arc-connected (i.e. the Azure Arc agent is installed and the server is registered in Azure), you can navigate to that server resource and simply Add the “Azure File Sync Agent for Windows” extension. The extension will automatically download and install the latest Azure File Sync agent (MSI) on the server. In other words, Azure Arc acts like a central deployment tool: you no longer need to manually log on or run separate install scripts on each server to set up or update AFS. If you have 10, 50, or 100 Arc-connected file servers, you can push Azure File Sync to all of them in a standardized way from Azure – a huge time saver for large environments. The extension also supports configuration options (like proxy settings or automatic update preferences) that you can set during deployment, ensuring the agent is installed with the right settings for your environment Note: The Azure File Sync Arc extension is currently Windows-only. Azure Arc supports Linux servers too, but the AFS agent (and thus this extension) works only on Windows Server 2016 or newer. So, you’ll need a Windows file server to take advantage of this feature (which is usually the case, since AFS relies on NTFS/Windows currently). Once the extension installs the agent, the remaining steps to fully enable sync are the same as a traditional Azure File Sync deployment: you register the server with your Storage Sync Service (if not done automatically) and then create a sync group linking a local folder (server endpoint) to an Azure file share (cloud endpoint). This can be done through the Azure portal, PowerShell, or CLI. The key point is that Azure Arc now handles the heavy lifting of agent deployment, and in the future, we may see even tighter integration where more of the configuration can be done centrally. For now, IT pros get a much simpler installation process – and once configured, all the hybrid benefits of Azure File Sync are in effect for your Arc-managed servers. Key Benefits for IT Pros: Azure File Sync + Azure Arc Centralized Management Azure Arc provides a single control plane in Azure to manage file services across multiple servers and locations. You can deploy updates or new agents at scale and monitor status from the cloud—reducing overhead and ensuring consistency. Simplified Deployment No manual installs. Azure Arc automates Azure File Sync setup by fetching and installing the agent remotely. Ideal for distributed environments, and easily integrated with automation tools like Azure CLI or PowerShell. Cost Optimization with Cloud Tiering Offload rarely accessed files to Azure storage to free local disk space and extend hardware life. Cache only hot data (10–20%) locally while leveraging Azure’s storage tiers for lower TCO. Improved Performance Cloud tiering keeps frequently used files local for LAN-speed access, reducing WAN latency. Active data stays on-site; inactive data moves to the cloud—delivering a smoother experience for distributed teams. Built-In Backup & DR Azure Files offers redundancy and point-in-time recovery via Azure Backup. If a server fails, you can quickly restore from Azure. Multi-site sync ensures continued access, supporting business continuity and cloud migration strategies. Getting Started with Azure File Sync via Arc Prepare Azure Arc and Servers Connect Windows file servers (Windows Server 2016+) to Azure Arc by installing the Connected Machine agent and onboarding them. Refer to Azure Arc documentation for setup. Deploy Azure File Sync Agent Extension Install the Azure File Sync agent extension on Arc-enabled servers using the Azure portal, PowerShell, or CLI. Verify the Azure Storage Sync Agent is installed on the server. See Microsoft Learn for detailed steps. Complete Azure File Sync Setup In the Azure portal, create or open a Storage Sync Service. Register the server and create a Sync Group to link a local folder (Server Endpoint) with an Azure File Share (Cloud Endpoint). Configure cloud tiering and free space settings as needed. Test and Monitor Allow time for initial sync. Test file access (including tiered files) and monitor sync status in the Azure portal. Use Azure Monitor for health alerts. Explore Advanced Features Enable options like cloud change enumeration, NTFS ACL sync, and Azure Backup for file shares to enhance functionality. Resources and Next Steps For more info and step-by-step guidance, check out these resources: Microsoft Learn – Azure File Sync Agent Extension on Azure Arc: Official documentation on installing and managing the AFS agent via Azure Arc. Azure File Sync Documentation: Comprehensive docs for Azure File Sync, including deployment guides, best practices, and troubleshooting. Azure Arc Documentation: Learn how to connect servers to Azure Arc and manage extensions. This is useful if you’re new to Arc or need to meet prerequisites for using the AFS extension. You, as an IT Pro, can provide your organization with the benefits of cloud storage – scalability, reliability, pay-as-you-go economics – while retaining the performance and control of on-premises file servers. All of this can be achieved with minimal overhead, thanks to the new Arc-delivered agent deployment and the powerful features of Azure File Sync. Check it out if you have not done so before. I highly recommend exploring this integration to modernize your file services. Cheers! Pierre Roman739Views1like0CommentsRequesting and Installing an SSL Certificate for Internet Information Server (IIS)
Generate a Certificate Signing Request (CSR) Generate the request using the Certificates snap-in in Microsoft Management Console (MMC). Step 1: Open the Certificates Snap-In Press Windows + R, type mmc, and press Enter. Go to File > Add/Remove Snap-in. Select Certificates and click Add. Choose Computer account, then click Next. Select Local computer and click Finish. Click OK to close the Add/Remove window. Step 2: Start the CSR Wizard In the left pane, expand Certificates (Local Computer). Right-click Personal and select: All Tasks → Advanced Operations → Create Custom Request Step 3: Configure the Request On the Certificate Enrollment page, click Next. Select Proceed without enrollment policy and click Next. On the “Certificate Information” page, expand Details and click Properties. On the General tab: Enter a friendly name, e.g., WS25-IIS Certificate. On the Subject tab: Under Subject name, choose Common Name. Enter the fully qualified domain name (FQDN), e.g. ws25-iis.windowserver.info. Click Add. Under Alternative name, choose DNS. Enter the same FQDN and click Add. On the Extensions tab: Under Key Usage, ensure Digital Signature and Key Encipherment are selected. Under Extended Key Usage, add Server Authentication. On the Private Key tab: Under Cryptographic Provider, select RSA, Microsoft Software Key Storage Provider. Set Key size to 2048 bits. Check Make private key exportable and Allow private key to be archived. Click Apply, then OK, and then Next. Step 4: Save the Request Choose a location to save the request file (e.g. C:\Temp). Ensure the format is set to Base 64. Provide a filename such as SSLRequest.req. Click Finish. You can open the file in Notepad to verify the Base64-encoded request text. Submit the CSR to a Certification Authority You can use an internal Windows CA or a public CA. The example below assumes a web enrollment interface. Step 1: Open the CA Web Enrollment Page Navigate to your CA’s enrollment site. If the server does not trust the CA, you may receive a warning. You'll need to or install the CA certificate as needed. Step 2: Submit an Advanced Certificate Request Select Request a certificate. Choose advanced certificate request. Open the CSR in Notepad, copy the Base64 text, and paste it into the request form. Click Submit. Step 3: Approve the Request (if required) If your CA requires approval, sign in to the CA server and approve the pending request. Step 4: Download the Issued Certificate Return to the CA web enrollment page. View the status of pending requests. Locate your request and select it. Choose the Base 64 encoded certificate format. Download the certificate. Save it to a known location and rename it meaningfully (e.g. WS25-IIS-Cert.cer). Install the SSL Certificate Double-click the .cer file to open it. Click Install Certificate. Choose Local Machine as the store location. When prompted for the store, select: Place all certificates in the following store Choose Personal Click Next, then Finish. Confirm the success message by clicking OK. The certificate is now imported and available for use by IIS. Bind the Certificate in IIS Step 1: Open IIS Manager Open Server Manager or search for IIS Manager. In the left pane, expand the server and select your website (e.g., Default Web Site). Step 2: Add an HTTPS Binding In the Actions pane, click Bindings. In the Site Bindings window, click Add. Select: Type: https Hostname: the FQDN used in the certificate (e.g., ws25-iis.windowserver.info) SSL Certificate: choose the certificate you installed (e.g. WS25-IIS Certificate) Click OK, then Close. Test the HTTPS Connection Open Microsoft Edge (or your preferred browser). Browse to the site using https:// and the FQDN. Example: https://ws25-iis.windowserver.info Confirm you see the IIS default page (or your site’s content). Click the padlock in the address bar: Verify the certificate is valid. Check the certificate details if desired. If the page loads securely without warnings, the certificate is installed and bound correctly. 3.4KViews1like0Comments