varghesejoji
2 TopicsCoreDNS in AKS: service discovery, upstream DNS, and failover
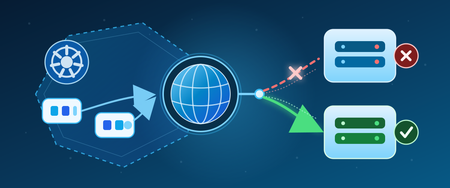
1. Where CoreDNS fits in AKS A pod can resolve another Kubernetes Service but fail to resolve a database name outside the cluster. CoreDNS can be running normally in both cases. That distinction matters because several problems can look like the same DNS outage: A cluster Service name fails. The namespace, Service record, or path from the pod to cluster DNS may be wrong. A name outside the cluster fails. CoreDNS may be reachable, but the upstream server or its network path may not be. A lookup eventually succeeds, but the application fails. The application may have stopped waiting before DNS returned an answer. CoreDNS is the default cluster DNS service in AKS. It runs as pods in kube-system, rather than as code inside your application or as a server hosted in the AKS control plane. It has two important jobs: Kubernetes service discovery: Answer names associated with Kubernetes resources, so workloads do not have to track changing addresses. Upstream forwarding: Send queries that require another DNS server to the configured upstream resolvers. Microsoft's AKS DNS concepts guide explains this architecture. The key operational lesson is simple: CoreDNS is part of the resolution path, but it is not the owner of every DNS answer. Who this is for: Platform engineers, application developers, and operations teams who want a practical understanding of CoreDNS in AKS. 2. How a pod gets a DNS answer For a typical pod using dnsPolicy: ClusterFirst, without a node-local DNS layer, the path looks like this: Application in a pod -> cluster DNS Service: kube-dns -> CoreDNS pod -> Kubernetes Service information: answer a cluster Service name -> upstream DNS server: forward a name handled outside the cluster -> DNS answer returns to the application The Service is still named kube-dns even when CoreDNS handles its traffic. That name does not mean the cluster is running the older kube-dns implementation. Kubernetes configures the pod's resolver settings, including its nameserver and search domains. For Linux containers, these are visible in /etc/resolv.conf. Cluster Service names Consider a regular ClusterIP Service named orders in the checkout namespace. With the cluster domain cluster.local, its full name is: orders.checkout.svc.cluster.local CoreDNS's kubernetes plugin uses Kubernetes resource information to answer that name with the Service's cluster IP. It does not need to ask a corporate or public DNS server for that Service record. The namespace matters. A pod in checkout may use the short name orders; a pod in another namespace normally needs orders.checkout or the full name. See Kubernetes DNS for Services and Pods for the naming rules. Names handled by another DNS server For a name outside its configured cluster zones, CoreDNS can use the forward plugin to contact another DNS server. That may be an Azure-provided resolver or a custom resolver, depending on the cluster's network and DNS configuration. Do not assume that every AKS cluster forwards to the same address or that two configured addresses always mean primary and backup. Inspect the effective CoreDNS configuration and the upstream resolver settings it references. Caching can also change the path. A valid cached answer may avoid an upstream query entirely. LocalDNS can change the first hop If AKS LocalDNS is enabled, the pod can contact a DNS proxy and cache on its node first. Cluster-domain queries are forwarded to CoreDNS, while other queries can go through CoreDNS or directly to an upstream, depending on the DNS policy and LocalDNS configuration. The diagram above is therefore a starting point, not a universal packet trace. Check whether LocalDNS is active before deciding which resolver to inspect. The AKS DNS concepts guide describes these alternate paths. 3. What AKS manages and what you can customize AKS manages the CoreDNS deployment and its main configuration. The Corefile, stored in the coredns ConfigMap, tells CoreDNS which plugins and forwarding rules to use. Three plugin responsibilities are useful to recognize: Plugin What it does kubernetes Answers DNS queries for configured Kubernetes zones using cluster resource information. forward Sends matching queries to upstream DNS servers. cache Reuses stored DNS responses when enabled and allowed by its configuration. An upstream failure affects queries that need that upstream. It does not automatically mean that normal Kubernetes Service records have become unavailable. For supported customization, AKS provides the coredns-custom ConfigMap. Microsoft documents custom entries with names ending in .server or .override, including domain-specific forwarding examples. Do not edit the managed main Corefile as a shortcut. A CoreDNS option being valid does not mean that every way of applying it is supported in AKS. For example, forwarding one private domain to designated resolvers is different from replacing the managed root forwarding behavior for the entire cluster. Follow the AKS CoreDNS customization guidance for the intended change. Also check the deployed image. The tests discussed here used CoreDNS 1.13.1. A setting shown in documentation for a newer CoreDNS release may not exist in that image. 4. How CoreDNS selects and checks upstream servers Once a query reaches the forward plugin, three separate decisions matter: which server to try, when to try another, and whether a server should be skipped on later queries. Selection policy chooses the starting server For CoreDNS 1.13.1: random chooses among eligible upstreams. It is the default when no policy is specified. round_robin rotates the initial choice. sequential tries upstreams in their configured order, preferring the first one not marked unhealthy. Here is an illustrative isolated-lab fragment, not a change to apply to AKS-managed CoreDNS. The addresses are placeholders: forward . <primary-dns-ip> <backup-dns-ip> { policy sequential failover SERVFAIL } policy sequential controls the order. failover SERVFAIL permits another upstream attempt when the response says the server could not complete the lookup. Those are different settings for different decisions. A missing reply and an error reply are different If packets are silently dropped, CoreDNS receives no answer and must wait for a timeout. If the server returns SERVFAIL, CoreDNS has received a DNS error response. By default, the forward plugin returns that SERVFAIL to the caller instead of trying another server. An explicit failover rule can change the handling of selected response codes. Protocol matters too. User Datagram Protocol (UDP) does not open a connection before sending the query. Transmission Control Protocol (TCP) does. In this release, the read timeout is two seconds. Opening a TCP connection has a separate timeout that starts at 30 seconds and can decrease toward one second based on recent connection times. There is no single timeout that describes every failure. These behaviors are documented in the CoreDNS 1.13.1 forward reference. Health checks change later selections The forward plugin starts upstream health checking after a network error. It does not continuously poll every untouched healthy upstream before any failure occurs. The documented default check interval is 0.5 seconds. That is not a promise that failover finishes in half a second: the triggering query may already be waiting for a timeout. max_fails controls how many failed health checks mark an upstream unhealthy. Its default is 2; the application-impact lab used 1 to make the change easier to observe. A DNS error response can still prove network reachability. Health checking therefore does not prove that an upstream can successfully resolve every name your application needs. Each CoreDNS process keeps its own upstream health state. Testing one replica does not establish the state of every replica, and restarting a resolver resets that state. The health-check guide and evidence distinguish source-backed behavior from measured, partial, and inconclusive cases. 5. What failure tests on AKS showed The run used Kubernetes v1.35.7 and image mcr.microsoft.com/oss/v2/kubernetes/coredns:v1.13.1-20. Tests ran against separate CoreDNS resolvers and controlled upstream servers in an isolated namespace. They did not inject faults into AKS-managed CoreDNS or validate every production DNS path, including LocalDNS. The test resolver used sequential selection and max_fails 1. Query times below are in milliseconds (ms). Test condition Recorded result First UDP query after silent primary packet loss Backup answer in 2,000 ms Independent one-second and two-second client timeouts Both clients received no response before timing out Five-second client timeout Backup answer in 2,000 ms Three later queries after the primary was marked unhealthy Backup answers, each displayed as 0 ms Primary returned SERVFAIL, with default handling SERVFAIL returned to the client Same error with failover SERVFAIL configured Successful answer from the backup First forced-TCP query with silent primary packet loss SERVFAIL, no address answer, after 30,000 ms Both test upstreams blocked No response before the five-second client timeout Five additional independent UDP failure cycles reached the backup in 2,000-2,004 ms on the first query. Their later queries took 0-4 ms. The result summary and raw query output retain the details. These are observations for one image and controlled failure conditions, not guaranteed AKS timings. A displayed 0 ms reflects the tool's timing precision, not zero latency. The practical lesson: an available CoreDNS pod, a reachable backup, and a successful application request are three different things. 6. Troubleshooting the right part of the DNS path Start by separating cluster Service resolution from upstream resolution. Then inspect the configuration before changing it. Prerequisites: PowerShell 7+, installed and authenticated kubectl, and permission to read CoreDNS Deployments, pods, Services, and ConfigMaps in the intended cluster. Check the context first and stop if it is not the correct cluster. The following commands are read-only. kubectl config current-context kubectl get deployment coredns -n kube-system ` -o jsonpath='{.spec.template.spec.containers[0].image}' kubectl get pods -n kube-system -l k8s-app=kube-dns kubectl get service kube-dns -n kube-system kubectl get configmap coredns -n kube-system -o yaml Use the findings to narrow the investigation: Only a cluster Service name fails: Check the Service name, namespace, and record type. Confirm that the Service exists and that the pod is using the expected cluster DNS path. Only names requiring an upstream fail: Check the matching forwarding rule, upstream reachability, and the upstream's ability to resolve that name. Only some pods fail: Compare their DNS policies, resolver settings, node-local DNS path, and network access. A successful query from another pod is useful, but not conclusive. The first query is slow and later queries are fast: Check upstream health state and caching. Do not assume the first result was an unrelated glitch. CoreDNS returns SERVFAIL: Identify whether it came from an upstream response or another failure. Do not assume it means packets were lost. Measure DNS latency with dig's Query time. The elapsed time of kubectl exec also includes Kubernetes API communication and process startup. Finally, look at the application. A reused connection may avoid DNS, a cached answer may hide an outage, and retries may increase load. A client can time out even if CoreDNS eventually finds an answer. The latest suite recorded 13 passing DNS and environment checks and five blocked application-specific cases. No representative application was supplied, so caching, connection reuse, retries, application telemetry, and service-level objective (SLO) impact were not established. A DNS test alone cannot prove the user's experience. 7. A repeatable way to validate CoreDNS behavior The CoreDNS repository folder organizes these questions into five detailed guides: Guide What to validate Selection policy Which upstream is tried first, and how the policy behaves during failure. Timeout behavior The difference between waiting for a reply, opening a connection, and the client's own timeout. Failover mechanism Network failures, DNS error responses, recovery, and all-upstream failure. Health checks How errors start checks and how health state affects later queries. Application and user impact Which DNS results are measured and which application effects still require a workload test. Each guide maps a question to named test cases, expected results, pass/fail criteria, and an Established evidence section. That section should tell you what happened, when it happened, and what the result does not prove. Prerequisites for fault testing: An authorized test cluster, PowerShell 7+, authenticated kubectl, permission to create and remove namespace-local test resources, and a network implementation that enforces the test NetworkPolicies. Review the selected guide's full setup and cleanup instructions before execution. Use an isolated test resolver. Do not change managed kube-system resources to reproduce an upstream failure. If another test namespace already exists and ownership is unclear, choose a unique namespace instead of deleting it. The published examples include the original lab context and paths beginning with 07-CoreDNS. A GitHub clone uses coredns. Adjust these values for your environment before running a suite. Cleanup is part of the test. In the current run, the unique test namespace was removed, all six base-lab Deployments remained Available, both managed CoreDNS replicas remained Available, and the managed Deployment resource version was unchanged. 8. Conclusion and next steps CoreDNS connects AKS workloads to both Kubernetes service discovery and the wider DNS environment. Understanding where a query is answered is the first step toward understanding why it failed. Start with the pod's DNS path. Inspect the CoreDNS version and configuration. Separate Service records from upstream queries. Then test selection, timeouts, health checks, and application behavior without changing managed cluster DNS. Understand the path before changing the policy. Validate the behavior before promising the outcome. Try it now Prerequisites: Git, PowerShell, network access to GitHub, and a working directory without an existing aks-stuff folder. No Azure permissions are needed to download the guides. These commands do not deploy resources or run failure tests. git clone https://github.com/jvargh/aks-stuff.git Set-Location .\aks-stuff Get-Content .\coredns\README.md Learn more CoreDNS guidance and test suites DNS concepts in AKS Supported CoreDNS customization in AKS Latest validation summary and recorded query output Connect and contribute Share a reproducible finding through the GitHub repository. Include the CoreDNS version, DNS path, test case, failure condition, client timeout, measured result, and cleanup outcome. Remove credentials, private addresses, and customer identifiers before sharing logs. Start here: github.com/jvargh/aks-stuff/tree/main/corednsAKS Pod Scheduling Demystified
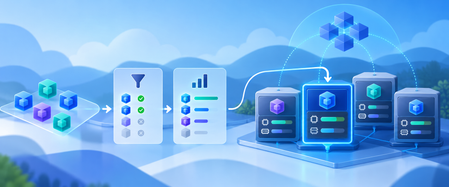
1. The scheduling question Picture four Azure Kubernetes Service (AKS) worker nodes with the same hardware. One keeps receiving new batch Jobs even as its CPU usage climbs. The natural question is: why does Kubernetes send another pod to a node that already looks busy? The answer is that the scheduler does not work like a live CPU load balancer. Its normal resource checks rely on the requests declared by pods. The process has two decisions: Filtering: Which nodes can run the incoming pod? Scoring: Which of those eligible nodes is the best match according to scheduling rules? Binding and runtime come next. The example below follows the same pod through all five stages. 2. Capacity, allocatable, requests, and usage Term What it means Capacity The CPU and memory a node has. Allocatable The portion Kubernetes makes available to pods, after reservations for system services. Requests The CPU and memory a pod asks Kubernetes to reserve for scheduling. Actual usage The CPU and memory containers are using right now. Suppose a node has 16 allocatable CPU cores. Its running pods request 11 cores but are currently consuming 14 cores. Kubernetes counts 5 unrequested cores when deciding whether another pod fits, not 2 idle cores. A CPU limit is different from a request. A request influences placement; a limit can restrict how much CPU a container uses. 3. One pod from arrival to completion We'll follow one batch pod, batch-worker-01, across workers A, B, C, and D. Each worker has 16 allocatable CPU cores and 64 GiB allocatable memory. Figure 1. The entire scheduling journey, with decisions at filtering, scoring, runtime, and Job completion. Follow the same pod from top to bottom. Stage 1: Filtering. Can each node run the pod? A new pod arrives and asks for 0.25 CPU cores (250m) and 0.5 GiB memory (512Mi). The scheduler checks each worker. For CPU and memory, the fit rule uses the formular: Existing requests + Incoming pod request <= Node allocatable The rule is checked separately for CPU and memory. Required placement rules, including taints and affinity, must also pass. Worker Unrequested CPU before pod Unrequested memory before pod Can the 0.25 CPU / 0.5 GiB pod fit? A 4.80 cores 29 GiB Yes B 4.20 cores 32 GiB Yes C 4.40 cores 43 GiB Yes D 4.60 cores 34 GiB Yes Result: All four workers pass filtering. None has won yet. Their actual CPU usage has not entered this calculation. Stage 2: Scoring. Which eligible node ranks highest? For this walkthrough, look at the default NodeResourcesFit LeastAllocated resource-scoring calculation. It favors a node with more capacity not already requested by pods. We use equal CPU and memory weights of 1 each and MaxNodeScore = 100. The Kubernetes source implements the weighted calculation as: LeastAllocated score: Here A is node allocatable capacity, R is requested capacity including the incoming pod, and w is the resource weight. See the official Kubernetes LeastAllocated implementation and scheduler configuration reference. The denominator is 2 here because CPU and memory each have weight 1. The scheduler considers the incoming pod's request, so subtract 0.25 CPU and 0.5 GiB before scoring each candidate: Worker CPU left after pod Memory left after pod Formula using 16 CPU and 64 GiB allocatable Score / 100 A 4.55 28.5 GiB [(4.55/16 × 100) + (28.5/64 × 100)] / 2 36.5 B 3.95 31.5 GiB [(3.95/16 × 100) + (31.5/64 × 100)] / 2 37.0 C 4.15 42.5 GiB [(4.15/16 × 100) + (42.5/64 × 100)] / 2 46.2 D 4.35 33.5 GiB [(4.35/16 × 100) + (33.5/64 × 100)] / 2 39.8 For worker C: Worker C score after accounting for the incoming pod: Result: Worker C ranks first for this resource-scoring calculation. Worker A has slightly more unrequested CPU, but C's larger memory advantage wins under equal weighting. The default Kubernetes scheduler also has other scoring components, including resource balance and image locality. Thus, this is the resource-plugin score, not a guarantee of the final combined result. Stage 3: Binding. Where does the pod go? Assume the other scoring components do not change the ranking. The scheduler assigns batch-worker-01 to worker C. Result: The pod has a selected node. The kubelet on that node can now start its container. Stage 4: Runtime. Why can worker C still become busy? The pod's CPU request stays at 0.25 cores, even if its program starts consuming substantially more CPU. Suppose its workload uses 1.2 cores while it runs. Scheduler accounts for Pod actually consumes 0.25 CPU requested 1.2 CPU cores in use Worker C still has request-based headroom Worker C may be busy running other pods Future pods are checked against requests More overlapping work can increase CPU contention Try the CPU behavior in a test cluster. The following Pod runs two CPU-working Python processes for around 45 seconds. Unlike a sleep command, the processes actively use CPU. Their exact consumption depends on what CPU is available, but their request remains 250m. apiVersion: v1 kind: Pod metadata: name: batch-worker-01 labels: app: batch-cpu-demo spec: restartPolicy: Never containers: - name: worker image: python:3.12-alpine command: - python - -c - | import multiprocessing as mp import time def work(): end = time.monotonic() + 45 while time.monotonic() < end: pass processes = [mp.Process(target=work) for _ in range(2)] for p in processes: p.start() for p in processes: p.join() resources: requests: cpu: 250m memory: 512Mi Save as batch-worker.yaml, then run in an approved test namespace: kubectl apply -n <test-namespace> -f .\batch-worker.yaml kubectl get pod batch-worker-01 -n <test-namespace> -o wide kubectl top pod batch-worker-01 -n <test-namespace> --containers kubectl delete pod batch-worker-01 -n <test-namespace> Run kubectl top while the pod is active, and use Grafana if you want a graph of CPU consumption over time. This tests the difference between requested and actual CPU; a single pod will not demonstrate a lasting node-wide scheduling imbalance. Stage 5: Completion. What happens to its reservation? When the workload finishes and the completed pod stops counting toward active scheduling requests, its 0.25-core reservation is released. Its CPU usage also stops. Worker C may therefore look attractive again when the next Job arrives. A new Job begins a new filtering and scoring cycle. Worker C does not automatically win again, but repeated short-lived Jobs can keep a node busy while reservations are repeatedly freed and reused. The journey in one sentence: A pod fits on four nodes, worker C scores highest under the example resource score, the scheduler binds it there, it runs using more CPU than requested, then finishes and frees its reservation for the next scheduling cycle. 4. Why memory can outweigh CPU All four workers have the same 64 GiB allocatable memory, but their existing pods reserve different amounts: Worker Memory reserved by existing pods Unrequested memory A 35 GiB 29 GiB B 32 GiB 32 GiB C 21 GiB 43 GiB D 30 GiB 34 GiB Worker C does not have more physical memory. It simply has less memory requested by the pods already there. Under equal-weight LeastAllocated scoring, that can be enough to give C the higher resource score even if another worker has more unrequested CPU. 5. How to investigate an uneven placement pattern Start with these three questions: Which nodes were eligible? Compare allocatable resources, pod requests, taints, affinities, and pod-count limits. Why might one node score better? Compare CPU and memory requests, not just live usage. What happened after binding? Compare actual CPU usage, new pods per node, Job completions, and pod startup time. For current node state, use PowerShell and kubectl: kubectl config current-context kubectl get nodes -o wide kubectl describe node <node-name> kubectl describe node shows current state, not what the node looked like last week. In Grafana, look for historical kube_node_status_allocatable, kube_pod_container_resource_requests, kube_pod_info, and container_cpu_usage_seconds_total. Compare nodes at the same timestamps. Where available, use kube_pod_status_scheduled_time for pod scheduling times, rather than treating pod creation time as binding time. For control-plane evidence, AKS can export the kube-scheduler log category through diagnostic settings. These logs establish which pod was bound, where, and when, but do not always contain scoring details. See AKS monitoring resource logs. 6. How to prevent pods piling onto one node A few workload-level changes usually deserve attention before changing scheduler profiles: Right-size CPU requests. If pods commonly consume much more CPU than they request, scheduling can pack too much real work onto a node. Size requests from actual application measurements. Spread related pods. A hostname-based topologySpreadConstraints rule can encourage more even placement. ScheduleAnyway prefers spreading, while DoNotSchedule can block placements that exceed a configured skew. Control batch concurrency. Limit .spec.parallelism for individual Jobs, or use controller-side limits or Kueue admission for many independent Jobs. Reintroduce nodes carefully. Uncordoning immediately makes a node eligible for ordinary scheduling. Test with approved workloads and monitor placements before opening it fully. For example, a Job template can include: topologySpreadConstraints: - maxSkew: 2 topologyKey: kubernetes.io/hostname whenUnsatisfiable: ScheduleAnyway labelSelector: matchLabels: app: batch-worker Remember that ScheduleAnyway is a preference, not a guarantee of equal pod counts. Test rules against your own workload mix. Changing to a bin-packing strategy such as MostAllocated is not an automatic fix for CPU-heavy workloads that under-request CPU. 7. Conclusion and references The Kubernetes scheduler starts with pod requests, not the node's live CPU graph. Filtering determines where the pod can run, and scoring decides which eligible node is preferred. In our example, worker C wins the resource score because its unrequested memory offsets a small CPU difference. Once the pod runs, its real CPU use may exceed what the scheduler reserved. Practical takeaway: Use realistic requests, spread workloads where balance matters, manage Job concurrency, and compare scheduler evidence with runtime metrics before deciding that a busy node is being scheduled incorrectly. Learn more Kubernetes scheduling framework Kubernetes scheduler configuration Kubernetes LeastAllocated scoring source Kubernetes resource management Kubernetes topology spread constraints AKS scheduler guidance AKS control-plane logs