updates
32 TopicsKubernetes Center: Security & LTS/Out-of-Support Version Insights Now Available
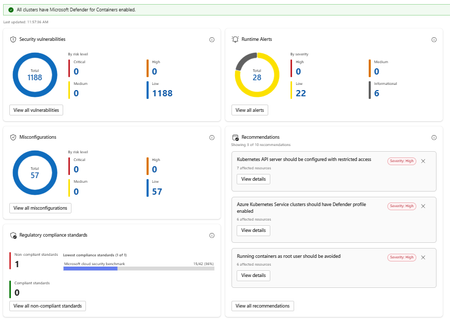
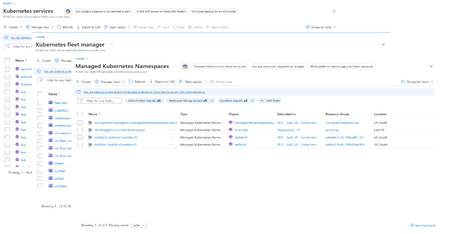
What's New Security Insights: The new Security page in Kubernetes Center gives you an immediate, all clusters or Kubernetes Fleet Manager-wide view of your security posture without leaving the portal. At the summary level you can see: Security vulnerabilities broken down by risk level Runtime alerts categorized by severity Non-compliant regulatory standards, with visibility into which benchmarks your clusters are falling short on Drilling deeper into the security detail view exposes four distinct panels: Security Vulnerabilities show a total count of vulnerabilities across all clusters, broken down by risk tier. Runtime Alerts surfaces live alerts from Defender for Containers categorized by High, Medium, Low, and Informational severity. You can see at a glance whether any active threats require immediate attention, and drill into the full alert list with one click. Misconfigurations show a count of configuration issues detected across your clusters, again broken down by risk level. Regulatory Compliance Standards lets you see which compliance standards your clusters are enrolled in, which are passing, and which are failing. The view surfaces the lowest-performing standard with its pass rate, so you know exactly where to focus remediation effort. Recommendations are shown alongside these panels, providing actionable and prioritized guidance. Each recommendation shows affected resource counts and links directly to remediation details. Note: Security insights require Microsoft Defender for Containers to be enabled. Kubernetes Center will confirm at a glance whether all your clusters have it enabled. Cluster Version Support Status: Stay Ahead of End-of-Support Running an out-of-support Kubernetes version is one of the most common and preventable sources of risk in production environments. The new Cluster Version Support Status panel in Kubernetes Center gives you a clear picture of where every cluster stands. The view breaks your clusters down into four states: Status What it means In support Running a supported Kubernetes version. No action needed. Expiring soon Version support is ending soon. Plan your upgrade. Out of support (LTS eligible) Out of support but eligible for Long Term Support. An easy path to extend coverage. Out of support No longer supported and not LTS eligible. Upgrade required. You can filter the view by cluster tier (Premium, Standard, or Free) to understand exposure by tier and prioritize accordingly. For clusters that are out of support but LTS eligible, a single Enable LTS for Eligible Clusters button lets you act immediately without navigating away. Kubernetes Center brings this into a single, always-on view so platform teams can: Catch version drift before it becomes an incident Spot misconfiguration patterns across clusters, not just within one Act on recommendations without switching tools Report on compliance posture without manual aggregation Try It Out These features are available now in Kubernetes Center in the Azure portal. → Open Security -Kubernetes Center in the Azure portal We'd love to hear what you think. Try the new security and version views with your clusters and share your feedback directly through the portal using the feedback button. FAQ Do I need Microsoft Defender for Containers enabled to use the security features? Yes. Security vulnerabilities, runtime alerts, and misconfiguration data are powered by MS Defender for Containers. Kubernetes Center will show you if any clusters don't have it enabled so you can quickly close that gap. Does this work across all my subscriptions and clusters? Kubernetes Center aggregates data across all AKS clusters you have access to. Make sure you have the appropriate RBAC permissions across the subscriptions you want visibility into. What is LTS and should I enable it for eligible clusters? Long Term Support (LTS) extends the supported lifecycle of a Kubernetes version beyond its standard window. It's available for clusters on eligible versions running the Premium tier. If you have clusters showing "Out of support, LTS eligible," enabling LTS is the fastest way to restore support coverage while you plan a full version upgrade. Is there a cost to use Kubernetes Center? Kubernetes Center itself is part of the Azure portal experience and there is no additional charge. Note that Microsoft Defender for Containers, which powers the security features, is a paid add-on. See the Defender for Containers pricing page for details. Where can I learn more about the Kubernetes version lifecycle? See the AKS Kubernetes version support policy documentation for full details on version support windows, LTS eligibility, and upgrade guidance.640Views1like0Comments
Building Secure AI Platforms in Banking Using Azure Enterprise Architecture
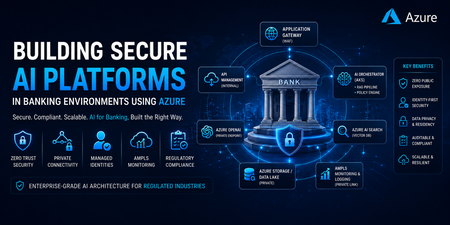
1. Introduction: AI in Banking Is Not Just a Model Problem Modern banking institutions are no longer asking “Can we use AI?” The real question is: “Can we use AI without violating regulatory, security, and data residency constraints?” Unlike public AI applications, banking systems must ensure: No public internet exposure Strict identity-based access control End-to-end auditability Data residency compliance Fully controlled inference pipelines 👉 In enterprise environments, AI success is driven by secure infrastructure—not just model accuracy. 2. Core Design Principle: Controlled Intelligence System Every AI request must follow a security-enforced execution pipeline: User Request ↓ Secure Edge (Application Gateway + WAF) ↓ API Governance Layer (API Management - Internal Mode) ↓ AI Orchestration Layer (AKS / App Services) ↓ Retrieval + Policy Layer (RAG + Guardrails) ↓ Private AI Services (Azure OpenAI) ↓ Observability Layer (AMPLS) ↓ Final Response Key Insight: This is not just an architecture—it is a controlled and auditable execution model. 3. Azure Enterprise AI Architecture (Production-Ready Pattern) A real-world architecture used in banking environments: 4. Private Connectivity Model (Critical for Compliance) Key components: Private Endpoints → Secure PaaS isolation Private DNS Zones → Controlled name resolution VNet Integration → Internal service communication Azure Firewall → Traffic inspection and control ⚠️ Common Production Failure: AKS pods fail to resolve Azure OpenAI private endpoint Root cause: Missing Private DNS links Incorrect VNet configuration 👉 This is one of the most frequent failures in enterprise AI deployments. “Debugging Private Endpoint Failures” Include: nslookup behavior in AKS DNS zone linking check VNet integration validation UDR / Firewall inspection 5. Identity-First Security Model (No Secrets Architecture) Modern banking architectures eliminate static credentials entirely. Authentication Flow: AKS Workload → Managed Identity → Azure AD → Azure Services Key Principle: 👉 Identity is the new security perimeter. Benefits: No API keys or secrets Simplified access management RBAC-based governance Fully auditable access 6. Secure AI Inference Pipeline A production AI request flow: def process_request(user_request): # 1. Authenticate user via Azure AD identity = authenticate_aad(user_request.token) if not identity or not identity.is_valid: return "ACCESS_DENIED" # 2. Enforce rate limiting per identity if not rate_limit(identity): return "RATE_LIMIT_EXCEEDED" # 3. Apply prompt security guardrails (injection protection) safe_prompt = apply_prompt_guardrails(user_request.prompt) # 4. Content safety filtering (PII / harmful content detection) if not content_filter(safe_prompt): return "CONTENT_BLOCKED" # 5. Retrieve secure RAG context context = retrieve_rag_context( query=safe_prompt, secure_mode=True ) # 6. Build final prompt final_prompt = merge_prompt_and_context(safe_prompt, context) # 7. Call Azure OpenAI with circuit breaker protection response = circuit_breaker( lambda: call_openai( prompt=final_prompt, identity=ManagedIdentity() ) ) # 8. Validate and sanitize model output validated_output = sanitize(response) # 9. Log everything for audit + compliance (AMPLS / SIEM) log_to_ampls( identity=identity, request=user_request, response=validated_output ) return validated_output Security controls include: Prompt injection filtering Context grounding (RAG) Output sanitization Full audit logging 7. RAG Architecture: Enterprise AI Backbone User Query → Embedding Model → Azure AI Search (Vector Store) → Context Retrieval → Azure OpenAI → Final Response Why RAG is preferred in banking: No model retraining required Controlled data exposure Easier compliance validation Real-time knowledge updates In banking systems, retrieval is not just about relevance—it is about controlled disclosure of sensitive context 8. Observability with AMPLS (A Critical Yet Overlooked Layer) AI telemetry flows through: Azure Services → Private Link → AMPLS → Log Analytics / App Insights Why this matters: Logs may contain: Sensitive financial data PII Prompt inputs 👉 AMPLS ensures telemetry remains private and compliant. 9. Regulatory Mapping: Banking Requirements to Azure Capabilities Requirement Azure Implementation No public exposure Private Endpoints Identity-based security Azure AD + Managed Identity Audit compliance Log Analytics + AMPLS Data protection Customer-Managed Keys (CMK) Network isolation VNet + Firewall Access governance RBAC + PIM 10. Real-World Production Challenges Common failure points in enterprise AI systems: DNS Misconfiguration – Private endpoints fail resolution Latency Chains – Excessive service hops OpenAI Rate Limits – High enterprise load Identity Propagation Issues – Cross-subscription failures Observability Gaps – Missing distributed tracing 11. Enterprise Architecture Best Practices Design with zero-trust principles Treat AI as a distributed system, not a single component Centralize governance using API Management Never expose AI services publicly Use identity everywhere—no secrets Separate: Control Plane (governance) Data Plane (inference execution) 12. Azure Service Mapping (Quick Reference) Layer Azure Services Edge Security Application Gateway (WAF) API Layer API Management Compute AKS / App Services AI Services Azure OpenAI Retrieval Azure AI Search Data Azure Storage / SQL Identity Azure AD + Managed Identity Networking Private Link + VNet Observability AMPLS + Log Analytics 13. Common Failure Patterns Issue Root Cause AI endpoint unreachable DNS / Private endpoint misconfig Data leakage risk Missing prompt filtering High latency Over-layered architecture Unauthorized access Identity misconfiguration Poor response quality Weak RAG implementation 14. Final Thought In enterprise banking AI systems: Models are replaceable. Architecture is not. The real challenge is designing a system where AI is: Secure Controlled Observable Fully compliant583Views0likes0Comments
Deploying Azure Redis Enterprise with Geo-Replication Using Terraform
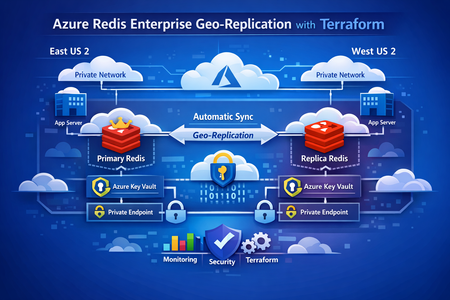
This post walks through a production‑proven pattern for running stateful services across Azure regions using Terraform. We’ll cover a primary–replica Redis architecture, regional isolation with Key Vault and networking, and a clean Terraform parameterization strategy that scales from development to production without duplication. Why Multi‑Region State Is Hard Running applications globally is easy when everything is stateless—if something fails, you redeploy. But stateful services tell a different story. Caches, message brokers, and data stores can’t be treated as disposable. They hold business‑critical data, and downtime or inconsistency quickly becomes customer‑visible. In real‑world systems, common requirements include: Low‑latency reads from multiple regions Automatic recovery when a region becomes unavailable Predictable data consistency Repeatable infrastructure from dev through production Manually configuring this per region doesn’t scale. Drift sets in. Failover is unclear. Backups get forgotten. That’s where Terraform + Azure Managed Redis geo‑replication shines. Github Link : https://github.com/vsakash5/Managed-redis.git High‑Level Architecture We use a primary–replica Redis Enterprise model: Primary Redis Single write endpoint Highly available inside its region Source of truth Replica Redis Read‑only Asynchronously synced from primary Can be promoted during disaster recovery Each region is fully isolated: Separate subnets Separate Key Vaults Private Endpoints only (no public exposure) This prevents shared failure domains and allows each region to operate independently if needed. The Terraform Design Principle Instead of maintaining separate Terraform stacks per region, the key idea is: One reusable module, one tfvars file per environment, multiple regions inside it. The module is written once. Regional differences are supplied via parameter suffixes like: _replica _secondary _tertiary This keeps logic centralized and environments consistent. Core Parameter Layers 1. Environment Identity (Shared) Terraform environment = "dev" # dev | staging | prod context_prefix = "app" Show more lines These values are reused everywhere—names, tags, and identifiers. 2. Primary Region Terraform location = "eastus2" resource_group_name = "rg-app-dev-primary" Show more lines 3. Replica Region Terraform location_replica = "uksouth" resource_group_name_replica = "rg-app-dev-replica" The symmetry is intentional. Terraform can now apply the same module twice without branching logic. Regional Isolation: Networking and Secrets Why isolation matters Geo‑replication copies data, not dependencies. If both Redis instances depend on: the same subnet the same Key Vault then a failure in one region can cascade into the other. Networking (One Subnet per Region) Benefits: Independent NSGs Independent routing Independent capacity planning Key Vault (One per Region) Why this matters: Redis credentials are not replicated Each region stores its own secrets A Key Vault outage doesn’t take both regions down Redis Configuration Primary Redis (Writes Enabled) The geo‑replication group name must match. That’s the logical binding Azure uses to link instances. Private Endpoint‑Only Access No Redis instance is exposed publicly. Each region uses: A private endpoint A workload subnet Internal DNS resolution This means: No public IPs No inbound attack surface Traffic stays on the Azure backbone Linking Primary and Replica Terraform explicitly defines the relationship: Terraform managed_redis_geo_replication_config = { primary_to_replica = { primary_redis_key = "primary" replica_keys = ["replica"] } } Terraform ensures: Primary is created first Replica is deployed second Geo‑replication is established last Environment Scaling: Dev → Staging → Prod The infrastructure pattern never changes. Only values do. Environment Group Name Dev dev-grp Staging stg-grp Prod prod-grp This is how you avoid “snowflake” environments. Disaster Recovery Strategy If the primary region fails: Applications fail over to the replica read endpoint Terraform configuration is updated to: Remove geo‑replication Promote replica config to primary Traffic is fully restored Once the original region recovers, roles can be re‑established cleanly. No click‑ops. No guesswork. Key Lessons Learned 1. Naming is Infrastructure Predictable names enable automation, discovery, and auditing. 2. Key Vault Isolation Beats Availability A shared Key Vault is a shared outage. 3. Parameterization Beats Copy‑Paste Fix once → benefit everywhere. 4. Geo‑Replication Is a Contract Matching replication group names is non‑negotiable. 5. The tfvars File Is the Source of Truth If it’s not in Terraform, it’s not real. Final Thoughts Running stateful services in multiple regions doesn’t require magic— it requires discipline: Isolate aggressively Parameterize consistently Automate everything Test failure often With this approach, adding a new region becomes configuration—not redesign. That’s how infrastructure scales.239Views1like0CommentsBuild Your AI Agent in 5 Minutes with AI Toolkit for VS Code
What if building an AI agent was as easy as filling out a form? No frameworks to install. No boilerplate to copy-paste from GitHub. No YAML to debug at midnight. Just VS Code, one extension, and an idea. AI Toolkit for VS Code turns agent development into something anyone can do — whether you're a seasoned developer who wants full code control, or someone who's never touched an AI framework and just wants to see something work. Let's build an agent. Then let's explore what else this toolkit can do. Getting Set Up You need two things: VS Code — download and install if you haven't already AI Toolkit extension — open VS Code, go to Extensions (Ctrl+Shift+X), search "AI Toolkit", and install it That's it. No terminal commands. No dependencies to wrangle. When AI Toolkit installs, it brings everything it needs — including the Microsoft Foundry integration and GitHub Copilot skills for agent development. Once installed, you'll see a new AI Toolkit icon in the left sidebar. Click it. That's your home base for everything we're about to do. Build an Agent — No Code Required Open the Command Palette (Ctrl+Shift+P) and type "Create Agent". You'll see a clean panel with two options side by side: Design an Agent Without Code — visual builder, perfect for getting started Create in Code — full project scaffolding, for when you want complete control Click "Design an Agent Without Code." Agent Builder opens up. Now fill in three things: Give it a name Something descriptive. For this example: "Azure Advisor" Pick a model Click the model dropdown. You'll see a list of available models — GPT-4.1, Claude Opus 4.6, and others. Foundry models appear at the top as recommended options. Pick one. Here's a nice detail: you don't need to know whether your model uses the Chat Completions API or the Responses API. AI Toolkit detects this automatically and handles the switch behind the scenes. Write your instructions This is where you tell the agent who it is and how to behave. Think of it as a personality brief: Hit Run That's it. Click Run and start chatting with your agent in the built-in playground. Want More Control? Build in Code The no-code path is great for prototyping and prompt engineering. But when you need custom tools, business logic, or multi-agent workflows — switch to code. From the Create Agent View, choose "Create in Code with Full Control." You get two options: Scaffold from a template Pick a pre-built project structure — single agent, multi-agent, or LangGraph workflow. AI Toolkit generates a complete project with proper folder structure, configuration files, and starter code. Open it, customize it, run it. Generate with GitHub Copilot Describe your agent in plain English in Copilot Chat: "Create a customer support agent that can look up order status, process returns, and escalate to a human when the customer is upset." Copilot generates a full project — agent logic, tool definitions, system prompts, and evaluation tests. It uses the microsoft-foundry skill, the same open-source skill powering GitHub Copilot for Azure. AI Toolkit installs and keeps this skill updated automatically — you never configure it. The output is structured and production-ready. Real folder structure. Real separation of concerns. Not a single-file script. Either way, you get a project you can version-control, test, and deploy. Cool Features You Should Know About Building the agent is just the beginning. Here's where AI Toolkit gets genuinely impressive. 🔧 Add Real Tools with MCP Your agent can do more than just talk. Click Add Tool in Agent Builder to connect MCP (Model Context Protocol) servers — these give your agent real capabilities: Search the web Query a database Read files Call external APIs Interact with any service that has an MCP server You control how much freedom your agent gets. Set tool approval to Auto (tool runs immediately) or Manual (you approve each call). Perfect for when you trust a read-only search tool but want oversight on anything that takes action. You can also delete MCP servers directly from the Tool Catalog when you no longer need them — no config file editing required. 🧠 Prompt Optimizer Not sure if your instructions are good enough? Click the Improve button in Agent Builder. The Foundry Prompt Optimizer analyzes your prompt and rewrites it to be clearer, more structured, and more effective. It's like having a prompt engineering expert review your work — except it takes seconds. 🕸️ Agent Inspector When your agent runs, open Agent Inspector to see what's happening under the hood. It visualizes the entire workflow in real time — which tools are called, in what order, and how the agent makes decisions. 💬 Conversations View Agent Builder includes a Conversations tab where you can review the full history of interactions with your agent. Scroll through past conversations, compare how your agent handled different scenarios, and spot patterns in where it succeeds or struggles. 📁 Everything in One Sidebar AI Toolkit puts everything in a single My Resources panel: Recent Agents — one-click access to agents you've been working on Local Resources — your local models, agents, and tools Foundry Resources — remote agents and models (if connected) Why AI Toolkit? There are other ways to build agents. What makes this different? Everything is in VS Code. You don't context-switch between a web UI, a CLI, and an IDE. Discovery, building, testing, debugging, and deployment all happen in one place. No-code and code-first aren't separate products. They're two views of the same agent. Start in Agent Builder, click View Code, and you have a full project. Or go the other way — build in code and test in the visual playground. Copilot is deeply integrated. Not as a chatbot bolted on the side — as an actual development tool that understands agent architecture and generates production-quality scaffolding. Wrapping Up: 📥 Install: AI Toolkit on the VS Code Marketplace 📖 Learn: AI Toolkit Documentation Open VS Code. Ctrl+Shift+P. Type "Create Agent." Five minutes from now, you'll have an agent running. 🚀4.9KViews7likes3Comments
Guardrails for Generative AI: Securing Developer Workflows
Generative AI is revolutionizing software development that accelerates delivery but introduces compliance and security risks if unchecked. Tools like GitHub Copilot empower developers to write code faster, automate repetitive tasks, and even generate tests and documentation. But speed without safeguards introduces risk. Unchecked AI‑assisted development can lead to security vulnerabilities, data leakage, compliance violations, and ethical concerns. In regulated or enterprise environments, this risk multiplies rapidly as AI scales across teams. The solution? Guardrails—a structured approach to ensure AI-assisted development remains secure, responsible, and enterprise-ready. In this blog, we explore how to embed responsible AI guardrails directly into developer workflows using: Azure AI Content Safety GitHub Copilot enterprise controls Copilot Studio governance Azure AI Foundry CI/CD and ALM integration The goal: maximize developer productivity without compromising trust, security, or compliance. Key Points: Why Guardrails Matter: AI-generated code may include insecure patterns or violate organizational policies. Azure AI Content Safety: Provides APIs to detect harmful or sensitive content in prompts and outputs, ensuring compliance with ethical and legal standards. Copilot Studio Governance: Enables environment strategies, Data Loss Prevention (DLP), and role-based access to control how AI agents interact with enterprise data. Azure AI Foundry: Acts as the control plane for Generative AI turning Responsible AI from policy into operational reality. Integration with GitHub Workflows: Guardrails can be enforced in IDE, Copilot Chat, and CI/CD pipelines using GitHub Actions for automated checks. Outcome: Developers maintain productivity while ensuring secure, compliant, and auditable AI-assisted development. Why Guardrails Are Non-Negotiable AI‑generated code and prompts can unintentionally introduce: Security flaws — injection vulnerabilities, unsafe defaults, insecure patterns Compliance risks — exposure of PII, secrets, or regulated data Policy violations — copyrighted content, restricted logic, or non‑compliant libraries Harmful or biased outputs — especially in user‑facing or regulated scenarios Without guardrails, organizations risk shipping insecure code, violating governance policies, and losing customer trust. Guardrails enable teams to move fast—without breaking trust. The Three Pillars of AI Guardrails Enterprise‑grade AI guardrails operate across three core layers of the developer experience. These pillars are centrally governed and enforced through Azure AI Foundry, which provides lifecycle, evaluation, and observability controls across all three. 1. GitHub Copilot Controls (Developer‑First Safety) GitHub Copilot goes beyond autocomplete and includes built‑in safety mechanisms designed for enterprise use: Duplicate Detection: Filters code that closely matches public repositories. Custom Instructions: Enhance coding standards via .github/copilot-instructions.md. Copilot Chat: Provides contextual help for debugging and secure coding practices. Pro Tip: Use Copilot Enterprise controls to enforce consistent policies across repositories and teams. 2. Azure AI Content Safety (Prompt & Output Protection) This service adds a critical protection layer across prompts and AI outputs: Prompt Injection Detection: Blocks malicious attempts to override instructions or manipulate model behaviour. Groundedness Checks: Ensures outputs align with trusted sources and expected context. Protected Material Detection: Flags copyrighted or sensitive content. Custom Categories: Tailor filters for industry-specific or regulatory requirements. Example: A financial services app can block outputs containing PII or regulatory violations using custom safety categories. 3. Copilot Studio Governance (Enterprise‑Scale Control) For organizations building custom copilots, governance is non‑negotiable. Copilot Studio enables: Data Loss Prevention (DLP): Prevent sensitive data leaks from flowing through risky connectors or channels. Role-Based Access (RBAC): Control who can create, test, approve, deploy and publish copilots. Environment Strategy: Separate dev, test, and production environments. Testing Kits: Validate prompts, responses, and behavior before production rollout. Why it matters: Governance ensures copilots scale safely across teams and geographies without compromising compliance. Azure AI Foundry: The Platform That Operationalizes the Three Pillars While the three pillars define where guardrails are applied, Azure AI Foundry defines how they are governed, evaluated, and enforced at scale. Azure AI Foundry acts as the control plane for Generative AI—turning Responsible AI from policy into operational reality. What Azure AI Foundry Adds Centralized Guardrail Enforcement: Define guardrails once and apply them consistently across: Models, Agents, Tool calls and Outputs. Guardrails specify: Risk types (PII, prompt injection, protected material) Intervention points (input, tool call, tool response, output) Enforcement actions (annotate or block) Built‑In Evaluation & Red‑Teaming: Azure AI Foundry embeds continuous evaluation into the GenAIOps lifecycle: Pre‑deployment testing for safety, groundedness, and task adherence Adversarial testing to detect jailbreaks and misuse Post‑deployment monitoring using built‑in and custom evaluators Guardrails are measured and validated, not assumed. Observability & Auditability: Foundry integrates with Azure Monitor and Application Insights to provide: Token usage and cost visibility Latency and error tracking Safety and quality signals Trace‑level debugging for agent actions Every interaction is logged, traceable, and auditable—supporting compliance reviews and incident investigations. Identity‑First Security for AI Agents: Each AI agent operates as a first‑class identity backed by Microsoft Entra ID: No secrets embedded in prompts or code Least‑privilege access via Azure RBAC Full auditability and revocation Policy‑Driven Platform Governance: Azure AI Foundry aligns with the Azure Cloud Adoption Framework, enabling: Azure Policy enforcement for approved models and regions Cost and quota controls Integration with Microsoft Purview for compliance tracking How to Implement Guardrails in Developer Workflows Shift-Left Security Embed guardrails directly into the IDE using GitHub Copilot and Azure AI Content Safety APIs—catch issues early, when they’re cheapest to fix. Automate Compliance in CI/CD Integrate automated checks into GitHub Actions to enforce policies at pull‑request and build stages. Monitor Continuously Use Azure AI Foundry and governance dashboards to track usage, violations, and policy drift. Educate Developers Conduct readiness sessions and share best practices so developers understand why guardrails exist—not just how they’re enforced. Implementing DLP Policies in Copilot Studio Access Power Platform Admin Center Navigate to Power Platform Admin Centre Ensure you have Tenant Admin or Environment Admin role Create a DLP Policy Go to Data Policies → New Policy. Define data groups: Business (trusted connectors) Non-business Blocked (e.g., HTTP, social channels) Configure Enforcement for Copilot Studio Enable DLP enforcement for copilots using PowerShell Set-PowerVirtualAgentsDlpEnforcement ` -TenantId <tenant-id> ` -Mode Enabled Modes: Disabled (default, no enforcement) SoftEnabled (blocks updates) Enabled (full enforcement) Apply Policy to Environments Choose scope: All environments, specific environments, or exclude certain environments. Block channels (e.g., Direct Line, Teams, Omnichannel) and connectors that pose risk. Validate & Monitor Use Microsoft Purview audit logs for compliance tracking. Configure user-friendly DLP error messages with admin contact and “Learn More” links for makers. Implementing ALM Workflows in Copilot Studio Environment Strategy Use Managed Environments for structured development. Separate Dev, Test, and Prod clearly. Assign roles for makers and approvers. Application Lifecycle Management (ALM) Configure solution-aware agents for packaging and deployment. Use Power Platform pipelines for automated movement across environments. Govern Publishing Require admin approval before publishing copilots to organizational catalog. Enforce role-based access and connector governance. Integrate Compliance Controls Apply Microsoft Purview sensitivity labels and enforce retention policies. Monitor telemetry and usage analytics for policy alignment. Key Takeaways Guardrails are essential for safe, compliant AI‑assisted development. Combine GitHub Copilot productivity with Azure AI Content Safety for robust protection. Govern agents and data using Copilot Studio. Azure AI Foundry operationalizes Responsible AI across the full GenAIOps lifecycle. Responsible AI is not a blocker—it’s an enabler of scale, trust, and long‑term innovation.2.5KViews0likes0CommentsBuilding Reusable Custom Images for Azure Confidential VMs Using Azure Compute Gallery
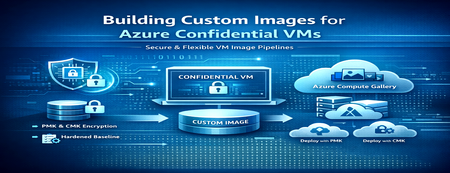
Overview Azure Confidential Virtual Machines (CVMs) provide hardware-enforced protection for sensitive workloads by encrypting data in use using AMD SEV-SNP technology. In enterprise environments, organizations typically need to: Create hardened golden images Standardize baseline configurations Support both Platform Managed Keys (PMK) and Customer Managed Keys (CMK) Version and replicate images across regions This guide walks through the correct and production-supported approach for building reusable custom images for Confidential VMs using: PowerShell (Az module) Azure Portal Disk Encryption Sets (CMK) Azure Compute Gallery Key Design Principles Before diving into implementation steps, it is important to clarify that during real-world implementations, two important architectural truths become clear: ✅1️⃣ The Same Image Supports PMK and CMK The encryption model (PMK vs CMK) is not embedded in the image. Encryption is applied: At VM deployment time Through disk configuration (default PMK or Disk Encryption Set for CMK) This means: You build one golden image. You deploy it using PMK or CMK depending on compliance requirements. This simplifies lifecycle management significantly. ✅2️⃣ Confidential VM Image Versions Must Use Source VHD When publishing to Azure Compute Gallery: Confidential VMs require Source VHD (Mandatory Requirement) This is a platform requirement for Confidential Security Type support. Therefore, the correct workflow is: Deploy base Confidential VM Harden and configure Generalize Export OS disk as VHD Upload to storage Publish to Azure Compute Gallery Deploy using PMK or CMK Security Stack Breakdown Protection Area Technology Data in Use AMD SEV-SNP Boot Integrity Secure Boot + vTPM Image Lifecycle Azure Compute Gallery Disk Encryption PMK or CMK Compliance Control Disk Encryption Set (CMK) Implementation Steps 🖥️ Step 1 – Deploy a Base Windows Confidential VM This VM will serve as the image builder. Key Requirements Gen2 Image Confidential SKUs (similar to DCasv5 or ECasv5 series) SecurityType = ConfidentialVM Secure Boot enabled vTPM enabled Confidential OS Encryption enabled Reference Code Snippets (PowerShell) $rg = "rg-cvm-gi-pr-sbx-01" $location = "NorthEurope" $vmName = "cvmwingiprsbx01" New-AzResourceGroup -Name $rg -Location $location $cred = Get-Credential $vmConfig = New-AzVMConfig ` -VMName $vmName ` -VMSize "Standard_DC2as_v5" ` -SecurityType "ConfidentialVM" $vmConfig = Set-AzVMOperatingSystem ` -VM $vmConfig ` -Windows ` -ComputerName $vmName ` -Credential $cred $vmConfig = Set-AzVMSourceImage ` -VM $vmConfig ` -PublisherName "MicrosoftWindowsServer" ` -Offer "WindowsServer" ` -Skus "2022-datacenter-azure-edition" ` -Version "latest" $vmConfig = Set-AzVMOSDisk ` -VM $vmConfig ` -CreateOption FromImage ` -SecurityEncryptionType "ConfidentialVM_DiskEncryptedWithPlatformKey" New-AzVM -ResourceGroupName $rg -Location $location -VM $vmConfig 📸 Reference Screenshots 🔧 Step 2 – Harden and Customize the OS This is where you: Install monitoring agents Install Defender for Endpoint Apply CIS baseline Install security agents Remove unwanted services Install application dependencies This is your enterprise golden baseline depending on the individual organizational requirements. 🔄 Step 3 – Generalize the Windows Confidential VM (Production-Ready Method) Confidential VMs often enable BitLocker automatically. Improper Sysprep handling can cause failures. Generalizing a Windows Confidential VM properly is critical to avoid: Sysprep failures BitLocker conflicts Image corruption Deployment errors later Follow these steps carefully inside the VM and later through Azure PowerShell. 1. Remove Panther Folder The Panther folder stores logs from previous Sysprep operations. If leftover logs exist, Sysprep can fail. This safely removes old Sysprep metadata. rd /s /q C:\Windows\Panther ✔ This step prevents common “Sysprep was not able to validate your Windows installation” errors. 2. Run Sysprep Navigate to Sysprep directory and run sysprep command: cd %windir%\system32\sysprep sysprep.exe /generalize /shutdown Parameters explained: Parameter Purpose /generalize Removes machine-specific info (SID, drivers) /shutdown Powers off VM after completion ⚠️ Handling BitLocker Issues (Common in Confidential VMs): Confidential VMs may automatically enable BitLocker. If Sysprep fails due to encryption, follow the next steps to resolve the issue and execute sysprep again. 3. Check BitLocker Status & Turn Off BitLocker manage-bde -status If Protection Status is 'Protection On': manage-bde -off C: Wait for decryption to complete fully. ⚠️ Do not run Sysprep again until decryption reaches 100%. 4. Reboot and Run Sysprep Again After decryption completes: Reboot the VM Open Command Prompt as Administrator Navigate to Sysprep folder and run sysprep command: cd %windir%\system32\sysprep sysprep.exe /generalize /shutdown ✔ VM will shut down automatically. 5. Mark VM as Generalized in Azure Now switch to Azure PowerShell: Stop-AzVM -Name $vmName -ResourceGroupName $rg -Force Set-AzVM -Name $vmName -ResourceGroupName $rg -Generalized ✔ This marks the VM as ready for image capture. 🧠 Why These Extra Steps Matter in Confidential VMs Confidential VMs differ from standard VMs because: They use vTPM They may auto-enable BitLocker They enforce Secure Boot They use Gen2 images Improper handling can cause: Sysprep failures Image capture errors Deployment failures from image “VM provisioning failed” issues These cleanup steps dramatically increase success rate. 💾 Step 4 – Export OS Disk as VHD Azure Gallery Image Definitions with Security Type as 'TrustedLaunchAndConfidentialVmSupported' require Source VHD as the support for Source Image VM is not available. Generate the SAS URL for OS Disk of the Virtual Machine. Copy to Storage Account as a .vhd file. Use Get-AzStorageBlobCopyState to validate the copy status and wait for completion. $vm = Get-AzVM -Name $vmName -ResourceGroupName $rg $osDiskName = $vm.StorageProfile.OsDisk.Name $sas = Grant-AzDiskAccess ` -ResourceGroupName $rg ` -DiskName $osDiskName ` -Access Read ` -DurationInSecond 3600 $storageAccountName = "stcvmgiprsbx01" $storageContainerName = "images" $destinationVHDFileName = "cvmwingiprsbx01-OsDisk-VHD.vhd" $destinationContext = New-AzStorageContext -StorageAccountName $storageAccountName Start-AzStorageBlobCopy -AbsoluteUri $sas.AccessSAS -DestContainer $storageContainerName -DestContext $destinationContext -DestBlob $destinationVHDFileName Get-AzStorageBlobCopyState -Blob $destinationVHDFileName -Container $storageContainerName -Context $destContext 🏢 Step 5 – Create Azure Compute Gallery & Image Version Instead of creating a standalone managed image, we will: Create an Azure Compute Gallery Create an Image Definition Publish a Gallery Image Version from the generalized Confidential VM This enables: Versioning Regional replication Staged rollouts Enterprise image lifecycle management 1. Create Azure Compute Gallery $galleryName = "cvmImageGallery" New-AzGallery ` -GalleryName $galleryName ` -ResourceGroupName $rg ` -Location $location ` -Description "Confidential VM Image Gallery" 2. Create Image Definition for Windows Confidential VM Important settings: OS State = Generalized OS Type = Windows HyperV Generation = V2 Security Type = TrustedLaunchAndConfidentialVmSupported $imageDefName = "img-win-cvm-gi-pr-sbx-01" $ConfidentialVMSupported = @{Name='SecurityType';Value='TrustedLaunchAndConfidentialVmSupported'} $Features = @($ConfidentialVMSupported) New-AzGalleryImageDefinition ` -GalleryName $galleryName ` -ResourceGroupName $rg ` -Location $location ` -Name $imageDefName ` -OsState Generalized ` -OsType Windows ` -Publisher "prImages" ` -Offer "WindowsServerCVM" ` -Sku "2022-dc-azure-edition" ` -HyperVGeneration V2 ` -Feature $features ✔ HyperVGeneration must be V2 for Confidential VMs. 📸 Reference Screenshot 3. Create Gallery Image Version from Generalized VM Now publish version 1.0.0 from the generalized VM OS Disk VHD to the Image Definition: There is no support for performing this step using Azure PowerShell, hence the Azure Portal needs to be used Ensure the right network and RBAC access on the storage account is in place Replication can be enabled on the Image Version to multiple regions for enterprises ✅ Why Azure Compute Gallery is the Right Choice Feature Managed Image Azure Compute Gallery Versioning ❌ ✅ Cross-region replication ❌ ✅ Enterprise lifecycle Limited Full Recommended for production ❌ ✅ For enterprise confidential workloads, Azure Compute Gallery is strongly recommended. 🚀 Step 6 – Deploy Confidential VM from Gallery Image 🔹 Using PMK (Default) If you do not specify a Disk Encryption Set, Azure uses Platform Managed Keys automatically. $imageId = (Get-AzGalleryImageVersion ` -GalleryName $galleryName ` -GalleryImageDefinitionName $imageDefName ` -ResourceGroupName $rg ` -Name "1.0.0").Id $vmConfig = New-AzVMConfig ` -VMName "cvmwingiprsbx02" ` -VMSize "Standard_DC2as_v5" ` -SecurityType "ConfidentialVM" $vmConfig = Set-AzVMOSDisk ` -VM $vmConfig ` -CreateOption FromImage ` -SecurityEncryptionType "ConfidentialVM_DiskEncryptedWithPlatformKey" $vmConfig = Set-AzVMSourceImage -VM $vmConfig -Id $imageId $vmConfig = Set-AzVMOperatingSystem -VM $vmConfig -Windows -ComputerName "cvmwingiprsbx02" -Credential (Get-Credential) New-AzVM -ResourceGroupName $rg -Location $location -VM $vmConfig 🔹 Using CMK (Same Image!) If compliance requires CMK: Create Disk Encryption Set Associate with Key Vault or Managed HSM Attach DES during deployment $vmConfig = Set-AzVMOSDisk ` -VM $vmConfig ` -CreateOption FromImage ` -SecurityEncryptionType "ConfidentialVM_DiskEncryptedWithCustomerKey" ` -DiskEncryptionSetId $des.Id ✔ Same image ✔ Different encryption model ✔ Encryption applied at deployment 🔎 Validation Check Confidential Security: Get-AzVM -Name "cvmwingiprsbx02" -ResourceGroupName $rg | Select SecurityProfile Check disk encryption: Get-AzDisk -ResourceGroupName $rg Architectural Summary Confidential VM security is independent of disk encryption model Encryption choice is applied at deployment One image supports multiple compliance models Source VHD is required for Confidential VM gallery publishing Azure Compute Gallery enables enterprise lifecycle �� PMK vs CMK Decision Matrix Scenario Recommended Model Standard enterprise workloads PMK Financial services / regulated CMK BYOK requirement CMK Simplicity prioritized PMK 🏢 Enterprise Recommendations ✔ Always use Azure Compute Gallery ✔ Use semantic versioning (1.0.0, 1.0.1) ✔ Automate using Azure Image Builder ✔ Enforce Confidential VM via Azure Policy ✔ Enable Guest Attestation ✔ Monitor with Defender for Cloud Final Thoughts Creating custom images for Azure Confidential VMs allows organizations to combine the security benefits of Confidential Computing with the operational efficiency of standardized deployments. By baking security baselines, monitoring agents, and required configurations directly into a golden image, every new VM starts from a consistent and trusted foundation. A key advantage of this approach is flexibility. The custom image itself is independent of the disk encryption model, meaning the same image can be deployed using Platform Managed Keys (PMK) for simplicity or Customer Managed Keys (CMK) to meet stricter compliance requirements. This allows platform teams to maintain a single image pipeline while supporting multiple security scenarios. By publishing images through Azure Compute Gallery, organizations can version, replicate, and manage their Confidential VM images more effectively. Combined with proper VM generalization and hardening practices, custom images become a reliable way to ensure secure, consistent, and scalable deployments of Confidential workloads in Azure. As Confidential Computing continues to gain adoption across industries handling sensitive data, investing in a well-designed custom image pipeline will enable organizations to scale securely while maintaining consistency, compliance, and operational efficiency across their cloud environments.427Views1like0CommentsAnnouncing Microsoft Azure Network Adapter (MANA) support for Existing VM SKUs
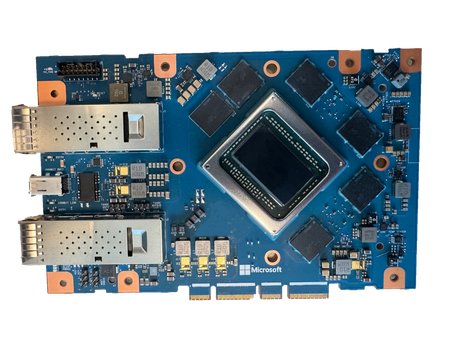
As a leader in cloud infrastructure, Microsoft ensures that Azure’s IaaS customers always have access to the latest hardware. Our goal is to consistently deliver technology to support business critical workloads with world class efficiency, reliability, and security. Customers benefit from cutting-edge performance enhancements and features, helping them to future proof their workloads while maintaining business continuity. Azure will be a deploying new hardware generation to support capacity demands for existing VM Size Families. The hardware is optimized for these VM sizes, utilizing Intel’s Emerald Rapid CPU, native NVMe SSD support for higher storage bandwidth and lower latency, and Microsoft Azure Network Adapter (MANA). Deployment timelines will be communicated via Service Health Advisory updates. The intent is to provide the benefits of new server hardware to customers of existing VM SKUs as they work towards migrating to newer SKUs. The deployments will be based on capacity needs and won’t be restricted by region. Once the hardware is available in a region, VMs can be deployed to it as needed. Workloads on operating systems which fully support MANA will benefit from sub-second Network Interface Card (NIC) firmware upgrades, higher throughput, lower latency, increased Security and Azure Boost-enabled data path accelerations. If your workload doesn't support MANA today, you'll still be able to access Azure’s network on MANA enabled SKUs, but performance will be comparable to previous generation (non-MANA) hardware. Check out the Azure Boost Overview and the Microsoft Azure Network Adapter (MANA) overview for more detailed information and OS compatibility. To determine whether your VMs are impacted and what actions (if any) you should take, start with MANA support for existing VM SKUs. This article provides additional information about which VM Sizes are eligible to be deployed on the new MANA-enabled hardware, what actions (if any) you should take, and how to determine if the workload has been deployed on MANA-enabled hardware.20KViews10likes8CommentsAnnouncing Kubernetes Center (Preview) On Azure Portal
Today, we’re excited to introduce the Kubernetes Center in the Azure portal, a new experience to simplify how customers manage, monitor, and optimize Azure Kubernetes Services environments at scale. The Kubernetes Center provides a unified view across all clusters, intelligent insights, and streamlined workflows that help platform teams stay in control while enabling developers to move fast. As Kubernetes adoption accelerates, many teams face growing challenges in managing clusters and workloads at scale. Getting a quick snapshot of what needs attention across clusters and workloads can quickly become overwhelming. Kubernetes Center is designed to change that, offering a streamlined and intuitive experience that brings everything together in one place, brings the most critical Kubernetes capabilities into a single pane of glass for unified visibility and control. What is Kubernetes Center?: Actionable insights from the start: Kubernetes Center surfaces key issues like security vulnerabilities, cluster alerts, compliance gaps, and upgrade recommendations in a single, unified view. This helps teams focus immediately on what matters most, leading to faster resolution times, improved security posture, and greater operational clarity. Streamlined management experience: By bringing together AKS, AKS Automatic, Fleet Manager, and Managed Namespaces into a single experience, we’ve reduced the need to jump between services. Everything you need to manage Kubernetes on Azure is now organized in one consistent interface. Centralized Quickstarts: Whether you’re getting started or troubleshooting advanced scenarios, Kubernetes Center brings relevant documentation, learning resources, and in-context help into one place so you can spend less time searching and more time building. Azure Portal: From Distinct landing experiences for AKS, Fleet Manager, and Managed Kubernetes Namespaces: To a streamlined management experience: Get the big picture at a glance, then dive deeper with individual pages designed for effortless discovery. Centralized Quickstarts: Next Steps: Build on your momentum by exploring Kubernetes Center. Create your first AKS cluster or deploy your first application using the Deploy Your Application flow and track your progress in real time or Check out the new experience and instantly see your existing clusters in a streamlined management experience. Your feedback will help shape what comes next. Start building today with Kubernetes Center on Azure Portal! Learn more: Create and Manage Kubernetes resources in the Azure portal with Kubernetes Center (preview) - Azure Kubernetes Service | Microsoft Learn FAQ: What products from Azure are included in Kubernetes Center? A. Kubernetes Center brings together all your Azure Kubernetes resources such as AKS, AKS Automatic, Fleet Manager, and Managed Namespaces into a single interface for simplified operations. Create new resources or view your existing resources in Kubernetes Center. Does Kubernetes Center handle multi-cluster management? A. Kubernetes Center provides a unified interface aka single pane of glass to view and monitor all your Kubernetes resources in one place. For multi-cluster operations like upgrading Kubernetes Version, placing cluster resources on N clusters, policy management, and coordination across environments, Kubernetes Fleet Manager is the solution designed to handle that complexity at scale. It enables teams to manage clusters at scale with automation, consistency, and operational control. Does Kubernetes Center provide security and compliance insights? A. Absolutely. When Microsoft Defender for Containers is enabled, Kubernetes Center surfaces critical security vulnerabilities and compliance gaps across your clusters. Where can I find help and documentation? A. All relevant documentation, QuickStarts, and learning resources are available directly within Kubernetes Center, making it easier to get support without leaving the platform. For more information: Create and Manage Kubernetes resources in the Azure portal with Kubernetes Center (preview) - Azure Kubernetes Service | Microsoft Learn What is the status of this launch? A. Kubernetes Center is currently in preview, offering core capabilities with more features planned for the general availability release. What is the roadmap for GA? A. Our roadmap includes adding new features and introducing tailored views designed for Admins and Developers. We also plan to enhance support for multi-cluster capabilities in Azure Fleet Manager, enabling smoother and more efficient operations within the Kubernetes Center.3.6KViews10likes0CommentsDefending the cloud: Azure neutralized a record-breaking 15 Tbps DDoS attack
On October 24, 2025, Azure DDOS Protection automatically detected and mitigated a multi-vector DDoS attack measuring 15.72 Tbps and nearly 3.64 billion packets per second (pps). This was the largest DDoS attack ever observed in the cloud and it targeted a single endpoint in Australia. By utilizing Azure’s globally distributed DDoS Protection infrastructure and continuous detection capabilities, mitigation measures were initiated. Malicious traffic was effectively filtered and redirected, maintaining uninterrupted service availability for customer workloads. The attack originated from Aisuru botnet. Aisuru is a Turbo Mirai-class IoT botnet that frequently causes record-breaking DDoS attacks by exploiting compromised home routers and cameras, mainly in residential ISPs in the United States and other countries. The attack involved extremely high-rate UDP floods targeting a specific public IP address, launched from over 500,000 source IPs across various regions. These sudden UDP bursts had minimal source spoofing and used random source ports, which helped simplify traceback and facilitated provider enforcement. Attackers are scaling with the internet itself. As fiber-to-the-home speeds rise and IoT devices get more powerful, the baseline for attack size keeps climbing. As we approach the upcoming holiday season, it is essential to confirm that all internet-facing applications and workloads are adequately protected against DDOS attacks. Additionally, do not wait for an actual attack to assess your defensive capabilities or operational readiness—conduct regular simulations to identify and address potential issues proactively. Learn more about Azure DDOS Protection at Azure DDoS Protection Overview | Microsoft Learn50KViews6likes3Comments