threat hunting & ti
4 TopicsFrom Domain Lists to Decisions: Scaling WHOIS Threat Intelligence with MDTI and Microsoft Graph
The real problem isn't WHOIS. It's what WHOIS costs you at scale. Ask any SOC analyst whether WHOIS data is useful and they'll say yes without hesitation. Registrant emails, creation dates, registrars, and nameservers are among the most durable pivots in domain-based threat intelligence — the threads that tie a single phishing domain back to an entire adversary campaign. Now ask them how often they actually pull WHOIS for every suspicious domain in an alert. The honest answer is: not always. And that gap is the real problem. Here's why. When a campaign surfaces two hundred lookalike domains, manual WHOIS becomes a losing game: It's slow. One-domain-at-a-time portal lookups don't finish before the incident clock runs out. It's inconsistent. Different analysts capture different fields, so the data can't be compared or correlated. It's un-auditable. Screenshots and copy-paste don't hold up in an investigation review months later. It loses the pattern. By the time you've checked twenty domains by hand, the shared registrant email that connected them has scrolled off the screen. The outcome of all this friction is the part that should worry a security leader: analysts quietly stop enriching, or enrich only a sample. The pivot that would have collapsed twenty alerts into one campaign never happens. The newly registered domain that should have been escalated gets triaged as routine. The intelligence exists — the process just can't reach it fast enough. The outcome we're actually after Reframe the goal. This isn't a project to "run WHOIS." It's a project to produce a specific set of outcomes: Every suspicious domain gets enriched — not a hand-picked sample. Enrichment is consistent and structured, so patterns across domains become visible instead of buried. The output is audit-ready — defensible in an investigation and reusable in a report. The whole thing is fast enough to happen inside the incident, not the day after. Get-MDTIWhois.ps1 exists to deliver exactly those outcomes. It reads a list of domains, calls Microsoft Defender Threat Intelligence (MDTI) through Microsoft Graph, and returns both a normalized CSV for immediate triage and the raw JSON for deep investigation — in one pass, read-only, with nothing changed in your environment. What changes for the analyst The clearest way to see the value is the before-and-after. Before: An alert fires on a suspected phishing campaign with two hundred candidate domains. The analyst opens a portal, checks a handful of domains, eyeballs a few registrant fields, and makes a judgment call on incomplete data. Correlation is mental and fragile. Twenty related alerts stay twenty separate alerts. After: The analyst drops the domains into a text file, runs one command, and gets a spreadsheet where all two hundred are enriched with the same fields. Sorting by registrant email instantly reveals that forty of them share one address, one budget registrar, and creation dates in the same week. Twenty alerts become one campaign. One judgment call becomes one defensible conclusion. That's the outcome: not "we ran WHOIS," but "we saw the campaign the manual process would have missed." Where the value shows up This translates into concrete wins across several SOC workflows: Faster campaign triage. Shared registrant emails and nameservers collapse dozens of alerts into a single adversary-infrastructure story — directly reducing mean-time-to-respond. Better newly-registered-domain hunting. Enrich domains from DNS or proxy logs, sort by registration date, and surface the freshly registered domains that are disproportionately malicious — before they're clicked. Enrichment that feeds the platform. The normalized CSV drops straight into a Sentinel watchlist, or the same Graph call can be wrapped in a Logic App / Azure Function playbook to auto-enrich domain entities the moment an incident is created. Reusable intelligence. Registrant and nameserver pivots become custom indicators and hunting queries — value that compounds over time instead of being thrown away after each investigation. Why this approach, specifically There are other ways to get WHOIS. A few reasons this approach earns its place in a modern, Defender-portal-centric SOC: It uses first-party intelligence. MDTI is Microsoft's own threat-intelligence graph, queried natively through Microsoft Graph — no third-party data broker, no separate contract, no data leaving your Microsoft trust boundary. It's read-only by design. The script cannot modify Sentinel, Defender, tenant settings, or domain records. Enrichment tooling should never be able to change the environment it observes — and this one can't. It's built to survive real-world APIs. Throttling (HTTP 429) and transient 5xx errors are retried with backoff; permanent misses (404) aren't retried needlessly; a single failed domain never aborts the run. You always get a complete, dependable result set. It handles secrets the way you'd want. Client secrets come from an environment variable or a secure prompt — never hard-coded, never committed to source control. The engineering exists to protect the outcome: a complete, consistent, trustworthy enrichment set every single time, even when the input list is messy or the API is having a bad day. The output is built for decisions, not just data Two files, two jobs: The normalized CSV is the decision surface. One row per domain, every registrant/registrar/date/nameserver field an analyst pivots on — sortable, filterable, watchlist-ready. This is where twenty alerts become one campaign. The raw JSON is the safety net. Full API fidelity per domain, preserved for the audit trail and for the registrar-specific edge cases the normalized view can't anticipate. Together they answer both questions a SOC actually asks: "What do I do right now?" (CSV) and "Can I stand behind it later?" (JSON). What it takes to get there The barrier to entry is low: An Entra ID app registration with the Graph application permission ThreatIntelligence.Read.All (admin-consented), on a tenant with MDTI API access. A text file of domains, one per line. One command: $env:MDTI_CLIENT_SECRET = "<client-secret>" .\Get-MDTIWhois.ps1 ` -TenantId "<tenant-id>" ` -ClientId "<client-id>" ` -InputTxt ".\domains.txt" Under the covers it authenticates with a client-credentials grant, normalizes and de-duplicates the input, calls GET /security/threatIntelligence/hosts/{domain}/whois per domain, and writes both outputs. Minutes of setup; a repeatable capability afterward. Use it responsibly The project is provided as-is, for educational and demonstration purposes, and is not intended for production use without independent review, validation, and monitoring. Keep in mind: A 404 means MDTI has no current WHOIS record for that host — not that the domain is safe. WHOIS fields vary by registrar — always retain the raw JSON for anything you'll act on. WHOIS can contain personal data — validate your storage and sharing obligations before distributing enrichment output. Never commit secrets — use the environment-variable or secure-prompt path. The bottom line The value here isn't that WHOIS is difficult. It's that the friction of doing WHOIS well, for everything, quietly erodes detection quality — analysts under time pressure enrich less, correlate by memory, and miss the campaign hiding in plain sight. Get-MDTIWhois.ps1 removes that friction. It turns a flat list of domains into structured, audit-ready intelligence in a single read-only pass, so the pivot that reveals the adversary's infrastructure actually happens — inside the incident, not after it. That's the outcome worth automating. Disclaimer This article and the referenced tooling are provided “as-is,” for educational and demonstration purposes only, without warranties of any kind, express or implied. They are not intended for production, safety-critical, or regulated use without independent review, testing, validation, and appropriate safeguards. The views expressed are the author’s own and do not necessarily represent those of any employer or of Microsoft. You are solely responsible for how you deploy, modify, or adapt this tooling, and for ensuring compliance with all applicable laws, regulations, licensing terms, privacy obligations, and organizational security policies. Source: MDTI-WHOIS in the Microsoft Security Operations Toolkit. Provided as-is for educational purposes; test in a controlled environment before production use.
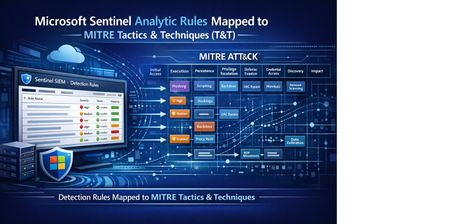
“Automating Export of Microsoft Sentinel Analytic Rules mapped to MITRE Tactics & Techniques”
1. Introduction In modern Security Operations Centers (SOCs), mapping detections to the MITRE ATT&CK framework is critical. MITRE ATT&CK provides a structured, globally recognized model of adversary behavior, categorized into Tactics (goals) and Techniques (methods). Microsoft Sentinel analytic rules frequently include MITRE mappings, but viewing or exporting these at scale isn’t straightforward within the portal. Security teams often need: • A centralized view of existing detections mapped to MITRE ATT&CK • A CSV export for reporting, audits, and threat coverage assessments • Insights for SOC maturity, gap analysis, and threat-informed defense Having an automated way to extract this information ensures accuracy, consistency, and faster operational insights — all essential for high-performing SOCs. 2) Why This Script Is Required While Sentinel analytic rules individually display MITRE mappings, organizations typically need a workspace-wide export for: Detection Coverage & Gap Analysis Identify which Tactics & Techniques are covered. Highlight missing ATT&CK areas. Support threat modelling or purple team exercises. Security Operations Reporting Governance and oversight meetings Compliance documentation SOC KPI reporting and dashboards. Detection Engineering Lifecycle Maintaining a detection catalogue. Versioning and documentation Supporting change management and audits Exporting rules into a CSV using automation avoids manual errors, saves analyst time, and ensures accurate, up-to-date data. 3) Script to Export Microsoft Sentinel Analytic Rules with MITRE Tactics & Techniques (TO BE RUN FROM AZURE CLI) Important: This Bash script must be executed from Azure CLI, either: Azure Cloud Shell, or A workstation/server with Azure CLI installed (Linux, macOS, or WSL on Windows) The script uses az rest and jq to pull analytic rules and generate a CSV containing MITRE Tactics, Techniques, Severity, Enabled state, and KQL query. Bash Script (Run in Azure CLI) ------------------------------------------------------------------------------------------------------------------------ #!/bin/bash # Variables export SUB="99005f96-e572-4035-b476-836fd9d83d64" export RG="CyberSOC" export WS="CyberSOC" API="2024-03-01" # Step 1: Set subscription az account set --subscription "$SUB" # Step 2: Fetch alert rules echo "Fetching alert rules..." az rest \ --method GET \ --uri "https://management.azure.com/subscriptions/$SUB/resourceGroups/$RG/providers/Microsoft.OperationalInsights/workspaces/$WS/providers/Microsoft.SecurityInsights/alertRules?api-version=$API" \ --output json > rules.json # Step 3: Validate file if [ ! -s rules.json ]; then echo "Error: rules.json is empty or missing." exit 1 fi echo "Total rules found:" jq '.value | length' rules.json # Step 4: Generate CSV with MITRE mapping, severity, enabled echo "Generating CSV..." jq -r ' (["RuleName","Tactics","Techniques","MITRE_Map","Severity","Enabled","Query"] | @csv), ( .value[] | select(.kind == "Scheduled") | . as $r | ($r.properties // {}) as $p | [ ($p.displayName // $r.name // "N/A"), (( $p.tactics // $p.attackTactics // [] ) | join(";")), (( $p.techniques // $p.attackTechniqueIds // [] ) | join(";")), ( ( ($p.tactics // []) | map("TA" + (.[2:]? // "")) ) as $tacs | ( ($p.techniques // []) | map(.) ) as $techs | ( [$tacs[], $techs[]] | join(";")) ), ($p.severity // "N/A"), ($p.enabled | tostring), (( $p.query // "" ) | gsub("\\r?\\n"; " ")) ] | @csv ) ' rules.json > Scheduled_Rules_TTP_Query.csv ------------------------------------------------------------------------------------------------------------------------ 4) Summary Mapping detections to MITRE ATT&CK is a cornerstone of threat-informed defense. This script simplifies the process of exporting Microsoft Sentinel analytic rules with their MITRE mappings into a CSV — enabling SOC teams to: Analyze coverage across ATT&CK Identify detection gaps. Strengthen red–blue team collaboration. Build dashboards and ATT&CK heatmaps. Enhance SOC governance & reporting. Automating this export ensures faster insights, reduces manual workload, and supports a mature detection engineering program.Sentinel-Threat Intelligence Feeds Integration to strengthen Threat Detection & Proactive Hunting.
Combining threat intelligence feeds is important for detecting threats and identifying Indicators of Compromise (IOCs) in various scenarios. Here are some key situations where this approach is advantageous: Comprehensive Threat Detection Integrating multiple threat intelligence feeds can cover a wider range of threats. Different feeds may provide unique insights into malicious activities, IP addresses, domain names, and other IOCs. Reducing False Positives Combining feeds helps cross-verify data, decreasing the likelihood of false positives. This ensures that security teams focus on actual threats rather than inaccurate alerts. Enhanced Contextual Analysis Multiple feeds can offer richer context around threats, including tactics, techniques, and procedures (TTPs) used by attackers. This helps in understanding the threat landscape better and making informed decisions. Real-Time Threat Response Integrating feeds allows for real-time updates on emerging threats. This enables security teams to respond swiftly to new threats and mitigate potential damage. Proactive Threat Hunting Threat hunters can use combined feeds to identify patterns and anomalies that might indicate a threat. This proactive approach assists in detecting threats before they can cause significant harm. Improved Threat Intelligence Sharing Combining feeds from different sources, such as government agencies, commercial vendors, and open-source communities, enhances the overall quality and reliability of threat intelligence. Example Query in Microsoft Sentinel Here's an example of how you might combine two threat intelligence feeds using the coalesce function in KQL: _______________________________________________________________________________________ ThreatIntelFeed1 | extend CombinedIndicator = coalesce(ThreatIntelFeed1.Indicator, ThreatIntelFeed2.Indicator) | extend CombinedDescription = coalesce(ThreatIntelFeed1.Description, ThreatIntelFeed2.Description) | project CombinedIndicator, CombinedDescription _________________________________________________________________________________________ In the above example coalsce function is used. The coalesce function in Kusto Query Language (KQL) is used to evaluate a list of expressions and return the first non-null (or non-empty for strings) expression. This function is particularly useful in Microsoft Sentinel for handling data where some fields might be missing or null. Syntax coalesce(arg, arg_2, [arg_3, ...]) arg: The expression to be evaluated. All arguments must be of the same type. Maximum of 64 arguments is supported. Functions of coalesce in Sentinel Threat Intelligence Feeds Handling Missing Data: It helps in filling gaps where data might be missing by providing a fallback value. For example, if one threat intelligence feed lacks an IP address, coalesce can pull it from another feed. Data Normalization: Combines multiple fields into one, ensuring that you always have a value to work with. This is useful when different feeds provide similar data in different fields. Simplifying Queries: Reduces the need for complex conditional logic to handle null values, making queries more readable and maintainable. Let’s look at Threat Intelligence Analytic rule where caolsec function is used. The query combines threat intelligence indicators with DNS data to identify potential malicious activity. It ensures that only relevant and recent indicators are considered and matches them with DNS queries to detect suspicious behavior. This query ensures that you obtain the most comprehensive data by taking the first non-null value from either feed. Let's break down this KQL query step by step: Define Lookback Periods dt_lookBack: Sets a lookback period of 1 hour for DNS data. ioc_lookBack: Sets a lookback period of 14 days for threat intelligence indicators. Extract Relevant Threat Intelligence Indicators ThreatIntelligenceIndicator: Filters threat intelligence indicators generated within the last 14 days and not expired. arg_max(TimeGenerated, *) by IndicatorId: Summarizes to get the latest indicator for each IndicatorId. Active == true: Filters only active indicators. coalesce(NetworkIP, NetworkDestinationIP, NetworkSourceIP, EmailSourceIpAddress, "NO_IP"): Combines various IP fields into a single IoC field, defaulting to "NO_IP" if none are present. where IoC != "NO_IP": Filters out entries without valid IP addresses. Join with DNS Data join kind=innerunique: Joins the threat intelligence indicators with DNS data using an inner unique join to keep performance fast and result set low. _Im_Dns(starttime=ago(dt_lookBack)): Retrieves DNS data from the last hour. where isnotempty(DnsResponseName): Filters DNS records with non-empty response names. summarize imDns_mintime=min(TimeGenerated), imDns_maxtime=max(TimeGenerated) by SrcIpAddr, DnsQuery, DnsResponseName, Dvc, EventProduct, EventVendor: Summarizes DNS data by various fields. extract_all(@'(\d+\.\d+\.\d+\.\d+)', DnsResponseName): Extracts all IP addresses from the DNS response name. mv-expand IoC = addresses to typeof(string): Expands the extracted IP addresses into individual rows. Combined KQL looks like below _________________________________________________________________________________________ let dt_lookBack = 1h; let ioc_lookBack = 14d; let IP_TI = ThreatIntelligenceIndicator | where TimeGenerated >= ago(ioc_lookBack) and ExpirationDateTime > now() | summarize LatestIndicatorTime = arg_max(TimeGenerated, *) by IndicatorId | where Active == true | extend IoC = coalesce(NetworkIP, NetworkDestinationIP, NetworkSourceIP,EmailSourceIpAddress,"NO_IP") | where IoC != "NO_IP" ; IP_TI | join kind=innerunique // using innerunique to keep perf fast and result set low, we only need one match to indicate potential malicious activity that needs to be investigated ( _Im_Dns(starttime=ago(dt_lookBack)) | where isnotempty(DnsResponseName) | summarize imDns_mintime=min(TimeGenerated), imDns_maxtime=max(TimeGenerated) by SrcIpAddr, DnsQuery, DnsResponseName, Dvc, EventProduct, EventVendor | extend addresses = extract_all (@'(\d+\.\d+\.\d+\.\d+)', DnsResponseName) | mv-expand IoC = addresses to typeof(string) ) on IoC _________________________________________________________________________________________ Summary This article explores the importance of combining threat intelligence feeds to improve security operations. Key benefits include extending threat coverage, reducing false positives, and enhancing contextual analysis through detailed insights into attackers' tactics and techniques. The integration process also facilitates real-time threat updates and enables better collaboration between different intelligence sources. An example is provided using KQL (Kusto Query Language) to demonstrate how threat intelligence feeds can be combined effectively within Microsoft Sentinel. The query showcases steps like defining lookback periods, extracting relevant indicators, and correlating them with DNS data through an inner unique join. By leveraging this method, organizations can efficiently identify potential malicious activities and strengthen their threat response capabilities. The content emphasizes that integrating threat feeds is not just a technical function but a strategic necessity to fortify organizations against evolving cyber threats.
Sentinel Notebook: Guided Hunting - Domain Generation Algorithm (DGA) Detection
Overview This notebook, titled “Guided Hunting - Domain Generation Algorithm (DGA) Detection”, provides a framework for investigating anomalous network activity by identifying domains generated by algorithms, which are often used by malware to evade detection. It integrates data from Log Analytics (DeviceNetworkEvents) and employs Python-based tools and libraries such as “msticpy”, “pandas”, and “scikit-learn” for analysis and visualization. DGA detection is crucial for cybersecurity as it helps identify and mitigate threats like botnets and malware that use dynamically generated domains for command-and-control communication, making it a key component in proactive threat hunting and network defense. Link: https://github.com/GonePhishing402/SentinelNotebooks/blob/main/DGA_Detection_ManagedIdentity.ipynb What is Domain Generation Algorithm and How to Detect it? A Domain Generation Algorithm (DGA) is a technique used by malware to create numerous domain names for communicating with Command and Control (C2) servers, ensuring continued operation even if some domains are blocked. DGAs evade static signature detection by dynamically generating unpredictable domain names, making it hard for traditional security methods to identify and blacklist them. Machine learning models can effectively detect DGAs by analyzing patterns and features in domain names, leveraging techniques like deep learning to adapt to new variants and identify anomalies that static methods may miss. How to Run the Notebook Log in with Managed Identity This notebook requires you to authenticate with a managed identity. The managed identity can be created from the Azure portal and must have the following RBAC: - Sentinel Contributor - Log Analytics Contributor - AzureML Data Scientist - AzureML Compute Operator Replace the [CLIENT_ID] with the client ID for your managed identity. This can be obtained from the Azure portal under Managed Identities -> Select the identity -> Overview. Note: This notebook will still work if you choose to authenticate with just an azure user using the CLI method as well. Import Libraries This code block is used to import the necessary libraries and label the “credential” variable to use the ManagedIdentityCredential() library. Setup msticpyconfig.yaml This section just pulls the msticpyconfig.yaml to use later on in the notebook. Ensure this is setup before running this notebook and in your current working directory. Setup QueryProvider The query provider is setup for Azure Sentinel. This does not need to be changed unless you want to use a different query provider from msticpy. Connect to Sentinel This code block is used to connect to Sentinel with the managed identity to the workspace specified in your msticpyconfig.yaml. You should see a “connected” after running this code block. DGA Model Creation This code block is designed to use CountVectorizer() and MultinomialNB() to create a model called dga_model.joblib and save it to the path specified in the “model_filename” variable. It is important to change this path specific to your environment. You must give the algorithm data to learn from in order to be effective. Download the domain.csv located here and upload to your current working directory on Azure Machine Learning Workspace: DGA_Detection/data/domain.csv at master · hmaccelerate/DGA_Detection You must also change line 10 in this code block to have the “labeled_domains_df” point to the domain.csv in your environment. Once you run the code block, you should see the model saved and the model accuracy. This number will vary depending on the data you are giving it. Apply dga_model.joblib to Sentinel Data This code block uses the model that we generated in the previous block and runs it against our data we specific in the “query” variable. This is using domain names from the “DeviceNetworkEvents” table in MDE events. The “parse_json” was used in our KQL to extract the appropriate sub-field needed for this search. When this model is run against the data, it will try to determine if any domains in our environment are associated with domain generation algorithms (DGA). If the “IsDGA” column contains a value of “True”, the model has determined that the characteristics of that domain matches a DGA. Here is what the output will look like: Output All Results to CSV This code block will output all the results above to a CSV called “dgaresults.csv”. Change the “output_path” variable to match your environment. Filter DGA Results to CSV This code block will output just the DGA results above to a CSV called “dgaresults2.csv”. Change the “output_path” variable to match your environment. How to Investigate these Results Further You can take the domain results that match DGA and find the correlating IP to see if it matches any threat intelligence. Correlate findings with other security logs, such as firewall or endpoint data, to uncover patterns of malicious behavior. This approach helps pinpoint potential threats and enables proactive mitigation. We can also create logic apps to automate follow-on analysis of these notebooks. This will be covered in a later blog.