student
561 TopicsMicrosoft Foundry Guardrails Getting in Your Way? Here’s How to Dial Them Down
How This All Started So here’s the story. I just got back from a trip and had a pile of footage sitting on my laptop. Being the lazy (sorry, efficient) person I am, I fired up OpenCode and asked GPT-6 Astra, running on Microsoft Foundry, to cut me a travelogue. Nothing fancy: under two minutes, nice lighting, clean transitions, no cringy effects, a quick QA before showing me, and the output in its own folder. Easy, right? Nope. This is what I got instead: “Image processing blocked due to content policy violation.” Seriously? It’s holiday footage! Nothing even remotely dodgy in there. This is a classic false positive from the default guardrails, and the good news is it’s totally fixable. Let me show you how. My Setup Quick context before we dive in: I’ve got two models deployed on Microsoft Foundry, gpt-6-astra and gpt-6-sol. Both were running on Microsoft’s out-of-the-box guardrail. Step 1: Find the Guardrails Page Head over to the Microsoft Foundry portal, click Build, then hit Guardrails in the left menu. You’ll see three guardrails that Microsoft gives you by default: Microsoft.Default, Microsoft.DefaultV2 and Microsoft.MAIDefault. Microsoft.DefaultV2 is the one every new deployment gets, which is why it’s sitting on both of my models. Here’s the catch: you can’t edit or delete these Microsoft-managed defaults. So instead of tweaking them, we’re going to build our own guardrail and swap it in. Step 2: Create Your Own Guardrail Smash that "Create" button and you’ll land on the Create guardrail page. This is where all the knobs and switches live: Every control has three bits: the risk type, the intervention point (does it check what you send in, what the model spits out, or both?) and the action. The magic trick for loosening things up is flipping the action from Block to Annotate. With Annotate, Foundry still scans the content and tags it in the API response, but it stops slamming the door on your request. So What Does Each Setting Actually Do? Before you go on a switching-off spree, it’s worth knowing what each of these does and what you’re giving up when you loosen it. Here’s the quick tour: Jailbreak: This one catches prompts trying to trick the model into ignoring its rules. On Block, those prompts get rejected outright. On Annotate, they go through with a flag. Turn it off completely and you’re trusting the model’s own training to keep it in line. Network (egress rules): Controls which outbound calls a hosted agent is allowed to make. As the portal points out, it only applies to hosted agents, so for plain model deployments like mine it doesn’t change a thing. Indirect prompt injections: Watches user input and tool responses (files, docs, web pages the model reads) for sneaky instructions someone has planted. Leave it on and your agents are protected when they read outside content; switch it off and a dodgy file could quietly hijack your model. For an agentic tool like OpenCode, which reads files and runs shell commands, I’d honestly keep this one on, even if it’s just on Annotate. Spotlighting (Preview): Tags external content inside the prompt so the model can tell your real instructions apart from random untrusted data. Think of it as an extra seatbelt against indirect attacks. Content harms (Hate, Sexual, Self-harm, Violence): Each of these has a severity slider that starts at Medium blocking, meaning anything rated medium or higher gets blocked. Slide it down to Lowest blocking and only the really nasty stuff gets stopped, which kills off most false positives like mine. The asterisk means these four are mandatory: you can turn the dial down, but you can’t switch them off. Blocklists: Want to ban specific words or phrases, like profanity or your competitor’s name? This is where you do it. It’s off by default. Protected material for code and text: Checks whether the model is about to spit out known copyrighted text (song lyrics, articles and so on) or code lifted from public repos. Block stops it; Annotate lets it through with a flag. Switch it off and you’re rolling the dice on your app reproducing someone else’s copyrighted work. Step 3: Pick Your Models Hit Next and Foundry asks which agents and models you want this guardrail on. Any model you’ve already deployed in your project shows up here. For me that’s gpt-6-astra and gpt-6-sol, so I ticked both. Step 4: Name It and Pick a Streaming Mode One more Next and you’re on the Review page. Give your guardrail a name (I went with NoGuardrails, because subtlety isn’t my thing) and pick a streaming mode. You’ve got two choices: Default: Foundry buffers the response and runs it through the guardrail before each chunk goes out. Nothing reaches the user until it’s been checked. Safest option, but you’ll feel a bit of lag when streaming. Asynchronous: Content streams back the moment it’s generated, with the filters running in the background. Much snappier, but flagged content might flash up briefly before the filter catches it, so your app has to clean up after the fact. Microsoft pitches this for low-latency stuff like internal dev tools, which is exactly my use case. Give the summary a quick once-over, then click Create. Done! Did It Work? Yep! With my shiny new guardrail in place, I fired off the exact same request, this time to GPT-6 Sol. And boom: no more content policy error. The model went straight to work scanning my footage and putting the video together. Wrapping Up Look, Microsoft’s default guardrails are a solid starting point, but they can be a bit trigger-happy when you’re doing perfectly legit stuff like video editing, creative work or internal tooling. Since you can’t touch the defaults, the trick is to roll your own: flip Block to Annotate where it makes sense, drag those content harm sliders down, pick the streaming mode that fits your app, and assign it to your deployments. That’s it! One friendly word of warning though: with great power comes great responsibility. Only loosen what you actually need, keep things like indirect prompt injection detection switched on for any agent that reads files or browses the web, and think twice before doing this on anything customer-facing. And if you want to go further than the portal lets you, like switching content filters off completely, you’ll need to apply to Microsoft for approval first. Happy building!158Views1like2CommentsBuilding a Fully Local Maintenance Assistant with Microsoft Foundry Local
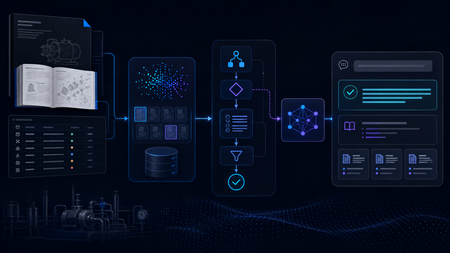
Building the Local RAG System The system was designed as a fully local RAG pipeline, with both retrieval and model inference running on the same machine. The knowledge base came from two equipment manuals covering pump and motor operation, maintenance, and troubleshooting. Rather than treating every page as plain text, I kept different types of information in forms that matched their structure, including paragraphs, Q&A entries, tables, procedures, and fault–cause–remedy troubleshooting records. The final corpus contained 165 retrievable records. Each record was embedded locally with all-MiniLM-L6-v2 and stored in ChromaDB. At query time, the system retrieved the most relevant manual records and passed the selected evidence to Phi-4-mini, a small language model (SLM) running through Microsoft Foundry Local, for grounded response generation. Once the required models and resources were installed, the full retrieval and inference workflow could run on the local machine without depending on cloud inference. I began with a simple Single-Agent RAG baseline. For each query, the system retrieved relevant manual evidence and used a single Phi-4-mini call to generate a grounded response. That gave me a clear reference point before I started adding separate model-driven stages for query understanding, retrieval, and reasoning. The Experiment That Changed the Architecture The next version split the workflow into three roles: Query Understanding, Retrieval, and Reasoning. All three reused the same local Phi-4-mini model through Microsoft Foundry Local, but with different prompts and responsibilities. I expected this separation to give the system more control over how queries were interpreted and how evidence moved through the pipeline. In practice, the extra stages added a noticeable cost, so I profiled the pipeline to see where the time was going. The stage timings showed where the delay was coming from: Query Understanding: 15.469 s Evidence Selection: 11.557 s Reasoning: 8.251 s Vector search: 0.002 s Vector search was only a tiny part of the total time. Most of the latency came from the stages that repeatedly called the local model. The bottleneck was repeated model inference, not vector search. I therefore started looking for decisions that could be handled reliably without another SLM call. The end-to-end numbers matched the profile. The Single-Agent baseline averaged 23.1 seconds per query, compared with 33.0 seconds for the Initial Multi-Agent system, without a consistent improvement in answer quality. That shifted the focus of the project from making the pipeline more agentic to deciding where model reasoning was actually useful, and where simpler deterministic control would be enough. A Deterministic-First Hybrid Design The Hybrid redesign kept the same local retrieval stack and Phi-4-mini setup, but changed when the model was asked to make decisions. Clear, bounded routing decisions were handled deterministically first. Depending on the query, the system could proceed to retrieval, request clarification when required information was missing, or stop requests that depended on information outside the manuals. Phi-4-mini was used for query analysis only when these rules could not make a reliable decision. In the 12-case final evaluation, Phi-4-mini was needed for query analysis in only three cases. The remaining routing decisions were handled deterministically. The Hybrid pipeline also handled clearly multi-part requests differently. Instead of relying on a single retrieval query, the system could identify separate information needs and search them alongside the original request. For example, a two-part pump question could be handled like this: Multi-part Query │ ▼ "What should I check before starting the B114N pump, and what should I inspect if it fails to prime?" │ ▼ Deterministic Decomposition │ ┌──────────────────┼──────────────────┐ ▼ ▼ ▼ Original Query Pre-start Checks Failure-to-prime Search Search Search │ │ │ └──────────────────┼──────────────────┘ ▼ Combine Ranked Results │ ▼ Retain Component Provenance │ ▼ Candidate Evidence The decomposition was deliberately conservative. It handled clear structures such as multiple questions, comparisons, or lists of requested facts, and did not split a query simply because it contained a comma or the word “and.” Once candidate evidence had been retrieved, clear matches could be selected without another model call, while Phi-4-mini was used when the candidates required additional judgement. Candidate Evidence │ ▼ Can deterministic rules select the evidence? / \ Yes No │ │ ▼ ▼ Deterministic Selection Phi-4-mini Evidence Selection │ │ └───────┬────────┘ ▼ Selected Evidence │ ▼ Evidence Guard │ ┌────────────────┼────────────────┐ ▼ ▼ ▼ Sufficient More evidence Insufficient coverage already in the evidence │ candidate pool │ ▼ │ ▼ Response ▼ Stop Generation Retain additional evidence │ ▼ Re-check coverage │ └──────► Evidence Guard The Evidence Guard checked whether the selected records covered the information requested by the user. Supporting evidence already present in the retrieved candidate set could be added before checking coverage again. When the available evidence was still insufficient, the pipeline stopped instead of asking the model to fill the gap. The guard never triggered a new retrieval or SLM call. The final response stage used the model selectively as well. Some bounded cases, including clarification, out-of-scope requests, insufficient evidence, and selected structured answers, could be handled without another model call. When synthesis was still needed, Phi-4-mini generated a grounded response from the selected evidence, while citation formatting remained deterministic. What Changed? I evaluated the three architectures on the same frozen 12-case test set, using answer quality and end-to-end latency as the main comparison points. The Final Hybrid system produced the lowest average latency while maintaining answer quality at roughly the same level as the Single-Agent baseline. Architecture Quality score Mean latency Single-Agent RAG 7.00 / 10 22.709 s Initial Multi-Agent 6.50 / 10 33.454 s Final Hybrid 7.08 / 10 16.905 s The Initial Multi-Agent design was the slowest of the three and did not produce a consistent quality improvement over the simpler baseline. The Hybrid redesign reversed that trend: average latency fell to 16.9 seconds while the overall quality score remained comparable to the baseline. For this prototype, adding more model-driven stages was therefore less useful than being selective about where model reasoning was actually needed. The call counts show the same change. Across the 12 final cases, the Hybrid system made 12 stage-level SLM calls: three during query analysis, four during evidence selection, and five during reasoning. A pipeline that invoked the SLM at all three stages for every query would require 36 stage-level calls over the same 12 cases. This was only a small 12-case evaluation, so I would not treat it as a final measure of system performance. What it did show was that cutting unnecessary SLM calls made the local pipeline faster without hurting the quality score in this test. From Pipeline to Local Application I connected the Final Hybrid backend to a lightweight PySide6 desktop interface. The application lets a user enter a maintenance question, view the generated answer, and inspect the supporting manual sources. What I Learned The biggest lesson from the project was that adding more model-driven stages did not automatically make the system better. The Initial Multi-Agent design gave each stage a clearer role, but the extra SLM calls increased latency without consistently improving answer quality. I also found that good retrieval alone was not enough. The system still needed to decide whether the retrieved evidence actually covered the user’s request and whether another model call was necessary. This is where deterministic routing, evidence checks, and model reasoning worked well together. By the end of the project, the question was no longer how many agents to add, but where an SLM call was actually useful. In this system, the best result came from combining simple deterministic control with model reasoning only where it was needed. What Comes Next The next step would be to test the system on a larger and more varied set of maintenance questions, including more unseen cases and feedback from engineers. I would also like to compare different local models and hardware configurations to see how response quality, latency, and resource use change in practice. Beyond that, the same approach could be applied to a larger maintenance knowledge base or adapted to other equipment domains. One question I would like to explore further is whether the deterministic-first design still works as well when the corpus, query types, and deployment conditions become more varied. Resources Foundry Local documentation Get started with Foundry Local Foundry Local architecture overview443Views0likes0CommentsSet Up Plaud Note Pro with Microsoft Foundry
Prerequisites Riffado, up and running: follow the setup guide in the official Riffado repository to get it going with Docker Compose. A Microsoft Foundry (formerly Azure AI Foundry) resource, with the models you want deployed; in my case, whisper for transcription and o3-mini for summaries. A Plaud device, or any audio recordings you can import into Riffado. Once Riffado is up, head to the Settings page > Providers > Add Provider, and select Custom. This is where the Azure details will go. Why "OpenAI-compatible" isn’t one thing on Microsoft Foundry Azure AI Foundry exposes two different API surfaces on the same resource, and which one serves your model depends on the model: Surface Path shape Serves OpenAI-compatible? v1 route /openai/v1/… gpt-4o-transcribe, gpt-4o-mini-transcribe, chat models, embeddings Yes: Bearer auth, model in the body, no api-version needed Classic route /openai/deployments/{name}/… Whisper (and other legacy audio) No: deployment name lives in the URL, and ?api-version= is mandatory A generic OpenAI client (Riffado's included) can only speak the first dialect. It has nowhere to put a deployment name in the path and no way to append a query parameter. That single fact drives everything below. Part 1 - Transcription Whisper and the DeploymentNotFound mystery Symptom My very first transcription attempt in Riffado failed with 404 Resource not found. Off to a flying start. Configured provider: base URL https://<resource>.services.ai.azure.com, model whisper. Dead end #1: the missing path The first bug was mine: the base URL had no path. Riffado's OpenAI client appends /audio/transcriptions to whatever you give it, so requests were hitting https://<resource>…/audio/transcriptions, a path that doesn't exist on the resource at all. Fixing the base URL to end in /openai/v1 got us to a more interesting error: POST /openai/v1/audio/transcriptions · model=whisper {"error":{"code":"DeploymentNotFound","message":"The API deployment for this resource does not exist. If you created the deployment within the last 5 minutes, please wait a moment and try again."}} Dead end #2: catalog ≠ deployment Worth checking before anything else: selecting a model in the Foundry catalog is not deploying it. GET /openai/v1/models lists everything you could deploy; only Deployments → Deploy model creates an endpoint that answers. If you get DeploymentNotFound, first confirm a deployment actually exists (the listing below requires only the API key): enumerate real deployments (classic control-plane, key auth) curl -s -H "api-key: $KEY" \ "https://<resource>.openai.azure.com/openai/deployments?api-version=2023-03-15-preview" # → {"data":[{"id":"whisper","model":"whisper","status":"succeeded",…}]} The actual cause Here is the part that nearly drove me mad: the deployment existed and was succeeded, yet the v1 route still said DeploymentNotFound. Because Whisper deployments are not served on the v1 route at all. They only answer on the classic path. Verified side by side with the same tiny WAV file: Request Result POST /openai/v1/audio/transcriptions · model=whisper · Bearer 404 DeploymentNotFound POST /openai/deployments/whisper/audio/transcriptions?api-version=2024-06-01 · Bearer 200 {"text":"you"} Same classic path, without ?api-version= 404 Resource not found Three constraints, then: Whisper needs the classic path; the classic path needs api-version; Riffado can send neither. One piece of good news hiding in the table: the classic route accepts Authorization: Bearer, not just Azure's api-key header, so the shim doesn't have to touch auth at all. The fix: a Caddy shim Drop a stock caddy:2-alpine container into the Compose network. Riffado points at it as if it were OpenAI; the shim rewrites the path, injects api-version, and proxies to Azure. The Bearer header passes through untouched. azure-shim.Caddyfile { admin off auto_https off } :80 { @transcribe path /v1/audio/transcriptions /audio/transcriptions handle @transcribe { rewrite * /openai/deployments/whisper/audio/transcriptions?api-version=2024-06-01 reverse_proxy https://<resource>.services.ai.azure.com { header_up Host <resource>.services.ai.azure.com } } handle { respond "azure-shim ok" 200 } } docker-compose.yml (added service) azure-shim: image: caddy:2-alpine restart: unless-stopped volumes: - ./azure-shim.Caddyfile:/etc/caddy/Caddyfile:ro Riffado's provider settings become: Field Value Base URL http://azure-shim/v1 Model whisper (must equal the deployment name) API key the Azure resource key (forwarded as Bearer) Verified From inside the Riffado container: POST http://azure-shim/v1/audio/transcriptions → 200 {"text":"…"}. Transcription works end-to-end in the UI. Part 2 · Summaries & titles o3-mini and the empty answer Symptom The summary button showed "An unexpected error occurred." The container logs were more honest: riffado-app logs Error generating title: TypeError: undefined is not an object (evaluating 'C.choices[0]') Riffado calls chat/completions and reads choices[0] without checking whether the response was an error. So anything the API refuses becomes "an unexpected error." What was it refusing? Cause 1: reasoning models reject the classic knobs o3-mini belongs to Azure/OpenAI's o-series reasoning models, which hard-reject parameters every classic chat client sends. Riffado sends temperature: 0.7 and max_tokens: 50 for titles (0.5 / 2000 for summaries), and o3-mini answers: POST /openai/v1/chat/completions · model=o3-mini HTTP 400 {"error":{"message":"Unsupported parameter: 'max_tokens' is not supported with this model. Use 'max_completion_tokens' instead.", …}} # and with max_tokens fixed: HTTP 400 {"error":{"message":"Unsupported parameter: 'temperature' is not supported with this model.", …}} Cause 2: reasoning tokens starve the output Stripping the bad params gets you to 200, and then comes a subtler failure, my personal favourite of this whole saga. Reasoning models spend completion tokens on internal "thinking" before emitting a single visible character. Riffado's 50-token title budget is consumed entirely by reasoning, and the reply comes back syntactically valid and empty: max_completion_tokens reasoning_effort finish_reason content 50 not set length "" (all 50 spent reasoning) 2000 not set stop "Q3 Budget Planning Strategy Meeting" 2000 low stop same, less reasoning overhead The fix: a Node shim that rewrites the request body Caddy can rewrite paths but not JSON bodies, so this shim is ~60 lines of dependency-free Node on node:20-alpine. Per request it: converts max_tokens → max_completion_tokens, strips temperature / top_p / penalties, floors the token budget at 4000, sets reasoning_effort: "low", maps /v1/* → /openai/v1/*, and forwards to the Azure resource. o3-shim.js const http = require('http'); const https = require('https'); const UPSTREAM_HOST = '<resource>.services.ai.azure.com'; // Params o-series reasoning models reject on chat/completions. const STRIP = ['temperature','top_p','presence_penalty', 'frequency_penalty','logprobs','top_logprobs']; const server = http.createServer((req, res) => { const chunks = []; req.on('data', c => chunks.push(c)); req.on('end', () => { let body = Buffer.concat(chunks); // Riffado's base_url is http://o3-shim/v1 → map to Azure's /openai/v1 let path = req.url; if (path.startsWith('/v1/')) path = '/openai' + path; const ct = (req.headers['content-type'] || '').toLowerCase(); if (ct.includes('application/json') && body.length) { try { const j = JSON.parse(body.toString('utf8')); if (j && typeof j === 'object' && !Array.isArray(j)) { if ('max_tokens' in j) { if (!('max_completion_tokens' in j)) j.max_completion_tokens = j.max_tokens; delete j.max_tokens; } // Reasoning spends tokens before any visible output; small // budgets (Riffado sends 50 for titles) return empty strings. if (Array.isArray(j.messages)) { j.max_completion_tokens = Math.max(Number(j.max_completion_tokens) || 0, 4000); if (!('reasoning_effort' in j)) j.reasoning_effort = 'low'; } for (const k of STRIP) delete j[k]; body = Buffer.from(JSON.stringify(j)); } } catch (_) { /* not JSON - forward untouched */ } } const headers = { ...req.headers, host: UPSTREAM_HOST, 'content-length': Buffer.byteLength(body) }; const up = https.request( { host: UPSTREAM_HOST, port: 443, method: req.method, path, headers }, upRes => { res.writeHead(upRes.statusCode, upRes.headers); upRes.pipe(res); } ); up.on('error', e => { res.writeHead(502, {'content-type':'application/json'}); res.end(JSON.stringify({error:{message:'o3-shim upstream error: '+e.message}})); }); up.end(body); }); }); server.listen(80, () => console.log('o3-shim listening on :80')); docker-compose.yml (added service) o3-shim: image: node:20-alpine restart: unless-stopped working_dir: /app command: ["node", "/app/o3-shim.js"] volumes: - ./o3-shim.js:/app/o3-shim.js:ro Add a second provider in Riffado (base URL http://o3-shim/v1, model o3-mini, the resource's API key) and set it as the default enhancement provider (summaries/titles), keeping the Whisper one as default for transcription. Riffado's exact title request (temperature: 0.7, max_tokens: 50) through the shim → 200, finish_reason: stop, real title text. A full meeting-transcript summary returns structured key points and action items. The final shape Reading it left to right: Riffado never talks to Azure directly. Transcription requests pass through azure-shim, a stock Caddy container that rewrites each request onto Whisper's classic deployment path and injects the mandatory api-version parameter. Summary and title requests pass through o3-shim, a tiny Node server that rewrites the request body into the shape o3-mini accepts and floors the token budget so the model's internal reasoning cannot starve the actual answer. As far as Riffado is concerned, it is simply talking to two ordinary OpenAI providers. Both shims live on the Compose network only; nothing is exposed publicly. Riffado is unmodified. Verification checklist Each layer, testable in isolation. Run these before blaming the app: smoke tests # 1. Key + resource alive? (v1 models listing, Bearer auth) curl -s -H "Authorization: Bearer $KEY" \ https://<resource>.services.ai.azure.com/openai/v1/models | head -c 200 # 2. Whisper answers on the classic path? curl -s -H "Authorization: Bearer $KEY" -F file=@test.wav \ "https://<resource>.services.ai.azure.com/openai/deployments/whisper/audio/transcriptions?api-version=2024-06-01" # 3. Shim translates correctly? (from inside the compose network) docker exec riffado-app node -e "fetch('http://azure-shim/') .then(r=>r.text()).then(console.log)" # 4. o3-mini via shim, sending the params Riffado sends? # (temperature + max_tokens:50; the shim must absorb both) If you'd rather not run shims Both shims exist because of the specific models chosen. Pick models that live natively on the v1 route and Riffado connects directly, with base URL https://<resource>.services.ai.azure.com/openai/v1 and zero extra containers: Transcription: deploy gpt-4o-mini-transcribe (or gpt-4o-transcribe) instead of Whisper. Summaries: deploy a non-reasoning chat model such as gpt-4o-mini, which happily accepts temperature and max_tokens. The shim approach earns its keep when you're standardized on specific models (Whisper's transcription quality, o3-mini's reasoning), or when you want a control point to add logging, retries, or budget caps later. For reference, this is what the finished setup looks like on Riffado's side. Each shim is registered as a plain Custom provider. Here is the whisper provider pointing at azure-shim, with Use for transcription ticked: And once both are saved, they sit side by side in the providers list, whisper tagged for transcription and o3-mini tagged for enhancement: A quick look at the Foundry portal In the Microsoft Foundry portal, head over to Models > AI Services and you will find a pleasant surprise: fifteen AI service models already deployed and ready to use, covering the Azure Speech family (including Voice Live and Speech to Text), Azure Translator, Azure Language, and Content Understanding: You can of course deploy another model for this, but the pre-deployed ones are a handy cost-saving option. Click on the Azure Speech – Voice Live radio button and you will be shown the Base URL and API Key, which you can then paste into the provider settings on Riffado's Settings page. A quick note on cost: these services are not free. They are billed pay-as-you-go based on usage. Azure Speech transcription is charged per audio hour, and Voice Live pricing is tiered by the model you choose. The free tier does include a monthly allowance, though. Check the Azure Speech pricing page before committing. And if you would rather deploy a dedicated transcription model such as whisper, Foundry gives you the flexibility to do just that. Open the model page in the catalogue, click Deploy, and go with Default settings unless you need custom quotas or guardrails: Let's test the setup On your Plaud device, just tap to start recording. The little LED bars light up to show it is listening: Or skip the device entirely and upload an audio file straight into Riffado using the Upload Audio button. Either way, the recording lands on the Recordings page; hit Transcribe and let the spinner do its thing: As you can see below, whisper, the transcription model we deployed earlier, even managed to transcribe a recording in Malay without a hitch. My 3:32 test clip came back as 186 words of clean Malay, with the language correctly detected and tagged: I have also set o3-mini as the enhancement provider, and it enhanced the transcription with a proper summary, key points, and title as well! The Meeting Notes-style summary came straight out of o3-mini through the shim, with zero manual prompting. Wrapping up What started as a TikTok-fuelled impulse buy nearly killed off by subscription pricing ended up as a fully self-hosted pipeline: Plaud for recording, Riffado as the interface, and Microsoft Foundry serving whisper and o3-mini behind two tiny shims. The total extra infrastructure came to two containers and roughly sixty lines of code, and not a single monthly subscription in sight. If you try this setup and run into a failure mode I have not covered here, do share it in the comments. Half the fun is in the debugging.411Views0likes0CommentsMaster the Command Line with GitHub Copilot CLI:
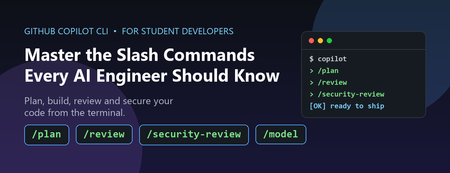
If you are a student aiming to become an AI engineer or a software developer, the terminal is about to become your most powerful classroom. https://github.com/features/copilot/cli/ brings an AI agent directly into your command line, and its slash commands (typed as /something ) are the shortcuts that unlock its real capabilities. The problem most students hit is simple: they install a powerful tool and then only ever use 10% of it. They type questions, get answers, and never discover the commands that turn Copilot CLI from a chatbot into a genuine pair programmer. This post fixes that. We will walk through the most useful slash commands, explain why you would reach for each one, and give you concrete student scenarios for every command. Why This Matters Now AI-assisted development is no longer optional in the industry. Employers increasingly expect graduates to be fluent with AI developer tools, not just programming languages. Learning the Copilot CLI slash commands early gives you two advantages: Speed: You spend less time context-switching between docs, terminal, and editor. Good habits: Commands like code review and security review teach you professional workflows while you are still learning. Everything below is grounded in the actual command set shipped in Copilot CLI. To see the full, current list at any time, just type /help inside the CLI. How to Run a Slash Command Slash commands are typed at the Copilot CLI prompt. Start a command with a forward slash and the CLI shows you an autocomplete menu: # Launch the CLI copilot # Then, at the prompt, type a slash to browse commands / # Or jump straight to one /model /plan /review A few related shortcuts are worth memorising on day one: ? — show quick help @ — mention files so Copilot reads them # — mention GitHub issues and pull requests ! — execute a raw shell command without leaving the prompt The Most Useful Slash Commands for Students The table below groups the highest-value commands by the job you are trying to do. Each row includes a realistic student scenario so you know exactly when to reach for it. Learning and Planning Command What it does Student scenario: why use it /plan Creates an implementation plan before any code is written. You have a coursework project ("build a sentiment classifier") but no idea where to start. Run /plan to get a step-by-step roadmap you can follow and learn from, instead of diving in blind. /research Runs a deep research investigation using GitHub search and web sources. For a dissertation or capstone, you need to compare approaches (e.g. "vector databases for RAG"). Use /research to gather grounded, cited findings rather than guessing. /ask Asks a quick side question without adding it to the conversation history. Mid-project you forget what a Python decorator does. Ask with /ask so your main task context stays clean and focused. /model Selects which AI model to use (or auto to let Copilot pick). A simple formatting fix needs a fast model; a tricky algorithm needs a stronger one. Learn to match the model to the task — a real engineering skill. Writing and Reviewing Code Command What it does Student scenario: why use it /diff Reviews the changes made in the current directory. Before submitting an assignment, run /diff to see exactly what changed — catch that debug print() you forgot to remove. /review Runs a code review agent to analyse your changes. No teaching assistant available at 2am? /review gives you professional-style feedback on bugs and logic errors so you learn before the deadline, not after grading. /security-review Analyses staged and unstaged changes for security vulnerabilities. Building a web app for a module? Run /security-review to spot issues like injection flaws — and start building the security mindset employers want. /pr Operates on pull requests for the current branch. Contributing to a group project or open source? Use /pr to manage pull requests and learn the collaboration workflow used in every real engineering team. /ide Connects Copilot to an IDE workspace. You prefer working in VS Code. Connect with /ide so Copilot understands your open files and editor context. Managing Your Work Session Command What it does Student scenario: why use it /resume Switches to a different saved session. You worked on a lab yesterday and want to continue today. /resume brings back the full context instead of starting from scratch. /context Shows context-window token usage and a visualization. Copilot seems to be "forgetting" earlier details. Check /context to understand how much conversation history fits — a core concept for any aspiring AI engineer. /compact Summarises conversation history to reduce context usage. Long debugging session running out of context? /compact condenses it so you can keep going without losing the thread. /undo / /rewind Rewinds the last turn and reverts file changes. Copilot made an edit that broke your tests. /undo safely rolls it back so you can experiment fearlessly. /usage Displays session usage metrics and statistics. Curious how much you are relying on the AI? /usage helps you stay aware of your consumption and learning balance. Setting Up and Extending the Environment Command What it does Student scenario: why use it /init Initialises Copilot instructions for the current repository. Starting a new project repo? /init sets up custom instructions so Copilot follows your project's conventions consistently. /mcp Manages Model Context Protocol (MCP) server configuration. Want Copilot to query a database or external tool? /mcp connects MCP servers — a cutting-edge skill for AI engineering portfolios. /agent Browses and selects specialised agents. Different tasks suit different agents. /agent lets you pick the right specialist for the job. /memory Shows memory status, or enables/disables memory across sessions. Want Copilot to remember your preferences (e.g. "I use Python type hints")? Manage that with /memory . A Realistic Student Workflow, End to End Here is how these commands fit together for a typical assignment — building a small machine learning script. Notice how the commands chain into a professional development loop: # 1. Plan the work before touching code /plan # 2. Pick an appropriate model for the task /model # 3. Let Copilot reference your data file @data/train.csv # 4. After Copilot writes code, see what changed /diff # 5. Get an automated code review /review # 6. Check for security issues before you submit /security-review # 7. If an edit broke something, roll it back /undo This loop —> plan, build, review, secure, iterate, is exactly the cycle used by professional engineering teams. By practising it now with Copilot CLI, you are rehearsing the workflow you will use in your first job. Responsible Use: Learn With AI, Not Instead Of It A quick but important note for students. AI assistance is a learning accelerator, not a replacement for understanding. Keep these principles in mind: Read the explanations, not just the code. Use /ask and /review to understand why something works. Check your institution's policy. Many courses have rules about AI use in assessed work, make sure you comply and cite appropriately. Never paste secrets. Keep API keys, passwords, and personal data out of prompts. Verify before you trust. Run the code, read the security review, and confirm claims against official documentation. Key Takeaways Slash commands turn Copilot CLI from a Q&A box into a full development partner. Start with /plan , /diff , /review , and /security-review they build professional habits immediately. Use /model , /context , and /compact to understand how AI systems actually work under the hood. Type /help any time to see the complete, current command list for your version. Next Steps and Resources Read the official guide: Use GitHub Copilot CLI Explore the broader docs: GitHub Copilot documentation Open the CLI and run /help to browse every command interactively. Pick one assignment this week and run the full plan → review → security-review loop on it. The fastest way to learn is to try. Launch Copilot CLI, type a single / , and start exploring. Your future engineering self will thank you.1.7KViews0likes0CommentsBuilding Reliable AI Coding Workflows Using Modular AI Agent Optimization
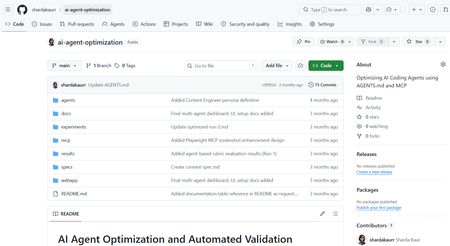
Artificial Intelligence is rapidly transforming the modern software development industry. AI-powered coding assistants such as GitHub Copilot, Claude Code, and other Large Language Model (LLM)-based systems are helping developers automate repetitive coding tasks, improve productivity, and accelerate software development processes. These tools can generate code, assist with debugging, provide recommendations, and support developers during implementation. However, despite their growing capabilities, many AI coding assistants still face challenges related to reliability, maintainability, project-specific conventions, and structured software engineering workflows. Most coding assistants perform well for generic programming tasks but often struggle when working with domain-specific development requirements, API integrations, project architectures, validation workflows, and coding standards. In real-world software engineering environments, developers require systems that not only generate code but also follow project conventions, maintain readability, support modular development, and improve long-term maintainability. The project “AI Agents Optimization” focuses on improving the reliability and effectiveness of AI coding agents by designing structured workflows, modular configurations, validation mechanisms, and optimized task execution strategies. The objective of the project is to investigate how AI agents can become dependable collaborators in practical software engineering tasks instead of functioning only as autocomplete systems. The project explores different approaches for organizing AI agent workflows using structured instruction handling, modular task division, context management, validation systems, and integration of external tools and documentation sources. Different agent configurations are analyzed and evaluated to understand how workflow optimization affects software development quality and performance. Why Existing AI Coding Workflows Often Fail Most AI coding assistants perform well for isolated coding tasks but struggle in real-world engineering environments where projects involve multiple files, coding standards, APIs, validation requirements, and contextual dependencies. For example, a generic prompt such as: “Build authentication middleware” may generate functional code, but the output often lacks: Project-specific architecture Error handling consistency Validation logic Security best practices Dependency awareness This project approaches the problem differently by introducing a structured workflow pipeline where AI agents operate in defined stages rather than generating outputs in a single step. The workflow separates planning, generation, validation, and refinement into independent modules. This improves maintainability, reduces inconsistent outputs, and supports iterative refinement similar to real software engineering workflows. Project Objectives The primary objective of this project is to optimize AI coding agents for real-world software engineering workflows. The project aims to improve how AI systems handle development tasks such as code generation, debugging, testing, validation, feature implementation, and workflow management. Another major objective is to design modular AI workflows where different stages of software development are managed systematically. The workflow focuses on task planning, instruction processing, validation, refinement, and output evaluation. This structured approach improves transparency, maintainability, and consistency in AI-generated outputs. The project also aims to evaluate how AI coding agents perform under different configurations and development scenarios. By testing multiple workflows and structured instruction methods, the project analyzes how optimization techniques improve development reliability and coding quality. Technologies and Tools Used The project utilizes multiple modern technologies and development tools for experimentation and workflow optimization. Technology / Tool Purpose Python Automation and scripting GitHub Copilot AI-assisted coding Claude / LLM APIs AI workflow experimentation Visual Studio Code Development environment Git & GitHub Version control and repository management Structured Prompting Workflow optimization MCP Concepts Tool and context integration These tools collectively support the implementation and testing of optimized AI coding workflows. Implementation Workflow The system was implemented using a modular AI workflow pipeline where each stage performs a dedicated engineering task. Step 1 — Task Parsing The user submits a development task or coding requirement. The Instruction Processing Module extracts: Objective Constraints Project context Expected output format Example structured prompt: Task: Create JWT authentication middleware Language: Node.js Constraints: - Use Express.js - Add token validation - Follow modular architecture - Include error handling Step 2 — Planning & Reasoning The Planning Module divides the task into subtasks such as: Route handling Token verification Error management Security validation This improves reasoning consistency before generation begins. Step 3 — Code Generation The Code Generation Module produces outputs using structured prompts and contextual references instead of generic instructions. Step 4 — Validation Generated outputs are validated using: Syntax checks Logical consistency checks Formatting standards Dependency validation Step 5 — Refinement If validation fails, the workflow loops back into refinement where issues are corrected before final delivery. System Workflow The workflow of the AI Agents Optimization system is based on modular task execution and structured development processes. The workflow begins with task planning and requirement analysis. The AI agent receives structured instructions along with coding constraints, project context, and validation requirements. The system processes the provided instructions and generates outputs according to defined workflows and development standards. Different configurations are tested to evaluate how instruction structures and modular task handling influence the quality of generated code The workflow also includes validation and refinement stages where generated outputs are analyzed for correctness, maintainability, and consistency. The project focuses not only on code generation but also on improving readability, workflow transparency, debugging support, and adherence to project conventions. Key Features of the Project Structured AI workflow design Modular task execution AI-assisted software development Workflow optimization strategies Validation and refinement mechanisms Integration of development tools and documentation Improved maintainability and readability Support for practical software engineering workflows Challenges Faced During Development One of the major challenges encountered during the project was maintaining consistency and reliability in AI-generated outputs. Different AI models often produce different responses depending on prompts, context, and task structure. Designing workflows that improve output stability and maintain coding standards required careful experimentation and optimization. Another challenge involved integrating structured workflows while ensuring flexibility in task execution. AI systems often require clear instructions and contextual information to produce accurate outputs. Balancing automation with maintainability and project-specific requirements was an important aspect of the project. Managing validation and refinement processes was also challenging because generated outputs needed to be evaluated not only for correctness but also for readability, maintainability, and software engineering best practices. Observations and Outcomes During experimentation, structured workflows produced more reliable and maintainable outputs compared to single-prompt generation approaches. Some important observations included: Reduced repetitive corrections during code refinement Improved consistency in generated outputs Better adherence to coding structure and formatting More stable workflow behavior for multi-step tasks Improved readability and maintainability of generated code The validation and refinement stages were particularly effective in reducing incomplete outputs and improving response quality. Although the project focuses primarily on workflow architecture and qualitative analysis rather than benchmark testing, the results demonstrate that modular AI pipelines can significantly improve practical software engineering workflows. Future Enhancements The project can be further enhanced by implementing advanced multi-agent collaboration systems where multiple AI agents work together on complex software development tasks. Future versions may also include real-time documentation integration, automated testing frameworks, cloud-based workflow management, and improved reasoning models. Additional enhancements may include IDE extensions, intelligent debugging systems, automated code review mechanisms, and adaptive workflow optimization based on project requirements. Conclusion The AI Agents Optimization project demonstrates how structured workflows and modular configurations can improve the effectiveness of AI-powered coding assistants in modern software engineering environments. By focusing on workflow optimization, validation mechanisms, modular task execution, and structured instruction handling, the project highlights the future potential of AI agents as reliable development collaborators capable of supporting real-world software engineering processes. The project represents an important step toward building dependable AI-assisted development systems that improve productivity, maintainability, and software quality while supporting modern engineering practices. How to Try This Workflow Define a structured development task Provide project constraints and context Break the task into subtasks Generate output using structured prompts Validate output quality Refine based on validation feedback1.1KViews0likes0CommentsSpec-Driven Development for AI-Enabled Enterprise Systems
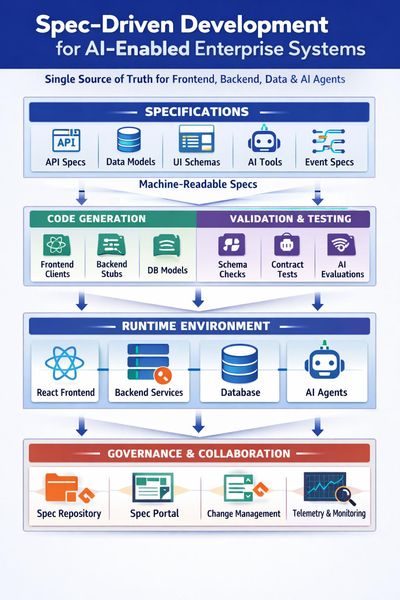
Spec-Driven Development for AI-Enabled Enterprise Systems How to make specs the single source of truth for your React frontends, backend services, data, and AI agents. If you are building an enterprise system with a React frontend, backend APIs and services, a database layer, and shared libraries, moving to Spec-Driven Development (SDD) can feel like a big cultural shift. For AI developers and engineers, though, it is a gift: structured, machine-readable specifications are exactly what both humans and AI coding agents need to stay aligned and productive. This post walks through how to structure specs, version contracts, design workflows, and integrate AI agents in a way that scales. Along the way, it references Microsoft’s public guidance on microservices, APIs, DevOps, and architecture so you can go deeper where needed. 1. Structuring specifications for an enterprise system For a serious enterprise system, treat specs as layered and modular rather than a single monolithic document. A good mental model is Domain-Driven Design (DDD) and bounded contexts (see https://learn.microsoft.com/azure/architecture/microservices/model/domain-analysis Business and domain layer This layer is technology-agnostic and captures: Business capabilities and problem statements Domain language and key entities Business rules and workflows Non-functional requirements (performance, security, compliance, SLAs) Solution and architecture layer Here you define how the system is shaped: System context and C4-style diagrams Service boundaries and ownership Integration patterns and event flows Data ownership and high-level models Microsoft’s microservices guidance is a solid reference: https://learn.microsoft.com/azure/architecture/microservices/. Implementation-oriented specs per component For each concrete component, keep a focused spec: Frontend / UI (React): screen catalogue, UX flows, state contracts, API dependencies, validation rules, accessibility and performance requirements. APIs / services: OpenAPI or AsyncAPI contracts, error models, authentication and authorisation, rate limits, SLAs, observability requirements. Database / schema: logical data model, ownership per service, migration strategy, retention, indexing, partitioning. Shared libraries: responsibilities, versioning policy, supported runtimes, compatibility matrix. Integrations: protocols, payloads, sequencing, idempotency, retry and backoff, SLAs, failure modes. In practice, this usually means: One “master” business and architecture spec per domain or product Separate specs per service or module (frontend app, each backend service, shared library, integration) Everything linked via IDs (for example REQ-123, SVC-ORDER-001) so you can trace from requirement to spec, implementation, and tests 2. Templates and standards that scale To keep things consistent across teams, use a base template that all components share, then extend it with technology-specific sections. This works well for both human readers and AI agents consuming the specs. Base specification template Every spec, regardless of component type, should include: Purpose and scope Stakeholders and dependencies Requirements mapping (list of requirement IDs covered) Architecture and interaction overview Contracts (APIs, events, data) Non-functional requirements Risks and open questions Test and acceptance criteria Extended templates per component Frontend: UX flows, wireframes or Figma links, accessibility, performance budgets, offline behaviour, error states. API / service: OpenAPI or AsyncAPI link, auth and authorisation, throttling, logging and metrics, health endpoints. See logging and monitoring guidance at https://learn.microsoft.com/azure/architecture/microservices/logging-monitoring Database: schema definition, migration plan, backup and restore, data lifecycle, multi-tenant strategy. Integration: sequence diagrams, error handling, retry and idempotency, message contracts, security. 3. Contracts, versioning, and change management API contracts For SDD, API contracts are first-class citizens. Define them via OpenAPI or AsyncAPI and treat the spec as the source of truth. Use contract testing to keep providers and consumers aligned, and version APIs explicitly (for example v1, v2) rather than breaking changes in place. Microsoft’s API design guidance is a good starting point: https://learn.microsoft.com/azure/architecture/best-practices/api-design and Azure API Management at https://learn.microsoft.com/azure/api-management/. Database migrations Any spec change that affects data should include a migration plan. Use migration tooling such as EF Core migrations, Flyway, or Liquibase, and treat migration scripts as code. Document backward-compatibility windows so APIs can support both old and new fields for a defined period. Shared DTOs and models Prefer sharing contracts (OpenAPI, JSON Schema) over large shared code libraries. If you must share code, version the shared library independently and document compatibility (for example, “Service A supports SharedLib 2.x”). Keep DTOs at the edges and map to internal domain models inside each service. Cross-service dependencies Capture dependencies explicitly in specs, such as “Order Service depends on Customer v1.3+ for endpoint /customers/{id}”. Use consumer-driven contracts and CI checks to prevent breaking changes. For event-driven systems, document event contracts and evolution rules. See event-driven architecture guidance at https://learn.microsoft.com/azure/architecture/reference-architectures/event-driven/event-driven-architecture-overview. Spec versioning and change management Version specs semantically (for example OrderServiceSpec v1.2.0) and record what changed, why, impact, and migration steps. Link spec versions to releases or tags in Git and to work items in Azure DevOps or GitHub Issues. Azure Boards is useful here: https://learn.microsoft.com/azure/devops/boards/?view=azure-devops. 4. A mature Spec-Driven Development workflow A realistic SDD workflow for AI-enabled teams might look like this: Discovery and domain analysis: capture business capabilities, domain language, and high-level workflows. Business and architecture specs: define bounded contexts, service boundaries, integration patterns, and NFRs. Contract design: design API specs (OpenAPI or AsyncAPI), event schemas, data models, and validation rules. Task generation: derive work items from specs, such as “Implement endpoint X”, “Add migration Y”, “Add UI flow Z”. This is a great place to use AI agents to read specs and generate tasks. Implementation: code is generated or written to satisfy the spec; the spec remains the reference, not the code. Validation and testing: contract tests, unit tests, integration tests, and end-to-end tests all trace back to spec IDs. Use quality gates in CI and CD, as described in Https://learn.microsoft.com/azure/architecture/framework/devops/devops-quality Review and sign-off: architecture and product review against the spec; update the spec if reality diverges. Release and observability: dashboards and alerts tied to specified SLIs and SLOs. 5. Governance, traceability, and avoiding drift Traceability across the lifecycle Use IDs everywhere: requirements, spec sections, tasks, tests, and deployment artefacts. In Azure DevOps or GitHub, link: Requirement (for example Azure DevOps Feature) Spec (stored in the repo) User stories and tasks Pull requests Tests Releases For key decisions, adopt Architecture Decision Records (ADRs). Microsoft’s guidance on ADRs is here: Https://learn.microsoft.com/azure/architecture/framework/devops/adrs Keeping humans and AI agents aligned To avoid implementation drift: Make specs as machine-readable as possible (OpenAPI, JSON Schema, YAML, BPMN). Enforce spec checks in CI: API implementation must match OpenAPI, DB schema must match migration plan, generated clients must be up to date. For AI coding agents, always provide the relevant spec files as context and constrain them to files linked to specific spec IDs. Add automated checks that compare generated code to contracts and fail builds when they diverge. 6. Enterprise best practices for repos and governance Example repository structure /docs /business /architecture /decisions (ADRs) /specs /frontend /services /orders /customers /integrations /data /src /frontend /services /shared /tests /ops /pipelines /infra-as-code Governance practices An architecture review group that reviews spec changes, not just code changes. Definition of Done includes: spec updated, tests linked, contracts validated. Regular “spec health” reviews to identify what is out of date or drifting. For broader architectural guidance, see: Azure microservices and DDD: https://learn.microsoft.com/azure/architecture/microservices/ Cloud design patterns: https://learn.microsoft.com/azure/architecture/patterns/ Azure Well-Architected Framework: https://learn.microsoft.com/azure/well-architected/ 7. Integrating AI and agentic workflows into SDD Spec-Driven Development is a natural fit for AI and multi-agent systems because specs provide structured, reliable context. Here are some practical patterns. LangGraph and multi-agent orchestration using Microsoft Agent Framework You can design a graph where: A “spec agent” reads and validates specs. An “implementation agent” writes or updates code based on those specs. A “test agent” generates tests from contracts and acceptance criteria. The graph flow can mirror your SDD workflow: Spec → Contract → Code → Tests → Review, with each agent responsible for a stage. MCP (Model Context Protocol) Expose your spec repository, OpenAPI definitions, and ADRs as MCP tools so agents can query the true source of truth instead of hallucinating. For example, provide a tool that returns the OpenAPI for a given service and version, or a tool that returns the ADRs relevant to a particular domain. Learn more about MCP at https://aka.ms/mcp-for-beginners BPMN and process flows Store BPMN diagrams as part of the spec. Agents can read them to generate workflow code, state machines, or tests. For process-oriented integrations, see Azure Logic Apps guidance at https://learn.microsoft.com/azure/logic-apps/. CI/CD pipelines on Azure In your pipelines, validate that implementation matches the spec: Contract tests for APIs and events Schema checks for databases Linting and static analysis for spec conformance Use pipeline gates to block deployments if contracts or migrations are out of sync. Azure Pipelines https://learn.microsoft.com/azure/devops/pipelines/?view=azure-devops GitHub Agentic Workflow Patterns https://github.github.com/gh-aw/ Where to start The key is not to boil the ocean. Pick one domain, such as “Orders”, and design a thin but end-to-end SDD flow: spec → contract → tasks → code → tests. Run it with your AI agents in the loop, learn where the friction is, and iterate. Once that feels natural, you can roll the patterns out across the rest of your system. For AI developers and engineers, SDD is more than process hygiene. It is how you give your agents high-quality, unambiguous context so they can generate code, tests, and documentation that actually match what the business needs. `2.1KViews1like0CommentsFrom Zero to 16 Games in 2 Hours
From Zero to 16 Games in 2 Hours: Teaching Prompt Engineering to Students with GitHub Copilot CLI Introduction What happens when you give a room full of 14-year-olds access to AI-powered development tools and challenge them to build games? You might expect chaos, confusion, or at best, a few half-working prototypes. Instead, we witnessed something remarkable: 16 fully functional HTML5 games created in under two hours, all from students with varying programming experience. This wasn't magic, it was the power of GitHub Copilot CLI combined with effective prompt engineering. By teaching students to communicate clearly with AI, we transformed a traditional coding workshop into a rapid prototyping session that exceeded everyone's expectations. The secret weapon? A technique called "one-shot prompting" that enables anyone to generate complete, working applications from a single, well-crafted prompt. In this article, we'll explore how we structured this workshop using CopilotCLI-OneShotPromptGameDev, a methodology designed to teach prompt engineering fundamentals while producing tangible, exciting results. Whether you're an educator planning STEM workshops, a developer exploring AI-assisted coding, or simply curious about how young people can leverage AI tools effectively, this guide provides a practical blueprint you can replicate. What is GitHub Copilot CLI? GitHub Copilot CLI extends the familiar Copilot experience beyond your code editor into the command line. While Copilot in VS Code suggests code completions as you type, Copilot CLI allows you to have conversational interactions with AI directly in your terminal. You describe what you want to accomplish in natural language, and the AI responds with shell commands, explanations, or in our case, complete code files. This terminal-based approach offers several advantages for learning and rapid prototyping. Students don't need to configure complex IDE settings or navigate unfamiliar interfaces. They simply type their request, review the AI's output, and iterate. The command line provides a transparent view of exactly what's happening, no hidden abstractions or magical "autocomplete" that obscures the learning process. For our workshop, Copilot CLI served as a bridge between students' creative ideas and working code. They could describe a game concept in plain English, watch the AI generate HTML, CSS, and JavaScript, then immediately test the result in a browser. This rapid feedback loop kept engagement high and made the connection between language and code tangible. Installing GitHub Copilot CLI Setting up Copilot CLI requires a few straightforward steps. Before the workshop, we ensured all machines were pre-configured, but students also learned the installation process as part of understanding how developer tools work. First, you'll need Node.js installed on your system. Copilot CLI runs as a Node package, so this is a prerequisite: # Check if Node.js is installed node --version # If not installed, download from https://nodejs.org/ # Or use a package manager: # Windows (winget) winget install OpenJS.NodeJS.LTS # macOS (Homebrew) brew install node # Linux (apt) sudo apt install nodejs npm These commands verify your Node.js installation or guide you through installing it using your operating system's preferred package manager. Next, install the GitHub CLI, which provides the foundation for Copilot CLI: # Windows winget install GitHub.cli # macOS brew install gh # Linux sudo apt install gh This installs the GitHub command-line interface, which handles authentication and provides the framework for Copilot integration. With GitHub CLI installed, authenticate with your GitHub account: gh auth login This command initiates an interactive authentication flow that connects your terminal to your GitHub account, enabling access to Copilot features. Finally, install the Copilot CLI extension: gh extension install github/gh-copilot This adds Copilot capabilities to your GitHub CLI installation, enabling the conversational AI features we'll use for game development. Verify the installation by running: gh copilot --help If you see the help output with available commands, you're ready to start prompting. The entire setup takes about 5-10 minutes on a fresh machine, making it practical for classroom environments. Understanding One-Shot Prompting Traditional programming education follows an incremental approach: learn syntax, understand concepts, build small programs, gradually tackle larger projects. This method is thorough but slow. One-shot prompting inverts this model—you start with the complete vision and let AI handle the implementation details. A one-shot prompt provides the AI with all the context it needs to generate a complete, working solution in a single response. Instead of iteratively refining code through multiple exchanges, you craft one comprehensive prompt that specifies requirements, constraints, styling preferences, and technical specifications. The AI then produces complete, functional code. This approach teaches a crucial skill: clear communication of technical requirements. Students must think through their entire game concept before typing. What does the game look like? How does the player interact with it? What happens when they win or lose? By forcing this upfront thinking, one-shot prompting develops the same analytical skills that professional developers use when writing specifications or planning architectures. The technique also demonstrates a powerful principle: with sufficient context, AI can handle implementation complexity while humans focus on creativity and design. Students learned they could create sophisticated games without memorizing JavaScript syntax—they just needed to describe their vision clearly enough for the AI to understand. Crafting Effective Prompts for Game Development The difference between a vague prompt and an effective one-shot prompt is the difference between frustration and success. We taught students a structured approach to prompt construction that consistently produced working games. Start with the game type and core mechanic. Don't just say "make a game"—specify what kind: Create a complete HTML5 game where the player controls a spaceship that must dodge falling asteroids. This opening establishes the fundamental gameplay loop: control a spaceship, avoid obstacles. The AI now has a clear mental model to work from. Add visual and interaction details. Games are visual experiences, so specify how things should look and respond: Create a complete HTML5 game where the player controls a spaceship that must dodge falling asteroids. The spaceship should be a blue triangle at the bottom of the screen, controlled by left and right arrow keys. Asteroids are brown circles that fall from the top at random positions and increasing speeds. These additions provide concrete visual targets and define the input mechanism. The AI can now generate specific CSS colors and event handlers. Define win/lose conditions and scoring: Create a complete HTML5 game where the player controls a spaceship that must dodge falling asteroids. The spaceship should be a blue triangle at the bottom of the screen, controlled by left and right arrow keys. Asteroids are brown circles that fall from the top at random positions and increasing speeds. Display a score that increases every second the player survives. The game ends when an asteroid hits the spaceship, showing a "Game Over" screen with the final score and a "Play Again" button. This complete prompt now specifies the entire game loop: gameplay, scoring, losing, and restarting. The AI has everything needed to generate a fully playable game. The formula students learned: Game Type + Visual Description + Controls + Rules + Win/Lose + Score = Complete Game Prompt. Running the Workshop: Structure and Approach Our two-hour workshop followed a carefully designed structure that balanced instruction with hands-on creation. We partnered with University College London and students access to GitHub Education to access resources specifically designed for classroom settings, including student accounts with Copilot access and amazing tools like VSCode and Azure for Students and for Schools VSCode Education. The first 20 minutes covered fundamentals: what is AI, how does Copilot work, and why does prompt quality matter? We demonstrated this with a live example, showing how "make a game" produces confused output while a detailed prompt generates playable code. This contrast immediately captured students' attention, they could see the direct relationship between their words and the AI's output. The next 15 minutes focused on the prompt formula. We broke down several example prompts, highlighting each component: game type, visuals, controls, rules, scoring. Students practiced identifying these elements in prompts before writing their own. This analysis phase prepared them to construct effective prompts independently. The remaining 85 minutes were dedicated to creation. Students worked individually or in pairs, brainstorming game concepts, writing prompts, generating code, testing in browsers, and iterating. Instructors circulated to help debug prompts (not code an important distinction) and encourage experimentation. We deliberately avoided teaching JavaScript syntax. When students encountered bugs, we guided them to refine their prompts rather than manually fix code. This maintained focus on the core skill: communicating with AI effectively. Surprisingly, this approach resulted in fewer bugs overall because students learned to be more precise in their initial descriptions. Student Projects: The Games They Created The diversity of games produced in 85 minutes of building time amazed everyone present. Students didn't just follow a template, they invented entirely new concepts and successfully communicated them to Copilot CLI. One student created a "Fruit Ninja" clone where players clicked falling fruit to slice it before it hit the ground. Another built a typing speed game that challenged players to correctly type increasingly difficult words against a countdown timer. A pair of collaborators produced a two-player tank battle where each player controlled their tank with different keyboard keys. Several students explored educational games: a math challenge where players solve equations to destroy incoming meteors, a geography quiz with animated maps, and a vocabulary builder where correct definitions unlock new levels. These projects demonstrated that one-shot prompting isn't limited to entertainment, students naturally gravitated toward useful applications. The most complex project was a procedurally generated maze game with fog-of-war mechanics. The student spent extra time on their prompt, specifying exactly how visibility should work around the player character. Their detailed approach paid off with a surprisingly sophisticated result that would typically require hours of manual coding. By the session's end, we had 16 complete, playable HTML5 games. Every student who participated produced something they could share with friends and family a tangible achievement that transformed an abstract "coding workshop" into a genuine creative accomplishment. Key Benefits of Copilot CLI for Rapid Prototyping Our workshop revealed several advantages that make Copilot CLI particularly valuable for rapid prototyping scenarios, whether in educational settings or professional development. Speed of iteration fundamentally changes what's possible. Traditional game development requires hours to produce even simple prototypes. With Copilot CLI, students went from concept to playable game in minutes. This compressed timeline enables experimentation, if your first idea doesn't work, try another. This psychological freedom to fail fast and try again proved more valuable than any technical instruction. Accessibility removes barriers to entry. Students with no prior coding experience produced results comparable to those who had taken programming classes. The playing field leveled because success depended on creativity and communication rather than memorized syntax. This democratization of development opens doors for students who might otherwise feel excluded from technical fields. Focus on design over implementation teaches transferable skills. Whether students eventually become programmers, designers, product managers, or pursue entirely different careers, the ability to clearly specify requirements and think through complete systems applies universally. They learned to think like system designers, not just coders. The feedback loop keeps engagement high. Seeing your words transform into working software within seconds creates an addictive cycle of creation and testing. Students who typically struggle with attention during lectures remained focused throughout the building session. The immediate gratification of seeing their games work motivated continuous refinement. Debugging through prompts teaches root cause analysis. When games didn't work as expected, students had to analyze what they'd asked for versus what they received. This comparison exercise developed critical thinking about specifications a skill that serves developers throughout their careers. Tips for Educators: Running Your Own Workshop If you're planning to replicate this workshop, several lessons from our experience will help ensure success. Pre-configure machines whenever possible. While installation is straightforward, classroom time is precious. Having Copilot CLI ready on all devices lets you dive into content immediately. If pre-configuration isn't possible, allocate the first 15-20 minutes specifically for setup and troubleshoot as a group. Prepare example prompts across difficulty levels. Some students will grasp one-shot prompting immediately; others will need more scaffolding. Having templates ranging from simple ("Create Pong") to complex (the spaceship example above) lets you meet students where they are. Emphasize that "prompt debugging" is the goal. When students ask for help fixing broken code, redirect them to examine their prompt. What did they ask for? What did they get? Where's the gap? This redirection reinforces the workshop's core learning objective and builds self-sufficiency. Celebrate and share widely. Build in time at the end for students to demonstrate their games. This showcase moment validates their work and often inspires classmates to try new approaches in future sessions. Consider creating a shared folder or simple website where all games can be accessed after the workshop. Access GitHub Education resources at education.github.com before your workshop. The GitHub Education program provides free access to developer tools for students and educators, including Copilot. The resources there include curriculum materials, teaching guides, and community support that can enhance your workshop. Beyond Games: Where This Leads The techniques students learned extend far beyond game development. One-shot prompting with Copilot CLI works for any development task: creating web pages, building utilities, generating data processing scripts, or prototyping application interfaces. The fundamental skill, communicating requirements clearly to AI applies wherever AI-assisted development tools are used. Several students have continued exploring after the workshop. Some discovered they enjoy the creative aspects of game design and are learning traditional programming to gain more control. Others found that prompt engineering itself interests them, they're exploring how different phrasings affect AI outputs across various domains. For professional developers, the workshop's lessons apply directly to working with Copilot, ChatGPT, and other AI coding assistants. The ability to craft precise, complete prompts determines whether these tools save time or create confusion. Investing in prompt engineering skills yields returns across every AI-assisted workflow. Key Takeaways Clear prompts produce working code: The one-shot prompting formula (Game Type + Visuals + Controls + Rules + Win/Lose + Score) reliably generates playable games from single prompts Copilot CLI democratizes development: Students with no coding experience created functional applications by focusing on communication rather than syntax Rapid iteration enables experimentation: Minutes-per-prototype timelines encourage creative risk-taking and learning from failures Prompt debugging builds analytical skills: Comparing intended versus actual results teaches specification writing and root cause analysis Sixteen games in two hours is achievable: With proper structure and preparation, young students can produce impressive results using AI-assisted development Conclusion and Next Steps Our workshop demonstrated that AI-assisted development tools like GitHub Copilot CLI aren't just productivity boosters for experienced programmers, they're powerful educational instruments that make software creation accessible to beginners. By focusing on prompt engineering rather than traditional syntax instruction, we enabled 14-year-old students to produce complete, functional games in a fraction of the time traditional methods would require. The sixteen games created during those two hours represent more than just workshop outputs. They represent a shift in how we might teach technical creativity: start with vision, communicate clearly, iterate quickly. Whether students pursue programming careers or not, they've gained experience in thinking systematically about requirements and translating ideas into specifications that produce real results. To explore this approach yourself, visit the CopilotCLI-OneShotPromptGameDev repository for prompt templates, workshop materials, and example games. For educational resources and student access to GitHub tools including Copilot, explore GitHub Education. And most importantly, start experimenting. Write a prompt, generate some code, and see what you can create in the next few minutes. Resources CopilotCLI-OneShotPromptGameDev Repository - Workshop materials, prompt templates, and example games GitHub Education - Free developer tools and resources for students and educators GitHub Copilot CLI Documentation - Official installation and usage guide GitHub CLI - Foundation tool required for Copilot CLI GitHub Copilot - Overview of Copilot features and pricing917Views2likes3CommentsAgents League: Build, Learn, and Level Up Your AI Skills
We're inviting the next generation of developers to join Agents League, running February 16-27. It's a two-week challenge where you'll build AI agents using production-ready tools, learn from live coding sessions, and get feedback directly from Microsoft product teams. We've put together starter kits for each track to help you get up and running quickly that also includes requirements and guidelines. Whether you want to explore what GitHub Copilot can do beyond autocomplete, build reasoning agents on Microsoft Foundry, or create enterprise integrations for Microsoft 365 Copilot, we have a track for you. Important: Register first to be eligible for prizes and your digital badge. Without registration, you won't qualify for awards or receive a badge when you submit. What Is Agents League? It's a 2-week competition where you learn by doing: 📽️ Live coding battles – Watch experts compete in real-time and explain their thinking 💻 Build at your pace – Two weeks to work on your project 💬 Get help on Discord – AMAs, community support, and a friendly crowd to cheer you on 🏆 Win prizes – $500 per track, GitHub Copilot Pro subscriptions, and digital badges for everyone who submits The Three Tracks 🎨 Creative Apps — Build with GitHub Copilot (Chat, CLI, or SDK) 🧠 Reasoning Agents — Build with Microsoft Foundry 💼 Enterprise Agents — Build with M365 Agents Toolkit (or Copilot Studio) More details on each track below, or jump straight to the starter kits. The Schedule Agents League starts on February 16th and runs through February 27th. Within 2 weeks, we host live battles on Reactor and AMA sessions on Discord. Week 1: Live Battles (Feb 17-19) We're kicking off with live coding battles streamed on Microsoft Reactor. Watch experienced developers compete in real-time, explaining their approach and architectural decisions as they go. Tue Feb 17, 9 AM PT — 🎨 Creative Apps battle Wed Feb 18, 9 AM PT — 🧠 Reasoning Agents battle Thu Feb 19, 9 AM PT — 💼 Enterprise Agents battle All sessions are recorded, so you can watch on your own schedule. Week 2: Build + AMAs (Feb 24-26) This is your time to build and ask questions on Discord. The async format means you work when it suits you, evenings, weekends, whatever fits your schedule. We're also hosting AMAs on Discord where you can ask questions directly to Microsoft experts and product teams: Tue Feb 24, 9 AM PT — 🎨 Creative Apps AMA Wed Feb 25, 9 AM PT — 🧠 Reasoning Agents AMA Thu Feb 26, 9 AM PT — 💼 Enterprise Agents AMA Bring your questions, get help when you're stuck, and share what you're building with the community. Pick Your Track We've created a starter kit for each track with setup guides, project ideas, and example scenarios to help you get started quickly. 🎨 Creative Apps Tool: GitHub Copilot (Chat, CLI, or SDK) Build innovative, imaginative applications that showcase the potential of AI-assisted development. All application types are welcome, web apps, CLI tools, games, mobile apps, desktop applications, and more. The starter kit walks you through GitHub Copilot's different modes and provides prompting tips to get the best results.View the Creative Apps starter kit. 🧠 Reasoning Agents Tool: Microsoft Foundry (UI or SDK) and/or Microsoft Agent Framework Build a multi-agent system that leverages advanced reasoning capabilities to solve complex problems. This track focuses on agents that can plan, reason through multi-step problems, and collaborate. The starter kit includes architecture patterns, reasoning strategies (planner-executor, critic/verifier, self-reflection), and integration guides for tools and MCP servers. View the Reasoning Agents starter kit. 💼 Enterprise Agents Tool: M365 Agents Toolkit or Copilot Studio Create intelligent agents that extend Microsoft 365 Copilot to address real-world enterprise scenarios. Your agent must work on Microsoft 365 Copilot Chat. Bonus points for: MCP server integration, OAuth security, Adaptive Cards UI, connected agents (multi-agent architecture). View the Enterprise Agents starter kit. Prizes & Recognition To be eligible for prizes and your digital badge, you must register before submitting your project. Category Winners ($500 each): 🎨 Creative Apps winner 🧠 Reasoning Agents winner 💼 Enterprise Agents winner GitHub Copilot Pro subscriptions: Community Favorite (voted by participants on Discord) Product Team Picks (selected by Microsoft product teams) Everyone who registers and submits a project wins: A digital badge to showcase their participation. Beyond the prizes, every participant gets feedback from the teams who built these tools, a valuable opportunity to learn and improve your approach to AI agent development. Why This Matters AI development is where the opportunities are right now. Building with GitHub Copilot, Microsoft Foundry, and M365 Agents Toolkit gives you: A real project for your portfolio Hands-on experience with production-grade tools Connections with developers from around the world Whether you're looking for your first internship, exploring AI, or just want to build something cool, this is two weeks well spent. How to Get Started Register first — This is required to be eligible for prizes and to receive your digital badge. Without registration, your submission won't qualify for awards or a badge. Pick a track — Choose one track. Explore the starter kits to help you decide. Watch the battles — See how experienced developers approach these challenges. Great for learning even if you're still deciding whether to compete. Build your project — You have until Feb 27. Work on your own schedule. Submit via GitHub — Open an issue using the project submission template. Join us on Discord — Get help, share your progress, and vote for your favorite projects on Discord. Links Register: https://aka.ms/agentsleague/register Starter Kits: https://github.com/microsoft/agentsleague/starter-kits Discord: https://aka.ms/agentsleague/discord Live Battles: https://aka.ms/agentsleague/battles Submit Project: Project submission template712Views0likes0CommentsAI Career Navigator — Empowering Job Seekers with Azure OpenAI
AI Career Navigator is more than just a project — it’s a mission to make career growth accessible, intelligent, and human. Powered by Azure OpenAI, it transforms uncertainty into direction and effort into achievement. Author: Aryan Jaiswal — Gold Microsoft Learn Student Ambassador Reviewer: Julia Muiruri (Microsoft)706Views2likes0Comments
Microsoft’s A-Grade Azure AI Stack: From Dissertation Prototype to Smart Campus Pilot
This post isn't just about the Student Support Agent (SSA) I built, which earned me a Distinction. It's about how Microsoft's tools made it possible to go from a rough concept to a robust pilot, proving their developer stack is one of the most convenient and powerful options for building intelligent, ethical, and scalable educational systems. The Vision: Cutting Through Campus Complexity University life is full of fragmented systems. Students constantly juggle multiple logins, websites, and interfaces just to check a timetable, book a room, or find a policy. My goal was simple: reduce that cognitive load by creating a unified assistant that could manage all these tasks through a single, intelligent conversation. The Stack That Made It Possible The core of the system relied on a few key, interconnected technologies: Technology Core Function Impact Azure AI Search Hybrid Data Retrieval Anchored responses in official documents. Azure OpenAI Natural Language Generation Created human-like, accurate answers. Semantic Kernel (SK) Multi-Agent Orchestration Managed complex workflows and memory. Azure Speech SDK Multimodal Interface Enabled accessible voice input and output. The foundation was built using Streamlit and FastAPI for rapid prototyping. Building a system that's context-aware, accessible, and extensible is a huge challenge, but it's exactly where the Microsoft AI stack shined. From Simple Chatbot to Multi-Agent Powerhouse Early campus chatbots are often single-agent models, great for basic FAQs, but they quickly fail when tasks span multiple services. I used Semantic Kernel (SK) Microsoft's powerful, open-source framework to build a modular, hub-and-spoke multi-agent system. A central orchestrator routes a request (like "book a study room") to a specialist agent (the Booking Agent), which knows exactly how to handle that task. This modularity was a game-changer: I could add new features (like an Events Agent) without breaking the core system, ensuring the architecture stayed clean and ready for expansion. Agentic Retrieval-Augmented Generation (Agentic RAG): Trust and Transparency To ensure the assistant was trustworthy, I used Agentic RAG to ground responses in real campus (Imperial College London) documentation. This included everything from admission fee payments to campus shuttle time. Azure AI Search indexed all handbooks and policies, allowing the assistant to pull relevant chunks of data and then cite the sources directly in its response. Result: The system avoids common hallucinations by refusing to answer when confidence is low. Students can verify every piece of advice, dramatically improving trust and transparency. Results: A Foundation for Scalable Support A pilot study with 15 students was highly successful: 100% positive feedback on the ease of use and perceived benefit. 93% satisfaction with the voice features. High trust was established due to transparent citations. The SSA proved it could save students time by centralising tasks like booking rooms, checking policies and offering study tips! Final Thoughts Microsoft’s AI ecosystem didn’t just support my dissertation; it shaped it. The tools were reliable, well-documented, and flexible enough to handle real-world complexity. More importantly, they allowed me to focus on student experience, ethics, and pedagogy, rather than wrestling with infrastructure. If you’re a student, educator, or developer looking to build intelligent systems that are transparent, inclusive, and scalable, Microsoft’s AI stack is a great place to start! 🙋🏽♀️ About Me I’m Tyana Tshiota, a postgraduate student in Applied Computational Science and Engineering at Imperial College London. Leveraging Microsoft’s AI stack and the extensive documentation on Microsoft Learn played a key role in achieving a Distinction in my dissertation. Moving forward, I’m excited to deepen my expertise by pursuing Azure certifications. I’d like to extend my sincere gratitude to my supervisor, Lee_Stott , for his invaluable mentorship and support throughout this project. If you haven’t already, check out his insightful posts on the Educator Developer Blog, or try building your own agent with the AI Agents for Beginners curriculum developed by Lee and his team! You can reach out via my LinkedIn if you’re interested in smart campus systems, AI in education, collaborative development, or would like to discuss opportunities.554Views0likes0Comments