siem
625 Topics
Microsoft Sentinel Armis Connector
Hi all, In our environment, we use Armis and collect Armis activity, alert, and device logs in Microsoft Sentinel. For this, we use the Microsoft-released Armis connector from Content Hub. The connector uses an Azure Function app to collect logs from Armis via the REST API. However, the connector uses the legacy HTTP Data Collector API, which Microsoft has deprecated, and support ended in September 2026. My questions: Has Microsoft released a DCR-based or CCF connector for collecting Armis logs? I couldn't find any newly released connector in Content Hub. If an issue occurs on the connector side, is Microsoft support still available, given that Microsoft hasn't released a new connector to migrate to?39Views0likes1CommentHow to maintain and update Azure Function Connector deployed via WEBSITE_RUN_FROM_PACKAGE?
Background We recently completed a migration from the legacy Microsoft Sentinel Box connector to the newer Box Events (CCP) connector. During the migration we discovered that the legacy Box connector was implemented using: Azure Functions JWT authentication WEBSITE_RUN_FROM_PACKAGE The Function App is configured as: WEBSITE_RUN_FROM_PACKAGE=https://aka.ms/sentinel-BoxDataConnector-functionapp and the Azure Function therefore operates in read-only mode because it is running directly from the package referenced by that URL. The migration to the new Box Events (CCP) connector has been successful and is now ingesting data into BoxEventsV2_CL using Client Credentials Grant (CCG) authentication. What prompted the question While reviewing the legacy Azure Function deployment, we noticed that: The Box Solution GitHub repository has received updates over time. The Box Solution itself has been updated (currently v3.16 in our environment). Analytics, parsers, and connector components have evolved. The legacy Azure Function deployment still appears to be tied to the original package referenced by WEBSITE_RUN_FROM_PACKAGE. This raised a broader lifecycle and maintenance question: Questions 1. Is the package referenced by: https://aka.ms/sentinel-BoxDataConnector-functionapp still actively maintained and republished by Microsoft? 2. If updates are made to the Box Solution source code or supporting files in the GitHub repository, are those updates expected to flow automatically to existing Azure Function deployments that use WEBSITE_RUN_FROM_PACKAGE? 3. If updates do not automatically flow to existing deployments, what was the intended maintenance model for customers using the legacy Azure Function connector? For example, were customers expected to: Continue using the Microsoft-hosted package URL indefinitely? Periodically redeploy using updated templates? Download and self-maintain the Function App package? Modify the Function App to stop using WEBSITE_RUN_FROM_PACKAGE? 4. Prior to the introduction of the Box Events (CCP) connector, how were customers expected to apply updates, dependency changes, security fixes, and other improvements to existing Box Azure Function deployments? 5. Is migration to the Box Events (CCP) connector now considered the only supported path for customers wishing to remain current with Microsoft Sentinel Box integrations? Reason for asking The goal is not to troubleshoot the new CCP connector. Rather, we are trying to better understand the support and maintenance lifecycle of the legacy Azure Function-based Box connector and how Microsoft intended customers to remain current when deployments were originally made using a Microsoft-hosted WEBSITE_RUN_FROM_PACKAGE endpoint. Any clarification from the Box Solution maintainers or Microsoft Sentinel team would be appreciated. NB I came across this notice after following some links from the Box Solution listed in Azure. https://github.com/Azure/Azure-Sentinel/blob/master/Solutions/known_issues.md#known-issue-2--solution-re-deployment-or-update That seems to indicate that somehow we are meant to Redeploy the entire package when there is an update and then somehow copy / update all the Custom Analytics Rules and Automations. Is there no way to merge the new modules and updates without basically having to start over with a side-by-side deployment?46Views0likes0CommentsManage all your Microsoft Sentinel data in one place with Unified Data Management (Public Preview)
As security teams bring in more data from more sources and use it across SIEM and XDR workflows, decisions about connector health, ingestion volume, and cost optimization get harder. Today, we’re announcing the public preview of Unified Data Management for Microsoft Sentinel, available in the new Data & connectors experience in the Microsoft Defender portal, so you can monitor and manage your data from a single place. What Unified Data Management is and why it matters Unified Data Management brings connectors, tables, and ingestion health together. Instead of moving between separate pages, you can see your full data landscape, spot issues, and act on them from one view. It’s designed to help you quickly answer questions like: Which connectors are configured and which need attention? Which tables are receiving data? Are there ingestion spikes, drops, or stale data patterns? Which tables drive the most ingestion volume? What schema, transformations, and retention settings apply to a table? You’ll find it under Setup & configuration > Data & connectors, organized into three tabs: Overview, Connectors, and Tables. Overview: See health at a glance The Overview tab gives you a workspace-level snapshot of ingestion and health, so you can catch data issues before they impact analytics, detections, investigations, or reporting. It surfaces: Ingestion volume: Daily ingestion split by Analytics tier and Data Lake tier for your selected time range. Connectors that need attention: Connectors with credential errors, ingestion failures, or outages, including error type, failure count, and last successful ingestion. Table ingestion fluctuations: Tables with unexpected volume changes, grouped into spikes and drops. Data ingestion volume by table: Your top ingesting tables, ranked by daily volume. Ingestion latency by table: How long it takes for data to become available after it’s generated. Together, these insights help you troubleshoot connector failures, track down cost spikes, validate that new connectors are flowing, and catch unexpected changes in volume. Figure 1: The Overview tab shows daily ingestion volume by tier alongside data health insights, including connectors that need attention and tables with unexpected volume spikes or drops. Connectors: One inventory for unified and classic connectors The Connectors tab puts unified data connectors and Sentinel classic data connectors side by side, so it’s easier to see which data sources are onboarded and how they're connected. From here, you can: View onboarded connectors with their status, provider, content source, and available updates. Switch between unified connectors and Sentinel classic connectors. Search and filter connectors by provider, data type, and status. Open connector details to review configuration and health. Unified connectors reduce duplication by allowing supported data sources to connect once and feed data across Microsoft security products. Sentinel classic connectors continue to support the broad connector ecosystem, including connectors built with the Codeless Connector Framework (CCF). Figure 2: The Connectors tab brings unified and Sentinel classic connectors into a single inventory, with counts for onboarded and connected connectors, available updates, and filters for provider, data type, and status. Tables: Health, schema, transformations, and retention in one place The Tables tab brings Microsoft Sentinel and Microsoft Defender XDR tables together with their health signals, schema, transformations, and retention settings. Key insights now appear right in the grid, so you can compare tables side by side: last data received, average daily ingestion volume, estimated daily ingestion cost, volume anomaly, tier, and retention settings. This makes it easier to spot tables that have gone stale, are growing unexpectedly, or are driving a big share of your ingestion volume. Select any table to open the details panel, which organizes everything about that table into tabs: Details panel tab What it shows Overview Table type, tier, analytics retention, total retention, and other table metadata. Schema Column names, data types, and descriptions, with no KQL query required. Transformations Filter, Split, and Scope Tag transformation rules applied to the table. Retention Analytics retention and total retention settings. Figure 3: The Tables tab opens a details panel for any selected table. The Schema tab is especially useful when you need to understand incoming data, validate table fields, or create transformation logic without first writing schema-discovery queries. Built for everyday data operations in the Microsoft Defender portal Data management touches nearly every part of security operations, from detection and investigation to hunting, retention, and cost optimization. By bringing these tasks into the Microsoft Defender portal, Unified Data Management cuts down on context switching and makes it clearer how connectors, tables, health, transformations, and retention fit together. It’s one more step in Microsoft Sentinel’s investment in a unified security operations experience, where SIEM and XDR data can be managed and used together. Preview availability and prerequisites Unified Data Management is now available in public preview in commercial cloud environments. To experience it, you’ll need: Microsoft Sentinel onboarded to the Microsoft Defender portal. Unified role-based access control (URBAC) enabled in the Microsoft Defender portal. Data (manage) permission in the Data Operations permission group. Workspace permissions equivalent to Log Analytics Contributor, including permissions to write workspace and table settings. Get started Ready to try it? Open the Microsoft Defender portal and go to Setup & configuration > Data & connectors. From there: Start on the Overview tab to check ingestion volume and data health. Use the Connectors tab to view your unified and classic connectors. Explore the Tables tab to review table health, schema, transformations, and retention. For implementation and configuration guidance, see: Manage data in Microsoft Sentinel and Defender Configure data connectors Manage your existing tables and data Monitor the health of your Microsoft Sentinel data connectors Unified connectors overview Microsoft Sentinel data connectors More Microsoft Sentinel data integration news Public Preview: Nested API Support Comes to Microsoft Sentinel CCF Create a pull codeless connector for Microsoft Sentinel Logs Ingestion API in Azure Monitor682Views1like0Comments
Expanded cross-tenant delegated access in Microsoft Defender is generally available
Security operations rarely stop at a single tenant boundary. Managed security service providers (MSSPs) protect many customer environments, and central security teams often operate across a tenant estate spanning business units, regions, or subsidiaries. In both cases, teams need to delegate security work without granting broad access or managing permissions one analyst at a time. Today, we’re announcing the general availability of cross-tenant delegated administration in Microsoft Defender, built on the same governance relationship model as Microsoft Entra Tenant Governance. Organizations can now use a consistent governance model to establish cross-tenant relationships, delegate access to partner or central security teams, and enforce least-privilege permissions across their tenant estate. We’re also extending delegated access to support Microsoft Sentinel resources and enabling granular permissions for delegated users through Defender unified RBAC, reducing the need for separate access models across identity and security. With the consistent access model, MSSPs partners (non-CSP) and multitenant organizations can run security operations across tenants, while each customer or governed tenant decides exactly what access to grant. Govern access across your tenant estate Microsoft Entra Tenant Governance helps organizations establish least-privilege governance relationships across related tenants. The same governance relationship model now extends into Microsoft Defender and Sentinel, enabling MSSPs and central security teams to manage security operations across governed environments without requiring separate local administrator identities in each tenant. This model helps organizations: Scale without multiplying identities. Analysts use their home-tenant accounts instead of requiring local administrator or Microsoft Entra B2B guest accounts in every governed tenant. Apply least privilege. Each governed tenant controls the roles and resource scopes assigned to remote tenant groups. Simplify ongoing administration. The partner or central team keeps access current by managing membership in its own security groups rather than maintaining individual assignments across customer tenants. Support integrated security operations. MSSPs and multitenant organizations can use a consistent governance relationship to support delegated operations across Microsoft Defender and Sentinel. Bring identity and security access together. Use a consistent governance relationship model across Microsoft Entra, Defender, and Sentinel, reducing the need for separate delegated-access arrangements. One relationship, two controls A governance relationship is a directional connection between two Microsoft Entra tenants: The governing tenant is where the MSSP or central security team manages its analysts and security groups. The governed tenant is the customer or organizational tenant that grants delegated access. After the relationship is approved, selected security groups from the governing tenant are represented in the governed tenant as remote tenant groups. The governed tenant can then assign the supported roles and resource scopes those groups need, while the governing tenant continues to manage group membership. This creates a clear separation of responsibilities: tenant administrators set the access boundaries in the governed tenant, and partners or central security teams manage their analysts within those boundaries. How the relationship works The governance relationship is established through a three-step, consent-based handshake: The governed tenant sends an invitation. A customer or organizational administrator enables governance invitations in Microsoft Defender and invites the governing tenant. The governing tenant sends the relationship request. The MSSP or central security team creates an access template containing the relevant security groups and Microsoft Entra role assignments, then sends the governance relationship request. The governed tenant approves the request and assigns roles and resource scopes. The governed tenant explicitly approves the governance relationship and configures the Defender and Sentinel roles and resource scopes granted to the remote tenant groups. With approval and permissions in place, the governance relationship is ready to be used. Figure 1: The governed tenant reviews the requested role assignments and retains final approval over delegated access. The relationship provides the cross-tenant foundation. Governed-tenant administrators then apply the workload and resource permissions required for the intended security operations: For Microsoft Defender: Administrators can assign supported Microsoft Defender unified RBAC roles to remote tenant groups, including custom roles with the permissions and scopes required for the work. For Microsoft Sentinel: Customers can manage delegated access using Defender unified RBAC or Azure RBAC, assigning remote tenant groups the permissions needed to operate customer environments with least privilege. Figure 2: Assign custom roles to a remote tenant group using Defender unified RBAC. This distinction allows each governed tenant to approve the relationship and right-size access for its own environment while the governing tenant manages the analysts who perform the work. What partners are saying Partners are seeing how expanded support for delegated access can simplify cross-tenant operations and help them deliver managed security services with least privilege. “The ability to assign Azure RBAC and Defender Unified RBAC to remote tenant groups over GDAP will allow us to securely and efficiently configure and access customer environments at scale. Historically, we would need to configure a range of different access methods to access all the different services, but now we can use GDAP to access everything we need to provide managed SOC services.” — Riley Boon, Senior Capability Engineer, CyberCX “Microsoft's investments in its partner programs pay off in real outcomes for the products BlueVoyant and our customers rely on every day. Over the past several months, Microsoft has worked alongside BlueVoyant to address limitations in Granular Delegated Admin Privileges (GDAP) and deliver new capabilities, including support for assigning GDAP security groups to Sentinel workspace roles and Unified Role-Based Access Control (URBAC) support for GDAP remote tenant groups. These improvements let us manage customer environments with least-privilege access. That is what customers have been asking for and Microsoft listened.” — Ryan Sturm, Senior Manager – Microsoft Security Engineering, BlueVoyant Whether you’re onboarding your first customer tenant or consolidating access across dozens, the same model applies: tenant administrators set the boundaries, and your team works within them. Get started Start with the work your partner or central security team needs to do. Identify the eligible security groups, establish the governance relationship, and assign only the workload roles and scopes that work requires. Configure delegated access with governance relationships for multitenant organizations Manage unified role-based access control in multitenant management Create custom roles with Microsoft Defender unified RBAC Additional resources Microsoft Entra tenant governance documentation1.3KViews1like0Comments
Microsoft Defender XDR / Defender for Endpoint data connectors inconsistent failures
Hello, We are deploying our SOC (Sentinel) environments via Bicep. Now the Defender XDR ( MicrosoftThreatProtection) and Defender for Endpoint ( MicrosoftDefenderAdvancedThreatProtection) data connectors are failing to deploy inconsistantly. It seems to be a known issue due to the following posts: - https://github.com/Azure/SimuLand/issues/23 - https://techcommunity.microsoft.com/t5/microsoft-sentinel/quot-missing-consent-invalid-license-quot-defender-for-endpoint/m-p/3027212 - https://github.com/Azure/Azure-Sentinel/issues/5007 Next to this issue I see almost no development on the data connectors API, is there some news to be spread how to enable data connectors automated in the future, since it seems to be moving to Content Hub. It is hard to find any docs about how to deploy this for example via Bicep!? Also I have a question regarding 'Tenant-based Microsoft Defender for Cloud (Preview)' data connector. We deploy this now via GenericUI data connector kind, but this has no option to enable it via automation. Same as the question in the previous paragraph, how would this be made possible?1.2KViews0likes1CommentIntroducing the Microsoft Sentinel ASIM EmailEvent schema
Email remains one of the most common entry points for security threats. Yet email products often describe the same activity with different table names, fields, and values. This makes it harder to build detections and investigations that work consistently across data sources. The Microsoft Sentinel Advanced Security Information Model, or ASIM, EmailEvent schema is now available. It provides a common structure for email delivery and inspection events, helping customers and partners create security content that works across supported email data sources. A consistent view of email security activity EmailEvent standardizes the information analysts need to understand what happened to an email and why. It covers: Email delivery and inspection events Sender, source, and recipient information Message subject, size, direction, and delivery location URLs and file attachments SPF, DKIM, and DMARC authentication results Delivery actions such as delivered, blocked, quarantined, or deleted Threat, risk, confidence, tactic, technique, and remediation details Instead of learning a different data model for every product, analysts can query the normalized EmailEvent fields. Parser developers map each source's native data to the same schema. How it works Consider an email that contains a suspicious attachment. The email security product records the sender, recipients, attachment, authentication results, inspection verdict, and final action. A connector collects that event. A parser or Data Collection Rule maps the source fields to EmailEvent. Microsoft Sentinel can then query the normalized record using the same field names used for other supported email sources. This common structure separates security content from the details of a specific product. When another source adds an EmailEvent parser, existing source-independent queries and detections can work with that source without being rewritten around its native field names. Why it matters Simpler analytics: Write queries against one consistent set of email fields. Broader coverage: Apply source-independent security content across normalized email sources. Faster investigations: Compare delivery, authentication, attachment, URL, and threat details without translating different data models. Easier integration: Give connector and parser developers a defined contract for bringing new email telemetry into ASIM. EmailEvent does not replace the rich native data produced by email security products. It provides a consistent security layer that makes that data easier to use together. Build on EmailEvent The EmailEvent release includes the schema definition, source-independent parser framework, filtering parser, deployment templates, and validation support in the Azure-Sentinel repository. The schema version is 1.0.0. Customers can use normalized EmailEvent data to develop hunting queries, analytics rules, workbooks, and investigation experiences. Partners and community contributors can create source-specific parsers that map their email data to the schema. Get started Normalization Email Schema MS Learn Learn about normalization and ASIM Explore the EmailEvent implementation in Azure-Sentinel Deploy ASIM parsers Thank you to the ASIM engineering and partner teams who contributed to the schema, deployment path, validation, and release.696Views1like0Comments
Cloudflare Log ingestion in Sentinel with CCF
Hi all, I built a connector to ingest cloudflare firewall logs using CCF. The reason why I had to build this custom one while the official one was available was because official one uses Logpush which is a service that is available only on Enterprise plan, so if you are on pro or business plan you can not use it. Putting it out here in case anyone wants to try. https://amankhan.net/posts/Cloudflare-CCF-Connector/337Views0likes1CommentWhat’s new in Microsoft Sentinel: September 2026
Welcome back to What's new in Microsoft Sentinel. In September, Case Management brings investigation and collaboration together in Microsoft Defender, with a shared workspace to track work through resolution. Defender unified RBAC custom roles for granular delegated admin privileges (GDAP) give you finer control over what managed security service providers (MSSPs) and other partners can access. In Sentinel data lake, a single Codeless Connector Framework (CCF) connector can bring in data from many accounts, and our connector catalog has passed 500 data connectors. Read on for the details. Sentinel innovations: Sentinel SIEM Sentinel data lake Sentinel SIEM Case Management (Public Preview) Starting September 23, 2026, Case Management brings investigation and collaboration together in one experience in Defender. With Incident Cases, you can investigate, coordinate response, assign work, capture notes, and track progress through resolution, all from a shared workspace that holds investigation context alongside tasks and workflow tracking. Your existing Sentinel automation, playbooks, workbooks, and integrations carry over unchanged. This builds on the integrated security operations (ISOC) vision of bringing the context and workflows practitioners need to investigate and respond together in Defender. Read our Case Management blog, see the documentation, and watch the demo to learn more. Unified RBAC custom roles (Public Preview) If you work with a managed security service provider (MSSP) or manage multiple tenants, giving partners the right level of access is simpler. Granular delegated admin privileges (GDAP) sets which partner groups can be delegated access to your tenant, and Defender unified role-based access control (RBAC) sets what they can see and do once delegated. You can assign unified RBAC custom roles to GDAP remote tenant groups and scope each role down to specific security products, data sources, and data collections so partners receive only the access they need. GDAP previously only supported Microsoft Entra directory roles, which often meant handing partners more access than the job needed. Anyone who is a member of a remote tenant group receives its permissions. Your partner manages who belongs to the group, while you keep control of the role and its scope. Learn more. Sentinel data lake Multi-account support for codeless connectors (Public Preview) A single connector built on the Codeless Connector Framework (CCF) can bring data from many accounts, tenants, or environments into one Sentinel workspace. A unified connections list shows each account as its own row, labeled so you can tell them apart by account name, tenant ID, or environment. An “Add connection” experience walks you through setting up each one, and an independent lifecycle per connection means you can edit or remove any account without affecting the rest. Shared, efficient ingestion sends all of it to the same table, so you have one place to investigate instead of a separate connector for every account. This helps if you run separate production and development accounts, segment by region or business unit, or manage several customers in one workspace. Learn more. Sentinel data connectors pass the 500 mark Sentinel has reached an exciting milestone of more than 500 data connectors. Our connectors bring security signals from Microsoft services, non-Microsoft solutions, multicloud environments, applications, infrastructure, and custom sources into Sentinel, where they can be correlated and analyzed to help teams detect threats, investigate incidents, hunt across their digital estate, and automate response. With 500+ connectors and growing, Sentinel makes it easier for organizations to unify their security ecosystem and give the security operations center (SOC) broader visibility where it matters most. Find your connector. Additional resources Blogs and documentation: Integrated Security Operations Center in Microsoft Defender ISOC in Microsoft Defender (preview) Activate Microsoft Defender unified role-based access control (URBAC) Support multiple connections in a codeless connector Upcoming webinars: Oct 6: Security Immersion Event: Into the Breach Oct 14: Microsoft Security Immersion Event: Shadow Hunter Upcoming events: Oct 19: Microsoft Security Days Summit: Dallas Edition (In Person) ISOC: What's new with the Defenders Capture the Flag: Agent Wars (Hands-on) Nov 17–20: Microsoft Ignite at Moscone Center in San Francisco, CA, USA. See what's next in Microsoft Security. Register now. Stay connected Check back each month for the latest innovations, updates, and events to ensure you’re getting the most out of Microsoft Sentinel. We’ll see you in the next edition!988Views2likes1CommentIntegrating Fluent Bit with Microsoft Sentinel
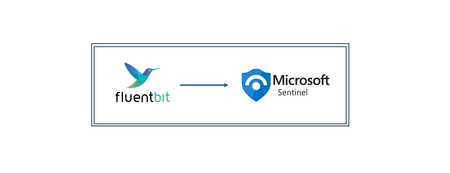
This guide will walk you through the steps required to integrate Fluent Bit with Microsoft Sentinel. Beware that in this article, we assume you already have a Sentinel workspace, a Data Collection Endpoint and a Data Collection Rule, an Entra ID application and finally a Fluent Bit installation. As mentioned above, log ingestion API supports ingestion both in custom tables as built-in tables, like CommonSecurityLog, Syslog, WindowsEvent and more. In case you need to check which tables are supported please the following article: https://learn.microsoft.com/en-us/azure/azure-monitor/logs/logs-ingestion-api-overview#supported-tables Prerequisites: Before beginning the integration process, ensure you have the following: An active Azure subscription with Microsoft Sentinel enabled; Microsoft Entra ID Application taking note of the ClientID, TenantID and Client Secret – create one check this article: https://learn.microsoft.com/en-us/entra/identity-platform/quickstart-register-app?tabs=certificate A Data Collection Endpoint (DCE) – to create a data collection endpoint, please check this article: https://learn.microsoft.com/en-us/azure/azure-monitor/essentials/data-collection-endpoint-overview?tabs=portal A Data Collection Rule (DCR) – fields from the Data Collection Rule need to match exactly to what exists in table columns and also the fields from the log source. To create a DCR please check this article: https://learn.microsoft.com/en-us/azure/azure-monitor/essentials/data-collection-rule-create-edit?tabs=cli Depending on the source, it might require a custom table to be created or an existing table from log analytics workspace; Fluent Bit installed on your server or container – In case you haven’t yet installed Fluent Bit, in the following article you'll find the instructions per type of operating system: https://docs.fluentbit.io/manual/installation/getting-started-with-fluent-bit High level architecture: Step 1: Setting up Fluent Big configuration file Before we step-in into the configuration, Fluent Bit has innumerous output plugins and one of those is through Log Analytics Ingestion API both to supported Sentinel tables but also for custom tables. You can check more information about it here in Fluent Bit documentation: https://docs.fluentbit.io/manual/pipeline/outputs/azure_logs_ingestion Moving forwarder, in order to configure Fluent Bit to send logs into Sentinel log analytics workspace, please take note of the specific input plugin you are using or intend to use to receive logs and how can you use it to output the logs to Sentinel workspace. For example most of the Fluent Bit plugins allow to set a “tag” key which can be used within the output plugin so that there’s a match in which logs are intended to send. On the other hand, in a scenario where multiple input plugins are used and all are required send logs to Sentinel, then a match of type wildcard "*" could be used as well. Another example, in a scenario where there are multiple input plugins of type “HTTP” and you want to just send a specific one into Sentinel, then the “match” field must be set according to the position of the required input plugin, for example “match http.2”, if the input plugin would the 3 rd in the list of HTTP inputs. If nothing is specified in the "match" field, then it will assume "http.0" by default. For better understanding, here’s an example of how a Fluent Bit config file could look: First, the configuration file is located under the path ”/etc/fluent-bit/fluent-bit.conf” The first part is the definition of all “input plugins”, then follows the “filter plugins” which you can use for example to rename fields from the source to match for what exists within the data collection rule schema and Sentinel table columns and finally there’s the output plugins. Below is a screenshot of a sample config file: INPUT plugins section: In this example we’re going to use the “dummy input” to send sample messages to Sentinel. However, in your scenario you could leverage other’s input plugins within the same config file. After everything is configured in the input section, make sure to complete the “FILTER” section if needed, and then move forward to the output plugin section, screenshot below. OUTPUT plugins section: In this section, we have output plugins to write on a local file based on two tags “dummy.log” and “logger”, an output plugin that prints the outputs in json format and the output plugin responsible for sending data to Microsoft Sentinel. As you can see, this one is matching the “tag” for “dummy.log” where we’ve setup the message “{“Message”:”this is a sample message for testing fluent bit integration to Sentinel”, “Activity”:”fluent bit dummy input plugn”, “DeviceVendor”:”Ubuntu”}. Make sure you insert the correct parameters in the output plugin, in this scenario the "azure_logs_ingestion" plugin. Step 2: Fire Up Fluent Bit When the file is ready to be tested please execute the following: sudo /opt/fluent-bit/bin/fluent-bit -c /etc/fluent-bit/fluent-bit.conf Fluent bit will start initialization all the plugins it has under the config file. Then you’re access token should be retrieved if everything is well setup under the output plugin (app registration details, data collection endpoint URL, data collection rule id, sentinel table and important to make sure the name of the output plugin is actually “azure_logs_ingestion”). In a couple of minutes you should see this data under your Microsoft Sentinel table, either an existing table or a custom table created for the specific log source purpose. Summary Integrating Fluent Bit with Microsoft Sentinel provides a powerful solution for log collection and analysis. By following this guide, hope you can set up a seamless integration that enhances your organization's ability to monitor and respond to security threats, just carefully ensure that all fields processed in Fluent Bit are mapped exactly to the fields in Data Collection Rule and Sentinel table within Log Analytics Workspace. Special thanks to “Bindiya Priyadarshini” that collaborated with me on this blog post. Cheers!3.2KViews2likes2Comments
The Hidden Reason Your Sentinel Playbook Won't Show Up in Automation Rules (It's Not RBAC)
If a Logic App using the native Microsoft Sentinel incident trigger doesn't show up in the "Run playbook" picker of an Automation Rule — even though permissions, region, and connection are all correct — check the internal action name of the trigger in the JSON code view. If the Logic App was created while the Azure portal was set to a non-English language, the designer may generate a localized action name instead of the expected Microsoft_Sentinel_incident, and the playbook won't be picked up. Environment Microsoft Sentinel (Log Analytics workspace) Logic Apps (Consumption plan) Trigger: native Microsoft Sentinel connector, "Incident" trigger (/incident-creation path) Authentication: system-assigned Managed Identity Same subscription, resource group, and region as the Sentinel workspace Problem Two Logic Apps, both triggered by the native Microsoft Sentinel incident trigger, both using a system-assigned managed identity with the Microsoft Sentinel Responder role granted on the workspace. Same subscription, same resource group, same region. Only one of the two appeared in the "Run playbook" dropdown when configuring an Automation Rule in Sentinel. The other was simply absent — no error message, no warning, nothing in the run history to explain it. Investigation The usual suspects were checked and ruled out one by one: API connection health — one azuresentinel connection was indeed in an "Error" state, but it turned out not to be the one referenced by the affected trigger. Managed identity RBAC — the Microsoft Sentinel Responder role was correctly assigned to the Logic App's managed identity on the Sentinel workspace. User's own RBAC/PIM role — the Logic App Contributor role (required for the account configuring the Automation Rule to even see the resource) was active via PIM at the time of testing. Region/subscription/resource group — identical for both Logic Apps. Trigger type — both used the native "Incident in Microsoft Sentinel" trigger added through the visual designer, not a generic HTTP trigger or a deprecated connector. Every documented requirement was met. The playbook was still invisible. Root Cause Comparing the raw JSON (Logic app > Development tools > Code view) revealed the actual difference. Working Logic App (visible in the picker): "triggers": { "Microsoft_Sentinel_incident": { "type": "ApiConnectionWebhook", "inputs": { "body": { "callback_url": "@{listCallbackUrl()}" }, "path": "/incident-creation" } } } Broken Logic App (invisible in the picker): "triggers": { "Incident_dans_Microsoft_Sentinel": { "type": "ApiConnectionWebhook", "inputs": { "body": { "callback_url": "@listCallbackUrl()" }, "path": "/incident-creation" } } } The connector type and the path (/incident-creation) are identical. The one meaningful structural difference is the trigger's action name: Microsoft_Sentinel_incident versus Incident_dans_Microsoft_Sentinel. The second Logic App's trigger had been added while the Azure portal was set to French. The designer generated a localized action name instead of the canonical English one. Everything points to Sentinel's playbook discovery mechanism scanning Logic App definitions for that exact canonical action name (Microsoft_Sentinel_incident) to identify a resource as a valid Sentinel playbook — rather than relying solely on the connector type or the webhook path, as one would reasonably expect. Fix Renaming the trigger's action key in the JSON to the canonical name was enough: "triggers": { "Microsoft_Sentinel_incident": { ... } } No permission, connection, or region change was required — only this rename. Takeaways The Sentinel Automation Rule playbook picker appears to depend on the exact trigger action name, not just its type or functional behavior — a dependency that isn't documented anywhere in the official Microsoft docs as of this writing. The Azure portal's display language at the time a trigger is added has a direct impact on that Logic App's compatibility with Sentinel Automation Rules. A playbook can be fully functional (running without errors when triggered manually or through an older automation mechanism) while still being invisible in the newer Automation Rule selector — which makes this particular issue easy to miss, since nothing explicitly flags it. Recommendations Temporarily switch the Azure portal to English (Portal settings > Language and region) before adding a Sentinel trigger to a Logic App, if your team usually works in another language. If an existing Logic App won't show up despite an otherwise correct configuration, check the trigger's action name in the JSON code view first — it's a 30-second check that can save hours of RBAC/connection troubleshooting. Document this in your internal runbooks if your team works in a localized portal — this kind of detail is easy to lose and can cost significant troubleshooting time down the line. Has anyone else run into similar localization-related quirks in Sentinel or Logic Apps? Would be curious to hear about other cases in the comments.245Views0likes0Comments