openai models
4 TopicsAdding a Fallback Model to Hermes with Microsoft Foundry
So the plan was simple. Leave the Bedrock configuration untouched, then wire Microsoft Foundry in behind it as a fallback, so Hermes always has somewhere else to go when the primary provider is not responding. A few other reasons pushed me towards Foundry in particular: Redundancy that does not need me. If Bedrock is throttled or out of quota, I want Hermes to fail over on its own rather than waiting for me to notice. A catalogue I already pay for. Foundry puts the latest GPT models next to open-weight and partner models in one place, so I can pick a model that suits the task instead of settling for whatever a single provider happens to offer. Enterprise controls out of the box. Region pinning, private networking, content filters and per-deployment quota all sit in the same portal, which makes the setup far easier to defend to a security reviewer. Learning the mechanics before I need them. Working out how Hermes handles a provider chain is much nicer on a quiet Tuesday than during a live outage. Here is the short version, if you are deciding whether to read on. Time: about thirty minutes if nothing goes wrong. Cost: pay-as-you-go tokens only, and none at all while the fallback sits idle. Result: an assistant that keeps answering when your primary provider stops. Before you start, you will need three things: a machine with Hermes already installed and a working primary provider configured, an Azure subscription with access to Microsoft Foundry in a region you can actually deploy into, and enough quota in that region to create a deployment. One thing that made this easy to justify: Foundry deployments bill per token on the standard pay-as-you-go tier. A fallback provider that never gets invoked costs nothing beyond the requests it actually serves, so the insurance is close to free until the day you need it. Chat surface (CLI, messaging) → Hermes Gateway → Primary Amazon Bedrock → Fallback Microsoft Foundry Figure 1: Where the fallback sits. Every request goes through the Hermes gateway to the primary provider; only when that provider is unavailable does the chain continue to Microsoft Foundry. Part 1: Deploying a Model on Microsoft Foundry The first half of this job happens entirely inside the Microsoft Foundry portal and has nothing to do with Hermes yet. All you are really doing here is making sure your Azure subscription can serve a model, and that you hold an endpoint and key Hermes can authenticate with later. 1. Deploy model in Foundry → 2. Copy endpoint + key → 3. hermes fallback add → 4. Authenticate → 5. Select models, test Figure 2: The whole setup in five moves. The first two happen in the Microsoft Foundry portal (orange); the rest happen on the Hermes machine (blue). Go to Microsoft Foundry > Build > Models > Deploy > Deploy a base model. You can deploy a fine-tuned model instead if you already have one, which works just as well with Hermes. Check the region shown at the top of the portal before you commit, because both model availability and deployment quota differ from one region to the next. Then deploy the model you have selected: In this case I deployed gpt-5.6-sol, which is the model Hermes will fall back to. The choice was deliberate rather than exciting. My primary model on Bedrock is a general-purpose chat model, and a fallback is only useful if the answers it gives feel like a continuation of the same conversation rather than a different assistant wearing the same name. The gpt-5.6-sol deployment matches that behaviour closely, it was available in the region I wanted to pin, and the quota I was granted comfortably covers a day of normal use. If a fallback surprises you the first time it fires, it is the wrong fallback. Once the deployment finishes, open it and take note of two values: the target endpoint URI and the API key. Copy both somewhere safe now, because you will be pasting them into Hermes in the next part. If your organisation rotates keys on a schedule, use a key with the longest life you are allowed, since a fallback secured with a credential that expires quietly stops being a fallback. What to copy Where it lives in the portal Where Hermes asks for it Target endpoint URI Deployment > Endpoint > Target URI "Endpoint" prompt in hermes fallback add API key Deployment > Endpoint > Key "API key" prompt, or choose Entra ID instead Deployment name Deployment > Details > Name Shown in the model list Hermes returns Region Top of the portal, next to the resource Must match the region you deployed into Figure 3: Everything Hermes will ask for, and where to find each value before you leave the portal. Part 2: Adding Foundry to Hermes as a Fallback With the Foundry side sorted, everything from here happens in the Hermes CLI. One thing worth knowing before you start: this is the fallback command, not the primary model command, so your existing Bedrock configuration is left completely alone. Nothing in this section can break what is already working, which makes it a good one to try on a live setup. Run the Hermes fallback command: When Hermes asks which provider to add, choose Azure Foundry. The picker still carries the old name; it is the same service that the portal now calls Microsoft Foundry. Paste the target endpoint URI from your deployment, then authenticate with the API key you copied earlier. Hermes also offers Microsoft Entra ID at this prompt, which is the better option if your organisation would rather not have a static key sitting on the machine. If authentication fails here, check the endpoint before you start suspecting the key. In my experience the endpoint is wrong far more often than the credential is, usually because the deployment name at the end of the URI does not match the deployment you actually created. Once authentication succeeds, Hermes lists the deployments your Foundry resource exposes and asks which ones you want to use. You can select more than one, and the order is not cosmetic: Hermes walks down the chain from top to bottom whenever the provider above is unavailable. Treat that list as a priority order, not a shopping basket. What happens to the primary What Hermes does What you see in the chat Responds normally Routes every request to the primary and never touches the chain Nothing. The fallback stays idle Throttled or out of quota Retries the next provider down the chain on the same request A reply, served by the fallback model Endpoint unreachable Keeps failing over on each new request until the primary recovers Slightly different tone and latency, but a working assistant Every provider fails Returns the error rather than hanging An error worth chasing with hermes status Figure 4: The chain in practice. The fallback only earns its keep in the middle two rows, which is exactly why it is easy to forget you configured it. Part 3: Promoting Foundry to the Primary Model At this stage Foundry is sitting in the back seat as a backup. I wanted to reverse the arrangement and make Foundry the primary while Bedrock slides down into the fallback slot, partly because I preferred keeping day-to-day traffic inside my Azure subscription, and partly because I wanted proof the chain works in both directions. Before promotion After promotion Primary: Amazon Bedrock → Primary: Microsoft Foundry Fallback: Microsoft Foundry → Fallback: Amazon Bedrock Figure 5: The promotion, in effect. Nothing is added or removed; the two providers simply trade places in the chain. There is no dedicated "promote" command in Hermes, so the manual route is a short sequence of steps rather than a single instruction: Select the fallback provider/model as the new primary: hermes model Remove the now-duplicate model from the fallback chain: hermes fallback remove Optionally add the old primary model as a fallback: hermes fallback add Restart the messaging gateway: hermes gateway restart Verify the result: hermes status / hermes fallback list That sequence works, and it is good to know what is happening underneath. But since I already had a working provider configured, I would rather just ask Hermes to rearrange itself. This is the part I genuinely enjoy about the tool: the configuration is something you can talk to, not only something you type commands at. Prompt: Okay now please make the model I configured on Microsoft Foundry into the main model, and make the Bedrock one the fallback model! Hermes rewrites the provider chain on its own and confirms the swap once it is done, which is a great deal less error-prone than running the five commands by hand. Part 4: Testing the Switch Configuration you have not tested is just an assumption with extra steps, so the next thing is to confirm Hermes really is talking to Foundry. Type /model when running Hermes to bring up the model picker. You will be prompted to select a provider first. Pick the Microsoft Foundry entry, then choose the specific deployment from the list underneath it. The active model should switch straight away. Send it a plain "Hello" to check that the deployment actually responds, rather than just looking correct in the menu. Appearing in a dropdown and serving a request are two very different things. A second test is worth the thirty seconds it costs: run hermes status to confirm which provider is live, then hermes fallback list to confirm the chain is ordered the way you intended. The picker tells you what you selected; those two commands tell you what Hermes will actually do at three in the morning. Part 5: The Obstacle, and What It Actually Taught Me Every walkthrough has the part the author quietly leaves out. Here is mine: the wrinkle was not the model, it was capacity. My first attempt deployed into the region closest to me out of habit, and the portal turned it down because there was no capacity left for that model at the tier I asked for. The model was clearly listed in the catalogue; being listed and being deployable in your region, on your subscription, at your quota, are three separate questions. Redeploying in a different region fixed it in a couple of minutes, but it meant the endpoint URI changed, which in turn meant the value I had already pasted into Hermes was stale. Re-running hermes fallback add against the new endpoint sorted it out. The lesson is cheap enough to hand over for free: check quota and regional capacity for your specific subscription before you design a walkthrough, a demo or a production fallback around one deployment. In the Foundry portal, Management then Quota shows exactly what you have been granted per region and per model family, which is the only list that matters. Symptom Likely cause Fix Deployment rejected in the portal No capacity for that model at the tier you asked for, in that region Deploy in another region, or drop to a smaller tier Hermes rejects the credential Endpoint URI does not match the deployment you created Re-copy the target URI from the deployment, not the resource Provider authenticates but lists nothing Key belongs to a different Foundry resource Check you are in the right resource, then re-run hermes fallback add Fallback never fires Chain ordered the wrong way round hermes fallback list, then reorder Figure 6: The four things that went wrong, or nearly did, and what fixed each one. There is a silver lining worth stating plainly. Because the fallback chain was already in place, a deployment that refused to come up did not take the assistant down with it. That is precisely the scenario this whole exercise was meant to cover, and it turned up on day one without me having to simulate it. Command Cheat Sheet Everything used in this walkthrough, collected in one place: hermes fallback add: attach a provider to the fallback chain hermes fallback remove: drop a provider from the chain hermes fallback list: show the chain in priority order hermes model: set the primary model hermes gateway restart: restart the messaging gateway after a change hermes status: confirm which provider is currently live /model: switch models from inside a running session Conclusion Adding Microsoft Foundry as a fallback behind my existing Bedrock setup took an afternoon, and most of that was spent recovering from a regional capacity limit I should have checked first. The work itself is small: deploy a model, copy the endpoint and key, run hermes fallback add, authenticate, pick your deployments. The payoff is that Hermes no longer depends on one provider staying healthy. Three things are worth carrying away from this: Check quota, not just the catalogue. The Foundry catalogue shows what Microsoft offers. It does not show what your subscription and region can actually deploy today. Confirm that first, before you build anything on top of a specific deployment. Order your fallback chain deliberately. Hermes works down the list from top to bottom, so the sequence you choose during setup is the failover policy you are going to live with. Put the model you actually trust at the top. Treat the endpoint as part of the credential. Redeploying in a new region changes the endpoint URI, and a fallback pointed at an endpoint that no longer exists is not a fallback. Re-run the setup whenever the deployment moves. The switch from Bedrock primary to Foundry primary also proved the chain runs in both directions, which is the real point. Provider redundancy is only useful if you have watched it work. Next on my list is deliberately breaking the primary provider to confirm the failover triggers on its own, without me typing a single command. If you run this against a different model, region or provider pairing, I would genuinely like to know how it went, particularly if your quota experience was better than mine. Drop it in the comments.430Views0likes0CommentsFine-Tuning Language Models with Azure AI Foundry: A Detailed Guide
What is Azure AI Foundry? Azure AI Foundry is a comprehensive platform designed to simplify the development, deployment, and management of AI models. It provides a user-friendly interface and powerful tools that enable developers to create custom AI solutions without needing extensive machine learning expertise. Key Features of Azure AI Foundry One-Button Fine-Tuning: A streamlined process that allows users to fine-tune models with minimal configuration. Integration with Development Tools: Seamless integration with popular development environments, particularly Visual Studio Code. Support for Multiple Models: Access to a variety of pre-trained models, including the Phi family of models. Understanding Fine-Tuning Fine-tuning is the process of taking a pre-trained model and adapting it to a specific dataset or task. This is particularly useful when the base model has been trained on a large corpus of general data but needs to perform well on a narrower domain. Why Fine-Tune? Improved Performance: Fine-tuning can significantly enhance the model's accuracy and relevance for specific tasks. Reduced Training Time: Starting with a pre-trained model reduces the amount of data and time required for training. Customization: Tailor the model to meet the unique needs of your application or business. One-Button Fine-Tuning in Azure AI Foundry Step-by-Step Process Select the Model: Log in to Azure AI Foundry and navigate to the model selection interface. Choose Phi-3 or another small language model from the available options. Prepare Your Data: Ensure your dataset is formatted correctly. Typically, this involves having a set of input-output pairs that the model can learn from. Upload your dataset to Azure AI Foundry. The platform supports various data formats, making it easy to integrate your existing data. Initiate Fine-Tuning: Locate the one-button fine-tuning feature within the Azure AI Foundry interface. Click the button to start the fine-tuning process. The platform will handle the configuration and setup automatically. Monitor Progress: After initiating fine-tuning, you can monitor the process through the Azure portal. The portal provides real-time updates on training metrics, allowing you to track the model's performance as it learns. Evaluate the Model: Once fine-tuning is complete, evaluate the model's performance using a validation dataset. Azure AI Foundry provides tools for assessing accuracy, precision, recall, and other relevant metrics. Deploy the Model: After successful evaluation, you can deploy the fine-tuned model directly from Azure AI Foundry. The platform supports various deployment options, including REST APIs and integration with other Azure services. Using the AI Toolkit in Visual Studio Code Overview of the AI Toolkit The AI Toolkit for Visual Studio Code enhances the development experience by providing tools specifically designed for AI model management and fine-tuning. This integration allows developers to work within a familiar environment while leveraging powerful AI capabilities. Key Features of the AI Toolkit 1) Model Management: Easily manage and switch between different models, including Phi-3 and Ollama models. 2) Data Handling: Simplified data upload and preprocessing tools to prepare datasets for training. 3) Real-Time Collaboration: Collaborate with team members in real-time, sharing insights and progress on AI projects. How to Use the AI Toolkit 1) Install the AI Toolkit: Open Visual Studio Code and navigate to the Extensions Marketplace. Search for "AI Toolkit" and install the extension. 2) Connect to Azure AI Foundry: Once installed, configure the toolkit to connect to your Azure AI Foundry account. This will allow you to access your models and datasets directly from Visual Studio Code. 3) Fine-Tune Models: Use the toolkit to initiate fine-tuning processes directly from your development environment. Monitor training progress and view logs without leaving Visual Studio Code. 4) Consume Ollama Models: The AI Toolkit supports the consumption of Ollama models, providing additional flexibility in your AI projects. This feature allows you to integrate various models seamlessly, enhancing your application's capabilities. Microsoft ONNX Live for Fine-Tuning What is Microsoft ONNX Live? Microsoft ONNX Live is a platform that allows developers to deploy and optimize AI models using the Open Neural Network Exchange (ONNX) format. ONNX is an open-source format that enables interoperability between different AI frameworks, making it easier to deploy models across various environments. Key Features of Microsoft ONNX Live Model Optimization: ONNX Live provides tools to optimize models for performance, ensuring they run efficiently in production environments. Cross-Framework Compatibility: Models trained in different frameworks (like PyTorch or TensorFlow) can be converted to ONNX format, allowing for greater flexibility in deployment. Real-Time Inference: ONNX Live supports real-time inference, enabling applications to utilize AI models for immediate predictions. Fine-Tuning with ONNX Live Model Conversion: If you have a model trained in a different framework, you can convert it to ONNX format using tools provided by Microsoft. This conversion allows you to leverage the benefits of ONNX Live for deployment and optimization. Integration with Azure AI Foundry: Once your model is in ONNX format, you can integrate it with Azure AI Foundry for fine-tuning. The one-button fine-tuning feature can be used to adapt the ONNX model to your specific dataset. Optimization Techniques: After fine-tuning, you can apply various optimization techniques available in ONNX Live to enhance the model's performance. Techniques such as quantization and pruning can significantly reduce the model size and improve inference speed. Deployment: Once optimized, the model can be deployed directly from Azure AI Foundry or ONNX Live. This deployment can be done as a REST API, allowing easy integration with web applications and services. Additional Resources To further enhance your understanding and capabilities in fine-tuning language models, consider exploring the following resources: Phi-3 Cookbook: This comprehensive guide provides insights into getting started with Phi models, including best practices for fine-tuning and deployment. Explore the Phi-3 Cookbook. Ignite Fine-Tuning Workshop: This workshop offers a hands-on approach to learning about fine-tuning techniques and tools. It includes real-world scenarios to help you understand the practical applications of fine-tuning. Visit the GitHub Repository. Conclusion Fine-tuning language models like Phi-3 using Azure AI Foundry, combined with the AI Toolkit in Visual Studio Code and Microsoft ONNX Live, provides a powerful and efficient workflow for developers. The one-button fine-tuning feature simplifies the process, while the integration with ONNX Live allows for optimization and deployment flexibility. By leveraging these tools, you can enhance your AI applications, ensuring they are tailored to meet specific needs and perform optimally in production environments. Whether you are a seasoned AI developer or just starting, Azure AI Foundry and its associated tools offer a robust ecosystem for building and deploying advanced AI solutions. References Microsoft Docs Links Fine-Tuning Models in Azure OpenAI Azure AI Services Documentation Azure Machine Learning Documentation Microsoft Learn Links Develop Generative AI Apps in Azure Fine-Tune a Language Model Azure AI Foundry Overview Get started with AI Toolkit for Visual Studio Code2.3KViews0likes0CommentsUnderstanding Azure OpenAI Service Quotas and Limits: A Beginner-Friendly Guide
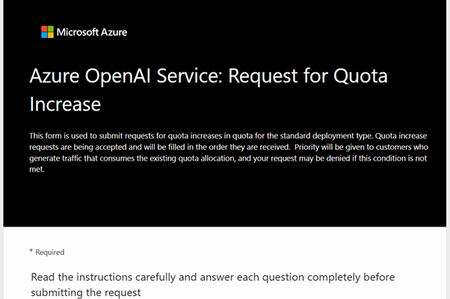
Azure OpenAI Service allows developers, researchers, and students to integrate powerful AI models like GPT-4, GPT-3.5, and DALL·E into their applications. But with great power comes great responsibility and limits. Before you dive into building your next AI-powered solution, it's crucial to understand how quotas and limits work in the Azure OpenAI ecosystem. This guide is designed to help students and beginners easily understand the concept of quotas, limits, and how to manage them effectively. What Are Quotas and Limits? Think of Azure's quotas as your "AI data pack." It defines how much you can use the service. Meanwhile, limits are hard boundaries set by Azure to ensure fair use and system stability. Quota The maximum number of resources (e.g., tokens, requests) allocated to your Azure subscription. Limit The technical cap imposed by Azure on specific resources (e.g., number of files, deployments). Key Metrics: TPM & RPM Tokens Per Minute (TPM) TPM refers to how many tokens you can use per minute across all your requests in each region. A token is a chunk of text. For example, the word "Hello" is 1 token, but "Understanding" might be 2 tokens. Each model has its own default TPM. Example: GPT-4 might allow 240,000 tokens per minute. You can split this quota across multiple deployments. Requests Per Minute (RPM) RPM defines how many API requests you can make every minute. For instance, GPT-3.5-turbo might allow 350 RPM. DALL·E image generation models might allow 6 RPM. Deployment, File, and Training Limits Here are some standard limits imposed on your OpenAI resource: Resource Type Limit Standard model deployments 32 Fine-tuned model deployments 5 Training jobs 100 total per resource (1 active at a time) Fine-tuning files 50 files (total size: 1 GB) Max prompt tokens per request Varies by model (e.g., 4096 tokens for GPT-3.5) How to View and Manage Your Quota Step-by-Step: Go to the Azure Portal. Navigate to your Azure OpenAI resource. Click on "Usage + quotas" in the left-hand menu. You will see TPM, RPM, and current usage status. To Request More Quota: In the same "Usage + quotas" panel, click on "Request quota increase". Fill in the form: Select the region. Choose the model family (e.g., GPT-4, GPT-3.5). Enter the desired TPM and RPM values. Submit and wait for Azure to review and approve. What is Dynamic Quota? Sometimes, Azure gives you extra quota based on demand and availability. “Dynamic quota” is not guaranteed and may increase or decrease. Useful for short-term spikes but should not be relied on for production apps. Example: During weekends, your GPT-3.5 TPM may temporarily increase if there's less traffic in your region. Best Practices for Students Monitor Regularly: Use the Azure Portal to keep an eye on your usage. Batch Requests: Combine multiple tasks in one API call to save tokens. Start Small: Begin with GPT-3.5 before requesting GPT-4 access. Plan Ahead: If you're preparing a demo or a project, request quota in advance. Handle Limits Gracefully: Code should manage 429 Too Many Requests errors. Quick Resources Azure OpenAI Quotas and Limits How to Request Quota in Azure Join the Conversation on Azure AI Foundry Discussions! Have ideas, questions, or insights about AI? Don't keep them to yourself! Share your thoughts, engage with experts, and connect with a community that’s shaping the future of artificial intelligence. 🧠✨ 👉 Click here to join the discussion!3.2KViews0likes0CommentsHow to Set Up Claude Code with Microsoft Foundry Models on macOS
Introduction Building with AI isn't just about picking a smart model. It is about where that model lives. I chose to route my Claude Code setup through Microsoft Foundry because I needed more than just a raw API. I wanted the reliability, compliance, and structured management that comes with Microsoft's ecosystem. When you are moving from a prototype to something real, having that level of infrastructure backing your calls makes a significant difference. The challenge is that Foundry is designed for enterprise cloud environments, while my daily development work happens locally on a MacBook. Getting the two to communicate seamlessly involved navigating a maze of shell configurations and environment variables that weren't immediately obvious. I wrote this guide to document the exact steps for bridging that gap. Here is how you can set up Claude Code to run locally on macOS while leveraging the stability of models deployed on Microsoft Foundry. Requirements Before we open the terminal, let's make sure you have the necessary accounts and environments ready. Since we are bridging a local CLI with an enterprise cloud setup, having these credentials handy now will save you time later. Azure Subscription with Microsoft Foundry Setup - This is the most critical piece. You need an active Azure subscription where the Microsoft Foundry environment is initialized. Ensure that you have deployed the Claude model you intend to use and that the deployment status is active. You will need the specific endpoint URL and the associated API keys from this deployment to configure the connection. An Anthropic User Account - Even though the compute is happening on Azure, the interface requires an Anthropic account. You will need this to authenticate your session and manage your user profile settings within the Claude Code ecosystem. Claude Code Client on macOS - We will be running the commands locally, so you need the Claude Code CLI installed on your MacBook. Step 1: Install Claude Code on macOS The recommended installation method is via Homebrew or Curl, which sets it up for terminal access ("OS level"). Option A: Homebrew (Recommended) brew install --cask claude-code Option B: Curl curl -fsSL https://claude.ai/install.sh | bash Verify Installation: Run claude --version. Step 2: Set Up Microsoft Foundry to deploy Claude model Navigate to your Microsoft Foundry portal, and find the Claude model catalog, and deploy the selected Claude model. [Microsoft Foundry > My Assets > Models + endpoints > + Deploy Model > Deploy Base model > Search for "Claude"] In your Model Deployment dashboard, go to the deployed Claude Models and get the "Endpoints and keys". Store it somewhere safe, because we will need them to configure Claude Code later on. Configure Environment Variables in MacOS terminal: Now we need to tell your local Claude Code client to route requests through Microsoft Foundry instead of the default Anthropic endpoints. This is handled by setting specific environment variables that act as a bridge between your local machine and your Azure resources. You could run these commands manually every time you open a terminal, but it is much more efficient to save them permanently in your shell profile. For most modern macOS users, this file is .zshrc. Open your terminal and add the following lines to your profile, making sure to replace the placeholder text with your actual Azure credentials: export CLAUDE_CODE_USE_FOUNDRY=1 export ANTHROPIC_FOUNDRY_API_KEY="your-azure-api-key" export ANTHROPIC_FOUNDRY_RESOURCE="your-resource-name" # Specify the deployment name for Opus export CLAUDE_CODE_MODEL="your-opus-deployment-name" Once you have added these variables, you need to reload your shell configuration for the changes to take effect. Run the source command below to update your current session, and then verify the setup by launching Claude: source ~/.zshrc claude If everything is configured correctly, the Claude CLI will initialize using your Microsoft Foundry deployment as the backend. Once you execute the claude command, the CLI will prompt you to choose an authentication method. Select Option 2 (Antrophic Console account) to proceed. This action triggers your default web browser and redirects you to the Claude Console. Simply sign in using your standard Anthropic account credentials. After you have successfully signed in, you will be presented with a permissions screen. Click the Authorize button to link your web session back to your local terminal. Return to your terminal window, and you should see a notification confirming that the login process is complete. Press Enter to finalize the setup. You are now fully connected. You can start using Claude Code locally, powered entirely by the model deployment running in your Microsoft Foundry environment. Conclusion Setting up this environment might seem like a heavy lift just to run a CLI tool, but the payoff is significant. You now have a workflow that combines the immediate feedback of local development with the security and infrastructure benefits of Microsoft Foundry. One of the most practical upgrades is the removal of standard usage caps. You are no longer limited to the 5-hour API call limits, which gives you the freedom to iterate, test, and debug for as long as your project requires without hitting a wall. By bridging your local macOS terminal to Azure, you are no longer just hitting an API endpoint. You are leveraging a managed, compliance-ready environment that scales with your needs. The best part is that now the configuration is locked in, you don't need to think about the plumbing again. You can focus entirely on coding, knowing that the reliability of an enterprise platform is running quietly in the background supporting every command.1.6KViews1like0Comments