microsoft sentinel
268 TopicsIntroducing the Microsoft Sentinel ASIM EmailEvent schema
Email remains one of the most common entry points for security threats. Yet email products often describe the same activity with different table names, fields, and values. This makes it harder to build detections and investigations that work consistently across data sources. The Microsoft Sentinel Advanced Security Information Model, or ASIM, EmailEvent schema is now available. It provides a common structure for email delivery and inspection events, helping customers and partners create security content that works across supported email data sources. A consistent view of email security activity EmailEvent standardizes the information analysts need to understand what happened to an email and why. It covers: Email delivery and inspection events Sender, source, and recipient information Message subject, size, direction, and delivery location URLs and file attachments SPF, DKIM, and DMARC authentication results Delivery actions such as delivered, blocked, quarantined, or deleted Threat, risk, confidence, tactic, technique, and remediation details Instead of learning a different data model for every product, analysts can query the normalized EmailEvent fields. Parser developers map each source's native data to the same schema. How it works Consider an email that contains a suspicious attachment. The email security product records the sender, recipients, attachment, authentication results, inspection verdict, and final action. A connector collects that event. A parser or Data Collection Rule maps the source fields to EmailEvent. Microsoft Sentinel can then query the normalized record using the same field names used for other supported email sources. This common structure separates security content from the details of a specific product. When another source adds an EmailEvent parser, existing source-independent queries and detections can work with that source without being rewritten around its native field names. Why it matters Simpler analytics: Write queries against one consistent set of email fields. Broader coverage: Apply source-independent security content across normalized email sources. Faster investigations: Compare delivery, authentication, attachment, URL, and threat details without translating different data models. Easier integration: Give connector and parser developers a defined contract for bringing new email telemetry into ASIM. EmailEvent does not replace the rich native data produced by email security products. It provides a consistent security layer that makes that data easier to use together. Build on EmailEvent The EmailEvent release includes the schema definition, source-independent parser framework, filtering parser, deployment templates, and validation support in the Azure-Sentinel repository. The schema version is 1.0.0. Customers can use normalized EmailEvent data to develop hunting queries, analytics rules, workbooks, and investigation experiences. Partners and community contributors can create source-specific parsers that map their email data to the schema. Get started Normalization Email Schema MS Learn Learn about normalization and ASIM Explore the EmailEvent implementation in Azure-Sentinel Deploy ASIM parsers Thank you to the ASIM engineering and partner teams who contributed to the schema, deployment path, validation, and release.609Views1like0Comments
How Granular Delegated Admin Privileges (GDAP) allows Sentinel customers to delegate access
Simplifying Defender SIEM and XDR delegated access As Microsoft Sentinel and Defender converge into a unified experience, organizations face a fundamental challenge: the lack of a scalable, comprehensive, delegated access model that works seamlessly across Entra ID and Sentinel’s Azure Resource Manage creating a significant barrier for Managed Security Service Providers (MSSPs) and large enterprises with complex multi-tenant structures. Extending GDAP beyond CSPs: a strategic solution In response to these challenges, we have developed an extension to GDAP that makes it available to all Sentinel and Defender customers, including non-CSP organizations. This expansion enables both MSSPs and customers with multi-tenant organizational structures to establish secure, granular delegated access relationships directly through the Microsoft Defender portal. This is now available in public preview. The GDAP extension aligns with zero-trust security principles through a three-way handshake model requiring explicit mutual consent between governing and governed tenants before any relationship is established. This consent-based approach enhances transparency and accountability, reducing risks associated with broad, uncontrolled permissions. By integrating with Microsoft Defender, GDAP enables advanced threat detection and response capabilities across tenant boundaries while maintaining granular permission management through Entra ID roles and Unified RBAC custom permissions. Delivering unified management of delegated access across SIEM and XDR With GDAP, customers gain a truly unified way to manage access across both Microsoft Sentinel and Defender—using a single, consistent delegated access model for SIEM and XDR. For Sentinel customers, this brings parity with the Azure portal experience: where delegated access was previously managed through Azure Lighthouse, it can now be handled directly in the Defender portal using GDAP. More importantly, for organizations running SIEM and XDR together, GDAP eliminates the need to switch between portals—allowing teams to view, manage, and govern security access from one centralized experience. The result is simpler administration, reduced operational friction, and a more cohesive way to secure multi-tenant environments at scale. How GDAP for non-CSPs works: the three-step handshake The GDAP handshake model implements a security-first approach through three distinct steps, each requiring explicit approval to prevent unauthorized access. Step 1 begins with the governed tenant initiating the relationship, allowing the governing tenant to request GDAP access. Step 2 shifts control to the governing tenant, which creates and sends a delegated access request with specific requested permissions through the multi-tenant organization (MTO) portal. Step 3 returns to the governed tenant for final approval. The approach provides customers with complete visibility and control over who can access their security data and with what permissions, while giving MSSPs a streamlined, Microsoft-supported mechanism for managing delegated relationships at scale. Step 4 assigns Sentinel permissions. In Azure resource management, assign governing tenant’s groups with Sentinel workspaces permissions (in the governed tenant), selecting the governing tenant’s security groups used in the created relationship. Learn more here: Configure delegated access with governance relationships for multitenant organizations - Unified se…7KViews2likes37CommentsWhat’s new in Microsoft Sentinel: September 2026
Welcome back to What's new in Microsoft Sentinel. In September, Case Management brings investigation and collaboration together in Microsoft Defender, with a shared workspace to track work through resolution. Defender unified RBAC custom roles for granular delegated admin privileges (GDAP) give you finer control over what managed security service providers (MSSPs) and other partners can access. In Sentinel data lake, a single Codeless Connector Framework (CCF) connector can bring in data from many accounts, and our connector catalog has passed 500 data connectors. Read on for the details. Sentinel innovations: Sentinel SIEM Sentinel data lake Sentinel SIEM Case Management (Public Preview) Starting September 23, 2026, Case Management brings investigation and collaboration together in one experience in Defender. With Incident Cases, you can investigate, coordinate response, assign work, capture notes, and track progress through resolution, all from a shared workspace that holds investigation context alongside tasks and workflow tracking. Your existing Sentinel automation, playbooks, workbooks, and integrations carry over unchanged. This builds on the integrated security operations (ISOC) vision of bringing the context and workflows practitioners need to investigate and respond together in Defender. Read our Case Management blog, see the documentation, and watch the demo to learn more. Unified RBAC custom roles (Public Preview) If you work with a managed security service provider (MSSP) or manage multiple tenants, giving partners the right level of access is simpler. Granular delegated admin privileges (GDAP) sets which partner groups can be delegated access to your tenant, and Defender unified role-based access control (RBAC) sets what they can see and do once delegated. You can assign unified RBAC custom roles to GDAP remote tenant groups and scope each role down to specific security products, data sources, and data collections so partners receive only the access they need. GDAP previously only supported Microsoft Entra directory roles, which often meant handing partners more access than the job needed. Anyone who is a member of a remote tenant group receives its permissions. Your partner manages who belongs to the group, while you keep control of the role and its scope. Learn more. Sentinel data lake Multi-account support for codeless connectors (Public Preview) A single connector built on the Codeless Connector Framework (CCF) can bring data from many accounts, tenants, or environments into one Sentinel workspace. A unified connections list shows each account as its own row, labeled so you can tell them apart by account name, tenant ID, or environment. An “Add connection” experience walks you through setting up each one, and an independent lifecycle per connection means you can edit or remove any account without affecting the rest. Shared, efficient ingestion sends all of it to the same table, so you have one place to investigate instead of a separate connector for every account. This helps if you run separate production and development accounts, segment by region or business unit, or manage several customers in one workspace. Learn more. Sentinel data connectors pass the 500 mark Sentinel has reached an exciting milestone of more than 500 data connectors. Our connectors bring security signals from Microsoft services, non-Microsoft solutions, multicloud environments, applications, infrastructure, and custom sources into Sentinel, where they can be correlated and analyzed to help teams detect threats, investigate incidents, hunt across their digital estate, and automate response. With 500+ connectors and growing, Sentinel makes it easier for organizations to unify their security ecosystem and give the security operations center (SOC) broader visibility where it matters most. Find your connector. Additional resources Blogs and documentation: Integrated Security Operations Center in Microsoft Defender ISOC in Microsoft Defender (preview) Activate Microsoft Defender unified role-based access control (URBAC) Support multiple connections in a codeless connector Upcoming webinars: Oct 6: Security Immersion Event: Into the Breach Oct 14: Microsoft Security Immersion Event: Shadow Hunter Upcoming events: Oct 19: Microsoft Security Days Summit: Dallas Edition (In Person) ISOC: What's new with the Defenders Capture the Flag: Agent Wars (Hands-on) Nov 17–20: Microsoft Ignite at Moscone Center in San Francisco, CA, USA. See what's next in Microsoft Security. Register now. Stay connected Check back each month for the latest innovations, updates, and events to ensure you’re getting the most out of Microsoft Sentinel. We’ll see you in the next edition!847Views2likes1CommentIntegrating Fluent Bit with Microsoft Sentinel
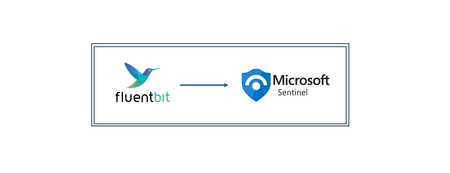
This guide will walk you through the steps required to integrate Fluent Bit with Microsoft Sentinel. Beware that in this article, we assume you already have a Sentinel workspace, a Data Collection Endpoint and a Data Collection Rule, an Entra ID application and finally a Fluent Bit installation. As mentioned above, log ingestion API supports ingestion both in custom tables as built-in tables, like CommonSecurityLog, Syslog, WindowsEvent and more. In case you need to check which tables are supported please the following article: https://learn.microsoft.com/en-us/azure/azure-monitor/logs/logs-ingestion-api-overview#supported-tables Prerequisites: Before beginning the integration process, ensure you have the following: An active Azure subscription with Microsoft Sentinel enabled; Microsoft Entra ID Application taking note of the ClientID, TenantID and Client Secret – create one check this article: https://learn.microsoft.com/en-us/entra/identity-platform/quickstart-register-app?tabs=certificate A Data Collection Endpoint (DCE) – to create a data collection endpoint, please check this article: https://learn.microsoft.com/en-us/azure/azure-monitor/essentials/data-collection-endpoint-overview?tabs=portal A Data Collection Rule (DCR) – fields from the Data Collection Rule need to match exactly to what exists in table columns and also the fields from the log source. To create a DCR please check this article: https://learn.microsoft.com/en-us/azure/azure-monitor/essentials/data-collection-rule-create-edit?tabs=cli Depending on the source, it might require a custom table to be created or an existing table from log analytics workspace; Fluent Bit installed on your server or container – In case you haven’t yet installed Fluent Bit, in the following article you'll find the instructions per type of operating system: https://docs.fluentbit.io/manual/installation/getting-started-with-fluent-bit High level architecture: Step 1: Setting up Fluent Big configuration file Before we step-in into the configuration, Fluent Bit has innumerous output plugins and one of those is through Log Analytics Ingestion API both to supported Sentinel tables but also for custom tables. You can check more information about it here in Fluent Bit documentation: https://docs.fluentbit.io/manual/pipeline/outputs/azure_logs_ingestion Moving forwarder, in order to configure Fluent Bit to send logs into Sentinel log analytics workspace, please take note of the specific input plugin you are using or intend to use to receive logs and how can you use it to output the logs to Sentinel workspace. For example most of the Fluent Bit plugins allow to set a “tag” key which can be used within the output plugin so that there’s a match in which logs are intended to send. On the other hand, in a scenario where multiple input plugins are used and all are required send logs to Sentinel, then a match of type wildcard "*" could be used as well. Another example, in a scenario where there are multiple input plugins of type “HTTP” and you want to just send a specific one into Sentinel, then the “match” field must be set according to the position of the required input plugin, for example “match http.2”, if the input plugin would the 3 rd in the list of HTTP inputs. If nothing is specified in the "match" field, then it will assume "http.0" by default. For better understanding, here’s an example of how a Fluent Bit config file could look: First, the configuration file is located under the path ”/etc/fluent-bit/fluent-bit.conf” The first part is the definition of all “input plugins”, then follows the “filter plugins” which you can use for example to rename fields from the source to match for what exists within the data collection rule schema and Sentinel table columns and finally there’s the output plugins. Below is a screenshot of a sample config file: INPUT plugins section: In this example we’re going to use the “dummy input” to send sample messages to Sentinel. However, in your scenario you could leverage other’s input plugins within the same config file. After everything is configured in the input section, make sure to complete the “FILTER” section if needed, and then move forward to the output plugin section, screenshot below. OUTPUT plugins section: In this section, we have output plugins to write on a local file based on two tags “dummy.log” and “logger”, an output plugin that prints the outputs in json format and the output plugin responsible for sending data to Microsoft Sentinel. As you can see, this one is matching the “tag” for “dummy.log” where we’ve setup the message “{“Message”:”this is a sample message for testing fluent bit integration to Sentinel”, “Activity”:”fluent bit dummy input plugn”, “DeviceVendor”:”Ubuntu”}. Make sure you insert the correct parameters in the output plugin, in this scenario the "azure_logs_ingestion" plugin. Step 2: Fire Up Fluent Bit When the file is ready to be tested please execute the following: sudo /opt/fluent-bit/bin/fluent-bit -c /etc/fluent-bit/fluent-bit.conf Fluent bit will start initialization all the plugins it has under the config file. Then you’re access token should be retrieved if everything is well setup under the output plugin (app registration details, data collection endpoint URL, data collection rule id, sentinel table and important to make sure the name of the output plugin is actually “azure_logs_ingestion”). In a couple of minutes you should see this data under your Microsoft Sentinel table, either an existing table or a custom table created for the specific log source purpose. Summary Integrating Fluent Bit with Microsoft Sentinel provides a powerful solution for log collection and analysis. By following this guide, hope you can set up a seamless integration that enhances your organization's ability to monitor and respond to security threats, just carefully ensure that all fields processed in Fluent Bit are mapped exactly to the fields in Data Collection Rule and Sentinel table within Log Analytics Workspace. Special thanks to “Bindiya Priyadarshini” that collaborated with me on this blog post. Cheers!3.2KViews2likes2Comments
Building Microsoft Sentinel Connectors in Minutes with the Sentinel Connector Builder Agent
Overview We previously announced the public preview of the Microsoft Sentinel connector builder agent via VS code extension, that helps developers build Microsoft Sentinel codeless connectors faster with low-code and AI-assisted prompts. This post walks through a hands-on lab using a mock Network Log API to demonstrate how the Sentinel connector builder agent simplifies building Codeless Connector Framework (CCF) pull connectors. Instead of manually creating ingestion infrastructure and configuration files, you’ll use a guided, conversational workflow in VS Code to generate connector artifacts, test them against a live API, and deploy them into Microsoft Sentinel. The lab focuses on the end-to-end experience ranging from API setup to validated connector deployment so you can see how quickly a working integration can be produced. For additional guidance beyond this lab, refer to our MS Learn documentation. The Lab Environment This lab is built around a mock Network Log API hosted as an Azure Function App. The purpose of the lab environment is to give us a live API that we can use to build, validate, and test the Sentinel CCF connector builder agent against end to end. The API exposes 50 synthetic network activity records that look and behave like a real product data source, including web traffic, DNS requests, blocked remote access attempts, malware command-and-control blocks, VPN activity, and other common network events. That makes it a useful stand-in for the type of telemetry many teams want to onboard into Microsoft Sentinel. The API is intentionally shaped like the kind of source a customer might expose for telemetry retrieval. It uses API key authentication through the X-API-Key header, returns paginated results through a nextLink model, and provides a predictable response structure that the builder agent can map into a pull connector configuration. The repo contains everything needed for the walkthrough. There is an ARM template to deploy the Function App, reference documentation for the API, and a sample connector package showing the generated polling config, table schema, DCR, and connector definition. The end goal of the lab is straightforward: use the builder agent to generate a CCF pull connector that ingests this API into the custom NetworkLogAPIGetNetworkLogs_CL table in Sentinel. Prerequisites Before starting, make sure you have the following: Azure subscription -- with Contributor access on a resource group (for deploying the Function App) and Microsoft Sentinel Contributor access on a Sentinel-enabled workspace (for deploying the connector) Microsoft Sentinel workspace -- an existing Log Analytics workspace with Sentinel enabled. See Onboard Microsoft Sentinel to a Log Analytics workspace for more information. Azure CLI -- See How to install the Azure CLI for more information. VS Code with the Microsoft Sentinel for Visual Studio Code extension installed. GitHub Copilot -- with access to premium models. The connector builder agent requires Claude Sonnet 4.5 or 4.6, which uses Copilot premium model credits. Lab Repository -- Once the aforementioned prerequisites are met, you can access the lab repository here: Azure-Sentinel/Tools/CCF-Connector-Builder-Agent-Accelerator at master · Azure/Azure-Sentinel Deploying the Mock API The full CLI commands for this section are available in the repo. For a simpler option, you can use GitHub Copilot to handle the deployment. Enter this prompt: Follow the deployment instructions in Sentinel-CCF-Pull-Connector-Builder-Agent-Accelerator/agent-instructions.md. Let’s deploy the Network Log API and build a CCF pull connector. At a high level, the setup is four steps: clone the repo, create a resource group, ensure you have a Sentinel-enabled workspace, and deploy the Function App using the included ARM template. The template takes two parameters: an ApiKey of your choice (the secret the CCF connector will use to authenticate) and your Log Analytics workspace resource ID for Application Insights. Deployment takes about two to three minutes and outputs the FunctionAppName and endpoint URLs you will need later. Once deployed, verify the API is live: curl -s -H "X-API-Key: <your-api-key>" \ "https://<functionappname>.azurewebsites.net/api/GetNetworkLogs?page=1&pageSize=3" </functionappname></your-api-key> You should see a response like this: The API also exposes an /api/RefreshData endpoint that regenerates the 50 sample records with fresh timestamps. This is useful later in the walkthrough when you want to produce new events and trigger an immediate ingestion cycle without waiting for the next polling interval: curl -s -X POST -H "X-API-Key: <your-api-key>" \ "https://<functionappname>.azurewebsites.net/api/RefreshData" </functionappname></your-api-key> Building the Connector with the Sentinel Connector Builder Agent With the Microsoft Sentinel extension installed and GitHub Copilot running in agent mode, open a Copilot chat and enter a single prompt pointing at the API documentation file: That is the entire invocation. The agent takes it from there. It works through a structured seven-step sequence: preparation, polling config, table schema, DCR, connector definition, package validation, and summary. The agent produces four files in a sentinel-connectors/NetworkLogAPI_CCF/ output folder: NetworkLogAPI_PollingConfig.json – This is the API poller configuration. The agent reads the documentation and correctly identifies the GET /api/GetNetworkLogs endpoint, configures API Key authentication via the X-API-Key header, sets up NextPageUrl pagination using $.metadata.nextLink with a $.metadata.hasNextPage stop condition, and wires up the since query parameter for incremental delta pulls using the timestamp field. The RefreshData endpoint is correctly excluded, which the agent recognizes as a maintenance operation, not a security data stream. NetworkLogAPI_Table.json – This is the custom Log Analytics table schema for NetworkLogAPIGetNetworkLogs_CL . All 20 fields from the API response are mapped to the correct column types, with timestamp promoted to TimeGenerated as the standard Sentinel time column. NetworkLogAPI_DCR.json – This is the Data Collection Rule. This defines the stream declaration, the workspace destination, and the KQL transform that maps the raw snake_case API fields ( sourceIp , destinationIp , threatIndicator , etc.) to their PascalCase table columns. NetworkLogAPI_ConnectorDefinition.json – This is the connector UI configuration. This drives what the connector page looks like in Microsoft Sentinel: the title, description, prerequisite instructions, the BaseUrl and ApiKey input fields, sample KQL queries, and the connectivity status logic. The only point where the agent paused for input was to propose a connector description and ask for confirmation before writing it to the file. Everything else such as endpoint selection, auth type, pagination pattern, schema mapping, KQL transform, cross-file consistency was selected autonomously. To put that in perspective: without the agent, a developer building this connector from scratch would need to manually author four JSON files, understand the CCF schema for polling configs, DCRs, and connector definitions, write the KQL transform by hand, and validate that every cross-file reference lines up correctly. The agent compresses that work, typically hours of reading documentation, trial-and-error, and portal debugging, into a single prompt. Testing the Connector Before deploying anything to a Sentinel workspace, the Microsoft Sentinel connector builder agent lets you validate the generated polling config against the live API directly from your editor. Right-click the sentinel-connectors/NetworkLogAPI_CCF folder, select Microsoft Sentinel → Test Connector (Preview), and a Configuration Variables panel opens asking for the two template variables from the polling config: BaseUrl and apiKey . For other API patterns, there may be additional and different inputs. For example, apiKey input could be swapped with clientID and secret if the API supports OAUTH. Enter the Function App base URL and your API key, and the test runner connects immediately. The panel shows a live polling session. Poll #1 returns HTTP 200 with 50 events, and a countdown timer shows when the next poll will fire. Switching to the Events tab displays the ingested records in a tabular view with columns for timestamp , severity , action , bytesIn , bytesOut , category , and the rest of the mapped fields fresh from the API. Additionally, there are tabs for Headers, Payload, and Response, which can be useful for verifying that your pollerconfig.json configuration provides the expected request to your api with a working response. Data Extracted: The Test Connector feature can be used to visualize the response data in a table format to verify that data will land in a Sentinel table based on your configuration. Request from Poller: The Test Connector feature can be used to validate the request and response headers that will go out to the API based on the generated poller configuration. Request Response: The Test Connector feature shows you the live response from the API with respect to the request going to the API based on the poller configuration. This is a meaningful pre-flight check. It confirms that auth is working, the $.data events path resolves correctly, pagination is functional, and the polling interval fires as configured all before a single file is deployed to Azure. The most common connector configuration issues (wrong base URL, incorrect header name, mismatched JSON path) surface here in seconds rather than after a failed deployment and a 20-minute wait for Sentinel to attempt its first ingestion cycle. It is also the fastest way to troubleshoot if something goes wrong after deployment, far quicker than pushing changes to Azure and waiting for the connector to poll again. Deploying and Enabling the Connector With the connector tested and passing, deployment is the same right-click menu: right-click the sentinel-connectors/NetworkLogAPI_CCF folder, select Microsoft Sentinel → Deploy Connector (Preview). If you are not already signed in to Azure, the extension will prompt you to authenticate. The agent will also provide a clickbox in the chat window to invoke a connector deployment. Right Click Deploy Connector: UI Prompt Based Deploy Method: Once signed in, a workspace picker lists all available Log Analytics workspaces across your subscriptions. Select the one with Sentinel enabled and click Deploy. The extension deploys all four files to the workspace in the correct order: table schema first, then DCR, polling config, and connector definition. Once deployed, navigate to your Sentinel workspace via https://security.microsoft.com, go to Data Connectors, and find the Network Log API connector. The connector page shows the description, prerequisite notes, and the two credential fields generated by the agent: API Base URL and API Key. Enter your Function App base URL and API key and click Connect. The status updates to show the connector is connected and the deployment succeeded. Note: Data will appear in the workspace within 5 to 30 minutes depending on the polling interval. Run this query in Log Analytics to confirm ingestion. Note that the agent derives the table name from the vendor name and endpoint, so yours may differ slightly from the example below. Check the agent's summary output or the NetworkLogAPI_Table.json file for the exact name: NetworkLogAPIGetNetworkLogs_CL | sort by TimeGenerated desc | take 10 If you want to generate a fresh batch of events immediately rather than waiting for the next polling cycle, use the RefreshData endpoint to reset the sample records with new timestamps: curl -s -X POST -H "X-API-Key: " \ "https://.azurewebsites.net/api/RefreshData" Next Steps If you want to go further: Try it with your own API. The lab repo includes documentation on adapting the polling config, schema, and KQL transform to a real data source. Review the CCF connector schema documentation to understand the full range of supported configurations: pagination patterns, auth types, incremental pull strategies, and delta filter expressions. Explore the Microsoft Sentinel content hub to see how published connectors are structured and what the certification requirements look like for production submissions. Conclusion Following these steps, you saw how a working Sentinel connector can be generated, tested, and deployed in minutes rather than requiring days of manual configuration and infrastructure setup. If you are an ISV building a Sentinel integration and want hands-on support, Microsoft’s App Assure program is available to help. We partner with ISVs on connector development, validation, and deployment and provide guidance through implementation, testing, and readiness for production. You can get started by reaching out through our intake form. See our other Sentinel connector feature’s hands-on labs Building a CCF Nested API Pull Connector: A Technical Lab Walkthrough1.1KViews0likes0Comments
Exciting Announcements: New Data Connectors Released Using the Codeless Connector Framework
Microsoft Sentinel’s Codeless Connector Framework or ‘CCF’ (formerly called Codeless Connector Platform [CCP]) represents a paradigm shift in data ingestion, making it easier than ever for organisations to do more with Microsoft Sentinel by integrating diverse data sources seamlessly. Designed to simplify and expedite the onboarding of data sources, CCF eliminates the need for extensive coding expertise and maintaining additional services to facilitate ingestion, allowing security teams to focus on what truly matters – safeguarding their environment. Advantages of the Codeless Connector Framework The Codeless Connector Framework offers several compelling benefits: Ease of Use: CCF configuration-based templates allows advanced users to create data connectors without writing exhausting code, making the onboarding process quicker and more accessible to a broader audience. Flexibility: Users can customise data streams to meet their specific needs; optimizing efficacy while ensuring more control on the data being ingested. Scalability: The connectors built using CCF follows a true SaaS auto-expansion model making them highly scalable and natively reliable for large data volumes. Efficiency: By reducing the time and effort required to develop and deploy data connectors, CCF accelerates the availability of critical insights for security monitoring and more rapidly expands the value Microsoft Sentinel provides. What are we up to? We recognize that Codeless Connectors offer substantial advantages over Azure Function App based ingestion in Microsoft Sentinel in most cases. That motivates us to continue investing in modernizing our ingestion patterns for out-of-box connectors; one connector at a time. Another goal of modernizing these connectors is to replace the deprecated HTTP Data Collector API with the Log Ingestion API to send data to Microsoft Sentinel. Announcing the General Availability of New Data Connectors We are continually improving the Data Collection experience for our customers and are thrilled to announce that the following data connectors are now Generally Available (GA) on the Codeless Connector Framework. Atlassian Confluence Ingesting Confluence audit logs allows organizations to monitor collaboration activity, detect security risks, and troubleshoot configuration issues using Confluence audit records. Auth0 With the Auth0 Connector, organizations can effortlessly integrate authentication and authorization data from Auth0 into Microsoft Sentinel. This connector provides valuable insights into user activities and access patterns, bolstering identity security and compliance efforts. Azure DevOps Audit logs from Azure DevOps, allows security teams to monitor user activities, detect anomalous behavior, and investigate potential threats across DevOps environments. Box The Box Connector facilitates the ingestion of file storage and sharing data from Box into Microsoft Sentinel. By leveraging this connector, security teams can monitor file access and sharing activities, ensuring data integrity, and preventing unauthorized access. Google Cloud Platform Load Balancer With GCP Load Balancer and Web Application Firewall (Cloud Armor) logs, security teams can monitor inbound network activity, enforce security policies, and detect threats across GCP environments. Proofpoint POD The ingestion of email security logs allows organizations to monitor message traceability, detect threats, and investigate data exfiltration attempts by attackers and malicious insiders. Proofpoint TAP Email threat intelligence logs, including message and click events, provides visibility into malware and phishing activity to support custom alerts, dashboards, and threat investigation. SentinelOne The SentinelOne Connector enables seamless ingestion of threat intelligence and endpoint security data from SentinelOne into Microsoft Sentinel. This integration empowers security teams to enhance their threat detection capabilities and respond swiftly to potential threats. New Connectors in Public Preview CrowdStrike Falcon Data Replicator (S3 based Polling) Google Cloud Platform VPC Flow Google Cloud Platform DNS Google IAM These new additions are not new out-of-box sources in Microsoft Sentinel, but they do improve how data is collected. The previously Azure Function App based polling has now been upgraded to the Codeless Connector Framework for these products to ensure data collection adheres to the more scalable; advantageous pattern with CCF. As noted previously, the newer version of these connectors replaces the deprecated HTTP Data Collector API with the Log Ingestion API to send data to Microsoft Sentinel. Call to Action! Microsoft Sentinel customers collecting data from any of the mentioned sources using Azure Function Apps are advised to migrate their ingestion streams to newer versions to utilize the Codeless Connector Framework. While we continue to improve the data collection experience across all connectors, we encourage our customers and partners to join the Microsoft Security Communities to benefit from early insights about the latest and greatest with Microsoft Security. Call to Action for ISV Partners We invite our ISV partners to migrate their Azure Function App-based data connectors to the Codeless Connector Framework. By leveraging CCF for data ingestion, we can ensure that our mutual customers benefit from streamlined data integration and enhanced security monitoring in Microsoft Sentinel. We are committed to ensuring partners have all the support needed in this transformation. For any support, please reach out to us at Microsoft Sentinel Partners. Join us in this transformative journey to empower our customers by unlocking the full potential of their security investments with Microsoft Sentinel’s Codeless Connector Framework. References Create a codeless connector for Microsoft Sentinel Migrate from the HTTP Data Collector API to the Log Ingestion API to send data to Azure Monitor Logs2.7KViews0likes2CommentsRun agentless SAP connector cost-efficiently
The SAP agentless connector uses SAP Integration Suite (Cloud Integration/CPI) to fetch SAP audit log data and forward it to Microsoft Sentinel. Because SAP CPI billing typically reflects message counts and data volume, you can tune the connector to control costs—while preserving reliability and timeliness. Cost reductions primarily come from sending fewer CPI messages by increasing the polling interval. The max-rows parameter is a stability safeguard that caps events per run to protect CPI resources; it is not a direct cost-optimization lever. After any change, monitor CPI execution time and resource usage. ☝️Note: It may not be feasible to increase the polling interval on busy systems processing large data volumes. Larger intervals lengthen CPI execution time and cause truncation when event spikes exceed max-rows. Cost optimization via longer intervals generally works best on lower-utilization environments (for example, dev and test) where event volume is modest and predictable. Tunable parameters Setting Default Purpose Cost impact Risk / trade-off Polling interval 1 minute How often the connector queries SAP and triggers a CPI message. Lower message count at longer intervals → potential cost reduction. Larger batches per run can extend CPI execution time; spikes may approach max-rows after which message processing for that interval is truncated. max-rows 150,000 Upper bound on events packaged per run to protect CPI stability. None (safeguard)—does not reduce message count on its own. If too low, frequent truncation; if too high, runs may near CPI resource limits. Adjust cautiously and observe. ☝️Note: When event volume within one interval exceeds max-rows, the batch is truncated by design. Remaining events are collected on subsequent runs. Find the latest documentation on available customizing parameters always on Microsoft Learn. Recommended approach Start with defaults. Use a 1-minute polling interval and max-rows = 150,000. Measure your baseline. Understand average and peak ingestion per minute (see KQL below). Optimize the polling interval first to reduce message count when costs are a concern. Treat max-rows as a guardrail. Change only if you consistently hit the cap; increase in small steps. Monitor after each change. Track CPI run duration, CPU/memory, retries/timeouts, and connector health in both SAP CPI and Sentinel. 💡Aim for the lowest interval that keeps CPI runs comfortably within execution-time and resource limits. Change one variable at a time and observe for at least a full business cycle. 🧐Consider the Azure Monitor Log Ingestion API limits to close the loop on your considerations. Analyze ingestion profile (KQL) ABAPAuditLog | where TimeGenerated >= ago(90d) | summarize IngestedEvents = count() by bin(UpdatedOn, 1m) | summarize MaxEvents = max(IngestedEvents), AverageEvents = toint(avg(IngestedEvents)), P95_EventsPerMin = percentile(IngestedEvents, 95) How to use these metrics? AverageEvents → indicates typical per-minute volume. P95_EventsPerMin → size for spikes: choose a polling interval such that P95 × interval (minutes) remains comfortably below max-rows. If MaxEvents × interval approaches max-rows, expect truncation and catch-up behavior—either shorten the interval or, if safe, modestly raise max-rows. Operational guidance ⚠️❗Large jumps (for example, moving from a 1-minute interval to 5 minutes and raising max-rows simultaneously) can cause CPI runs to exceed memory/time limits. Adjust gradually and validate under peak workloads (e.g., period close, audit windows). Document changes (interval, max-rows, timestamp, rationale). Alert on CPI anomalies (timeouts, retries, memory warnings). Re-evaluate regularly in higher-risk periods when SAP event volume increases. Balancing Audit Log Tuning and Compliance in SAP NetWeaver: Risks of Excluding Users and Message Classes When tuning SAP NetWeaver audit logging via transaction SM19 (older releases) or RSAU_CONFIG (newer releases), administrators can filter by user or message class to reduce log volume - such as excluding high-volume batch job users or specific event types - but these exclusions carry compliance risks: omitting audit for certain users or classes may undermine traceability, violate regulatory requirements, or mask unauthorized activities, especially if privileged or technical users are involved. Furthermore, threat hunting in Sentinel for SAP gets "crippled" due to missing insights. Best practice is to start with comprehensive logging, only apply exclusions after a documented risk assessment, and regularly review settings to ensure that all critical actions remain auditable and compliant with internal and external requirements. Cost-Efficient Long-Term Storage for Compliance Microsoft Sentinel Data Lake enables organizations to retain security logs - including SAP audit data - for up to 12 years at a fraction of traditional SIEM storage costs, supporting compliance with regulations such as NIS2, DORA and more. By decoupling storage from compute, Sentinel Data Lake allows massive volumes of security data to be stored cost-effectively in a unified, cloud-native platform, while maintaining full query and analytics capabilities for forensic investigations and regulatory reporting. This approach ensures that organizations can meet strict data retention and auditability requirements without compromising on cost or operational efficiency. Summary Use the polling interval to reduce message count (primary cost lever). Keep max-rows as a safety cap to protect CPI stability. Measure → adjust → monitor to achieve a stable, lower-cost configuration tailored to your SAP workload. Use built-in mirroring to the Sentinel Data Lake to store the SAP audit logs cost-efficient for years Next Steps Explore agentless SAP deployment config and parameter guide on Microsoft Learn Expand deployment to SAP Business Technology Platform Use the insightful blog series by AryaG for details on how to move to production with the built-in SAP content of agentless899Views0likes0CommentsWhat’s new in Microsoft Sentinel: June 2026
Welcome back to What's new in Microsoft Sentinel. In June, Sentinel SIEM’s Advanced Security Information Model (ASIM) broadens its normalization, so one analytic rule can reach more sources with less per-source work and, additionally, two new ASIM schemas can now bring asset inventory and AI agent telemetry into common form. In Microsoft Sentinel data lake, the Agent Identities Asset Connector adds the identity context behind your AI agents, helping you see who owns an agent and what permissions it holds. In Sentinel MCP, graph tools help security teams investigate threats and optimize security coverage by visualizing relationships across identities, devices, alerts, and signals in a unified graph experience. Read on for the details, and explore the resources at the end to go deeper. Sentinel innovations: Sentinel SIEM Sentinel data lake Sentinel MCP Microsoft Security Store Sentinel SIEM Advanced Security Information Model (ASIM) parsers and schemas [Generally available] The Advanced Security Information Model (ASIM) in Sentinel normalizes logs into common schemas, so one analytic rule can cover many sources without managing each native schema. ASIM coverage has expanded across more Azure services, broader AWS CloudTrail activity, and a range of third-party firewall, identity, and proxy products, so your detections reach more of your environment with less per-source work. Two schemas also join ASIM: Asset Entities normalizes asset inventory so you can correlate files and assets across investigations, and AI Agent Events normalizes telemetry from AI-driven workflows and autonomous agents. Browse the ASIM parsers on GitHub to explore, file issues, or contribute. Learn more in our blog. Sentinel transition to Defender blog series By March 31, 2027, all Microsoft Sentinel customers transition to Defender. This six-part series guides you through moving your Sentinel experience from the Azure portal to Defender, where SIEM, XDR, threat intelligence, AI, and automation come together in one experience. Your analytics rules, playbooks, workbooks, log analytics workspace, and access assignments all carry forward while the operational layer becomes more connected and intelligent. Starting early matters because you realize the benefits sooner, including a unified incident queue, cross-product correlation, Security Copilot, Sentinel data lake, and SOC optimization. Across the six-part blog series you get 1) the strategic shift, 2) the anatomy of incident and data changes, 3) detection and automation, 4) the governance shift across roles and access, 5) a readiness playbook with the adoption helper and cost guidance, and 6) a look at the AI-first SOC. Each part stands alone, so you can read in order or jump to what matters most to you. Sentinel data lake Agent Identities Asset Connector [Public preview] The Agent Identities Asset Connector brings identity context for AI agents into Sentinel. Activity connectors like Agent 365 and Microsoft 365 Copilot already show you what AI agents do, but activity alone cannot tell you who owns an agent, what permissions it holds, or how it is governed. This connector fills that gap with four asset tables covering agent owners, agent identities, agent blueprints, and the service principals tied to those blueprints. Together they form a connected agent identity graph you can trace from owner to identity to blueprint to permissions to the resources an agent touches. Joining this asset data with activity data in Sentinel data lake lets you detect anomalous behavior relative to permissions, spot over-permissioned or misconfigured agents, and follow full execution chains for end-to-end traceability. To get started, install the Agent 365 and Microsoft 365 Copilot solutions in Content Hub and enable the asset and activity connectors. Learn more. Sentinel MCP Sentinel MCP graph tools [Public preview] Microsoft Security Graph MCP tools, recently introduced in the Microsoft Sentinel MCP Server data exploration collection helps security teams investigate threats by exploring relationships between identities and device assets, and threat and activity signals ingested by data connectors and surfaced by analytic rules. Starting from an alert, analysts can follow the exposure path across connected entities — tracing lateral movement, understanding blast radius, and identifying configuration gaps — all from a single, interactive workspace. The tool provides a clear graph view that highlights dependencies and makes it easier to understand how content interacts across your environment. This helps security teams assess coverage, optimize content deployment, and identify areas that may need tuning or additional data sources. Executing graph queries via the MCP tools will trigger the graph meter. Learn more. Microsoft Security Store Partner testimonials from Adaquest and Glueckkanja For partners like Adaquest and Glueckkanja, the Microsoft Security Store helps not only put their years of knowledge, understanding, and best practices into a scalable, packaged solution, it gives them the ability to democratize that expertise and take it to market globally. Security Store operationalizes their expertise as always-on defenses — discoverable, deployable, and driving real outcomes inside the tools that security teams rely on every day. See how the Security Store is helping security teams act on threats faster with the right solutions and to be ready when it matters most: Watch: Adaquest unlocks faster response times for customers (testimonial) Watch: Glueckkanja builds agents with purpose (testimonial) Additional resources Blogs and documentation: The Advanced Security Information Model (ASIM) Process Event normalization schema reference How BlueVoyant's ASIM-First Strategy Simplifies Threat Detection in Microsoft Sentinel Migrate Sentinel to Defender – Why It Is a Security Architecture Decision, Not Just a Portal Change Connect Microsoft Sentinel to the Microsoft Defender portal Agent 365 connector: Monitor, hunt, and investigate AI agent activity in Microsoft Sentinel Get started with Microsoft Sentinel MCP server Upcoming webinars and events: July 15–16: Microsoft Virtual Training Day: Predict and Defend Against Cybersecurity Threats July 22: Microsoft Security Immersion Event: Shadow Hunter July 23-24: Microsoft Virtual Training Day: Introduction to Microsoft Security July 28: Tech Brief: Modernize security operations with a unified platform July 29: Security Immersion Event: Into the Breach Stay connected Check back each month for the latest innovations, updates, and events to ensure you’re getting the most out of Microsoft Sentinel. We’ll see you in the next edition!1KViews2likes0CommentsA guide to innovating threat hunting with Microsoft Sentinel custom graph
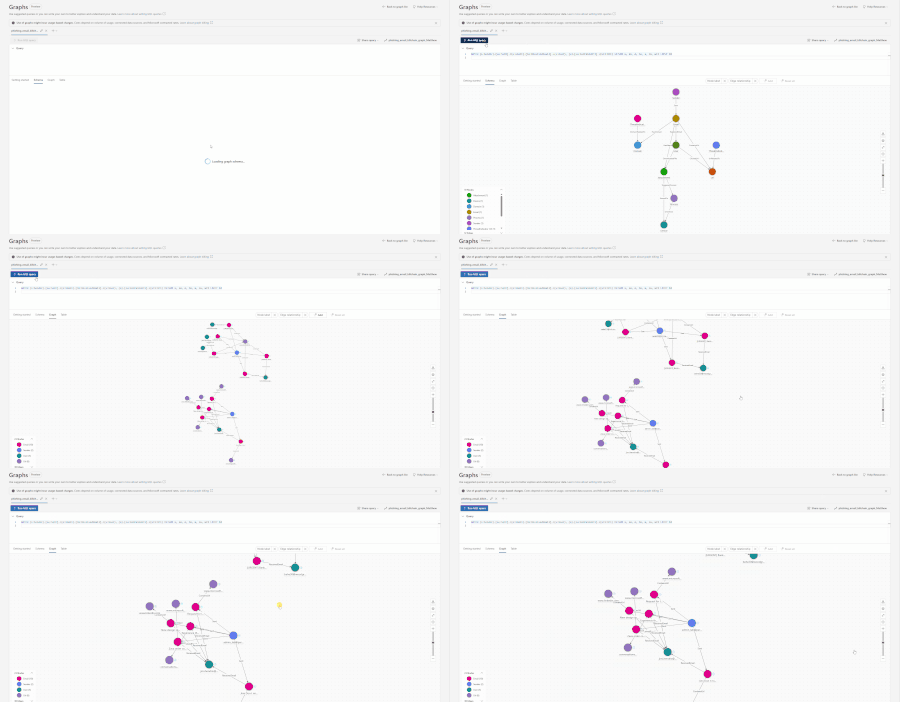
Microsoft Sentinel platform offers a growing list of tools and features, with graph being a cornerstone capability. Sentinel graph is a relationship-first method for organizing and querying data within Microsoft Sentinel data lake. Activities amongst entities (users, devices, emails, IPs, applications, etc.) become a navigable structure that avoids a complex table structure. Rather than stitching together data and evidence via complex joins, users can follow multi-hop connections in order to understand insights such as blast radius, unseen pivots in malicious behavior, and investigative details that may not be as obvious within regular logs, all while visualizing these paths to assist in communicating evidence and findings. This blog will walk through how to create custom graphs using GitHub Copilot chat experiences in Sentinel VS Code. And how to leverage out-of-the-box graph samples to build custom graphs addressing security outcomes. Custom graphs are available in public preview. Prerequisites and Tooling Sentinel data lake enabled in the tenant, this is where the data for the graph will be stored. Users will need read/write permissions on Sentinel data lake data. And either security operator or security admin permissions to save a custom graph in the tenant. Visual Studio Code (VS Code) will need to be installed, as it is essential for building and saving graphs. The Jupyter notebook extension, Microsoft Sentinel extension, and GitHub Copilot extension will need to be installed from within VS Code. These are key pieces for configuring and managing graphs. (Optional) Microsoft Sentinel MCP server if using MCP tools like the data exploration tool. Building a new custom graph The starting point is within Visual Studio Code (VS Code), where the custom graph will be built via GitHub Copilot and the Sentinel graph authoring tool. Make sure to have a GitHub account logged in within VS Code, then start a chat with Copilot via View > Chat. This will open a chat window on the right side of the screen. Determining security telemetry for investigation If unsure about which tables are available within the environment or the columns to focus on for hunting/investigations, turn to the Sentinel MCP server. With the Sentinel MCP server, users can explore the threat landscape within their environment as well as see which data sources currently exist within the Sentinel data lake. This process can be done using natural language with Copilot to obtain the information needed to perform the task at hand. “List the most important tables within my Microsoft Sentinel data lake environment that would build a blast radius for a compromised user account. List the best columns to use for this scenario. Format the response as a table” The tables and columns that can be used are now known. The next step is to use these tables to construct a custom graph with help from GitHub Copilot. For this example, a blast radius graph will be built to assist in reviewing the impact of compromised accounts within the environment: “List the top 5 compromised or targeted accounts within my environment. List which types of attacks are involved with those accounts. Summarize the information into a simple to read table” Given this response, there are a few options for going forward: Return to the Microsoft Defender portal and attempt threat hunting/review this with other analysts Ask Copilot to provide threat hunting queries or perform incident investigations for the top users who are most targeted Build custom graphs to visualize threat data around the most targeted accounts For this example, we will use option 3. Building graph mappings with GitHub Copilot To begin building a custom graph from scratch, a new prompt is submitted, this time tagging the Sentinel extension’s graph authoring tool. An example of the type of prompt to use is below: “@Sentinel /graph-authoring I want to investigate the blast radius of a compromised user and what systems/ app/ devices that they accessed based on users authentication activity. Please use at least SignInLogs, NonInteractivelogs, DeviceLogon, Onprem AD logs, IdentityInfo, and AADRiskyUsers. The graph should help investigate the following security outcomes: What is the user's current risk level and risk score from Identity Protection? Which applications and resources did a user authenticate to? Are there sign-ins from risky IP addresses, Tor exit nodes, or anonymizers? Are there non-interactive sign-ins from unexpected locations or devices? Which machines did a user log on to locally/remotely (RDP)? Which user accounts have been active on a compromised device? A few guidance for data ingestion: Ensure to filter out any data that has NULL or empty values for key Nodes and Edges Filter all data for last 14 days Do not map json arrays as Keys in Nodes or Edges” Note: To ensure that the graph that is written matches the desired scenario, it helps to provide outcomes or guidance to the graph authoring tool. If a Juypter notebook is not already open within the VS Code, Copilot will build a new notebook based on the prompt given. Once Copilot is done, select a kernel to run the notebook. This can be done from the top right of the Notebook: Click on Select Kernel. Click on Microsoft Sentinel. Choose a pool option for the compute cluster. Once a pool is picked, click on the run button next to one of the code cells to boot up the compute pool (this can take up to 5 minutes) Once connected, users can either go through and click the run button next to the code cell to run the code or click the Run All button at the top of the Notebook. For each cell in the Notebook: Cell 2 This section of the notebook is for mporting the sentinel_graph library and configures Spark settings. This is essentially setting up the notebook environment for executing the rest of the code. from sentinel_graph import notebook notebook.requires(sentinel_graph="0.3.8") spark.conf.set("spark.sql.parquet.datetimeRebaseModeInRead", "CORRECTED") Cell 3 This section is performing more Sentinel specific configurations by defining which Sentinel workspace to use, which timerange to use, which tables to use, etc. This is defining which data sources should be considered when building the graph. from pyspark.sql import functions as F from sentinel_lake.providers import MicrosoftSentinelProvider lake_provider = MicrosoftSentinelProvider(spark=spark) LOG_ANALYTICS_WORKSPACE = "Woodgrove-LogAnalyiticsWorkspace" # Auto-detected from the Microsoft Sentinel extension TARGET_USER = "ram723@int.zava-private.com" # Time filter — 7 days for broader blast radius context time_filter = F.col("TimeGenerated") >= F.expr("current_timestamp() - INTERVAL 7 DAYS") # --- IdentityInfo: user profile, roles, group memberships, risk --- df_identity_info = ( lake_provider.read_table("IdentityInfo", LOG_ANALYTICS_WORKSPACE) .filter(time_filter) .filter(F.lower(F.col("AccountUPN")) == TARGET_USER.lower()) ) # --- SigninLogs: interactive sign-ins to resources --- df_signins = ( lake_provider.read_table("SigninLogs", LOG_ANALYTICS_WORKSPACE) .filter(time_filter) .filter( (F.lower(F.col("UserPrincipalName")) == TARGET_USER.lower()) & (F.col("ResultType") == "0") # successful sign-ins ) ) Cell 4 This section is defining and building the nodes that will be used in the graph. The definitions include what events look like, which entities are involved, and how they are considered for each node type. # 1. User node (the target user) user_nodes = ( df_identity_info .select( F.col("AccountUPN"), F.col("AccountDisplayName"), F.col("RiskLevel"), F.col("RiskState"), F.col("AssignedRoles"), F.col("GroupMembership"), F.col("BlastRadius"), F.col("Department"), F.col("JobTitle"), F.col("IsMFARegistered"), F.col("IsAccountEnabled") ) .distinct() .withColumn("AccountUPN", F.lower(F.col("AccountUPN"))) ) Cell 5 This section is building out the schema for the graph. The schema for a graph is taking the columns and details from the tables in cell 3 while also tying them to the nodes and edges built in cell 4. # Build nodes first builder = ( GraphSpecBuilder.start() # === NODES === .add_node("User") .from_dataframe(user_nodes) .with_columns("AccountUPN", "AccountDisplayName", "RiskLevel", "RiskState", "AssignedRoles", "GroupMembership", "BlastRadius", "Department", "JobTitle", "IsMFARegistered", "IsAccountEnabled", key="AccountUPN", display="AccountUPN") # Then add edges and finalise into a GraphSpec spec = ( builder # === EDGES === .add_edge("AccessedInteractive") .from_dataframe(edge_user_resource_interactive) .source(id_column="UserUPN", node_type="User") .target(id_column="ResourceName", node_type="Resource") .with_columns("AppDisplayName", "TimeGenerated", "IPAddress", "ConditionalAccessStatus", "AccessType", "EdgeKey", key="EdgeKey", display="AccessType") Cell 6 This cell will take the schema from cell 5 and will load it into the graph visual builder. This will give a sample of what the graphs made with this Notebook will look like. These samples are fully interactive and will give an example of how it will look within the Defender portal. For example: Please note that the Authoring Agent may provide a different looking schema if following along with this example. The schema above is just meant to provide an example of what one will look like within a Notebook. Cell 7 This cell is taking each of the following steps performed and is going to compile and build the graph based on the data from the Sentinel data lake. This may take a few minutes to perform. With the custom graph built, the next step is to create a Graph Job to save the custom graph in the tenant for persistent use. If necessary, users can go back into the notebook to refine, expand, and improve the custom graph. Publishing graph Publishing a graph is the process of saving the graph in a tenant, allowing for the graph to be scheduled for recurring refreshes or as needed. This process saves the graph to the tenant and enables other SOC members to access this graph from within the Defender portal. To publish a custom graph, this must go through a Graph Job. This option is available within the Notebook experience as a button near the top: Clicking on the Create Scheduled Job button will open a new tab within VS Code with the jobs settings and the option to publish: There are two types of job schedules: On Demand: Saves the custom graph to the tenant and will persist the custom graph for 30 days. After 30 days, the graph will be auto deleted. Scheduled: Saves the custom graph to the tenant and will rebuild with new security telemetry based on a user defined schedule. Once everything is prepped, the custom graph can be published to the tenant by hitting the Submit button. Users can view and monitor the creation progress by finding the graph within the Sentinel extension navigation as it shows the graphs available for the environment: Finding and selecting the custom graph will open up a new tab that shows details around the graph. This includes details around the name, creation status (creating, ready, etc), author, and publishing date. Near the top, there are tabs for Job Details and Graph Query. These options allow the user to review the current Graph Job, make changes to the Graph Job, or query the graph within the notebook. Querying the graph in Defender Once the custom graph has been published and the creation status is Ready, users can query the new graph in the Defender Portal: Expand the Microsoft Sentinel navigation. Select Graphs. Either find the card with the graph title or search for it within the menu. Once found, click Query Graph to open it. The graph will open in the schema view. The schema here is a visual representation of which nodes, edges, and relations are part of the graph. This is what was built in the notebook. To query it, a user can write GQL queries or use ones that are provided. For this example, a query provided in the Getting Started tab will be used. This is a generic query that will show everything in a graph: // Visualize any graph MATCH (x)-[y]->(z) RETURN * LIMIT 100 More focused queries will yield more focused results. For example: MATCH (n_user:User)-[e_ip:SignedInFrom]->(n_ip:IPAddress) MATCH (n_user)-[e_signin:InteractiveSignIn]->(n_app:Application) WHERE n_user.UserPrincipalName = 'ENTERUSERNAMHERE' AND n_ip.IPAddress = 'IPADDRESSHERE' RETURN n_user, e_ip, n_ip, e_signin, n_app MATCH (n_user)-[x]->() MATCH (n_user)-[e_signin:InteractiveSignIn]->(n_app:Application) WHERE n_user.UserPrincipalName = 'ENTERUSERNAMEHERE' RETURN * From here, a user can continue the hunt, remediate the concerns, escalate this for further attention and remediation, or refine the graph as needed. Refining Graphs Throughout the process, the custom graph may need to be updated for various reasons, including: The scope of the hunt/investigation has expanded due to new information or the hypothesis being updated based on findings The original hypothesis of the hunt was incorrect or needs to be changed Important nodes are missing from the graph and need to be added To achieve this, return to VS Code and use the GitHub Copilot chat experience to add new telemetry, nodes, edges, or properties in the existing graph. The below example illustrates adding Azure resources as new assets by prompting the Sentinel graph authoring tool and instructing it on what needs to be added. Running the cells of the Notebook will yield an updated graph that includes the new changes: Graph samples in the Sentinel VS Code extension To help with learning, building, and using Sentinel graph, there are 5 graph samples included in the Sentinel extension within VS Code. These can be found by clicking on the Sentinel extension and looking under Notebook Samples > Graphs. Each graph included contains a Jupyter notebook containing the graph schema and mappings, as well as graph queries which can be run against the graph. These graphs ingest certain security telemetry and expect them to already exist within the Sentinel lake instance that is being used. If needed, the graph mapping can be updated to include/ exclude security telemetry as needed. These graph samples are also located within the Sentinel GitHub repository. Let’s look at one of the sample graphs – Phishing Email Killchain to understand how it can help during a security investigation. Using a graph: phishing email kill chain scenario Phishing is the number one initial access vector, yet investigating a phishing campaign requires correlating data across multiple Sentinel tables: EmailEvents, EmailUrlInfo, UrlClickEvents, EmailAttachmentInfo, DeviceFileEvents, and DeviceProcessEvents. Each table uses a different join key (NetworkMessageId, AccountUpn, SHA256, DeviceName), and analysts must stitch results together manually across several Defender portals. The core question every SOC analyst needs to answer is: “Who received the email, clicked the URL, downloaded the attachment, and executed it on their device?” In KQL, answering this requires 5+ sequential queries and 30–60 minutes of manual correlation. The Phishing Email Kill Chain graph fuses all of these tables into a single connected structure with 10 node types and 12 edge types, making it possible to answer that question in seconds with a single GQL traversal. SOC teams can create this graph in their tenant and start investigating phishing campaigns using graph-powered insights. Investigation with the Phishing Email Killchain graph Multi-hop traversal. The full kill chain from email to endpoint execution is a 4-hop path: Email → Attachment → Process → Device. In KQL, each hop is a separate join with a different key column. In the graph, it’s one MATCH clause. Structural detection. Campaign topology is visible as the graph’s shape — senders fanning out to emails, emails fanning out to users, shared URLs converging into hubs. These patterns are structural properties requiring no aggregation queries. Click-exposure overlay. The graph overlays email delivery and URL click paths in a single view. An analyst instantly sees which users received a phishing email AND clicked the embedded URL — no separate UrlClickEvents join needed. Example queries Below are three queries from the published phishing_email_killchain graph that demonstrate these capabilities. Each query is a single GQL statement that replaces multiple KQL joins. Query 1: Full Kill Chain — Email to Endpoint This query traces the complete attack path: phishing email → malicious attachment → process execution → endpoint device. In KQL, this requires joining 4 tables with different keys and temporal proximity filtering. MATCH (e:Email)-[ha:HasAttachment]->(att:Attachment) -[tp:TriggeredProcess]->(p:Process)-[od:OnDevice]->(d:Device) RETURN e, ha, att, tp, p, od, d LIMIT 10 Figure 1: Two complete kill chains — Invoice_Q3.xlsm → EXCEL.EXE → DESKTOP-FIN01 and DocuSign_Contract.pdf.exe → cmd.exe → DESKTOP-SALES02. Each path is one traversal replacing 4+ KQL joins. Query 2: Campaign Topology — Sender to Email to User to URL This query visualizes the full campaign structure: which senders sent which emails, who received them, and what URLs were embedded. The graph’s fan-out shape immediately reveals the blast radius and shared infrastructure. MATCH (s:Sender)-[se:Sent]->(e:Email)-[re:ReceivedEmail]->(u:User), (e)-[cu:ContainsUrl]->(url:Url) RETURN s, se, e, re, u, cu, url LIMIT 10 Figure 2: Campaign topology — 2 senders, 2 emails fanning out to 9 users and 2 URLs. The shared URL node (c0ntoso-share...) receiving edges from both emails reveals coordinated campaign infrastructure. Query 3: URL Click Exposure — Who Clicked the Phishing Links This query shows which emails contained URLs and which users clicked them. The Email → URL → User click chain is a single traversal that replaces joining EmailUrlInfo with UrlClickEvents. MATCH (e:Email)-[cu:ContainsUrl]->(url:Url)<-[cl:ClickedUrl]-(u:User) RETURN e, cu, url, cl, u LIMIT 10 Figure 3: Click exposure — 3 users clicked phishing URLs from 3 different emails. Each cluster shows Email → URL → User, instantly identifying click-through victims. These are just 3 examples of what is possible when using GQL on a graph. Users can author their own GQL queries to run on this graph to show other possibilities. Additional graph samples As mentioned, the Phishing Email Killchain graph is one of five graph samples that are available today for use within the VS Code Sentinel Extension. The remaining graphs are: Behavioral Attack Chain Ingests data from the SentinelBehaviorInfo, SentinelBehaviorEntities, AlertInfo, AlertEvidence, ThreatIntelIndicators, and BehaviorAnalytics tables to model the relationships between different detections, MITRE tactics/techniques, entities, and threat intel to high different traversals that are difficult to do with just KQL alone. Databricks Outbound Exfiltration Ingests data from the DatabricksNotebook, DatabricksSecrets, DatabricksDBFS, DatabricksClusters, DatabricksJobs, DatabricksSQLPermissions, IdentityInfo, AADUserRiskEvents, and BehaviorAnalytics tables to map Databricks notebook and cluster activities to the identities used in order to enable detections of unusual outbound data movement, privilege escalation, and data exfiltration patterns. DNS C2 Beaconing Ingests data from the DeviceNetworkEvents, DeviceInfo, and ThreatIntelIndicators to model DNS resolution patterns to detect C2 beaconing and other malicious patterns. OAuth Privilege Escalation Ingests data from the EntraServicePrincipals, AADRiskyServicePrincipals, and AADServicePrincipalSignInLogs tables to trace OAuth consent chains, credential abuse, and privilege escalation paths to identify hub users, over-permissions identities, and backdoor patterns that may exist. Closing This blog showcased an example of how a custom graph can be made with data within Microsoft Sentinel data lake and the help of GitHub Copilot, investigating a phishing email kill chain situation, and how to leverage the several graph templates that are provided in Sentinel. Get started today by using one of the template graphs, building your own graph, or by checking out the public documentation for Sentinel graph. Note: Custom graph API usage for creating graph and querying graph will be billed according to the Sentinel graph meter. Public Documentation: https://learn.microsoft.com/azure/sentinel/datalake/sentinel-graph-overview GQL Reference: Graph Query Language (GQL) reference for Microsoft Sentinel graph (Preview) | Microsoft Learn Planning graph Costs: Plan costs and understand pricing and billing - Microsoft Sentinel | Microsoft Learn1.3KViews1like1Comment
Introducing New Additions to Microsoft Sentinel Normalization and ASIM
TL;DR: New ASIM parsers for Azure Firewall, Key Vault, AWS CloudTrail (EC2, S3, IAM), and 10+ third-party products. Two new schemas — Asset Entities and AI Agent Events. Plus changelogs on GitHub and a heads-up on an upcoming breaking change in ProcessEvent parsers. What's New Security teams deal with logs from dozens of sources, each with its own schema. This painpoint makes it harder to write detections that work everywhere. The Advanced Security Information Model (ASIM) solves this by normalizing logs into a common schema, so a single analytic rule can cover a wide variety of sources without worrying about the source schema. Over the past few months, we have shipped a wave of new parsers, schemas, and improvements to ASIM. Here's everything you need to know. ASIM Parsers Azure Firewall Azure Firewall logs were previously only supported from the AzureDiagnostics table. Now, we support the dedicated resource-specific tables: Table ASIM Schema AZFWDnsQuery DNS AZFWNetworkRule NetworkSession AZFWApplicationRule WebSession Azure Key Vault Logs that are going to both AzureDiagnostics and resource-specific table AZKVAuditLogs are now normalized in the Audit Event schema. Azure Synapse SQL and Azure SQL Database Logs that are going to both AzureDiagnostics and resource-specific table SQLSecurityAuditEvents are now normalized to the Audit Event schema. Azure Traffic Analytics We have added support for the NTANetAnalytics table from Azure Traffic Analytics under the Network Session schema. AWS CloudTrail AWS CloudTrail previously only mapped to the Authentication schema. Now, you can correlate EC2, S3, and IAM activity through ASIM alongside your Azure telemetry: AuditEvent — Normalized EC2 events FileEvent — Normalized S3 events UserManagement — Normalized IAM and Cognito events Additional Parser Support We have also integrated the following third-party sources into ASIM: Authentication — Normalize sign-in and identity events for cross-source threat detection. CheckPoint Smart Defense Cisco IOS Cisco ISE Fortinet FortiGate Okta (OktaSystemLogs) Palo Alto — PAN-OS Palo Alto — Global Protect VMware vCenter Web Session — Normalize proxy and web gateway traffic. Cisco Umbrella Proxy Logs New ASIM Schemas We have created two new schemas to expand support new use cases. Asset Entities — Provides a normalized view of asset inventory data, enabling you to correlate files and assets across detections and investigations. AI Agent Events — Normalizes telemetry from AI-driven workflows and autonomous agents. Other Changes GitHub Changes Changelogs for every ASIM parser have been created to better help you understand updates and bug fixes we have implemented. As an example, here is the change log for the Authentication ASIM unifying parser. View Changelog Breaking Changes While aligning our ProcessEvent parsers to the official documentation, we found a naming inconsistency in the _Im_ProcessCreate function: Documentation specifies the parameter as targetusername_has Deployed parsers used targetusername What we changed: Both parameter names are now accepted. What you need to do: Update your analytic rules and queries to use targetusername_has. The legacy targetusername parameter will be deprecated in Summer 2026. What's Next We are continuing to expand ASIM with new parsers and schema capabilities to make detection authoring and log correlation even more powerful. BlueVoyant is also investing heavily in the ASIM ecosystem, building parsers that enhance detection coverage for their customers. See how they are using ASIM to operationalize detections. Want to get involved? Browse the ASIM parsers on GitHub, file issues, or contribute your own. We'd love to hear your feedback.875Views1like0Comments