integration
65 Topics
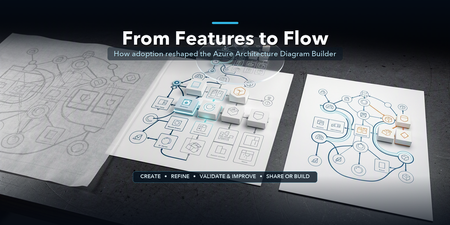
From Features to Flow: How Real-World Adoption Reshaped the Azure Architecture Diagram Builder
In May, I introduced the open-source Azure Architecture Diagram Builder as a way to move from a natural-language prompt to an Azure architecture diagram, cost estimate, Well-Architected assessment, and deployment guidance. In July, I shared how the project had become agent-ready through Model Context Protocol (MCP). Those posts described what the tool could do. The more interesting story came next: what happened when people actually used it. As adoption grew, the central product question changed. It was no longer simply, Can AI generate an Azure architecture? It became: How do we help an architect choose how to begin, improve a result without losing their work, validate it responsibly, and turn it into something another person can use? That question reshaped the Azure Architecture Diagram Builder from a collection of capabilities into a guided workflow: Create → Refine → Validate & Improve → Share or Build This post explains what we learned, what changed in the product, and why the hardest part of AI-assisted architecture is not the first diagram. It is everything that comes after it. TL;DR. Growing adoption created a feedback loop. Aggregate usage showed that people moved beyond generation into validation, recommendations, exports, and deployment guidance. Privacy-safe feedback revealed recurring problems with diagram integrity, preservation of human edits, cost credibility, export quality, and validation continuity. Those signals led to a four-stage architecture journey that keeps human judgment and professional review at the center. The same lesson now shapes agent access and the next product boundary: distinguish logical proposals from evidence-backed physical architecture. Adoption created a product feedback loop As of August 5, 2026, the first two Azure Architecture Blog articles had accumulated approximately 12,100 combined views. A refreshed view of deduplicated application telemetry through August 13 recorded: Activity Aggregate count Architecture generation and refinement events 5,023 Well-Architected validations 960 Recommendations applied 175 Diagram exports 2,020 Deployment guides generated 212 As of August 13, the public repository had reached 45 stars and 14 forks. In GitHub’s current rolling 14-day window, the repository recorded 277 unique visitors and 67 unique cloners. These numbers measure different things and should not be added together. Article views are not unique readers. Application activity uses anonymous telemetry identifiers, not verified people. GitHub traffic is a rolling aggregate window. The signals are useful because of the pattern they reveal, not because they can be combined into one headline user count. Activity also accelerated during the period following the second article. Compared with the May 19–July 9 baseline, daily activity from July 10 through August 13 was approximately 7.0 times higher for architecture generation and refinement, 5.6 times higher for Well-Architected validation, and 5.9 times higher for recommendation application. The timing coincided with publication; it does not prove that the article alone caused the growth. The important product lesson was simpler: people were not stopping after the first diagram. They were testing alternatives, validating designs, applying recommendations, exporting artifacts, and asking how to move toward implementation. Generation was the entry point, not the complete job. The first guided-journey signals reinforce the need for more than one starting path. Through August 13, the new journey instrumentation recorded 880 interactions from 174 anonymous identifiers across 241 sessions. At first start, structured brief/image generation and Guided Chat were selected at almost the same frequency (158 and 156 events), while template and live-Azure import added another 68 selections. These are interaction counts, not unique people or conversion rates, and the window is still too early to claim that the journey improves completion. They are enough to show that architecture work does not begin in one uniform way. In-product Start Here panel showing the four-stage Azure Architecture Diagram Builder journey: Create, Refine, Validate and Improve, and Share or Build. Figure 1. The in-product Start Here panel explains one complete architecture loop. The stages are recommendations, not gates, and direct access to every tool remains available. Stage 1: Create — make the starting choice explicit As capabilities accumulated, the first screen became harder to interpret. Architecture Chat and structured generation were both useful, but they competed for attention. Importing an existing architecture was available, yet easy to miss. The new starting experience makes three paths explicit: Starting path Best suited for Guided Chat Exploring requirements conversationally and refining them over multiple turns Generate Diagram Providing a structured brief or image and producing a first architecture quickly Import Existing Opening an existing architecture or infrastructure artifact for analysis and editing This is not a marketing landing page placed in front of the tool. It is a small decision point inside the authoring experience. Once a path is selected, the user lands on the real canvas. The distinction matters because different architecture tasks begin with different levels of certainty. Sometimes the architect knows the target services. Sometimes the problem needs discovery. Sometimes the architecture already exists and the work is to understand or improve it. The product should acknowledge those differences instead of pretending every design starts with a perfect prompt. Start chooser presenting Guided Chat, Generate Diagram, and Import Existing as three equal entry paths. Figure 2. Three starting paths reflect three different architecture situations: discovery, structured generation, and analysis of an existing design. Stage 2: Refine — preserve human work One of the clearest feedback themes was not about adding another AI capability. It was about preventing AI from casually undoing human effort. An architect might spend time arranging a one-page diagram for a review, resizing groups, moving labels, or emphasizing a specific boundary. A subsequent AI refinement could improve the service selection while disrupting that carefully prepared layout. The design principle that emerged was straightforward: AI acceleration should preserve deliberate human work by default. Refinement now retains existing node positions, group geometry, sizes, and viewport context whenever possible. The model can change the architecture without treating every turn as permission to redraw the entire document. The same principle applies beyond geometry: Preserve the prior validation result when recommendations change the architecture. Preserve the active light or dark theme in exported artifacts. Preserve the distinction between the authoring canvas and the presentation deliverable. Preserve user-configured pricing assumptions rather than replacing them with one fixed estimate. This is a broader lesson for AI-assisted tools. A generated result is not the only source of value. The edits, judgments, and communication choices a person adds afterward are part of the artifact too. Before-and-after AADB canvases showing an AI refinement that adds Azure Front Door and WAF while retaining the positions of eight existing services and the anchors of four existing groups. Figure 3. In this controlled synthetic refinement, all eight existing service positions and four group anchors remained unchanged. The containing Application group expanded to accommodate the new edge tier, so preservation does not imply that every group dimension stays fixed. Quality is structural, not only visual A diagram can look polished while still being architecturally confusing. Early feedback exposed cases where a generated service appeared disconnected because a model referenced a display name instead of the service identifier used by the canvas. The correction was not another prompt instruction alone. The application now resolves connection endpoints across identifiers, normalized service names, and service-type aliases. It repairs valid edges, drops invalid or self-referential edges, detects remaining orphan nodes, and records aggregate integrity signals. That creates a more useful definition of diagram quality: Are the services connected as intended? Were any generated edges repaired or dropped? Are there orphaned nodes? Did refinement preserve the existing layout? Did an architecture change receive a fresh validation? Visual polish still matters, especially when an artifact leaves the editor. But structural integrity gives the product something deterministic to test and monitor. Stage 3: Validate & Improve — treat validation as a lifecycle The Azure Well-Architected Framework is most useful when validation becomes iterative rather than ceremonial. The Diagram Builder can assess a proposed design across the five Well-Architected pillars, surface findings, and apply selected recommendations. But that workflow exposed an important state-management problem: when the architecture changed, the prior validation result disappeared along with the obvious route back to revalidation. The updated experience keeps the previous report, marks it Revalidate Needed, and makes clear that the score describes an earlier state of the architecture. A new validation replaces it only after the updated design has been assessed. This distinction prevents a stale score from looking current. It also clarifies what an architecture-level assessment can and cannot prove. A diagram may show that a WAF, cache, backup service, or secondary region exists. It usually cannot prove that purge protection, diagnostic routing, encryption settings, role assignments, health probes, or failover policies are configured correctly. That is why validation findings need to distinguish between: Pattern-level gaps — missing or misplaced architectural components Configuration-level gaps — required settings that must be verified in Infrastructure as Code or the deployed environment Generated scores and recommendations help architects review a design; they do not replace an Azure Well-Architected Review, security review, deployment validation, or professional judgment. Validation result retained after architecture recommendations are applied, with a Revalidate Needed status and action. Figure 4. Architecture changes make a previous validation historical, not useless. The result remains available while the interface clearly asks for a fresh validation. Stage 4: Share or Build — design for the artifact’s destination The editing canvas and the final deliverable serve different purposes. Canvas dots, handles, navigation controls, and selection states help during authoring. They can make an exported diagram feel unfinished. The Diagram Builder now separates those concerns with Plain, Dots, and Grid export backgrounds while preserving the active light or dark theme. The same AADB architecture shown first on the editing canvas with the export menu open and then as the resulting Plain PNG without authoring controls. Figure 5. Authoring and delivery are different contexts. The upper view shows the editable canvas and its real export controls; the lower view is the Plain PNG produced from that same canvas, without editing chrome. Cost language is deliberately qualified. Azure services often combine fixed, usage-based, and configuration-dependent charges. A baseline that includes six numerically priced services but excludes 20 usage-based items is not the total cost of the architecture. The output identifies those exclusions rather than treating missing values as zero. The final stage also includes deployment guides and Infrastructure as Code. Here, honesty about artifact coverage is essential. A generated Bicep file may be a useful starter while still omitting private endpoints, diagnostic settings, failover configuration, or service-specific resources. The artifact should state what it implements, what remains conceptual, and whether Azure Resource Manager validation passed. AI-generated diagrams, costs, validation results, deployment guides, and Infrastructure as Code should all be reviewed and validated before production use. The same journey now extends to agents The MCP server introduced in the previous article makes the Diagram Builder available to agent experiences such as Microsoft Scout. The four-stage journey provides a useful way to think about agent orchestration too: Import or create one canonical architecture. Refine it without silently changing the intended topology. Validate it, apply supported improvements, and revalidate. Render or generate artifacts with explicit coverage and limitations. The current MCP surface exposes 12 tools, three resources, and three reusable prompts. It can normalize an existing architecture, validate and harden it deterministically, estimate regional costs from a dated pricing snapshot, render presentation/technical/cost views, and generate Bicep, Terraform, and deployment guidance. The calling agent still owns orchestration and reasoning; the MCP server is intended to remain a deterministic architecture capability, not a second hidden agent. The native MCP renderer can project one canonical architecture into three communication profiles: Presentation emphasizes the primary request path, reduces supporting labels, and removes pricing. Technical preserves complete connection detail for engineering inspection. Cost retains the focused composition while adding service-level pricing assumptions, a fixed-priced baseline, and explicit exclusions. These are MCP-generated SVG views, not Blueprint diagrams or screenshots of the editable web canvas. The services, connections, and groups remain the same; only the information treatment changes. The AADB MCP renderer projecting the same canonical architecture into presentation, technical, and cost SVG profiles. Figure 6. Native AADB MCP output from one 8-service, 9-connection, 4-group architecture. Presentation prioritizes the story, Technical exposes connection detail, and Cost foregrounds pricing assumptions and exclusions. Recent work on the MCP renderer added purpose-built presentation, technical, and cost profiles. More importantly, testing agent-generated artifacts reinforced an accountability principle: a polished diagram and a compiled Bicep file do not prove deployability. An agent workflow should report whether topology changed, whether validation improved, which services are represented only conceptually, and whether the generated IaC passed Azure preflight. That is more useful than an unsupported claim that a design is production-ready. Trust also includes the tool boundary itself. The hosted MCP endpoints now require a bearer token for real session operations; missing or incorrect credentials are rejected. A shared token is appropriate for the current controlled integration, but it is not the end state for enterprise multi-user access. Entra ID/OAuth, per-client authorization, rotation, and revocation remain future hardening work. Microsoft Scout response after an authenticated Azure Architecture Diagram Builder MCP workflow, showing the tools used, initial and final validation scores, cost scope, Bicep classification, rendered architecture, artifact links, coverage gaps, and no-deployment warning. Figure 7. The guided lifecycle extends beyond the web application. In this synthetic Scout run with GPT-5.6 Sol, the agent used authenticated AADB MCP tools to validate, harden, cost, render, and generate starter artifacts while explicitly reporting coverage gaps and that nothing was deployed. Learning from adoption without identifying people Product learning does not require reconstructing individual identities. The findings behind this article use aggregate, deduplicated application telemetry, public article counters, public repository totals, and paraphrased feedback themes. They do not correlate Application Insights identifiers, feedback records, GitHub accounts, or email addresses. Written feedback remains submittable without contact information. When someone explicitly opts into follow-up, the email address is stored with the feedback record in Cosmos DB and is not sent to normal product telemetry. The current 180-day expiry field is a retention marker; automated deletion must be implemented and verified before describing that retention period as enforced. Those boundaries matter for both product design and public writing: Aggregate activity rather than profiling individuals. Paraphrase themes rather than publishing comments without permission. Keep optional contact consent separate from telemetry. Avoid presenting anonymous identifiers as confirmed people. Avoid claiming that publication timing proves acquisition causality. This is not a claim of legal compliance. It is a product discipline: collect less, preserve user agency, and make only the claims the evidence supports. What changed The guided journey is the visible result, but the deeper change is how the project now evaluates progress. Earlier question Better question Did the model generate a diagram? Did it generate a connected and understandable architecture? Did the user click Validate? Was the current architecture validated, and was it revalidated after changes? Did export start? Did a professional artifact finish generating successfully? Does the IaC compile? What does it actually implement, and does Azure preflight pass? How many features exist? Can an architect understand the next useful step? The model portfolio continued to evolve as well. The production selector now contains 15 configured entries, including MAI-Thinking-1 (Public Preview). But the more consequential changes in this article are deliberately model-independent: preserve human work, keep state and provenance explicit, qualify generated artifacts, and authenticate the tools agents can call. The goal is not to remove flexibility. Architects can still open any tool directly, rearrange the canvas, reject recommendations, change pricing assumptions, or export at any point. The goal is to make the workflow coherent without pretending architecture itself is linear. The next boundary: logical versus physical architecture Recent feedback points to a harder problem than adding another model or export format. Architects working with private Azure AI landing zones need to distinguish shared platform resources from project-owned resources, preserve VNet and subnet boundaries, and reason about CIDRs, NSGs, route tables, private endpoints, DNS, and managed identities. The current Topology mode can show services and relationships, but it should not imply exact physical fidelity when those facts are absent. A useful logical diagram answers what exists and how it interacts. A physical or low-level design must answer where it is deployed, how it is isolated, and which values came from evidence. That is the next technical direction I am exploring: an evidence-aware Physical Architecture view backed by deterministic reconstruction from Terraform plan/state, ARM, or a live Azure inventory. Exact fields would be labeled as observed or resolved; AI suggestions would remain explicitly proposed; unsupported or missing inputs would be reported instead of silently invented. This capability is not shipped today, and it will require its own schema, validation rules, layout, security review, and evaluation set. That distinction matters. The lesson from adoption is not to put every architecture concern into one crowded canvas. It is to make each artifact’s purpose and evidence boundary clear. Try it, challenge it, help shape what comes next The Azure Architecture Diagram Builder remains open source, and the live experience is available today: Live app: https://aka.ms/diagram-builder Source code: github.com/Arturo-Quiroga-MSFT/azure-architecture-diagram-builder Getting started: Documentation and deployment guidance The next phase is to measure whether the guided journey helps people complete the full loop, especially recommendation-to-revalidation and artifact-generation success. In parallel, I am beginning the narrower physical-architecture investigation described above. Both efforts will use aggregate signals, reviewed fixtures, and sufficiently large cohorts rather than individual journey reconstruction. Try the workflow with a real architecture problem. Tell me where the handoffs are unclear, where the diagram loses intent, or where an artifact claims more than it implements. Those are the gaps worth fixing next. Measurement note: Article views are rounded public counters observed August 5, 2026. Application figures use deduplicated retained telemetry through August 13 and anonymous identifiers. GitHub totals and rolling 14-day traffic were observed August 13. The comparison windows are May 19–July 9 and July 10–August 13. These signals have different populations and must not be added together. Timing comparisons show concurrent activity, not causal attribution.1.1KViews1like2Comments
Agent experience with data in Onelake using Fabric IQ
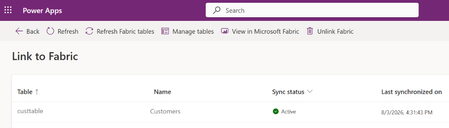
Business Scenario A retail organization runs multiple promotional sales events across its store network in different cities, featuring various product categories. Data is captured from: Third-party systems (products, stores, sales events) ERP system i.e. Finance and Operations (customer data) Customers are linked to stores based on city in the ERP system, and each store hosts specific sales events. However, while significant investments are made in marketing campaigns, inventory allocation, and event planning, the organization needs to identify Which stores generate the highest revenue during events Which locations are having majority of customer footprint Solution: Rather than creating custom reports on raw data, an agent can leverage the data in Onelake and use Fabric semantic models and Fabric IQ to provide conversational analytics. The agent can intelligently normalize user inputs and return accurate results even when values such as city names are entered with spelling errors or variations. Advantage: Because the data comes from two disconnected worlds (third-party systems for products/stores/events, ERP for customers), the "join" between them — customer → city → store → event → product — is business logic, not a database key. Fabric Ontology captures exactly that: entity types, relationships, rules and source mappings, so agents don't have to rediscover it from raw tables each time. A. Prerequisite: Data Sources & Relationships Overview Product, store, and sales event data are sourced from third-party systems. Customer data is sourced from the ERP (Dynamics 365 Finance & Operations) system through Fabric lakehouse. How the data is connected: Customers are linked to stores based on city alignment (customer city = store location). Sales events are associated with: The products being sold, and The stores where the events are conducted. Licenses and access requirement: Component License / Requirement Microsoft Fabric Fabric Capacity F2 or higher OR Power BI Premium Capacity P1 or higher with Fabric enabled Fabric IQ Ontology Ontology (Preview) enabled and an active Ontology item in Fabric Copilot Studio A Copilot Studio environment where MCP tools are allowed D365 F&O Valid Dynamics 365 Finance and/or Supply Chain Management licenses for the source users and data access Data movement Fabric ingestion pattern (Lakehouse, OneLake, Dataflow, Link to Fabric, etc.) as applicable B. Step by step configuration: Push the data to OneLake : Connect D365 F&O customer data to Fabric Lakehouse through PowerPlatform Ref: Link your Dataverse environment to Microsoft Fabric and unlock deep insights - Power Apps | Microsoft Learn A Lake house will be created in Fabric with the data Ingest the Data for Store , Sales event and Product from third party system to Fabric using any of the methods as outlined in the documentation below (as relevant) Ref: https://learn.microsoft.com/en-us/fabric/data-engineering/load-data-lakehouse Create a semantic model and relationship between them Ref: https://learn.microsoft.com/en-us/fabric/data-engineering/tutorial-lakehouse-build-report Create Ontology using the semantic model Ref: https://learn.microsoft.com/en-us/fabric/iq/ontology/concepts-generate Ref: Create an Ontology with Fabric IQ - Training | Microsoft Learn Click on View entity type details > click on manage relationship > click on the relation Configure the source and target entity names and connected fields. Repeat similar setup for others as relevant Login to https://copilotstudio.preview.microsoft.com/ and Create Copilot studio agent with following instruction: When processing a user query: Determine whether the user input contains a city name, location name, region, state, or geographical reference. If a location reference is detected: o Identify potential spelling mistakes, abbreviations, alternate spellings, phonetic variations, or non-standard user input using the <<custom prompt>>. o Normalize the value to the most likely official city name used in the enterprise data model. o Examples: "Bombay" → "Mumbai" "NYC" → "New York" Use only the normalized location value when querying Fabric IQ. If confidence in the normalization is high, proceed automatically without asking the user for confirmation. If multiple cities are equally likely matches, ask a clarifying question before querying Fabric IQ. When invoking Fabric IQ MCP: o Replace the original user-entered city value with the normalized city value. o Use the normalized value consistently across all ontology searches and filters. Never expose the internal normalization process unless the user explicitly asks how the result was determined. Return the business result based on data retrieved from Fabric IQ, not based on assumptions. Example: User: "Show sales for Bangaluru last quarter" Normalized City: "Bengaluru" Fabric IQ Query: "Show sales for Bengaluru last quarter" Add Fabric IQ MCP tool Click on Fabric IQ MCP and provide workspace ID and Ontology ID as retrieved from the Ontology URL in Fabric To find the URL, follow these steps: Open your ontology item in Fabric. View the URL in the browser, in the format https://app.fabric.microsoft.com/groups/<workspace-ID>/ontologies/<ontology-item-ID>. Copy the values of <workspace-ID> and <ontology-item-ID> from the URL. Form the MCP server URL by entering the copied values into this string: https://api.fabric.microsoft.com/v1/mcp/dataPlane/workspaces/<workspace-ID>/items/<ontology-item-ID>/ontologyEndpoint.You use this MCP server URL in the next section Following figures explains the details once the process Ref: https://learn.microsoft.com/en-us/fabric/iq/ontology/how-to-create-agent-copilot-studio Add a tool Prompt to ensure normalised search for any user input (e.g. City) Put the following instruction in a custom prompt : You are a location normalization expert. Your task is to identify the most likely city name from the user's input, even when: - The city name contains spelling mistakes. - The city name is partially entered. - The city is entered using an old or alternate name. - The city contains abbreviations or phonetic spellings. Rules: Determine the most likely official city name. Correct spelling mistakes using geographic knowledge. Expand abbreviations where appropriate. Return only the normalized city name. If confidence is below 80%, return "AMBIGUOUS". Never invent a city when multiple equally likely matches exist. Examples: Input: Banglore Output: Bengaluru Input: Mumbi Output: Mumbai Input: BNG Output: Bengaluru Input: Londn Output: London City input: {{CityName}} Output format: { "normalizedCity": "Bengaluru", "confidence": 0.95 } Test the agent Open the Test pane using the Test button in the top right corner of the screen. Enter NL query Allow the MCP tool when prompted Test case 1: What is the top product revenue across all stores? Test case 2: Intelligent Location Normalization with Fabric IQ When a user submits a query such as "Compare the customer footfall between city Blr and Hyd", the agent first applies an AI-powered normalization layer before querying enterprise data. The normalization prompt analyses abbreviations, alternate spellings, phonetic variations, and non-standard location references, mapping them to their canonical business values. In this example: Blr → Bengaluru (Bangalore) Hyd → Hyderabad The normalized city names are then passed to Fabric IQ for semantic retrieval against the ontology and underlying data sources. This approach improves query accuracy, reduces dependency on exact user input, and enables a more natural conversational experience while ensuring consistent reporting and analytics results. Process Flow : User Query → AI Prompt Normalization → Canonical City Resolution (Bengaluru, Hyderabad) → Fabric IQ Semantic Search → Data Retrieval & Comparison Results331Views1like0CommentsConfigure DNS forwarding for Azure NetApp Files
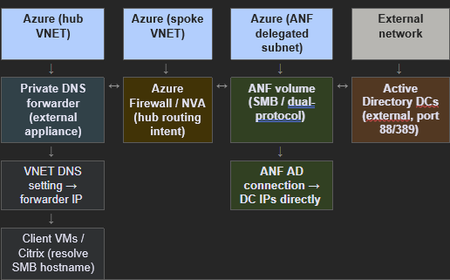
This post has been written with the collaboration of Rizul Khanna Applies to: Azure NetApp Files — SMB, dual-protocol, and NFSv4.1 Kerberos volumes deployed in hub-spoke or Azure Virtual WAN topologies using an external private DNS forwarder. Overview Azure NetApp Files (ANF) has a hard dependency on DNS for all volume types that integrate with Active Directory (AD): SMB, dual-protocol (SMB + NFS), and NFSv4.1 with Kerberos. Unlike most Azure PaaS services, ANF does not use Azure Private Link and has no privatelink.* zone. Its volumes attach directly to a delegated subnet, and their hostnames are registered into AD-integrated DNS via Secure Dynamic DNS (DDNS). This architecture means DNS design decisions for the ANF delegated subnet are fundamentally different from those that apply to storage accounts, SQL databases, or other services that use private endpoints. This article documents what DNS resolution ANF requires, how to correctly configure an external private DNS forwarder in hub-spoke and Virtual WAN deployments, and the specific undocumented requirements that cause volume creation failures and SMB permission errors in practice. Several requirements covered here are not present in the official Azure NetApp Files documentation and have been identified through field support cases. ANF does not inherit the VNET DNS server setting. It queries only the two DNS server IPs configured in the Active Directory connection on the NetApp account. This is not documented in the ANF networking or AD connection articles. The VNET DNS server setting is irrelevant to ANF volume creation and AD join behavior — only the AD connection DNS IPs matter. Architecture overview The following diagram shows the two separate DNS paths that must be configured when ANF is deployed in a hub-spoke or Virtual WAN topology with an external private DNS forwarder. The client resolution path (VNET DNS setting) and the ANF internal resolution path (AD connection DNS fields) are distinct and must not be conflated. Note: ANF AD connection DNS IPs must point to the external DC IPs directly — not to the private DNS forwarder. The forwarder handles client-side resolution only and must have both forward and reverse rulesets for the AD domain. Figure 1: DNS resolution paths for ANF with an external private DNS forwarder. Client VMs use the forwarder (VNET DNS setting). ANF uses the external AD DC IPs directly (AD connection DNS fields). Both forward and reverse lookup rulesets are required on the forwarder. What DNS must provide for Azure NetApp Files Outbound resolution — ANF querying DNS ANF must be able to resolve the following records from the DNS IPs specified in the AD connection: AD domain controller SRV records: _ldap._tcp.<site>._sites.dc._msdcs.<domain>, _kerberos._tcp.dc._msdcs.<domain>, and site-scoped equivalents Kerberos KDC records: _kerberos._tcp.<domain> and _kerberos-master._tcp/udp.<domain> DC A records: Forward lookup for each DC hostname to its IP PTR (reverse) records: IP-to-hostname for each DC — required for dual-protocol volume creation, NFSv4.1 Kerberos, LDAP-over-TLS certificate validation, and NTFS ACL operations on SMB shares. Note: _kerberos-master._tcp and _kerberos-master._udp SRV records are not created automatically by Active Directory DNS. They must be added manually in the DNS zone. Their absence causes Kerberos failures that do not clearly identify DNS as the root cause. This requirement is not documented in any ANF article. ANF performs Secure Dynamic DNS (DDNS) using GSS-TSIG to register SMB and dual-protocol volume hostnames in AD DNS. This requires that the DNS IPs in the AD connection belong to Microsoft AD-integrated DNS servers. External private DNS forwarders (Infoblox, BIND, Unbound, and similar appliances) do not support GSS-TSIG and will silently discard DDNS updates — volume hostnames will not appear in DNS and SMB mounts will fail. No error is surfaced in the ANF portal or activity log when DDNS is silently dropped. Inbound resolution — clients resolving ANF hostnames SMB and dual-protocol volumes are accessed via a hostname of the form <smb-prefix>-XXXX.<ad-dns-domain>, where the four-character suffix is assigned by ANF and cannot be overridden. Clients must resolve this hostname to the volume IP via the VNET DNS server setting, which in enterprise environments points to the external private DNS forwarder. The forwarder must have a forward lookup ruleset for the AD domain pointing to the external DC IPs. NFSv3 mounts use the volume IP directly and do not require hostname resolution. Note: NFSv3 volume creation success does not indicate SMB readiness. NFSv3 mounts use the volume IP directly and require no AD join, Kerberos exchange, or reverse DNS. SMB and dual-protocol volumes require all three. Using NFSv3 as a connectivity proxy during SMB troubleshooting produces false confidence. This distinction is not documented in ANF troubleshooting guidance. Configuring the external private DNS forwarder The two DNS paths — client resolution vs ANF internal In environments using an external private DNS forwarder (Infoblox, BIND, Windows DNS VM, or similar appliance), two distinct DNS paths must be kept separate. The VNET DNS server setting governs client resolution of ANF SMB hostnames and should point to the external forwarder. The ANF AD connection DNS fields govern ANF's own resolution of DCs and DDNS registration and must point directly to writable Microsoft AD-integrated DC IPs. DNS Path Used By Correct Target Client resolution (VNET DNS setting) VMs, Citrix, application servers resolving ANF SMB hostnames. External private DNS forwarder, which forwards AD zone queries to external DC IPs ANF internal resolution (AD connection DNS fields) ANF service — DDNS, Kerberos, LDAP, SRV lookup Writable AD-integrated external DC IPs directly — not the forwarder Required rulesets on the external private DNS forwarder The external private DNS forwarder must have both of the following rulesets configured. Missing either one produces failures that are difficult to diagnose because forward DNS tests pass while the actual failure occurs in a different path. References: Understanding Private DNS resolver endpoints & rulesets How to create Private Reverse DNS records Forward lookup ruleset Forward all queries for the AD domain to the external DC IPs: Zone: ad.contoso.com Targets: <DC-IP-1>:53, <DC-IP-2>:53 (writable external DC IPs) Reverse lookup ruleset (most commonly missing) Forward reverse lookup queries for the DC IP range to the external DC IPs: Zone: <reverse-octets>.in-addr.arpa. Targets: <DC-IP-1>:53, <DC-IP-2>:53 (same external DC IPs) Critical: The reverse lookup ruleset is the most commonly missing configuration item and causes a failure that forward DNS tests do not detect. Without it, Windows clients cannot resolve DC IPs to hostnames. This produces the following error when provisioning NTFS permissions on an ANF SMB share: 'The program cannot open the required dialog box because it cannot determine whether the computer named is joined to a domain.' All connectivity tests pass. Forward DNS passes. The volume was created successfully. Only the reverse lookup fails — and only when NTFS ACL operations are attempted. This failure mode and its root cause are not documented in any ANF article. GSS-TSIG constraint — why the forwarder cannot be in the ANF AD connection External private DNS forwarders (including Infoblox, BIND, Unbound, and third-party appliances) do not support GSS-TSIG, the protocol ANF uses to securely register SMB volume hostnames into AD DNS. If a forwarder IP is placed in the ANF AD connection DNS fields, ANF sends DDNS update packets to the forwarder, which discards them silently. The volume hostname never appears in DNS. Clients cannot mount by name. No error is returned in the ANF portal. The correct design: external DC IPs in the ANF AD connection, external private DNS forwarder as the VNET DNS server for clients only. Role of 168.63.129.16 168.63.129.16 is the Azure-provided internal resolver. It should be configured as the upstream forwarder target on the external private DNS forwarder for all queries not covered by AD or other conditional forwarders. This allows Azure-hosted DNS zones (such as any privatelink.* zones linked to your VNET) to resolve correctly through the forwarder. IMPORTANT: 168.63.129.16 must never be placed in the ANF AD connection DNS fields. It is not AD-aware, cannot answer SRV queries for your domain, cannot accept DDNS updates, and is unreachable from on-premises over ExpressRoute or VPN. Its correct position is as an upstream target on the external private DNS forwarder — not in ANF's AD connection. This is not stated anywhere in the ANF documentation set. DNS forwarder pattern comparison Pattern DDNS Support Reverse DNS Ops overhead Best Fit AD DNS on DCs + upstream 168.63.129.16 Yes, Native Yes, if reverse zones on DC's Medium Default; simplest topology External private DNS forwarder (VMs only) + external DC IPs in ANF AD connection Yes (ANF bypasses forwarder) Yes, if reverse ruleset on forwarder. Medium Enterprise with existing DNS infrastructure External DNS forwarder in ANF AD connection (incorrect) No — DDNS silently dropped N/A — config is wrong High Not supported Azure DNS Private Resolver in ANF AD connection (incorrect) No — DDNS not accepted N/A — config is wrong High Not supported Azure Virtual WAN considerations When ANF is deployed in a spoke VNET connected to an Azure Virtual WAN hub, a routing requirement applies that directly causes Kerberos and LDAP failures — which appear to be DNS or AD failures — when not addressed. This is one of the most common misdiagnoses in ANF deployments using Virtual WAN with NVA inspection. ANF subnet prefix must be in Routing Intent additional prefixes Azure Virtual WAN with Routing Intent routes private traffic through an NVA or Azure Firewall in the hub. For return traffic from external AD domain controllers to reach the ANF data plane IP, the hub must have an explicit routing entry for the ANF delegated subnet prefix. If the ANF delegated subnet is a /26 inside a larger VNET (/21 or /16), the broader VNET prefix alone is not sufficient — the specific /26 must be added explicitly. Action Required: In Azure Virtual WAN: Hub -> Routing -> Routing Intent -> Private Traffic -> Additional Prefixes. Add the ANF delegated subnet prefix (for example, 10.x.x.0/26) explicitly. Without this, Kerberos and LDAP reply traffic from external domain controllers is dropped before reaching the ANF data plane. The symptom is TCP port 88 connects succeeding followed by KRB5_KDC_UNREACH — which looks like a Kerberos or DNS problem but is a routing problem. Use availability zone switching to surface detailed error messages When ANF volume creation fails with the generic 'context deadline exceeded' error from the XMLrequest_filer endpoint, the error does not identify root cause. Redeploying the volume to a different availability zone (AZ1 to AZ2, or AZ2 to AZ3) forces a different backend assignment and consistently produces a more descriptive error that distinguishes routing failures (KRB5_KDC_UNREACH) from Kerberos authentication failures, DNS lookup failures, and LDAP errors. TIP: If the detailed error shows 'Successfully connected to ip <DC-IP>, port 88 using TCP' followed by 'Cannot contact any KDC for requested realm', the outbound path works but reply packets are dropped — this is a routing problem, not a DNS or Kerberos problem. Check vWAN Routing Intent, NVA firewall rules, and UDRs for the ANF subnet prefix. This diagnostic technique is not documented in ANF troubleshooting guidance. Required DNS records The following records must exist in the AD DNS zone served by the external DC DNS servers and must be resolvable from the ANF delegated subnet. Records marked * are not created automatically by AD DNS and must be added manually. Forward lookup zone Record Type Notes _ldap._tcp.dc._msdcs.<domain> SRV Domain-wide DC discovery _kerberos._tcp.dc._msdcs.<domain> SRV Domain-wide KDC discovery _ldap._tcp.<site>._sites.dc._msdcs.<domain> SRV Site-scoped — preferred when AD site is specified in ANF _kerberos._tcp.<site>._sites.dc._msdcs.<domain> SRV Site-scoped Kerberos _kerberos-master._tcp.<domain> * SRV NOT auto-created by AD DNS — must be added manually _kerberos-master._udp.<domain> * SRV NOT auto-created by AD DNS — must be added manually <dc-hostname> A Forward A record for each external DC in the AD site <anf-smb-hostname> A Registered by ANF via DDNS — must not be scavenged or blocked Reverse lookup zone (<reverse-octets>.in-addr.arpa) Record Type Notes PTR for each external DC IP PTR Required for dual-protocol, NFSv4.1 Kerberos, LDAP-over-TLS, and NTFS ACL operations PTR for each ANF volume IP * PTR Required for NFSv4.1 Kerberos reverse-lookup clients — create manually or via DDNS if supported How ANF internally fails when reverse DNS is missing When the reverse DNS ruleset is absent from the external private DNS forwarder, the failure does not surface as a DNS error in the ANF portal. Instead, it propagates through ANF's internal security daemon (secd) and presents as a generic InternalServerError or a Kerberos authentication failure. Understanding the internal failure chain explains why reverse DNS is non-negotiable and why the symptom is so misleading. The secd service list mechanism ANF uses an internal process called secd (Security Daemon) to manage all Active Directory communication — Kerberos ticket exchange, LDAP binds, and DC discovery. secd maintains a service list of discovered DCs. When a DC communication attempt fails for any reason, secd marks that DC as UNUSABLE and records a forgive time after which it will retry. If all DCs in the service list are simultaneously marked UNUSABLE, secd returns RESULT_ERROR_SECD_NO_SERVER_AVAILABLE, which propagates to the portal as InternalServerError. The reverse PTR lookup inside secd A critical and undocumented behavior: before secd completes a SASL/GSSAPI bind to an LDAP server, it performs a reverse PTR lookup of the DC's IP address. This lookup is used to validate the DC identity as part of Kerberos mutual authentication. If the PTR lookup fails — because the external private DNS forwarder has no reverse ruleset for the DC IP range — secd logs the failure and marks that DC UNUSABLE immediately, even though TCP connectivity on ports 88 and 389 succeeded. The following is the exact failure sequence from ANF backend logs when reverse DNS is absent: Stage 1 — TCP connects succeed, PTR lookup fails Successfully connected to ip 10.x.x.60, port 389 using TCP Entry for host-address: 10.x.x.60 not found in the current source: FILES Source: DNS unavailable. Entry for host-address: 10.x.x.60 not found in any of the available sources secd successfully opens the TCP connection to the DC on port 389 (LDAP), then immediately attempts a reverse lookup of that IP. The forwarder has no reverse ruleset, so DNS returns NXDOMAIN. secd logs 'DNS unavailable' and proceeds to mark the DC UNUSABLE. Stage 2 — GSSAPI bind fails as a consequence Unable to SASL bind to LDAP server using GSSAPI: Local error Unable to connect to LDAP (Active Directory) service on dc01.ad.contoso.com (Error: Local error) Because the PTR lookup failed, secd cannot complete the GSSAPI mutual authentication context. The 'Local error' is not a Kerberos configuration problem — it is the direct result of the identity validation step failing due to missing reverse DNS. Stage 3 — All DCs marked UNUSABLE 10.x.x.27 UNUSABLE Wed Apr 8 00:19:24 2026 10.x.x.28 UNUSABLE Wed Apr 8 00:19:24 2026 10.x.x.29 UNUSABLE Wed Apr 8 00:19:25 2026 10.x.x.30 UNUSABLE Wed Apr 8 00:19:25 2026 ... (all DCs in the service list) secd cycles through every DC in the discovered service list. Each DC fails the same PTR lookup. Each is marked UNUSABLE. Once the list is exhausted: Stage 4 — Service list exhausted, error propagates No servers in the service list which aren't marked bad Unable to select any server in the current serviceList RESULT_ERROR_SECD_NO_SERVER_AVAILABLE:6940 No servers available for MS_LDAP_AD, domain: ad.contoso.com This internal error code propagates up through the ANF volume creation stack and is presented to the operator as the generic 'context deadline exceeded (Client.Timeout exceeded while awaiting headers)' error in the portal. The actual cause — missing PTR records — is completely obscured. Stage 5 — Kerberos pre-auth error (secondary, misleading) Received error from KDC: -1765328359 / Additional pre-authentication required This Kerberos error code (KRB5KDC_ERR_PREAUTH_REQUIRED) appears in logs and can mislead investigation toward Kerberos configuration, encryption type mismatches, or clock skew. It is a downstream consequence of the failed PTR-based GSSAPI context — not a root cause. Chasing this error without first verifying reverse DNS is a common and time-consuming dead end. KEY INSIGHT: The complete failure chain is: missing reverse PTR ruleset on DNS forwarder → secd PTR lookup returns DNS unavailable → GSSAPI mutual auth cannot complete → DC marked UNUSABLE → all DCs exhausted → InternalServerError at portal. TCP connectivity on ports 88 and 389 succeeds at every stage. Only the PTR lookup fails. This is why all standard connectivity tests pass and the issue remains invisible until reverse DNS is specifically tested. Why this failure is invisible to standard troubleshooting ? Standard ANF DNS troubleshooting checks forward SRV records, forward A record resolution, and TCP port connectivity to DCs. All of these pass when only the reverse ruleset is missing. The secd PTR lookup is an internal step that occurs after TCP connectivity is confirmed and is not tested by any of the standard nslookup or Test-NetConnection commands used during initial validation. The only reliable way to surface this failure without access to backend logs is to explicitly test reverse PTR resolution from the ANF VNET — as documented in the verification section below. Verify DNS configuration Run the following commands from a test VM in the same VNET as the ANF delegated subnet. Use the external private DNS forwarder IP for client-side tests and an external DC IP for ANF-side tests. Forward SRV lookup — site-scoped nslookup -type=SRV _ldap._tcp.<SITE>._sites.dc._msdcs.<domain> <forwarder-IP> nslookup -type=SRV _kerberos._tcp.<SITE>._sites.dc._msdcs.<domain> <forwarder-IP> Forward SRV lookup — domain-wide nslookup -type=SRV _ldap._tcp.dc._msdcs.<domain> <forwarder-IP> nslookup -type=SRV _kerberos._tcp.dc._msdcs.<domain> <forwarder-IP> Reverse PTR lookup — use the external forwarder IP nslookup <external-DC-IP> <forwarder-IP> Expected output: Server: <forwarder-IP> <reverse-arpa> name = dc01.ad.contoso.com. If reverse lookup returns NXDOMAIN or times out while forward lookup succeeds, add the reverse DNS ruleset to the external private DNS forwarder. This is the most common cause of NTFS permission failures after a volume is successfully created. Port connectivity from ANF VNET Test-NetConnection -ComputerName <external-DC-IP> -Port 88 # Kerberos Test-NetConnection -ComputerName <external-DC-IP> -Port 389 # LDAP Test-NetConnection -ComputerName <forwarder-IP> -Port 53 # DNS Common issues and resolutions Symptom Likely cause Resolution InternalServerError: context deadline exceeded (XMLrequest_filer) Generic ANF backend timeout — routing or Kerberos root cause not visible at this level Switch deployment availability zone for a detailed error. Check vWAN Routing Intent for ANF /26 prefix. KRB5_KDC_UNREACH — TCP port 88 connects succeed but auth fails Return traffic from external DCs dropped before reaching ANF NIC — routing issue, not DNS Add ANF subnet /26 to vWAN Hub Routing Intent > Additional Prefixes > Private Traffic 'Cannot determine whether the computer is joined to a domain' — NTFS permissions Reverse DNS (PTR) lookup failing on external forwarder for DC IPs Add reverse lookup ruleset to external private DNS forwarder: <reverse-zone>.in-addr.arpa. > external DC IPs DDNS fails — SMB hostname not in DNS after volume creation ANF AD connection DNS IPs point to external forwarder — GSS-TSIG not supported by forwarder Set AD connection DNS IPs to writable Microsoft AD-integrated external DC IPs directly 'Failed to validate LDAP configuration' during dual-protocol creation Missing PTR records for external DCs, or reverse zone unreachable Add PTR records for all external DCs. Verify reverse ruleset is present on the forwarder. NFSv4.1 Kerberos: 'Cannot determine realm for numeric host address' Missing PTR for ANF volume IP or external DC IPs Add PTR records for ANF volume IPs and all external DC IPs in the reverse zone. SMB hostname resolves on-premises but not from Azure VMs External private DNS forwarder missing forward ruleset for AD zone, or targeting wrong DC IPs Verify forward ruleset is present and targeting reachable writable external DC IPs. Volume creation fails after external DC IP change External DNS forwarder (especially BIND) caching stale DC IPs — default TTL up to 7 days Flush forwarder cache. Set short TTLs on DC A records. Consider Microsoft AD-integrated DNS for AD zones. Summary of key requirements: ANF AD connection DNS IPs must point to writable Microsoft AD-integrated DNS servers (external DC IPs) — not the external private DNS forwarder, not Azure DNS Private Resolver, not 168.63.129.16. The external private DNS forwarder must have both a forward ruleset (AD domain > external DC IPs) and a reverse ruleset (in-addr.arpa. zone for DC IP ranges > external DC IPs). The reverse ruleset is required for NTFS ACL operations on SMB shares and is not mentioned in ANF documentation. 168.63.129.16 is the upstream forwarder target on the external DNS forwarder — not a target in the ANF AD connection. It is unreachable from on-premises and is not AD-aware. External private DNS forwarders (Infoblox, BIND, Unbound) do not support GSS-TSIG. Placing a forwarder IP in the ANF AD connection causes silent DDNS failure with no portal error. In Virtual WAN deployments, add the ANF delegated subnet /26 to the hub Routing Intent under Additional Prefixes for Private Traffic. The broader VNET prefix alone is not sufficient. NFSv3 volume creation success does not indicate SMB readiness — NFSv3 uses the IP directly and bypasses AD, Kerberos, and reverse DNS. _kerberos-master SRV records are not created automatically by AD DNS and must be added manually. DNS scavenging should be disabled on zones containing ANF records, or records pre-created as static entries, as ANF does not aggressively refresh DDNS registrations. When volume creation fails with a generic 'context deadline exceeded' error, switch the deployment availability zone before deep troubleshooting to surface a more descriptive error. Related documentation: Understand Domain Name Systems in Azure NetApp Files Guidelines for Azure NetApp Files network planning Configure Virtual WAN for Azure NetApp Files Create and manage Active Directory connections for Azure NetApp Files Create and manage reverse DNS zones in Azure Private DNS Understand guidelines for Active Directory Domain Services site design and planning How to configure Virtual WAN Hub routing policies What is IP address 168.63.129.16?688Views0likes0Comments
Centralizing Enterprise API Access for Agent-Based Architectures
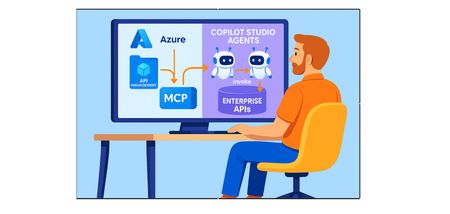
Problem Statement When building AI agents or automation solutions, calling enterprise APIs directly often means configuring individual HTTP actions within each agent for every API. While this works for simple scenarios, it quickly becomes repetitive and difficult to manage as complexity grows. The challenge becomes more pronounced when a single business domain exposes multiple APIs, or when the same APIs are consumed by multiple agents. This leads to duplicated configurations, higher maintenance effort, inconsistent behavior, and increased governance and security risks. A more scalable approach is to centralize and reuse API access. By grouping APIs by business domain using an API management layer, shaping those APIs through a Model Context Protocol (MCP) server, and exposing the MCP server as a standardized tool or connector, agents can consume business capabilities in a consistent, reusable, and governable manner. This pattern not only reduces duplication and configuration overhead but also enables stronger versioning, security controls, observability, and domain‑driven ownership—making agent-based systems easier to scale and operate in enterprise environments. Designing Agent‑Ready APIs with Azure API Management, an MCP Server, and Copilot Studio As enterprises increasingly adopt AI‑powered assistants and Copilots, API design must evolve to meet the needs of intelligent agents. Traditional APIs—often designed for user interfaces or backend integrations—can expose excessive data, lack intent-level abstraction, and increase security risk when consumed directly by AI systems. This document outlines a practical, enterprise-‑ready approach to organize APIs in Azure API Management (APIM), introduce a Model Context Protocol (MCP) server to shape and control context, and integrate the solution with Microsoft Copilot Studio. The goal is to make APIs truly agent-‑ready: secure, scalable, reusable, and easy to govern. Architecture at a glance Back-end services expose domain APIs. Azure API Management (APIM) groups and governs those APIs (products, policies, authentication, throttling, versions). An MCP server calls APIM, orchestrates/filters responses, and returns concise, model-friendly outputs. Copilot Studio connects to the MCP server and invokes a small set of predictable operations to satisfy user intents. Why Traditional API Designs Fall Short for AI Agents Enterprise APIs have historically been built around CRUD operations and service-‑to-‑service integration patterns. While this works well for deterministic applications, AI agents work best with intent-driven operations and context-aware responses. When agents consume traditional APIs directly, common issues include: overly verbose payloads, multiple calls to satisfy a single user intent, and insufficient guardrails for read vs. write operations. The result can be unpredictable agent behavior that is difficult to test, validate, and govern. Structuring APIs Effectively in Azure API Management Azure API Management (APIM) is the control plane between enterprise systems and AI agents. A well-‑structured APIM instance improves security, discoverability, and governance through products, policies, subscriptions, and analytics. Key design principles for agent consumption Organize APIs by business capability (for example, Customer, Orders, Billing) rather than technical layers. Expose agent-facing APIs via dedicated APIM products to enable controlled access, throttling, versioning, and independent lifecycle management. Prefer read-only operations where possible; scope write operations narrowly and protect them with explicit checks, approvals, and least-privilege identities. Read‑only APIs should be prioritized, while action‑oriented APIs must be carefully scoped and gated. The Role of the MCP Server in Agent‑Based Architectures APIM provides governance and security, but agents also need an intent-level interface and model-friendly responses. A Model Context Protocol (MCP) server fills this gap by acting as a mediator between Copilot Studio and APIM-exposed APIs. Instead of exposing many back-end endpoints directly to the agent, the MCP server can: orchestrate multiple API calls, filter irrelevant fields, enforce business rules, enrich results with additional context, and emit concise, predictable JSON outputs. This makes agent behavior more reliable and easier to validate. Instead of exposing multiple backend APIs directly to the agent, the MCP server aggregates responses, filters irrelevant data, enriches results with business context, and formats responses into LLM‑friendly schemas. By introducing this abstraction layer, Copilot interactions become simpler, safer, and more deterministic. The agent interacts with a small number of well‑defined MCP operations that encapsulate enterprise logic without exposing internal complexity. Designing an Effective MCP Server An MCP server should have a focused responsibility: shaping context for AI models. It should not replace core back-end services; it should adapt enterprise capabilities for agent consumption. What MCP should do An MCP server should be designed with a clear and focused responsibility: shaping context for AI models. Its primary role is not to replace backend services, but to adapt enterprise data for intelligent consumption. MCP does not orchestrate enterprise workflows or apply business logic. It standardizes how agents discover and invoke external tools and APIs by exposing them through a structured protocol interface. Orchestration, intent resolution, and policy-driven execution are handled by the agent runtime or host framework. It is equally important to understand what does not belong in MCP. Complex transactional workflows, long‑running processes, and UI‑specific formatting should remain in backend systems. Keeping MCP lightweight ensures scalability and easier maintenance. Call APIM-managed APIs and orchestrate multi-step retrieval when needed. Apply security checks and business rules consistently. Filter and minimize payloads (return only fields needed for the intent). Normalize and reshape responses into stable, predictable JSON schemas. Handle errors and edge cases with safe, descriptive messages. What MCP should not do Avoid implementing complex transactional workflows, long-running processes, or UI-specific formatting in MCP. Keep it lightweight so it remains scalable, testable, and easy to maintain. Step by step guide 1) Create an MCP server in Azure API Management (APIM) Open the Azure portal (portal.azure.com). Go to your API Management instance. In the left navigation, expand APIs. Create (or select) an API group for the business domain you want to expose (for example, Orders or Customers). Add the relevant APIs/operations to that API group. Create or select an APIM product dedicated for agent usage, and ensure the product requires a subscription (subscription key). Create an MCP server in APIM and map it to the API (or API group) you want to expose as MCP operations. In the MCP server settings, ensure Subscription key required is enabled. From the product’s Subscriptions page, copy the subscription key you will use in Copilot Studio. Screenshot placeholders: APIM API group, product configuration, MCP server mapping, subscription settings, subscription key location. * Note: Using an API Management subscription key to access MCP operations is one supported way to authenticate and consume enterprise APIs. However, this approach is best suited for initial setups, demos, or scenarios where key-based access is explicitly required. For production‑grade enterprise solutions, Microsoft recommends using managed identity–based access control. Managed identities for Azure resources eliminate the need to manage secrets such as subscription keys or client secrets, integrate natively with Microsoft Entra ID, and support fine‑grained role‑based access control (RBAC). This approach improves security posture while significantly reducing operational and governance overhead for agent and service‑to‑service integrations. Wherever possible, agents and MCP servers should authenticate using managed identities to ensure secure, scalable, and compliant access to enterprise APIs. 2) Create a Copilot Studio agent and connect to the APIM MCP server using a subscription key Copilot Studio natively supports Model Context Protocol (MCP) servers as tools. When an agent is connected to an MCP server, the tool metadata—including operation names, inputs, and outputs—is automatically discovered and kept in sync, reducing manual configuration and maintenance overhead. Sign in to Copilot Studio. Create a new agent and add clear instructions describing when to use the MCP tool and how to present results (for example, concise summaries plus key fields). Open Tools > Add tool > Model Context Protocol, then choose Create. Enter the MCP server details: Server endpoint URL: copy this from your MCP server in APIM. Authentication: select API Key. Header name: use the subscription key header required by your APIM configuration. Select Create new connection, paste the APIM subscription key, and save. Test the tool in the agent by prompting for a domain-specific task (for example, “Get order status for 12345”). Validate that responses are concise and that errors are handled safely. Screenshot placeholders: MCP tool creation screen, endpoint + auth configuration, connection creation, test prompt and response. Operational best practices and guardrails Least privilege by default: create separate APIM products and identities for agent scenarios; avoid broad access to internal APIs. Prefer intent-level operations: expose fewer, higher-level MCP operations instead of many low-level endpoints. Protect write operations: require explicit parameters, validation, and (when appropriate) approval flows; keep “read” and “write” tools separate. Stable schemas: return predictable JSON shapes and limit optional fields to reduce prompt brittleness. Observability: log MCP requests/responses (with sensitive fields redacted), monitor APIM analytics, and set alerts for failures and throttling. Versioning: version MCP operations and APIM APIs; deprecate safely. Security hygiene: treat subscription keys as secrets, rotate regularly, and avoid exposing them in prompts or logs. Summary As organizations scale agent‑based and Copilot‑driven solutions, directly exposing enterprise APIs to AI agents quickly becomes complex and risky. Centralizing API access through Azure API Management, shaping agent‑ready context via a Model Context Protocol (MCP) server, and consuming those capabilities through Copilot Studio establishes a clean and governable architecture. This pattern reduces duplication, enforces consistent security controls, and enables intent‑driven API consumption without exposing unnecessary backend complexity. By combining domain‑aligned API products, lightweight MCP operations, and least‑privilege identity‑based access, enterprises can confidently scale AI agents while maintaining strong governance, observability, and operational control. References Azure API Management (APIM) – Overview Azure API Management – Key Concepts Azure MCP Server Documentation (Model Context Protocol) Extend your agent with Model Context Protocol Managed identities for Azure resources – Overview959Views0likes0CommentsEnabling Agentic Data Governance with Hybrid Cloud Flexibility in Azure
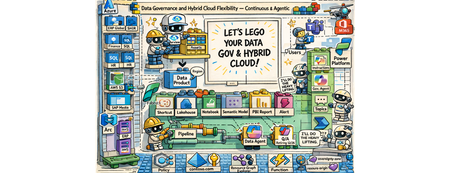
The “Why” Do you manage data in a complex multi-cloud environment? Are you struggling with data silos, evolving regulations, and the pressure to maintain control and compliance across on-prem and multiple clouds? Do you ever wish an intelligent assistant could help shoulder the load of data governance? If so, I can relate. Let me tell you a story that might sound familiar. Meet Mark (pictured above). He is a data governance officer at Contoso (a fictional but very representative enterprise). Mark’s day job is ensuring data governance and compliance across his company’s vast hybrid cloud estate – think around ~2 million data assets sprawled across 12+ datacenters on-premises and in different public clouds. Regulatory requirements are constantly shifting. Customer data is increasingly sensitive. Each department and region has its own way of doing things. Mark is fighting an uphill battle with data silos and disconnected cloud operations. He bounces between a patchwork of tools – spreadsheets, cloud consoles, governance portals – trying to answer basic questions: Where is our data? Who’s using it? Are we in compliance? Armed with an old desk calculator and a pile of paper-based reports (a perfect 1990s backdrop), he is dealing with the data around him that has exploded in volume and complexity. What if Mark had a single pane of glass. The glass that reflects and acts. It reflects your governance state and enforces compliance – a self-hydrating pane of glass accompanied by a conversational AI. And he’s not alone. We’re all living in a data overload era. Every day, organizations generate and ingest more information than ever before. Transistors and mainframes gave way to the internet boom of the ’90s, then an explosion of mobile devices in the 2000s, social media in the 2010s, and now widespread cloud computing – all funneling data into our systems at an exponential rate. On top of that, a new wave of AI and conversational interfaces has arrived here in the mid-2020s, making data more accessible but also increasing expectations for real-time insight. It’s no wonder modern IT leaders feel overwhelmed. But these challenges are also opportunities. The way I see it, the incredible growth of data and cloud capabilities means we have a chance to reimagine data governance. The fact that I’m writing about this right now is no coincidence. My customers are looking to resolve problems in this space. In my conversations with them, I hear the same needs: We want better governance, more visibility, streamlined oversight… and cherry on top, we want it in an “agentic” fashion. In other words, they want to delegate the grunt work to the platform toolset augmented by AI, so they can focus on higher-value tasks. The “What” That vision – agentic data governance with hybrid cloud flexibility – became the driver for this work. This is a modular solution, and you have these building block style components (cloud services, governance tools, AI agents), which you can snap them together into an intended solution. Think of it as a jumpstart kit for continuous data governance across multiple clouds, with autonomous (“agentic”) assistance baked in that you can leverage and build upon. It’s not the final, productized solution – more a vision of what’s possible. Contoso’s Requirements These are the high-level requirements from Contoso: Data governance across clouds under one roof A single pane of glass dashboard consolidating reporting on the 5 governance domains: o Visibility on data residency and lineage o PII (Personally Identifiable Information) must run on a CC (Confidential Compute) o Security software (Defender) compliance o Resource tagging compliance (foundational for a good governance posture) o OS updates compliance Ability to enforce compliance in an agentic manner with a human in the loop Agentic enforcement of compliance pertaining to residency and confidential compute Solution – The breakdown The solution is comprised of 8 modules addressing these requirements. These solution modules are: Foundational (Landing zones, Data Sources, Operational setup, Policies, etc.) Dashboard Hydration + Agentic Reporting – Residency Compliance Dashboard Hydration + Agentic Reporting – Confidential Compute for PII Compliance Dashboard Hydration + Agentic Reporting – MS Defender Compliance Dashboard Hydration + Agentic Reporting – Resource Tag Compliance Dashboard Hydration + Agentic Reporting – OS Updates/Patch Compliance Enforce Compliance via Copilot Agent - Residency Compliance Enforce Compliance via Copilot Agent – CC PII Compliance Solution – The architecture view These are the main technical components that make up the solution architecture: Data sources of all shapes and sizes on the left, governed by the native Azure or the Arc plane. Additional Azure services across the bottom layer for the foundational governance posture Microsoft Purview, in the top middle, as the unified data governance platform Microsoft Fabric, in the bottom middle, as the end-to-end ingestion and analytics platform Microsoft Power Platform, on the right, as the low code/no code business flow and the copilot agent experience Solution – The end user view So how does Mark see this solution as a data governance officer? He doesn’t see all the intricacies of the solution integration and the logic execution. He sees two things: A Power BI dashboard running on Microsoft Fabric with A compliance dashboard with an overall score in each of the five compliance domains alongside scores for each of the data products across these domains Additional reporting views for more granular reporting Fabric-based pipeline that hydrates the underlying semantic models from various sources to keep the reports fresh and current A Copilot agent (in Teams) for both: Reporting on all compliance domains Enforcing in-scope compliance across selected domains The agent takes care of it - queries Fabric’s semantic model, calls Azure Function endpoints, updates Purview glossary terms, applies Azure tags, and sends Teams notifications. The “How” – Residency Compliance Let’s pick a few modules to walk through how these solution modules work together to give a cohesive agentic governance experience to Mark. It’s Monday morning, and Mark logs into the Contoso governance portal with a cup of coffee in hand. Instead of a dozen browser tabs, he has two main tools opened: the Data Governance Dashboard and the Contoso Governance Copilot agent. To address some inquiries that came as an assigned action to him, he interacted with the agent. During this interaction, not only did he validate if there were any residency missing in the unified data governance platform (Purview), but he was also able to address a mismatch between Purview and Azure resource, based on the designed principles. Here is the snippet of the chat: Now, under the hood, several components have worked on behalf of the agent in performing this governance checking and applying the necessary course of action: Even before Mark's conversation with the agent, an ongoing hydration process keeps the Fabric Power BI dashboard up to date. Dashboard Hydration + Agentic Reporting – Residency Compliance A Fabric notebook runs the residency scorecard code block through a pipeline. It reads two Lakehouse tables containing latest residency information from Purview and the approved region list Then, the notebook gets a Microsoft Entra bearer token Once acquired, the notebook then calls an Azure Function endpoint This endpoint, then searches for the Azure resources associated with the data products in Purview using an Azure resource tag. The notebook then compares the declared Purview residency with the approved region list and the associated resource’s region The notebook then calculates the final 0 / 25 / 50 / 75 / 100 residency compliance score and a reason. For example: A data product without an associated Azure resource gets a 0, while a data product whose residency in Purview is an approved region by Contoso, and also matches with the associated Azure resource, gets a 100. It then writes the results to the relevant residency compliance Lakehouse tables The dedicated compliance table then feeds to the semantic model for reporting The compliance Power BI dashboard is hydrated Enforce Compliance via Copilot Agent - Residency Compliance With the dashboard data regularly updated, the agent follows this logic, the updated reporting data, and the actions at its disposal, during the earlier conversation with Mark : Mark initiates the conversation with the agent The agent calls a Power Automate flow This flow retrieves Purview’s residency information stored in the Fabric semantic model 5, 6, 7 and 8. When Mark asks to investigate further on a data product, the agent carries the conversation using a topic, which then leverages a flow, which uses a Power Automate custom connector to access an Azure Function endpoint. This endpoint then retrieves latest glossary (residency) information about the data product in question, from Purview, and provides a preview back to the user 10, 11, 12, and 13. If the update criteria are met, and if there is no conflict, and with Mark’s blessings, the topic then calls another flow to access the Functions Purview Update endpoint, and make the glossary (residency) update in Purview for that data product The “How” – Confidential Compute for PII Compliance Dashboard Hydration + Agentic Reporting – Confidential Compute for PII Compliance The following snippet shows how Mark addresses the compliance risk with a critical data product (application), S/4 HANA, and performed the necessary compliance actions, such as tagging the associated resources and notifying the data product owners via Teams channel. The following diagram shows the under-the-hood hydration flow for confidential compute compliance: Enforce Compliance via Copilot Agent – CC PII Compliance Finally, the diagram below shows how Mark’s conversation flows through the main solution components: Outcome Stepping back, what did we accomplish for Mark and Contoso? We turned an onslaught of governance challenges into an opportunity to modernize how data is managed. This gave Mark: Centralized Visibility into data assets across the landscape through Purview and a unified dashboard Proactive compliance enabled with automated checks - controlled with Purview exports and Fabric pipeline schedules And compliance enforcement using an agent Hybrid Cloud Consistency. By using Azure Arc and a foundational data plane management setup Reduced Operational overhead with agentic reporting and compliance Though the solution is comprised of wide variety of components/services, it is built from standard building blocks and is relatively simple to implement. In total, the solution combined around a dozen Azure services and over 40 distinct components (from Purview catalogs to data pipelines, to custom functions and flows). You can choose to implement some or all the compliance domains. Or, better yet, build upon and create new domains and pave new paths. Wrap-up I believe many enterprises could take a similar journey. If you’re facing these issues, consider this an invitation to think differently about data governance. Start with the pieces you already have – your own building blocks of cloud services and data – and imagine what you could build. Chances are that a lot of the heavy lifting can be orchestrated with today’s technology. And with the rise of AI copilots, the dream of agentic data governance – where your policies are continuously enforced by smart agents – is no longer science fiction. It’s here, right now, waiting for you to take it for a spin. Next steps Watch the video narrative on SAP on Azure YouTube channel: Build it with the GitHub Repository: https://github.com/moazmirza/data-sov-and-hyb-cloud Comments/questions: Here, or @ LinkedIn /moazmirza Solution Selfies Azure Policy Compliance - Foundational Governance Posture Purview Data Product Catalog and Data Lineage Purview Governance Metadata à Fabric Lakehouse Fabric Semantic Model Additional Fabric Power BI Dashboard Copilot Studio Topic Flow Azure Function Endpoints520Views0likes0CommentsAdvancing to Agentic AI with Azure NetApp Files VS Code Extension v1.2.0
The Azure NetApp Files VS Code Extension v1.2.0 introduces a major leap toward agentic, AI‑informed cloud operations with the debut of the autonomous Volume Scanner. Moving beyond traditional assistive AI, this release enables intelligent infrastructure analysis that can detect configuration risks, recommend remediations, and execute approved changes under user governance. Complemented by an expanded natural language interface, developers can now manage, optimize, and troubleshoot Azure NetApp Files resources through conversational commands - from performance monitoring to cross‑region replication, backup orchestration, and ARM template generation. Version 1.2.0 establishes the foundation for a multi‑agent system built to reduce operational toil and accelerate a shift toward self-managing enterprise storage in the cloud.546Views0likes0CommentsGranting Azure Resources Access to SharePoint Online Sites Using Managed Identity
When integrating Azure resources like Logic Apps, Function Apps, or Azure VMs with SharePoint Online, you often need secure and granular access control. Rather than handling credentials manually, Managed Identity is the recommended approach to securely authenticate to Microsoft Graph and access SharePoint resources. High-level steps: Step 1: Enable Managed Identity (or App Registration) Step 2: Grant Sites.Selected Permission in Microsoft Entra ID Step 3: Assign SharePoint Site-Level Permission Step 1: Enable Managed Identity (or App Registration) For your Azure resource (e.g., Logic App): Navigate to the Azure portal. Go to the resource (e.g., Logic App). Under Identity, enable System-assigned Managed Identity. Note the Object ID and Client ID (you’ll need the Client ID later). Alternatively, use an App Registration if you prefer a multi-tenant or reusable identity. How to register an app in Microsoft Entra ID - Microsoft identity platform | Microsoft Learn Step 2: Grant Sites.Selected Permission in Microsoft Entra Open Microsoft Entra ID > App registrations. Select your Logic App’s managed identity or app registration. Under API permissions, click Add a permission > Microsoft Graph. Select Application permissions and add: Sites.Selected Click Grant admin consent. Note: Sites.Selected ensures least-privilege access — you must explicitly allow site-level access later. Step 3: Assign SharePoint Site-Level Permission SharePoint Online requires site-level consent for apps with Sites.Selected. Use the script below to assign access. Note: You must be a SharePoint Administrator and have the Sites.FullControl.All permission when running this. PowerShell Script: # Replace with your values $application = @{ id = "{ApplicationID}" # Client ID of the Managed Identity displayName = "{DisplayName}" # Display name (optional but recommended) } $appRole = "write" # Can be "read" or "write" $spoTenant = "contoso.sharepoint.com" # Sharepoint site host $spoSite = "{Sitename}" # Sharepoint site name # Site ID format for Graph API $spoSiteId = $spoTenant + ":/sites/" + $spoSite + ":" # Load Microsoft Graph module Import-Module Microsoft.Graph.Sites # Connect with appropriate permissions Connect-MgGraph -Scope Sites.FullControl.All # Grant site-level permission New-MgSitePermission -SiteId $spoSiteId -Roles $appRole -GrantedToIdentities @{ Application = $application } That's it, Your Logic App or Azure resource can now call Microsoft Graph APIs to interact with that specific SharePoint site (e.g., list files, upload documents). You maintain centralized control and least-privilege access, complying with enterprise security standards. By following this approach, you ensure secure, auditable, and scalable access from Azure services to SharePoint Online — no secrets, no user credentials, just managed identity done right.14KViews2likes6CommentsHow Azure NetApp Files Object REST API powers Azure and ISV Data and AI services – on YOUR data
This article introduces the Azure NetApp Files Object REST API, a transformative solution for enterprises seeking seamless, real-time integration between their data and Azure's advanced analytics and AI services. By enabling direct, secure access to enterprise data—without costly transfers or duplication—the Object REST API accelerates innovation, streamlines workflows, and enhances operational efficiency. With S3-compatible object storage support, it empowers organizations to make faster, data-driven decisions while maintaining compliance and data security. Discover how this new capability unlocks business potential and drives a new era of productivity in the cloud.1.6KViews0likes0CommentsUnlocking Advanced Data Analytics & AI with Azure NetApp Files object REST API
Azure NetApp Files object REST API enables object access to enterprise file data stored on Azure NetApp Files, without copying, moving, or restructuring that data. This capability allows analytics and AI platforms that expect object storage to work directly against existing NFS based datasets, while preserving Azure NetApp Files’ performance, security, and governance characteristics.1.3KViews0likes0Comments