First published on MSDN on Dec 13, 2017
Machine Learning Server 9.2 adds support for the full data science lifecycle of your Python-based analytics.
In this article, we will go through step by step details of implementing data science lifecycle using Python. These steps include :
For this article, we are going to create a Windows DSVM since it provides many useful python tools like Python Tools for Visual Studio , Jupyter Notebooks , PyCharm Community Edition , Visual Studio Code .
We have one-click deployable ARM Templates for quickly creating One-Box and Enterprise Configurations . More information here .
We are going to create a Windows DSVM configured as One-Box using this specific ARM Template.
Click on Deploy to Azure button. Once Deployment is successful, you can RDP into the VM using its public IP address.
There are many ways to run ML Server python. We will discuss the following ways:
(You can choose any of the above methods in which you are comfortable to develop the python code/model)
You can simply start a python terminal by double clicking the following exe :
C:\Program Files\Microsoft\ML Server\PYTHON_SERVER\python.exe
And start typing python code (or) copy paste python code.

MLServer comes with a jupyter notebook executable that can be found in the following location:
C:\Program Files\Microsoft\ML Server\PYTHON_SERVER\Scripts\jupyter-notebook.exe
Right-click Run as administrator on jupyter-notebook.exe
The Notebook Dashboard opens in your default browser at http://localhost:8888/tree
If you have an existing Jupyter Notebook, you can use the upload button on the top right to load the .ipynb file. If you wish to develop from scratch, click on New and choose MLO16N

This will open a new tab with MLO16N kernel and you can start typing code :

How to use Jupyter notebooks in single-user and multi-user servers
Jupyter Notebook Samples
Open Visual Studio 2017 as Administrator. (you can find it as taskbar icon)
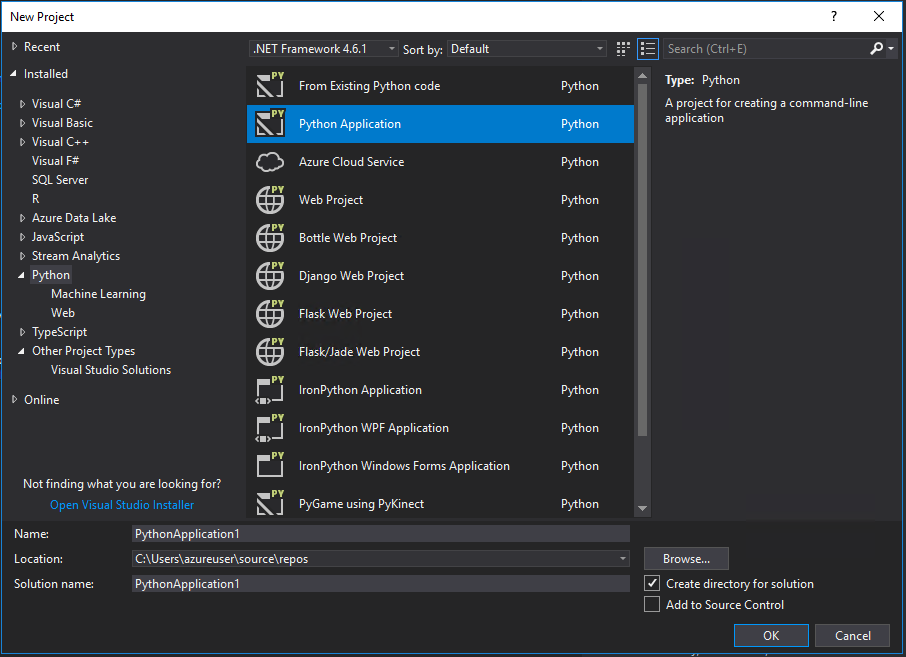
Click on File -> New -> Project
Choose Python on the left side and create a Python Application Project. (choose ‘From existing python code’ if you already have python code)
Once the project is open, you can start typing python code.
We will now point Visual Studio to ML Server Python Interpreter directly.
Go to View > Other Windows > Python Environments.
Click on Custom and Fill the following values:

Click Apply. Now you should see a Machine Learning Server environment with details:

Now you can click Open Interactive Window and start typing code interactively:

If we wish to use Machine Learning Server Python Environment in our Python Application Project, we can add it by right clicking the Python Environment and choosing Add/Remove Python Environments

Now we can add code to PythonApplication1.py file.
Once we add python code, we can select a particular python code and run it in Interactive Window by pressing Ctrl+Enter or right click the selected code and click on ‘Send to Interactive’.
Also, you can set breakpoints and debug your python code.
VS code is a lightweight IDE alternative to Visual Studio. You can open VS Code from the taskbar.
We will install Python Extension by clicking on extensions on left banner and searching python :

Once installed, close and open VS Code.
Create a new python file and add some python code.
Click on File -> Preference -> Settings
Search python.pythonPath setting and add our custom ML Server Python path value on the right hand side :
{
"python.pythonPath": "C:\\Program Files\\Microsoft\\ML Server\\PYTHON_SERVER\\python.exe"
}

Save User Settings and restart VS Code.
Open View -> Command palette and type >Python: Select Interpreter and choose Machine Learning Server


Now you can type python code. Select code, right click and choose Run Selection/Line in python terminal. This will open ML Server python in an Intergrated Terminal below and execute the line of python code.

More details on Configuring Python environments in VS Code .
Open PyCharm Community Edition (shortcut in desktop)
Click on Create New Project

Click on the settings button -> Add Local and paste the ML Server python path.
Now we can add a python file in this project hello.py and add python code
We can then right click the file and debug the python code.
You can also choose Tools -> Python Console to open an IPython interactive shell.
Now that we have learnt to run ML Server python in different IDEs, let us write some python code to publish a python webservice.
Here is the sample python code to create a simple ManualTransmission WebService, publish it, consume it, generate swagger and save it as json file.
We can use the swagger json file from previous step to generate clients in many languages.
Easiest way is to copy paste the swagger json into http://editor2.swagger.io and click on Generate Client button at the top :

Since we are already in python development environment, here is a python snippet to generate clients from swagger.json file :
Further details on consuming the C# client : Service Consumption Client Library from Swagger (in CSharp)
Deploy a Python model as a web service with azureml-model-management-sdk
An example of binary classification with the microsoftml Python package
Create a linear regression model using revoscalepy in Python
Machine Learning Server 9.2 adds support for the full data science lifecycle of your Python-based analytics.
In this article, we will go through step by step details of implementing data science lifecycle using Python. These steps include :
- Creating a VM configured as One-Box [using ARM Templates ]
- Developing python models [using revoscalepy , microsoftml packages in any IDE]
- Publishing a python web service [using azureml-model-management-sdk ]
- Generating service consumption clients [using swagger generator ]
STEP 1 : Create One-Box Configuration.
For this article, we are going to create a Windows DSVM since it provides many useful python tools like Python Tools for Visual Studio , Jupyter Notebooks , PyCharm Community Edition , Visual Studio Code .
We have one-click deployable ARM Templates for quickly creating One-Box and Enterprise Configurations . More information here .
We are going to create a Windows DSVM configured as One-Box using this specific ARM Template.
Click on Deploy to Azure button. Once Deployment is successful, you can RDP into the VM using its public IP address.
STEP 2: Develop Python Code/Model.
There are many ways to run ML Server python. We will discuss the following ways:
- Command line
- Jupyter-notebook
- Python Tools for Visual Studio
- Visual Studio Code
- PyCharm
(You can choose any of the above methods in which you are comfortable to develop the python code/model)
Commandline
You can simply start a python terminal by double clicking the following exe :
C:\Program Files\Microsoft\ML Server\PYTHON_SERVER\python.exe
And start typing python code (or) copy paste python code.
Jupyter Notebook
MLServer comes with a jupyter notebook executable that can be found in the following location:
C:\Program Files\Microsoft\ML Server\PYTHON_SERVER\Scripts\jupyter-notebook.exe
Right-click Run as administrator on jupyter-notebook.exe
The Notebook Dashboard opens in your default browser at http://localhost:8888/tree
If you have an existing Jupyter Notebook, you can use the upload button on the top right to load the .ipynb file. If you wish to develop from scratch, click on New and choose MLO16N
This will open a new tab with MLO16N kernel and you can start typing code :
How to use Jupyter notebooks in single-user and multi-user servers
Jupyter Notebook Samples
Python Tools for Visual Studio
Open Visual Studio 2017 as Administrator. (you can find it as taskbar icon)
Click on File -> New -> Project
Choose Python on the left side and create a Python Application Project. (choose ‘From existing python code’ if you already have python code)
Once the project is open, you can start typing python code.
We will now point Visual Studio to ML Server Python Interpreter directly.
Go to View > Other Windows > Python Environments.
Click on Custom and Fill the following values:
Click Apply. Now you should see a Machine Learning Server environment with details:
Now you can click Open Interactive Window and start typing code interactively:
If we wish to use Machine Learning Server Python Environment in our Python Application Project, we can add it by right clicking the Python Environment and choosing Add/Remove Python Environments

Now we can add code to PythonApplication1.py file.
Once we add python code, we can select a particular python code and run it in Interactive Window by pressing Ctrl+Enter or right click the selected code and click on ‘Send to Interactive’.
Also, you can set breakpoints and debug your python code.
Visual Studio Code
VS code is a lightweight IDE alternative to Visual Studio. You can open VS Code from the taskbar.
We will install Python Extension by clicking on extensions on left banner and searching python :
Once installed, close and open VS Code.
Create a new python file and add some python code.
Click on File -> Preference -> Settings
Search python.pythonPath setting and add our custom ML Server Python path value on the right hand side :
{
"python.pythonPath": "C:\\Program Files\\Microsoft\\ML Server\\PYTHON_SERVER\\python.exe"
}
Save User Settings and restart VS Code.
Open View -> Command palette and type >Python: Select Interpreter and choose Machine Learning Server
Now you can type python code. Select code, right click and choose Run Selection/Line in python terminal. This will open ML Server python in an Intergrated Terminal below and execute the line of python code.
More details on Configuring Python environments in VS Code .
PyCharm
Open PyCharm Community Edition (shortcut in desktop)
Click on Create New Project
Click on the settings button -> Add Local and paste the ML Server python path.
Now we can add a python file in this project hello.py and add python code
We can then right click the file and debug the python code.
You can also choose Tools -> Python Console to open an IPython interactive shell.
STEP 3: Publish a Web Service
Now that we have learnt to run ML Server python in different IDEs, let us write some python code to publish a python webservice.
Here is the sample python code to create a simple ManualTransmission WebService, publish it, consume it, generate swagger and save it as json file.
STEP 4: Generate Service Consumption Client
We can use the swagger json file from previous step to generate clients in many languages.
Easiest way is to copy paste the swagger json into http://editor2.swagger.io and click on Generate Client button at the top :
Since we are already in python development environment, here is a python snippet to generate clients from swagger.json file :
Further details on consuming the C# client : Service Consumption Client Library from Swagger (in CSharp)
Python Quickstarts :
Deploy a Python model as a web service with azureml-model-management-sdk
An example of binary classification with the microsoftml Python package
Create a linear regression model using revoscalepy in Python
Updated Mar 24, 2019
Version 2.0SQL-Server-Team
Former Employee
Joined March 23, 2019
SQL Server Blog
Follow this blog board to get notified when there's new activity