Installing Shibboleth and federating it with your Office365 AAD
A number of institutions have contact me asking how they can configure a Shibboleth server running on Windows Server or Linux. The following details are from Azure Engineers James Evans and Ashley Reason.
Installing Shibboleth on Windows
Please note: Shibboleth configuration XML file content is case sensitive. Please follow below instructions exactly as is. Sample XML files are also provided as a reference .
The instructions have been tested with Shibboleth IDP 2.4.0 and Java JRE 7
##Install
1. Logon to <your-alias>SHB as the domain administrator
2. Launch Server Manager and click Configure IE ESC

3. Configure the IE Enhanced Security to be off or administrators as we need to use IE and browse certain sites during this lab

4. Download and install Java Runtime 7 (32-bit) from www.java.com
5. Download and install XML notepad from http://xmlnotepad.codeplex.com/
6. Click start – run
7. Type sysdm.cpl and hit enter
8. Click on Advanced – Environment variables
9. Click New to create a new system environment variable
10. Type JAVA_HOME for the name and the value as c:\program files (x86)\java\jre7 folder.

11. Create a normal user account named shibsvc in AD in the users container for Shibboleth to use. It will be used for LDAP queries against AD by Shibboleth later.
12. Download and Install the msi file for Shibboleth Identity Provider at http://shibboleth.net


13. During the install use the options below
i. DNS Name of Host = sts.sub2.<your-alias>.msftonlinerepro.com
ii. Browser facing port = leave as default (443)
iii. Shibboleth facing port = leave as default (8443)
iv. AD domain IDP to serve = leave as default (<your-alias>O365.local)
v. Scope IDP will assert = accept default for AD domain(<your-alias>O365.local)
vi. AD Server/Port = use port 389 and <your-alias>DC.<your-alias>O365.local
vii. Credentials = shibsvc/password


14. Click Next and complete the install
15. Click Finish when prompted
16. Open the logging.xml from C:\Program Files (x86)\Internet2\Shib2IdP\conf using XML Notepad
17. Save the file unchanged as is. This saves the file with indentations that make using notepad against the file easier.
18. Open the file using notepad
19. Uncomment the protocol message section as shown below by deleting the “<!--” and the “-- >”

20. Open the login.config in “C:\Program Files (x86)\Internet2\Shib2IdP\conf” using notepad
21. Replace tls=”true” with tls=”false”

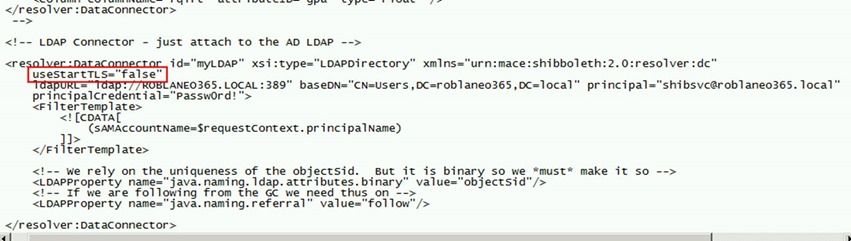
22. Open the attribute-resolver.xml in “C:\Program Files (x86)\Internet2\Shib2IdP\conf”
23. Replace useStartTLS=”true” with useStartTLS=”false” in resolver:dataconnector for myLDAP as per below.
We are disabling TLS as it’s simpler than configuring the DC for LDAPS and importing a root cert to the java key store to ensure cert revocation checks work.
24. Restart service “tomcat6”
i. Open https://localhost in IE. Click continue on certificate warning (this is expected as it’s a self-signed cert generated by the installer)
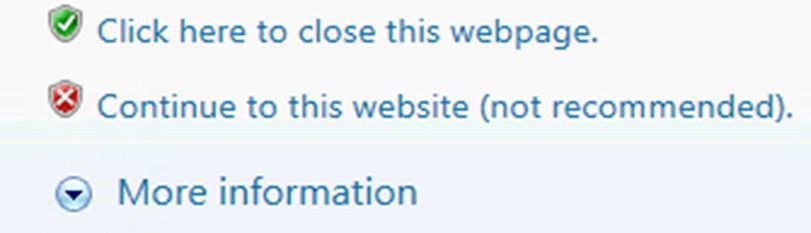
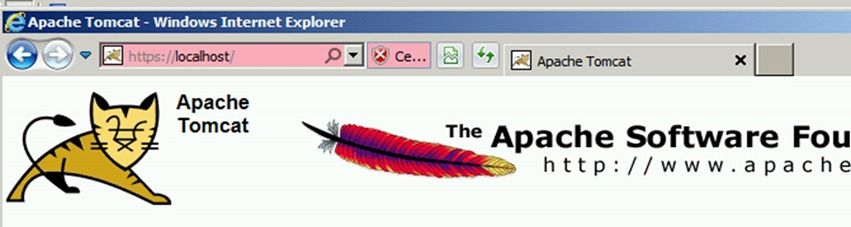
2. Open https://sts.sub2.<your-alias>.msftonlinerepro.com . Click continue on certificate warning (this is expected as it’s a self-signed cert generated by the installer). should open Apache Tomcat front page after certificate warning.
3. Open https://localhost/idp/status . Click continue on certificate warning (this is expected as it’s a self-signed cert generated by the installer) .should show idp status after certificate warning.

25. Copy the PFX obtained earlier for *.<your-alias>.msftonlinerepro.com cert from http://ssladmin to C:\Program Files (x86)\Internet2\Shib2IdP\credentials folder.
26. Rename the file to shibcert.pfx in lowercase.
27. Open server.xml in C:\Program Files (x86)\Internet2\CaptiveTomcat 6.0\conf\ in notepad.
28. Replace the connector for port 443 text with the content from configuressl.txt as per below. Replace <insertpfxpasswordhere> with the PFX password you chose during the PFX export.

This PFX and enclosed cert with chain to trusted root is used for SSL connection establishment only. We have a self-signed cert the installer created that we will continue to use for token signing.
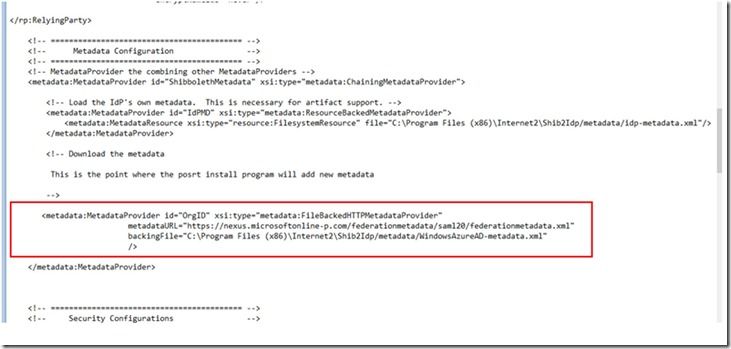
29. Open the relying-party.xml in C:\Program Files (x86)\Internet2\Shib2IdP\conf
30. Add the content from configurerp.txt beneath the </rp:DefaultRelyingParty> line as shown below. Replace the <your-alias> references in the copied text as applicable to your environment.

31. Replace the metadata provider configuration for Testshib with OrgID as shown below using text from pointtometadata.txt. Note where the content is located and ensure it’s placed exactly in the same place.
32. Open the attribute-resolver.xml in c:\Program Files (x86)\Internet2\Shib2Idp\Conf
33. Add the text from add2attributedefinitions .txt before the data connectors are defined as shown below.

34. Further down in the same file add the content from convertobjectguidtobase64 . txt beneath the java.naming.referral setting in the myLDAP Data Conenctor as shown below.

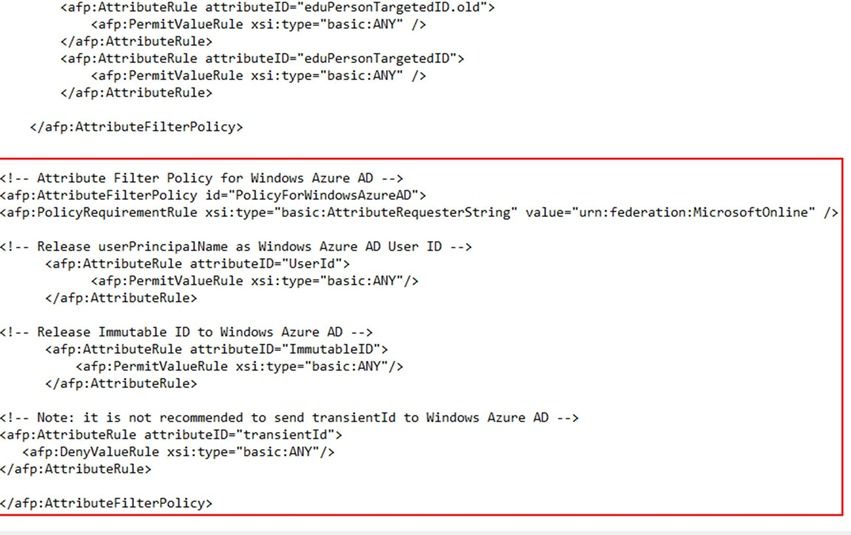
35. Modify the attribute-filter.xml in c :\Program Files (x86)\Internet2\Shib2Idp\Conf by pasting the content from addfilterattributesfororgid .txt at the end of the attribute filter policy releasetoanyone as shown below.
36. Add an entry for sts.sub2.<your-alias>.msftonlinerepro.com to point to 127.0.0.1 on <your-alias>SHB in the hosts file in c:\windows\system32\drivers\etc
37. Restart service “Tomcat6”
i. open https://sts.sub2.<your-alias>.msftonlinerepro.com (should open Apache Tomcat front page without certificate warning)
ii. open https://localhost/idp/status (should show idp status after certificate warning)
38. Install .Net Framework 3.5.1 feature by itself without sub features
39. Install Microsoft Online Services Sign-In Assistant (64-bit) and Microsoft Online Services Module for Windows PowerShell (64-bit version) from http://aka.ms/aadposh
40. Open the Windows Azure Active Directory Module for Windows PowerShell using desktop shortcut
41. Type connect-msolservice and hit enter
42. Enter the global administrator credentials for your tenant (e.g. administrator@<your-alias>.onmicrosoft.com )
43. Modify the powershell code from powershellcodetofederatedomainwithshib .txt to replace the <your-alias> references as appropriate and save the text file.
44. Paste the text file content into the powershell launched earlier.
45. Open http://portal.microsoftonline.com or http://outlook.com/owa/sub2.<your-alias>.msftonlinerepro.com
i. Your browser is redirected to your Shibboleth IDP server
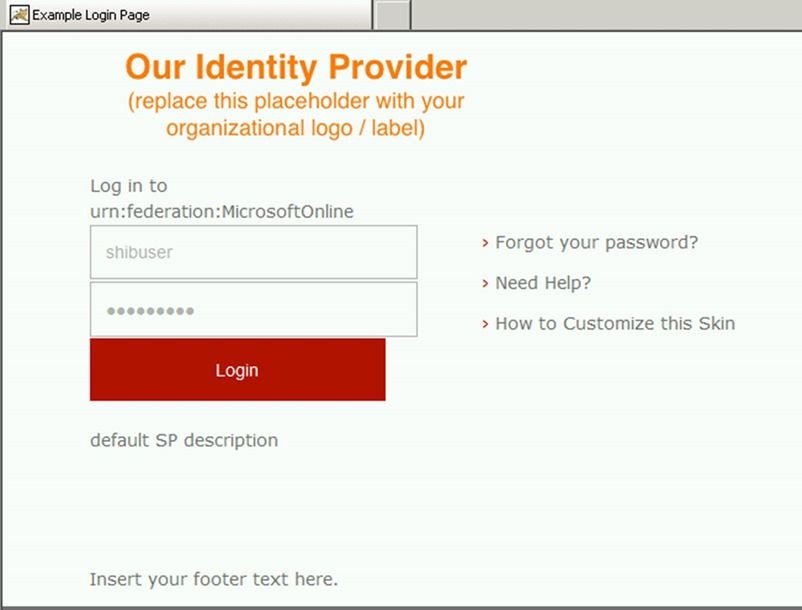
ii. Type your test user account’s username (not the UPN) and password to Shibboleth IDP login page. This would be a user account that was created in the users container with the @sub2.<your-alias>.msftonlinerepro.com UPN suffix
3. Office 365 portal opens after successful authentication
46. Open server.xml in C:\Program Files (x86)\Internet2\CaptiveTomcat 6.0\conf \ and add the content from realmforecpauth.txt beneath the userdatabaserealm as shown below. Please replace the <your-alias> references as appropriate.

47. Open C:\Program Files (x86)\Internet2\Shib2IdPInstall\src\main\webapp\WEB-INF\web.xml using XML notepad
48. Save the file as is in XML notepad and close it.
49. Now re-open it in Notepad. The previous save changed the file indentation (not the content) to make it easier to view in notepad.
50. Paste the content from ecpprofilehandlerauth.txt beneath as shown below. Please uncomment the BASIC auth method as shown below.

51. Open an elevated command prompt as administrator and run Shibboleth’s install script

52. Restart service “Apache Tomcat”
i. open https://sts.sub2.<your-alias>.msftonlinerepro.com (should open Apache Tomcat front page)
ii. Open https://localhost/idp/status (should show idp status after certificate warning)
iii. Open https://sts.sub2.<your-alias>.msftonlinerepro.com/idp/profile/SAML2/SOAP/ECP . HTTP Basic Authentication should be required. HTTP 500 error or similar is expected even after successful authentication.
iv. Open portal.microsoftonline.com and use Shibboleth authentication. Office 365 should open without errors.
53. Launch Outlook and configure your mail account manually for IMAP/SMTP. See http://help.outlook.com/en-gb/140/gg312147.aspx to determine mailserver settings
Troubleshooting:
Values and settings are case sensitive. Please be careful when editing XML files
Shibboleth adds firewall rules to the current active profile for ports 443 and 8443. But if there is more than one profile active, you may need to change those rules or disable the firewall for all profiles entirely for testing purposes. You should not need to do this in this lab if you follow the steps exactly as outlined.
Copy/paste from Outlook/Browsers will often bring characters that are invalid. Use text files as source instead of Outlook/Browsers.
Use Apache and Shibboleth logs to determine if there are any errors
Apache = c:\program files (x86)\Internet2\CaptiveTomcat6.0\logs
Shibboleth = c:\program files (x86)\Internet2\Shib2Idp\logs
·Netmon and liveidtool are useful if there are no syntax errors in the XML and the service itself is started and running
TMG monitoring is also worth investigating if troubleshooting connections from the internet
Installing Shibboleth on Ubuntu
REMEMBER: Linux is case sensitive, so all commands must closely follow the case used in this document
Update box with latest libraries/packages
Sudo apt-get update
Sudo apt-get upgrade
Install Java
sudo apt-get install openjdk-8-jdk
Download latest version of Jetty
Go to http://download.eclipse.org/jetty/ in a web browser, and copy the hyperlink for .tgz under the stable branch
Use this in the following commands:
Cd /tmp
Wget http://download.eclipse.org/jetty/stable-9/dist/jetty-distribution-9.3.5.v20151012.tar.gz
Unzip and rename directory
Sudo tar zxvf jetty-distribution-9.3.5.v20151012.tar.gz -C /opt/
sudo mv jetty-distribution-9.3.5.v20151012/ /opt/jetty
Create service account for Jetty to use
sudo useradd jetty -U -s /bin/false
sudo chown -R jetty:jetty /opt/jetty/
sudo cp /opt/jetty/bin/jetty.sh /etc/init.d/jetty
Jetty Config File
Sudo vi /etc/default/jetty
Add following entries to this file:
JAVA_HOME=/usr/bin/java
JETTY_HOME=/opt/jetty
NO_START=0
JETTY_ARGS=jetty.port=8085
JETTY_HOST=0.0.0.0
JETTY_USER=jetty
Save file (Esc -> :wq if using vi)
Start Jetty and re-install UpStart (problem with Ubuntu 15.10)
Sudo apt-get install upstart-sysv
Sudo servic jetty start
Grab the latest tarball for Shibboleth
Go to https://shibboleth.net/downloads/identity-provider/latest/ in a web browser
Find the .tar.gz file in this directory listing (At time of writing this is shibboleth-identity-provider-3.1.2.tar.gz )
Right-click to copy the hyperlink to this file, it should look similar to the below:
https://shibboleth.net/downloads/identity-provider/latest/shibboleth-identity-provider-3.1.2.tar.gz
Download and unpack tarball
Cd /tmp
Wget https://shibboleth.net/downloads/identity-provider/latest/shibboleth-identity-provider-3.1.2.tar.gz
Tar -zxvf shibboleth-identity-provider-3.1.2.tar.gz
Install Shibboleth
Cd shibboleth-identity-provider-3.1.2/bin
Sudo JAVA_HOME=/usr/lib/jvm/java-8-openjdk-amd64 ./install.sh
Settings during setup
Source Directory: [Press Enter, accept default]
Installation Directory: /opt/shibboleth-idp
Hostname: shibboleth-idp.yourdomain.com
SAML EntityID: Leave default
Attribute Scope: yourdomain.com
TLS Private Key Password: Up to you
Cookie Key Password: Up to you again
Create Container for Shibboleth app within Jetty
sudo mkdir /opt/jetty/webapps/shibboleth
sudo cp -R /tmp/shibboleth-identity-provider-3.1.2/jetty-base/* /opt/jetty/webapps/shibboleth/
sudo rm start.ini
sudo vim start.ini
Paste content below and save file:
--module=server
--module=deploy
--module=annotations
--module=resources
--module=logging
--module=requestlog
--module=servlets
--module=jsp
--module=jstl
--module=ext
--module=plus
# Allows setting Java system properties (-Dname=value)
# and JVM flags (-X, -XX) in this file
# NOTE: spawns child Java process
--exec
# Bypass file validation for the SSL module, to work around a bug in Jetty 9.3.X
--skip-file-validation=ssl
# Uncomment if IdP is installed somewhere other than /opt/shibboleth-idp
-Didp.home=/opt/shibboleth-idp
# Maximum amount of memory that Jetty may use, at least 1G is recommended
# for handling larger (> 25M) metadata files but you will need to test on
# your particular metadata configuration
-Xmx1024m
# Maximum amount of memory allowed for the JVM permanent generation (Java 7 only)
-XX:MaxPermSize=128m
-Djava.io.tmpdir=tmp
-Dorg.eclipse.jetty.LEVEL=DEBUG
Copy ini files
sudo cp ../../../demo-base/start.d/http.ini ./
sudo cp ../../../demo-base/start.d/https.ini ./
sudo cp ../../../demo-base/start.d/ssl.ini ./
Setup SSL
Copy .pem and .key files to Linux server under /home/youraccount using WinSCP
Run command:
openssl pkcs12 -export -in star_overtrax_me_uk.pem -inkey star_overtrax_me_uk.key -out star_overtrax_me_uk.p12
sudo cp star_overtrax_me_uk.p12 /opt/shibboleth-idp/credentials/star_overtrax_me_uk.p12
sudo vim ssl.ini
Add:
jetty.sslContext.keyStorePath=/opt/shibboleth-idp/credentials/idp-browser.p12
jetty.sslContext.keyStoreType=PKCS12
jetty.sslContext.keyStorePassword=thepasswordgoeshere
From < https://wiki.shibboleth.net/confluence/display/IDP30/Jetty93 >
Give jetty user ownership of shibboleth-idp directory
sudo chown -R jetty:jetty /opt/shibboleth-idp
Mod file
sudo vim jetty-ssl-context.xml
Add:
<? xml version="1.0"?>
<!DOCTYPE Configure PUBLIC "-//Jetty//Configure//EN" " http://www.eclipse.org/jetty/configure_9_0.dtd" >
< Configure id="Server" class="org.eclipse.jetty.server.Server">
<!-- ============================================================= -->
<!-- TLS context factory without client auth -->
<!-- ============================================================= -->
< New id="sslContextFactory" class="org.eclipse.jetty.util.ssl.SslContextFactory">
< Set name="KeyStorePath">< Property name="jetty.sslContext.keyStorePath" /></ Set >
< Set name="KeyStoreType">< Property name="jetty.sslContext.keyStoreType" /></ Set >
< Set name="KeyStorePassword">< Property name="jetty.sslContext.keyStorePassword" /></ Set >
<!-- This is a tweak to work around a bug in Jetty when using the PKCS12 keystore type. -->
< Set name="TrustStoreType">< Property name="jetty.sslContext.keyStoreType" /></ Set >
< Set name="EndpointIdentificationAlgorithm"></ Set >
< Set name="NeedClientAuth">false</ Set >
< Set name="WantClientAuth">false</ Set >
< Set name="renegotiationAllowed">false</ Set >
< Set name="useCipherSuitesOrder">true</ Set >
< Set name="IncludeCipherSuites">
< Array type="String">
< Item >TLS_ECDHE.*</ Item >
< Item >TLS_RSA.*</ Item >
</ Array >
</ Set >
< Set name="ExcludeCipherSuites">
< Array type="String">
< Item >.*NULL.*</ Item >
< Item >.*RC4.*</ Item >
< Item >.*MD5.*</ Item >
< Item >.*DES.*</ Item >
< Item >.*DSS.*</ Item >
</ Array >
</ Set >
</ New >
</ Configure >
From < https://wiki.shibboleth.net/confluence/display/IDP30/Jetty93 >
Connecting your Data Science VM to your domain
One of the key requirements of most institutions is the provision of Single Sign On for academics and students. The Data Science VM community have been making a number of enhancements and resources available to make this more straightforward to implement.
You can simply connect your Linux or Windows Data Science Virtual Machine on Azure to the institutions network via an Azure Express route connection.
A huge benefit of this is once the DSVM in connected to your campus you can access data sources SQL database on premise Data Sets or file shares from the Data Science VM. Single Sign on is a huge benefit is that you can now login to the VMs with institutional credentials and even use that for JupyterHub authentication on Linux DSVMs.
Azure Express route setup

ExpressRoute : Dedicated, private, high-throughput network connectivity with on-premises https://azure.microsoft.com/en-us/services/expressroute/?v=17.23h
It is a pretty streamlined process as I went through these steps these steps need to be completed by IT Services/Azure Account Managers.
|
1. Navigate to the Azure Portal http://portal.azure.com 2. Select "Subscriptions" on the navigation sidebar at the left edge of the page. 3. Pick your subscription from the list. 4. Click the access icon near the top-right corner of the subscription details page. 5. Click "Add" at the top of the blade. 6. For step1. choose the "Owner" role from the list. 7. For step 2. search for "MyExpressRoute ARM". Highlight: "MyExpressRoute ARM [WSFED-ENABLED]" in the list then "Select". 8. Click "OK" to finish adding MyExpressRoute to your subscription. 9. [Classic ONLY] Add your institutional administrator as a co-admin to your Subscription in the Legacy Azure Portal. 10. Visit: https://myexpressroute.azurewebsites.net/ to create your Express Route VNET in your subscription. There is a UI that lets you define parameters which will be used use to create a few resources to setup the VNET and peer to peer. More information can be found here: https://docs.microsoft.com/en-us/azure/expressroute/expressroute-faqs |
Once you have your Express route setup, the instructions for getting your DSVM to join your institutional domain or alternatively connect it to an Azure Active Directory Domain.

Joining an Ubuntu Data Science VM to AD
https://github.com/Azure/DataScienceVM/blob/master/Scripts/ActiveDirectory/UbuntuDSVMJoinAD.md
Joining CentOS Data Science VM to AD
https://github.com/Azure/DataScienceVM/blob/master/Scripts/ActiveDirectory/CentOSDSVMJoinAD.md
Joining Windows Data Science VM, to AD
https://github.com/Azure/DataScienceVM/blob/master/Scripts/ActiveDirectory/WindowsDSVMJoinAD.md
Resources
If you have any other scripts to share with community and our user base outside please do fork and submit a pull request on the Data Science VM Github repo found @ https://github.com/Azure/DataScienceVM . You will find some ARM templates, scripts , extensions that may be useful to you already on our Github.
 Microsoft