
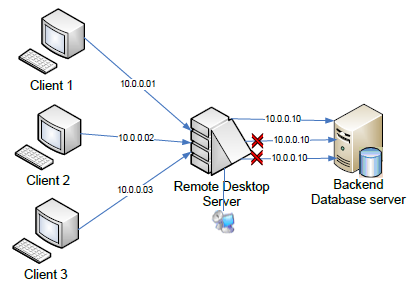
OK, let’s take a quick look at the architecture of the RD IP Virtualization feature. User mode applications using WinSock will be able to get Virtual IP’s – the application itself does not need to be aware of RD IP Virtualization or need to be changed in any way. However, there are some caveats – services in Session 0 will not be virtualized, nor will applications and services running inside the a remote administrator session. In addition, applications that use named pipes or any other mechanism besides sockets will not be virtualized. The RD IP Virtualization Service depends on a valid DHCP Server being active. A pool of static addresses can also be configured. The actual process for assigning the IP Addresses is as follows (the diagram below shows the sequence):
- The RD IP Virtualization Client Layered Service Provider (LSP) intercepts WinSock bind() and connect() calls. It calls the RD IP Virtualization Service and requests IP addresses
- The RD IP Virtualization Service calls into the DHCP client. This call returns either a Machine IP (MIP), Virtual IP (VIP) or an access denied error
-
The RD IP Virtualization Client writes the VIP address to the WTSInfoClass which is returned by WTSQuerySessionInformation().
- In order to determine what users have what IP’s at what time, WTSEnumerateSessions is called to get a list of sessions
- For sessions in the list, WTSQuerySessionInformation is called to get the IP Address. The session is not virtualized if the call fails and GetLastError() returns ERROR_NOT_SUPPORTED or RPC_S_SERVER_UNAVAILABLE
- WTSQuerySessionInformation is also called to retrieve the user name for the session

Now let’s look at how applications get their IP Addresses and what RD IP Virtualization does in each case.
WinSock provides a pluggable Service Provider Infrastructure (SPI) that facilitates the interception of the WinSock API calls. Applications don’t know about the SPI – they make their normal WinSock API calls to get network addresses. Transport Service Providers (TSP) are services that set up the connection or transfer data. There are two different types of TSP – Layered Service Providers, that we mentioned above, that intercept the WinSock API calls, and Base Service Providers (BSP) that implement lower-level protocols such as TCP/IP. Namespace Providers (NSP) are services that associate network addresses with human-friendly names. Since the applications using Namespace Service Providers are also WinSock applications, they are intercepted and assigned VIP’s as well. The diagram below gives you an idea of how this all interacts:

Now that we’ve looked at some of the underlying architecture, let’s take a look at the functional pieces. RD IP Virtualization is installed as part of the Remote Desktop Server Session Host role service, but by default it is set as “Not Enabled”.

To enable IP Virtualization, check the box as shown below, and click on Apply. You can then select if you are going to use Per Session or Per Program mode as well as select which NIC to use to host the Virtualized IP Address.

Important : If your computer has more than one network adapter, you must choose per program. Using per session Remote Desktop IP Virtualization with more than one network adapter installed on the computer is not supported.
Before we wrap up, let’s take a look at how to configure a Static IP Pool for RD IP Virtualization. Normally you would allow your DHCP server to handle the addresses, but if you want to set up a specific set of IP addresses (possibly due to firewall rules etc), here’s how you go about doing that. Remember that these addresses need to be excluded from the list of addresses that your DHCP server can hand out so that you can avoid IP Address conflicts! The basic steps are to turn on Static IP via the registry (there is no UI method to do this), then choose your IP Virtualization mode (per-app or per-session) and add your IP address information. Let’s walk through the process.
The first step is to pop open REGEDIT.EXE and navigate to the HKLM\SYSTEM\CurrentControlSet\Control\TerminalServer\TSAppSrv\VirtualIP key. Once you are at that key, you’ll need to add the following values:
- EnableVirtualIP – set this to a DWORD value of 1
- VirtualMode – set this to a DWORD value of either 0 (per-session mode) or 1 (per-application mode)
- AdapterAddress – set this to a String (REG_SZ) value with the MAC address of Physical Network card that you are using for the IP Address Virtualization
- IPPool – set this to a String (REG_SZ) value of %SystemRoot%\system32\TSVIPool.dll
Once you have these values configured, you’ll need to go in and add the IP Address information. Navigate to HKLM\SYSTEM\CurrentControlSet\Control\TerminalServer\TSAppSrv\VirtualIP\IPPool and create the following values as String (REG_SZ) values:
- Start – the starting IP address for your VIP addresses
- End – the ending IP address for your VIP addresses
- SubnetMask – the subnet mask for your VIP address range
If you chose to set up your server in per-application mode, you will need to add the applications you want to virtualize. You can do this via the UI – ensure that the “Per program” radio button is selected and use the “Add Program” button to add the applications:

OK – that’s it for today’s post. That also wraps up our segment on some of the new Remote Desktop Services features. Tomorrow, Dane Smart will be back with a quick look at AppLocker. Until next time …
| Share this post : |
|
|
|

|

|

|

|

|
// <![CDATA[<br/><br/>// ]]>
 Microsoft