software architecture
85 TopicsSecuring AI Agent Tool Calls in Azure: Identity, Authorization, and Verified Execution
When an agent can use tools, untrusted content can influence requests to access sensitive data or change external systems. A retrieved document might tell the agent to send a file to an external address. An attacker-controlled log field might suggest disabling a security setting. A tool result might redirect the next action. The application must establish who is acting, authorize each requested operation, constrain execution, and verify what happened. System instructions, content filters, and model evaluations help reduce unsafe proposals. Token validation, retrieval permissions, business authorization, execution limits, and disclosure checks govern what the application actually permits. This article uses an Agent Control Loop as a design-review framework for placing those checks at five observable handoffs: Input → Context → Tool Request → Execution → Output Tool results return to Context because they can influence another model decision. They need the same attention to source permissions, provenance, and untrusted content as retrieved documents. The framework should fit the workload. A read-only assistant needs strong retrieval and disclosure checks when it handles sensitive information. A routine transaction may need only service-side authorization and safe retry handling. A delayed, high-impact operation may also need approval, expiry, current-state checks, and recovery procedures. Choose safeguards according to data sensitivity, action scope, reversibility, delay, and the consequence of failure. In this article: Input | Context | Tool Request | Execution | Output | Review questions Guide and test the model's proposals Model behavior remains an important part of the design: Guide the model with system instructions, task boundaries, and a limited tool set. Ground its decisions in permitted sources with provenance metadata. Review observable artifacts such as tool arguments, citations, assumptions, uncertainty, and concise decision summaries. Test behavior with offline evaluations and adversarial regression tests. These measures reduce the likelihood of a poor proposal. The receiving service must still validate its arguments and authorize the requested operation. Authorization also has limits. A request can satisfy business rules while conflicting with the user's intent. Narrow workflow scope, cumulative action limits, and review when consequences justify it help address that remaining risk. Token validation, authorization rules, and execution limits must run outside model-controlled context. Every path to a protected capability—including direct API calls, background jobs, and retries—must pass through the applicable checks. 1. Input: validate identity and enforce request limits Input includes the user's prompt, attachments, conversation state, and request metadata. For an authenticated enterprise workflow, establish the caller's identity before loading protected conversation state or retrieving enterprise data. Validate the token's signature, issuer, audience, and lifetime. Check the expected tenant, client application, and required claims. Derive the acting principal and tenant from validated identity information, and resolve application permissions through trusted server logic. Keep this authorization context separate from model-editable content. A tenant name in a prompt or a role asserted in an attachment must not change the caller's permissions. Apply request-size limits, attachment-type restrictions, rate limits, and relevant data-handling rules before content reaches the model. These checks protect application capacity and reduce avoidable exposure of sensitive content. Microsoft Entra ID can authenticate users and workloads. Azure API Management can enforce token-validation policies, required claims, quotas, and rate limits. Azure AI Content Safety Prompt Shields can add detection for direct prompt attacks. A detection result may trigger rejection, isolation, or additional review. Passing that check does not authorize a later tool call. A missed attack must still encounter the tool service's argument validation and authorization checks. Authentication establishes who submitted the request. It does not establish that the request is accurate, appropriate, or within the caller's business authority. 2. Context: enforce retrieval permissions and preserve provenance Context can contain system instructions, retrieved documents, database records, conversation history, memory, and tool results. These sources have different trust properties. For example, an Azure log record may have authenticated provenance while containing a filename, URI, process argument, or user-agent string chosen by an attacker. The logging service can accurately preserve that value without making it a valid instruction. A registered tool can return the same kind of content. Its response may include attacker-controlled text, unrelated sensitive information, or evidence that contradicts another source. Enforce source permissions before content enters model context. Scope retrieval to the authorized tenant and permitted documents or records. Limit tables, indexes, fields, result counts, and time windows. Construct security filters from trusted identity information, and prevent model-generated queries from removing mandatory restrictions. For Azure AI Search, use supported document-level access controls or security filters enforced by the application. Authentication to the search service alone does not establish permission to read every document in an index. Microsoft documents this distinction in its security-filter guidance. For Azure Monitor and other query tools, constrain the accessible resources and query scope through service permissions and application logic. Query templates should parameterize permitted inputs while preserving mandatory tenant and resource restrictions. Preserve source identifiers, timestamps, classification, and tenant metadata. Keep application instructions separate from retrieved evidence, and label externally influenced text as untrusted data. These labels help the model interpret content; retrieval authorization remains the service's responsibility. Require citations when conclusions depend on retrieved evidence. For consequential decisions, verify that the cited material supports the conclusion and corroborate it against another source or current system state where practical. Prompt Shields can add detection for indirect prompt attacks in document content. Microsoft Purview classification can inform filtering and disclosure decisions where classification is available and integrated into the application. Retrieved content may inform a proposed action. It must not modify the caller's identity, broaden retrieval permissions, or grant authority to another tool. 3. Tool Request: validate arguments and authorize the exact action The model produces an observable request: a tool name, target, and arguments. The receiving service must decide whether that exact request is permitted. Use a narrow tool definition. For example, a refund tool can accept an order identifier and an amount without accepting an arbitrary payment destination or caller-selected authorization limit. The following function-definition fragment describes a workflow for USD refunds. Amounts use integer cents: JSON | Refund tool definition { "name": "issue_refund", "description": "Request a USD refund to the order's original payment method.", "strict": true, "parameters": { "type": "object", "additionalProperties": false, "required": ["order_id", "amount_minor"], "properties": { "order_id": { "type": "string", "description": "The order identifier." }, "amount_minor": { "type": "integer", "description": "The refund amount in USD cents." } } } } The surrounding API format and supported schema constraints depend on the provider and model. Azure's structured-output guidance and OpenAI's guidance document different support for some constraints. Confirm compatibility with the deployment, and enforce all required validation in the receiving service. Here is an illustrative Pydantic v2 validation and authorization fragment. It assumes that principal comes from trusted authentication and permission resolution, and that order is loaded from the authoritative store through a tenant-scoped lookup. Python | Request validation and refund authorization from pydantic import BaseModel, ConfigDict, Field class RefundRequest(BaseModel): model_config = ConfigDict(extra="forbid", strict=True) order_id: str = Field(pattern=r"^ord_[A-Za-z0-9]{12}$") amount_minor: int = Field(gt=0, le=50_000) # USD cents: at most $500 class AuthorizationError(Exception): pass def authorize_refund(request: RefundRequest, principal, order) -> None: if order.tenant_id != principal.tenant_id or order.id != request.order_id: raise AuthorizationError("order is outside the requested scope") if not principal.can_issue_refunds: raise AuthorizationError("caller cannot issue refunds") if order.customer_id != principal.customer_id: raise AuthorizationError("caller does not own the order") if order.currency != "USD": raise AuthorizationError("this workflow supports USD orders only") if not order.is_refundable or order.account_fraud_blocked: raise AuthorizationError("order is not eligible for a refund") if request.amount_minor > principal.refund_limit_usd_minor: raise AuthorizationError("amount exceeds caller authority") if request.amount_minor > order.remaining_refundable_minor: raise AuthorizationError("amount exceeds the refundable balance") The service must parse the incoming arguments with RefundRequest.model_validate(...) before calling this function. The example assumes a customer refund workflow; a support-agent workflow would use its own delegated permissions and order-access rules. The payment destination comes from the authoritative payment record and must satisfy the refund policy. It is not selected from model-generated arguments. These checks do not reserve funds or prevent concurrent refunds. The service must couple authorization to an atomic transaction or conditional reservation so competing requests cannot consume the same refundable balance. For systems that allow partial refunds, the available balance should account for both completed refunds and active reservations. Derive the acting principal and allowed scope from trusted server context. If a tool accepts a target user or tenant, treat that value as an untrusted target selector and authorize it independently. Authenticating a workload also does not establish the authority of the user it represents. A domain service must enforce either the represented user's permissions or an explicitly defined service workflow's authority. An Azure Function, App Service API, or another domain service can perform these checks. An external policy engine can help when rules need independent ownership or consistent reuse. Azure RBAC separately limits which Azure operations the executor's identity can perform. 4. Execution: bind approval, recheck state, and constrain privileges An authorized request can become stale before execution. The caller's permissions may change, a refund balance may shrink, or a resource may be modified while a request waits for approval. For an immediate operation within one transactional system, authorize and apply the change in the same transaction where possible. An external API call introduces a separate failure boundary and may require idempotency and reconciliation. When human approval is required, store an approval record that binds the decision to the exact operation, canonical target, parameters, requester, tenant, and expiry. Validate the approver's authority, and require a new decision if the approved action changes. Before execution, check approval validity where applicable, re-evaluate current authorization, and re-read the state relevant to the operation. Use conditional writes when the target API supports the required concurrency condition. A single-use approval claim prevents approval reuse. It does not by itself prevent duplicate external effects. A worker can submit a payment and crash before recording the result. Where supported, bind a downstream idempotency key to the authorized action and reuse that key for retries. If the outcome is uncertain, reconcile with the downstream system before submitting another operation. Use an executor identity with only the resource scope and API permissions the workflow requires. A separate managed identity is useful when execution needs privileges that the model-facing component should not hold. Restrict outbound destinations and the data that may be sent to each destination. Example: verify an Azure Storage configuration change The following execution fragment changes one Storage account property. It assumes that the service has already loaded a trusted execution record, validated any required approval, and authorized the exact subscription and resource target. The expected state comes from that record. Python | Azure Storage execution and verification import os from azure.identity import ManagedIdentityCredential from azure.mgmt.storage import StorageManagementClient from azure.mgmt.storage.models import StorageAccountUpdateParameters def disable_public_network_access(command): client = StorageManagementClient( credential=ManagedIdentityCredential( client_id=os.environ["EXECUTOR_MANAGED_IDENTITY_CLIENT_ID"] ), subscription_id=command.subscription_id, ) before = client.storage_accounts.get_properties( command.resource_group, command.account_name, ) if before.public_network_access != command.expected_public_network_access: raise RuntimeError("resource state changed after authorization") client.storage_accounts.update( command.resource_group, command.account_name, StorageAccountUpdateParameters(public_network_access="Disabled"), ) after = client.storage_accounts.get_properties( command.resource_group, command.account_name, ) return { "operation": "storage.disable_public_network_access", "target": after.id, "status": ( "configuration_verified" if after.public_network_access == "Disabled" else "verification_pending" ), "observed_public_network_access": after.public_network_access, } This verifies the property reported by the management API. It does not establish that every access path is blocked. Azure documents that previously configured trusted-service and resource-instance exceptions can remain effective, and that Storage firewall restrictions apply to data-plane operations. If the objective is containment, verification must also account for the relevant exceptions and access paths. See Storage network-security limitations. The Storage Accounts Update reference for API version 2025-08-01 does not document an If-Match header. The initial read can detect a difference from the expected state, but another writer can still change the resource between that read and the update. The example does not provide an atomic compare-and-update operation. If verification remains pending or a network failure obscures the result, retain the action record and reconcile current state. Do not report verified completion or blindly resubmit a new action. The Azure services involved each have a specific role: Managed identities provide credentials without embedding application secrets. Azure RBAC limits resource scope and permitted operations. A broad resource-write permission may still allow more property changes than this function exposes. Azure Policy deny rules can reject covered resource changes that violate configured policies. Private endpoints and egress restrictions constrain connectivity; application logic must still authorize destinations and payloads. Durable Functions can coordinate an approval wait and execution workflow. Cosmos DB conditional writes can protect an approval claim or action record against competing updates. The domain service remains responsible for deciding whether the business action is permitted. Workflow coordination and restricted credentials do not replace that decision. 5. Output: verify outcomes, authorize disclosure, and record evidence Output includes the tool result returned to the model, the final user response, and operational evidence. Each has a different audience and disclosure policy. Keep separate records of what the model requested, what the service authorized, what a human approved when required, what the downstream API returned, and what verification subsequently observed. A successful API response may describe an intermediate state. A refund may be accepted but not settled. A message may be queued but not delivered. A resource property may be updated while the broader containment objective remains unverified. Define the postcondition for the workflow and report the state actually observed. Use explicit statuses such as submitted, pending verification, completed, failed, or outcome unknown. For delayed outcomes, retain the action identifier and update its status as evidence becomes available. Authorize disclosure before returning data to the model or user. Apply equivalent checks before tools transmit data to another service. A response filter cannot recover information already sent in an outbound tool request. Remove secrets and unrelated personal or tenant data from tool responses, final answers, and telemetry. Collect the identifiers, decision reasons, timestamps, and verification results needed to investigate the action without retaining unrestricted prompts or credentials. Read target state through the relevant API and correlate the result with Azure Monitor or Application Insights telemetry. Microsoft Sentinel can consume the evidence when the workflow supports security operations. Use access-controlled or immutable records where audit requirements justify them. Recovery must reflect the consequence of the action. Retrying an idempotent evidence write can be appropriate. Automatically reversing a containment action because a later annotation failed can create a new security problem. Preserve partial failures and uncertain outcomes so operators can make an informed recovery decision. Logs record observations. They do not establish every aspect of the real-world outcome. State what was verified, when it was observed, and what remains unresolved. Review the five handoffs For an agentic application, ask: Input: Which token checks establish the caller, and which request limits apply? Context: Which retrieval permissions restrict the evidence, and how are its source and trust represented? Tool Request: Which argument checks and business rules authorize this operation, target, amount, and acting principal? Execution: Are approval and authorization still valid, how are competing actions and retries handled, and what can the executor change or transmit? Output: Which postcondition was observed, who may receive the result, and what evidence remains available? Continue improving the model's instructions, grounding, and evaluations. At each handoff, make the responsible service and its checks explicit. The model proposes; trusted services validate requests, authorize actions, constrain execution, and verify outcomes.Distributing Agents to Microsoft Teams and Microsoft 365 Copilot Part 4/5
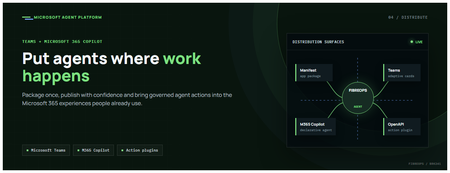
This is the fourth post in our series on the Microsoft agent platform. We cover the Distribute in M365 pillar — publishing your agents to Microsoft Teams and Microsoft 365 Copilot so they reach users where they already work. All examples reference the FibreOps repository, demonstrated at Microsoft Build BRK241. The Distribution Story Building a great agent is only half the challenge. The other half is getting it into the hands of users without asking them to learn a new tool, visit a new URL, or change their workflow. Microsoft 365 Copilot and Microsoft Teams are where enterprise users already spend their day, making them the natural distribution surface for agents. With the GA release, publishing an agent to Teams and M365 Copilot is a single command. No separate app registration portal, no manual manifest assembly, no multi-step approval workflow for development and testing. Publishing to Microsoft 365 Copilot (GA) FibreOps ships as a declarative agent + action plugin ready for sideload. A single CLI command produces the complete package: python -m fibreops.demo publish-m365 --out dist/m365 # Output: # ✓ wrote dist/m365/declarativeAgent.json # ✓ wrote dist/m365/fibreops-action.json # ✓ wrote dist/m365/manifest.json # ✓ wrote dist/m365/color.png (192x192) # ✓ wrote dist/m365/outline.png ( 32x32) # ✓ wrote dist/m365/fibreops-copilot.zip What Gets Generated File Purpose declarativeAgent.json Defines the agent's persona, capabilities, and conversation starters for M365 Copilot fibreops-action.json Action plugin that proxies tool calls to the deployed FastAPI backend via OpenAPI manifest.json Teams app manifest with publisher metadata, permissions, and capabilities color.png / outline.png App icons for Teams and M365 surfaces fibreops-copilot.zip Ready-to-upload package for Teams Admin Center Configuration Set the base URL to your deployed FastAPI app before publishing — the action plugin uses this to resolve the OpenAPI runtime: # Set the public HTTPS hostname of the deployed FastAPI app $env:M365_ACTION_BASE_URL = "https://fibreops-demo.azurewebsites.net" # Optional: customise publisher metadata $env:M365_PUBLISHER_NAME = "Contoso Network Operations" $env:M365_PUBLISHER_WEBSITE = "https://contoso.com/noc" # Generate the package python -m fibreops.demo publish-m365 --out dist/m365 Environment Variable Purpose M365_ACTION_BASE_URL Public HTTPS root for the FastAPI /openapi.json (e.g., Container Apps FQDN) M365_APP_ID Override the generated Teams app GUID (default: deterministic per repo) M365_PUBLISHER_NAME Publisher name shown in M365 Admin Center M365_PUBLISHER_WEBSITE Publisher website link Uploading the Package Upload the generated fibreops-copilot.zip through either path: Teams Admin Center → Manage apps → Upload new app M365 Admin Center → Integrated apps → Upload custom apps Once uploaded, the declarative agent: Inherits the publisher metadata you configured Advertises conversation starters from the FibreOps deck (e.g., "What is the current outage status?", "Dispatch an engineer to FN-LDN-001") Proxies tool calls to the deployed FastAPI app via the action plugin Appears in Microsoft 365 Copilot as a specialised agent users can invoke How Declarative Agents Work A declarative agent in Microsoft 365 Copilot is defined by metadata rather than code running in the M365 surface. The intelligence lives in your backend — Copilot handles the conversational UX, tool orchestration schema, and user authentication. The flow: User invokes the agent in Microsoft 365 Copilot or Teams Copilot renders conversation starters and accepts natural language input When the agent needs to act, Copilot calls the action plugin (your OpenAPI endpoint) Your FastAPI backend processes the request using the full agent pipeline Results return to the user in the Copilot/Teams UX This architecture means your agent logic stays in one place — the backend. The M365 surface is purely a distribution and interaction layer. Action Plugins and OpenAPI The action plugin ( fibreops-action.json ) references your FastAPI app's /openapi.json endpoint. FibreOps exposes a JSON API that the action plugin can call: /api/runs — List and query agent runs /api/optimiser — Get optimizer scores and suggestions /sdk/chat — Natural language interaction with the agent system /healthz — Liveness probe Because FastAPI auto-generates OpenAPI schemas from your typed Python endpoints, the action plugin gets accurate parameter descriptions, response schemas, and error codes without any manual specification work. Publishing as Autopilots (Public Preview) Autopilots take distribution one step further — agents that operate autonomously without requiring a user to initiate each interaction. An Autopilot can: React to events (e.g., a critical telemetry signal) without human initiation Take actions within defined guardrails Notify users only when human intervention is needed Operate continuously across Microsoft 365 surfaces For FibreOps, an Autopilot would monitor the Event Hub stream continuously and only surface to the NOC team when an incident exceeds automated resolution capability — a fully autonomous operations agent. Teams Adaptive Cards FibreOps posts rich Adaptive Card notifications to Microsoft Teams throughout the agent pipeline. This is separate from the declarative agent — it is a push notification channel for real-time operational awareness. # The NetOps agent posts an outage notice via Incoming Webhook def post_outage_notice(incident_id, node_id, severity, summary, engineer=None): card = { "type": "AdaptiveCard", "body": [ {"type": "TextBlock", "text": f"🚨 Outage: {node_id}", "weight": "Bolder", "size": "Large"}, {"type": "FactSet", "facts": [ {"title": "Severity", "value": severity.upper()}, {"title": "Incident", "value": incident_id}, {"title": "Summary", "value": summary}, ]}, ], "actions": [ {"type": "Action.OpenUrl", "title": "View in NOC Console", "url": f"{base_url}/runs/{incident_id}"} ] } # POST to Teams webhook or append to outbox for offline mode ... If TEAMS_WEBHOOK_URL is not configured, cards are appended to state/teams_outbox.jsonl for review in the NOC console's Teams panel. End-to-End: From Code to Copilot Here is the complete flow from development to distribution: Build — Develop agents with Microsoft Agent Framework, test locally with python -m fibreops.demo --backend local Publish agents — python -m fibreops.demo publish creates hosted Prompt Agents in Foundry Deploy infrastructure — azd up provisions App Service, ACR, Event Hub, Key Vault, and Application Insights Deploy hosted agent — azd env set FIBREOPS_DEPLOY_HOSTED true && azd up Generate M365 package — python -m fibreops.demo publish-m365 --out dist/m365 Upload to Teams — Upload fibreops-copilot.zip via Teams Admin Center Users interact — The agent is now available in Microsoft 365 Copilot and Teams Security Considerations Managed Identity — The deployed app uses system-assigned managed identity for all Azure service access. No secrets in code. Least privilege — Each role grant is scoped to the minimum required (Event Hubs Data Owner, Key Vault Secrets User, AcrPull, Azure AI Developer). Authentication — The M365 Copilot surface handles user authentication; your backend receives authenticated requests. Guardrails — Autopilots operate within defined boundaries; human-in-the-loop escalation is built into the Routine and agent decision logic. Key Takeaways Publishing to Teams and M365 Copilot is GA — a single command generates the complete package. Declarative agents separate distribution (M365) from intelligence (your backend). Action plugins leverage your existing FastAPI OpenAPI schema — no manual specification needed. Autopilots (Public Preview) enable fully autonomous operation within guardrails. Adaptive Cards provide real-time push notifications alongside the conversational agent surface. The same backend serves the NOC console, the Copilot SDK, and the M365 declarative agent. Next Steps Explore the FibreOps repository — try python -m fibreops.demo publish-m365 Microsoft 365 Copilot extensibility documentation Next in this series: Voice Live and Observability for Production Agent SystemsBuilding Autonomous Agents with Microsoft Agent Framework and GitHub Copilot SDK Part 2/5
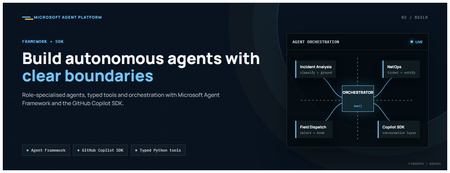
This is the second post in our series on the Microsoft agent platform. Here we dive deep into building autonomous agents, the development experience, the Microsoft Agent Framework, tool design patterns, and how the GitHub Copilot SDK brings conversational AI to your agent system. All examples reference the FibreOps repository, an autonomous fibre outage response system demonstrated at Microsoft Build BRK241. The Microsoft Agent Framework The Microsoft Agent Framework (now GA) provides a unified programming model for building agents. It supports multiple backends through a single .run() contract: Hosted — FoundryAgent connected to a Prompt Agent published to Microsoft Foundry Agent Service. Foundry — Agent + FoundryChatClient with the definition resolved locally (ideal for prompt iteration). Local — Deterministic LocalAgent for offline development and testing. This design means your orchestration code never changes regardless of where the agent runs. The factory pattern in FibreOps selects the backend at startup: # src/fibreops/agents/factory.py — simplified from agent_framework_foundry import FoundryAgent from agent_framework import Agent, FoundryChatClient def build_agent(role: str, backend: str, config: Config): if backend == "hosted": return FoundryAgent(agent_id=config.foundry_agents[role]) elif backend == "foundry": return Agent( instructions=get_instructions(role), chat_client=FoundryChatClient(endpoint=config.endpoint), tools=get_tools(role), ) else: return LocalAgent(role=role) Set FIBREOPS_AGENT_BACKEND to override the backend, or leave it as auto for intelligent detection. Designing Role-Specialised Agents FibreOps demonstrates a key pattern: role specialisation. Rather than one monolithic agent, the system uses three focused agents, each with a clear responsibility boundary: Agent Role Tools Available IncidentAnalysisAgent Classify severity, find root cause, retrieve SOP Knowledge (SOPs + topology), Web IQ, Work IQ NetOpsCoordinatorAgent File D365 incident, post Teams notice Ticketing, Teams, Memory FieldDispatchAgent Select engineer, book resource, update team Dispatch, Teams, Voice Why Role Specialisation? Focused system prompts — Each agent has a tightly scoped instruction set, reducing hallucination and improving reliability. Independent evaluation — You can score each agent separately against role-specific criteria. Parallel development — Teams can iterate on agents independently. Selective upgrade — Swap one agent's model or implementation without touching others. Tool Design: Typed Python Functions Tools in the Microsoft Agent Framework are typed Python functions that the runtime supplies to the hosted agent definition. FibreOps demonstrates several tool categories: Knowledge Tools # src/fibreops/tools/knowledge.py — simplified def sop_lookup(node_id: str, signal_type: str) -> dict: """Retrieve the Standard Operating Procedure for a given signal type. Args: node_id: The fibre node identifier (e.g., FN-LDN-001) signal_type: The type of signal (loss_of_light, high_ber, signal_degradation) Returns: SOP with steps, escalation path, and estimated resolution time. """ # Load from local markdown SOPs or Foundry IQ ... def web_iq_search(query: str, *, limit: int = 5) -> list[dict]: """Search public web for context relevant to the incident. Grounding against roadworks, weather, power outages, splice guidance. Falls back to deterministic fixtures when endpoint is unset. """ ... def work_iq_search(query: str, *, limit: int = 5) -> list[dict]: """Search enterprise knowledge for context relevant to the incident. Site surveys, SLA tiers, competency matrix, MTTR trends. """ ... Integration Tools # src/fibreops/tools/teams.py — simplified def post_outage_notice( incident_id: str, node_id: str, severity: str, summary: str, engineer: str | None = None, ) -> dict: """Post an Adaptive Card outage notice to the configured Teams channel. If TEAMS_WEBHOOK_URL is not set, appends to state/teams_outbox.jsonl for offline review. """ card = build_adaptive_card(incident_id, node_id, severity, summary, engineer) if config.teams_webhook_url: requests.post(config.teams_webhook_url, json=card) else: append_to_outbox(card) return {"status": "posted", "incident_id": incident_id} Design Principles for Agent Tools Typed parameters with docstrings — The runtime uses type hints and docstrings to generate the tool schema for the LLM. Graceful degradation — Every tool works offline by falling back to local fixtures or file-based state. Idempotent where possible — Tools that create resources return existing records if called with the same parameters. Observable — Every tool invocation emits an OpenTelemetry span for tracing and debugging. The Orchestrator Pattern The orchestrator drives signals through the agent pipeline. It is deliberately simple — a linear flow with error handling: # src/fibreops/orchestrator.py — simplified async def handle_signal(signal: TelemetrySignal) -> RunResult: """Process a telemetry signal through the agent pipeline.""" # Stage 1: Incident Analysis analysis = await incident_agent.run( f"Analyse this signal: {signal.model_dump_json()}" ) # Stage 2: NetOps Coordination coordination = await netops_agent.run( f"Coordinate response for: {analysis.summary}" ) # Stage 3: Field Dispatch dispatch = await dispatch_agent.run( f"Dispatch engineer for incident: {coordination.incident_id}" ) return RunResult( signal=signal, analysis=analysis, coordination=coordination, dispatch=dispatch, ) The orchestrator honours the same contract regardless of backend — hosted , foundry , or local — because all backends implement await agent.run(prompt) . GitHub Copilot SDK Integration (GA) The GitHub Copilot SDK enables conversational interaction with your agent system. FibreOps implements FibreOpsCopilotClient with the same interface as github/copilot-sdk : # src/fibreops/sdk/__init__.py — simplified from fibreops.sdk.client import FibreOpsCopilotClient client = FibreOpsCopilotClient() session = client.create_session() # Query agent status response = session.send_and_wait("status") print(response.text) # Human-readable summary print(response.data) # Structured JSON # Inject a telemetry signal via conversation response = session.send_and_wait(json.dumps({ "signal_id": "sig-demo", "node_id": "FN-LDN-001", "signal_type": "loss_of_light", "severity": "critical" })) The adapter routes prompts by shape: JSON signal-shaped dicts — Forwarded to the orchestrator for processing. Free-form text — Answered by a deterministic responder ( help , status , nodes , engineers , optimiser , dispatch ). Drive it from the terminal: python -m fibreops.demo chat "help" python -m fibreops.demo chat "status" python -m fibreops.demo chat '{"signal_id":"sig-demo","node_id":"FN-LDN-001","signal_type":"loss_of_light","severity":"critical"}' Or hit the embedded HTTP endpoint when the NOC console is running: Invoke-RestMethod -Method Post http://127.0.0.1:8800/sdk/chat -Body '{"prompt":"status"}' -ContentType application/json Development Workflow with Foundry Toolkit for VS Code The Foundry Toolkit for VS Code provides an integrated development experience: Author prompts — Edit system instructions with live preview and token counting. Test locally — Run against the foundry backend with FoundryChatClient pointing at your development model. Iterate fast — The foundry backend resolves definitions locally, so prompt changes take effect immediately without republishing. Publish when ready — python -m fibreops.demo publish creates hosted Prompt Agents in Foundry. Multi-Model Support The Microsoft Agent Framework supports multiple models. FibreOps defaults to gpt-4.1-mini (the model available in most demo Foundry accounts), but any chat-completions deployment works: # .env AZURE_AI_MODEL_DEPLOYMENT=gpt-4.1-mini # or gpt-4o-mini, gpt-4o, gpt-4.1 The framework also supports Claude Code connectors and Magentic-One for multi-agent collaboration scenarios. Testing Strategy FibreOps demonstrates a layered testing approach: Unit tests — Test tools in isolation with mocked dependencies. Local backend tests — Run the full pipeline with LocalAgent for deterministic assertions. Integration tests — Run against real Foundry agents with pytest -q . Rubric evaluation — The optimizer scores every run against defined criteria. # Run the test suite .\.venv\Scripts\python.exe -m pytest -q Key Takeaways The Microsoft Agent Framework provides a unified .run() contract across hosted, foundry, and local backends. Role specialisation keeps agents focused, testable, and independently evolvable. Tools are typed Python functions with docstrings — the runtime generates schemas automatically. The GitHub Copilot SDK (GA) enables conversational interaction with any agent system. Graceful degradation means the entire system works offline for development. The factory pattern lets you switch backends without changing orchestration code. Next Steps Clone the FibreOps repository and run python -m fibreops.demo --signals 3 Microsoft Agent Framework documentation Next in this series: Running Hosted Agents in Microsoft Foundry Agent ServiceRound Table: Building Browser-Capable Agents with the Browser Automation Tool
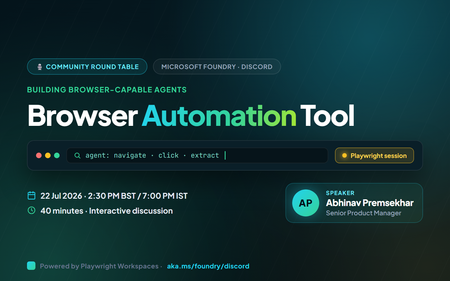
Some of the most valuable work still lives inside a browser: booking a class, pulling a figure off a dashboard, filling in a portal form, gathering research across a dozen tabs. These are exactly the tasks people wish an agent could just do. On 22 July 2026 at 2:30 PM BST (7:00 PM IST), the Microsoft Foundry community is running a 40‑minute Discord round table on the Browser Automation tool : how how it helps agents complete real browser workflows, where you see risk or friction, and what samples, docs, and product improvements would help you adopt it. This is a discussion, not a slideshow. Bring your real projects : the the web workflows you'd love to hand off, and the guardrails you'd want first. Join us in the Microsoft Foundry Discord community. Please arrive at the scheduled time for a quick tech check. Event at a glance What: Microsoft Foundry Discord Community Round Table : Building Browser-Capable Agents with the Browser Automation Tool When: 22 July 2026, 2:30 PM BST / 7:00 PM IST (40 minutes) Where: https://aka.ms/foundry/discord Event link https://discord.gg/Z8JZsrP5P5?event=1527676149264679013 Format: Interactive discussion : voice and chat, live polls, and a short prioritisation exercise voice and chat, live polls, and a short prioritisation exercise Who it's for: AI engineers and developers building agents that need to act on the web Opening question we'll start with: "What browser-based task would you love an AI agent to automate for you today?" The problem: the last mile of automation still runs in a browser Most real-world workflows eventually hit a website with no clean API , such as a supplier portal, an internal admin console, a booking page, or a legacy dashboard a supplier portal, an internal admin console, a booking page, a legacy dashboard. Traditional scripting can automate these, but selectors break, pages change, and every new site means another brittle script to maintain. What developers actually want is an agent that can look at a page, decide what to do, and do it : navigate, read, click, type, and hand back a structured result navigate, read, click, type, and hand back a structured result. That's the gap the Browser Automation tool in Microsoft Foundry is built to close , and doing it responsibly and doing it responsibly, with the right safeguards, is a big part of why we want your feedback. What is the Browser Automation tool? The Browser Automation Tool (BAT) gives Foundry agents the ability to drive a real browser to complete web workflows. It's available as an MCP tool, and it uses Playwright Workspaces , a generally available, cloud-scale service, a generally available, cloud-scale service : navigating, clicking at coordinates, typing, and applying filters as its headless browser infrastructure. When an agent gets a request, Foundry spins up an isolated, sandboxed browser session per interaction, so each run is private and segregated. How agents actually interact with a page BAT runs a perception–action loop. The model receives the current state of the page (including screenshots), decides the next action, and BAT executes it in the sandbox using Playwright and real oversight navigating, clicking at coordinates, typing, applying filters. After each action, BAT captures the updated state and sends it back to the model, repeating until the goal is met or the user stops. Because the model can parse HTML into a DOM, it can reason about the page rather than follow a fixed script. It also supports multi-turn conversations, so you can refine a request mid-flow to complete form-filling or scraping scenarios. Built for real use : watch the automation happen in real time for debugging. and real oversight Live View : a human-in-the-loop override for ambiguous or sensitive steps. watch the automation happen in real time for debugging. Take Control : each interaction gets its own sandboxed browser. a human-in-the-loop override for ambiguous or sensitive steps. Isolated sessions : for reliability, optimisation, and audit. each interaction gets its own sandboxed browser. Built-in observability : for internal systems (private preview). for reliability, optimisation, and audit. Private website browsing : Python, C#, JavaScript, Java, and the REST API. for internal systems (private preview). Broad SDK support , and the agent can make mistakes or be misled by malicious page content Python, C#, JavaScript, Java, and the REST API. A word on responsible use. BAT is powerful precisely because an AI can use credentials you share with it to reach email, financial, enterprise, or social accounts , watching for and the agent can make mistakes or be misled by malicious page content. You're responsible for reviewing your applications, scoping which credentials you provide, and adding your own mitigations. See the Foundry Agent Service transparency note. This is exactly the kind of trade-off we want to talk through together. Example scenario A user asks: "Report the year-to-date percent change of Microsoft's stock price." The agent navigates to a finance site, enters MSFT in the search bar, opens the stock page, clicks the YTD view on the chart, reads the value, and returns a clean, structured answer ; that's the no bespoke scraper, no hard-coded selectors, and a full trace of what it did. Discussion prompt: "Where would browser automation fit into your current projects or workflows?" How setup works (the short version) You'll want to understand the wiring before you scale, so it's worth a look ahead of the session. There are two moving parts: Create a Playwright Workspace in the Azure portal, enable the access token auth method, and grab the wss:// browser endpoint. Give your project identity a Contributor (or custom) role on the workspace. Connect the tool in Foundry under Build > Tools: create a toolbox, add Browser Automation, point it at your Playwright workspace and auth type, and publish. Copy the Project connection ID from the tool's details page : how agents interact with the web, example use cases, and responsible use. that's the BROWSER_CONNECTION_ID in your code. What we'll cover in the 40 minutes Welcome & opening question (0:00–0:03) : navigate, gather, interact, and return a structured result, end to end. the browser task you'd most love to automate. What is Browser Automation (0:03–0:07) : the workflows you're building, public vs. internal targets, and where you'd pick automation over scripting. how agents interact with the web, example use cases, and responsible use. Scenario walkthrough (0:07–0:12) : what agents may do autonomously, what needs approval, and the observability and enterprise safeguards you'd require. navigate, gather, interact, return a structured result : your biggest adoption blockers, missing docs, and the SDK samples and demos you'd prioritise. end to end. Use cases & opportunities (0:12–0:22) : vote live on top use cases, challenges, and feature requests. the workflows you're building, public vs. internal targets, and where you'd pick automation over scripting. Trust, security & governance (0:22–0:31) , and which would benefit most from a capable agent. what agents may do autonomously, what needs approval, and the observability and enterprise safeguards you'd require. Developer experience feedback (0:31–0:36) ; which should always require approval. your biggest adoption blockers, missing docs, and the SDK samples and demos you'd prioritise. Prioritisation & next steps (0:36–0:40) , sometimes with credentials, vote live on top use cases, challenges, and feature requests. Come prepared to talk about The browser-based workflows you're building today : navigation, data gathering, form filling, and research, via an MCP tool powered by Playwright Workspaces. and which would benefit most from a capable agent. Whether your scenarios target public websites, internal systems, or both. Why you'd choose browser automation over traditional scripting. Which actions you'd let an agent perform autonomously : a perception-action loop with screenshots and DOM parsing handles pages that break brittle scripts. and which should always require approval. The observability, audit, and enterprise safeguards you'd expect before running this in production. The examples, samples, and tutorials that would help you get started fastest. Responsible and secure by design Because BAT lets an agent take real actions on live websites : isolated sessions, Live View, Take Control, and observability for reliability and audit. sometimes with credentials : scope credentials carefully and add your own mitigations; the tool is powerful and in preview. governance is a first-class part of the conversation, not a footnote. Isolated per-session sandboxes, Live View, Take Control human-in-the-loop, and built-in observability are there so you can see, pause, and audit what an agent does. Bring your trust concerns, required guardrails, and governance requirements: they directly shape the roadmap. Note: the Browser Automation tool is in preview; APIs and capabilities may change, and it isn't recommended for production workloads yet. Key takeaways Browser Automation lets Foundry agents complete real web workflows : this round table feeds directly into the engineering and product teams. navigation, data gathering, form filling, research , and arrive on time for the tech check. via an MCP tool powered by Playwright Workspaces. Agents reason, not just replay , and browser-capable agents are how we cross it. a perception–action loop with screenshots and DOM parsing handles pages that break brittle scripts. Oversight is built in: isolated sessions, Live View, Take Control, and observability for reliability and audit. Responsibility is shared: scope credentials carefully and add your own mitigations; the tool is powerful and in preview. Your feedback shapes the product: this round table feeds directly into the engineering and product teams. Save your spot Add it to your calendar: 22 July 2026, 2:30 PM BST / 7:00 PM IST, and arrive on time for the tech check. Join the community: https://aka.ms/foundry/discord Prep with the sample: explore the browser automation sample in foundry-samples. Read the docs: Automate browser tasks with Foundry agents and the hosted-agent quickstart. Event registration link https://discord.gg/Z8JZsrP5P5?event=1527676149264679013 The last mile of automation still runs in a browser, and browser-capable agents are how we cross it. Come tell us what you'd automate, where you'd draw the line, and what you'd need to trust it in production. See you on 22 July.Building AI Agents from Zero to Production
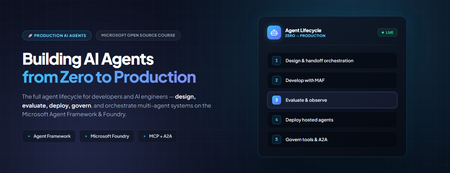
Building AI Agents from Zero to Production Most agent demos stop at "it answered my question." Production doesn't. The gap between a notebook that calls an LLM and a governed, observable, multi-agent system your organisation can actually depend on is where real engineering happens, evaluation, deployment, data sovereignty, tool governance, and cross-team interoperability. Microsoft's open-source course Building AI Agents from Zero to Production walks that entire arc in seven lessons, using one realistic use case and the Microsoft Agent Framework (MAF) plus Microsoft Foundry. This post is a developer-focused tour of what it teaches, the architecture decisions behind each stage, and the code patterns that matter when you move from prototype to production. Who this is for AI engineers building their first or first production, agent system. Backend and full-stack developers integrating agents into real applications and CI/CD. Cloud architects who need data sovereignty, private networking, and governance around agent workloads. Technical leads deciding how to standardise tools and orchestration across multiple teams. The samples are Python 3.12+, served through Microsoft Foundry using GPT-5 series models (for example gpt-5.1 ). Lesson 4 adds a TypeScript/React frontend. You will want an Azure subscription and the Azure CLI. The AI Agent Development Lifecycle The course is organised around a lifecycle rather than a feature list. Each lesson is a stage, and each stage assumes the previous one is solved: # Stage The production question it answers 1 Agent Design What should each agent do, and how do they hand off? 2 Agent Development How do I build and run them with the Agent Framework? 3 Agent Evaluations How do I know they actually work — and keep working? 4 Agent Deployment How do I ship one as a hosted service with a UI and CI gate? 5 Production Hosted Agents How do I meet enterprise data, network, and governance needs? 6 Microsoft Toolbox How do I govern tools once, and reuse them across teams? 7 Multi-Agent & A2A How do agents from different teams interoperate safely? The thread running through all seven is a single scenario: a Developer Onboarding agent system that helps a new hire find the right teammates, get a sensible first task, and pull learning resources and code snippets. It is deliberately mundane, which is exactly why it exposes the production concerns that flashy demos hide. Lesson 1 — Agent Design: three components, one graph The course defines an agent by three parts: an LLM for reasoning, tools to act, and memory to retain context. The design work is context engineering — making sure the right information reaches the model at the right moment, no more and no less. Rather than one monolithic assistant, the onboarding system is split into specialists coordinated by a triage agent using handoff orchestration: Agent Job Tool Employee Search Answer org and people questions Foundry file search over an employee-directory vector store Task Recommendation Suggest 1–3 GitHub issues for the new dev GitHub MCP Server (reads recent commits + open issues) Code Assistant Provide resources and runnable snippets Microsoft Learn MCP + Code Interpreter Architecturally this is a directed graph: User → Triage → [Employee, Learning, Coding] . Splitting responsibilities early pays off later, each agent gets a tightly scoped prompt (less hallucination), can be evaluated independently, and can be upgraded without touching its peers. Lesson 2 — Development: standalone agents with MAF Here the design becomes code. Each specialist is a small, independently runnable service built with the Microsoft Agent Framework, authenticated to Foundry with your Azure CLI login. Setup is deliberately boring: az login az account set --subscription "<your-subscription-id>" cp .env.example .env # Fill FOUNDRY_PROJECT_ENDPOINT and FOUNDRY_MODEL (e.g. gpt-5.1) # Create the employee-directory vector store once; note the printed VECTOR_STORE_ID python lesson-2-agent-development/setup_vector_store.py # Start an agent — serves on http://localhost:8090 python lesson-2-agent-development/employee-search-agent.py The FoundryChatClient auto-reads any FOUNDRY_ -prefixed environment variables and uses AzureCliCredential , so there are no keys in code. The lesson ships six samples, each on its own port, so you can chat with them individually in the local DevUI before wiring them together: Sample Tool Port employee-search-agent.py Foundry file search / vector store 8090 task-recommendation-agent.py GitHub MCP Server 8095 azure-learning-agent.py Microsoft Learn MCP 8092 coding-agent.py Code Interpreter 8093 learning-recommendation-agent.py Learn MCP + reasoning 8091 agent-orchestration.py Multi-agent handoff 8094 Why this matters: keeping each agent as its own process with its own port is a testability decision, not an accident. You can smoke-test one specialist in isolation, then compose them in agent-orchestration.py . Lesson 3 — Evaluation: you can't unit-test a probability distribution This is the lesson that separates a demo from a product. Agents are non-deterministic, so traditional assertions don't fit. The course uses three complementary layers: Observability / tracing — always on, via OpenTelemetry to Application Insights. Smoke tests — fast, run on every deploy. Evaluations — deeper, model-based scoring run on-demand or nightly. Turning on tracing is a single call: from agent_framework.foundry import FoundryChatClient client = FoundryChatClient() client.configure_azure_monitor() # export traces + metrics to Application Insights For quality it uses Foundry's built-in "LLM-as-a-judge" evaluators against real persisted responses (identified by response_id ), not freshly regenerated ones: Evaluator evaluator_name Measures Relevance builtin.relevance Does the response address the request? Groundedness builtin.groundedness Is it supported by retrieved data (no hallucination)? Tool-call accuracy builtin.tool_call_accuracy Were the right tools called with the right arguments? Tool-output utilization builtin.tool_output_utilization Did the agent actually use tool results? The judge model is set independently via AZURE_AI_MODEL_DEPLOYMENT_NAME , so you can evaluate a cheap production model with a stronger one. The run prints a report_url that deep-links into the Foundry portal. Lesson 4 — Deployment: a hosted agent, a UI, and a CI gate Now the agent becomes a managed service. It is deployed as a Foundry Hosted Agent a Microsoft-managed execution environment and fronted by an OpenAI ChatKit React UI talking to a FastAPI backend: ChatKit React (3000) → FastAPI backend (8001) → Foundry Hosted Agent → tools Building the agent is declarative attach tools, name it, serve it: agent = client.as_agent( name="DevOnboardingAgent", instructions="...", tools=[file_search_tool, learn_mcp_tool], ) # served with: from_agent_framework(agent).run() The recommended deploy path is the Azure Developer CLI: cd hosted-agent azd auth login azd agent deploy The genuinely production-minded part is the smoke test as a post-deploy CI gate. Six cases cover reachability, each scenario, off-topic prompt adherence, and multi-turn threading (verifying state via previous_response_id ). The GitHub Action runs them against the freshly deployed agent: export FOUNDRY_TOKEN=$(az account get-access-token \ --resource https://ai.azure.com/ --query accessToken -o tsv) python runner.py \ --project-endpoint "https://<account>.services.ai.azure.com/api/projects/<project>" \ --agent-name dev-onboarding \ --tests-file tests/smoke-tests.json Pitfall to remember: the token audience must be https://ai.azure.com/ . A cognitiveservices.azure.com token is rejected by the Responses API — a mistake that costs many engineers an afternoon. Lesson 5 — Production: separating where an agent runs from where its data lives The pivotal concept for enterprise readiness is the distinction between a Hosted Agent (compute, scaling, identity) and a Capability Host (where conversation history, files, and embeddings actually reside): Concern Hosted Agent Capability Host Compute / scaling / identity ✅ Provided — Conversation history Microsoft-managed default Redirect to your Azure Cosmos DB File uploads Microsoft-managed default Redirect to your Azure Storage Vector embeddings Microsoft-managed default Redirect to your Azure AI Search Required to run the agent? ✅ Yes ❌ Optional Required for data sovereignty? ❌ Not sufficient ✅ Yes "Basic" setup uses Microsoft-managed storage and is perfect for getting started. "Standard" setup redirects each data plane to your own Azure resources through a project-level capability host, this is how you keep customer data in your tenant, inside your network boundary: PUT .../accounts/{account}/projects/{project}/capabilityHosts/{name}?api-version=2025-06-01 { "properties": { "capabilityHostKind": "Agents", "threadStorageConnections": ["my-cosmosdb-connection"], "vectorStoreConnections": ["my-ai-search-connection"], "storageConnections": ["my-storage-connection"] } } Operational constraints worth internalising before you provision: there is one capability host per scope (a second attempt returns 409 Conflict ), configuration is immutable (delete and recreate to change it), deletion is destructive, and the account-level host must exist before the project-level one. Lesson 6 — Toolbox: govern tools once, reuse everywhere Left unchecked, every team re-implements the same tools, scatters credentials, and loses governance visibility. The Microsoft Foundry Toolbox solves this by exposing a curated, versioned set of tools behind a single MCP-compatible endpoint, with credentials held in Foundry connections rather than agent code. You build a toolbox version once: from azure.ai.projects.models import MCPTool, ToolboxSearchPreviewTool, WebSearchTool toolbox_version = project.toolboxes.create_toolbox_version( name="agent-tools", description="Web search + an MCP server + tool search", tools=[ WebSearchTool(), MCPTool( server_label="myserver", server_url="https://your-mcp-server.example.com", require_approval="never", project_connection_id="my-key-auth-connection", # credentials live in Foundry ), ToolboxSearchPreviewTool(), ], ) And every agent consumes it through one endpoint, no per-team tool code: from agent_framework import MCPStreamableHTTPTool mcp_tool = MCPStreamableHTTPTool( name="toolbox", url=TOOLBOX_ENDPOINT, # {project_endpoint}/toolboxes/{name}/mcp?api-version=v1 http_client=http_client, load_prompts=False, ) agent = chat_client.as_agent(name="my-toolbox-agent", instructions="...", tools=[mcp_tool]) Versioning is blue/green: create a new version, test it on its version-specific endpoint, then promote it to default and every consumer picks it up with zero code changes. A Guardrail (RAI) policy can be applied at the toolbox layer, independent of model-level content filters. Note the toolbox management APIs are currently preview; the portal or VS Code Foundry Toolkit are practical alternatives for creation today. Lesson 7 — Multi-Agent & A2A: agents as networked peers The final lesson contrasts two ways agents collaborate: Handoff / Workflow — in-process, same codebase, fastest, tightest coupling. Agent-to-Agent (A2A) — cross-process over an open protocol, so agents from different teams, orgs, or frameworks interoperate. A2A gives each agent a discoverable Agent Card at /.well-known/agent-card.json and a task lifecycle (submitted → working → completed/failed). The elegant part: A2AExecutor wraps an existing MAF agent with no changes to that agent's code. from agent_framework.a2a import A2AExecutor from a2a.server.apps import A2AStarletteApplication from a2a.server.tasks import InMemoryTaskStore agent_card = AgentCard( name="Coding Assistant", url="http://localhost:9000/", version="1.0.0", capabilities=AgentCapabilities(streaming=True), skills=[AgentSkill(id="generate-code", name="Generate code", tags=["code"])], ) request_handler = DefaultRequestHandler( agent_executor=A2AExecutor(agent), # wraps your existing MAF agent unchanged task_store=InMemoryTaskStore(), ) app = A2AStarletteApplication(agent_card=agent_card, http_handler=request_handler).build() Consuming a remote agent then looks exactly like calling a local one: from agent_framework.a2a import A2AAgent remote_agent = A2AAgent(name="remote-coding-assistant", url="http://localhost:9000") result = await remote_agent.run("Write a Python function that reverses a string.") Because an A2AAgent can be a participant inside a HandoffBuilder workflow, you can mix in-process routing with remote services in the same orchestration. For enterprise use, A2AAgent accepts an auth_interceptor for bearer tokens, and the Agent Card carries security_schemes . Responsible and secure by design Production readiness in this course is not just uptime, it is governance: Identity over keys — AzureCliCredential and managed identity throughout; no secrets in code. Least privilege — CI runners get a scoped Azure AI User role assignment on the specific project. Data sovereignty — capability hosts keep conversation history, files, and embeddings in your own Cosmos DB, Storage, and AI Search. Tool approval and guardrails — MCP approval_mode and toolbox-level RAI policy gate what agents can do. Grounded evaluation — groundedness and tool-utilization scoring catch hallucination and unused-tool behaviour before users do. Cost hygiene — the lessons create real Azure resources; delete the resource group when done: az group delete --name <rg> --yes --no-wait . Key takeaways Design as a graph of specialists. Handoff orchestration with tightly scoped agents beats one monolith on reliability and testability. One .run() contract, many backends. The Agent Framework keeps orchestration code stable from local dev to hosted production. Evaluate continuously. Tracing + smoke tests + model-based evaluators are three layers, not alternatives. Separate compute from data. Hosted Agents run the agent; Capability Hosts give you sovereignty — you need both for enterprise. Govern tools centrally. A versioned toolbox behind one MCP endpoint kills tool sprawl and credential duplication. Open protocols for interop. A2A lets agents cross team, org, and framework boundaries without rewrites. Get started Clone the repo (skip the 50+ translations for a faster download) and work through the lessons in order: git clone --filter=blob:none --sparse https://github.com/microsoft/Building-AI-Agents-From-Zero-To-Production.git cd Building-AI-Agents-From-Zero-To-Production git sparse-checkout set --no-cone '/*' '!translations' '!translated_images' References Building AI Agents from Zero to Production — course repo Microsoft Agent Framework Microsoft Foundry documentation Agent-to-Agent (A2A) protocol specification a2a-python SDK AI Agents for Beginners MCP for Beginners Microsoft Foundry Discord
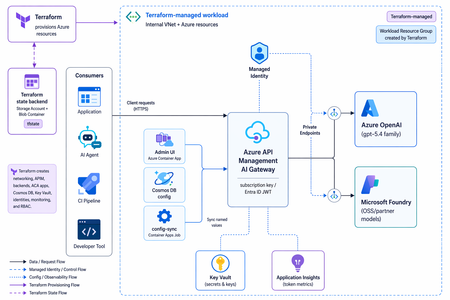
From Multi-Model Chaos to a Governed AI Gateway: Cost Optimization on Azure
What is Multi-Model Chaos, and what cost and security challenges does it pose? Multi-model chaos describes the sprawl that emerges when an organization rapidly adopts many large language and foundation models—OpenAI, Anthropic, Meta Llama, Mistral, and a long tail of open-source and fine-tuned variants—across teams and applications without any unifying control plane. Instead of a single governed entry point, each team wires its own keys, endpoints, SDKs, and prompts directly to whichever provider it prefers, leaving the enterprise with a fragmented, duplicated, and largely invisible AI estate. On the cost side, this fragmentation makes spend almost impossible to predict or contain, identical workloads run against premium models when cheaper ones would suffice, token consumption goes unmeasured, redundant calls and missing caching inflate bills, and finance teams have no consolidated view to attribute usage back to a team, product, or customer. On the security and governance side, the risks compound: API keys are scattered across code and config files, sensitive or regulated data flows to external endpoints with no data-loss prevention or residency guarantees, prompt-injection and jailbreak attempts go unmonitored, and there is no centralized authentication, rate limiting, auditing, or content filtering. The net effect is an uncontrolled attack surface and a compliance blind spot—precisely the conditions that motivate consolidating model access behind a governed AI gateway. In short, multi-model chaos trades short-term speed for runaway costs and an unmanaged security risk, making a governed AI Gateway essential. What is a Governed AI Gateway, and how do they help reduce cost and improve security? A governed AI gateway is an enterprise control plane built on Azure API Management (APIM) that consolidates every model behind a single, governed endpoint. It unifies Azure OpenAI (the gpt-5.4 family) and Azure AI Foundry (open-source and partner models such as grok-4.3 and DeepSeek-V4-Pro), so consumers reach any of them through one consistent, policy-enforced entry point rather than a tangle of direct connections. Every backend is password-less, authenticated through managed identity, which eliminates scattered API keys. On top of this foundation, the gateway enforces per-consumer model permissions, token-based rate limits, and cost-based budget downgrade—automatically routing teams to more economical models as they approach their spend limits—all administered from a self-service Admin UI. One governed endpoint for every backend. Azure OpenAI and Azure AI Foundry (OSS and partner) models are bundled behind a single governance endpoint. Each backend is reachable only over a private endpoint with key authentication disabled, so APIM authenticates using its own managed identity—no model keys ever live on the gateway. Per-consumer governance, edited live in the Admin UI with no redeployment: Allowed models — a consumer can call only the models explicitly granted to it; anything else returns a 403. Rate limits — per-consumer TPM and token-quota tiers (small / medium / large), returning a 429 once exceeded. Cost budget — a daily USD spend limit; when it is exceeded, requests are automatically downgraded to a cheaper model along a configured ladder, including cross-backend downgrades (e.g. gpt → OSS or OSS → gpt). Self-service Admin UI (React + FastAPI, Entra ID login, gated to an admin group) to issue consumer keys, set model, limit, and budget policies, and review the usage dashboard and request logs. Built-in observability — per-call token metrics, broken down by consumer and model, stream to Application Insights, surfaced through the Admin UI's usage dashboard and a request / blocked & downgrade-event log. Flexible client authentication — an APIM subscription key by default, or an Entra ID JWT (client_auth_mode). How is it different from APIM AI Gateway? APIM already provides useful GenAI gateway primitives: token rate limiting, token-usage metrics, semantic caching, backend routing, endpoint import, authentication, authorization, and monitoring. The difference is that APIM enables the enforcement runtime and policy control point, but not the full operating model required to run a shared, multi-tenant AI platform across teams, models, and budgets. Inside the policy pipeline, APIM remains the load-bearing layer: llm-token-limit enforces per-consumer token-per-minute and quota limits, llm-emit-token-metric streams token usage into our metrics namespace, and standard APIM capabilities handle endpoint exposure, access control, and platform monitoring. The governed AI Gateway adds the governance layer APIM does not provide out of the box: Self-service onboarding — a platform team can issue or revoke consumer keys and manage access from the Admin UI, without raising a pull request or redeploying infrastructure. Per-consumer model entitlements — every consumer has an explicit allow-list of model deployments. The gateway calculates the effective allowed set per request and returns 403 when a caller asks for a model it is not entitled to use. Live configuration without redeployment — entitlements, rate tiers, token quotas, budgets, and downgrade levels live in the configuration store. A sync worker projects those values into APIM named values continuously, so operational changes can take effect without a terraform apply while the policy logic stays version-controlled in IaC. Managed-identity-only, private backends — key-based authentication is disabled on Azure OpenAI and Azure AI Foundry. APIM injects a managed identity token on every backend call, and the backends are reachable only over private endpoints. Cost-based downgrade across backends — when a consumer approaches its budget, the gateway can route to a cheaper model while preserving availability, including cross-backend downgrades between Azure OpenAI and Azure AI Foundry. APIM’s AI gateway is the enforcement runtime while the governed AI Gateway is the platform operating model around it. APIM handles the gateway primitives extremely well, while our governance layer adds identity, self-service administration, entitlement management, live configuration, cost controls, and cross-model routing so teams can safely consume multiple models without creating new cost, security, or compliance sprawl. Solution overview Figure 1 shows the end-to-end architecture of the governed AI gateway. Client applications never talk to the models directly; instead, every request passes through Azure API Management, which acts as the single governed entry point that authenticates callers, applies per-consumer policy, and routes traffic privately to the appropriate model backend. Around this gateway sit the supporting planes for administration, identity, and observability, giving the organization one consistent place to control access, contain cost, and monitor usage across both Azure OpenAI and Azure AI Foundry models. This solution is also completely serverless. Key components: Client / consumer applications — the apps and services that call for model inference, each identified by its own consumer key or Entra ID identity. Azure API Management (the gateway) — the single governance endpoint that handles authentication, allowed-model checks, rate limiting, and cost-based budget downgrade before any request reaches a model. Model backends — Azure OpenAI (the gpt-5.4 family) and Azure AI Foundry (OSS and partner models such as grok-4.3 and DeepSeek-V4-Pro), each reachable only over a private endpoint. Microsoft Entra ID — provides identity for both clients (optional JWT auth) and the gateway's own managed identity used to reach the backends without password credentials. Admin UI (React + FastAPI) — the self-service control plane for issuing consumer keys and setting model, rate-limit, and budget policies. Application Insights — collects per-call token metrics by consumer and model, powering the usage dashboard and request / blocked-event logs. 1: Solution architecture diagram Request flow Authenticate — a client calls the gateway with an APIM subscription key (or an Entra ID JWT) instead of any model key. Authorize the model — APIM checks whether the consumer is permitted to call the requested model; if not, it returns 403. Enforce limits — the gateway applies the consumer's TPM and token-quota tier, returning 429 when the limit is exceeded. Apply the cost budget — if the consumer's daily USD budget is exhausted, the request is automatically downgraded to a cheaper model along the configured ladder. Route to the backend — APIM forwards the request over a private endpoint, authenticating with its managed identity to Azure OpenAI or Azure AI Foundry. Return and record — the model response is returned to the client while per-call token metrics are emitted to Application Insights and surfaced in the Admin UI dashboard and logs. Implement the solution This section describes how to deploy the solution architecture. In this post, you’ll perform the following tasks: Create APIM Create Cosmos DB Create Microsoft foundry with Gpt-5.4, Gpt-5.4-mini, DeepSeek-V4-Pro and Grok-4.3 deployed Create the Admin UI on container apps Create a consumer with an APIM subscription key on the Admin UI Integrate APIM endpoint with Github Copilot chat and Copilot CLI Create a budget and rate limit in the Admin UI Simulate and validate auto downgrade feature Ensure that you have the following prerequisites deployed before moving to the next section An Azure subscription with model quota (Azure OpenAI and, optionally, Azure AI Foundry models). Tools: Git, Terraform ≥ 1.7, Azure CLI, and az login to the subscription. Container images are built remotely in Azure Container Registry, so Docker is not required. VScode and Copilot CLI Deploy the Azure AI Gateway Clone the repository from https://github.com/microsoft/apim-foundry-governance git clone https://github.com/microsoft/apim-foundry-governance git checkout english By default the solution deploys in koreacentral region. Export your custom variables if needed. export location=eastus2 export backend-rg=rg-aigw-tfstate-dev-eastus2 export storage-prefix=staigwtfstate export state-key=ai-gateway-eus2.tfstate Bootstrap the Terraform state backend (once per subscription) This creates an eastus2 resource group + storage account for remote state (Entra auth, public blob access blocked). ./scripts/bootstrap-backend.sh \ --location $location \ --backend-rg $backend-rg \ --storage-prefix $storage-prefix \ --state-key $state-key Set Terraform variables cp infra/terraform.tfvars.example infra/terraform.tfvars # Edit infra/terraform.tfvars: prefix, location, owner, cost_center, apim_publisher_*, budget_* Create the Gateway Core On the first apply, leave worker_image and admin_ui_image empty (default ""). The images don't exist yet, and the worker Job / Admin UI app are count-gated on these variables. cd infra terraform init # If you are moving an existing state from another backend, run `terraform init -migrate-state` instead. terraform apply Build and push the container images with app registrations After the registry is created, build the worker and Admin UI images remotely (no local Docker needed). acr=$(terraform output -raw registry_login_server) reg=$(terraform output -raw registry_name) az acr build --registry $reg --image config-sync-worker:latest ../app/config-sync-worker az acr build --registry $reg --image admin-ui:latest ../app/admin-ui The worker and Admin UI requires entra app registrations for a user to access the frontend. Create the admin security group, BFF API App registrations and SPA public-client app registrations. ./scripts/app-registration.sh Enable the worker and Admin UI From the output above, populate the image references and the three Entra variables from the prerequisites into infra/terraform.tfvars and apply again. worker_image = "<registry_login_server>/config-sync-worker:latest" admin_ui_image = "<registry_login_server>/admin-ui:latest" admin_ui_public = true # external FQDN (still Entra-gated). false = VNet-only admin_group_object_id = "<entra security group object id>" bff_api_audience = "api://<bff app id>" spa_client_id = "<spa app id>" entra_tenant_id = "<tenant id>" CosmosDB Seed configuration Cosmos is private with key auth disabled, so the initial config is seeded from a jumpbox inside the VNet. Default confguration of enable_jumpbox = true in infra/terraform.tfvars triggers Terraform to: provision the jumpbox VM, grant it’s managed identity the Cosmos DB Built-in Data Contributor role (scoped to the config container), and runs a VM run-command that seeds both documents automatically: Global config (id=global) — allowed models + token limits. Per-model pricing (id=pricing) — prompt/completion rates for cost-based budgeting. To seed manually instead (jumpbox connected via Bastion), the same scripts can be run directly: # Global allowed models + limits ./scripts/seed-cosmos-jumpbox.sh https://<cosmos-account>.documents.azure.com:443/ # Per-model pricing (for cost-based budgeting) ./scripts/seed-pricing-jumpbox.sh https://<cosmos-account>.documents.azure.com:443/ Access the AdminUI Update the SPA with your containerapps url spa_app_id="$(az ad app list --display-name "AI Gateway SPA" --query "[].appId" -o tsv)" # spa_client_id fqdn=$(terraform output -raw admin_ui_fqdn) # run from infra/ oid=$(az ad app show --id "$spa_app_id" --query id -o tsv) az rest --method PATCH \ --uri "https://graph.microsoft.com/v1.0/applications/$oid" \ --headers 'Content-Type=application/json' \ --body "{\"spa\":{\"redirectUris\":[\"https://$fqdn\"]}}" Browse to the admin_ui_fqdn, which is also the container apps fqdn. You will need to login via EntraID (Users will need to be added to the Entra group for them to login). Go ahead and register the consumer with a name and issue the API key. The API key is the APIM subscription key and will only be shown once on the UI, so copy and paste it somewhere safe. 2: AI Gateway Consumers and Keys Next, on the left hand tab, click on budgets. This will set the daily budget limit a user is allowed to consume in a day and is also where the model downgrade logic resides. For the purpose of demonstration, set a low budget of $1.8 and select the model priority that you want the downgrade to occur. In this case, gpt-5.4 will be used first, followed by gpt-5.4-mini, DeepSeek then Grok. 3: AI Gateway Budgets Lastly, on the land hand tab, select Rate limits. This sets the amount of tokens a user can consume in a day. It is a daily limit and resets after 24 hours. Select the large tier. 4: AI Gateway Rate Limits Browse to Dashboard, it shows you all the token information, request status codes and group them by consumer and model. You can also view the budget downgrade for a specific user. 5: AI Gateway Captions Integrate endpoint with github copilot chat in vscode In VScode, type “Ctrl + Shift + p” and select “Chat: Manage Language Model”. Select Add Models and choose Azure. 6: Add models toGithubCopilot Chat Follow through the prompts. It will create or edit a chatLanguageModels.json file. Your file should look like this. Take note that you will need to use the /vscode path. [ { "name": "Azure", "vendor": "azure", "models": [ { "id": "gpt-5.4", "name": "gpt-5.4 (APIM)", "url": "https://<REPLACE WITH YOUR APIM ENDPOINT>.azure-api.net/vscode/openai/deployments/gpt-5.4/chat/completions?api-version=2025-01-01-preview", "toolCalling": true, "vision": true, "maxInputTokens": 128000, "maxOutputTokens": 16000, "requestHeaders": { "Ocp-Apim-Subscription-Key": "<REPLACE WITH YOUR SUBSCRIPTION KEY" } } ] } ] Now select the gpt-5.4 (APIM) model and ask it a question. Integrate endpoint with copilot cli As copilot only accepts api-key headers, a separate api is used. Replace and export the following variables before using copilot cli. export COPILOT_PROVIDER_TYPE="azure" export COPILOT_PROVIDER_BASE_URL="<REPLACE WITH YOUR APIM ENDPOINT>" export COPILOT_PROVIDER_API_KEY="<REPLACE WITH YOUR SUBSCRIPTION KEY>" export COPILOT_MODEL="gpt-5.4" export COPILOT_PROVIDER_AZURE_API_VERSION="2025-01-01-preview" export COPILOT_PROVIDER_MODEL_ID="gpt-5.4" You should see a similar response. 7: Integration of APIM to copilot cli Simulate downgrade feature Continue to ask more questions to consume more tokens. Once it hits the 80% cost threshold, you should see that the tag has been switched to “Auto-switch level 1”, meaning it will downgrade to gpt-5.4-mini for future requests. 8: AI Gateway Downgrade Feature Validate by running this command in your terminal with your own endpoints and api-key. curl -sS -i -X POST "https://<REPLACE>.azure-api.net/openai/deployments/gpt-5.4/chat/completions?api-version=2025-01-01-preview" -H "api-key: <REPLACE WITH API KEY>" -H "Content-Type: application/json" -d '{"messages":[{"role":"user","content":"hi"}],"max_completion_tokens":8}' Inspect the headers, you should see that the downgrade level is 1 and the effective model is gpt-5.4-mini despite hitting the same endpoint of gpt-5.4. 9: Model downgrade Conclusion This post started with the problem of multi-model chaos: teams moving quickly with different models, endpoints, SDKs, keys, quotas, and cost profiles, but without a common control plane resulting in ineffective cost control and potential security leaks with model API keys. The governed AI Gateway addresses that by putting Azure OpenAI and Azure AI Foundry behind a single APIM-based entry point, where access, limits, routing, identity, telemetry, and budget behavior can be applied consistently for every consumer. We also walked through how the gateway is different from APIM’s native AI gateway capabilities. APIM provides the enforcement runtime and the GenAI policy primitives, such as token limits, token metrics, semantic caching, and backend routing. The governed AI Gateway builds the operating model around those primitives: self-service onboarding, per-consumer model entitlements, live configuration without redeployment, managed-identity-only private backends, per-call cost telemetry, and cost-based downgrade across model providers. From there, we integrated the APIM endpoint with Github Copilot Chat and Copilot CLI, and validated the downgrade behavior when spend thresholds were reached. The result is not just an AI proxy, but a reusable enterprise pattern for running AI access as a governed platform: developers keep a simple model endpoint experience, while the platform team keeps control over security, cost, observability, and operational change. Overall, this post helps organizations bring multi-model AI usage under one governed entry point, reducing sprawl across endpoints, keys, policies, and cost controls. It also gives platform teams centralized control over model access, rate limits, budgets, telemetry, and private backend access while preserving a simple endpoint experience for developers. References AI gateway capabilities in Azure API Management Policies in Azure API Management Azure API Management policy reference - llm-emit-token-metric Using GitHub Copilot CLI - GitHub Docs AI language models in VS CodeMCP for Beginners: Why Every AI Engineer and Developer Should Learn the Model Context Protocol
If you have spent any time building with large language models in the last year, you have hit the same wall everyone hits: your model is brilliant at reasoning but blind to the real world. It cannot read your database, call your internal API, search your documents, or trigger a deployment unless you hand-write glue code for every single integration. The Model Context Protocol (MCP) exists to tear that wall down, and Microsoft's open-source MCP for Beginners curriculum (reachable via the short link https://aka.ms/mcp-for-beginners) is the most complete, hands-on way to learn it. This post explains what MCP is, walks through the latest updates to the course, shows real code, and makes the case for why MCP belongs on your learning roadmap right now. Whether you are an AI engineer shipping agents to production, a developer wiring tools into Copilot, or a student trying to build a standout portfolio project. What is MCP, and why does it matter? Think of MCP as a universal translator for AI applications. Just as a USB-C port lets you connect any peripheral to any laptop without a custom cable per device, MCP lets an AI model connect to any tool or data source through one standardized protocol. The course uses exactly this analogy, and it holds up well. Before MCP, integrations were an M × N problem: every one of your M AI applications needed bespoke code to talk to each of your N tools. MCP turns that into an M + N problem. Build a tool once as an MCP server, and any MCP-compatible client, Claude Desktop, VS Code, Cursor, GitHub Copilot, and many others — can use it immediately. The protocol is built on a clean client–server model with a small set of primitives: Tools — functions the model can call (query a database, send an email, run code). Resources — data the server exposes for context (files, records, documents). Prompts — reusable, parameterized prompt templates. Sampling — a server asking the client's LLM to generate a completion, enabling collaborative workflows. Elicitation — a server requesting structured input from the user mid-task. Roots — boundaries that tell a server which directories or resources it is allowed to operate on. Communication runs over JSON-RPC, with transports for local processes ( stdio ) and remote servers (streamable HTTP). That standardization is the whole point: write to the spec, and you interoperate with the entire ecosystem. What's new: the latest updates to the course The MCP for Beginners curriculum is actively maintained, and the public changelog reads like a release log for a living product. Here are the most important recent changes, drawn directly from that changelog. 1. Aligned to MCP Specification The biggest update: the entire curriculum has been validated against the current MCP Specification 2025-11-25 and the latest official SDKs. Stale references to older spec revisions (2025-03-26 and 2025-06-18) were corrected across the security, transport, real-time search, sampling, and stdio-server modules, with links repointed to the canonical modelcontextprotocol.io spec paths. A gap analysis confirmed the course already covers every primitive introduced or expanded in the latest spec: Sampling — covered in lesson 3.14 and Advanced Topics. Elicitation (including URL mode) — in Core Concepts and Protocol Features. Roots — in the Introduction, Core Concepts, and Root Contexts. Tasks (experimental, long-running operations) — in Core Concepts and Protocol Features. Tool Annotations ( readOnlyHint / destructiveHint ) — in Core Concepts and Protocol Features. 2. Samples validated against current SDKs Code that does not run is worse than no code at all, so the maintainers re-validated the core samples: TypeScript: @modelcontextprotocol/sdk resolved to 1.29.0 ; a tsc --noEmit type-check passed with no errors — the McpServer and StdioServerTransport APIs remain valid. Python: validated in an isolated virtual environment with mcp[cli] (1.27.2); FastMCP.list_tools() correctly returned the sample add and subtract tools. SDK version pins across labs were bumped (for example mcp>=1.26.0 ) and lockfiles regenerated so every sample tracks the current release. 3. A serious security pass Security is treated as a first-class concern, not an afterthought. A full audit across every dependency manifest and the sample source code was run, and npm audit now reports 0 vulnerabilities in every audited directory. Highlights: Transitive npm advisories (in the MCP Inspector dev tool, the OpenAI client, and the SDK) were remediated by bumping @modelcontextprotocol/inspector to 0.22.0 and pinning a patched shell-quote . A real code-level command-injection fix (OWASP A03): an open_in_vscode tool that used subprocess.run(..., shell=True) was rewritten to launch the resolved executable directly with no shell — closing a metacharacter-injection vector. Python dependencies were audited with pip-audit , and a vulnerable transitive werkzeug was pinned to a patched >=3.1.6 . For anyone learning to ship agents, this is gold: the course demonstrates the whole secure-development loop, not just the happy path. 4. New lessons and a growing curriculum The curriculum keeps expanding with practical, modern lessons: 5.17 Adversarial Multi-Agent Reasoning — two agents argue opposite sides of a question using shared MCP tools ( web_search + run_python ), judged by a third agent. Includes a Mermaid architecture diagram, orchestrators in Python, TypeScript, and C#, and use cases like hallucination detection, threat modeling, and API design review. 3.12 MCP Hosts — configuration for Claude Desktop, VS Code, Cursor, Cline, and Windsurf, with JSON templates and a transport comparison table. 3.13 MCP Inspector — a debugging guide for testing tools, resources, and prompts. 4.1 Pagination — cursor-based pagination patterns in Python, TypeScript, and Java. 5.16 Protocol Features — progress notifications, request cancellation, resource templates, and lifecycle management. 5. Microsoft product rebranding Content was updated to reflect Microsoft's rebranding: Azure AI Foundry → Microsoft Foundry, and the AI Toolkit (AITK) → Microsoft Foundry Toolkit Extension for VS Code. If you have seen older tutorials referencing the previous names, the curriculum is now current. Your first MCP server: see how little code it takes The course's "first server" lesson builds a simple calculator. Here is the shape of a minimal MCP server in Python using FastMCP , which mirrors the validated sample in the repo. Notice how the protocol plumbing disappears — you just decorate functions. # server.py — a minimal MCP server with two tools from mcp.server.fastmcp import FastMCP # Name your server; this identifies it to MCP clients mcp = FastMCP("Calculator") @mcp.tool() def add(a: int, b: int) -> int: """Add two numbers and return the result.""" return a + b @mcp.tool() def subtract(a: int, b: int) -> int: """Subtract b from a and return the result.""" return a - b if __name__ == "__main__": # Run over stdio so local hosts (VS Code, Claude Desktop) can connect mcp.run() The same idea in TypeScript, using the official SDK validated at version 1.29.0 : // server.ts — minimal MCP server in TypeScript import { McpServer } from "@modelcontextprotocol/sdk/server/mcp.js"; import { StdioServerTransport } from "@modelcontextprotocol/sdk/server/stdio.js"; import { z } from "zod"; const server = new McpServer({ name: "Calculator", version: "1.0.0" }); // Register a tool with a typed input schema server.tool( "add", { a: z.number(), b: z.number() }, async ({ a, b }) => ({ content: [{ type: "text", text: String(a + b) }], }) ); // Connect over stdio and start listening const transport = new StdioServerTransport(); await server.connect(transport); That is a complete, runnable server. The docstrings and schemas matter: MCP exposes them to the model so it knows when and how to call each tool. Clear descriptions are effectively prompt engineering for your tools — a common pitfall is leaving them vague, which leads to the model misusing or ignoring the tool. Connecting it in VS Code Once your server runs, an MCP host connects to it. A typical VS Code / host configuration looks like this: { "servers": { "calculator": { "command": "python", "args": ["server.py"] } } } Lesson 3.12 (MCP Hosts) covers the equivalent JSON for Claude Desktop, Cursor, Cline, and Windsurf, and lesson 3.13 shows how to use the MCP Inspector to test your tools before wiring them into a host — the single best debugging habit you can build early. How the course is structured The curriculum is organized as a progressive journey with hands-on code in C#, Java, JavaScript, Python, Rust, and TypeScript. It is grouped into phases: Foundations (Modules 0–2): Introduction, Core Concepts, and Security. Building (Module 3): Getting Started — 15 lessons covering your first server and client, LLM clients, VS Code integration, stdio and HTTP streaming, testing, deployment, auth, hosts, the Inspector, sampling, and MCP Apps. Growing (Modules 4–5): Practical Implementation and Advanced Topics — 17 advanced lessons including Azure integration, OAuth2, Entra ID auth, scaling, multi-modality, context engineering, custom transports, and adversarial multi-agent reasoning. Mastery (Modules 6–11): Community Contributions, Lessons from Early Adoption, Best Practices, Case Studies, a Microsoft Foundry Toolkit workshop, and an end-to-end 13-lab PostgreSQL capstone. That final module is the standout for portfolio building: a complete, production-flavored path that takes you from architecture and row-level security through database design, a FastMCP server, semantic search with pgvector and Azure OpenAI, testing, Docker deployment to Azure Container Apps, and monitoring with Application Insights. Why developers should learn MCP now For AI engineers MCP is becoming the default integration layer for agents. Instead of re-implementing tool calling for every framework, you write to one open protocol and your tools work everywhere. The advanced modules — sampling, roots, elicitation, scaling, routing, and adversarial multi-agent patterns — are exactly the techniques you need to move agents from demo to production. For developers MCP is already wired into tools you use daily: VS Code, GitHub Copilot, Claude Desktop, Cursor, and more. Learning to build an MCP server means you can expose your systems — internal APIs, databases, CI/CD — to AI assistants safely. The security-first approach in the course (OAuth2, Entra ID, RBAC, dependency auditing) teaches you to do this the right way from day one. For students MCP is a rare opportunity to learn a technology while it is still early, with a free, beginner-friendly, Microsoft-maintained curriculum and code in six languages. The 13-lab capstone alone is a genuine portfolio project. And with content translated into 50+ languages, the barrier to entry is low no matter where you are. Responsible and secure by design A recurring theme worth calling out: the course does not treat security and governance as optional extras. It models real practices you should carry into your own work: Least privilege via roots — constrain what a server can touch. Tool annotations — mark tools readOnlyHint or destructiveHint so clients can warn users before destructive actions. No shells for user input — the command-injection fix is a textbook example of why you never pass untrusted input through a shell. Dependency hygiene — audit with npm audit and pip-audit , and pin patched releases. Proper auth — dedicated lessons on OAuth2 and Microsoft Entra ID. Key takeaways MCP standardizes how AI connects to tools and data, turning a combinatorial integration problem into a simple, reusable one. The course is current, validated against MCP Specification 2025-11-25 with SDKs at TypeScript 1.29.0 and Python mcp 1.27.2 . Samples actually run, and the repo demonstrates a full secure-development loop with 0 reported vulnerabilities after auditing. It is broad and deep: from a 10-line calculator server to a 13-lab production capstone, in six languages. It is the fastest credible path to MCP fluency for AI engineers, developers, and students alike. Get started today Open the course: https://aka.ms/mcp-for-beginners (redirects to the GitHub repository). Fork and clone it — use a sparse checkout to skip translations for a faster download: git clone --filter=blob:none --sparse https://github.com/microsoft/mcp-for-beginners.git cd mcp-for-beginners git sparse-checkout set --no-cone "/*" "!translations" "!translated_images" Build your first server with lesson 3.1 in your language of choice. Debug it with the MCP Inspector, then connect it in VS Code. Go deep with the 13-lab database capstone, and read the official spec at modelcontextprotocol.io. Track what's new in the changelog and join the community discussions. MCP is quietly becoming the connective tissue of the AI ecosystem. The earlier you learn it, the more leverage you will have — and Microsoft's MCP for Beginners is the clearest on-ramp available. Star the repo, build a server this week, and start connecting your AI to the world.Mastering Query Fields in Azure AI Document Intelligence with C#
Introduction Azure AI Document Intelligence simplifies document data extraction, with features like query fields enabling targeted data retrieval. However, using these features with the C# SDK can be tricky. This guide highlights a real-world issue, provides a corrected implementation, and shares best practices for efficient usage. Use case scenario During the cause of Azure AI Document Intelligence software engineering code tasks or review, many developers encountered an error while trying to extract fields like "FullName," "CompanyName," and "JobTitle" using `AnalyzeDocumentAsync`: The error might be similar to Inner Error: The parameter urlSource or base64Source is required. This is a challenge referred to as parameter errors and SDK changes. Most problematic code are looks like below in C#: BinaryData data = BinaryData.FromBytes(Content); var queryFields = new List<string> { "FullName", "CompanyName", "JobTitle" }; var operation = await client.AnalyzeDocumentAsync( WaitUntil.Completed, modelId, data, "1-2", queryFields: queryFields, features: new List<DocumentAnalysisFeature> { DocumentAnalysisFeature.QueryFields } ); One of the reasons this failed was that the developer was using `Azure.AI.DocumentIntelligence v1.0.0`, where `base64Source` and `urlSource` must be handled internally. Because the older examples using `AnalyzeDocumentContent` no longer apply and leading to errors. Practical Solution Using AnalyzeDocumentOptions. Alternative Method using manual JSON Payload. Using AnalyzeDocumentOptions The correct method involves using AnalyzeDocumentOptions, which streamlines the request construction using the below steps: Prepare the document content: BinaryData data = BinaryData.FromBytes(Content); Create AnalyzeDocumentOptions: var analyzeOptions = new AnalyzeDocumentOptions(modelId, data) { Pages = "1-2", Features = { DocumentAnalysisFeature.QueryFields }, QueryFields = { "FullName", "CompanyName", "JobTitle" } }; - `modelId`: Your trained model’s ID. - `Pages`: Specify pages to analyze (e.g., "1-2"). - `Features`: Enable `QueryFields`. - `QueryFields`: Define which fields to extract. Run the analysis: Operation<AnalyzeResult> operation = await client.AnalyzeDocumentAsync( WaitUntil.Completed, analyzeOptions ); AnalyzeResult result = operation.Value; The reason this works: The SDK manages `base64Source` automatically. This approach matches the latest SDK standards. It results in cleaner, more maintainable code. Alternative method using manual JSON payload For advanced use cases where more control over the request is needed, you can manually create the JSON payload. For an example: var queriesPayload = new { queryFields = new[] { new { key = "FullName" }, new { key = "CompanyName" }, new { key = "JobTitle" } } }; string jsonPayload = JsonSerializer.Serialize(queriesPayload); BinaryData requestData = BinaryData.FromString(jsonPayload); var operation = await client.AnalyzeDocumentAsync( WaitUntil.Completed, modelId, requestData, "1-2", features: new List<DocumentAnalysisFeature> { DocumentAnalysisFeature.QueryFields } ); When to use the above: Custom request formats Non-standard data source integration Key points to remember Breaking changes exist between preview versions and v1.0.0 by checking the SDK version. Prefer `AnalyzeDocumentOptions` for simpler, error-free integration by using built-In classes. Ensure your content is wrapped in `BinaryData` or use a direct URL for correct document input: Conclusion Using AnalyzeDocumentOptions provides a cleaner and more reliable way to work with query fields in Azure AI Document Intelligence using C#. By aligning with the latest SDK approach, developers can simplify implementation, reduce common errors, and improve code maintainability. Keeping up with SDK enhancements and recommended practices ensures more accurate and efficient document data extraction. As Azure AI capabilities continue to evolve, adopting modern integration patterns will help you build scalable and future-ready document processing solutions with greater confidence. Reference Official AnalyzeDocumentAsync Documentation. Official Azure SDK documentation. Azure Document Intelligence C# SDK support add-on query field.570Views0likes0Comments
Microsoft Leads a New Era of Software Supply Chain Transparency
Microsoft announces the general availability of Microsoft’s Signing Transparency (MST) – a first-of-its-kind capability that brings unprecedented visibility and trust to our software supply chain. With this release, Microsoft is leading the industry by recording the build of critical cloud services into a publicly readable and verifiable SCITT standard (Supply Chain Integrity, Transparency, and Trust) compliant ledger. This means every production software build for in scope services like Azure Attestation and Azure Managed HSM (Hardware Security Module), Azure confidential ledger, Microsoft Signing Transparency itself (and others over time) – is now logged in an immutable, tamper-evident record. Only builds that are in the MST ledger are deployed to production; this gives customers confidence that the supply chain for these critical services can be audited at anytime. Notably, the MST ledger is fully open source and built to align with the emerging IETF SCITT standard. By embracing SCITT’s principles and open protocols, Microsoft ensures that MST not only secures our own ecosystem but also contributes to a broader industry movement toward standardized supply chain transparency. The open-source MST ledger serves as a verifiable trust anchor that any organization or researcher can inspect, audit, or even integrate with their own tooling. MST itself meets the highest levels of transparency, backed by a tamper-proof confidential ledger, open-source, and independently verified. Specifically, we are making the foundation of our trust model transparent and accessible to everyone – reinforcing that trust must be earned through proof, not just promises. This launch marks a major milestone in our commitment to Zero Trust principles, extending “never trust, always verify” all the way into the build itself. Building on a public preview introduced late last year, MST’s general availability delivers verifiable transparency at the software level. It transforms traditional code signing with an additive trust layer that is accessible via an open verification model. Every new software update is accompanied by a publicly auditable proof of integrity, enabling security teams to proactively confirm that each update is authentic and unaltered. To help organizations get the most out of this capability, we are also introducing a free tool to explore the contents – Ledger Explorer – an offline tool that allows security teams to examine MST ledger entries, verify cryptographic proofs, and even validate the ledger’s integrity independently. This tool, combined with MST’s open design, ensures that every Microsoft customer – and the broader community – can hold us accountable in real time for the software we run on their behalf. Key Benefits of Microsoft’s Signing Transparency (MST) Verified Code Integrity – Every software release is cryptographically logged in MST’s ledgers. This makes each build tamper-evident and traceable. If an attacker attempts to inject malicious code or sign an unauthorized update, it will be evident through the well-defined validation step built into the SCITT standard. Organizations gain the assurance that code integrity can be independently confirmed at any time. Independent Verification & Zero Trust – MST enables customers and auditors to verify software authenticity on their own, without having to solely rely on vendor attestations. For each update, Microsoft provides a transparency “receipt” (proof of logging) that you can use to prove the update was officially published and unaltered. This fosters a “don’t just trust, verify” approach, empowering security teams to double-check everything running in their environment aligns with what Microsoft intended. Audit-Trail & Compliance – The transparency ledger creates a permanent, auditable timeline of code deployments. Every entry is a record of what was released and when, backed by cryptographic proofs. This simplifies compliance reporting and accelerates forensic analysis. In the event of an incident, you can quickly audit the ledger to see if any unexpected code was introduced. For highly regulated industries, MST offers concrete evidence of software integrity and policy compliance over time. Leadership & Open Standards – We are delivering real transparency now, encouraging a future where all critical software is released with verifiable integrity. MST’s open source implementation and SCITT-compliant design exemplify our commitment to openness and collaboration. We believe widespread adoption of these standards will strengthen supply chain security for everyone, making trust verification a universal practice. Next Steps Microsoft’s Signing Transparency is more than a new security feature and shapes the advances in trust technology. As threats grow more sophisticated, we must evolve the way we assure our customers about the software they depend on. With MST now generally available, we are leading by example: proving that it is possible to open up the traditionally opaque process of software deployment and turn it into a source of strength and trust, i.e. empowering each person with verifiable transparency. We invite the industry to join us on this journey and get started by reading the documentation and exploring Ledger Explorer today! Together, by embracing transparency and open standards, we can turn “trust but verify” from a slogan into an everyday reality for digital infrastructure.Using Keycloak with Azure AD to integrate AKS Cluster authentication process
Integrating Azure Kubernetes Service (AKS) with Keycloak through Azure Active Directory (Azure AD) as an intermediary leverages Azure AD’s support for OpenID Connect (OIDC) to handle authentication and authorization. This integration enhances security, streamlines user management, and simplifies the authentication process for users accessing the AKS cluster.