hosted agents
11 TopicsEngineering Agentic Recall Controls with MCP and Microsoft Foundry
AI agents become operationally interesting when they can reach real systems. They also become operationally dangerous at exactly the same moment. Caldova Recall Control Tower is a developer demonstration built around that tension. It uses a fictional pharmaceutical recall to show how an agent can gather evidence and prepare a decision while deterministic application code retains authority over approval and inventory mutation. The implementation combines the Model Context Protocol (MCP), Microsoft Agent Framework, a Microsoft Foundry Hosted Agent, FastAPI, Microsoft Entra authentication, managed identity, and optimistic concurrency in Azure Blob Storage. Central design rule: Let the model interpret and recommend. Make ordinary code authenticate, authorize, mutate, and prove what happened. Caldova is fictional, all operational data is synthetic, and this sample is not a production recall system or a source of clinical advice. The scenario: useful reasoning, consequential action The demo starts with a temperature excursion affecting batch B-2408-AX7 of Caldova Relief 20 mg tablets. The synthetic inventory contains 2,196 units across two distribution centers and two retail stores. A useful system must establish the notice, locate every affected position, check supplier status, explain uncertainty, and recommend an action. That analysis is a good fit for specialized agents. Quarantining inventory is not. Quarantine changes operational state. It therefore needs an authenticated human, explicit authorization, a batch-scoped approval, concurrency control, idempotency, and an audit record. None of those guarantees should depend on a prompt being followed. The authenticated hosted application at the start of the fictional recall. Architecture: separate reasoning from authority The solution has two related but deliberately separate paths. Caldova separates model reasoning from application authority. Official Microsoft service icons identify Foundry Agent Service, App Service, Managed Identity, and Blob Storage. The reasoning path invokes a Hosted Agent through the Responses protocol. Four agents run in a fixed sequence: triage, inventory impact, supplier/compliance, and supervisor. The first three have narrow read-only tools. The supervisor has no tools and synthesizes the accumulated context into a decision brief. The authority path remains in the web application. It validates the EasyAuth identity claims, checks an approver allowlist, binds approval to the caller, batch, action, and current demo generation, and only then calls deterministic domain code. State is stored per actor in Blob Storage and updated with ETag match conditions so concurrent writes fail instead of silently overwriting each other. There is also a deterministic localhost demo. It reuses synthetic domain fixtures and demonstrates MCP contracts, approval, quarantine, and replay without a model or cloud account. It is useful for development, but its typed approver name and in-memory state are not production identity or durable compliance evidence. Building a narrow MCP surface MCP standardizes how an AI application discovers and calls external tools. It does not remove the need to design those tools carefully. Caldova exposes small, typed operations such as get_recall_notice , locate_inventory , and get_supplier_status . Inputs are constrained with Pydantic, and tool annotations tell clients that these operations are read-only and closed-world: @mcp.tool( title="Locate affected inventory", annotations=ToolAnnotations( read_only_hint=True, open_world_hint=False, ), ) def locate_inventory(batch_id: BatchId) -> dict[str, Any]: return STORE.locate_inventory(batch_id) The mutation tool is separately marked destructive and requires a batch-scoped approval token. Those annotations improve discovery and planning, but they are metadata, not an authorization boundary. The real check occurs inside quarantine_batch , below the model and below the tool description. The Hosted Agent does not receive the mutation tools at all. Its specialists call only three read operations through an isolated MCP stdio subprocess. This is stronger than asking an all-powerful agent to "please remain read-only": capability is constrained by construction. The subprocess boundary also keeps MCP v2 dependencies isolated from the Foundry hosting environment. Each call has a timeout, bounded concurrency, structured JSON handling, and a generic failure response that does not leak subprocess details. Fixed workflows beat vague autonomy for this case Multi-agent does not have to mean dynamic routing. Caldova uses an explicit sequence because the business dependency is explicit: validate the notice before locating inventory, locate inventory before checking supplier implications, and synthesize only after all three specialist outputs exist. return ( WorkflowBuilder(start_executor=triage, output_from=[supervisor]) .add_edge(triage, inventory) .add_edge(inventory, compliance) .add_edge(compliance, supervisor) .build() .as_agent() ) This topology is easier to test and reason about than an unconstrained planner. Each specialist has one job and one tool allowlist. Full context is passed where synthesis requires it, while the supervisor remains tool-free. Request isolation matters too. A hosted process can serve concurrent users, so workflow state must not leak between requests. The sample creates a fresh workflow agent for each request context rather than reusing mutable agent state globally. What the live hosted run showed The hosted application completed a read-only assessment for the synthetic batch. The resulting brief reported: 2,196 affected units across four locations. A high-risk inbound temperature excursion. Supplier acknowledgement, a 36-hour replacement estimate, and a drafted credit note. Unknown transit temperature details, excursion duration, stability impact, final supplier disposition, and potentially issued stock. A recommendation to hold or quarantine stock, explicitly stating that no quarantine had occurred. A required human approval before any inventory restriction. The live Hosted Agent decision brief. Transient response and correlation identifiers are masked; the operations rail is excluded because it contains actor-scoped audit data. The screenshot also shows an important truthfulness choice: the UI says Hosted workflow trace unavailable. The application does not invent stage completion or tool-call evidence when the hosted endpoint does not return trustworthy trace data. The answer can be displayed, but it must not be presented as proof of an internal execution path. Approval is a protocol, not a button The hosted web path uses App Service authentication with Microsoft Entra. The application accepts the injected principal only on the configured App Service host, validates tenant and object identifiers, applies a user allowlist, and performs an additional approver check for mutation requests. State-changing calls also require the expected origin and an application request header. Approval is then bound to five facts: The authenticated actor. The current demo generation. The affected batch. The quarantine action. A ten-minute validity window until first use. Resetting the demo creates a new generation, invalidating old handles. Consuming an approval does not make replay unsafe: the same bound handle can repeat the same quarantine operation, but domain code changes only positions that are not already quarantined. A second call reports an idempotent replay with zero additional positions changed. This is the difference between a human-in-the-loop interface and a human-authorized system. A modal dialog provides user experience; identity binding and deterministic policy provide control. Durable state needs concurrency semantics The hosted application stores each actor's synthetic session in a separate Blob object. A load returns both JSON state and its ETag. A save uses IfNotModified semantics; if another request updated the same state first, Azure Storage rejects the stale write and the API returns a conflict. conditions = ( {"etag": etag, "match_condition": MatchConditions.IfNotModified} if etag else {} ) await blob.upload_blob( json.dumps(state), overwrite=etag is not None, **conditions, ) Without that condition, two browser requests could both read the same approval state and overwrite one another using last-writer-wins behavior. Agent systems do not get a concurrency exemption: ordinary distributed-systems rules still apply. Fail closed, and make the failure legible The analysis adapter accepts only HTTPS Foundry endpoints with the expected path, uses a managed-identity token for https://ai.azure.com/.default , disables redirects, and enforces bounded connect and overall timeouts. It accepts only a completed assistant response with non-empty output text. If the endpoint times out, returns partial output, returns malformed data, or becomes unavailable, the application clears the analysis lease and reports that no inventory changed. It does not substitute a local answer and label it as hosted. Approval remains locked until a new hosted analysis succeeds. This can feel strict during a demo, but it protects provenance. A degraded fallback is useful only when the UI and audit model can identify it accurately. What is proven, and what is not The sample provides useful evidence for several engineering claims: Typed MCP tools reject malformed input. Hosted specialists receive read-only capabilities only. Approval is checked below the model and bound to identity and session state. Quarantine is idempotent in the synthetic domain. Blob ETags prevent stale session writes. Empty, partial, failed, and timed-out hosted responses fail closed. Local tests cover domain, MCP, workflow, API, and repository-hygiene behavior. It does not prove that the sample is a production recall platform. The scenario is synthetic. The local audit log is not tamper-evident. The hosted UI currently lacks trustworthy per-stage and per-tool trace rendering. Deployment-specific RBAC, EasyAuth configuration, telemetry access, model behavior, load characteristics, costs, and recovery procedures require validation in each environment. Evaluation evidence also expires. Golden cases and evaluator configuration are useful assets, but historical results are not a current release certificate. Re-run evaluations against the deployed agent version and inspect failures before making quality claims. Try the pattern Start with the deterministic path before provisioning cloud resources: Set-Location (git rev-parse --show-toplevel) py -3.13 -m venv caldova-recall-control/.venv ./caldova-recall-control/.venv/Scripts/python.exe -m pip install ` -r caldova-recall-control/requirements-ui.txt ./caldova-recall-control/.venv/Scripts/python.exe -m uvicorn ` control_tower_api:app ` --app-dir caldova-recall-control/src ` --host 127.0.0.1 ` --port 8091 Then inspect the MCP server over stdio: ./caldova-recall-control/.venv/Scripts/python.exe ` caldova-recall-control/scripts/inspect_mcp.py The inspector discovers the real tool schemas, reads the synthetic inventory, rejects malformed input and an unapproved mutation, and confirms the stock remains unchanged. Only after that local contract is understood should you configure a Foundry project, deployment identity, model deployment, and Hosted Agent. Engineering takeaways The most reusable lesson in Caldova is not the number of agents. It is the placement of authority. Give each model the smallest useful toolset. Prefer explicit workflow topology when the business process is known. Treat tool annotations as descriptive metadata, not access control. Bind consequential approval to authenticated identity, resource, action, and session generation. Put mutation and idempotency in deterministic domain code. Use optimistic concurrency for durable web state. Preserve provenance by failing closed instead of silently changing execution paths. Show only evidence the system actually captured. Agents are excellent at turning fragmented evidence into an actionable brief. Reliable systems make sure the brief and the action remain two different things. References Caldova source repository Model Context Protocol introduction Microsoft Agent Framework workflow capabilities Deploy a Hosted Agent in Microsoft Foundry Configure Microsoft Entra authentication for Azure App Service Manage concurrency in Azure Blob StorageDistributing Agents to Microsoft Teams and Microsoft 365 Copilot Part 4/5
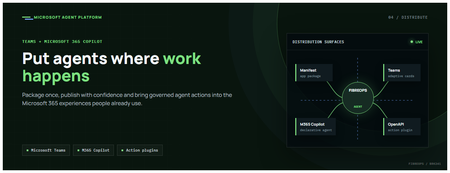
This is the fourth post in our series on the Microsoft agent platform. We cover the Distribute in M365 pillar — publishing your agents to Microsoft Teams and Microsoft 365 Copilot so they reach users where they already work. All examples reference the FibreOps repository, demonstrated at Microsoft Build BRK241. The Distribution Story Building a great agent is only half the challenge. The other half is getting it into the hands of users without asking them to learn a new tool, visit a new URL, or change their workflow. Microsoft 365 Copilot and Microsoft Teams are where enterprise users already spend their day, making them the natural distribution surface for agents. With the GA release, publishing an agent to Teams and M365 Copilot is a single command. No separate app registration portal, no manual manifest assembly, no multi-step approval workflow for development and testing. Publishing to Microsoft 365 Copilot (GA) FibreOps ships as a declarative agent + action plugin ready for sideload. A single CLI command produces the complete package: python -m fibreops.demo publish-m365 --out dist/m365 # Output: # ✓ wrote dist/m365/declarativeAgent.json # ✓ wrote dist/m365/fibreops-action.json # ✓ wrote dist/m365/manifest.json # ✓ wrote dist/m365/color.png (192x192) # ✓ wrote dist/m365/outline.png ( 32x32) # ✓ wrote dist/m365/fibreops-copilot.zip What Gets Generated File Purpose declarativeAgent.json Defines the agent's persona, capabilities, and conversation starters for M365 Copilot fibreops-action.json Action plugin that proxies tool calls to the deployed FastAPI backend via OpenAPI manifest.json Teams app manifest with publisher metadata, permissions, and capabilities color.png / outline.png App icons for Teams and M365 surfaces fibreops-copilot.zip Ready-to-upload package for Teams Admin Center Configuration Set the base URL to your deployed FastAPI app before publishing — the action plugin uses this to resolve the OpenAPI runtime: # Set the public HTTPS hostname of the deployed FastAPI app $env:M365_ACTION_BASE_URL = "https://fibreops-demo.azurewebsites.net" # Optional: customise publisher metadata $env:M365_PUBLISHER_NAME = "Contoso Network Operations" $env:M365_PUBLISHER_WEBSITE = "https://contoso.com/noc" # Generate the package python -m fibreops.demo publish-m365 --out dist/m365 Environment Variable Purpose M365_ACTION_BASE_URL Public HTTPS root for the FastAPI /openapi.json (e.g., Container Apps FQDN) M365_APP_ID Override the generated Teams app GUID (default: deterministic per repo) M365_PUBLISHER_NAME Publisher name shown in M365 Admin Center M365_PUBLISHER_WEBSITE Publisher website link Uploading the Package Upload the generated fibreops-copilot.zip through either path: Teams Admin Center → Manage apps → Upload new app M365 Admin Center → Integrated apps → Upload custom apps Once uploaded, the declarative agent: Inherits the publisher metadata you configured Advertises conversation starters from the FibreOps deck (e.g., "What is the current outage status?", "Dispatch an engineer to FN-LDN-001") Proxies tool calls to the deployed FastAPI app via the action plugin Appears in Microsoft 365 Copilot as a specialised agent users can invoke How Declarative Agents Work A declarative agent in Microsoft 365 Copilot is defined by metadata rather than code running in the M365 surface. The intelligence lives in your backend — Copilot handles the conversational UX, tool orchestration schema, and user authentication. The flow: User invokes the agent in Microsoft 365 Copilot or Teams Copilot renders conversation starters and accepts natural language input When the agent needs to act, Copilot calls the action plugin (your OpenAPI endpoint) Your FastAPI backend processes the request using the full agent pipeline Results return to the user in the Copilot/Teams UX This architecture means your agent logic stays in one place — the backend. The M365 surface is purely a distribution and interaction layer. Action Plugins and OpenAPI The action plugin ( fibreops-action.json ) references your FastAPI app's /openapi.json endpoint. FibreOps exposes a JSON API that the action plugin can call: /api/runs — List and query agent runs /api/optimiser — Get optimizer scores and suggestions /sdk/chat — Natural language interaction with the agent system /healthz — Liveness probe Because FastAPI auto-generates OpenAPI schemas from your typed Python endpoints, the action plugin gets accurate parameter descriptions, response schemas, and error codes without any manual specification work. Publishing as Autopilots (Public Preview) Autopilots take distribution one step further — agents that operate autonomously without requiring a user to initiate each interaction. An Autopilot can: React to events (e.g., a critical telemetry signal) without human initiation Take actions within defined guardrails Notify users only when human intervention is needed Operate continuously across Microsoft 365 surfaces For FibreOps, an Autopilot would monitor the Event Hub stream continuously and only surface to the NOC team when an incident exceeds automated resolution capability — a fully autonomous operations agent. Teams Adaptive Cards FibreOps posts rich Adaptive Card notifications to Microsoft Teams throughout the agent pipeline. This is separate from the declarative agent — it is a push notification channel for real-time operational awareness. # The NetOps agent posts an outage notice via Incoming Webhook def post_outage_notice(incident_id, node_id, severity, summary, engineer=None): card = { "type": "AdaptiveCard", "body": [ {"type": "TextBlock", "text": f"🚨 Outage: {node_id}", "weight": "Bolder", "size": "Large"}, {"type": "FactSet", "facts": [ {"title": "Severity", "value": severity.upper()}, {"title": "Incident", "value": incident_id}, {"title": "Summary", "value": summary}, ]}, ], "actions": [ {"type": "Action.OpenUrl", "title": "View in NOC Console", "url": f"{base_url}/runs/{incident_id}"} ] } # POST to Teams webhook or append to outbox for offline mode ... If TEAMS_WEBHOOK_URL is not configured, cards are appended to state/teams_outbox.jsonl for review in the NOC console's Teams panel. End-to-End: From Code to Copilot Here is the complete flow from development to distribution: Build — Develop agents with Microsoft Agent Framework, test locally with python -m fibreops.demo --backend local Publish agents — python -m fibreops.demo publish creates hosted Prompt Agents in Foundry Deploy infrastructure — azd up provisions App Service, ACR, Event Hub, Key Vault, and Application Insights Deploy hosted agent — azd env set FIBREOPS_DEPLOY_HOSTED true && azd up Generate M365 package — python -m fibreops.demo publish-m365 --out dist/m365 Upload to Teams — Upload fibreops-copilot.zip via Teams Admin Center Users interact — The agent is now available in Microsoft 365 Copilot and Teams Security Considerations Managed Identity — The deployed app uses system-assigned managed identity for all Azure service access. No secrets in code. Least privilege — Each role grant is scoped to the minimum required (Event Hubs Data Owner, Key Vault Secrets User, AcrPull, Azure AI Developer). Authentication — The M365 Copilot surface handles user authentication; your backend receives authenticated requests. Guardrails — Autopilots operate within defined boundaries; human-in-the-loop escalation is built into the Routine and agent decision logic. Key Takeaways Publishing to Teams and M365 Copilot is GA — a single command generates the complete package. Declarative agents separate distribution (M365) from intelligence (your backend). Action plugins leverage your existing FastAPI OpenAPI schema — no manual specification needed. Autopilots (Public Preview) enable fully autonomous operation within guardrails. Adaptive Cards provide real-time push notifications alongside the conversational agent surface. The same backend serves the NOC console, the Copilot SDK, and the M365 declarative agent. Next Steps Explore the FibreOps repository — try python -m fibreops.demo publish-m365 Microsoft 365 Copilot extensibility documentation Next in this series: Voice Live and Observability for Production Agent SystemsBuilding Autonomous Agents with Microsoft Agent Framework and GitHub Copilot SDK Part 2/5
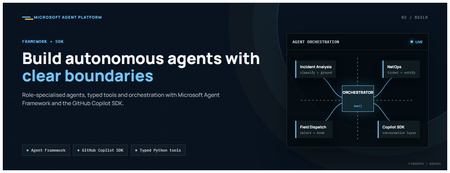
This is the second post in our series on the Microsoft agent platform. Here we dive deep into building autonomous agents, the development experience, the Microsoft Agent Framework, tool design patterns, and how the GitHub Copilot SDK brings conversational AI to your agent system. All examples reference the FibreOps repository, an autonomous fibre outage response system demonstrated at Microsoft Build BRK241. The Microsoft Agent Framework The Microsoft Agent Framework (now GA) provides a unified programming model for building agents. It supports multiple backends through a single .run() contract: Hosted — FoundryAgent connected to a Prompt Agent published to Microsoft Foundry Agent Service. Foundry — Agent + FoundryChatClient with the definition resolved locally (ideal for prompt iteration). Local — Deterministic LocalAgent for offline development and testing. This design means your orchestration code never changes regardless of where the agent runs. The factory pattern in FibreOps selects the backend at startup: # src/fibreops/agents/factory.py — simplified from agent_framework_foundry import FoundryAgent from agent_framework import Agent, FoundryChatClient def build_agent(role: str, backend: str, config: Config): if backend == "hosted": return FoundryAgent(agent_id=config.foundry_agents[role]) elif backend == "foundry": return Agent( instructions=get_instructions(role), chat_client=FoundryChatClient(endpoint=config.endpoint), tools=get_tools(role), ) else: return LocalAgent(role=role) Set FIBREOPS_AGENT_BACKEND to override the backend, or leave it as auto for intelligent detection. Designing Role-Specialised Agents FibreOps demonstrates a key pattern: role specialisation. Rather than one monolithic agent, the system uses three focused agents, each with a clear responsibility boundary: Agent Role Tools Available IncidentAnalysisAgent Classify severity, find root cause, retrieve SOP Knowledge (SOPs + topology), Web IQ, Work IQ NetOpsCoordinatorAgent File D365 incident, post Teams notice Ticketing, Teams, Memory FieldDispatchAgent Select engineer, book resource, update team Dispatch, Teams, Voice Why Role Specialisation? Focused system prompts — Each agent has a tightly scoped instruction set, reducing hallucination and improving reliability. Independent evaluation — You can score each agent separately against role-specific criteria. Parallel development — Teams can iterate on agents independently. Selective upgrade — Swap one agent's model or implementation without touching others. Tool Design: Typed Python Functions Tools in the Microsoft Agent Framework are typed Python functions that the runtime supplies to the hosted agent definition. FibreOps demonstrates several tool categories: Knowledge Tools # src/fibreops/tools/knowledge.py — simplified def sop_lookup(node_id: str, signal_type: str) -> dict: """Retrieve the Standard Operating Procedure for a given signal type. Args: node_id: The fibre node identifier (e.g., FN-LDN-001) signal_type: The type of signal (loss_of_light, high_ber, signal_degradation) Returns: SOP with steps, escalation path, and estimated resolution time. """ # Load from local markdown SOPs or Foundry IQ ... def web_iq_search(query: str, *, limit: int = 5) -> list[dict]: """Search public web for context relevant to the incident. Grounding against roadworks, weather, power outages, splice guidance. Falls back to deterministic fixtures when endpoint is unset. """ ... def work_iq_search(query: str, *, limit: int = 5) -> list[dict]: """Search enterprise knowledge for context relevant to the incident. Site surveys, SLA tiers, competency matrix, MTTR trends. """ ... Integration Tools # src/fibreops/tools/teams.py — simplified def post_outage_notice( incident_id: str, node_id: str, severity: str, summary: str, engineer: str | None = None, ) -> dict: """Post an Adaptive Card outage notice to the configured Teams channel. If TEAMS_WEBHOOK_URL is not set, appends to state/teams_outbox.jsonl for offline review. """ card = build_adaptive_card(incident_id, node_id, severity, summary, engineer) if config.teams_webhook_url: requests.post(config.teams_webhook_url, json=card) else: append_to_outbox(card) return {"status": "posted", "incident_id": incident_id} Design Principles for Agent Tools Typed parameters with docstrings — The runtime uses type hints and docstrings to generate the tool schema for the LLM. Graceful degradation — Every tool works offline by falling back to local fixtures or file-based state. Idempotent where possible — Tools that create resources return existing records if called with the same parameters. Observable — Every tool invocation emits an OpenTelemetry span for tracing and debugging. The Orchestrator Pattern The orchestrator drives signals through the agent pipeline. It is deliberately simple — a linear flow with error handling: # src/fibreops/orchestrator.py — simplified async def handle_signal(signal: TelemetrySignal) -> RunResult: """Process a telemetry signal through the agent pipeline.""" # Stage 1: Incident Analysis analysis = await incident_agent.run( f"Analyse this signal: {signal.model_dump_json()}" ) # Stage 2: NetOps Coordination coordination = await netops_agent.run( f"Coordinate response for: {analysis.summary}" ) # Stage 3: Field Dispatch dispatch = await dispatch_agent.run( f"Dispatch engineer for incident: {coordination.incident_id}" ) return RunResult( signal=signal, analysis=analysis, coordination=coordination, dispatch=dispatch, ) The orchestrator honours the same contract regardless of backend — hosted , foundry , or local — because all backends implement await agent.run(prompt) . GitHub Copilot SDK Integration (GA) The GitHub Copilot SDK enables conversational interaction with your agent system. FibreOps implements FibreOpsCopilotClient with the same interface as github/copilot-sdk : # src/fibreops/sdk/__init__.py — simplified from fibreops.sdk.client import FibreOpsCopilotClient client = FibreOpsCopilotClient() session = client.create_session() # Query agent status response = session.send_and_wait("status") print(response.text) # Human-readable summary print(response.data) # Structured JSON # Inject a telemetry signal via conversation response = session.send_and_wait(json.dumps({ "signal_id": "sig-demo", "node_id": "FN-LDN-001", "signal_type": "loss_of_light", "severity": "critical" })) The adapter routes prompts by shape: JSON signal-shaped dicts — Forwarded to the orchestrator for processing. Free-form text — Answered by a deterministic responder ( help , status , nodes , engineers , optimiser , dispatch ). Drive it from the terminal: python -m fibreops.demo chat "help" python -m fibreops.demo chat "status" python -m fibreops.demo chat '{"signal_id":"sig-demo","node_id":"FN-LDN-001","signal_type":"loss_of_light","severity":"critical"}' Or hit the embedded HTTP endpoint when the NOC console is running: Invoke-RestMethod -Method Post http://127.0.0.1:8800/sdk/chat -Body '{"prompt":"status"}' -ContentType application/json Development Workflow with Foundry Toolkit for VS Code The Foundry Toolkit for VS Code provides an integrated development experience: Author prompts — Edit system instructions with live preview and token counting. Test locally — Run against the foundry backend with FoundryChatClient pointing at your development model. Iterate fast — The foundry backend resolves definitions locally, so prompt changes take effect immediately without republishing. Publish when ready — python -m fibreops.demo publish creates hosted Prompt Agents in Foundry. Multi-Model Support The Microsoft Agent Framework supports multiple models. FibreOps defaults to gpt-4.1-mini (the model available in most demo Foundry accounts), but any chat-completions deployment works: # .env AZURE_AI_MODEL_DEPLOYMENT=gpt-4.1-mini # or gpt-4o-mini, gpt-4o, gpt-4.1 The framework also supports Claude Code connectors and Magentic-One for multi-agent collaboration scenarios. Testing Strategy FibreOps demonstrates a layered testing approach: Unit tests — Test tools in isolation with mocked dependencies. Local backend tests — Run the full pipeline with LocalAgent for deterministic assertions. Integration tests — Run against real Foundry agents with pytest -q . Rubric evaluation — The optimizer scores every run against defined criteria. # Run the test suite .\.venv\Scripts\python.exe -m pytest -q Key Takeaways The Microsoft Agent Framework provides a unified .run() contract across hosted, foundry, and local backends. Role specialisation keeps agents focused, testable, and independently evolvable. Tools are typed Python functions with docstrings — the runtime generates schemas automatically. The GitHub Copilot SDK (GA) enables conversational interaction with any agent system. Graceful degradation means the entire system works offline for development. The factory pattern lets you switch backends without changing orchestration code. Next Steps Clone the FibreOps repository and run python -m fibreops.demo --signals 3 Microsoft Agent Framework documentation Next in this series: Running Hosted Agents in Microsoft Foundry Agent ServiceLearn how to use the four IQs: Web IQ, Work IQ, Fabric IQ, Foundry IQ
We just concluded Microsoft IQ Deep Dive with Python, a three-part livestream series all about Microsoft IQ. We showed how to use the four IQs to ground your AI applications and agents: Work IQ: user-specific retrieval of M365 data, like Teams chats, emails, and calendar events. Fabric IQ: retrieval of data stored in OneLake, via Fabric ontologies, graphs, and data agents. Web IQ: real-time web results with super low latency Foundry IQ: multi-source agentic retrieval on search indexes plus remote sources (including Web IQ, Work IQ, and Fabric IQ) The four IQs are all exposed as MCP endpoints, so you can easily integrate into your own agents, or add to your Foundry agents via the Foundry Toolbox. Check out our code samples for Python notebooks and agents that use each of the MCP servers and APIs. All of the materials from our series are available for you to keep learning from, and linked below: Video recordings of each stream PowerPoint slides that you can use for reviewing or even teaching the material to your own community An annotated write-up of each presentation, so you can quickly read through 🙋🏽♂️ Have follow up questions? Join the weekly Python+AI office hours on Foundry Discord. Microsoft IQ Deep Dive with Python: Foundry IQ 📺 Watch YouTube recording In the first session, we dived into Foundry IQ (Azure AI Search), exploring how it helps agents and applications work with curated knowledge and organizational context. We built knowledge bases in Python and connected them to multiple knowledge sources, including file knowledge sources, search indexes built from ingested data, and the Web IQ MCP server. Then we performed multi-source agentic retrieval on those knowledge bases, which executes queries in parallel and merges the results with state-of-the-art ranking models. Finally, we built agents in Python using Microsoft Agent Framework and grounded their responses in Foundry IQ results three different ways: a custom tool calling the knowledge base API, the knowledge base MCP endpoint, and a Foundry Toolbox. We deployed those agents to Foundry Agent Service as hosted agents and published one to Teams. 🖼️ Slides for this session 📝 Write-up for this session 💻 Code repository with examples: iqdeepdive Microsoft IQ Deep Dive with Python: Work IQ 📺 Watch YouTube recording In the second session, we focused on Work IQ and how it brings workplace context into AI-powered experiences. We compared Work IQ to Microsoft Graph, then explored all three protocols it speaks — A2A, MCP, and REST — with runnable Python notebooks for each. We walked through the 10 generic tools that Work IQ exposes over MCP, including ask, which calls Microsoft 365 Copilot directly, and do_action, the only write path. We also connected Work IQ to a Foundry IQ knowledge base as a knowledge source, so a single query returns a blended answer across indexed HR documents and live work context. Then we wired Work IQ into a Microsoft Agent Framework agent as an MCP tool, and finished with Agent 365 autopilots — agents that get their own Microsoft 365 identity, mailbox, and place in the org chart, and act as themselves rather than on behalf of you. A live demo showed the Work Mate autopilot reading its own mailbox in Teams and emailing a customer directly. 🖼️ Slides for this session 📝 Write-up for this session 💻 Code repository with examples: iqdeepdive Microsoft IQ Deep Dive with Python: Fabric IQ 📺 Watch YouTube recording In the final session, we explored Fabric IQ and how it connects AI experiences to structured business data stored in Microsoft Fabric's OneLake. We introduced the key components of Fabric IQ — ontologies, graphs, semantic models, and data agents — and showed how each one helps describe, organize, and reason over operational data. Ontologies provide a shared business vocabulary that maps entity types, properties, and relationships to actual OneLake data. Graphs offer dedicated graph database capabilities for queries requiring extensive relationship traversal. Semantic models expose Power BI analytics through DAX measures on star-schema tables. Data agents combine all of these behind a single conversational interface that selects the right source and query language automatically. For each component, we demonstrated the Ontology MCP server and Data Agent MCP server for agent integration, and showed how to add each as a knowledge source to Foundry IQ knowledge bases for multi-source retrieval. 🖼️ Slides for this session 📝 Write-up for this session 💻 Code repository with examples: iqdeepdive1.9KViews2likes0CommentsBuilding AI Agents from Zero to Production
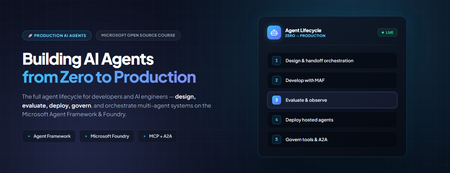
Building AI Agents from Zero to Production Most agent demos stop at "it answered my question." Production doesn't. The gap between a notebook that calls an LLM and a governed, observable, multi-agent system your organisation can actually depend on is where real engineering happens, evaluation, deployment, data sovereignty, tool governance, and cross-team interoperability. Microsoft's open-source course Building AI Agents from Zero to Production walks that entire arc in seven lessons, using one realistic use case and the Microsoft Agent Framework (MAF) plus Microsoft Foundry. This post is a developer-focused tour of what it teaches, the architecture decisions behind each stage, and the code patterns that matter when you move from prototype to production. Who this is for AI engineers building their first or first production, agent system. Backend and full-stack developers integrating agents into real applications and CI/CD. Cloud architects who need data sovereignty, private networking, and governance around agent workloads. Technical leads deciding how to standardise tools and orchestration across multiple teams. The samples are Python 3.12+, served through Microsoft Foundry using GPT-5 series models (for example gpt-5.1 ). Lesson 4 adds a TypeScript/React frontend. You will want an Azure subscription and the Azure CLI. The AI Agent Development Lifecycle The course is organised around a lifecycle rather than a feature list. Each lesson is a stage, and each stage assumes the previous one is solved: # Stage The production question it answers 1 Agent Design What should each agent do, and how do they hand off? 2 Agent Development How do I build and run them with the Agent Framework? 3 Agent Evaluations How do I know they actually work — and keep working? 4 Agent Deployment How do I ship one as a hosted service with a UI and CI gate? 5 Production Hosted Agents How do I meet enterprise data, network, and governance needs? 6 Microsoft Toolbox How do I govern tools once, and reuse them across teams? 7 Multi-Agent & A2A How do agents from different teams interoperate safely? The thread running through all seven is a single scenario: a Developer Onboarding agent system that helps a new hire find the right teammates, get a sensible first task, and pull learning resources and code snippets. It is deliberately mundane, which is exactly why it exposes the production concerns that flashy demos hide. Lesson 1 — Agent Design: three components, one graph The course defines an agent by three parts: an LLM for reasoning, tools to act, and memory to retain context. The design work is context engineering — making sure the right information reaches the model at the right moment, no more and no less. Rather than one monolithic assistant, the onboarding system is split into specialists coordinated by a triage agent using handoff orchestration: Agent Job Tool Employee Search Answer org and people questions Foundry file search over an employee-directory vector store Task Recommendation Suggest 1–3 GitHub issues for the new dev GitHub MCP Server (reads recent commits + open issues) Code Assistant Provide resources and runnable snippets Microsoft Learn MCP + Code Interpreter Architecturally this is a directed graph: User → Triage → [Employee, Learning, Coding] . Splitting responsibilities early pays off later, each agent gets a tightly scoped prompt (less hallucination), can be evaluated independently, and can be upgraded without touching its peers. Lesson 2 — Development: standalone agents with MAF Here the design becomes code. Each specialist is a small, independently runnable service built with the Microsoft Agent Framework, authenticated to Foundry with your Azure CLI login. Setup is deliberately boring: az login az account set --subscription "<your-subscription-id>" cp .env.example .env # Fill FOUNDRY_PROJECT_ENDPOINT and FOUNDRY_MODEL (e.g. gpt-5.1) # Create the employee-directory vector store once; note the printed VECTOR_STORE_ID python lesson-2-agent-development/setup_vector_store.py # Start an agent — serves on http://localhost:8090 python lesson-2-agent-development/employee-search-agent.py The FoundryChatClient auto-reads any FOUNDRY_ -prefixed environment variables and uses AzureCliCredential , so there are no keys in code. The lesson ships six samples, each on its own port, so you can chat with them individually in the local DevUI before wiring them together: Sample Tool Port employee-search-agent.py Foundry file search / vector store 8090 task-recommendation-agent.py GitHub MCP Server 8095 azure-learning-agent.py Microsoft Learn MCP 8092 coding-agent.py Code Interpreter 8093 learning-recommendation-agent.py Learn MCP + reasoning 8091 agent-orchestration.py Multi-agent handoff 8094 Why this matters: keeping each agent as its own process with its own port is a testability decision, not an accident. You can smoke-test one specialist in isolation, then compose them in agent-orchestration.py . Lesson 3 — Evaluation: you can't unit-test a probability distribution This is the lesson that separates a demo from a product. Agents are non-deterministic, so traditional assertions don't fit. The course uses three complementary layers: Observability / tracing — always on, via OpenTelemetry to Application Insights. Smoke tests — fast, run on every deploy. Evaluations — deeper, model-based scoring run on-demand or nightly. Turning on tracing is a single call: from agent_framework.foundry import FoundryChatClient client = FoundryChatClient() client.configure_azure_monitor() # export traces + metrics to Application Insights For quality it uses Foundry's built-in "LLM-as-a-judge" evaluators against real persisted responses (identified by response_id ), not freshly regenerated ones: Evaluator evaluator_name Measures Relevance builtin.relevance Does the response address the request? Groundedness builtin.groundedness Is it supported by retrieved data (no hallucination)? Tool-call accuracy builtin.tool_call_accuracy Were the right tools called with the right arguments? Tool-output utilization builtin.tool_output_utilization Did the agent actually use tool results? The judge model is set independently via AZURE_AI_MODEL_DEPLOYMENT_NAME , so you can evaluate a cheap production model with a stronger one. The run prints a report_url that deep-links into the Foundry portal. Lesson 4 — Deployment: a hosted agent, a UI, and a CI gate Now the agent becomes a managed service. It is deployed as a Foundry Hosted Agent a Microsoft-managed execution environment and fronted by an OpenAI ChatKit React UI talking to a FastAPI backend: ChatKit React (3000) → FastAPI backend (8001) → Foundry Hosted Agent → tools Building the agent is declarative attach tools, name it, serve it: agent = client.as_agent( name="DevOnboardingAgent", instructions="...", tools=[file_search_tool, learn_mcp_tool], ) # served with: from_agent_framework(agent).run() The recommended deploy path is the Azure Developer CLI: cd hosted-agent azd auth login azd agent deploy The genuinely production-minded part is the smoke test as a post-deploy CI gate. Six cases cover reachability, each scenario, off-topic prompt adherence, and multi-turn threading (verifying state via previous_response_id ). The GitHub Action runs them against the freshly deployed agent: export FOUNDRY_TOKEN=$(az account get-access-token \ --resource https://ai.azure.com/ --query accessToken -o tsv) python runner.py \ --project-endpoint "https://<account>.services.ai.azure.com/api/projects/<project>" \ --agent-name dev-onboarding \ --tests-file tests/smoke-tests.json Pitfall to remember: the token audience must be https://ai.azure.com/ . A cognitiveservices.azure.com token is rejected by the Responses API — a mistake that costs many engineers an afternoon. Lesson 5 — Production: separating where an agent runs from where its data lives The pivotal concept for enterprise readiness is the distinction between a Hosted Agent (compute, scaling, identity) and a Capability Host (where conversation history, files, and embeddings actually reside): Concern Hosted Agent Capability Host Compute / scaling / identity ✅ Provided — Conversation history Microsoft-managed default Redirect to your Azure Cosmos DB File uploads Microsoft-managed default Redirect to your Azure Storage Vector embeddings Microsoft-managed default Redirect to your Azure AI Search Required to run the agent? ✅ Yes ❌ Optional Required for data sovereignty? ❌ Not sufficient ✅ Yes "Basic" setup uses Microsoft-managed storage and is perfect for getting started. "Standard" setup redirects each data plane to your own Azure resources through a project-level capability host, this is how you keep customer data in your tenant, inside your network boundary: PUT .../accounts/{account}/projects/{project}/capabilityHosts/{name}?api-version=2025-06-01 { "properties": { "capabilityHostKind": "Agents", "threadStorageConnections": ["my-cosmosdb-connection"], "vectorStoreConnections": ["my-ai-search-connection"], "storageConnections": ["my-storage-connection"] } } Operational constraints worth internalising before you provision: there is one capability host per scope (a second attempt returns 409 Conflict ), configuration is immutable (delete and recreate to change it), deletion is destructive, and the account-level host must exist before the project-level one. Lesson 6 — Toolbox: govern tools once, reuse everywhere Left unchecked, every team re-implements the same tools, scatters credentials, and loses governance visibility. The Microsoft Foundry Toolbox solves this by exposing a curated, versioned set of tools behind a single MCP-compatible endpoint, with credentials held in Foundry connections rather than agent code. You build a toolbox version once: from azure.ai.projects.models import MCPTool, ToolboxSearchPreviewTool, WebSearchTool toolbox_version = project.toolboxes.create_toolbox_version( name="agent-tools", description="Web search + an MCP server + tool search", tools=[ WebSearchTool(), MCPTool( server_label="myserver", server_url="https://your-mcp-server.example.com", require_approval="never", project_connection_id="my-key-auth-connection", # credentials live in Foundry ), ToolboxSearchPreviewTool(), ], ) And every agent consumes it through one endpoint, no per-team tool code: from agent_framework import MCPStreamableHTTPTool mcp_tool = MCPStreamableHTTPTool( name="toolbox", url=TOOLBOX_ENDPOINT, # {project_endpoint}/toolboxes/{name}/mcp?api-version=v1 http_client=http_client, load_prompts=False, ) agent = chat_client.as_agent(name="my-toolbox-agent", instructions="...", tools=[mcp_tool]) Versioning is blue/green: create a new version, test it on its version-specific endpoint, then promote it to default and every consumer picks it up with zero code changes. A Guardrail (RAI) policy can be applied at the toolbox layer, independent of model-level content filters. Note the toolbox management APIs are currently preview; the portal or VS Code Foundry Toolkit are practical alternatives for creation today. Lesson 7 — Multi-Agent & A2A: agents as networked peers The final lesson contrasts two ways agents collaborate: Handoff / Workflow — in-process, same codebase, fastest, tightest coupling. Agent-to-Agent (A2A) — cross-process over an open protocol, so agents from different teams, orgs, or frameworks interoperate. A2A gives each agent a discoverable Agent Card at /.well-known/agent-card.json and a task lifecycle (submitted → working → completed/failed). The elegant part: A2AExecutor wraps an existing MAF agent with no changes to that agent's code. from agent_framework.a2a import A2AExecutor from a2a.server.apps import A2AStarletteApplication from a2a.server.tasks import InMemoryTaskStore agent_card = AgentCard( name="Coding Assistant", url="http://localhost:9000/", version="1.0.0", capabilities=AgentCapabilities(streaming=True), skills=[AgentSkill(id="generate-code", name="Generate code", tags=["code"])], ) request_handler = DefaultRequestHandler( agent_executor=A2AExecutor(agent), # wraps your existing MAF agent unchanged task_store=InMemoryTaskStore(), ) app = A2AStarletteApplication(agent_card=agent_card, http_handler=request_handler).build() Consuming a remote agent then looks exactly like calling a local one: from agent_framework.a2a import A2AAgent remote_agent = A2AAgent(name="remote-coding-assistant", url="http://localhost:9000") result = await remote_agent.run("Write a Python function that reverses a string.") Because an A2AAgent can be a participant inside a HandoffBuilder workflow, you can mix in-process routing with remote services in the same orchestration. For enterprise use, A2AAgent accepts an auth_interceptor for bearer tokens, and the Agent Card carries security_schemes . Responsible and secure by design Production readiness in this course is not just uptime, it is governance: Identity over keys — AzureCliCredential and managed identity throughout; no secrets in code. Least privilege — CI runners get a scoped Azure AI User role assignment on the specific project. Data sovereignty — capability hosts keep conversation history, files, and embeddings in your own Cosmos DB, Storage, and AI Search. Tool approval and guardrails — MCP approval_mode and toolbox-level RAI policy gate what agents can do. Grounded evaluation — groundedness and tool-utilization scoring catch hallucination and unused-tool behaviour before users do. Cost hygiene — the lessons create real Azure resources; delete the resource group when done: az group delete --name <rg> --yes --no-wait . Key takeaways Design as a graph of specialists. Handoff orchestration with tightly scoped agents beats one monolith on reliability and testability. One .run() contract, many backends. The Agent Framework keeps orchestration code stable from local dev to hosted production. Evaluate continuously. Tracing + smoke tests + model-based evaluators are three layers, not alternatives. Separate compute from data. Hosted Agents run the agent; Capability Hosts give you sovereignty — you need both for enterprise. Govern tools centrally. A versioned toolbox behind one MCP endpoint kills tool sprawl and credential duplication. Open protocols for interop. A2A lets agents cross team, org, and framework boundaries without rewrites. Get started Clone the repo (skip the 50+ translations for a faster download) and work through the lessons in order: git clone --filter=blob:none --sparse https://github.com/microsoft/Building-AI-Agents-From-Zero-To-Production.git cd Building-AI-Agents-From-Zero-To-Production git sparse-checkout set --no-cone '/*' '!translations' '!translated_images' References Building AI Agents from Zero to Production — course repo Microsoft Agent Framework Microsoft Foundry documentation Agent-to-Agent (A2A) protocol specification a2a-python SDK AI Agents for Beginners MCP for Beginners Microsoft Foundry DiscordDeploying Foundry Hosted Agents from Source Code
Introduction At Microsoft Build, it was announced that Foundry Hosted Agents now support source-code deployments. Previously, Hosted Agents required application code to be packaged in a container for deployment. This new functionality allows you to deploy the agent from a `.zip` file instead of from a container image. This post walks through the process of deploying a source-code Hosted Agent, briefly compares that approach to container-based Hosted Agent deployment, and provides a reusable GitHub Action for CI/CD deployments. It is part of a series of post whose source code is housed in simple-hosted-agent-responses repository. If Hosted Agents are new to you, read the previous posts, "Deploying Foundry Hosted Agents via REST API" and "GitHub Actions for Deploying Hosted Agents." Background A Foundry Hosted Agent helps abstract the management of the compute tier for your agent. It runs in a self-contained Micro-VM sandbox, meaning the Hosted Agent sandbox provides the CPU and memory allocation used to run your agent. Previously, this Micro-VM would download your code from an Azure Container Registry (ACR) and run it on the virtualized platform. Not all customers use container-based workloads today and, let's face it, not everything needs to be a container. So how do those customers and platforms take advantage of Foundry Hosted Agents? The answer is through source-code deployments of Foundry Hosted Agents. What is a Source Code Agent? Source Code Agents are like other Foundry Hosted Agents. The key deployment difference is that the code asset is a .zip file instead of a container image. This also changes the Agent Development Lifecycle compared with the containerized version of Foundry Hosted Agents. An important point of clarity: the way the agent is configured is a data plane operation. As such, taking advantage of Source Code Agent functionality does not require changes to the Foundry infrastructure itself when your Infrastructure as Code (IaC) is only provisioning the supporting resources in Bicep, Terraform, or PowerShell. The deployment change happens through the Foundry data plane. First, let's look at a container-based Foundry Hosted Agent: Now, let's compare it to the source-code version: Deployment Process Now that we've looked at the end result, let's talk through the steps required to deploy a Foundry Hosted Agent via source code. So in Foundry, what does the difference between a container-based and a source-code-based Foundry Hosted Agent look like? The Microsoft Learn docs outline this well: Every source-code deployment follows the same sequence: package -> create or update -> poll until active -> invoke. The source-code path uses `code_configuration` in the agent definition; the image-based path uses `container_configuration` instead--the two are mutually exclusive on a single version. If wanting to confirm and see in more detail one can refer to the Foundry Agent REST API documentation. The source layout can stay familiar, but the deployed artifact changes to a `.zip` file. Packaging the source code into a ZIP is the piece that differs from the container-image flow. The agent deployment to Foundry is also slightly different because it uses source-code configuration instead of container configuration. You can run this via `azd` with a command structured like the following: azd ai agent init --no-prompt --project-id "<project-resource-id>" --deploy-mode code --runtime python_3_13 --entry-point main.py This assumes `azd` is installed and authenticated, and that the authenticated identity has access to the Foundry project. The command initializes a code deployment for the project. However, we recognize that the majority of enterprise organizations will want to use other deployment methods. As such, REST API deployments are supported, as are the Python and C# SDKs for creating the agent. Taking this a step further, and similar to "GitHub Actions for Deploying Hosted Agents," let's create a reusable GitHub Action for deploying source-code-based Hosted Agents. GitHub Action If you are wanting to see the entire action it is part of the repository simple-hosted-agent-responses, which contains source code, IaC, and deployment options. Background First, we need to understand that we cannot reuse the GitHub Action from "GitHub Actions for Deploying Hosted Agents" because, as noted above, the REST API uses mutually exclusive options. In theory, we could add conditional logic across the parameters; however, it is cleaner to create a separate action. Before invoking this action, the workflow must authenticate to Azure because the action calls `az account get-access-token` to acquire a token for the Foundry data plane. Inputs inputs: project_endpoint: description: Foundry project endpoint URL required: true agent_name: description: Name of the hosted agent required: true source_code_zip: description: Path to the local source-code zip artifact required: true model_deployment_name: description: Name of the AI model deployment required: true cpu: description: CPU allocation for the hosted agent container required: false default: '0.25' memory: description: Memory allocation for the hosted agent container required: false default: '0.5Gi' runtime: description: Source-code runtime for the hosted agent required: false default: 'python_3_13' entry_point: description: Source-code entry point command for the hosted agent required: false default: '["python", "main.py"]' dependency_resolution: description: How Agent Service resolves dependencies for the source-code deployment required: false default: 'remote_build' max_polling_seconds: description: Maximum time to wait for the source-code deployment to reach active status required: false default: '600' For our inputs, `project_endpoint`, `agent_name`, `source_code_zip`, and `model_deployment_name` are required. The CPU, memory, runtime, entry point, dependency resolution, and max polling values are configurable properties with defaults set in the action. The source-code-specific inputs populate the `code_configuration` properties of the REST payload. These include `source_code_zip`, `runtime`, `entry_point`, and `dependency_resolution`. This information tells Foundry how to run the code from the `.zip` package. Outputs We should output values that make sense for downstream workflows. Every workflow may not use them, but it is useful to expose non-secret values when they can support later steps. In this case, we are creating a new version of the agent, so let's output that version ID. outputs: agent_version: description: Version ID returned by the Foundry data plane value: ${{ steps.post.outputs.agent_version }} Action The action maps the inputs to environment variables as the first step. After that, it gets an access token from Azure and calls the REST API endpoint. Once we have this, we prepare the body of the call. Verify against the API for all valid properties. For this example, I chose not to set `rai_config` and `tools` to keep things simple. runs: using: composite steps: - name: Create source-code metadata id: metadata shell: bash env: AGENT_NAME: ${{ inputs.agent_name }} MODEL_DEPLOYMENT_NAME: ${{ inputs.model_deployment_name }} CPU: ${{ inputs.cpu }} MEMORY: ${{ inputs.memory }} RUNTIME: ${{ inputs.runtime }} ENTRY_POINT: ${{ inputs.entry_point }} DEPENDENCY_RESOLUTION: ${{ inputs.dependency_resolution }} run: | METADATA_FILE=$(mktemp) ENTRY_POINT_JSON=$(python3 -c 'import json,sys; print(json.dumps(json.loads(sys.argv[1])))' "$ENTRY_POINT") jq -n \ --arg model "$MODEL_DEPLOYMENT_NAME" \ --arg cpu "$CPU" \ --arg memory "$MEMORY" \ --arg runtime "$RUNTIME" \ --arg dep_resolution "$DEPENDENCY_RESOLUTION" \ --argjson entry_point "$ENTRY_POINT_JSON" \ '{ description: "Hosted agent deployed from source code", definition: { kind: "hosted", protocol_versions: [{protocol: "responses", version: "1.0.0"}], cpu: $cpu, memory: $memory, code_configuration: { runtime: $runtime, entry_point: $entry_point, dependency_resolution: $dep_resolution }, environment_variables: {AZURE_AI_MODEL_DEPLOYMENT_NAME: $model} } }' > "$METADATA_FILE" echo "metadata_file=${METADATA_FILE}" >> "$GITHUB_OUTPUT" echo "Metadata file created at ${METADATA_FILE}" - name: Post source-code agent deployment to Foundry data plane id: post shell: bash env: PROJECT_ENDPOINT: ${{ inputs.project_endpoint }} AGENT_NAME: ${{ inputs.agent_name }} SOURCE_CODE_ZIP: ${{ inputs.source_code_zip }} METADATA_FILE: ${{ steps.metadata.outputs.metadata_file }} MAX_POLLING_SECONDS: ${{ inputs.max_polling_seconds }} run: | if [[ ! -f "$SOURCE_CODE_ZIP" ]]; then echo "Error: Source code zip not found at ${SOURCE_CODE_ZIP}" exit 1 fi CODE_ZIP_SHA256=$(sha256sum "$SOURCE_CODE_ZIP" | awk '{print $1}') echo "Source code SHA256: ${CODE_ZIP_SHA256}" FOUNDRY_TOKEN=$(az account get-access-token \ --resource "https://ai.azure.com/" \ --query accessToken -o tsv) # POST /agents/{name}/versions auto-creates the agent if it doesn't # exist and adds a new version if it does, so a single call covers # both first-deploy and update scenarios (matches update-agent). HTTP_STATUS=$(curl -s -o /tmp/source_code_response.json \ -w "%{http_code}" \ -X POST \ "${PROJECT_ENDPOINT}/agents/${AGENT_NAME}/versions?api-version=2025-11-15-preview" \ -H "Authorization: Bearer ${FOUNDRY_TOKEN}" \ -H "Accept: application/json" \ -H "Foundry-Features: CodeAgents=V1Preview,HostedAgents=V1Preview" \ -H "x-ms-agent-name: ${AGENT_NAME}" \ -H "x-ms-code-zip-sha256: ${CODE_ZIP_SHA256}" \ -F "metadata=@${METADATA_FILE};type=application/json" \ -F "code=@${SOURCE_CODE_ZIP};type=application/zip;filename=${AGENT_NAME}.zip") echo "HTTP ${HTTP_STATUS}: $(cat /tmp/source_code_response.json)" if [[ "$HTTP_STATUS" -lt 200 || "$HTTP_STATUS" -ge 300 ]]; then echo "Error: Foundry data plane returned HTTP ${HTTP_STATUS}" exit 1 fi RESPONSE=$(cat /tmp/source_code_response.json) AGENT_VERSION=$(echo "$RESPONSE" | python3 -c 'import sys,json; print(json.load(sys.stdin)["version"])') echo "agent_version=${AGENT_VERSION}" >> "$GITHUB_OUTPUT" echo "Agent version resolved as ${AGENT_VERSION}" START_TIME=$(date +%s) while true; do ELAPSED=$(($(date +%s) - START_TIME)) if [[ $ELAPSED -gt $MAX_POLLING_SECONDS ]]; then echo "Error: Agent version did not reach active state within ${MAX_POLLING_SECONDS} seconds" exit 1 fi VERSION_STATUS=$(curl -s \ -X GET \ "${PROJECT_ENDPOINT}/agents/${AGENT_NAME}/versions/${AGENT_VERSION}?api-version=2025-11-15-preview" \ -H "Authorization: Bearer ${FOUNDRY_TOKEN}" \ -H "Accept: application/json" \ -H "Foundry-Features: CodeAgents=V1Preview,HostedAgents=V1Preview" \ | python3 -c 'import sys,json; data=json.load(sys.stdin); print(data.get("status", "unknown"))' 2>/dev/null) echo "Current status: ${VERSION_STATUS} (elapsed ${ELAPSED}s)" if [[ "$VERSION_STATUS" == "active" ]]; then echo "Agent version ${AGENT_VERSION} is active" break fi if [[ "$VERSION_STATUS" == "failed" ]]; then echo "Error: Agent version reached failed status" exit 1 fi sleep 5 done Building the Source-Code Artifact Before calling the source-code Hosted Agent action, create the ZIP artifact that will be passed into `source_code_zip`. source-code: name: Build source-code artifact runs-on: ubuntu-latest permissions: contents: read steps: - name: Checkout uses: actions/checkout@v6 - name: Create source-code zip artifact run: | git archive --format=zip --output=source-code.zip HEAD:src/agent-framework/responses/basic - name: Upload source-code artifact uses: actions/upload-artifact@v7 with: name: source-code path: source-code.zip Calling the Action Now that we have the action, how can we scale this across multiple workflows? We pass in the required parameters and the ZIP artifact path. - name: Update agent with source code uses: ./.github/actions/update-agent-source-code with: project_endpoint: ${{ needs.deploy-iac.outputs.project_endpoint }} # Source-code agent shares the same Foundry project as the image-based # agent; the `-src` suffix keeps them as distinct agent versions. agent_name: ${{ inputs.agent_name }}-src source_code_zip: ./.artifacts/source-code/source-code.zip model_deployment_name: ${{ needs.deploy-iac.outputs.model_deployment_name }} And just to show we can call the same action multiple times, here are two examples that do just that: Deploy (Bicep) and Deploy (Terraform). Conclusion Source-code deployments give Foundry Hosted Agents another deployment path for teams that do not want, or do not need, to package every agent as a container image. By using a .zip artifact, teams can keep a familiar source-code packaging flow while still taking advantage of the managed compute abstraction that Hosted Agents provide. The reusable GitHub Action shown in this post turns that deployment process into a repeatable CI/CD step: package the source code, post the deployment to the Foundry data plane, poll until the new version is active, and expose the resulting agent version for downstream workflow steps. This keeps the deployment flexible while fitting into existing enterprise pipeline patterns. For organizations already using container-based Hosted Agents, source-code deployments do not replace that model; they expand the options available. Choose the deployment approach that best fits how your teams package, govern, and operate their agent workloads.Foundry Toolkit for VS Code at //build: Hosted Agents End-to-End, a Smarter Toolbox, and More
We’re excited to share what’s new for Foundry Toolkit for Visual Studio Code at //build 2026. Since going generally available, the toolkit has kept moving fast, and this release is a big one. The headline: a complete, end-to-end Hosted Agent experience, scaffold, run, deploy, and observe without ever leaving VS Code. On top of that, we’ve expanded the Toolbox with native enterprise integrations and shipped a wave of LangGraph samples so every developer has a clear path from idea to production. From your first prompt to a production-grade, observable agent, Foundry Toolkit meets you where you are. Hosted Agents, End to End Building an agent is the easy part; getting it from a first draft to a production-grade, observable service is what matters. This release makes the full Hosted Agent lifecycle available in VS Code, and it follows the way you actually work — scaffold, run, deploy, observe. Scaffold — start from a rich set of samples Hosted Agent creation now opens with a refreshed scaffolding experience and a rich sample selection, so you start from a working, framework-appropriate template instead of a blank file. Creation is smarter, too: we auto-select your subscription when there’s only one, gate tabs more clearly, and tightened spacing for a cleaner setup flow. Run (F5) — inspect as you build Press F5 and your agent runs locally with the Agent Inspector, now aligned with the rest of the extension and featuring Copilot SDK visualization so you can see what the Inspector visualizes as the agent executes. It’s the fastest loop from change to verification before anything leaves your machine. Deploy — a new UX and new ways to ship Different teams ship differently, so deployment got a refreshed UX and two new options for Hosted Agents: ZIP Code Deploy: Package your agent source as a ZIP and deploy it directly to Microsoft Foundry Agent Service. Bring-Your-Own-Image (BYOI): Already have a pre-built container in your own Azure Container Registry? Deploy straight from it. Observe — know it works in production Once deployed, the full observability story is now available: Hosted Agent Tracing: Inspect end-to-end traces of Hosted Agent invocations directly from VS Code — tool calls, delegation chains, and timing for real debugging instead of guesswork. Continuous Evaluation Settings: A new page to configure ongoing evaluation for deployed Hosted Agents, so quality is measured continuously — not just at ship time. Evaluations Node: One-click access to evaluation runs and results right from the Foundry project tree. A Smarter, More Connected Toolbox What it is, and why it matters A Toolbox is how your agent gets its capabilities — the curated set of tools, knowledge sources, and integrations it can call at runtime. Instead of hand-wiring each connection, you assemble a Toolbox once and your agent consumes it consistently across local runs and production. The result: agents that can act on real enterprise data and systems, with the connections managed in one place. From what to how: create, connect, consume Create: Start a new Toolbox from the Foundry Toolkit sidebar “Tools Catalog” and pick the capabilities your agent needs. Connect: Configure and wire in enterprise systems through native, first-class connections once, and use it for all your agents. Consume: Reference the Toolbox from your Hosted Agent so its tools are available the moment the agent runs, locally (F5) and once deployed. New this release Building on that flow, the Toolbox is now richer and more enterprise-ready: WorkIQ as a Built-in Tool: A first-class WorkIQ experience powered by A2A connections — no MCP fallback required. End-to-end toolbox creation with WorkIQ works out of the box. Fabric IQ (OneLake Catalog) Integration: Connect your agents to Microsoft Fabric OneLake catalogs directly from the Toolbox. Toolbox Guardrails: Apply content-safety guardrails to your Toolbox for safer agent execution. Faster discovery: A new Toolbox Search Toggle and Agent Tool Multi-Select let you find and wire in multiple tools in a single action. LangGraph Reaches Parity LangGraph developers, this one is for you. We’ve added five new Hosted Agent samples that bring LangGraph to full parity with the Agent Framework Responses learning path — so you get an equivalent, end-to-end walkthrough no matter which framework you prefer: MCP — tool loading from a remote MCP server (defaults to GitHub Copilot MCP) via MultiServerMCPClient. Workflows — a custom StateGraph chaining three specialized LLM nodes: slogan writer, legal reviewer, and formatter. Files — local filesystem tools plus the Foundry-Toolbox code_interpreter working over session-uploaded files. Human-in-the-Loop — a StateGraph that drafts a proposal and pauses for approval via langgraph.types.interrupt. Observability — GenAI OpenTelemetry tracing with enable_auto_tracing(); spans, metrics, and logs flow to Application Insights. We’ve also refreshed the existing bring-your-own LangGraph samples against the new hosting layer (chat with local tools, Foundry-managed Toolbox loading, and SSE-streamed multi-turn sessions backed by a MemorySaver checkpointer), so every sample reflects how Hosted Agents work today. Polish Across the Board A release is more than headline features. This one also includes a redesigned Prompt Builder “Improve an Instruction” dialog for faster iteration, fixes for MCP toolbox tool icons, clearer ZIP-deploy error surfacing, and assorted Agent Builder and Playground regression fixes — the whole experience feels tighter end to end. Get Started Today Install: Foundry Toolkit on the VS Code Marketplace Quick Start: Follow our getting-started tutorial to build your first Hosted Agent Deep Dive: Explore the documentation, samples, and LangGraph parity walkthroughs Join the Community Share your projects, file issues, or suggest features on our GitHub repository. We can’t wait to see what you build. Welcome to the next chapter of AI development!372Views0likes0CommentsGitHub Action for Deploying Hosted Agents
Introduction With Microsoft's introduction to Hosted Agents comes a next logical question. How to implement this? Organizations need a method that is quick, repeatable, and requires minimal adjustments to their existing tooling and processes. Thus, we will walk through how to deploy a Hosted Agent through a repeatable GitHub Action. If this is new to you this blog is a follow up to Deploying Foundry Hosted Agents via REST API | Microsoft Community Hub. Before You Start This action assumes the following are already in place in the workflow that calls it: An existing Microsoft Foundry project with a deployed model. A container image already pushed to Azure Container Registry (ACR). An identity with the **Foundry User** role on the Foundry project. See [hosted agent permissions](https://learn.microsoft.com/en-us/azure/foundry/agents/concepts/hosted-agent-permissions) for the full permissions reference. A runner with `az`, `jq`, and `python3` installed. This is true on `ubuntu-latest`; if you self-host, install them explicitly. azure/login configured in the caller workflow **before** this action runs. ⚠️ *Identity prerequisite This action assumes `azure/login` has already run in the caller workflow and that the resulting identity holds a Foundry data-plane role (e.g., Foundry User). Without that, `az account get-access-token` will fail before the REST call is made. Requirements Grounding ourselves in our requirements to implement the deployment processes, in the quickest way that leverages minimal adjustments and a repeatable process, we will leverage GitHub Action and Bash. The Bash script will take a series of arguments that will be used to call the REST API. The action requires four inputs: `project_endpoint`, `agent_name`, `image`, and `model_deployment_name`. The example pipeline wires these from the outputs of a preceding IaC step, but the action itself takes plain strings. These strings can come from any tool that can hand them off as workflow inputs. This keeps it flexible and limits adjustments to existing CI/CD processes. If interested, one can use the Azure Developer CLI (`azd up`) command which is documented via Microsoft official examples and MS Learn. This blog chose not to cover this as the majority of enterprise customers already have tooling they are leveraging other than `azd`. Also, one could use the `azure.ai.projects` library to create an agent. This blog made the decision not to go down this route as not all organizations have adopted the philosophy of allowing application code to create underlying compute infrastructure. Additionally, some organizations desire teams outside of developers to control and set the size of the Micro VM (referred to as the "sandbox" in the Foundry docs) that the Hosted Agent is running on. If your organization does not use GitHub Actions this step should be duplicatable in Azure DevOps leveraging the Bash task. Deployment Steps For us to do this appropriately let's take a step back and evaluate a CI/CD workflow for an Agent whose definition is stored in a container. Ideally a pipeline should follow steps outlined in CI/CD for AI Agents on Microsoft Foundry. Those pipelines typically take the shape build/push → IaC → update agent → smoke test. For our purposes, since we are hyper-focusing on the Hosted Agent Deployment via REST API we are going to focus on the repeatable GitHub Action of deploying the agent. To emphasize this our workflow will focus on the step called "Update agent — Foundry data plane POST `agents/NAME/versions`". Based on organization preference, I can understand the need to break out the update agent step into a separate workflow. We traditionally don't recommend this as keeping everything in one pipeline means one set of failures to triage, one history to read, and one CI/CD surface to keep current. but This action though is structured to support a split if your release process requires it. Hosted Agent REST Deployment Action This is the crux of why the article exists. If you've followed my style of repeatable DevOps process for YAML Pipelines, this action follows similar principles. We will parametrize with defaults to empower minimal configuration while also optimizing for flexibility. To view the full example check out the Update Foundry Agent action . The Inputs, Outputs, and `runs:` blocks shown below all live in a single file: `.github/actions/update-agent/action.yml`. Inputs Here are those parameters with descriptions and defaults: inputs: project_endpoint: description: Foundry project endpoint URL required: true agent_name: description: Name of the hosted agent required: true image: description: Full container image reference (registry/name:tag) required: true model_deployment_name: description: Name of the AI model deployment required: true cpu: description: CPU allocation for the agent container required: false default: '0.25' memory: description: Memory allocation for the agent container required: false default: '0.5Gi' Verify the latest sandbox sizes at hosted-agents#sandbox-sizes There is also guidance on right-sizing your Micro VMs. At the time of this writing here are the available combinations: Outputs We should output values that make sense for subsequent steps in the workflow. Every instance that calls this action may not use them, but it's always good to expose non-secret values just in case. In our case we are creating a new version of the agent, so let's output that agent version: outputs: agent_version: description: Version ID returned by the Foundry data plane value: ${{ steps.post.outputs.agent_version }} `agent_version` is the version identifier returned by the data plane. Capture this in your pipeline (artifact, release tag, etc.) so you have an audit trail and a target to re-deploy against if a future version needs to be rolled back. Subsequent steps in the workflow can reference it via `${{ steps.<step-id>.outputs.agent_version }}`. Action The action will need to map our environment variables being passed into the input as the first step. After that we will need to get an access token from Azure so we can then call the REST API endpoint. Once we have this, we will need to prepare the body of our call. Verify against the API for all valid properties. For our example I chose not to set `rai_config` (Responsible AI overview) and `tools` (function/tool bindings) to keep things simple. runs: using: composite steps: - name: Post agent version to Foundry data plane id: post shell: bash env: PROJECT_ENDPOINT: ${{ inputs.project_endpoint }} AGENT_NAME: ${{ inputs.agent_name }} IMAGE: ${{ inputs.image }} MODEL_DEPLOYMENT_NAME: ${{ inputs.model_deployment_name }} CPU: ${{ inputs.cpu }} MEMORY: ${{ inputs.memory }} run: | FOUNDRY_TOKEN=$(az account get-access-token \ --resource "https://ai.azure.com/" \ --query accessToken -o tsv) AGENT_REQUEST_BODY=$(jq -n \ --arg cpu "$CPU" \ --arg memory "$MEMORY" \ --arg model "$MODEL_DEPLOYMENT_NAME" \ --arg image "$IMAGE" \ '{ definition: { kind: "hosted", container_protocol_versions: [{protocol: "responses", version: "1.0.0"}], cpu: $cpu, memory: $memory, environment_variables: {AZURE_AI_MODEL_DEPLOYMENT_NAME: $model}, image: $image ⚠️ **Heads up on logs.** The line that echoes `HTTP ${HTTP_STATUS}: $(cat /tmp/agent_response.json)` dumps the full response body to the job log. If your request body contains sensitive `environment_variables`, the API may return them in the response, where they will appear in plain text in the workflow log. Either scrub the response before echoing, or echo only the `version` field on success. A 2xx response confirms the data plane accepted the new agent version. Confirming the agent behaves as intended is a separate step. This is done typically with a smoke test against the deployed agent in a later workflow job. If something goes wrong the most common failures are: 401/403- `azure/login` didn't run, the identity is missing a Foundry data-plane role, or the wrong subscription is selected. Check the `azure/login` step and confirm the identity holds **Foundry User** (or higher) on the Foundry project (see the *Before You Start* callout above). 404 - wrong `project_endpoint`, or the agent named in `agent_name` does not yet exist on the project. The agent must exist before posting a new version. 400 - body or model issue: invalid `cpu` / `memory` shape, a required field missing, or `model_deployment_name` pointing at a deployment that isn't reachable from this project. Calling the Action So now that we have the action, how can we scale this across multiple workflows? Simple, we just need to pass in the required parameters. Here is an example, with a stubbed `deploy-iac` step so can the outputs passed into the action as inputs: - name: Deploy Bicep infrastructure id: deploy-iac uses: ./.github/actions/deploy-bicep with: environment_name: ${{ inputs.environment_name || 'main' }} location: ${{ inputs.location || 'swedencentral' }} - name: Update agent uses: ./.github/actions/update-agent with: project_endpoint: ${{ steps.deploy-iac.outputs.project_endpoint }} agent_name: ${{ inputs.agent_name }} image: ${{ steps.deploy-iac.outputs.acr_endpoint }}/${{ inputs.image_name }}:${{ inputs.image_tag }} model_deployment_name: ${{ steps.deploy-iac.outputs.model_deployment_name }} And just to show we can call the same action multiple times here are two examples that do just that: Deploy (Bicep) and Deploy (Terraform). Conclusion The composite action shown above gives organizations what the introduction called for: a quick, repeatable way to deploy a Hosted Agent that requires minimal adjustments to the GitHub Actions tooling and processes already in use. With it wired into a workflow, deploying a new Hosted Agent version becomes a standard step in your pipeline.Infrastructure as Code for AI: Building and Deploying Microsoft Hosted Agents with Terraform
AI agents are no longer experimental. Teams are shipping production-grade agents that retrieve information, call APIs, reason over documents, and orchestrate multi-step workflows at scale. Microsoft Foundry's Hosted Agents service gives you a fully managed runtime for those agents, built on top of the Microsoft Foundry Agent Service, with Microsoft handling the infrastructure, scaling, and runtime lifecycle. The challenge is that provisioning this infrastructure by hand or clicking through the portal, running one-off CLI commands, or relying on undocumented shell scripts, simply does not scale. It introduces configuration drift, makes reproducing environments painful, and creates real governance risk as teams grow. This post walks through how to provision and manage the Azure infrastructure required to run Microsoft Hosted Agents using Terraform. You will leave with working configuration, a clear understanding of the resource model, and practical guidance on where Terraform can take you all the way and where you will need to supplement with the Azure CLI or the Microsoft Foundry Agent Service SDK. What Are Microsoft Hosted Agents? Microsoft Hosted Agents are AI agents deployed and managed within Microsoft Foundry. Microsoft Foundry is Microsoft's unified platform for building, evaluating, and deploying AI applications and agents. It provides: A managed compute runtime — Microsoft provisions and scales the infrastructure so you do not manage VMs or containers. An agent execution environment — agents are defined with instructions, tools (code interpreter, Bing grounding, Azure AI Search, function calling), and a backing model endpoint. Deep Azure integration — identity via Microsoft Entra ID, secrets via Azure Key Vault, storage via Azure Blob, tracing via Azure Monitor and Application Insights. A project-scoped model — each Microsoft Foundry project encapsulates an agent's resources, connections, and deployments within a logical boundary. The "Hosted" distinction matters. You are not running agent code on your own Kubernetes cluster or App Service. Microsoft manages the runtime. Your responsibility is to provision the surrounding infrastructure correctly: the Microsoft Foundry resource, the project, the model deployment, the identity configuration, and the monitoring resources that back it all. That boundary — the infrastructure you own — is exactly what Terraform manages well. Why Terraform for Hosted Agent Deployments? Infrastructure as Code (IaC) is not a new idea, but its importance grows as AI deployments become more complex. Here is why Terraform is a strong choice for Microsoft Foundry deployments specifically: Repeatability: A Terraform configuration produces the same infrastructure every time. Staging mirrors production. Disaster recovery is a terraform apply away. Governance: Infrastructure definitions live in version control alongside application code. Changes are reviewable, auditable, and reversible. This satisfies most enterprise change-management requirements. Scale: Spinning up per-customer or per-team agent environments using Terraform workspaces or module instantiation is far more manageable than manual provisioning. State management: Terraform tracks the actual state of your Azure resources. It detects drift and reconciles it declaratively. Ecosystem: The AzureRM provider is mature, actively maintained by HashiCorp and Microsoft, and covers the majority of Azure services including the Microsoft Foundry resources. Architecture Overview Before writing any Terraform, it helps to understand the resource hierarchy in Microsoft Foundry and how each layer maps to an Azure resource type. The Foundry Resource Hierarchy Microsoft Foundry uses a two-level hierarchy: 1. Foundry Account ( azurerm_cognitive_account , kind: AIServices ) — The top-level AI Services resource. It provides the model endpoint, manages agent execution, and acts as the logical boundary for all projects beneath it. You must set project_management_enabled = true and provide a custom_subdomain_name to enable project creation. In ARM terms this is a Microsoft.CognitiveServices/accounts resource. 2. Foundry Project ( azurerm_cognitive_account_project ) — A child resource scoped within the Foundry Account. Each project has its own agents, model deployments, connections, and data assets. In production, you typically have one project per application, product team, or environment. Figure 1: The Microsoft Foundry resource hierarchy. A single Foundry Account (Cognitive Services, kind AIServices) acts as the top-level container, with Projects scoped beneath it — one per application, team, or environment. Supporting Resources The following Azure resources make up a complete Hosted Agents deployment: Microsoft Foundry Account (AI Services): A single azurerm_cognitive_account of kind AIServices serves as both the Foundry Account and the model endpoint host. Model deployments (e.g. gpt-4.1 ) are provisioned via azurerm_cognitive_deployment within this account. Log Analytics Workspace + Application Insights: Provides observability for agent traces, request logs, and metrics. User-Assigned Managed Identity: Grants the Foundry Account and Projects access to Azure resources without stored credentials. Role Assignments (RBAC): Wires the managed identity to the Foundry Account with least-privilege Cognitive Services permissions. Figure 2: Supporting infrastructure map. The managed identity holds least-privilege RBAC grants to the Microsoft Foundry Account (AI Services) — enabling model access and project management — all within the same resource group. Reference Architecture (Described) A production-ready layout separates concerns across two resource groups: one for shared infrastructure (networking, monitoring) and one for the Microsoft Foundry Account and its projects. The Foundry resource group houses the azurerm_cognitive_account (kind: AIServices) resource and the azurerm_cognitive_account_project instances. The shared resource group holds Log Analytics and Application Insights. A user-assigned managed identity spans both, holding RBAC grants to each backing service. For a dev/test environment you can collapse both into a single resource group. For production, the separation makes cost attribution, access control, and lifecycle management cleaner. Prerequisites Accounts and Permissions An active Azure subscription with the Owner or Contributor + User Access Administrator roles at the subscription or resource group level (role assignments require elevated permission). Foundry access enabled in your subscription. In some tenants you may need to accept terms or request quota for Azure OpenAI. Azure OpenAI quota for the model you intend to deploy (e.g. gpt-4.1 ). Request this via the Azure portal under Quotas in Azure OpenAI Studio. Local Tools Terraform CLI ≥ 1.9 — Install guide Azure CLI ≥ 2.60 — Install guide A code editor (VS Code with the HashiCorp Terraform extension and the Azure Terraform extension is a strong combination). Authentication For local development, authenticate via the Azure CLI. The AzureRM Terraform provider picks this up automatically: az login az account set --subscription "<your-subscription-id>" For CI/CD pipelines, use a service principal with AZURE_CLIENT_ID , AZURE_CLIENT_SECRET , AZURE_TENANT_ID , and AZURE_SUBSCRIPTION_ID environment variables, or — preferably — a workload identity federation (federated credentials) to avoid storing long-lived secrets. GitHub Actions supports OIDC-based workload identity natively. Terraform Fundamentals for Hosted Agents Provider Configuration The hashicorp/azurerm provider is your primary dependency. The new Microsoft Foundry resources ( azurerm_cognitive_account with kind = "AIServices" and azurerm_cognitive_account_project ) require version 4.x of the provider. Pin your version to avoid unexpected breaking changes: terraform { required_version = ">= 1.9" required_providers { azurerm = { source = "hashicorp/azurerm" version = "~> 4.0" } } } provider "azurerm" { features { key_vault { purge_soft_delete_on_destroy = false } resource_group { prevent_deletion_if_contains_resources = true } } subscription_id = var.subscription_id } The features block is required even when empty. The Key Vault setting prevents accidental secret loss during terraform destroy . The resource group setting adds an extra safety net in production. State Management Never use local state for shared or production environments. Store state in Azure Blob Storage with state locking via Azure Blob lease: terraform { backend "azurerm" { resource_group_name = "rg-terraform-state" storage_account_name = "sttfstate<unique>" container_name = "tfstate" key = "ai-agents/prod.tfstate" } } Create the state storage account and container before running terraform init . A bootstrap script or a separate Terraform workspace dedicated to state management are both valid approaches. Known Limitations and Workarounds Terraform coverage of Foundry is improving rapidly but is not yet complete. You should be aware of the following gaps as of mid-2025: Agent definitions are not in Terraform: The actual agent (its system prompt, instructions, tool configuration, and model binding) is created via the Azure AI Agent Service SDK or the Foundry portal, not via Terraform. Terraform provisions the infrastructure; your application code or a post-provisioning script creates the agent. Connections: Some connection types within a Foundry Project (e.g. Azure AI Search, custom connections) may require the Azure CLI or the Foundry SDK. Verify coverage in the AzureRM provider docs before assuming Terraform handles them. Model deployments: azurerm_cognitive_deployment covers OpenAI model deployments and is well-supported. Use this to deploy your model before referencing it from the agent. Private networking: If you need private endpoints for your Foundry Account, additional VNet, subnet, and DNS zone resources are required. This post focuses on the public networking path; private networking is a follow-on topic. Step-by-Step Implementation The following sections build up a complete Terraform configuration. The recommended project structure is a flat module layout for a single environment, with a separate modules/ai-foundry/ directory when you need to reuse the pattern across environments. ai-agents-infra/ ├── main.tf ├── variables.tf ├── outputs.tf ├── versions.tf └── terraform.tfvars 1. Variables Define variables first. Parameterising from the start avoids hard-coded values that create technical debt when you replicate the configuration for staging or production: # variables.tf variable "subscription_id" { type = string description = "Azure subscription ID." } variable "location" { type = string default = "eastus" description = "Azure region for all resources." } variable "environment" { type = string default = "dev" description = "Environment label (dev, staging, prod)." } variable "project_name" { type = string description = "Short name for the project. Used in resource naming." } variable "openai_model_name" { type = string default = "gpt-4.1" description = "Azure OpenAI model to deploy for the agent." } variable "openai_model_version" { type = string default = "2025-04-14" description = "Model version to deploy." } variable "openai_sku_capacity" { type = number default = 10 description = "Tokens-per-minute capacity (in thousands) for the deployment." } 2. Resource Group and Core Infrastructure A single resource group keeps things simple for dev. In production, consider splitting as described in the architecture section above. # main.tf — Resource group and naming locals locals { name_prefix = "${var.project_name}-${var.environment}" tags = { environment = var.environment project = var.project_name managed_by = "terraform" } } resource "azurerm_resource_group" "main" { name = "rg-${local.name_prefix}" location = var.location tags = local.tags } 3. Supporting Services Provision Log Analytics and Application Insights for agent observability and diagnostics. Unlike the legacy Hub-based architecture, the azurerm_cognitive_account (kind AIServices ) does not require a dedicated Storage Account or Key Vault as provisioning dependencies. # main.tf — Monitoring infrastructure data "azurerm_client_config" "current" {} # Log Analytics Workspace (required by Application Insights) resource "azurerm_log_analytics_workspace" "main" { name = "law-${local.name_prefix}" resource_group_name = azurerm_resource_group.main.name location = azurerm_resource_group.main.location sku = "PerGB2018" retention_in_days = 30 tags = local.tags } # Application Insights for agent observability resource "azurerm_application_insights" "main" { name = "appi-${local.name_prefix}" resource_group_name = azurerm_resource_group.main.name location = azurerm_resource_group.main.location workspace_id = azurerm_log_analytics_workspace.main.id application_type = "web" tags = local.tags } 4. User-Assigned Managed Identity A managed identity allows the Foundry Account and its projects to authenticate to Azure services without stored credentials. This is a security best practice and is required for several Microsoft Foundry features. # main.tf — Managed identity for the Microsoft Foundry Account resource "azurerm_user_assigned_identity" "foundry" { name = "id-${local.name_prefix}-foundry" resource_group_name = azurerm_resource_group.main.name location = azurerm_resource_group.main.location tags = local.tags } 5. Microsoft Foundry Account and Model Deployment In the current Microsoft Foundry architecture, a single azurerm_cognitive_account of kind AIServices serves as both the Foundry Account and the model endpoint host. Set project_management_enabled = true and provide a globally unique custom_subdomain_name to enable Foundry Project creation beneath it. # main.tf — Microsoft Foundry Account (AI Services) resource "azurerm_cognitive_account" "foundry" { name = "aisa-${local.name_prefix}" resource_group_name = azurerm_resource_group.main.name location = azurerm_resource_group.main.location kind = "AIServices" sku_name = "S0" project_management_enabled = true custom_subdomain_name = "${replace(local.name_prefix, "-", "")}foundry" tags = local.tags identity { type = "UserAssigned" identity_ids = [azurerm_user_assigned_identity.foundry.id] } } # Deploy the model within the Foundry Account resource "azurerm_cognitive_deployment" "agent_model" { name = var.openai_model_name cognitive_account_id = azurerm_cognitive_account.foundry.id model { format = "OpenAI" name = var.openai_model_name version = var.openai_model_version } sku { name = "Standard" capacity = var.openai_sku_capacity } } Note on quota: The capacity value is in thousands of tokens per minute. A value of 10 means 10,000 TPM. If terraform apply fails with a quota error, reduce this value or request a quota increase via the Azure portal. Note on custom_subdomain_name : This must be globally unique across all Azure AI Services accounts. If provisioning fails with a conflict error, adjust the suffix (e.g. append a random string using the random_string resource). 6. Foundry Project Create a Foundry Project beneath the Foundry Account provisioned in Step 5. Each project scopes its own agents, model connections, and data assets. Use one project per application or team. # main.tf — Microsoft Foundry Project resource "azurerm_cognitive_account_project" "agent_project" { name = "proj-${local.name_prefix}-agents" cognitive_account_id = azurerm_cognitive_account.foundry.id location = azurerm_resource_group.main.location display_name = "Agent Project - ${var.project_name}" description = "Hosted agents project for ${var.project_name}" identity { type = "UserAssigned" identity_ids = [azurerm_user_assigned_identity.foundry.id] } tags = local.tags } 7. RBAC Role Assignments Grant the managed identity the permissions it needs. This is the area most commonly misconfigured in manual deployments. Terraform makes it explicit and auditable. # main.tf — RBAC assignments # AI Services: Foundry identity needs Cognitive Services OpenAI User to call model endpoints resource "azurerm_role_assignment" "foundry_openai" { scope = azurerm_cognitive_account.foundry.id role_definition_name = "Cognitive Services OpenAI User" principal_id = azurerm_user_assigned_identity.foundry.principal_id } # AI Services: Foundry identity needs Cognitive Services Contributor to manage projects resource "azurerm_role_assignment" "foundry_contributor" { scope = azurerm_cognitive_account.foundry.id role_definition_name = "Cognitive Services Contributor" principal_id = azurerm_user_assigned_identity.foundry.principal_id } # Optional: grant your own principal the Azure AI Developer role on the Foundry Account # so you can create and manage agents from your local machine or CI pipeline resource "azurerm_role_assignment" "developer_account" { scope = azurerm_cognitive_account.foundry.id role_definition_name = "Azure AI Developer" principal_id = data.azurerm_client_config.current.object_id } 8. Outputs Export the values your application and post-provisioning scripts will need: # outputs.tf output "resource_group_name" { value = azurerm_resource_group.main.name } output "foundry_account_id" { value = azurerm_cognitive_account.foundry.id } output "ai_foundry_project_id" { value = azurerm_cognitive_account_project.agent_project.id } output "foundry_endpoint" { value = azurerm_cognitive_account.foundry.endpoint } output "openai_deployment_name" { value = azurerm_cognitive_deployment.agent_model.name } output "managed_identity_client_id" { value = azurerm_user_assigned_identity.foundry.client_id } 10. Example terraform.tfvars # terraform.tfvars — do NOT commit this file if it contains sensitive values subscription_id = "xxxxxxxx-xxxx-xxxx-xxxx-xxxxxxxxxxxx" location = "eastus" environment = "dev" project_name = "contoso-agents" openai_model_name = "gpt-4.1" openai_model_version = "2025-04-14" openai_sku_capacity = 10 Figure 3: Terraform deployment workflow. State is stored in an Azure Blob Storage backend, enabling team collaboration and preventing concurrent apply conflicts. Deploying and Validating the Agent Infrastructure Running the Deployment # 1. Initialise — downloads provider plugins and configures the backend terraform init # 2. Validate syntax and configuration terraform validate # 3. Preview what will be created (review carefully before applying) terraform plan -out=tfplan # 4. Apply the plan terraform apply tfplan A full initial apply typically takes 8–15 minutes. The Foundry Account (AI Services) provisioning is the longest step. The model deployment may also take a few minutes to reach a ready state — Terraform handles this with implicit dependency ordering, but you may see brief retries in the output. Verifying the Deployment After apply completes, verify each resource is in a healthy state: # Confirm the resource group and its resources exist az resource list --resource-group "rg-contoso-agents-dev" --output table # Check the Foundry Account (AI Services) is in a Succeeded state az cognitiveservices account show \ --name "aisacontosoagentsdevfoundry" \ --resource-group "rg-contoso-agents-dev" \ --query "properties.provisioningState" # Confirm the model deployment is ready az cognitiveservices account deployment show \ --resource-group "rg-contoso-agents-dev" \ --name "aisacontosoagentsdevfoundry" \ --deployment-name "gpt-4.1" \ --query "properties.provisioningState" Navigate to the Microsoft Foundry portal and confirm your Foundry Account and Project appear. At this point you can create an agent manually in the portal to validate that the model endpoint is reachable and the identity chain works correctly before automating agent creation. Common Deployment Issues Quota exceeded on model deployment: Reduce openai_sku_capacity or request a quota increase in the Azure portal under Azure OpenAI → Quotas. Resource name conflicts: The custom_subdomain_name on the Foundry Account must be globally unique. Use the random_string Terraform resource to append a unique suffix if needed. Role assignment propagation delay: RBAC changes can take 1–2 minutes to propagate. If the Foundry Account cannot access resources immediately after apply, wait a moment and retry. project_management_enabled not set: If azurerm_cognitive_account_project fails with an error about project management, ensure project_management_enabled = true and custom_subdomain_name are set on the parent azurerm_cognitive_account . azurerm_cognitive_account_project not found: Ensure your AzureRM provider version is ~> 4.0 or later. Run terraform init -upgrade if you previously initialised with an older version. Creating an Agent After Infrastructure Provisioning Terraform has provisioned the platform. Now you need to create the agent itself. This is done via the Azure AI Agents SDK (available for Python, C#, JavaScript, and Java) or the Foundry portal. The following Python snippet demonstrates creating a basic agent programmatically after Terraform apply. It uses the outputs from Terraform directly: import os from azure.ai.projects import AIProjectClient from azure.identity import DefaultAzureCredential # These values come from Terraform outputs project_connection_string = os.environ["AI_PROJECT_CONNECTION_STRING"] model_deployment = os.environ["OPENAI_DEPLOYMENT_NAME"] client = AIProjectClient.from_connection_string( credential=DefaultAzureCredential(), conn_str=project_connection_string, ) # Create the hosted agent agent = client.agents.create_agent( model=model_deployment, name="customer-support-agent", instructions=( "You are a helpful customer support assistant. " "Answer questions accurately and concisely. " "If you are unsure, say so rather than guessing." ), ) print(f"Agent created: {agent.id}") Figure 5: Agent runtime architecture. The Foundry Project hosts the Agent Service, which routes requests to the GPT-4.1 model endpoint and optionally invokes tool integrations (Code Interpreter, File Search, Azure Functions, or custom tools). The project connection string is available from the Foundry portal (Project → Overview → Project connection string) or can be constructed from Terraform outputs. Refer to the Azure AI Agents quickstart for the full SDK setup. Operational Considerations Lifecycle Management Terraform's declarative model means updates are incremental by default. To update the OpenAI model version, change openai_model_version in your .tfvars file and run terraform plan to confirm the change before applying. Terraform will delete and recreate the cognitive deployment in-place — be aware this causes brief downtime for the model endpoint. To destroy a complete environment: terraform destroy The prevent_deletion_if_contains_resources feature on the resource group will block destruction if any untracked resources exist, which is a useful safety net in production. Handling Configuration Drift Drift occurs when Azure resources are modified outside of Terraform (portal changes, CLI scripts, other automation). Detect drift with: terraform plan -refresh-only This reports the difference between the Terraform state and the actual resource state without making changes. Schedule this as a drift-detection job in CI to catch out-of-band changes early. Environment Isolation Use Terraform workspaces or separate state files per environment: # Create and switch to a staging workspace terraform workspace new staging terraform workspace select staging terraform apply -var-file="environments/staging.tfvars" Alternatively, use a directory-per-environment layout ( environments/dev/ , environments/prod/ ) with a shared module in modules/ai-foundry/ . The directory layout is more explicit and easier to navigate in a team setting. Cost Control Set a low openai_sku_capacity in dev (e.g. 1 = 1,000 TPM) to limit accidental spend. Tag all resources with environment and project tags (the locals.tags block handles this) to enable cost attribution in Azure Cost Management. Use the Azure Pricing Calculator to estimate monthly costs before deploying to production. The Azure AI Services account (model token usage), Log Analytics, and Application Insights are the primary cost drivers. Consider destroying dev environments overnight using a scheduled CI job that runs terraform destroy and terraform apply on a schedule. CI/CD Integration Automating Terraform via GitHub Actions is straightforward. The following workflow runs plan on pull requests and apply on merge to the main branch: # .github/workflows/terraform.yml name: Terraform Deploy on: push: branches: [main] pull_request: branches: [main] permissions: id-token: write # Required for OIDC workload identity federation contents: read pull-requests: write env: ARM_CLIENT_ID: ${{ secrets.AZURE_CLIENT_ID }} ARM_TENANT_ID: ${{ secrets.AZURE_TENANT_ID }} ARM_SUBSCRIPTION_ID: ${{ secrets.AZURE_SUBSCRIPTION_ID }} ARM_USE_OIDC: "true" jobs: terraform: runs-on: ubuntu-latest environment: ${{ github.ref == 'refs/heads/main' && 'production' || 'staging' }} steps: - uses: actions/checkout@v4 - uses: hashicorp/setup-terraform@v3 with: terraform_version: "~1.9" - name: Terraform Init run: terraform init - name: Terraform Plan run: terraform plan -out=tfplan -var-file="environments/dev.tfvars" - name: Terraform Apply if: github.ref == 'refs/heads/main' run: terraform apply -auto-approve tfplan Figure 4: CI/CD pipeline using GitHub Actions with OIDC workload identity federation. No long-lived secrets are stored — the runner exchanges a JWT for a short-lived Azure token before each Terraform run. Use OIDC workload identity federation to avoid storing long-lived service principal secrets in GitHub. This is the recommended authentication method for GitHub Actions deployments to Azure. Best Practices Modular Terraform Design Once you have a working flat configuration, extract the Foundry resources into a reusable module. A module boundary around the Hub, Project, OpenAI account, and RBAC assignments lets you stamp out new agent environments with a single module call and a new .tfvars file. # environments/staging/main.tf module "agent_platform" { source = "../../modules/ai-foundry" project_name = "contoso-agents" environment = "staging" location = "eastus" subscription_id = var.subscription_id openai_model_name = "gpt-4.1" openai_model_version = "2025-04-14" openai_sku_capacity = 30 } Parameterisation and Environment Configs Never hard-code subscription IDs, tenant IDs, or region names in main.tf . Keep environment-specific values in environments/<env>.tfvars files and commit them to source control (they are config, not secrets). Store actual secrets (service principal credentials, API keys for third-party connections) in Azure Key Vault or GitHub Secrets — not in .tfvars files. Versioning Models and Agent Configurations Treat your openai_model_version and agent instructions as versioned artefacts. When Microsoft releases a new model version, create a pull request that updates the variable value, runs a plan, and documents the expected change. This creates a clear history of when model versions changed and who approved the change. Logging and Monitoring Enable diagnostic settings on the Azure OpenAI account to route request logs and metrics to your Log Analytics workspace. Use Application Insights to capture agent traces from the Azure AI Agents SDK (it integrates with OpenTelemetry). Set up Azure Monitor alerts on OpenAI account errors (4xx/5xx rates) and Log Analytics ingestion failures. Responsible AI Considerations Enable Azure OpenAI content filtering on your deployment. Terraform supports this via the content_filter block in azurerm_cognitive_deployment where the policy allows. Define a clear system prompt that sets agent behaviour boundaries and instructs the agent to decline harmful requests. Log and review agent conversations during early deployment. Microsoft Foundry includes evaluation tools for assessing agent response quality and safety. Apply least-privilege RBAC throughout — the role assignments in this post follow that principle. Conclusion and Next Steps You now have a complete, repeatable Terraform configuration for provisioning the Azure infrastructure required to run Microsoft Hosted Agents via Microsoft Foundry. The key takeaways: Terraform manages the infrastructure layer effectively — the Foundry Account, Project, model deployment, identity, and RBAC. Agent definitions themselves are provisioned via the Azure AI Agents SDK or the Foundry portal as a post-Terraform step. State management, parameterisation, and modular design are non-negotiable for team environments. OIDC-based workload identity is the right authentication model for CI/CD pipelines. Drift detection, environment isolation, and cost tagging are operational necessities, not optional extras. Where to Go Next Add Azure AI Search: Extend the Foundry Project with an Azure AI Search connection and enable the Search tool on your agent for Retrieval-Augmented Generation (RAG). Private networking: Add private endpoints for the Foundry Hub and OpenAI account to lock down ingress to your VNet. Multi-region deployment: Instantiate the Terraform module twice with different regions and use Azure Traffic Manager or Front Door to route requests. GitOps for agents: Store agent definitions (system prompts, tool configurations) as YAML or JSON in your repository and use a CI pipeline to apply them via the Azure AI Agents SDK on every merge, creating a fully declarative agent deployment pipeline. Evaluation pipelines: Use Microsoft Foundry's built-in evaluation capabilities to run automated quality and safety assessments on every new model version or prompt change. References What is Microsoft Foundry? — Microsoft Learn Azure AI Agent Service overview — Microsoft Learn Azure AI Agents quickstart — Microsoft Learn azurerm_cognitive_account — Terraform Registry azurerm_cognitive_account_project — Terraform Registry azurerm_cognitive_deployment — Terraform Registry AzureRM backend — Terraform documentation OIDC workload identity federation with GitHub Actions — Microsoft Learn Azure OpenAI content filtering — Microsoft Learn Install Terraform — HashiCorp Microsoft Foundry portal1.1KViews0likes0Comments