enrollment
11 TopicsNew policy implementation and web enrollment for Android personally owned work profile is now GA
We’re happy to announce two improvements for the management of Android personally owned work profile devices with Microsoft Intune, which is now generally available! A new implementation for how Intune delivers policies to devices. Web based enrollment. These updates modernize how Microsoft Intune manages devices and improves the enrollment flow. As of June 18, you will need to take action to opt in to the new implementation. This change will become required later in 2026, and we’ll continue to update this blog as rollout details become available. Keep reading to understand what’s changing, actions, and timelines you need to know. What’s changing New implementation We’re finalizing our work on moving the Android personally owned work profile implementation to the latest and greatest available – Google’s Android Management API (AMAPI). It has been almost a decade since Intune released support for Android personally owned work profile management. At that time, we accomplished this by building a custom device policy controller (DPC), in the form of the Intune Company Portal app. A lot has changed since then. Google released AMAPI and its companion app, Android Device Policy, which enforces AMAPI policy on devices. This is now Google’s recommended implementation, which we used to deliver the three corporate Android Enterprise management methods: corporate owned work profile, fully managed, and dedicated. Google no longer recommends use of custom DPCs and they’re deprecating associated functionality. The benefits of moving personally owned work profile management to AMAPI include: Faster release of new features across all four Android Enterprise management options. Consistent behaviors across all four Android Enterprise management options. The Microsoft Intune app will replace the Company Portal app as the user app (to manage devices, contact their IT department, collect logs, and more), providing an updated user experience and aligning it with the corporate Android Enterprise management options. Enables Intune to support the latest Android platform management capabilities, which are unavailable with custom DPC implementations. Web based enrollment The move to AMAPI also enables us to build a web-based enrollment flow for personally owned work profile devices, similar to web based device enrollment for iOS. The benefits of this include: Users don’t need to manually install an app to start Intune enrollment since they can start enrollment from a webpage instead. Users can access enrollment from any of the three different entry points which all launch the same webpage: Productivity apps - when admin has configured conditional access so that the user is required to enroll before accessing corporate resources (recommended) The Company Portal app This gives you more options for how to guide your users to get set up. A URL Android enrollment is more consistent with the iOS web-based enrollment flow. How to configure and monitor Web based enrollment As of June, 18th 2026 - A new setting is now available that lets you switch your tenant to the new web-based enrollment experience for all future personally owned work profile enrollments. We recommend that you configure this in a test tenant first, try out and document the user flow, and prepare your helpdesks accordingly before opting in on your main tenant. Once you opt in, there isn’t an option to opt out. Planned for Q4 2026, Intune will automatically configure all personally owned work profile enrollments across all tenants to be web enrollments. New implementation A new configuration policy allows you to migrate device groups to the new implementation. As a best practice, we encourage admins to evaluate migrating a smaller device set before migrating all devices. Before moving devices to the new implementation, you may want to email users or configure custom notifications to inform them of what to expect. Planned for Q4 2026, Intune will automatically migrate all remaining devices using the custom DPC implementation over to the new AMAPI implementation. Monitoring There is a new report that shows how many personally owned work profile devices are in each of the following states: On AMAPI Not targeted to move to AMAPI Targeted to move and pending completion (since it may roll out over some time) Attempted to move and hit an error (and why) How this will affect your users Web based enrollment After you opt in to web based enrollment or later after it’s changed to the default, all personally-owned devices (on all Android OS versions) will enroll with the web based flow. These devices will be managed with AMAPI. After enrollment, Intune will install a few apps automatically to ensure streamlined management. Microsoft Intune: User-facing app to manage devices, contact the IT department, collect diagnostic logs, and more. Company Portal: For mobile app management (MAM). Android Device Policy: To enforce AMAPI policies. This app is installed in a “hidden” state, so users won't see it in their app list. Microsoft Authenticator: To provide single sign on for users’ work account. Below is an example of the web based enrollment flow that a user would see if they needed to set a PIN on their device to meet admin requirements. New implementation When a device is moved to the new implementation (either through admin configuration or the later automatic move), devices won’t unenroll and users won’t lose access to corporate resources. Moving enrolled devices to the new implementation will be supported on any device running supported Android OS versions for user-based management methods at that time. The changes on the device will be: The Microsoft Intune app will install, and it will be the app for users to interact with instead the Company Portal. Users will not see a notification about this app installing. The Android Device Policy app will install to enforce policies. Users will not see a notification about this app installing and it will be in a “hidden” state on their device. If a device connected to corporate Wi-Fi with username and password authentication, when they move to AMAPI, they will lose access to corporate Wi-Fi until they sign in to the corporate Wi-Fi again. To avoid any potential disruption, we encourage you to move to certificate Wi-Fi authentication instead (as mentioned below). Timeline 2025: Use this time to revise any relevant policy configurations, update your internal documentation, and prepare your helpdesk teams, as advised below. June, 18th 2026: Enrollment: You’ll be able to opt in for all enrollments of personally owned work profile devices to be web based enrollments on AMAPI. New implementation: You’ll be able to set a configuration policy to migrate groups of previously enrolled devices over to AMAPI. Planned for Q4 2026: Enrollment: All enrollments (regardless of past configuration) will be web enrollments for devices running all Android OS versions. New implementation: All devices still on the custom DPC implementation and running supported Android OS versions for user-based management methods at that time will be automatically moved over to AMAPI. You will receive advanced notice of when these changes will be applying to your tenant. How to prepare We recommend you make these changes to prepare for the upcoming release and provide the most streamlined experience for users. Passkey support: If you have passkeys configured as the only accepted authentication method, users won't be able to enroll with the new web based enrollment flow. This is a known limitation, and we'll add passkey support before web based enrollment becomes the default for all personally owned work profile enrollments across all tenants - planned for Q4 2026. Important: Web-based enrollment doesn't support passkeys yet. If passkeys are your only allowed authentication method, enrollment will fail. Don't opt in to web-based enrollment until we announce passkey support for this flow. Replace custom policies: Intune ended support for custom configuration polices for personally owned work profile devices in April 2025. Custom policies are not supported in the new implementation. Replace all custom policies with equivalent policies using this setting mapping. Certificate authentication for Wi-Fi: If you’re using username and password authentication for Wi-Fi policies, we strongly encourage you to move to certificate authentication instead. Devices that are connected to corporate Wi-Fi with username and password authentication will lose access to corporate Wi-Fi when they are moved to AMAPI until the user signs into the corporate Wi-Fi network again. Devices using certificate authentication for Wi-Fi won’t lose access, and it’s also a more secure authentication method. Evaluate biometric configuration: Devices on the new implementation won't apply policies that prevent users from using face, fingerprint, iris, or trust agents to unlock their device. However, policies that prevent this at the work profile level are still supported. If you have this configured at the device level, consider blocking at the work profile level to protect work resources in an equivalent way. Note that for users who have turned on the setting to use one lock (unified password for the device and work profiles), then biometric settings configured for the work profile will apply to the device instead, since there isn't a separate work profile unlock. Review enrollment restrictions: In enrollment restrictions (also referred to as device platform restrictions) the “Android Enterprise (work profile)” restriction for personally owned work profile devices has a setting to Allow or Block “Personally owned” devices. This configuration will not apply to devices on AMAPI and the setting will be removed from the Intune admin center when all devices are moved to AMAPI. As communicated in the Intune Android 12 blog, this setting does not work reliably on devices running Android 12 and later. Conceptually, personally owned work profile management is meant for personal devices, so blocking personal devices from enrolling and only allowing corporate devices isn’t recommended. If you currently have the “Personally owned” setting set to Block for personal work profile devices, you should plan an alternate way for blocking these devices. Options include using a corporate management method instead (such as corporate owned work profile) or configuring the personal work profile enrollment restriction to block enrollments for all users except for users in a specified group. Update Android OS: Intune currently supports Android 10 and later on personally owned work profile devices. We recommend you guide users to update to their device’s latest supported Android version for the best experience. Helpdesk preparation: Inform your helpdesk teams of these coming changes so they know what to expect. For devices on the new implementation, diagnostic logs will be collected using the Microsoft Intune app (instead of the Company Portal app). Plan to update any user instructions you have after you try out the web based enrollment flow. iOS web based enrollment: We recommend you consider setting up web based device enrollment for iOS now or when we release Android web based enrollment for a more consistent and improved user experience. Changes to be aware of A few defaults will change as part of the move to the new implementation. Required app installation behavior: In the custom DPC implementation, users can uninstall required apps, and then they are reinstalled automatically within a few hours. In the new implementation, users won’t be able to uninstall required apps from their device, which is the same experience as on corporate Android Enterprise devices. Caller ID and contact search: In the custom DPC implementation, the settings to “Display work contact caller-id in personal profile” and “Search work contacts from personal profile” are two independent settings. In AMAPI, they are controlled with a single setting. If you have blocked either, Intune will automatically block both for devices on the new implementation. Intune will update the policy user interface to have a single setting once all devices are on the new implementation. Screen timeout: In the custom DPC implementation, you can configure screen timeouts either for the full device or for the work profile under “Maximum minutes of inactivity until work profile locks.” In AMAPI, you can only configure this at the work profile level. Intune will set this to the lesser of the two when devices move to the new implementation. We will remove the device level setting from policies when all devices are on AMAPI. Security provider and Google Play services: The compliance settings for "Up-to-date security provider" and "Google Play Services is configured" won't be supported for devices on AMAPI. This is because security providers will automatically be updated and Google Play Services are required for device enrollment and management. Intune will remove these settings from compliance policies when all devices are on AMAPI. Password: There will be some minor changes to how some configurations of password requirements apply on some devices. We will update to provide more information and guidance. Enrollment reports: A couple of enrollment reports will not report on devices enrolled into AMAPI management. They are the “Enrollment failures” and “Incomplete user enrollments” reports that are found in Devices > Enrollment in the Monitor tab. Google Domain allow listing: The device restriction setting “Google domain allow-list” will not be supported for devices on AMAPI. This capability is now managed directly in the Google Admin console rather than through device restriction policies. Once the onboarding account has been migrated to a Microsoft Entra account and federated with a Google account, admins can configure this setting in the Google Admin console under the Third-party integrations node by enabling “Authenticate Using Google.” Intune will remove this setting from device restriction policies once all devices are on AMAPI. Stay tuned to this blog for updates! If you have any questions or feedback on this change, leave a comment on this post or reach out on X @IntuneSuppTeam. Post updates 02/19/25: Updated the Timeline and How this will affect your users + New Implementations sections. 04/08/25: Updated these sections: How to configure and monitor, How this will affect your users, Timeline, How to prepare, and Changes to be aware of. 04/09/25: Updated the Changes to be aware of section to include details about TeamViewer supportability. 08/22/25: Added images and updated all sections with the latest information, including an updated Timeline section and removing the information about the delay to TeamViewer support. 09/09/25: Added a screenshot to clarify Android enrollment restrictions. 09/23/25: Update the Changes to be aware of section to include more information about 'Enrollment reports'. 02/12/26: Updates to the Changes to be aware of section to include more information about 'Security provider and Google Play services'. 03/27/26: Updates to the Changes to be aware of section to include more information about 'Google Domain allow listing'. 05/13/26: Updated the Timeline section to reflect availability in late Q2 of calendar year 2026. 06/18/26: Updated to note that as of June 18 this is now generally available! You may need to take action to opt in to the new implementation.28KViews3likes38CommentsIntroducing device association for Windows Autopilot device preparation
By: Maggie Dakeva, Senior Product Manager - Microsoft Intune We’ve heard organizations want Windows deployment to be simple for employees and predictable for IT admins. But before a device enrolls, how does the organization know that the device is really one of its own - and how can IT make sure the right experience and policy reach that device regardless of who signs in? Today, we're announcing device association for Windows Autopilot device preparation, a new way to bind a physical Windows 11 device to your organization before enrollment begins. Device association uses hardware-backed attestation to create a trusted relationship between the device and your tenant at the start of the provisioning journey. That relationship helps Windows Autopilot device preparation recognize the device during the out-of-box experience (OOBE), automatically treat it as corporate-owned, and apply the experience and policy intended for that specific device. The result is a more secure, more consistent, and more device-centric onboarding flow. Start with the device, not just the user Windows Autopilot device preparation already gives IT teams a straightforward way to configure new Windows devices with the apps, scripts, and policies employees need. Device association extends that experience by allowing IT to target a device preparation policy directly to a device before it enrolls. This is especially valuable when the deployment experience needs to follow the hardware rather than the person signing in. For example, one employee can enroll multiple devices that serve different purposes, and each device can receive its own device preparation policy. When both device-based and user-based assignments are available, the device-based assignment takes precedence. That gives administrators greater confidence that the correct configuration reaches the correct device from the beginning of its lifecycle. Create a simpler out-of-box experience Because an associated device is recognized before enrollment, IT can configure more of the Windows setup experience in advance. Device association enables organizations to: Configure Language and region. Automatically configure the keyboard and skip the keyboard selection page. When the device uses a Wi-Fi network connection during OOBE, the language and keyboard selection screens aren't hidden. Hide the Microsoft Software License Terms page. Hide privacy settings during OOBE. Apply a device name template that uses the serial number or a randomized value. Hide account-change options on company sign-in and domain error pages. These controls reduce the number of decisions an employee must make while setting up a device and help create a consistent, organization-ready experience from the first screen. Strengthen trust before enrollment Device association isn't only an experience improvement. It establishes device trust earlier in the deployment process. The association uses hardware-based attestation and TPM-backed cryptographic validation to verify the device's identity. Tenant affinity is stored in the device's UEFI firmware, where it persists across a Windows reset, operating system reinstallation, or removal of enrollment. This durable, hardware-backed relationship helps ensure that the device presenting itself for preparation is the device the organization intended to onboard. Associated devices are also automatically marked as corporate-owned. If your organization blocks personally owned Windows devices with Intune enrollment restrictions, device association can be used instead of uploading a separate corporate identifier. You can continue to use corporate identifiers where they fit your process, but an associated device doesn't need both. How the device association flow works Device association is designed as a clear workflow that starts with IT and finishes automatically during OOBE: Create the device preparation policy. Configure the apps, scripts, deployment settings, OOBE experience, and optional device name template that should apply. Export the device information. During OOBE, a technician opens the Autopilot menu and exports the DeviceLink CSV with the device information required for pre-association to a USB. For an existing device, the same information can be collected from Autopilot diagnostic logs. Figure 1. The Windows Autopilot menu with Assign device association selected. ormation was exported to a removable drive. Pre-associate the device in Intune. In the Microsoft Intune admin center, go to Devices > Enrollment > Device association > Devices, upload the CSV, and optionally assign a device preparation policy directly to the device. Complete association. When the device connects to a network in OOBE, it finds the pre-association record and completes association automatically. A technician can also trigger this step manually from the Autopilot menu. Enroll and prepare the device. The device receives the applicable device-targeted policy, is marked as corporate-owned, and presents the configured OOBE experience. Monitor the deployment. Administrators can review association state and assigned policy in the Device association blade and filter devices by state, policy, manufacturer, or model. The device association lifecycle consists of the following states: Pre-associated: The device was added on the service side and is waiting to complete association in OOBE. Associated: The device completed association by writing the tenant affinity to UEFI and is ready for enrollment. This happens automatically when a pre-associated device syncs with an MDM provider. Pending removal: A request to remove the pre-association is being processed. A device's association can be removed by an administrator or partner with physical access to the device who manually runs a local script that clears the tenant affinity information stored in the device's UEFI. This action should be performed only when the device should no longer be associated with the organization, such as when it is sold, recycled, or transferred. Manage the full device lifecycle The association remains with the device through reset and reinstallation, helping preserve the organization's intended provisioning path when a device is redeployed internally. When a device permanently leaves the organization - for example, when it's sold, recycled, or transferred—the association should be removed as part of decommissioning. Because the tenant affinity is stored on the device, clearing a completed association can be performed via script locally on the physical device, without access to the service. This lifecycle model is intentional: association is durable during normal reuse inside the organization, while permanent removal can be completed by an admin or partner who has control of the physical device. Designed to work alongside your existing Windows Autopilot strategy Device association is part of Windows Autopilot device preparation and can coexist with traditional Windows Autopilot deployments in the same organization. For a device already registered with Windows Autopilot, the association state determines which deployment runs. If the device isn't associated, its Windows Autopilot registration takes precedence. If it is associated, the Windows Autopilot device preparation deployment takes precedence. This gives organizations a practical path to introduce device association while continuing to support existing Windows Autopilot investments. Get started To use device association, you'll need a supported physical Windows 11 device with TPM 2.0 enabled and in a healthy state. Virtual machines aren't supported because device association relies on hardware-backed identity verification. Start by reviewing the Windows Autopilot device association requirements, then create or update your Windows Autopilot device preparation policy. From there, export the device information, pre-associate the device in Intune, and let Windows complete the trusted association during OOBE. With device association, Windows Autopilot device preparation moves device trust, targeting, and customization earlier in the deployment journey - before enrollment and before the employee reaches the desktop. That means fewer setup decisions for users, more predictable deployments for IT, and stronger confidence that the right device is joining the right organization with the right configuration. Learn more Overview of Windows Autopilot device association Requirements for Windows Autopilot device association Set up Windows Autopilot device preparation with device association24KViews5likes20CommentsCloud-native Windows endpoints: Begin by beginning
By: Jason Sandys – Principal Product Manager | Microsoft Intune Cloud-native is Microsoft’s goal for all commercial Windows endpoints. By definition, a cloud-native Windows endpoint is joined to Microsoft Entra ID and enrolled in Microsoft Intune. It represents and involves a clean break from on-premises related systems, limitations, and dependencies for device identity and management. This clean break from on-premises dependencies might align with larger organizational goals to reduce or eliminate on-premises infrastructure but doesn’t prevent users from accessing or using existing on-premises resources like file shares, printers, or applications. Cloud-native for Windows endpoints is a large change in thinking for most organizations and thus poses an initial challenge of how to even begin on this journey. This article provides you with guidance on how to begin and how to embrace this new model. For additional guidance that includes a higher-level discussion of what to do with existing endpoints, see: Best practices in moving to cloud native endpoint management | Microsoft 365 Blog to learn more. Proof of concept The first step is to begin with a proof of concept (POC). For any new technology, methodology, or solution, POCs offer numerous advantages. Specifically, they enable you to evaluate the new “thing” with minimal risk while building your skills and gaining stakeholder buy-in. Because the exact end state of Windows endpoints is highly variable among organizations and even within an organization, a POC for cloud-native Windows enables you to take an iterative approach for defining and deploying these endpoints. This iterative approach involves smaller waves of users and endpoints within your organization. It’s ultimately up to you to define which endpoints or users should be in each wave, but you should align this to your endpoint lifecycle and refresh plan. Aligning to your endpoint lifecycle allows you to minimize impact to your users by consolidating the delivery of new endpoints with the changeover from hybrid join to Microsoft Entra join, which requires a Windows reset or fresh Windows instance. Additional significant criteria to consider for which users and endpoints to include in each wave are the organizational user personas and endpoint roles. An iterative POC enables you to break work effort and challenges into more manageable pieces and address them individually or sequentially. This is important since some (often many) challenges related to adopting cloud-native Windows endpoints are isolated or not applicable to all endpoints or users in the organization. Some challenges may even remain unknown until they arise, and the only way to learn about them is by conducting actual production testing and evaluation. You don’t need to address or solve every challenge to successfully begin your journey to cloud-native Windows endpoints. An easy example for this is users that exclusively use SaaS applications: these users’ endpoints already have limited (if any) true on-premises service or application dependencies, and they likely face few, if any, challenges in moving to cloud-native Windows endpoints. Initial cloud-native Windows configuration There are some common activities that need to occur before you deploy your first cloud-native Windows endpoints. Keep in mind that this list is simply the steps to begin the iterative process, it’s not all-inclusive or representative of the final state. For a detailed walkthrough on configuring these items (and more), see the following detailed tutorial: Get started with cloud-native Windows endpoints. Identify the user personas and endpoint types within your organization. These typically vary among organizations, so there’s no standard template to follow. However, you should align your POC to these personas and endpoint types to limit each wave’s impact and scope of necessary change. Configure your baseline policies. Implement a minimum viable set of policies within Intune to deploy to all endpoints. Base these policies on your organizational requirements rather than what has been previously implemented in group policy (or elsewhere). We strongly suggest starting as cleanly as possible with this activity and initially including only what is necessary to meet the security requirements of your organization. Configure Windows Autopatch. Keeping Windows up to date is critical, and Windows Autopatch offers the best path to doing this (whether a Windows endpoint is cloud-native or not). Configure Windows applications. As with policies, this should be a minimal set of applications to deploy to your POC endpoints and can include Win32 based and Microsoft Store based applications. Configure Windows Autopilot. Windows Autopilot enables quick and seamless Windows provisioning without the overhead of classic on-premises OS deployment methods. With Windows Autopilot, the provisioning process for cloud-native Windows endpoints is quick and easy. Configure Delivery Optimization. Windows uses Delivery Optimization for downloading most items from the cloud. By default, Delivery Optimization leverages peers to cache and download content locally. Edit the default configuration to define which managed endpoints are peers or to disable peer content sharing. Enable Windows Hello for Business and enforce multi-factor authentication (MFA) using Conditional Access. Enable Cloud Kerberos Trust for Windows Hello for Business to enable seamless access to on-premises resources. These items significantly increase your organization’s security posture and place your organization well on the Zero Trust path. As the iterative POC process evolves to include more user personas and endpoint roles, you can add more functional policy requirements and applications. This will involve some discovery as you learn about the actual needs of these various personas and roles. Since you aren’t targeting everything from day one, you don’t need to have all requirements defined up front or solutions for every potential issue. Additional suggestions, tips, and guidance Don’t assume something does or doesn’t work on cloud-native Windows endpoints. The POC process enables you to iteratively test and evaluate applications, services, resources, and everything else in your environment – most of which isn’t typically documented. It might simply be part of the tacit or tribal knowledge within your organization. In general, you’ll find that nearly everything works just as it did before Windows cloud-native. Document everything. As you implement, document the “what” as well as the “why” for everything you configure. This allows you and your colleagues to come back at any time and understand or refresh your memory for your cloud-native Windows implementation, as well as many other things in the environment. Microsoft doesn’t expect organizations to rapidly convert their entire estate of Windows endpoints to cloud-native. Instead, we recommend taking it slow, being deliberate, and using the iterative approach outlined above by aligning to your hardware refresh cycle to minimize impact on users. This also provides you with time to prove the solution, address gaps, and overcome challenges as you discover them without disrupting productivity. Use the built-in Conditional Access policy templates to quickly get started with MFA and other Conditional Access capabilities. The templates enable you to implement Conditional Access policies that align with our recommendations without experimentation. Accessing on-premises resources including file shares from a cloud-native Windows endpoint works with little to no configuration. Refer to the documentation for more details: How SSO to on-premises resources works on Microsoft Entra joined devices. Call to action Begin exploring your cloud-native Windows POC today. Taking this first step now will allow your organization to start reaping the benefits of enhanced security, streamlined management, and improved user experience sooner. Every organization is unique, so there’s no blueprint for comprehensively implementing cloud-native Windows. However, you don’t need a comprehensive blueprint to be successful, you just need to begin and slowly expand adoption throughout your organization when and where it makes sense. The guidance provided above along with the getting started tutorial should give you the information, tools, and confidence to move forward with decoupling your endpoints and users from your on-premises anchors and fully embrace cloud-native Windows. For a more detailed and in-depth discussion on adopting cloud-native Windows, including planning and execution, see Learn more about cloud-native endpoints. If you have any questions, leave a comment below or reach out to us on X @IntuneSuppTeam. Additional Blogs 3 benefits of going cloud native | Microsoft 365 Blog How to achieve cloud-native endpoint management with Microsoft Intune | Microsoft 365 Blog Myths and misconceptions: Windows 11 and cloud native | Windows IT Pro Blog (microsoft.com)7.6KViews2likes3CommentsSupport tip: Troubleshoot device cap reached when enrolling devices into Microsoft Intune
By: Premkumar N – Security Customer Experience Engineer | Microsoft Intune When Microsoft Entra or Intune device limits are reached, users will encounter an error when enrolling their device into Intune. While it can be difficult to understand the reason for the failure from the error message, this blog will explain the differences between Microsoft Entra device registration limit and the Intune device enrollment limit, along with the steps to resolve these issues. For an overview of Microsoft Entra and Intune device limit scenarios refer to: Understand Intune and Microsoft Entra device limit restrictions. Let’s look at the experiences on different platforms, followed by the resolution steps. Android Intune device limit reached When the Intune device limit is reached, an Android device enrollment will fail with the following error: To diagnose the issue, review the Intune Company Portal logs for the affected device. Capturing Company Portal logs: Users can select "Email Support" from the error screen to send the logs via email or Send logs from Company Portal. If the Company Portal logs display the “Device Cap Reached” error as shown in the example logs below, this indicates that the Intune device limit has been reached. 2025-07-16T15:07:39.8410000 VERB o.zzafi 13923 6035 sending event: EnrollmentFailureEvent( networkState=CONNECTED, enrollmentFlowType=Enrollment, enrollmentType=AfwProfileOwner, failureName=DeviceEnrollmentFailure, errorException=com.microsoft.windowsintune.companyportal.exceptions.EnrollmentException: Server error = <s:Envelope xmlns:s="http://www.w3.org/2003/05/soap-envelope" xmlns:a="http://www.w3.org/2005/08/addressing"> <s:Body> <s:Fault> <s:Code> <s:Value>s:Receiver</s:Value> <s:Subcode> <s:Value>s:Authorization</s:Value> </s:Subcode> </s:Code> <s:Reason> <s:Text xml:lang="en-US">Device Cap Reached</s:Text> </s:Reason> <s:Detail> <DeviceEnrollmentServiceError xmlns="http://schemas.microsoft.com/windows/pki/2009/01/enrollment"> <ErrorType>DeviceCapReached</ErrorType> <Message>Device Cap Reached</Message> <TraceId>xxx</TraceId> </DeviceEnrollmentServiceError> </s:Detail> </s:Fault> </s:Body> </s:Envelope>, errorMessage=, sessionGuid=xxx ) By default, Intune allows a maximum of 15 devices per user; exceeding this limit logs an error in the Company Portal. To address this issue, either remove inactive devices that have not checked in to Intune within a specified timeframe, or increase the device limit (up to 15) in the Intune settings. To remove stale devices: Navigate to the Microsoft Intune admin center > Devices > All Devices. Search using the affected user's UPN to view all enrolled devices. Remove any devices no longer in use. To increase the device limit: Navigate to the Microsoft Intune admin center > Devices > Enrollment > Device Limit Restrictions. Select the policy, go to Properties, then edit Device Limit, and adjust the limit (maximum 15). Note: If the Intune device limit is reached, errors are logged in the Microsoft Intune admin center under Devices > Monitor > Enrollment failures. Microsoft Entra device limit reached For Android, users will see the same error message when Microsoft Entra device limit has been reached. You can confirm the Microsoft Entra device limit has been reached by checking the Company Portal logs for the following error: com.microsoft.identity.broker4j.workplacejoin.exception.DrsErrorResponseException: { "code": "invalid_request", "subcode": "error_directory_quota_exceeded", "message": "User 'xxx' is not eligible to enroll a device of type 'Android'. Reason 'DeviceCapReached'.", "operation": "DeviceJoin", "requestid": "xxx", "time": "xxx" } Similar to the Intune device limit reached, to resolve this issue either increase the device limit in Microsoft Entra for Microsoft Entra registration or remove any stale devices associated with the user in the Microsoft Entra admin center. Stale devices are those that are no longer active and can be removed when they haven’t checked in for a specified period. One cause of stale devices is deleting or retiring an Intune device, which may leave behind a record in Microsoft Entra and contribute to reaching the Microsoft Entra device registration limit. To remove stale devices: Go to the Microsoft Entra admin center. Navigate to Microsoft Entra ID > Users. Search for the user using their UPN. Select Devices. This displays a list of registered devices for the user. Devices that are no longer in use can be removed. To increase the device limit for Microsoft Entra registration: Go to the Microsoft Entra admin center. Navigate to Microsoft Entra ID > Devices. Select Device Settings. Locate Maximum number of Devices Per User. Adjust the device limit as needed. iOS Intune device limit reached For iOS, device enrollment may fail with the following error if the device limit has been reached. To check the issue, select 'Report and Email logs' to collect Company Portal logs. If the logs show the below error, it confirms the Intune device limit has been reached. 2025-07-18 12:38:33.427 | utility | 31673 | AlertManager.swift:37 (push(alert:grouping:)) Pushing alert with: grouping = 0 title = Couldn't add your device. message = You have reached the limit of devices you can register. Please contact your company support to increase this number, or review and remove devices that are already registered with this account. into the AlertManager The resolution is the same as Android, refer to the earlier steps for Intune device limit reached on Android. Microsoft Entra device limit reached On iOS devices, Intune enrollment may successfully complete; however, device registration may still result in an error as shown below in the Company Portal app. To collect Intune Company Portal logs, select More > Send logs > Email Logs. When you see the following error message in the Company Portal logs: iOSunderlyingErrorMessage: { "ErrorType": "AuthorizationError", "Message": "User '00000000-0000-0000-0000-000000000000' is not eligible to enroll a device of type 'Ios'. Reason 'DeviceCapReached'.", "TraceId": "00000000-0000-0000-0000-000000000000", "Time": "2025-07-16 14:07:23Z" } To resolve, use the same steps as Android when Microsoft Entra device limit is reached. macOS Intune device limit reached For macOS, device enrollment will fail with the following error when the Intune device limit has been reached. To identify the issue, collect the Company Portal logs by selecting 'Report' and then email the logs. In the logs, when you see the following error, this confirms the Intune device limit has been reached. 2025-07-25 07:39:23.731 | utility | 14262 | AlertManager.swift:37 (push(alert:grouping:)) Pushing alert with: grouping = 0 title = Couldn't add your device. message = You have reached the limit of devices you can register. Please contact your company support to increase this number, or review and remove devices that are already registered with this account. into the AlertManager To resolve, use the same steps as Android when Intune device limit is reached. Microsoft Entra device limit reached For macOS when enrolling into Intune, if the Microsoft Entra device limit has been reached, you’ll notice the following error: In the Company Portal logs, when you see the following error, this confirms the Microsoft Entra device limit has been reached. Description: { "ErrorType": "AuthorizationError", "Message": "User '00000000-0000-0000-0000-000000000000' is not eligible to enroll a device of type 'Mac'. Reason 'DeviceCapReached'.", "TraceId": "00000000-0000-0000-0000-000000000000", "Time": "2025-05-27 05:24:52Z" } To resolve, use the same steps as Android when Microsoft Entra device limit is reached. Windows Intune device limit reached For Windows devices, enrollment will fail with the following error when Intune device limit has been reached: When you see this error, you can check the logs in the event viewer in this path: Source: Microsoft-Windows-DeviceManagement-Enterprise-Diagnostics-Provider/Admin Event ID: 71 MDM Enroll: Failed to receive or parse certificate enroll response. Result: The account has too many devices enrolled to Mobile Device Management (MDM). Delete or unenroll old devices to fix this error. To resolve, use the same steps as Android when Intune device limit is reached. Microsoft Entra device limit reached For Windows, when the Microsoft Entra device limit has been reached, you’ll notice the following error during Intune enrollment: When you see this error, you can check the logs in the event viewer in this path: Windows Device Source: Microsoft-Windows-User Device Registration/Admin Event ID: 304 The get join response operation callback failed with: exit code: Unknown HResult Error code: 0x801c000e Activity Id: a0a15e15-631a-46ab-b0a4-2f540778df7d The server returned: HTTP status: 400 Server response: { "code": "invalid_request", "subcode": "error_directory_quota_exceeded", "message": "User '8b000000-0000-0000-0000-000000000000' is not eligible to enroll a device of type 'Windows'. Reason 'DeviceCapReached'.", "operation": "DeviceJoin", "requestid": "a0000000-0000-0000-0000-000000000000", "time": "2025-05-30 15:33:09Z" } This is the result of the Microsoft Entra device limit reached for the user for Windows platform. To resolve, use the same steps as Android when Microsoft Entra device limit is reached. Device limit reached – Windows Autopilot hybrid join scenario The Microsoft Entra device limit reached error will also occur when changing the primary user in Intune for Windows Autopilot Microsoft Entra hybrid joined devices). In the Autopilot hybrid join scenario there will be two device records in Azure. The Microsoft Entra hybrid join record, and the standard Microsoft Entra join record. Changing the primary user only updates the hybrid joined record in Microsoft Entra, leaving the original user as the owner of the Microsoft Entra join record. The owner entries on the Microsoft Entra join record will impact the device registration limit. Rather than removing the Microsoft Entra join device, which deletes its join state and is not a recommended approach, remove the registered owner on that record. Note: Deploying new devices as Microsoft Entra hybrid join devices isn’t recommended, for more details refer to Microsoft Entra joined vs. Microsoft Entra hybrid joined in cloud-native endpoints: Which option is right for your organization. The following image shows the device state after the Microsoft Entra hybrid joined deployment is completed. User1 enrolled a Microsoft Entra hybrid join device with Intune and Windows Autopilot and the registered user for both the records is ‘user1’. After changing the primary user in Intune to user2, only the Microsoft Entra hybrid joined record is updated for user2. The Microsoft Entra device registration usage for user1 remains unchanged for the Microsoft Entra joined record, both before and after modifying the primary user of the Intune device. This counts toward the Microsoft Entra registration limit for user1. Resolution Before proceeding with the resolution steps for this scenario, it’s important to note the difference between a registered owner and a registered user: Registered owner: A registered owner is the user that cloud joined the device or registered their personal device. The registered owner is set at the time of registration. Registered user: For cloud joined devices and registered personal devices, registered users are set to the same value as registered owners at the time of registration. Remove the registered owner This action can be done using PowerShell and Graph Explorer. Step 1. Check the user's device count in Microsoft Entra ID using Graph Explorer or PowerShell. PowerShell: This query lists the registered devices for the user. Install-Module Microsoft.graph Connect-MGgraph Get-MgUserRegisteredDevice -UserId <userID> Get-MgUserRegisteredOwner -UserId <userId> Sample from PowerShell: Graph Explorer queries: Owned devices for the user GET https://graph.microsoft.com/v1.0/users/{user-id}/OwnedDevices Registered device for the user GET https://graph.microsoft.com/v1.0/users/{user-id}/registeredDevices Sample Graph Explorer output: Only the "ID" in the output is needed to remove the device in next step. { "@odata.context": "******", "@microsoft.graph.tips": "******", "id": "00000000-0000-0000-0000-00000000", "deletedDateTime": null, "accountEnabled": true, "approximateLastSignInDateTime": "******", "complianceExpirationDateTime": null, "createdDateTime": "******", "deviceCategory": null, "deviceId": "******", "deviceMetadata": null, "deviceOwnership": "Company", "deviceVersion": 2, "displayName": "******", "domainName": null, "enrollmentProfileName": null, "enrollmentType": "AzureDomainJoined", "externalSourceName": null, "isCompliant": false, "isManaged": true, "isRooted": false, "managementType": "MDM", "manufacturer": "******", "mdmAppId": "******", "model": "******", "onPremisesLastSyncDateTime": null, "onPremisesSyncEnabled": null, "operatingSystem": "******", "operatingSystemVersion": "******", "physicalIds": [ "******", "******", "******", "******" ], "profileType": "RegisteredDevice" } Step 2. After confirming the user association for the device, remove both the registered owner and user for the Microsoft Entra joined device record to clear the user count toward the pre-defined limit. Graph API query: Replace the 'deviceid' in the following query with the 'id' from the Graph Explorer output from the previous step. Delete Registered Owner DELETE https://graph.microsoft.com/v1.0/devices/{deviceid}/registeredowners/{user-id}/$ref Delete Registered User DELETE https://graph.microsoft.com/v1.0/devices/{deviceid}/registeredusers/{user-id}/$ref This can also be done with PowerShell as below. PowerShell commands In the below commands DeviceID = Microsoft Entra Device ID/ObjectID. It’s important to remove both the registered owner and registered user for the device. Remove registered owner: Remove-mgdeviceregisteredownerDirectoryObjectByRef –DeviceId <DeviceID> -DirectoryObjectId <userID> Sample PowerShell output: Remove registered user: Remove-mgdeviceregistereduserDirectoryObjectByRef –DeviceId <DeviceID> -DirectoryObjectId <userID> Sample PowerShell output: PowerShell or Graph Explorer can also be used to delete the device in other scenarios such as Intune device deletion and Microsoft Entra device ID deletion. Summary Device enrollment can fail when either Intune or Microsoft Entra device limits are reached. These errors can be confusing, however, understanding the difference between Microsoft Entra device registration limits and Intune device enrollment limits makes it easier to sort out and resolve the issue. These issues commonly stem from stale device records, or changing the primary user of a Microsoft Entra hybrid joined device. Resolving them involves removing inactive devices or adjusting device limit policies in the appropriate service. As a best practice, avoid changing the primary user of the Microsoft Entra hybrid joined device and deploy the Windows Autopilot device to new users with a fresh start. Additional information on this topic can be found in the Microsoft Learn docs below: Device limit - Understand Intune and Microsoft Entra device limit restrictions List RegisteredDevices for user - List registeredDevices - Microsoft Graph v1.0 ListOwnedDevices for user - List ownedDevices - Microsoft Graph v1.0 Remove the registered owners for the device - Delete registeredOwners - Microsoft Graph v1.0 Remove the registered user for the device - List registeredUsers - Microsoft Graph v1.0 If you have any questions, leave a comment below or reach out to us on X @IntuneSuppTeam.Understanding Apple enrollment methods in Microsoft Intune
By: Rishita Sarin – Product Manager | Microsoft Intune Microsoft Intune, together with Microsoft Entra ID, facilitates a secure, streamlined process for registering and enrolling devices to access your organization’s resources. Once users and devices are registered within your Microsoft Entra ID (also called a tenant), then you can utilize Intune for its endpoint management capabilities. The process that enables device management for a device is called device enrollment. During enrollment, Intune installs a mobile device management (MDM) certificate on the enrolling device. The MDM certificate communicates with the Intune service, and enables Intune to start enforcing your organization's policies, like: Enrollment policies that limit the number or type of devices someone can enroll. Compliance policies that help users and devices meet your organization’s requirements. Configuration profiles that configure work-appropriate features and settings on devices. This blog aims to provide an overview of Microsoft Intune’s enrollment methods for Apple devices to help you make informed decisions about device management. Enrollment methods Personal owned devices (BYOD) To get started with enrolling personally owned devices navigate to the Intune admin center, Devices > Enrollment > Apple > Enrollment types > Create. Apple’s name since 2019 Intune’s name When to use it Profile-based Device Enrollment (Previously known as User Enrollment) Device enrollment with Company Portal Secures entire personal device. Supports app takeover. Web enrollment Secures entire personal device. Supports app takeover. We recommend enabling web-based enrollment for devices running iOS/iPadOS 15 and later because it doesn't require employees and students to install the Company Portal app. Post-enrollment functionality remains the same as with app-based enrollment. Profile-based User Enrollment (Support ended in 2024) User enrollment with Company Portal (Support ended in 2024) Do not use this (Support ended in 2024) Account-driven User Enrollment Account-driven user enrollment Secures only work-related apps on a personal device. No support for app takeover. Account-driven Device Enrollment Not supported Not supported N/A Determine based on user choice Gives users the option to select if they want to secure their entire device or only work-related apps. Corporate owned devices Devices > Enrollment > Apple > Enrollment program tokens > select a token > Enrollment policies > Create Apple’s name since 2019 Intune’s name When to use it Automated Device Enrollment (ADE) (Previously known as Device Enrollment Program (DEP)) Automated Device Enrollment (ADE) for iOS/iPadOS Automated Device Enrollment (ADE) for macOS Secures entire corporate device. Enroll with User Affinity: Select this option for devices that belong to users who want to use the Company Portal for services like installing apps. Enroll without User Affinity: Select this option for devices that aren't affiliated with a single user. Use this option for devices that don't access local user data. This option is typically used for kiosk, point of sale (POS), or shared-utility devices. Enroll with Microsoft Entra ID shared mode (only iOS/iPadOS): Select this option to enroll devices that will be in shared mode. 💡 Tip: If you’re enrolling Apple devices for frontline worker scenarios, make sure to check out this detailed guide: Get started with iOS/iPadOS frontline worker devices. Improvements Based on customer feedback, Intune introduced a faster and more intuitive version of device enrollment with the Intune Company Portal called web enrollment in 2023. Web enrollment retains all the benefits of device enrollment with added benefits of reduced latency and without requiring installation of the Company Portal app. We strongly encourage you to take advantage of web enrollment for a faster and more efficient enrollment process for your users. Additionally, turning on just-in-time (JIT) registration and compliance remediation (automatically set up as part of JIT registration setup) for all iOS/iPadOS enrollments can significantly improve the registration and compliance remediation experience. By bringing the enrollment experience to where the user is, we help them get productive faster and ensure a smoother transition. This applies to both iOS/iPadOS bring-your-own-device (BYOD) web enrollment and corporate Automated Device Enrollment (ADE), specifically for Setup Assistant with modern authentication within ADE. For more information on JIT registration and compliance remediation, check out this blog post: Use JIT registration and JIT compliance remediation for all your iOS/iPadOS enrollments. As a result of recent enhancements to our enrollment workflows, the Company Portal app is no longer required for some enrollment methods. However, we recognize the use cases for the Company Portal go beyond enrollment, and we’ll continue to support and invest in improvements for the app. One example of upcoming improvements to the Company Portal is the addition of the user-less app catalog. This enhancement opens the doors for future frontline worker (FLW) scenarios, allowing for more flexible and efficient device management without the need for user-specific configurations. Stay tuned to What’s new in Intune for the release and more! If you have any questions or want to share how you’re using Apple enrollment across your organization in Intune, leave a comment below or reach out to us on X @IntuneSuppTeam or @MSIntune. You can also connect with us on LinkedIn: aka.ms/IntuneLinked.6.8KViews2likes7CommentsMoving from Windows Autopilot to Windows Autopilot device preparation
By: Maggie Dakeva, Senior Product Manager - Microsoft Intune Organizations have spent years refining Windows Autopilot deployments. Profiles, Enrollment Status Page settings, group tags, dynamic groups, application assignments, and support processes all work together to deliver a familiar provisioning experience. Windows Autopilot device preparation is a re-architecture of Windows Autopilot designed around the customer asks we hear most often: simpler configuration, faster and more reliable setup, clearer progress for users, and near real-time deployment reporting for administrators. A single device preparation policy brings deployment and the out-of-box experience (OOBE) settings together, enrollment time grouping (ETG) places devices into the right security group during enrollment, and granular application and PowerShell script status makes troubleshooting easier. Autopilot device preparation is now the recommended solution for user-driven scenarios. Future engineering investments will focus on Windows Autopilot device preparation, enabling organizations to benefit from ongoing improvements to provisioning, reliability, reporting, and support. Moving eligible deployments positions your organization to benefit from those ongoing improvements while reducing the complexity of provisioning and support. So how do you move without disrupting devices that are already working - or forcing every deployment scenario to transition at once? The answer is a phased approach. Windows Autopilot and Windows Autopilot device preparation can coexist in the same organization. You can move eligible user-driven Microsoft Entra join populations in controlled waves, validate the full experience, and keep scenarios that still require Windows Autopilot on their existing path. The result is a practical way to adopt a simpler provisioning model while protecting the investments and workflows your organization still depends on. Start with the outcome, not a one-for-one migration Windows Autopilot device preparation brings enrollment settings, OOBE, device naming, required applications, PowerShell scripts, and enrollment-time targeting into a more coherent policy flow. The device preparation page, which replaces the Enrollment status page, gives users clearer progress and gives administrators more detailed deployment status for troubleshooting. Windows Autopilot device preparation includes two complementary capabilities: Device preparation policy defines the deployment experience, including OOBE settings, applications, scripts, naming, and ETG. Device association optionally binds a physical device to your organization before enrollment. It can establish corporate ownership and tenant affinity, enable associated-device OOBE settings, and support direct per-device policy assignment. Based on organizational needs, customers can choose to use device preparation policy, device association, or both. Device preparation policy provides the deployment configuration and experience, while device association adds pre-enrollment device affinity and device-based capabilities. Organizations can adopt each capability where it adds value to their provisioning model. But moving to that model shouldn't mean recreating every Windows Autopilot object exactly as it exists today. Instead, begin with the outcome each device population needs. Identify the required OOBE behavior, applications, scripts, naming, assignments, and support experience. Then design the device preparation policy and ETG model that delivers that outcome. This approach reduces inherited complexity and helps ensure that the new deployment is designed for Windows Autopilot device preparation and not constrained by the architecture it replaces. Choose what moves - and what stays Windows Autopilot device preparation is the recommended path for eligible user-driven provisioning scenarios, including: Corporate-owned Windows 11 devices User-driven Microsoft Entra join Windows 365 Continue using Windows Autopilot for scenarios that aren't supported or recommended for transition, including: Pre-provisioning Self-deploying mode Hybrid Microsoft Entra join Autopilot into co-management This isn't an all-or-nothing decision. The right transition plan deliberately separates eligible populations from valid exceptions. Translate the provisioning model Several familiar Windows Autopilot concepts have a corresponding role in Windows Autopilot device preparation: Windows Autopilot Concept Windows Autopilot Device Preparation Model Deployment profile Device preparation policy Enrollment Status Page profile Device preparation policy Enrollment Status Page in OOBE Device preparation page in OOBE Windows Autopilot registration Optional device association Profile and dynamic group-based targeting based on group tags Granular device preparation policy assignment with enrollment time grouping (ETG) using Microsoft Entra static security groups Device name template defined in the Autopilot deployment profile Device name template defined in the device preparation policy Windows Autopilot deployments report Windows Autopilot device preparation deployments report The goal is to preserve the required customer and administrator experience - not every historical configuration object. How the transition flow works A controlled transition can follow eight steps: Define the eligible population: Start with corporate-owned Windows 11 devices using user-driven Microsoft Entra join. Exclude scenarios that should remain on Windows Autopilot. Design enrollment time grouping (ETG): Create assigned, static Microsoft Entra security groups for populations that genuinely differ by location, role, device type, or required configuration. Don't build the new design around a group tag or a device object that must exist before enrollment. Create device preparation policy equivalents: Inventory each deployment profile and Enrollment Status Page pairing. Map the required OOBE settings, naming, applications, PowerShell scripts, blocking requirements, and dependencies into the new device preparation policy. Evaluate whether device association is required for all scenarios. For user-targeted deployments that don't need pre-enrollment tenant affinity or per-device policy selection, the organization can use the device preparation policy without device association and simplify the setup and management of device onboarding. For devices that need automatic corporate ownership, OOBE customization settings, or stronger pre-enrollment trust, continue with step 5. Pre-associate eligible devices. For existing registered or enrolled devices, collect the pre-association information by collecting the diagnostics logs, then exporting the DeviceLink CSV file found in the logs. Upload the CSV in the Associated devices blade in Intune and assign a device preparation policy to the device. Assignment can be done during the CSV upload process or after. Confirm that the device reaches the Pre-associated state before its planned reset or refresh. Note: Device pre-association is only available for devices that meet the minimum OS and hardware requirements , including TPM 2.0. Pilot the complete OOBE experience. Start with new devices or reset a small, representative set of devices. Validate policy selection, ETG placement, applications, scripts, naming, progress reporting. Expand and pre-associate remaining devices. Pre-associate additional populations in controlled waves. You do not need to force resets to all existing enrolled devices but simply pre-associate to prepare them so they enroll via the Windows Autopilot device preparation flow whenever each device next undergoes a natural or required reset. Retire registered flows. Retire deployment profiles, Enrollment Status Page profiles, groups, registrations, and processes only after reporting confirms that no active or planned population still depends on them. Pre-association doesn’t reset the device or disrupt its current use. The device remains enrolled and productive until its next natural or required reset, when Windows Autopilot device preparation takes effect. Don't remove the Windows Autopilot registration early. Doing so can remove Autopilot properties and affect dynamic-group membership that supports the device's current configuration. The next time the device enters OOBE, Windows recognizes the association and follows the Windows Autopilot device preparation path. If a device is both registered and associated, association takes precedence. Plan the pilot around this behavior rather than expecting an automatic fallback to Windows Autopilot. OEM and partner note: Device association uploads are currently only supported through Intune. OEM and partner pre-association scenarios aren't supported yet, but they’re on the roadmap. What this means for your organization You can prepare existing devices for transition while they remain enrolled and in use. You can move one eligible population at a time instead of committing to an organization-wide cutover. You can preserve Windows Autopilot for scenarios that still require it. You can use the transition to simplify assignment and provisioning logic rather than carry every legacy object forward. You can retire the old configuration gradually - after validation and dependency checks confirm that nothing still relies on it. A sample customer pilot setup scenario Consider a multinational organization, Contoso, that uses group tags to distinguish devices in the United Kingdom and Germany and to identify different device use cases. Dynamic groups use those tags to determine which deployment profile, Enrollment Status Page configuration, applications, policies, scope tags, and naming rules apply. The organization wants to move its eligible user-driven Windows 11 populations to Windows Autopilot device preparation without reproducing the same pre-created record and dynamic-group dependencies. The Contoso deployment team transitions to Autopilot device preparation with the following steps: Create static security groups for each required configuration. The team creates assigned Microsoft Entra security groups such as User Devices UK and User Devices Germany. It creates separate groups only when location, role, device type, scope, or required configuration differs. Create a device preparation policy for each population. The team creates a policy such as User Devices UK DPP and User Devices Germany DPP. Each policy contains the required OOBE settings, applications, PowerShell scripts, blocking behavior, and device name template, and identifies the corresponding enrollment time grouping (ETG) security group. Assign the device preparation policies to each population. The team assigns each device preparation policy to the respective sets of devices at time of pre-association or later. During enrollment, the device joins the group selected by the device preparation policy. For example, devices assigned the User Devices UK DPP join the User Devices UK group and receive the apps and policies assigned to that group. Configure scope through the static groups. The team assigns the appropriate regional scope tag to each ETG security group. The device receives the associated scope tag when it joins the group during enrollment. Set a naming template for each device preparation policy. The organization uses a naming convention where devices start with a prefix indicating their location. The team sets UK-%SERIAL% in User Devices UK DPP and DE-%SERIAL% in User Devices Germany DPP. Pre-associate pilot devices without disruption. Selected devices can be pre-associated while they remain enrolled and in use. The team collects diagnostics logs via script, extracts the DeviceLink CSV files, imports them in Intune, confirms the devices reach the Pre-associated state, and keeps the Windows Autopilot registration in place until the approved reset or refresh window. Validate the end-to-end experience with representative devices. The admin team uses test devices representing each target population to verify policy assignment, static group membership, scope tags, naming, applications, scripts, reporting, and successful completion of the device preparation flow. Existing devices can remain in service until their next natural or required reset. Seven-step regional Windows Autopilot device preparation rollout workflow, from creating security groups and device preparation policies through regional configuration, pilot association, and device validation. This scenario is illustrative, not a completed deployment or a measured customer outcome. It shows the transition pattern: define the supported scope, replace group-tag dependencies with ETG, move Enrollment Status Page and deployment profile settings to the device preparation policy, decide where device association adds value, validate end to end, and expand in controlled waves. Get started Begin with one eligible user-driven Microsoft Entra join population. Map its current Windows Autopilot outcomes to enrollment time grouping (ETG) and a device preparation policy. Pre-associate a representative pilot, validate the complete reset-to-desktop experience, and expand only when the results meet your deployment and support criteria. Moving to Windows Autopilot device preparation doesn't require a forced cutover. It requires a clear boundary, a deliberately redesigned assignment model, and evidence from each wave. That gives IT a controlled path toward simpler provisioning while keeping every device population on the experience that supports it best. Learn more Windows Autopilot device preparation overview Compare Windows Autopilot device preparation and Windows Autopilot Windows Autopilot device preparation user-driven Microsoft Entra join workflow Windows Autopilot device preparation requirements We’d love to hear your feedback! Share your thoughts in the comments below, follow us on LinkedIn or reach out to us on X @IntuneSuppTeam or @MSIntune.5.3KViews0likes6CommentsUnpacking Endpoint Management: Episodes Available On Demand
Over the course of the Unpacking Endpoint Management series, we brought together experts from across Microsoft Intune, Security, and Customer Experience teams to share practical strategies, lessons learned, and honest conversations about modern endpoint management. While the series has now concluded, the insights remain as relevant as ever. We invite you to explore past episodes on demand and continue connecting with the Intune community through Tech Community, Microsoft Learn, and future opportunities to engage with Microsoft experts. A quick update on the hosts Danny Guillory, a familiar face to the community and a Product Manager for Intune and Configuration Manager, hosted the series alongside Rachelle Blanchard. Together, they brought a strong mix of technical expertise, community engagement, and customer perspective to each episode. Rachelle helped surface real customer questions and guide conversations toward practical outcomes, ensuring each discussion reflected how endpoint management works in the real world. Thank you to everyone who participated Thank you to everyone who participated in Unpacking Endpoint Management and helped shape the conversations throughout the series. Catch up on demand You may have missed them, but you don't have to miss out on the learnings. Watch and learn when it's convenient for you. Policy: from hybrid to cloud-native Device security with Microsoft Intune Trends in endpoint management (live from Tech Takeoff 2026) Not sure where to start? Watch our most recent episode, App management at scale with Intune, now on demand! Watch on demand All episodes of Unpacking Endpoint Management are now available on demand via: aka.ms/JoinUEM. The series brought together experts from across Microsoft Intune, Security, and Customer Experience teams to share practical guidance, lessons learned, and real-world experiences from endpoint management. Continue the conversation While Unpacking Endpoint Management has concluded, there are many ways to stay connected with the Intune team and broader community. Join the Microsoft Intune Community here on Tech Community, and follow us on LinkedIn or @MSIntune and @IntuneSuppTeam on X to engage with experts, discover new content, and stay informed about the latest Intune guidance, best practices, and innovations. A Note from the Team Thank you for being part of the series. We're incredibly grateful to our customers, IT professionals, community members, guest speakers, and Microsoft experts who helped make Unpacking Endpoint Management such a valuable experience. Your questions, feedback, and real-world insights shaped every conversation and helped create meaningful discussions for the broader endpoint management community. Although the series has come to a close, our commitment to listening, learning, and engaging with our community remains unchanged. We look forward to continuing those conversations through the Microsoft Intune Community, Tech Community blogs, Microsoft Learn, events, and future opportunities to connect with Intune product, engineering, and customer success teams. Join the Community to get early insight into what's coming for Intune, connect with experts, and share real-world feedback that helps shape the product. 👉 aka.ms/JoinIntuneCommunity3.2KViews1like1CommentSupport Tip: Company Portal Prompt
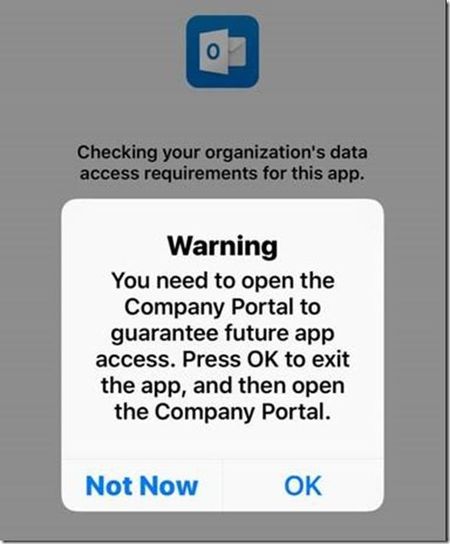
First published on TechNet on Mar 13, 2018 Microsoft Intune and Mobile Device Management (MDM) for O365 both use certificates to ensure there’s a secure communication channel to send mobile device management policies between the service and managed end user devices.2KViews0likes0Comments