dishan francis
11 TopicsStep-by-Step: How to update an Azure Linux VM using Update management
Operating system updates include feature updates, bug fixes, and security improvements and are important to update periodically. This applies to desktop computers as well as servers. There are many tools available to manage the Windows update process. When it comes to Linux however, most struggle as few tools support Linux system updates. Luckily in Azure, we can manage updates for Linux VMs without any 3rd party tool. This post will detail steps on how to enable patch management for Linux VM and how we can automate the patch deployment task.48KViews2likes0CommentsPowerShell Basics: How to Encrypt Azure Linux VMs
Disk encryption is a basic data protection method for physical & virtual hard disks. It falls under physical data security and it prevents data breaches from stolen hard disks (physical & virtual). Similar to on-premises Windows servers and computers, we can use BitLocker to encrypt Windows VM running on Azure. For Linux VMs, we can use DM-Crypt to encrypt virtual disks. More details about BitLocker is available here on Microsoft Docs. Azure VM encryption uses the Azure Key Vault to store encryption keys and secrets In this post, I am going to demonstrate how we can encrypt Azure Linux VM. Things to Consider Before we move forward, make sure your Azure VM configurations comply with following, • Azure disk encryption for Linux VM is only going to work if you are running Azure-endorsed Linux distribution such as, Ubuntu 14.04.5, 16.04, 18.04 RHEL 6.7, 6.8, 7.2, 7.3, 7.4, 7.5, 7.6 CentOS 6.8, 7.2n, 7.3, 7.4, 7.5, 7.6 openSUSE 42.3 SLES 12-SP3, 12-SP4 • If you encrypting OS & Data volume in Linux VM and its root (/) file system usage is 4GB or less you need a minimum of 8GB Ram. Also, if root (/) file system usage is more than 4GB, it needs 2 * (/root file system usage). This is only required during the initial encryption process. • Azure Linux VM must have dm-crypt & vfat modules running. • Data disks of Linux VM (which required encryption) must be listed under /etc/fstab correctly. In this demo, I will be using PowerShell. Therefore, please make sure you have Azure PowerShell module installed. More info about it can find under https://docs.microsoft.com/en-us/powershell/azure/install-az-ps?view=azps-2.6.0 Setup Resource Group The first step of the configuration is to create a new resource group. To do that, 1. Launch PowerShell console and connect to Azure using Connect-AzAccount 2. Then create a new resource group using, New-AzResourceGroup -Name REBELRG1 -Location "East US" In the above, REBELRG1 is the resource group name and East US is the resource group location. Configure Azure Key Vault Next, we need to create a new key vault and encryption key. 1. As the first step, let's go ahead and enable Azure Key Vault provider within the subscription by using, Register-AzResourceProvider -ProviderNamespace "Microsoft.KeyVault" 2. Then, we go ahead with Azure Vault setup, New-AzKeyVault -Location "East US" -ResourceGroupName REBELRG1 -VaultName REBELVMKV1 -EnabledForDiskEncryption In the above, REBELVMKV1 is the key vault name and it is created under REBELRG1 resource group which we created in the previous step. -EnabledForDiskEncryption is used to prepare the key vault to use with disk encryption. 3. Then we need to create access policy so currently logged in user can create encryption keys. Set-AzKeyVaultAccessPolicy -VaultName REBELVMKV1 -ObjectId xxxxxxxxxxxxxxxx -PermissionsToKeys create,import,delete,list,get -PermissionsToSecrets set,delete -PassThru In above objectid should replace with the actual objectid value of the currently logged in global admin account. In here -PermissionsToKeys define the permissions allocated for keys and -PermissionsToSecrets defines the permissions allocated for secrets. 4. Now we need a new encryption key to use with disk encryption. Add-AzKeyVaultKey -VaultName REBELVMKV1 -Name "REBELVMKey" -Destination "Software" In the above, REBELVMKey is the key name. -Destination is defined as Software as we creating the standard encryption key. If required it can be set to Hardware Security Model (HSM) but it comes with additional cost. Create VM In this demo, I am going to create a new VM for encryption testing. It is not a must; we still can encrypt any existing VM. To create new VM I am using, $mylogin = Get-Credential New-AzVm -ResourceGroupName REBELRG1 -Name "REBELVM01" -Location "eastus" -VirtualNetworkName "REBELVNET1" -SubnetName "REBELVMSubnet1" -PublicIpAddressName "REBELVM01IP1" -OpenPorts 22 -Image Canonical:UbuntuServer:16.04-LTS:latest -Size Standard_D2s_v3 -Credential $mylogin In the above, REBELVM01 is the VM name. It is running UbuntuServer:16.04 edition. I have specified it using -Image parameter. It also using Standard_D2s_v3 vm size. Encrypt VM The next step of the configuration is to encrypt the VM. To do that we need the following values, • Azure Key Vault Resource ID • Azure Key Vault URI • Azure Key vault key ID We can find Key Vault Resource ID & Key Vault URI values using, Get-AzKeyVault -VaultName REBELVMKV1 -ResourceGroupName REBELRG1 | fl We can find Key vault key ID using, Get-AzKeyVaultKey -VaultName rebelvmkv1 -Name REBELVMKey Now we can go ahead with the encryption, Set-AzVMDiskEncryptionExtension -ResourceGroupName REBELRG1 -VMName "REBELVM01" -DiskEncryptionKeyVaultUrl (value of Azure Key Vault URI) -DiskEncryptionKeyVaultId (value of Azure Key Vault Resource ID) -KeyEncryptionKeyUrl (value of Azure Key vault key ID) -KeyEncryptionKeyVaultId (value of Azure Key Vault Resource ID) -VolumeType All –SkipVmBackup In above, replace the parameter values according to your setup. In there -VolumeType defines which type of disks need to be encrypted. In this demo I am encrypting OS & Data disks. VMBackup extension is a recovery safeguard for encrypted disks. However, this is not compatible with the managed disks. Therefore, the encryption will fail if you not using –SkipVmBackup Once encryption is completed, VM will be rebooted. Verification Once the reboot is completed, we can verify the encryption status using, Get-AzVmDiskEncryptionStatus -VMName REBELVM01 -ResourceGroupName REBELRG1 Also, when I go to VM properties | Disks, I can see encryption is enabled as expected. As we can see the encryption for Azure Linux VM is working as expected.5.4KViews0likes0CommentsStep-by-Step: Managing Groups via Azure Active Directory PowerShell for Graph module
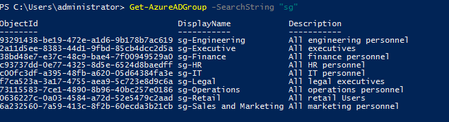
In my previous blog post, I explained how we can manage Azure AD users by using Azure Active Directory PowerShell for Graph module. In there I also shared many examples. You can access it via https://techcommunity.microsoft.com/t5/ITOps-Talk-Blog/Step-by-Step-Managing-Users-via-the-Azure-Active-Directory/ba-p/961128 In this blog post I am going to show how we can manage Groups, using same method. Azure AD Groups also works similar to on-premises AD groups. It can use to manage permissions in effective manner. In Hybrid environment there will be cloud-only groups as well as synced groups from on-premises AD environment. In this section we are going to look in to group management using Azure Active Directory PowerShell for Graph module. Let’s start with listing groups. We can search for a group using, Get-AzureADGroup -SearchString "sg" In above command, SearchString is used to define the search criteria. Above example will list down any group containing “sg” in Display name field. In search result, we can see the objectId for the group. Once we know the ObjectId, we can see the details of the group using, Get-AzureADGroup -ObjectId 93291438-be19-472e-a1d6-9b178b7ac619 | fl In hybrid environment, there will be security groups which is synced from on-premises Active Directory. We can filter this groups using, Get-AzureADGroup -Filter 'DirSyncEnabled eq true' | select ObjectId,DisplayName,LastDirSyncTime In above example, LastDirSyncTime column display the last successful sync time of the group. We can filter cloud-only groups using, Get-AzureADGroup -All $true | where-Object {$_.OnPremisesSecurityIdentifier -eq $null} In preceding command, we are using attribute OnPremisesSecurityIdentifier to filter the groups. This attribute only has value if it is synced from on-premises AD. We can view group memberships by using, Get-AzureADGroupMember -ObjectId 2a11d5ee-8383-44d1-9fbd-85cb4dcc2d5a In above command, we are using ObjectId to uniquely identify the group. We can add members to group using Add-AzureADGroupMember cmdlet. Add-AzureADGroupMember -ObjectId 2a11d5ee-8383-44d1-9fbd-85cb4dcc2d5a -RefObjectId a6aeced9-909e-4684-8712-d0f242451338 In preceding command, ObjectId value represent the group and RefObjectId value represent the user. We can remove a member from group by using, Remove-AzureADGroupMember -ObjectId 2a11d5ee-8383-44d1-9fbd-85cb4dcc2d5a -MemberId a6aeced9-909e-4684-8712-d0f242451338 In preceding command, ObjectId value represent the group and MemberId value represent the user’s Object Id. We also can combine Add-AzureADGroupMember cmdlet with Get-AzureADUser cmdlet to add bulk users to a group. In below script, I used Get-AzureADUser cmdlet to search users in Marketing Department. Then used Add-AzureADGroupMember to add those users to Sales group as members. #######Script to Add Multiple users to Security Group############# Import-Module AzureAD Connect-AzureAD ##### Search for users in Marketing Department ########## Get-AzureADUser -All $true -Filter "Department eq 'Marketing'" | select ObjectId | Out-File -FilePath C:\salesusers.txt #####Add Users to Sales Group######### (Get-Content "C:\salesusers.txt" | select-object -skip 3) | ForEach { Add-AzureADGroupMember -ObjectId f9f51d29-e093-4e57-ad79-2fc5ae3517db -RefObjectId $_ } In hybrid environment, the security groups are mainly synced from on-premises AD. But there can be requirements for cloud-only groups as well. We can create cloud-only group by using, New-AzureADGroup -DisplayName "REBELADMIN Sales Team" -MailEnabled $false -MailNickName "salesteam" -SecurityEnabled $true Preceding command creates a security group called "REBELADMIN Sales Team". This group is not a mail enabled group. We can remove Azure AD group using, Remove-AzureADGroup -ObjectId 7592b555-343d-4f73-a6f1-2270d7cf014f In above, Object ID value defines the group. Apart from security groups, Azure AD also have predefined administrative roles which can use to assign access permissions to Azure AD and other cloud services. There are more than 35 predefined administrative roles. Each of role have their own set of permissions. More details about this roles can find in https://docs.microsoft.com/en-us/azure/active-directory/users-groups-roles/directory-assign-admin-roles We can list down all the administrative roles using, Get-AzureADDirectoryRoleTemplate By default, only few administrative roles are enabled. We can list these roles using, Get-AzureADDirectoryRole Company Administrator directory role represent the Azure AD Global Administrators. We can enable Administrative role using, Enable-AzureADDirectoryRole -RoleTemplateId e6d1a23a-da11-4be4-9570-befc86d067a7 In above command, RoleTemplateId value represent the Administrative Role. We can assign administrative role to a user by using, Add-AzureADDirectoryRoleMember -ObjectId b63c1671-625a-4a80-8bae-6487423909ca -RefObjectId 581c7265-c8cc-493b-9686-771b2f10a77e In preceding command, ObjectId value represent the Administrative Role. RefObjectId is the object id value of the user. We can list down members of Administrative role using, Get-AzureADDirectoryRoleMember -ObjectId 36b9ac02-9dfc-402a-8d44-ba2d8995dc06 In above command, ObjectId represent the Administrative role. We can remove a member from the role using, Remove-AzureADDirectoryRoleMember -ObjectId 36b9ac02-9dfc-402a-8d44-ba2d8995dc06 -MemberId 165ebcb7-f07d-42d2-a52e-90f44e71e4a1 In preceding command, MemberId is equal to user’s object id value.17KViews1like0CommentsStep-by-Step: Managing Users via the Azure Active Directory PowerShell for Graph Module
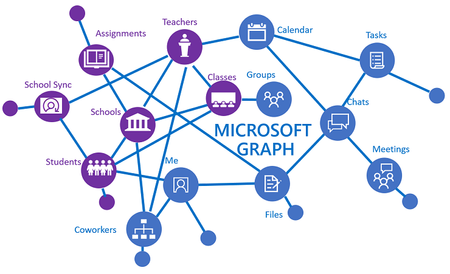
Microsoft Graph provides a unified programmability model to access a vast amount of data in Microsoft 365, Azure Active Directory, Enterprise Mobility Suite, Windows 10 and so on. As part of it, Azure AD PowerShell for Graph module allows us to retrieve data, update directory configuration, add/update/remove objects and configure features via Microsoft Graph. In this post, I am going to demonstrate how we can manage Azure Active Directory users using Azure Active Directory PowerShell for Graph module. Installation Azure Active Directory PowerShell for Graph module comes as two versions. The public preview version is the latest version but it is not recommended to use in production. The installation steps for this version can be found on https://www.powershellgallery.com/packages/AzureADPreview . General Availability version is the stable and recommended version for production environments. This can be installed in any computer which runs Windows Server 2008 R2 or above with the latest updates. This is also required Microsoft .NET framework 4.5 or above. Once prerequisites are in place, Log in to the computer you have selected for Azure Active Directory PowerShell for Graph module Launch PowerShell console as Administrator Run Install-Module -Name AzureAD command. Answer "Yes" if it is required repository update. 4. After installation, we can verify module install using Get-Module AzureAD 5. After the successful module installation, run Connect-AzureAD to initiate the connection to Azure AD tenant. 6. Then it will prompt a login window. Use Azure AD global administrator account details to connect. Now we have Azure Active Directory PowerShell for Graph module installed. Let's see how we can manage Azure AD hybrid-environment using this module. Manage Users Let's see how we can Manage use accounts using Azure Active Directory PowerShell for Graph module. We can view user accounts details for a known account using, Get-AzureADUser -ObjectId AdeleV@M365x562652.OnMicrosoft.com | fl In the above command, AdeleV@M365x562652.OnMicrosoft.com represents the UPN of the user. We also can use user attributes to find user account details. Get-AzureADUser -Filter "startswith(GivenName,'Adele')" Preceding command will filter Azure AD users with Given Name: Adele We also can filter users based on specific attribute value. Get-AzureADUser -Filter "GivenName eq 'Adele'" Above command will search for the exact user with given name-value Adele. In my demo environment, I like to see list of disabled account. I can do it using, Get-AzureADUser -All $true -Filter 'accountEnabled eq false' We can modify the output of the filtered data further. Get-AzureADUser -All $true -Filter 'accountEnabled eq false' | select DisplayName,UserPrincipalName,Department Preceding command will display value of DisplayName,UserPrincipalName,Department attributes of filtered accounts. In hybrid environment, we can filter accounts which is synced from on-premises AD by using, Get-AzureADUser -All $true -Filter 'DirSyncEnabled eq true' In above command, value of DirSyncEnabled attribute defines if it's a cloud only account or synced account. We also can check the last sync value for the synced accounts. Get-AzureADUser -All $true -Filter 'DirSyncEnabled eq true' | select DisplayName,UserPrincipalName,LastDirSyncTime In above command, LastDirSyncTime value defines last sync time of the object. We also can export the output to a CSV file using Export-CSV command. Get-AzureADUser -All $true -Filter 'DirSyncEnabled eq true' | select DisplayName,UserPrincipalName,LastDirSyncTime | Export-CSV -Path .\syncaccount.csv ImmutableID value of a user account is used to map Azure AD user object to on-premises user object. It does have a relationship with on-premises user accounts' ObjectGUID . We can use this to identify cloud-only users. If it is a cloud-only user ImmutableID value should be null. Get-AzureADUser -All $true | where-Object {$_.ImmutableId -eq $null} Preceding command return list of all the cloud only accounts. We can export the required attribute values to CSV by using, Get-AzureADUser -All $true | where-Object {$_.ImmutableId -eq $null} | select DisplayName,UserPrincipalName | Export-CSV -Path .\cloudaccount.csv Another important thing related to account is "licences". If we are going to use Azure AD premium features, we need to have relevant licences assigned. By default, the user only has Azure AD free version features. To view licenses associated with a user account, we can use, Get-AzureADUserLicenseDetail -ObjectId MeganB@M365x562652.OnMicrosoft.com | fl Above command will return the licenses associated with user MeganB@M365x562652.OnMicrosoft.com We also can view the subscribed SKUs using, Get-AzureADSubscribedSku | fl Above command list down all the details about licenses which is associated with the tenant. But mostly we only need to know how many licenses been used and how many licenses available. We can do it using, Get-AzureADSubscribedSku | select SkuPartNumber,ConsumedUnits -ExpandProperty PrepaidUnits In the preceding example, SkuPartNumber value represent the licence part number. Value of Enabled field represent the number of purchased licences. ConsumedUnits represent the number of used licences. Let's go ahead and see how we can assign a new licence to a user. In my environment, I have a user who synced from on-premises Azure AD who doesn't have a licence assigned. Get-AzureADUserLicenseDetail -ObjectId ADJellison@M365x562652.onmicrosoft.com | fl As first step, lets create objects to use in licence assignment process. $newlicence = New-Object -TypeName Microsoft.Open.AzureAD.Model.AssignedLicense $newlicenceadd = New-Object -TypeName Microsoft.Open.AzureAD.Model.AssignedLicenses Then we need to find SkuId of the licences. I am going to assign ENTERPRISEPREMIUM licence to the user. $newlicence.SkuId = (Get-AzureADSubscribedSku | Where-Object -Property SkuPartNumber -Value "ENTERPRISEPREMIUM" -EQ).SkuId Then we need to assign the licences to the object, $newlicenceadd.AddLicenses = $newlicence Now we can go ahead and assign the licence to the user, Set-AzureADUserLicense -ObjectId "ADJellison@M365x562652.onmicrosoft.com" -AssignedLicenses $newlicenceadd Preceding command assign ENTERPRISEPREMIUM licences to user ADJellison@M365x562652.onmicrosoft.com It is must to set UsageLocation value for users who sync from on-premises AD, before assign licences. We can do it by using, Set-AzureADUser -ObjectId ADJellison@M365x562652.onmicrosoft.com -UsageLocation "US" We can remove the assigned licences using, $licenseB = New-Object -TypeName Microsoft.Open.AzureAD.Model.AssignedLicenses $licenseB.RemoveLicenses = (Get-AzureADSubscribedSku | Where-Object {$_.SkuPartNumber -eq 'ENTERPRISEPREMIUM'}).SkuId Set-AzureADUserLicense -ObjectId "ADJellison@M365x562652.onmicrosoft.com" -AssignedLicenses $licenseB Using above commands, I have created following script to do following, Search for users who synced from on-premises AD. From those users, select the users who doesn't have Azure AD licences assigned. Set UsageLocation value for selected users. Assign Azure AD licences to selected users. #######Script to Assign Licences to Synced Users from On-Permises AD############# Import-Module AzureAD Connect-AzureAD ###Filter Synced Users who doesnt have licence assigned####### $ADusers = Get-AzureADUser -All $true -Filter 'DirSyncEnabled eq true' $notlicenced = Get-AzureADUser -All $true | Where-Object {$ADusers.AssignedLicenses -ne $null} | select ObjectId | Out-File -FilePath C:\users.txt #####Set UsageLocation value to sync users######### (Get-Content "C:\users.txt" | select-object -skip 3) | ForEach { Set-AzureADUser -ObjectId $_ -UsageLocation "US" } #####Set User Licecnes############ $newlicence = New-Object -TypeName Microsoft.Open.AzureAD.Model.AssignedLicense $newlicenceadd = New-Object -TypeName Microsoft.Open.AzureAD.Model.AssignedLicenses $newlicence.SkuId = (Get-AzureADSubscribedSku | Where-Object -Property SkuPartNumber -Value "ENTERPRISEPREMIUM" -EQ).SkuId $newlicenceadd.AddLicenses = $newlicence (Get-Content "C:\users.txt" | select-object -skip 3) | ForEach { Set-AzureADUserLicense -ObjectId $_ -AssignedLicenses $newlicenceadd } In hybrid environment, users are mainly created through on-premises Active Directory but there are occasions where we need to add cloud only accounts. This is mainly for cloud management tasks. We can create a new user by using, $Userpassword = New-Object -TypeName Microsoft.Open.AzureAD.Model.PasswordProfile $Userpassword.Password = "London@1234" New-AzureADUser -DisplayName "Andrew Xavier" -PasswordProfile $Userpassword -UserPrincipalName "Andrew.Xavier@M365x562652.onmicrosoft.com" -AccountEnabled $true -MailNickName "AndrewXavier" In preceding command, -PasswordProfile is used to define the password profile for the new user account. -MailNickName defines value for user's mail nick name. Above example, add a new user account Andrew.Xavier@M365x562652.onmicrosoft.com with password London@1234 We also can create multiple user accounts using CSV files. In below example, I am using a CSV file to create users. CSV file contains the following, UserPrincipalName, DisplayName,MailNickName DishanM@M365x562652.onmicrosoft.com, Dishan Melroy,DishanMel JackM@M365x562652.onmicrosoft.com,Jack May,JackMay RicahrdP@M365x562652.onmicrosoft.com,Richard Parker,RichardPar Then I can create these new users using, $Userpassword = New-Object -TypeName Microsoft.Open.AzureAD.Model.PasswordProfile $Userpassword.Password = "London@1234" Import-Csv -Path C:\newuser.csv | foreach {New-AzureADUser -UserPrincipalName $_.UserPrincipalName -DisplayName $_.DisplayName -MailNickName $_.MailNickName -PasswordProfile $Userpassword -AccountEnabled $true} By using above commands, I have created following script to do, Create new user accounts using CSV file Set UsageLocation for new user accounts Assign ENTERPRISEPREMIUM licences to users ########A Script to create new users and assign Azure AD licences####### Import-Module AzureAD Connect-AzureAD ###########Create New Users using CSV ################### $Userpassword = New-Object -TypeName Microsoft.Open.AzureAD.Model.PasswordProfile $Userpassword.Password = "London@1234" Import-Csv -Path C:\newuser.csv | foreach {New-AzureADUser -UserPrincipalName $_.UserPrincipalName -DisplayName $_.DisplayName -MailNickName $_.MailNickName -PasswordProfile $Userpassword -UsageLocation "US" -AccountEnabled $true} | select ObjectId | Out-File -FilePath C:\users.txt ###########Assign Licences################# $newlicence = New-Object -TypeName Microsoft.Open.AzureAD.Model.AssignedLicense $newlicenceadd = New-Object -TypeName Microsoft.Open.AzureAD.Model.AssignedLicenses $newlicence.SkuId = (Get-AzureADSubscribedSku | Where-Object -Property SkuPartNumber -Value "ENTERPRISEPREMIUM" -EQ).SkuId $newlicenceadd.AddLicenses = $newlicence (Get-Content "C:\users.txt" | select-object -skip 3) | ForEach { Set-AzureADUserLicense -ObjectId $_ -AssignedLicenses $newlicenceadd } To remove Azure AD user, we can use Remove-AzureADUser -ObjectId "JDAllen@M365x562652.onmicrosoft.com" We can combine it with user search, Get-AzureADUser -Filter "startswith(DisplayName,'Dishan')" | Remove-AzureADUser Above command will search for user accounts who has DisplayName starts with "Dishan". If there is any, second part of the command will remove it. This marks the end of this post. I hope this was useful. The scripts used in the post is also available at https://github.com/rebeladm/rebeladm/tree/master/AzureADGraphModule-Users26KViews0likes4CommentsStep-by-Step: How to work with Group Managed Service Accounts (gMSA)
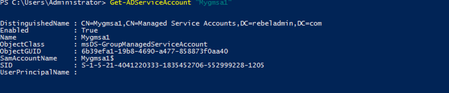
Services Accounts are recommended to use when install application or services in infrastructure. It is dedicated account with specific privileges which use to run services, batch jobs, management tasks. In most of the infrastructures, service accounts are typical user accounts with “Password never expire” option. Since these service accounts are not been use regularly, Administrators have to keep track of these accounts and their credentials. I have seen in many occasions where engineers face in to issues due to outdated or misplace service account credential details. Pain of it is, if you reset the password of service accounts, you will need to update services, databases, application settings to get application or services up and running again. Apart from it Engineers also have to manage service principle names (SPN) which helps to identify service instance uniquely.142KViews6likes16CommentsHow to Migrate Active Directory from Windows Server 2012 R2 to 2019
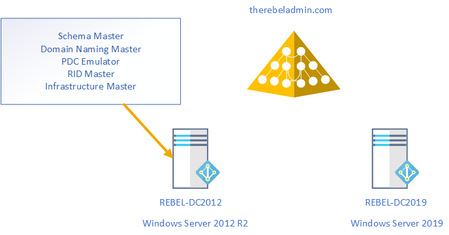
Windows Server 2019 was available for public (GA) from early October 2018. In past i have written many articles about domain migrations by covering different Active Directory versions. So, it is time me to write about AD 2019 migrations. In this demo I am going to demonstrate how to migrate from Active Directory 2012 R2 to Active Directory 2019. The same procedure is going to apply for any AD version from Windows Server 2008.174KViews2likes12CommentsStep-by-Step: Blocking Data Downloads via Microsoft Cloud App Security
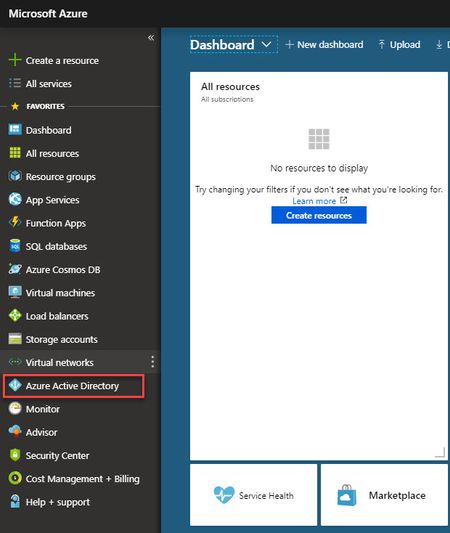
By using Azure AD conditional access policies, we can define who have access to what applications from where. This is purely control the access to your app. Microsoft Cloud App Security (MCAS) allow us to extend these capabilities further into session level. Using MCAS, we can examine each session to the app in real-time to protect information further.34KViews3likes6CommentsPowerShell Basics: How to Troubleshoot Active Directory Replication Issues
There are certain windows cmdlets and utilities which we can use for replication issues troubleshooting purpose. Among those, Repadmin.exe is most commonly used Microsoft utility. This is available in servers which have AD DS or AD LDS role installed. It is also part of Remote Server Administration Tools (RSAT). This utility recommended to run as Domain Administrator or Enterprise Administrator. However, it is also possible to delegate permission only to review and manage replication. This posts will share the steps to make this happen via PowerShell.20KViews2likes0CommentsPowerShell Basics: How to Check Active Directory Replication Status
Data Replication is crucial for healthy Active Directory Environment. There are different ways to check status of replication. In this article I am going to explain how you can check status of domain replication using PowerShell.120KViews7likes3Comments