connectors
73 TopicsBring Azure Logic Apps connectors into your .NET applications with the Azure Connectors SDK
Modern business applications rarely work in isolation. An order exception might need an email, a support case might need a Teams notification, and a completed document might need to be stored in SharePoint. Developers can build each integration directly against a service API, but that also means owning different authentication models, request and response shapes, pagination rules, and error handling for every service. The Azure Connectors SDK brings the typed experience of a .NET client library to Connector Namespace, which makes the Logic Apps and Power Platform connector runtime available to developers as a programmable integration layer. Your application can call connector operations through generated clients and models while Azure manages the connection to the external service. In this post, we will build a small Azure function app that reacts to a new email through a Connector trigger and sends a formatted review email through the Office 365 Outlook connector. The same pattern can then be extended to many other business systems. Preview: Azure Connectors SDK is currently in preview. Preview features are provided without a service-level agreement and are not recommended for production workloads. APIs and setup steps can change before general availability. Why this matters Integration code often starts with one HTTP call and grows into a collection of service-specific concerns. The Azure Connectors SDK gives .NET developers: Typed clients, request models, and response models generated from connector contracts Async operations with cancellation-token support Azure credential integration for authenticating the calling application Consistent connector exceptions and diagnostics Built-in retry support for transient failures Pagination, binary payload, and dynamic-schema support where connectors expose them OpenTelemetry integration for tracing connector calls Access to a broad connector ecosystem that includes Microsoft 365, Azure services, data platforms, storage, messaging, and SaaS applications The SDK does not put external-service credentials in your application. Instead, your code authenticates to a Connector Namespace connection. That connection holds the authorization for Office 365 Outlook or another target service. Scenario: notify operations about an order exception Imagine an order service that flags transactions for manual review by sending an email to an Office 365 mailbox. The subject identifies the order and the body briefly explains the exception: To: orders@contoso.com Subject: Order exception: SO-10482 Body: Customer requested a delivery-address change after payment. Connector Namespace polls the mailbox for new messages matching the subject filter and calls an Azure function app's Connector trigger. The function reads the typed email payload and sends a formatted review email to a separate operations inbox. Unlike an HTTP-triggered function, there is no application endpoint or 202 Accepted response to invoke. Prerequisites You need: An Azure subscription in which Connector Namespace is available Permission to create Connector Namespace resources and connections .NET 10 SDK Azure Functions Core Tools v4 Azure CLI Azure Developer CLI ( azd ) for deployment, or an existing .NET 10 isolated-worker function app An Office 365 account that can authorize the connection and send email At the time of writing, Connector Namespace is available in a limited set of preview regions. Confirm current region availability before creating the resource. 1. Create an Office 365 connection First sign in and select the subscription that will own the Connector Namespace: az login az account set --subscription "<subscription-id>" $subscriptionId = "<subscription-id>" $resourceGroup = "<resource-group>" $namespaceName = "<connector-namespace-name>" $connectionName = "office365-orders" $location = "<supported-azure-region>" $apiVersion = "2026-05-01-preview" $nsId = "/subscriptions/$subscriptionId/resourceGroups/$resourceGroup/providers/Microsoft.Web/connectorGateways/$namespaceName" Create a Connector Namespace with a system-assigned managed identity: $namespace = @{ location = $location identity = @{ type = "SystemAssigned" } properties = @{} } | ConvertTo-Json -Depth 5 -Compress $tempFile = Join-Path $env:TEMP "connector-namespace.json" [System.IO.File]::WriteAllText($tempFile, $namespace) az rest --method PUT ` --uri "https://management.azure.com${nsId}?api-version=$apiVersion" ` --body "@$tempFile" ` --headers "Content-Type=application/json" ` --output none Remove-Item $tempFile Create the Office 365 connection: $connection = @{ properties = @{ connectorName = "office365" } } | ConvertTo-Json -Depth 5 -Compress $tempFile = Join-Path $env:TEMP "connector-connection.json" [System.IO.File]::WriteAllText($tempFile, $connection) az rest --method PUT ` --uri "https://management.azure.com${nsId}/connections/${connectionName}?api-version=$apiVersion" ` --body "@$tempFile" ` --headers "Content-Type=application/json" ` --output none Remove-Item $tempFile The new connection is not authorized yet. Request an OAuth consent link and open it in your browser: $consentRequest = @{ parameters = @( @{ redirectUrl = "https://portal.azure.com" parameterName = "token" } ) } | ConvertTo-Json -Depth 5 -Compress $tempFile = Join-Path $env:TEMP "connector-consent.json" [System.IO.File]::WriteAllText($tempFile, $consentRequest) $consent = az rest --method POST ` --uri "https://management.azure.com${nsId}/connections/${connectionName}/listConsentLinks?api-version=$apiVersion" ` --body "@$tempFile" ` --headers "Content-Type=application/json" ` --output json | ConvertFrom-Json Remove-Item $tempFile Start-Process $consent.value[0].link Complete the sign-in and consent flow. Then verify that the connection reports Connected : az rest --method GET ` --uri "https://management.azure.com${nsId}/connections/${connectionName}?api-version=$apiVersion" ` --output json | ConvertFrom-Json | Select-Object -ExpandProperty properties | Select-Object -ExpandProperty statuses 2. Allow your local identity to call the connection OAuth consent authorizes the connection to call Office 365. A separate access policy authorizes your application to call the connection. This distinction is important: without the policy, the runtime call fails with HTTP 403 and a missing connection ACL message. Add an access policy for the identity currently signed in to Azure CLI: $userObjectId = az ad signed-in-user show --query id --output tsv $tenantId = az account show --query tenantId --output tsv $policy = @{ properties = @{ principal = @{ type = "ActiveDirectory" identity = @{ objectId = $userObjectId tenantId = $tenantId } } } } | ConvertTo-Json -Depth 6 -Compress $tempFile = Join-Path $env:TEMP "connector-policy.json" [System.IO.File]::WriteAllText($tempFile, $policy) az rest --method PUT ` --uri "https://management.azure.com${nsId}/connections/${connectionName}/accessPolicies/local-dev?api-version=$apiVersion" ` --body "@$tempFile" ` --headers "Content-Type=application/json" ` --output none Remove-Item $tempFile Access-policy changes can take a few minutes to reach the connector runtime. Finally, retrieve the connection runtime URL. Treat this value as application configuration rather than source code: $connection = az rest --method GET ` --uri "https://management.azure.com${nsId}/connections/${connectionName}?api-version=$apiVersion" ` --output json | ConvertFrom-Json $connectionRuntimeUrl = $connection.properties.connectionRuntimeUrl 3. Create the Azure function app Create an isolated-worker function app with the current Core Tools template. Some Core Tools v4 versions do not offer net10.0 as a func init --target-framework option; use the .NET 9 template, then change the generated project's TargetFramework to net10.0 before building: func init ConnectorsSdkOrderAlerts --worker-runtime dotnet-isolated --target-framework net9.0 Set-Location ConnectorsSdkOrderAlerts In ConnectorsSdkOrderAlerts.csproj , set: <TargetFramework>net10.0</TargetFramework> Add the connector packages: dotnet add package Azure.Connectors.Sdk --version 0.13.0-preview.1 dotnet add package Azure.Identity dotnet add package Microsoft.Azure.Functions.Worker.Extensions.Connector --version 0.2.0-alpha Register an Azure credential and only the connector client this function needs. DefaultAzureCredential can use your Azure CLI identity locally and the function app's managed identity in Azure: using Azure.Connectors.Sdk; using Azure.Core; using Azure.Identity; using Microsoft.Extensions.Configuration; using Microsoft.Extensions.DependencyInjection; using Microsoft.Extensions.Hosting; var host = new HostBuilder() .ConfigureFunctionsWorkerDefaults() .ConfigureServices((hostContext, services) => { services.AddSingleton<TokenCredential>(new DefaultAzureCredential()); services.AddOffice365Client( hostContext.Configuration.GetSection("Connectors:Office365")); }) .Build(); host.Run(); Add the function. The Connector trigger binds the OnNewEmailV3 callback to a typed payload. Filter the subject again in code, HTML-encode untrusted email fields, and send the review message through the generated SendEmailInput model: using System.Text.Encodings.Web; using Azure.Connectors.Sdk.Office365; using Azure.Connectors.Sdk.Office365.Models; using Microsoft.Azure.Functions.Worker; using Microsoft.Azure.Functions.Worker.Extensions.Connector; public sealed class OperationalAlertFunctions { private const string SubjectPrefix = "Order exception:"; private readonly Office365Client _office365Client; public OperationalAlertFunctions(Office365Client office365Client) { this._office365Client = office365Client; } [Function("OnOrderExceptionEmail")] public async Task OnOrderExceptionEmailAsync( [ConnectorTrigger] Office365OnNewEmailTriggerPayload payload, CancellationToken cancellationToken) { foreach (var message in payload.Body?.Value ?? []) { if (message?.Subject?.StartsWith( OperationalAlertFunctions.SubjectPrefix, StringComparison.OrdinalIgnoreCase) != true) { continue; } var orderId = message.Subject[OperationalAlertFunctions.SubjectPrefix.Length..].Trim(); if (string.IsNullOrWhiteSpace(orderId)) { continue; } var email = new SendEmailInput { To = "operations@contoso.com", Subject = $"Order {orderId} requires review", Body = "<h2>Order review required</h2>" + $"<p><strong>Order:</strong> {HtmlEncoder.Default.Encode(orderId)}</p>" + $"<p><strong>From:</strong> {HtmlEncoder.Default.Encode(message.From ?? string.Empty)}</p>" + $"<p><strong>Reason:</strong> {HtmlEncoder.Default.Encode(message.BodyPreview ?? string.Empty)}</p>" }; await this._office365Client.SendEmailAsync(email, cancellationToken); } } } Use a monitored mailbox or folder separate from the operations inbox. Keep the outgoing subject different from the trigger's subject filter so the notification cannot trigger itself. For production workloads, account for repeated callbacks and partial failures within a batch before performing non-idempotent actions such as sending mail. 4. Deploy and register the Connector trigger Keep the runtime URL out of source control. Set it for local development, then deploy the function app with a system-assigned managed identity and the same setting in its application configuration: $env:Connectors__Office365__ConnectionRuntimeUrl = $connectionRuntimeUrl The public Office 365 connector-trigger sample is a downloadable .NET 10 function app with deployment infrastructure, an OnNewEmail binding, and post-deploy trigger registration. Use its azd up workflow or deploy this function app through your existing pipeline. A locally running Functions host is not reachable by the Connector Namespace polling callback unless you provide a secure public callback endpoint. Once the function app is deployed, add its managed identity to the connection's access policies, just as you added your CLI identity for local development. For a system-assigned identity, get its principal ID and use it in the access policy from step 2 instead of $userObjectId : $functionAppName = "<function-app-name>" $functionObjectId = az functionapp identity show ` --resource-group $resourceGroup --name $functionAppName ` --query principalId --output tsv $policy = @{ properties = @{ principal = @{ type = "ActiveDirectory" identity = @{ objectId = $functionObjectId tenantId = $tenantId } } } } | ConvertTo-Json -Depth 6 -Compress $tempFile = [System.IO.Path]::GetTempFileName() try { [System.IO.File]::WriteAllText($tempFile, $policy) az rest --method PUT ` --uri "https://management.azure.com${nsId}/connections/${connectionName}/accessPolicies/order-alert-function?api-version=$apiVersion" ` --body "@$tempFile" ` --headers "Content-Type=application/json" ` --output none } finally { Remove-Item $tempFile } Obtain the Connector extension's system key and the function app's actual default hostname, then construct the callback URL for the deployed function. Do not assume that the hostname is <function-app-name>.azurewebsites.net ; the default hostname format can vary: $connectorExtensionKey = az functionapp keys list ` --resource-group $resourceGroup --name $functionAppName ` --query "systemKeys.connector_extension" --output tsv $functionAppHostname = az functionapp show ` --resource-group $resourceGroup --name $functionAppName ` --query "defaultHostName" --output tsv $callbackUrl = "https://$functionAppHostname/runtime/webhooks/connector?functionName=OnOrderExceptionEmail&code=$connectorExtensionKey" The system key is a secret. Do not log, publish, or commit the callback URL. Create the Office 365 polling trigger config using the same connection and a subject filter matching the incoming order messages: $triggerConfig = @{ properties = @{ operationName = "OnNewEmailV3" connectionDetails = @{ connectorName = "office365" connectionName = $connectionName } notificationDetails = @{ callbackUrl = $callbackUrl httpMethod = "Post" } parameters = @( @{ name = "folderPath"; value = "Inbox" } @{ name = "subjectFilter"; value = "Order exception:" } ) metadata = @{ destinationType = "functionApp" functionAppName = $functionAppName functionAppResourceGroup = $resourceGroup functionAppSubscriptionId = $subscriptionId functionName = "OnOrderExceptionEmail" recurrenceFrequency = "Minute" recurrenceInterval = "5" } } } | ConvertTo-Json -Depth 6 -Compress $tempFile = [System.IO.Path]::GetTempFileName() try { [System.IO.File]::WriteAllText($tempFile, $triggerConfig) az rest --method PUT ` --uri "https://management.azure.com${nsId}/triggerConfigs/order-exception-email?api-version=$apiVersion" ` --body "@$tempFile" ` --headers "Content-Type=application/json" ` --output none } finally { Remove-Item $tempFile } Confirm that the trigger config reports Enabled . Send a test email to the monitored mailbox, and allow for the polling interval before checking the function logs and the operations inbox: az rest --method GET ` --uri "https://management.azure.com${nsId}/triggerConfigs/order-exception-email?api-version=$apiVersion" ` --query "properties.{operation:operationName,state:state}" ` --output table Confirm all three outcomes before considering the test complete: The trigger config is Enabled and the function logs show the invocation. The operations inbox receives a review email with the expected order ID and reason. Unrelated messages do not produce review emails. From local development to Azure For a deployed function app, use its managed identity instead of a developer identity: Enable a system-assigned or user-assigned managed identity on the function app. Add that identity as an access policy on the Connector Namespace connection. Register DefaultAzureCredential or ManagedIdentityCredential as the TokenCredential . Store the connection runtime URL in function app configuration. Protect the Connector trigger callback with the Connector extension system key; use a stronger authorization model for production as appropriate. The external-service credential remains in the connector connection. The function app presents its Azure identity when it calls the runtime URL. The Connector Namespace uses the callback URL and its system key to invoke the function. Go beyond email The order-alert example is intentionally small, but the programming model supports much broader integration scenarios: Microsoft 365: work with Outlook, SharePoint, Teams, OneDrive, Excel, Planner, Forms, and Microsoft Entra ID-backed operations. Azure services: connect to Blob Storage, queues, tables, Event Grid, Event Hubs, Service Bus, Key Vault, Azure Monitor Logs, and Azure Data Factory. Business applications: integrate with Salesforce, Dynamics 365, Jira, ServiceNow-style workflows, DocuSign, Zendesk, and other SaaS systems represented in the connector catalog. Event-driven applications: register polling triggers that call back to an Azure function app when connector events occur. Data-rich APIs: consume paginated operations, binary content, and operations whose input or output schema is resolved dynamically. Observable integrations: capture connector activity in distributed traces with OpenTelemetry. Because connector clients are typed, developers can discover operations through IntelliSense and keep connector calls alongside the rest of their application code. The connection layer handles authorization to the external system, while Azure identity and access policies govern which application may use that connection. Troubleshooting The call returns 403 with “missing connection ACL.” The external OAuth connection may be healthy, but the calling Azure identity is not authorized. Add an access policy for the Azure CLI user during local development or the workload managed identity after deployment. Allow time for the policy to propagate. The connection remains in an error state. Complete the OAuth consent flow and query the connection again. Make sure the account used for consent has access to the target service. The client fails during startup because the runtime URL is missing. Make sure Connectors__Office365__ConnectionRuntimeUrl is present in the process environment. In a larger application, register only the connector clients whose configuration is available. Authentication works locally but fails in Azure. The local Azure CLI user and the function app managed identity are different principals. Add a separate connection access policy for the function app identity and use a managed-identity-capable credential in the deployed host. The email trigger does not fire. Verify the trigger config is Enabled , its operation is OnNewEmailV3 , its folderPath and subjectFilter match the test email, and its callback uses the deployed function's OnOrderExceptionEmail name and Connector extension system key. Polling is not instantaneous. Get started Explore the Azure Connectors SDK repository, try the samples, and tell us which connectors and application patterns would be most useful for your team. Azure Connectors SDK for .NET Azure Connectors SDK samples Downloadable Office 365 connector-trigger function app Azure Logic Apps connectors overview Azure Identity client library for .NET408Views0likes0Comments
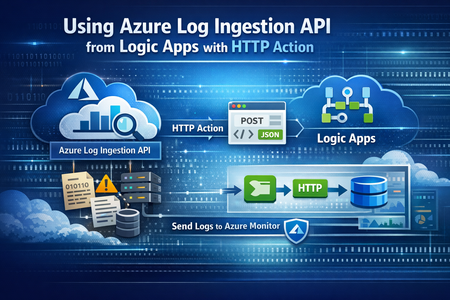
Migrate Data Ingestion from Data Collector to Log Ingestion - Part 2
In Part1, we discussed how to use HTTP action to migrate from the deprecated Data Collector API to Log Ingestion API. However, since the deprecated Data Collector API was allowing message payload up to 30MB, some migration scenarios encountered issues; since the new Log Ingestion API has only 1MB payload limit. This applies to both HTTP action, and the preview (Log Ingestion connector) Azure Monitor service limits - Azure Monitor | Microsoft Learn When sending payload larger than 1MB, the HTTP action would fail with the error: In order to overcome this, we can chunk the array payload, before calling the Ingestion API. We need to chunk the array payload, so each produced chunk is around 800KB To do this, you can divide the size of your full payload, by the number of records it has, and this would give an average record size. Then divide 800,000 bytes with the average record size, and this will give you the chunk size. For example, if your payload size is 1,200,259 bytes, and the number of records is 2500, then the average record size is: 1,200,259 / 2,500 =~ 480 bytes To find the chunk size, we divide 800,000 bytes by 480 bytes 800,000 / 480 =~ 1666 records. So if we send around 1600 records, this should be less than 1MB. To chunk your array payload, we can use the chunk expression inside a compose action. You can use the expression below for chunking inside the compose action: After the compose action, add for-each action, and use the output of the compose action as an input: Inside the for-each, use the normal HTTP to send the logs, and in the body, choose the for-each current item190Views1like0CommentsReplacing Retired Office 365 Connectors with Teams Workflows
Microsoft retired Office 365 Connectors in May 2026. You might not have noticed that some Teams channels no longer receive updates from different network sources via adaptive cards. The solution is to replace the old connectors with new Power Automate workflows. In this article, we discuss updating two PowerShell scripts to post information about Microsoft 365 roadmap items and service health to Teams channels. It’s only four months since the connectors stopped working… https://office365itpros.com/2026/09/18/teams-workflows-updates/120Views0likes0CommentsLogic Apps Aviators Newsletter - September 2026
In this issue: Ace Aviator of the Month News from our product group News from our community Ace Aviator of the Month September 2026's Ace Aviator: Parth Talaviya What's your role and title? What are your responsibilities? AI-Powered Azure/.NET Solution Architect I work as an Azure/.NET Solution Architect, combining technical leadership with building a Microsoft-focused boutique company. My work mainly revolves around application modernization and migration, cloud architecture, integrations, and team leadership. I also stay hands-on with development, architecture reviews, production troubleshooting, and mentoring developers. Can you give us some insights into your day-to-day activities and what a typical day in your role looks like? My day usually starts with thinking about how we can add more value to our clients' businesses. It includes reviewing project priorities, solving technical challenges, discussing architecture, supporting developers, and collaborating with stakeholders. I mainly work across .NET, Azure, APIs, integrations, DevOps, and AI automation, so every day brings something new to learn and solve. What motivates and inspires you to be an active member of the Aviators/Microsoft community? What really motivates me is how active and supportive the Microsoft community is. People are genuinely willing to help each other, share experiences, and solve problems together. Being able to use my own experience to help someone overcome a challenge genuinely makes my day, while learning from others keeps me motivated to continuously improve. Looking back, what advice do you wish you had been given earlier that you'd now share with those looking to get into STEM/technology? You don’t have to do everything alone. In technology, especially when you are stuck on a very specific problem, it can sometimes feel that way. Asking questions, learning from the community, and collaborating with others can make a huge difference. I would also say: embrace AI early, but use it wisely. Don’t use AI only to generate code. Use it to understand concepts, challenge your thinking, explore better approaches, review your work, and become a better problem-solver. What has helped you grow professionally? Continuous learning and solving real-world challenges have helped me grow the most. Working on legacy modernization, cloud architecture, large-scale data systems, automation, and AI has taught me to think beyond writing code and understand the broader business impact. Being part of a strong technical community has also helped significantly. Whenever you are stuck, there is often someone who has faced a similar challenge and is willing to share their experience. If you had a magic wand that could create a feature in Logic Apps, what would it be and why? I would create an AI-powered Copilot troubleshooting and self-healing assistant for Logic Apps. It could analyze failed workflows, understand the execution context, identify the likely root cause, suggest a fix, and provide safe recovery options. For complex integrations, this could save significant troubleshooting time and allow developers to focus more on building solutions rather than spending hours finding where something went wrong. News from our product group Use connectors with Managed Identity in the Logic Apps Standard extension Managed Identity is Azure's built-in way to authenticate to Microsoft Entra-protected resources without storing credentials, secrets, or connection strings. Deployed Logic Apps have supported it for some time, and this post explains connector support in the Logic Apps Standard extension. Introducing dependency telemetry in Application Insights for Azure API Management policies Running API platforms at scale requires both handling load and understanding where inefficiencies occur. This post introduces dependency telemetry in Application Insights for Azure API Management policies to help teams identify performance bottlenecks. Power Azure SRE Agent with the tools it needs Azure SRE Agent is an AI-powered service designed to reduce operational toil. Teams can use it to investigate incidents, identify probable causes, and automate health-related operational work using connected tools. Give your Copilot agents real tools, without hand-wiring MCP GitHub Copilot coding agents can work independently on branches, but some tasks require access to external systems. This post shows how to equip agents with real tools without manually wiring Model Context Protocol integrations. Zonal redundancy in API management Standard v2 APIs power modern mobile experiences, microservices, AI-driven applications, and business-critical integrations. This post explains zonal redundancy in Azure API Management Standard v2 for improving resilience as customers modernize their API platforms. BizTalk Server 2020 End-of-Sale Announcement Microsoft announces that BizTalk Server 2020 and Host Integration Server 2020 sales are expected to end on March 31, 2027. Existing licensed deployments can continue to be used, while mainstream support for BizTalk Server 2020 is scheduled through April 12, 2028. An optional paid extended-mainstream support offering is planned for eligible customers through April 10, 2030, with final terms to be published later. The post recommends beginning migration planning now, evaluating Azure Logic Apps Standard or Azure Logic Apps Hybrid, inventorying dependencies, and using the Logic Apps Migration Agent to assess and convert supported workloads. Logic App Storage Inspector Logic App Storage Inspector is a read-only Kudu site extension for examining storage used by an Azure Logic App Standard application. It supports searching workflow action and trigger history by workflow, date, or text, with results exportable as CSV or JSON. Users can browse and compare workflow-definition versions, review table and queue information, and monitor health indicators and refresh status. The extension isolates access to the current Logic App site, uses asynchronous paged operations for large storage accounts, and can be installed from Kudu Site Extensions. News from our community Azure Logic Apps Automation – A Practical Infrastructure Lab with Agentic Remediation Post by João Paulo Costa João Paulo Costa tests Azure Logic Apps Automation through an after-hours virtual-machine remediation lab. The workflow uses an agent to inspect VM metadata, tags, and runtime state, then apply guardrails before deciding whether to deallocate the resource, leave it unchanged, or request review. The article contrasts agentic decision-making with deterministic workflows, documents tool and connector choices, and examines preview limitations such as runtime-state retrieval and managed-identity support. It also emphasizes constrained permissions, explicit policies, verification after actions, and negative testing for production, exemptions, missing ownership, and disabled remediation. Agentic Integration: Non-Deterministic Experience, Solid Core Post by Massimo Crippa Massimo Crippa examines whether agentic capabilities make enterprise integration non-deterministic. He separates an agent’s variable decision-making from the predictable integration layer that executes selected capabilities. The article highlights durable messaging, reliable contracts, idempotency, transactional boundaries, retries, compensation, governance, and observability as continuing requirements. It presents tools as the boundary between reasoning and execution: agents determine what should happen, while integration platforms control how operations are performed safely. Azure Logic Apps is positioned as both a deterministic integration foundation and a platform that can expose governed capabilities to emerging agentic experiences. Build AI Agents in Azure Logic Apps (Conversational + Autonomous) Video by Rafsan Huseynov Rafsan Huseynov presents a video on building conversational and autonomous AI agents with Azure Logic Apps. The session describes Logic Apps as more than a background integration layer, covering orchestration, managed identities, agent loops, and the use of workflows as MCP tools. Demonstrations explore connections with Document Intelligence, Blob Storage, Microsoft Foundry, and Copilot Studio workflows, alongside conversational and autonomous agent patterns. The video also introduces a separate low-code automation experience with scoped permissions, while noting that the demonstrations use synthetic data and that the experience remains in preview. BizTalk to Logic Apps migration (three things, everyone gets wrong) Post by Brajesh Sinha Brajesh Sinha explains why simple counts of BizTalk orchestrations and maps produce unreliable Logic Apps migration estimates. One orchestration can fan out into several Azure resources, supposedly simple maps may hide substantial transformation complexity, and operational requirements are often omitted from statements of work. The article highlights the architecture, mapping, and production-readiness effort that teams frequently underestimate. It encourages migration planners to assess actual behavior and dependencies rather than relying on inventory totals, helping create more realistic timelines, scope, and delivery expectations. Hybrid Logic Apps on RKE2: a self-managed cluster with MetalLB Post by Sonny Gillissen Sonny Gillissen demonstrates how to run Azure Logic Apps Hybrid on a self-managed RKE2 Kubernetes cluster. Because RKE2 does not include a native load balancer, the walkthrough uses MetalLB to assign the ingress IP required by the deployment. It covers creating the cluster, configuring networking, connecting the environment to Azure Arc, and handling the platform-specific details needed for Logic Apps. The article provides a practical alternative for teams evaluating hybrid integration workloads outside managed Kubernetes services, extending earlier guidance for OpenShift environments. An Introduction to Logic Apps Standard SDK Video by Marcel Medina Marcel Medina shares a Coding Night ANZ recording introducing the Logic Apps Standard SDK. The session shows how the SDK brings a modern, code-first .NET development experience to Azure Logic Apps while retaining the platform’s connectors, triggers, monitoring, and managed runtime. It is aimed at developers who want familiar tooling and stronger source-driven workflow development without giving up managed integration capabilities. The post also thanks the community for its questions and participation and provides the complete session recording for anyone who missed the live event. Managed Identity in Logic Apps Standard: A Zero Trust Read Post by Steef-Jan Wiggers Steef-Jan Wiggers examines new Managed Identity support for connectors in the Logic Apps Standard local development experience. Developers can now use a consistent authentication model from development through production instead of swapping connection strings before deployment, removing a common source of unmanaged secrets. The article frames this improvement through Zero Trust while stressing that authentication alone does not replace disciplined RBAC. A working azd sample demonstrates the setup and highlights a critical application setting whose absence causes the otherwise correctly configured connection, access policy, and role assignment to fail.652Views0likes0CommentsModernize Any Integration Platform to Azure Logic Apps Standard with the Logic Apps Migration Agent
Explore the open-source Logic Apps Migration Agent Enterprise integration is entering a new era Enterprise integration platforms have powered business-critical processes for decades. They connect applications, data, partners, devices, and industries, often carrying transactions that an organization cannot afford to interrupt. Expectations have changed. Organizations want cloud-native architectures, AI-assisted automation, stronger governance, improved developer productivity, and faster response to business change. Yet many integration estates contain years of accumulated dependencies, custom code, transformations, operational procedures, and platform-specific knowledge. The challenge is not simply moving an orchestration or flow from one runtime to another. This is not lift and shift. It is a refactoring exercise that preserves business intent and expected behavior while translating source-platform constructs into cloud-ready workflows, connectors, code, operational patterns, and deployment practices for Azure Logic Apps Standard. That is why we created the Logic Apps Migration Agent. Introducing the Logic Apps Migration Agent: An Open-source project to provide an AI End-to-End Modernization Experience The Logic Apps Migration Agent is an open-source Visual Studio Code extension that provides an AI-assisted, end-to-end modernization experience. It uses GitHub Copilot and the Visual Studio Code Language Model API to guide teams through a structured five-stage workflow, while keeping people in control at every stage. Rather than treating modernization as a single conversion step, the agent helps teams discover what they have, understand dependencies, design an appropriate target, generate baseline implementation artifacts, validate expected behavior, and prepare the solution for deployment to Azure Logic Apps Standard. Refactor the implementation, preserve the business intent Lift and shift attempts to reproduce the source platform as closely as possible in a new environment. That approach can carry forward legacy topology, operational assumptions, platform-specific patterns, and technical debt. The Migration Agent supports a different outcome. It uses the source implementation as evidence of the required business behavior, then helps teams design and generate an appropriate Logic Apps Standard implementation. Some components may map directly, while others require restructuring, consolidation, decomposition, replacement, or custom implementation. The objective is functional and semantic continuity, not structural duplication. A successful migration should preserve contracts, transformations, routing rules, ordering requirements, error behavior, and essential business outcomes while allowing the target solution to adopt Azure-native identity, connectivity, observability, resiliency, deployment, and operating practices. Preserve what the integration must do. Refactor how it does it. Start by understanding what you have For many organizations, discovery is one of the most difficult parts of modernization. Documentation may be incomplete, original developers may no longer be available, and relationships between applications, endpoints, schemas, maps, pipelines, and custom components may be difficult to reconstruct. The Migration Agent scans the source project, catalogs supported artifacts, organizes related components into flow groups, and identifies dependencies and migration gaps. It can also generate architecture and message-flow visualizations for review before conversion begins. This discovery output becomes the foundation for migration sequencing, refactoring decisions, effort discussions, and risk management. Use AI to accelerate the work, not remove accountability The Migration Agent uses specialized GitHub Copilot agents for analysis, planning, and conversion. AI helps interpret source artifacts, propose mappings, create task plans, and generate baseline Logic Apps artifacts. Enterprise integration, however, requires more than plausible code generation. Human-in-the-loop checkpoints let teams review discovered flows, resolve missing dependencies, reshape the proposed architecture, approve conversion plans, and validate generated behavior before progressing. This combines the speed of AI assistance with the governance and technical review required for mission-critical integration. Modernize incrementally and reduce migration risk Large integration estates do not need a single big-bang program. The Migration Agent organizes work into logical flow groups so teams can refactor one business capability or integration path at a time. Prioritize workloads by business value, risk, complexity, or platform urgency. Validate target architecture and operating patterns with a representative first migration. Run phased cutovers and coexistence strategies when required. Apply reusable refactoring patterns, templates, and engineering standards to subsequent waves. A phased approach helps teams build experience with Azure Logic Apps while reducing migration risk and preserving delivery momentum. Bring your own tests and validate continuously Migration confidence depends on behavior, not structural similarity. The agent supports validation using source specifications, sample files, test cases, and customer-provided black-box tests. This helps compare expected inputs and outputs and identify semantic differences earlier. Generated artifacts are a baseline. Domain-specific transformations, error-handling behavior, performance characteristics, security controls, and edge cases still require customer and partner expertise. Built for BizTalk today and extensible for other platforms BizTalk Server 2016 and BizTalk Server 2020 are the first fully implemented source platforms. MuleSoft Anypoint support is represented as an in-progress built-in parser. The architecture is open and extensible so contributors can add parsers and platform-specific migration capabilities for other integration technologies. That extensibility is central to the vision. A common modernization workflow can help teams apply consistent governance, target patterns, refactoring practices, and validation across mixed integration estates. Why Azure Logic Apps Standard? Azure Logic Apps Standard provides a modern destination with a local project structure, Visual Studio Code development experience, source-control alignment, CI/CD support, stateful and stateless workflows, enterprise connectivity, and Azure and hybrid deployment options. Modernization is not about reproducing a legacy topology component by component. The target design should be optimized for Logic Apps Standard rather than constrained by the source architecture. The migration preserves valuable business logic while refactoring the implementation around modern practices for identity, networking, observability, reliability, deployment, and operations. What your team should still own The Migration Agent accelerates repeatable work, but it does not replace the decisions that define a production-ready integration platform. Responsibility Refactoring focus Target architecture Refactor application and workflow boundaries for Logic Apps Standard. Select reliability, networking, deployment, and supporting Azure patterns rather than copying the source topology. Semantic equivalence Validate contracts, mappings, transformations, business rules, error behavior, ordering, retries, and edge cases. Capability gaps Redesign source capabilities without direct equivalents using connectors, custom code, local functions, API Management, Service Bus, or other appropriate Azure patterns. Production hardening Implement identity, secrets management, security policies, monitoring, cost controls, performance testing, resiliency, and operational ownership. Cutover and coexistence Plan backlog reconciliation, dual-run periods, data consistency, partner coordination, rollback, and decommissioning. More mission critical features for Logic Apps Standard and Hybrid We are weeks away from shipping the following features, aimed at any customers in the Enterprise Application Integration space: HL7 In-App operations in general availability. MLLP Receive/Send In-App connector in Public Preview. Rules Engine In-App operation for XML facts in Public Preview. MSMQ In-App connector in Public Preview. Oracle DB In-App connector in Public Preview. Flat File generation In-App operations in Public Preview. Integration accounts support (Hybrid On premises). NMS In-App connector in Public Preview. Improvements to our EDI capabilities. BizTalk Mapper to Data Mapper Migration path What about other integration platforms? Yes—the Logic Apps Migration Agent is designed to be customizable so you can migrate from any integration platform to Logic Apps (not just BizTalk). The open architecture lets you plug in new discovery, analysis, and conversion skills for the source product you’re modernizing, while keeping the same stage-gated workflow and human-in-the-loop checkpoints. We provide guidance and examples to help you extend the agent for other platforms than BizTalk —so you can tailor mappings, transformation rules, and validation to your customer’s standards and target patterns in Logic Apps. Benefits Faster time to value with a guided process: A structured discovery→planning→conversion workflow reduces uncertainty and helps teams move from assessment to execution with clear checkpoints. Higher confidence migrations: Human-in-the-loop validation, artifacts generation, and black-box testing support mission‑critical correctness and governance. Customizable for your source platform and standards: Extend the agent with product-specific discovery and conversion steps, tailor mappings and transformation rules, and align outputs with your target Logic Apps patterns and engineering conventions. Open-source transparency and control: Review how the tool works end-to-end, validate what it produces, and adopt changes at your pace without waiting for a closed release cycle. Community-driven innovation: Benefit from contributions across Microsoft, partners, and customers—new adapters, mapping packs, and best practices can be shared and reused. Lower total migration cost: Automating repeatable tasks reduces manual effort while preserving the ability to invest partner expertise where it matters most (architecture, governance, reliability, and operations). Reusable accelerators for partners: Partners can create differentiated offerings by packaging templates, validation suites, CI/CD pipelines, and domain-specific patterns on top of the agent. An accelerator for customers and partners For customers, the Migration Agent provides a practical starting point and a consistent process for moving from assessment to a refactored implementation. For professional services organizations and system integrators, the agent augments delivery rather than replacing it. Automating inventory, analysis, baseline generation, and validation scaffolding allows experts to focus on architecture, governance, security, reliability, domain-specific transformation, DevOps, performance, cutover, and operating-model change. Because the project is open source, partners can contribute parsers or package reusable templates, mapping packs, test suites, CI/CD assets, and industry-specific modernization patterns. Review our public documentation here: https://learn.microsoft.com/en-us/azure/logic-apps/migration/migration-agent-overview How to get started Download VSCode and install the Logic Apps Migration Agent extension. Organize source projects and dependencies in a clear directory structure. Include project files, bindings, schemas, maps, pipelines, orchestrations, custom code, configuration, certificates or certificate references, and available documentation. Once you have all your artifacts ready, point the Migration Agent to the directory with all the artifacts. Review every migration stage. Confirm the discovered architecture, resolve missing dependencies, and refine the target design before authorizing conversion. Prepare a representative test environment. The workstation running Visual Studio Code must be able to reach the systems needed for local or end-to-end validation. Bring known inputs, expected outputs, specifications, and existing test cases whenever possible. These materials improve validation and reduce ambiguity. Treat the first migration as a reusable foundation. Capture architecture patterns, naming standards, deployment templates, observability practices, and lessons that can accelerate subsequent waves. Use Claude Opus 4.8 or higher. Make sure you increase the Maximum number of requests for the Copilot Chat as follows (we recommend changing the value from 60 to 1000) Check the following video for a demonstration on how the Agent works and let us know if you have any questions in the comments.2.3KViews1like0CommentsGive your Copilot agents real tools, without hand-wiring MCP
You’re running agents in the GitHub Copilot app - maybe three at once, each on its own branch, each working a task while you steer. It’s a good way to work, right up until an agent needs to reach outside your repo. It needs to read a SharePoint library, file a Salesforce record, or check an Outlook calendar, and suddenly it’s blind. An agent is only as capable as the tools you hand it. The usual way to hand it one of those tools is to wire up a Model Context Protocol (MCP) server by hand: find the endpoint, paste it into config, add an auth header, keep the token alive, and hope you got the casing right. Then your teammate does the same thing on their machine, and the next person after that. The MCP Connectors canvas removes the hand-wiring. It’s a plugin for the GitHub Copilot app: it lists the hosted MCP servers already published in your Azure Connector Namespace, and you connect one to Copilot by selecting it - no URL, no header, no local proxy. Where the servers come from Connector Namespace is the managed Azure service on the other end. It provides a list of curated MCP Servers that you can use to quickly create and manage MCPs connections. It also does the work you’d rather not: it stores and rotates the credentials, applies retry and throttling policies, and scales the server. Your machine never holds a raw secret related to the end systems that MCP touches, and access is governed by access policies, allowing fine grained control on who can use the MCP servers. So, when you connect a server from the canvas, you’re not standing up infrastructure. The server already exists, already authenticated, already managed. You’re pointing Copilot at it. Prerequisites GitHub Copilot app with canvas extension support. An Azure subscription with permission to cerate and view the namespace and to create connections and hosted managed MCP server configurations. Connector Namespace is in preview, and availability varies by region. Install From the GitHub Copilot app, add the following prompt. Install connector-namespaces v1.2.0 for my user account, reload it, verify it is running, then open the MCP Connectors canvas. Open the Connector Namespace canvas in a new session Once you install if you need to open the Connector Namespace in a new session, just request it in a prompt: Open the MCP Connectors canvas. Connect an MCP server Open the MCP Connectors canvas. Select Sign in to Azure, then choose a subscription and Connector Namespace. Browse or search the MCP servers grouped under Microsoft and Partners. Select Connect and complete the connector’s separate authentication or consent flow. Confirm the server appears under My MCPs. Restart GitHub Copilot so a new session loads the added tools. ℹ️Note That last step matters more than it look. Copilot loads an agent’s tools when a session starts, so a server you add mid-session shows up in the next one, not the one you’re in. Manage connected servers My MCPs shows the servers connected to Copilot. Sandbox opens a connected server in the Connector Namespace playground, so you can try a tool call yourself before you let an agent lean on it. Disconnect removes the MCP registration from your MCP configuration. The MCP is still available in Connector namespace to be added again later. Also if you are sharing the connector namespace with other developers, this only remove the your local configuration. Connect adds configured MCP connectors that are not registered locally yet to your local MCP configuration. Delete from namespace… removes the MCP registration from your MCP configuration and deletes the MCP connection from your connector namespace. If you are sharing the connector namespace with other developers this will affect any developer using this MCP connector – be careful when using this. Switch namespace switches the active subscription or namespace - useful when you keep dev and production connections apart. How it works and security The extension registers each server directly in Copilot’s user-scoped MCP configuration. There’s no local MCP proxy sitting in the tool path between the agent and the server. The canvas itself runs on loopback. Your Azure tokens stay in process memory, the selected namespace coordinates may be cached locally, and gateway credentials are sent only to the server’s configured HTTPS endpoints. The connector’s own secrets never reach your machine. That’s the namespace’s job, which is also why an admin can rotate or revoke a connection in one place instead of chasing down every developer’s config. Where can I use my connected MCP servers You manage the servers from the canvas, but they don’t only work there. The canvas writes to Copilot’s user-scoped MCP configuration at ~/.copilot/mcp-config.json, and the GitHub Copilot app is built on GitHub Copilot CLI. Connect a server once and it’s available to both. Agent sessions in the app. Any session on your machine picks the server up, whatever repository or branch it’s working on, because the config is user-scoped rather than per-project. Copilot CLI. The same server shows up in the terminal. Run copilot mcp list to confirm it, or /mcp show SERVER-NAME in an interactive session to see the tools it exposes. Two things to know: Tools load when a session starts, so connect first and start the session second. A project-level .mcp.json or .github/mcp.json takes precedence over your user config when the names collide, which is what you want if a repository pins its own version of a server. VS Code is the exception. Copilot Chat there reads .vscode/mcp.json, a separate file the CLI doesn’t use, so a server you connect in the canvas won’t appear in VS Code until you configure it there too. Where this all sits today The GitHub Copilot app went generally available in June 2026, and canvases shipped with it, so neither is a preview feature. The MCP Connectors canvas is a published extension you install at personal scope. You get the version we ship and tested, not one an agent generates on the fly from a prompt. Two caveats. GitHub doesn't publish a compatibility guarantee for the canvas extension format, so an app update may need a matching update from us. Re-run the install commands above to pick it up if you see any issues. On the Azure side, Connector Namespace is still in preview. Check the documentation for more details on this service outside the GitHub Copilot App support. If you're on Copilot Business or Enterprise, check with your admin that the GitHub Copilot app policy is enabled. It's on by default, and it's separate from the Copilot CLI policy. Try it Install the plugin, point it at a namespace, and connect one server your agents keep reaching for: the SharePoint library, the CRM, whatever it is. Then watch an agent actually use it in the next session. Tell me where the canvas saved you a config headache and where it got in your way. That’s the feedback we act on before general availability.849Views2likes2CommentsAI Gateway tier of API Management now in public preview
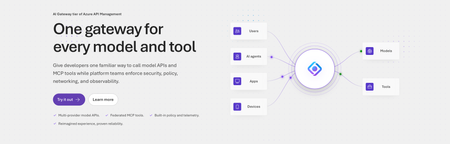
Today, we are introducing the AI Gateway tier of Azure API Management, now in public preview. It gives platform teams a purpose-built experience built specifically for AI workloads - publishing and governing models and MCP servers. Controls are configured through policy cards rather than XML and expressions, and the portal experience and control plane are structured around models, MCP servers, and tools rather than APIs. (For brevity, we refer to the AI Gateway tier as AI Gateway throughout the rest of this article.) AI Gateway is built on Azure API Management, bringing proven operational capabilities to AI workloads. The resource runs in your subscription, uses your Entra tenant, and sends telemetry to destinations you control. The operating model will be familiar to existing API Management customers, but the interface is built around AI workloads. The AI Gateway tier is intended for teams that want this focused experience; other API Management tiers remain the right choice when organizations also need general-purpose API management or capabilities not included in the AI Gateway experience. A practical model for platform teams The AI Gateway gives platform teams a shared place to manage models, MCP servers, policies, and observability destinations, with access controlled through Azure RBAC. For example, a central platform group can connect a set of approved models and tools and publish them for application teams. The application teams can test those assets in the test console and build against them without routing every change through the central group. The platform group still owns the shared guardrails and can see how the assets are being used. After an asset is published, developers can create a named runtime key and begin calling the gateway immediately. Bring the models and tools you already use Most organizations don't standardize on a single model provider. Different models are selected based on quality, latency, cost, geography, or specialized capabilities. The preview supports models from Microsoft Foundry including OpenAI, Anthropic, Mistral, and other Foundry hosted models, as well as models hosted in AWS Bedrock, Google Vertex AI, OpenAI, and Anthropic. A guided wizard simplifies importing models from Microsoft Foundry. Other providers can be added by configuring a connection, with backend authentication configured as part of that connection. All published models are available under the same stable endpoint. Applications continue to use supported API formats such as OpenAI Chat Completions and Responses or Anthropic Messages directly or via SDKs. The AI Gateway extends governance beyond models to the MCP servers and tools agents use to interact with enterprise systems. You can expose an existing MCP server over SSE or Streamable HTTP, turn all or selected operations from a REST API into an MCP server by uploading its OpenAPI specification, or use more than 1,400 connector-backed tools from the Power Platform and Logic Apps library. You can also federate multiple MCP servers behind a single server, so an agent connects once and sees the tools across those servers. Backend authentication supports an API key, OAuth client credentials, managed identity, or mTLS. Governance that's built in Organizations need consistent governance across models and MCP servers without requiring every application team to implement those capabilities independently. The AI Gateway portal presents governance policies through an intuitive card-based experience rather than requiring policy XML. The same policies are expressed as JSON properties, making them easy to manage as infrastructure as code and to audit and enforce across a fleet with Azure Policy. In the public preview, those cards cover request and token rate limits, token quotas, Azure AI Content Safety, and fallback to a secondary model. Policies are applied per asset, making it clear which controls protect each model or MCP server. OpenTelemetry-based token metrics The AI Gateway emits token-usage metrics through OpenTelemetry, with attributes following GenAI and cloud semantic conventions. Metrics can be sent to Application Insights, Datadog, Splunk, Grafana Cloud, or another OTLP endpoint. The portal provides a monitoring view over Application Insights data. Better together: Microsoft Foundry and AI Gateway With AI Gateway, teams can extend the same governance controls, for example token rate limits and quotas, across models hosted in Microsoft Foundry and models hosted elsewhere. Foundry and non-Foundry models are published through gateway-managed endpoints, giving applications and agents a consistent way to access governed models regardless of where they are hosted. Foundry-hosted agents can consume curated sets of tools from Foundry toolboxes, with access to the underlying MCP servers and APIs governed through AI Gateway. Together, Microsoft Foundry and AI Gateway cover the enterprise application lifecycle: Foundry for building and running AI applications, and AI Gateway for publishing, governing, and observing models, tools, and MCP servers across your AI estate. The new AI Gateway tier will soon be available through the gateway experience in Microsoft Foundry portal. We are working toward a seamless, integrated AI Gateway experience within Foundry portal and will share more about that work separately. Available today in public preview The AI Gateway tier is available today at no cost in public preview in East US 2 and Sweden Central. Pricing will be shared separately. To provision a resource, add a model or MCP server, and make a first call click this to go to the AI Gateway tier portal and try it. If you prefer to start from code, use a sample to deploy all the required resources for a Foundry-hosted agent configured to access its model and tools through AI Gateway. We look forward to your feedback as we continue to rapidly evolve AI Gateway.8.4KViews5likes10CommentsPower Azure SRE Agent with the tools it needs
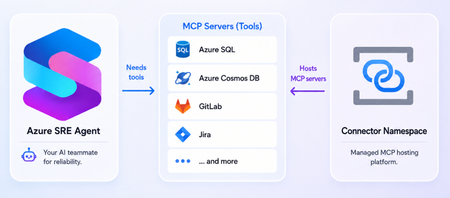
What is the Azure SRE Agent Azure SRE Agent is an AI-powered service designed to reduce operational toil. Teams can use it to: Investigate incidents and identify probable causes. Automate health checks, compliance reviews, and other scheduled work. Answer questions such as “What changed before this service became degraded?” Propose remediations while allowing teams to require human approval. An effective investigation rarely depends on one source of information. An alert might originate in Azure Monitor, while deployment history lives in source control, telemetry stored in another observability platform, and incident records in a service-management tool. Without access to those systems, you must retrieve and transfer the information manually, adding context switching and slowing diagnosis. MCP servers can give SRE Agent tools to query telemetry, inspect deployments, retrieve database records, look up incidents, etc. SRE Agent provides native connection for some servers such as GitHub, Datadog, New Relic, and Splunk. Connector Namespace makes it easier to host additional remote MCP servers you want the agent to use. Removing remote MCP server hosting burden Connecting SRE Agent to an existing remote endpoint is straightforward. Hosting that endpoint yourself is not. You must deploy the server, provide secure HTTPS infrastructure, configure authentication, manage downstream credentials, scale the runtime, monitor its health, recover failed instances, and maintain it over time. These responsibilities are necessary, but the value is in the server’s tools not in operating another service. Azure Connector Namespace is a fully managed service for hosting connectors and MCP servers. You select the server you need and let the namespace handles the operational and maintenance tasks. The offering is currently in preview. See documentation for supported regions and other preview considerations. You’ll find a wide variety of servers in the Connector Namespace’s catalog. Some examples of useful servers for the SRE agent include: Database servers such as Azure SQL and Azure Cosmos DB Source control and CI/CD servers like GitLab Incident management servers like Jira and PagerDuty A note on what's currently in development: We're building “bring-your-own” server support, allowing you to supply your own server image while the namespace handles hosting and operations. Please keep an eye out for the blog post about this! Deploy server and connect it to SRE Agent The following example deploys the SQL MCP server in Connector Namespace and connects it to Azure SRE Agent. 1. Server deployment Prerequisite: Install the Azure Developer CLI (azd). Clone the sql-server-samples repo: git clone https://github.com/microsoft/sql-server-samples.git Navigate to the azure-sql-mcp sample cd sql-server-samples/samples/applications/azure-sql-mcp From the azure-sql-mcp folder, run the following to log into your Azure subscription and then deploy the server and related resources: azd auth login azd up The last command will prompt for the following before deployment: Prompt Suggested value Explanation Enter a unique environment name mcp-dev This name added as prefix to Azure resources created Select an Azure Subscription Pick your subscription Resources will deploy under this subscription Enter value for connectorNamespaceIdentityType UserAssigned User assigned identity is recommended as it’s not tied to resource lifecycle Enter value for deployerLoginName Enter your Azure subscription login email To give your identity access to the MCP server Enter value for the location Pick a supported region Supported regions: West Central US, Central US, East Asia, North Europe Once deployment finishes, copy the MCP endpoint for use later. It looks similar to: https://<app-name>.<region>.logic.azure.com/api/connectorGateways/123abc456defg7890/mcpServerConfigs/sql-mcp/mcp (Optional) Test deployed server in Visual Studio Code GitHub Copilot: Open command palette > search MCP: Add server > pick HTTP > enter MCP endpoint and server name > pick Local Workspace. Inside .vscode/mcp.json, click Start above server name, then allow authentication with Microsoft in the popup and log into Azure subscription account. 2. Configure MCP connector in SRE Agent Connector Namespace does not create the connection in SRE Agent. Add the server endpoint through SRE Agent’s existing MCP connection experience. Open the Azure SRE Agent portal On the left menu, go to Builder > Connectors, and select + Add connector Under Choose a connector, select the MCP tab, choose MCP server, and select Next Configure the connector: Field Value Name A descriptive name for the server Connection type Streamable-HTTP URI The hosted server endpoint from Connector Namespace Authentication method Managed identity (Selecting managed identity automatically creates an identity for the connector.) Azure AD token scope https://apihub.azure.com/.default Select Next. Before testing the connection, grant the managed identity access to the MCP server. 3. Authorize the managed identity Open the Azure portal, search for the managed identity by name. In the identity’s Overview page, click JSON View (top right) and copy the tenantId and principalId. The principal ID is also called the object ID. Open Connector Namespace portal and search for the deployed namespace. Inside the namespace, navigate to the MCP Connectors tab on the left, then select the SQL MCP server. Inside the MCP server, click Access Policies, then select Add Access Policy. Enter the tenant ID and principal ID, then select Create. 4. Test and finish the connection Return to Azure SRE Agent portal and select Test connection. After the test succeeds, select the server tools the agent should use. Select Add connector. Establishing the connection can take a minute. Select Refresh at the top of the connectors page until its status changes to Connected. The agent can now use the selected server tools in chat threads. The azd deployment from previous created and seeded a SQL database with sample blog post data, so you can ask something like: What are the top blog posts? For more details, see MCP connectors and tools in Azure SRE Agent. Focus on the server, not its infrastructure MCP servers can give Azure SRE Agent access to the additional systems it needs to investigate incidents and perform operational work effectively. However, operating every remote server yourself introduces infrastructure, security, and maintenance responsibilities that distract from that goal. Connector Namespace removes much of that friction. Your primary question becomes “Which MCP server do I want to host?” rather than “How will I deploy, secure, scale, monitor, and maintain it?” Once deployed, the hosted endpoint can be added to Azure SRE Agent through its existing MCP connection experience. That gives teams a straightforward path to extending the agent with more operational tools, without turning MCP server hosting into another platform they must build and run. Try Connector Namespace with Azure SRE Agent and share your feedback! Resources Azure SRE Agent Overview Set up an MCP connector in Azure SRE Agent Connector Namespace Overview Hosted MCP servers in Connector Namespace663Views0likes0Comments
Ingesting Logs through Azure Private Link
Hi, We are currently using Azure Private Link within our environment and we are attempting to ingest logs into Log Analytics. When I reached out to Microsoft Support, it appears that the CCF connectors will not work using Private Link and the Azure Functions connectors are becoming depricated. Has anyone else run into this issue and what is the solution for getting logs into Sentinel through the Private Link, specifically API log sources? Did this require a custom app for each of these log sources or some sort of custom script that lives on an AMA host within the Private Link to ingest the logs? Any advice here would be greatly appeciated. Thank you,461Views0likes4Comments
Dynamic Connection Properties in Azure Logic Apps Standard
Switching Built-in Connections at Runtime The Problem Imagine your organization has a single Logic App workflow used by multiple teams. Each team has its own SFTP server, database, or service bus namespace. Traditionally, you'd need separate workflows or hardcode a single connection — neither scales well. The Solution Logic Apps Standard supports dynamic connection names for built-in (service provider) connectors. Instead of hardcoding a connection name, you can use any workflow expression — trigger inputs, previous action outputs, parameters, or conditional logic — to determine which connection to use at runtime. No designer support is available at this time — this works today via Code View. How It Works Define multiple connections in connections.json — one per team/environment/tenant Resolve the connection name dynamically using any expression Reference that expression in the connectionName field of your service provider action The runtime evaluates the expression and resolves the connection from connections.json at execution time. The Key Pattern "serviceProviderConfiguration": { "connectionName": "@<expression-that-resolves-to-connection-name>", "operationId": "listFolder", "serviceProviderId": "/serviceProviders/Sftp" } Instead of hardcoding "connectionName": "sftp", you provide an expression that evaluates to a connection key defined in connections.json. What You Can Use as the Dynamic Value Source Example Trigger body @triggerBody()?['connectionName'] Trigger header @triggerOutputs()['headers']['X-Connection-Name'] Conditional expression if(equals(triggerBody()?['team'], 'teamA'), 'sftpTeamA', 'sftpTeamB') Previous action output @outputs('Resolve_Connection') Workflow parameter @parameters('defaultConnection') Step-by-Step Example: Dynamic SFTP Connection 1. Define Connections in connections.json { "serviceProviderConnections": { "sftpTeamA": { "parameterValues": { "sshHostAddress": "@appsetting('SftpTeamA_HostAddress')", "username": "@appsetting('SftpTeamA_Username')", "password": "@appsetting('SftpTeamA_Password')", "portNumber": "@appsetting('SftpTeamA_PortNumber')", "rootDirectory": "@appsetting('SftpTeamA_RootDirectory')" }, "serviceProvider": { "id": "/serviceProviders/Sftp" }, "displayName": "SFTP - Team A" }, "sftpTeamB": { "parameterValues": { "sshHostAddress": "@appsetting('SftpTeamB_HostAddress')", "username": "@appsetting('SftpTeamB_Username')", "password": "@appsetting('SftpTeamB_Password')", "portNumber": "@appsetting('SftpTeamB_PortNumber')", "rootDirectory": "@appsetting('SftpTeamB_RootDirectory')" }, "serviceProvider": { "id": "/serviceProviders/Sftp" }, "displayName": "SFTP - Team B" } } } 2. Add App Settings In your Logic App's Configuration → Application settings, add values for each connection: Setting Example Value SftpTeamA_HostAddress storageacctA.blob.core.windows.net SftpTeamA_Username storageacctA.localuserA SftpTeamA_Password (generated password) SftpTeamA_PortNumber 22 SftpTeamA_RootDirectory /uploads SftpTeamB_HostAddress storageacctB.blob.core.windows.net SftpTeamB_Username storageacctB.localuserB SftpTeamB_Password (generated password) SftpTeamB_PortNumber 22 SftpTeamB_RootDirectory /uploads 3. Create the Workflow (Code View) { "definition": { "$schema": "https://schema.management.azure.com/providers/Microsoft.Logic/schemas/2016-06-01/workflowdefinition.json#", "actions": { "List_files_in_folder": { "type": "ServiceProvider", "inputs": { "serviceProviderConfiguration": { "connectionName": "@if(equals(triggerBody()?['team'], 'teamA'), 'sftpTeamA', 'sftpTeamB')", "operationId": "listFolder", "serviceProviderId": "/serviceProviders/Sftp" }, "parameters": { "path": "@triggerBody()?['folderPath']" } }, "runAfter": {} }, "Response": { "type": "Response", "kind": "Http", "inputs": { "statusCode": 200, "body": "@body('List_files_in_folder')" }, "runAfter": { "List_files_in_folder": ["Succeeded"] } } }, "triggers": { "When_a_HTTP_request_is_received": { "type": "Request", "kind": "Http", "inputs": { "schema": { "type": "object", "properties": { "team": { "type": "string" }, "folderPath": { "type": "string" } } } } } }, "contentVersion": "1.0.0.0" }, "kind": "Stateful" } 4. Test It Send a POST request to the workflow trigger URL: { "team": "teamA", "folderPath": "/uploads" } Change "team": "teamB" to route to the other SFTP server at runtime. Multi-Step Resolution Example For more complex logic — lookups, mappings, or multi-condition routing — resolve the connection in a prior action and reference its output: { "Resolve_Connection": { "type": "Compose", "inputs": "@if(contains(triggerBody()?['region'], 'eu'), 'sftpEurope', if(contains(triggerBody()?['region'], 'us'), 'sftpAmerica', 'sftpDefault'))", "runAfter": {} }, "Upload_File": { "type": "ServiceProvider", "inputs": { "serviceProviderConfiguration": { "connectionName": "@outputs('Resolve_Connection')", "operationId": "createFile", "serviceProviderId": "/serviceProviders/Sftp" }, "parameters": { "path": "/incoming/data.csv", "content": "@triggerBody()?['fileContent']" } }, "runAfter": { "Resolve_Connection": ["Succeeded"] } } } Applicable Connectors This pattern works with all built-in service provider connectors (type: "ServiceProvider"), including: SFTP SQL Service Bus Event Hubs Azure Blob Storage (built-in) SMTP Azure Automation And any other built-in connector Limitations Code View only — The designer does not render or edit dynamic connection names visually. Built-in connectors only — Managed API connections (type: "ApiConnection") do not support this pattern. Connection must exist — The resolved name must match a key already defined in connections.json. Connections cannot be created on-the-fly. Case-sensitive — The expression output must exactly match the connection key in connections.json. Tips Use @appsetting() references in connections.json to keep credentials out of source control Store passwords in Azure Key Vault referenced via app settings Use meaningful connection names (e.g., sftpTeamA, sqlProd, serviceBusDev) You can scale to any number of connections — just add entries to connections.json and corresponding app settings Inline expressions like @if(...) work directly in connectionName — you don't always need a separate action