azure sql vm
4 TopicsSQL Server 2016 Reaches End of Support: A Customer Engineer's Perspective on What's Next
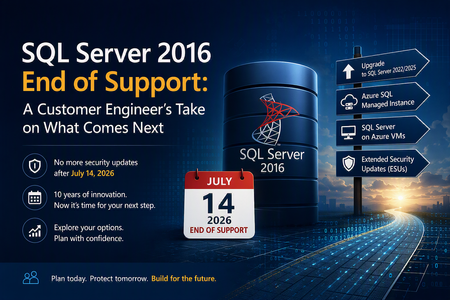
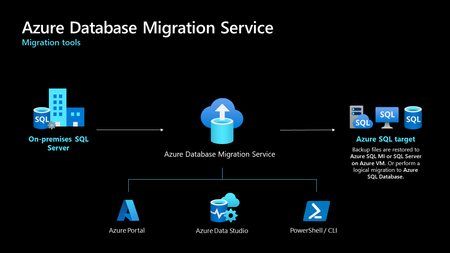
Why This Day Matters July 14, 2026 marks the end of Extended Support for SQL Server 2016. After today, organizations running SQL Server 2016 will no longer receive security updates, non-security hotfixes, or product support unless they have a specific support strategy in place. As a Customer Engineer, I've spent years helping customers navigate technology lifecycle events. This one feels particularly significant because SQL Server 2016 remains heavily deployed across enterprise environments. For official lifecycle dates and milestones, see the Microsoft Lifecycle Policy for SQL Server 2016: Reference: https://learn.microsoft.com/lifecycle/products/sql-server-2016 Why SQL Server 2016 Feels Different SQL Server 2016 introduced capabilities that many organizations still rely on today, including: Query Store Always Encrypted Native JSON Support Stretch Database Enhanced security and performance capabilities For many businesses, SQL Server 2016 became the standard data platform supporting ERP systems, billing applications, healthcare workloads, manufacturing systems, and custom line-of-business applications. Ten years is a long time in IT. During that period, databases often evolve from "just another server" into business-critical infrastructure. Learn more about SQL Server 2016 features: Reference: https://learn.microsoft.com/sql/sql-server/what-s-new-in-sql-server-2016 What "End of Support" Really Means One of the most common misconceptions I hear is: "Will my SQL Server stop working tomorrow?" No. The server will continue running. Applications will continue connecting. What changes is your risk profile. Organizations will no longer receive: Security updates Product fixes Technical support Regulatory assurance associated with supported software Microsoft's official guidance on end-of-support considerations can be found here: Reference: https://learn.microsoft.com/sql/sql-server/end-of-support/sql-server-end-of-support-overview Option 1: Upgrade to a Supported SQL Server Version For many organizations, the most straightforward path is upgrading to SQL Server 2022 or SQL Server 2025. Benefits include: Continued support Latest security protections Performance improvements New AI and data platform capabilities Before upgrading, review compatibility considerations and perform application testing. Reference: https://learn.microsoft.com/sql/database-engine/install-windows/upgrade-sql-server Reference: https://learn.microsoft.com/sql/sql-server/sql-server-release-notes Option 2: Move to Azure SQL Managed Instance Azure SQL Managed Instance is often my recommendation when customers want to reduce operational overhead while maintaining high SQL Server compatibility. Advantages include: Automated patching Built-in high availability Automated backups Near full SQL Server compatibility Reduced infrastructure management Learn more: Reference: https://learn.microsoft.com/azure/azure-sql/managed-instance/sql-managed-instance-paas-overview Option 3: Lift and Shift to SQL Server on Azure Virtual Machines For organizations seeking minimal application changes, SQL Server on Azure Virtual Machines can provide a familiar environment while eliminating hardware refresh requirements. This option also enables customers to take advantage of Extended Security Updates through Azure while planning broader modernization initiatives. Reference: https://learn.microsoft.com/azure/azure-sql/virtual-machines/windows/sql-server-on-azure-vm-iaas-what-is-overview Option 4: Purchase Extended Security Updates (ESUs) If immediate migration is not possible, Extended Security Updates provide up to three additional years of Critical security updates. ESUs can be valuable when: Vendor certification delays upgrades Hardware refresh projects are underway Business priorities prevent immediate migration However, ESUs should be viewed as a temporary bridge rather than a long-term strategy. Reference: https://learn.microsoft.com/sql/sql-server/end-of-support/sql-server-extended-security-updates Don't Skip the Assessment Phase The most successful migration projects begin with discovery and assessment. Common issues identified include: Deprecated features Compatibility concerns Linked Server dependencies SQL Agent jobs CLR integrations Legacy SSIS and SSRS workloads Resources that can help: https://learn.microsoft.com/azure/migrate/migrate-services-overview https://learn.microsoft.com/sql/sql-server/azure-arc/overview https://learn.microsoft.com/sql/dma/dma-overview Migration Tools Worth Evaluating Different migration scenarios require different tools. Microsoft provides several options: Data Migration Assistant (DMA) SQLPackage Azure Database Migration Service Managed Instance Link Distributed Availability Groups Comprehensive migration guidance: https://techcommunity.microsoft.com/blog/microsoftdatamigration/microsoft-options-to-migrate-sql-server-databases/4407666 https://learn.microsoft.com/azure/dms/dms-overview https://learn.microsoft.com/sql/tools/sqlpackage/sqlpackage Lessons Learned from Customer Engagements After supporting numerous SQL Server modernization projects, several themes consistently emerge: The database is rarely the hardest part. Applications and dependencies drive complexity. Downtime requirements significantly influence migration strategy. Organizations that start 6–9 months early typically experience smoother transitions. ESUs buy time, but they do not replace a modernization plan. For migration planning best practices: https://learn.microsoft.com/azure/cloud-adoption-framework/migrate/ Final Thoughts If you're reading this on or shortly after July 14, 2026, and SQL Server 2016 is still running in your environment, you're not alone. Whether your path forward is: SQL Server 2025 Azure SQL Managed Instance SQL Server on Azure Virtual Machines Extended Security Updates the most important step is to begin with an assessment and establish a modernization plan. SQL Server 2016 served organizations exceptionally well for nearly a decade. The conversation now is not about the end of SQL Server 2016. It's about preparing your data platform for the next decade.
Making Azure DMS More Secure: Azure Portal Permission Enhancements
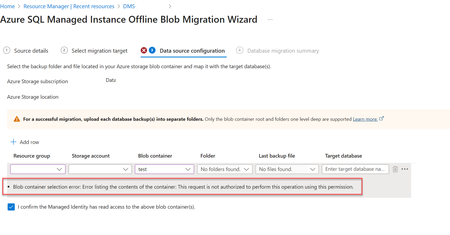
Migrating databases to Azure SQL Managed Instance or Azure SQL Virtual Machine is a critical step in modernizing enterprise infrastructure. With security and compliance top of mind, Azure Database Migration Service (DMS) has introduced key changes to its Azure portal experience—especially around permission for blob container access. Why the Change? Previously, in case of Azure Portal, DMS relied on account key-based access to Azure Blob Storage for listing and accessing backup files on the migration configuration page. While functional, this approach is not best in terms of security, especially for industries which prohibit the use of shared keys. Now, DMS's Azure portal uses security context of the current signed in user on the Azure portal to list and access backup files in the blob container, making it better security approach. Impact of the Change When migrating to Azure SQL Managed Instance or Azure SQL Virtual Machine via Azure portal make sure the current signed in user has Storage Blob Data Reader role on the Blob container that contains the backup files. This permission is needed to list folders and files in the blob container during migration setup via Azure portal only. If the current signed in user lacks the Storage Blob Data Reader role on the Blob container, users will encounter the following error: Error: "Blob container selection error: Error listing the contents of the container: This request is not authorized to perform this operation using this permission." Solution: Make sure the current signed in user has "Storage Blob Data Reader" role on the Blob container that contains the backup files. For more information, refer : Tutorial: Migrate SQL Server to Azure SQL Managed Instance - Azure Database Migration Service | Microsoft Learn Tutorial: Migrate SQL Server to SQL Server on Azure Virtual Machine Using Azure Data Studio - Azure Database Migration Service | Microsoft Learn307Views0likes0Comments
A quick way to generate Azure SQL migration assessments
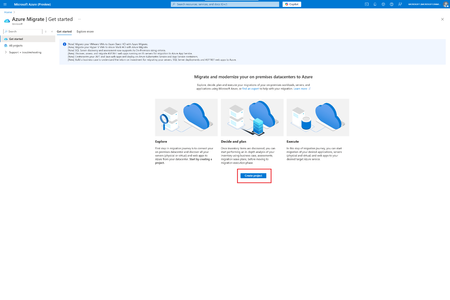
Overview Azure Migrate doesn’t allow users to import the SQL Server Inventory and discovery information from sources other than Azure Migrate appliance as of today. As a result, users who cannot deploy Azure Migrate appliance to discover their SQL Server estate for technical, business or compliance reasons or have already discovered their SQL Server estate using tools like rvtools and want a quick and approximate way to check readiness and total cost savings by moving to Azure, cannot leverage the rich capabilities SQL assessment and business case capabilities that Azure Migrate offers. To help customers quickly get migration readiness and cost savings by migrating to Azure, we are introducing “Import SQL Server Discovery data as CSV” feature in Azure Migrate that allows users to import the SQL Server inventory as a CSV file and use the discovery data to generate assessments and business cases. This feature is launched in private preview. In this blog post, we will do a deep dive on how to use this feature to generate quick assessments for your off-Azure SQL Server estate. Here are the high-level steps for importing your off-Azure SQL Server inventory as a CSV: 1) Step-1: Identify the SQL Server Instances and extract the discovery data into a CSV file. 2) Step-2: Validate and upload the inventory data to Azure Migrate 3) Step-3: Generate and view Assessments Pre-requisites: Import SQL Discovery data as a CSV feature is built on top of the new Azure Migrate experience which is also in Private Preview phase. To use Import SQL Discovery data as CSV feature, you must onboard to the private preview of new Azure Migrate experience and here is the form to sign up for Private preview: Azure Migrate Private Preview Sign-Up Survey. We will share the instructions to onboard via the contact details you provided. Make sure you have the credentials to connect to the SQL Server Instances of interest Make sure you have the requisite roles and privileges on each SQL Server Instance to access and extract the required metadata from Dynamic Management Views. To generate a login with required privileges, please run the scripts listed here: Configure custom login for SQL Server Discovery An Azure Subscription. Please note you don't need to deploy an Azure Migrate appliance to use the SQL import CSV feature. Step-1: Identify and extract the discovery data of SQL Server Instances you intend to migrate to Azure SQL into a CSV file Identify the list of all off-Azure SQL Server Instances you intend to migrate to Azure SQL from either on-premises infrastructure or other cloud platforms like Amazon Web Services (AWS), Google Cloud Platform (GCP). To extract the discovery data, please run the SQL Script below against the SQL Server Instance which you would like to import into Azure Migrate via CSV and store the output into a CSV file. /* PLEASE ENTER THE FULLY QUALIFIED DOMAIN NAME OF THE HOST IN THE LINE BELOW BEFORE RUNNING THE QUERY */ Declare @FullyQualifiedDomainName varchar(200) = ''; With ServerCores AS( SELECT cpu_count AS [Logical CPU Count], hyperthread_ratio AS [Hyperthread Ratio], cpu_count/hyperthread_ratio AS [Physical CPU Count], sqlserver_start_time FROM sys.dm_os_sys_info ), Config AS( SELECT value_in_use AS [Max Server Memory(MB) In Use] FROM sys.configurations WHERE name = 'max server memory (MB)'), UserCount AS( SELECT count(database_id) AS [Number User Databases] FROM sys.databases WHERE database_id > 4 ), DbSize AS( SELECT SUM(CAST(Size AS bigint))*8/1024 AS [Max server memory (in MB)] FROM sys.master_files WHERE database_id > 4 ), TempDbSize AS ( SELECT SUM(CAST(Size AS bigint))*8/1024 AS [TempDb Size (In MB)] FROM sys.master_files WHERE db_name(database_id) = 'tempdb' ), Logins AS (Select count(name) AS [NumOfLogins] from sys.syslogins), Properties AS ( select db.name as database_name, db.database_id as database_id, cast(db.compatibility_level as int) as database_compatibility_level, db.collation_name as database_collation, db.is_broker_enabled as is_service_broker_enabled, '0' as [Number of Nics], SERVERPROPERTY ('servername') as instance_name, SERVERPROPERTY ('productversion') as instance_version, SERVERPROPERTY ('edition') as instance_edition, SERVERPROPERTY ('productlevel') as instance_level, SERVERPROPERTY ('IsHadrEnabled') as is_hadr_enabled, SERVERPROPERTY ('collation') as server_collation, CASE WHEN SERVERPROPERTY ('IsClustered') = 1 THEN 'TRUE' ELSE 'FALSE' END as is_failover_clustered, COALESCE(SERVERPROPERTY ('IsIntegratedSecurityOnly'), 0) as is_integrated_security_only, COALESCE(SERVERPROPERTY ('IsPolyBaseInstalled'), 0) as is_polybase_installed, CASE WHEN 'A' = 'a' THEN 0 ELSE 1 END as is_server_case_sensitive, /* '' + @host_platform + '' as host_platform,*/ db.state as database_state, /* db.is_auto_close_on as is_auto_close_on,'+ CASE when @check_cdc = 1 THEN 'db.is_cdc_enabled' else '0' END + ' as is_cdc_enabled,*/ CASE when db.user_access = 0 THEN 1 ELSE 0 END as is_multi_user, CASE when db.recovery_model = 0 THEN 0 ELSE 1 END as is_full_recovery_model, db.is_read_only as is_read_only, case when source_database_id IS NULL THEN 0 ELSE 1 end as is_snapshot, case when is_published = 1 OR is_subscribed = 1 OR is_merge_published = 1 or is_distributor = 1 THEN 1 ELSE 0 end as is_replication_enabled, db.is_encrypted from sys.databases db where db.name not in ('master', 'tempdb', 'model', 'msdb') and is_distributor <> 1), EachDbSize AS( SELECT database_name = DB_NAME(database_id), CAST(SUM(CAST(size AS bigint)) * 8. / 1024 AS DECIMAL(12,2)) AS [Database size (in MB)], convert(varchar(12),CAST((sum(case when physical_name like '%ldf'then 0 else size end)*8.0)/1024.0 AS numeric(8,2))) AS [Data file size (in MB)], convert(varchar(12),CAST((sum(case when physical_name like '%ldf'then size else 0 end)*8.0)/1024.0 AS numeric(8,2))) AS [Log file size (in MB)] FROM sys.master_files WHERE database_id > 4 GROUP BY database_id) select @FullyQualifiedDomainName as [Fully qualified domain name], instance_name as [Instance Name], p.database_name as [Database Name], database_state as [Database Status], instance_edition [SQL Edition], instance_version as [SQL Version], [Logical CPU Count], [Hyperthread Ratio], [Physical CPU Count], [TempDb size (in MB)], is_failover_clustered as [Is FCI Enabled], '' as [Failover cluster name], '' as [Failover cluster instance role], '' as [Failover cluster shared disk count], '' as [Is failover cluster multi subnet], [Max server memory (in MB)], [Number of Nics], instance_level as [Service pack], '' as [ESU status], 'FALSE' as [IS AG enabled], instance_level as [Build version], 'Online' as [Service status], 'FALSE' as [Is database highly available], 'FALSE' as [Is part of distributed availability group], [Database size (in MB)], [Data file size (in MB)], [Log file size (in MB)], database_compatibility_level as [Compatibility level], '' as [Availability group ID], '' as [Availability group name], '' as [Availability group type], '' as [Availability replica ID], '' as [Availability replica name], '' as [Commit mode], '' as [Replica type], '' as [Replica state], 'FALSE' as [Is AG multi subnet], '' as [AG replica sync status], '' as [AG replica seed mode], '' as [AG replica read mode] from ServerCores, Config, UserCount, DbSize, TempDbSize,Logins, Properties p LEFT JOIN EachDbSize s on p.database_name = s.database_name order by p.database_name Collate the output of all SQL Server Instances of interest into a single file. Step-2: Validate and upload the CSV file To validate and upload the generated CSV file with SQL Server discovery data: 1) Go to the Azure Migrate experience link you would have received from Microsoft after you signed up for the private preview of this feature. Click on “Create Project” to create a new Project (if not done already): 2) Fill in the required fields in create project wizard 3) Click on the created project and select “Using custom Import” option under “Start Discovery” button. 4) In the Discover page, select “File Type” as “SQL Server inventory (CSV)” 5) (Optional) Click on “Download” button under Step 1: Download template to view and understand the template expected by Azure Migrate. Optionally, you can skip this step as the CSV file generated by SQL script shared above confirms to the template. 6) Browse and select the inventory file in Step-2 and click on Validate to validate the uploaded SQL Inventory data. 7) If the uploaded doesn’t contain any warnings or error messages, it will show validation completed successfully with 0 errors and warnings. If there are any errors or warnings Azure Migrate will show a count of warning and error messages. To view and resolve the warnings or errors (if any) with the imported file, click on Download ErroDetails.csv, which displays errors/warning messages corresponding to each database along with remedial action. Please note warnings are non-blocking messages, i.e., user can still go ahead and complete the Import operation. Whereas errors are blocking in nature i.e. users will not be allowed to import unless the error messages are resolved. 8) Once the validation phase is completed, click on Import button to complete the import operation. Step-3: Create Assessments using imported SQL Discovery Data SQL Server Instances and the databases uploaded via CSV import route are treated at par with the SQL Server instances that are discovered by Azure Migrate appliance. You can view the SQL Server Instance properties like Version details, Number of databases, Support status and all other properties uploaded via CSV file. The quality of property details and the assessments generated is directly dependent on the quality of data uploaded via CSV. To create SQL assessments for the uploaded SQL Server Instances, go to the Azure Migrate project's resource page and click on Create Assessments button: Give a name for the assessment and click on Add workloads to add the imported and appliance discovered workloads: In the following page, select the SQL Server instances that have value “Import” for Discovery Source column. You can also create assessments on a combination of workloads that are imported and appliance discovered. Click Add button to add the workloads and click on Review + Create Assessments to create assessment. For imported SQL Server instances, the quality of assessments is only as good as the data uploaded via CSV, please ensure that the data uploaded via CSV accurately depicts the metadata of the SQL Server instance. Like regular SQL assessments, you will have all the assessment configuration options like choosing Sizing criteria (performance-based vs as on-premises), migration strategy (optimizing cost vs migration to PaaS), comfort factor etc. By default, Azure Migrate will try to create a performance-based incase the performance-metrics are not available, it defaults to As-on-premises assessment. Assessment created on the imported SQL Servers will help you know which SQL Server Instances are ready for migration to Azure SQL, the recommended Azure SQL Target type. Linking and Rediscovery Linking If the host where the imported SQL Instance currently hosted is discovered via import of VM Servers or via appliance, the SQL Server Instance will be automatically associated with that host. SQL Server Instance will be rolled up under that VM Server in the discovery view. The SQL Server instance will be uniquely identified based on the FQDN and the SQL Server Instance name. The combination of attributes is used for conflict resolution as well. Rediscovery and precedence rules 1) If the SQL Server instance is originally imported via CSV and is reuploaded again via CSV, upload operation will rewrite all the properties. 2) If the SQL server instance is first imported via CSV and then discovered via Azure Migrate appliance and the user has provided credentials to do deep discovery via Azure Migrate appliance, then the appliance discovered data will override the data imported via CSV. 3) If the SQL server instance is first imported via CSV and then discovered via Azure Migrate appliance and the user has not provided SQL Server credentials to do deep discovery, then the appliance discovered data will only update the additional data that appliance discovered. 4) If the SQL Server Instance is first discovered via the Azure Migrate appliance and is deep discovered (correct SQL Server credentials are provided), and if the SQL Server is imported via CSV, data imported via CSV will be discarded. 5) If the SQL Server Instance is first discovered via the Azure Migrate appliance and is only inventoried (correct SQL Server credentials are not provided), and if the SQL Server is later imported via CSV, upload operation will completely overwrite the appliance discovered details. How to onboard to Private Preview To onboard Preview of SQL Inventory import as CSV, please fill the Signup form for Private preview What’s Next 1) In the next release will ship out capabilities to create Business case for SQL Servers imported via CSV. 2) We will also build support for Availability Groups and Failover cluster Instances for the SQL Server instances imported via CSV.