azure database for postgresql
180 TopicsWolters Kluwer scales tax and accounting software with PostgreSQL on Azure
This blog was authored by Sven Hubert, Associate Director IT Operations at Wolters Kluwer, Oliver Heimlich, Lead Product Software Engineer at Wolters Kluwer, Volker Krebs, DevOps Engineer at Wolters Kluwer As part of Wolters Kluwer, a global leader in professional information, software solutions, and services, Wolters Kluwer Tax & Accounting Germany develops software that helps tax advisory firms and midsize businesses streamline payroll, bookkeeping, banking, and tax compliance. With decades of experience, we are a leading technology partner in the industry's transition towards an integrated digital ecosystem. More than 6,000 tax advisory firms and 14,000 midsize businesses rely on our solutions, which process 2.5 million payslips every month, 2.5 million tax returns annually, and support 15% of Germany’s annual financial statements. All these applications run on PostgreSQL, but their data requirements vary significantly, from transactional accounting and dense payroll data to complex tax structures requiring frequent recalculation. At the same time, decades-long customer relationships mean years of historical data must remain readily accessible. Combined, those demands have helped drive our PostgreSQL data from about 6 TB in early 2026 to nearly 10 TB by September 2026, and it's still roughly doubling every year. Keeping ahead of that kind of growth is what led us to adopt elastic clusters in Azure Database for PostgreSQL, enabling us to scale PostgreSQL horizontally as our data volumes and workloads continue to expand. Looking for a more sustainable way to scale Our PostgreSQL architecture has evolved as our business has grown. Before moving to Azure Database for PostgreSQL three years ago, we managed PostgreSQL ourselves on Azure infrastructure, which meant our team was responsible for server patching, backups, and day-to-day database operations. Azure Database for PostgreSQL gave us the managed platform-as-a-service (PaaS) model we wanted and reduced that operational burden. But our data kept growing. Reaching 6 TB was not a hardware problem. We could still scale vertically with relatively little operational effort. The challenge was that the growing size of our datasets increasingly affected PostgreSQL's day-to-day operation. By that point, 42 tables exceeded 10 GB and several had grown beyond 100 GB. Larger tables and indexes made maintenance tasks, queries, updates, and retention-driven cleanup operations more expensive, and a single poorly performing query could impact the wider system. Our engineers were manually creating or tuning indexes in production almost every week, consuming roughly half of one engineer's time, while peak memory usage approached 90%. We wanted to retain the managed experience of Azure Database for PostgreSQL while gaining the ability to scale horizontally. With our data continuing to roughly double each year, it became clear that we needed a more sustainable scaling model. Finding a path to horizontal scale Those requirements narrowed the field quickly. We wanted to stay on PostgreSQL so we could preserve our existing data-access layer and the time-based partitioning we'd already built with pg_partman. Any new solution also needed to run on Microsoft Azure and provide a managed PaaS experience rather than require us to manage the infrastructure ourselves. Data residency requirements limited our options even further: we needed high availability and disaster recovery in multiple German regions. We evaluated several options, running proof-of-concept tests on synthetic banking data. But it was hard to find one that supported development and CI testing without requiring a live cluster and was also available in two German regions. When elastic clusters in Azure Database for PostgreSQL reached general availability in both Germany West Central and Germany North, we had our path forward. Elastic clusters use the Citus extension to turn PostgreSQL into a distributed database. It's still PostgreSQL, so scaling out is transparent to our applications, and we keep the managed-service model we already relied on. We also had a head start because our custom data-access layer was already sharding-aware from that earlier proof-of-concept work. The move meant extending a partitioning strategy we understood, not rewriting the application from scratch. Getting that architecture right took longer than the cutover itself. Across roughly 400 tables, we decided which ones to distribute by tenant, which to replicate as reference tables, and which also needed pg_partman's time-based partitioning layered on top. That combination mattered because our data is both multi-tenant and long-lived, with some customers' records going back decades. We spent about three months on that design and cleanup work as well as continuous testing to ensure a smooth and short migration. The production migration itself ran over a single weekend earlier this year, when we used pgcopydb to move roughly 6.4 TB of data onto the new cluster. What we learned as an early adopter Working with elastic clusters at production scale taught us things we hadn't seen in smaller test environments, particularly around connection pooling. We hadn't used PgBouncer in our previous architecture, so we initially ran elastic clusters without it as well. But distributing and partitioning our data multiplied the number of shards, and in Citus, memory cost per connection scales with shard count. Adding PgBouncer reduced our physical connections to close to one-sixth of their previous level, helping us use cluster resources far more efficiently. We also learned that the test environment has to match production exactly, not just the data but every configuration setting. We enabled high availability only after the production migration, and that surfaced an issue we hadn't seen in testing. Now we validate failover, health probes, and traffic routing with high availability enabled before making any changes to the cluster. However, being early to the platform also meant we didn't have to work through issues like that on our own. We had direct access to the Azure Database for PostgreSQL product group throughout the project, beyond the standard support model. That relationship has become an ongoing feedback loop, where we bring current challenges and upcoming requirements to Microsoft's team, test new capabilities against our own environment, and help shape what matters most as the platform evolves. Leaving weekly database troubleshooting behind We went into this migration primarily looking for a more sustainable way to scale. What exceeded our expectations was the performance improvement we saw after the migration and the relatively short tuning and optimization work that followed. Before the migration, some queries encountered multi-second I/O waits as the database grew larger. Since then, average statement execution time has stabilized below 20 milliseconds, and peak memory now stays consistently below 80%. The weekly cycle of hunting slow queries and hand-building new indexes has stopped completely. Long-standing performance tickets have been closed as "not reproducible," and work that had consumed close to half of one engineer's time now requires only occasional attention. That shift means our engineers spend less time chasing the next database bottleneck and more time building the features our customers use. That matters on the development side, too: roughly 100 developers work against the databases across development, test, integration, and production, with around two dozen systems running at once. Once we'd proven the configuration in production, rolling it out across those environments was straightforward. We use the same Terraform provisioning scaled down to inexpensive single-node clusters, and a plain Citus Docker container for local work. Preparing for the next doubling Just as important, we now have room to keep scaling. The growth that took us from roughly 6 TB to nearly 10 TB hasn't slowed, and we don't expect it to. As that data grows, we need our applications to keep performing for the thousands of firms and businesses that rely on them every day. But for the first time, that expansion feels like something our architecture is designed for rather than something we're constantly reacting to. Today, our production deployment of elastic clusters in Azure Database for PostgreSQL runs across six nodes. As data volumes continue to increase, we expect to add a seventh and eighth, testing the scale-out process against a restored production backup before applying it live. With elastic clusters, we can now scale both horizontally and vertically as our capacity needs change. And we're continuing to work with Microsoft on what comes next, from further optimizing connection pooling to major PostgreSQL version upgrades, as we prepare for the next doubling and the one after that.160Views1like0CommentsThe Invisible Storage Leak: How Replication Slots Can Fill Azure PostgreSQL Flexible Server Storage
Understanding WAL in PostgreSQL PostgreSQL uses Write-Ahead Logging (WAL) to guarantee durability and consistency. Every change made to the database is first recorded in WAL before being written to data files. The following activities generate WAL: INSERT operations UPDATE operations DELETE operations VACUUM operations CREATE INDEX ALTER TABLE Bulk data loads Maintenance operations A common misconception is that WAL generation is only significant for large transactions. Database workloads with frequent data modifications continuously generate WAL throughout the day. Why Replication Slots Exist Imagine a primary server generating WAL files while a replica becomes temporarily unavailable. Without replication slots, PostgreSQL would eventually remove older WAL files to reclaim storage space. To prevent this, PostgreSQL uses replication slots. A replication slot tracks the WAL position required by a specific replica and prevents PostgreSQL from deleting WAL files that have not yet been consumed. This mechanism significantly improves replication reliability. The Hidden Side Effect Replication slots solve one problem but introduce another. When a replica stops consuming WAL, PostgreSQL continues retaining WAL files because the replication slot indicates they are still required. The database may function normally. Applications may run without issues. Database size may remain unchanged. Yet storage usage continues increasing. This often times comes as a surprise, because the growth isn't coming from tables or indexes. It comes from retained transaction logs. Microsoft documentation specifically notes that replication slots automatically retain WAL required by replicas and warns that inactive replication slots can cause significant storage growth on the primary server. Let’s explore some common scenarios that can lead to unexpected storage growth due to WAL retention Scenario 1: Replica Lag Replica lag is perhaps the most common cause of WAL accumulation. Consider a workload generating: 50 GB WAL per day If the replica falls behind and remains several days behind the primary: The primary cannot remove WAL because the replica still requires it. Even though replication is technically working, retained WAL continues to grow. Common causes include: Network latency High write workloads Long-running transactions Resource bottlenecks on replicas What to do Monitor replication lag and primary storage using Azure Monitor metrics. Investigate sustained or increasing replication lag and address the underlying cause. Continue monitoring storage while the replica catches up, as accumulated WAL may remain until it is no longer required. See the “How to investigate” section below for steps to monitor replication lag, check replication slots, and correlate WAL retention with storage growth. Scenario 2: Broken Replica When a replica becomes unavailable due to infrastructure, maintenance, or recovery issues, WAL required by the replica can accumulate on the primary and contribute to storage growth. When the replica is unavailable: What to do Restore the replica if it is still required. Monitor replication lag and primary storage using Azure Monitor metrics while the replica is unavailable. If the replica has been permanently removed, verify that its associated replication slot is no longer required before removing the slot. Do not remove a replication slot simply because it is inactive. Confirm that no replica or other replication consumer still depends on it. See the “How to investigate” section below for steps to identify inactive replication slots and measure retained WAL. Scenario 3: Deleted Logical Replication Subscriber If a logical replication subscriber is removed but its replication slot remains on the publisher, the slot can continue retaining WAL even though the subscriber is no longer consuming it. What to do Confirm whether the subscriber has been permanently removed. If the associated replication slot is no longer required, it can be removed after verifying that no replication consumer depends on it. See the “How to investigate” section below for steps to identify inactive logical replication slots and measure retained WAL. Scenario 4: WAL Retention Becomes the Largest Storage Consumer One of the most interesting escalation cases occurs when WAL occupies more storage than business data. For example: Component Size Database Data 500 GB Indexes 120 GB WAL Retention 1.8 TB At this point, the actual application data is no longer the primary storage consumer. The retained WAL becomes the dominant storage workload. You will commonly see symptoms like: Stable database size Continuously increasing storage utilization Unexpected storage alerts Auto-grow events What to do Identify replication slots retaining significant WAL. Monitor Storage Used and Storage Percentage in Azure Monitor. Resolve the underlying replication issue rather than relying on additional storage alone. See the “How to investigate” section below for steps to identify replication slots and measure retained WAL. Scenario 5: Primary Server Enters Read-Only Mode The most severe outcome is storage exhaustion. According to Microsoft documentation, when retained WAL causes storage utilization to reach critical thresholds, Flexible Server can automatically switch to read-only mode to prevent disk-full scenarios. The sequence typically looks like: At this stage, the server prevents further modifications, which can result in application write failures and service impact. Microsoft also notes that disk-full conditions can affect operational activities such as backups and WAL archiving This behavior has been observed in real-world storage exhaustion incidents where storage consumption reached critical levels and database write operations were affected. What to do Monitor Storage Percentage and Storage Used in Azure Monitor. Check whether retained WAL is contributing to storage growth. Resolve the underlying replication or replication-slot issue where applicable. Configuring alerts on Storage Percentage for approaching disk-full conditions. How to Investigate Review Azure Monitor Metrics and Configure Alerts Monitor: Use Azure Monitor Metrics to track storage consumption and replication health over time. In the Azure portal, open your Flexible Server and use Monitoring > Metrics (Metrics Explorer) to review the relevant storage and replication metrics. You can also select Dashboards with Grafana from the server menu to use the built-in Grafana monitoring experience. Transaction Log Storage Used (txlogs_storage_used) to track transaction log/WAL storage consumption. Storage Used Monitor the amount of storage currently consumed and look for sustained or unexpected growth. Storage Percentage: Monitor how much of the provisioned storage is being consumed and watch for a steady increase toward the available capacity. Read Replica Lag (physical_replication_delay_in_seconds): Shows replica lag in seconds on an individual read replica. Max Logical Replication Lag (logical_replication_delay_in_bytes): Shows the maximum WAL backlog retained for logical replication. Max Physical Replication Lag (physical_replication_delay_in_bytes): Shows the largest physical replication backlog on the primary server. Learn more about Monitor here. Learn more about Dashboards with Grafana here. Alert: Use Azure Metric alerts for proactive monitoring and alerting. Create metric alerts based on the backlog and storage limits that the workload can tolerate. Useful starting examples include: Alert when Max Logical Replication Lag exceeds the acceptable logical replication backlog. Alert when Read Replica Lag remains above 300 seconds. Alert when Storage Percentage exceeds 80%. For configuration steps, see Configure metric alerts for Azure Database for PostgreSQL Flexible Server. 2. Check Replication Slots For logical replication, first monitor Max Logical Replication Lag (logical_replication_delay_in_bytes) in Azure Monitor to identify whether the replication backlog is increasing. If the metric shows a sustained or increasing backlog, check the replication slots to identify inactive consumers: SELECT slot_name, slot_type, restart_lsn, inactive_since FROM pg_replication_slots WHERE active='f'; Note: " inactive_since" column only exists in PostgreSQL 17 and later. This query identifies inactive replication slots. Investigate each inactive slot to determine whether its replication consumer is temporarily unavailable or whether the slot is no longer required. 3. Check Replica Status For read replicas, start by monitoring replication lag in Azure Monitor. Use Read Replica Lag (physical_replication_delay_in_seconds) on each replica and Max Physical Replication Lag (physical_replication_delay_in_bytes) on the primary server to identify replicas that are falling behind. If Azure Monitor indicates persistent or increasing replication lag, check the replication state from the primary: SELECT usename, application_name, state, sync_state, replay_lag FROM pg_stat_replication; Use the replication state and replay_lag to understand whether the replica is keeping up: state = streaming: WAL is actively being streamed to the replica. state = catchup: The replica is connected but is working through a WAL backlog. replay_lag: Helps identify delay in WAL replay on the replica. 4. Measure Retained WAL Before measuring WAL retained by individual replication slots, review the following metrics in Azure Monitor: Transaction Log Storage Used (txlogs_storage_used): helps determine whether transaction/WAL log usage is increasing. Storage Percentage (storage_percent): shows overall storage utilization as a percentage. Storage Free (storage_free): shows the remaining available storage. Reviewing these metrics together helps determine whether increasing transaction-log usage is contributing to overall storage pressure. If transaction-log storage is increasing, use the following query to determine how much WAL is being retained by each replication slot: SELECT slot_name, pg_size_pretty( pg_wal_lsn_diff(pg_current_wal_lsn(),restart_lsn)) AS retained_wal FROM pg_replication_slots; restart_lsn represents the earliest WAL position that may still be required by the replication slot. retained_wal estimates the amount of WAL between the slot’s restart_lsn and the current WAL position. A large or steadily increasing retained_wal can indicate that the slot is not advancing fast enough and WAL is accumulating. Compare retained_wal across slots to identify which slot is associated with the largest WAL retention. Preventative Measures ✅ Monitor replication lag and overall storage utilization. ✅ Configure Azure Monitor alerts for replication lag and storage percentage. ✅ Regularly review replication slots ✅ Remove unused slots only after confirming that no replication consumer depends on them. ✅ Validate replica health after maintenance activities ✅ Include replication slot checks in operational runbooks Conclusion By proactively monitoring replication lag, replica health, replication slots, and storage metrics, administrators can identify issues like lagging replicas and inactive replication slots early, helping prevent unexpected storage growth caused by retained WAL.145Views2likes0CommentsSeptember 2026 Recap: Azure Database for PostgreSQL
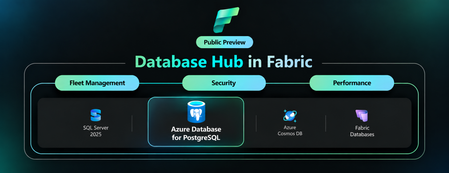
Save the date for POSETTE 2027 Mark your calendar for March 30–31, 2027, when POSETTE: An Event for Postgres returns for its sixth year. Organized by the PostgreSQL team at Microsoft in partnership with AMD, this free virtual developer conference brings together PostgreSQL experts, developers, users, and contributors from around the world to share knowledge and expertise. The call for proposals is expected to open later in November. Visit PosetteConf.com for the latest updates. Features💡 Cross-Tenant Customer Managed Key (CMK) now Generally Available In September, cross-tenant customer-managed key (CMK) support became generally available for Azure Database for PostgreSQL flexible server. This capability enables independent software vendors (ISVs) and other service providers to host PostgreSQL resources in their tenant while their customers retain control of encryption keys stored in Azure Key Vault or Azure Managed HSM in a separate Microsoft Entra tenant. Using a multitenant application and user-assigned managed identity, organizations can maintain tenant separation while meeting data-protection and key-governance requirements. Learn more about cross-tenant customer-managed keys for Azure Database for PostgreSQL. Database Hub in Microsoft Fabric: A Single View of Your PostgreSQL Estate (Preview) Database Hub in Microsoft Fabric is now in public preview with support for Azure Database for PostgreSQL flexible server. One place to discover, monitor, and secure your entire database estate across PostgreSQL, Azure SQL, Azure Cosmos DB, and Azure SQL Server. No more hopping between portals and per-server dashboards. What you can do today: Estate view automatically discovers the PostgreSQL flexible servers you can access through Microsoft Entra ID and Azure RBAC, with filters for subscription, resource group, and tags. Security posture flags issues and suggestions such as Microsoft Entra authentication, public network access, and customer-managed keys. Fleet monitoring tracks CPU, memory, storage, IOPS, connections, and read replica lag across your servers. Spot what needs attention, then jump straight to the Azure portal or VS Code to act. No data movement, no agents. Learn more: A Single View of Your PostgreSQL Estate: Database Hub in Public Preview Azure Backup for PostgreSQL Flexible Server (v2) Public preview Azure Backup for PostgreSQL Flexible Server (v2) is now in Public Preview, bringing a redesigned, physical snapshot-based backup architecture that removes several key limitations of v1. You can now protect databases up to 32 TB on Premium SSD v1 and 64 TB on Premium SSD v2, compared with the previous 1 TB limit, and schedule daily or weekly backups with incremental backups after the first full backup, improving from v1’s weekly full backup cadence. V2 also introduces support for elastic clusters and Restore as Server, allowing recovery directly to a target flexible server or elastic cluster instead of restoring files to a storage account and manually importing them. Long-term retention remains available for up to 10 years, with additional protection through capabilities such as WORM immutability, soft delete, and multi-user authorization. Learn more: Azure Backup for PostgreSQL flexible server and elastic cluster (v2) is now in public preview | Microsoft Community Hub Azure PostgreSQL Learning Byte 🎓 PostgreSQL Skills Did you kow that with PostgreSQL Skills you can bring expert guidance, live database context, execution tools, and built-in validation into the development workflow? With 32 expert sub-skills, you can build capabilities such as vector search and row-level security, troubleshoot query performance, and manage high availability, disaster recovery, upgrades, and authentication. The plugin detects the environment automatically and routes each request to the right guidance, with one installation that works across GitHub Copilot CLI, VS Code, Claude Code, and Codex CLI. Learn more: Postgres Skills: Give Your AI Agent PostgreSQL Expertise220Views2likes0CommentsFrom Alert to Online Repack: Playbook for PostgreSQL Table Bloat on Azure Database for PostgreSQL
I ran a experiment on my own Azure Database for PostgreSQL Flexible Server: deliberately bloat a table, build a monitoring job that would catch it, and then reclaim the space while keeping the application available. This post is the scenario-specific playbook that came out of that experiment: first the detector, then the remediation built around pg_cron and pg_repack. It is intended for update- or delete-heavy tables with measurable physical bloat, enough temporary storage for an online rebuild, and a maintenance window in which brief lock waits and elevated I/O are acceptable. Everything below was run in a lab. I validated the process end to end on Azure Database for PostgreSQL Flexible Server running PostgreSQL 17, with 32 GiB of storage and autogrow enabled. I use bloatlab throughout as the name of my existing application database. Replace it with your own database name. Every table, timestamp, and command in this post came from that lab. Setup I loaded a table (customer_orders) with 3,000,000 rows (~1 KB payload each), then held back autovacuum first with a long-running transaction, then by explicitly disabling it on the table and ran repeated full-table UPDATE passes against random rows. That's the only artificial part of this: in production, the same accumulation happens naturally on any update- or delete-heavy table, just slower. SELECT pg_size_pretty(pg_total_relation_size('customer_orders')) AS total_size, pg_size_pretty(pg_relation_size('customer_orders')) AS table_size, pg_size_pretty(pg_indexes_size('customer_orders')) AS indexes_size; total_size table_size indexes_size row_count 3471 MB 3348 MB 122 MB 3,000,000 After the bloat-inducing passes: SELECT pg_size_pretty(pg_total_relation_size(s.relid)) AS total_size, pg_size_pretty(pg_relation_size(s.relid)) AS table_size, pg_size_pretty(pg_indexes_size(s.relid)) AS indexes_size, s.n_live_tup, s.n_dead_tup, round(100.0 * s.n_dead_tup / NULLIF(s.n_live_tup + s.n_dead_tup, 0), 2) AS dead_pct FROM pg_stat_all_tables s WHERE s.schemaname = 'public' AND s.relname = 'customer_orders'; total_size table_size indexes_size n_live_tup n_dead_tup dead_pct 13 GB 13 GB 422 MB 3,000,000 6,000,000 66.67 Row count never moved. Physical size roughly quadrupled. That gap between row count and bytes on disk is the whole story of this post. Part 1: build the alarm before you need it I built a watchdog first instead of jumping straight to the fix because bloat is silent by default. PostgreSQL does not proactively alert you when a table grows unexpectedly. In many cases, the issue becomes visible only after the table has expanded significantly and starts affecting performance or storage. Azure Monitor's storage_percent metric can show storage trending toward an autogrow threshold, but remediation is more useful before additional storage has already been provisioned. Step 1: a catalog check you can run anywhere This query reads catalog statistics and does not scan table data. Validate permissions and workload policies before running it in production: SELECT schemaname, relname, n_dead_tup, n_live_tup, round(100.0 * n_dead_tup / NULLIF(n_live_tup + n_dead_tup, 0), 2) AS dead_tup_pct, autovacuum_count, last_vacuum, last_autovacuum, last_autoanalyze, last_analyze FROM pg_stat_all_tables WHERE n_live_tup > 0 ORDER BY dead_tup_pct DESC NULLS LAST; Step 2: don't trust dead_tup_pct on its own Here's that made me build a real watchdog instead of a one-off check. I polled the lab every 5 minutes and caught this the moment autovacuum finally ran: checked_at (UTC) live_tuples dead_tuples dead_tup_pct table_size table_size_bytes 13:05 3,000,000 9,000,000 75.00 13 GB 14,452,064,256 13:10 3,000,000 9,000,000 75.00 13 GB 14,452,064,256 13:15 3,000,000 0 0.00 13 GB 14,452,064,256 13:20 3,000,000 0 0.00 13 GB 14,452,064,256 last_autovacuum confirmed autovacuum ran at 13:12:06. Dead-tuple percentage dropped from 75% to 0% and the table stayed byte-for-byte the same size, 14,452,064,256 bytes, before and after. dead_tup_pct is derived from n_dead_tup, PostgreSQL’s estimated number of dead rows. I use it as an investigation signal, not as a direct measurement of reclaimable space. It says nothing about whether the file itself shrank. A watchdog built only on this number would have reported healthy at 13:15 while the table was still sitting at 13 GB. Step 3: get the physical truth with pgstattuple This query performs a full table scan and is more resource-intensive than lightweight monitoring checks. Run it during off-peak hours to minimize impact; it provides an accurate view of table contents and reusable space. CREATE EXTENSION IF NOT EXISTS pgstattuple; SELECT *, round(free_percent + dead_tuple_percent, 2) AS approx_bloat_pct FROM pgstattuple('public.customer_orders'); table_len tuple_count tuple_percent dead_tuple_count dead_tuple_percent free_percent 14,043,430,912 3,000,000 23.5 3,000,000 23.5 52.22 Only 23.5% of that 13 GB file held live data. Another 23.5% was dead but not yet vacuumed, and 52.22% was already-vacuumed free space just sitting there reusable by future rows in this table, but not returned to the OS. Total physical waste: roughly 76% of the file (75.72%). Index bloat can be checked the same way: SELECT *, round(100.0 * (1 - avg_leaf_density/100), 2) AS index_bloat_pct FROM pgstatindex('public.idx_customer_orders_status'); Step 4: find what's stopping autovacuum from keeping up Three checks worth running whenever bloat outpaces autovacuum. Long-running or idle-in-transaction sessions are the most common real-world cause: SELECT pid, age(backend_xid) AS age_in_xids, now() - xact_start AS xact_age, now() - query_start AS query_age, state, query FROM pg_stat_activity WHERE state != 'idle' ORDER BY 2 DESC LIMIT 10; Unused replication slots can also hold back vacuum: SELECT slot_name, slot_type, database, xmin FROM pg_replication_slots ORDER BY age(xmin) DESC; So can uncommitted prepared transactions: SELECT gid, prepared, owner, database, transaction FROM pg_prepared_xacts ORDER BY age(transaction) DESC; Also worth a quick check: is autovacuum_enabled explicitly turned off on the table, or is autovacuum_vacuum_scale_factor tuned too high for how fast the table changes? Step 5: wire all of this into pg_cron pg_cron is available on Flexible Server through azure.extensions, with no restart required. Its control tables (cron.job and cron.job_run_details) live in the database where the extension is created commonly postgres. Jobs targeting another database use cron.schedule_in_database. In this article, bloatlab is the existing application database that contains customer_orders; replace it with your own database name. This is the exact job I ran: \c postgres CREATE EXTENSION IF NOT EXISTS pg_cron; \c bloatlab -- History table (created once, in the SAME database the job below runs in) CREATE TABLE IF NOT EXISTS bloat_alert_history ( checked_at timestamptz NOT NULL DEFAULT now(), schemaname text, relname text, table_size_bytes bigint, dead_tup_pct numeric, live_tuples bigint, dead_tuples bigint, alert_triggered boolean ); \c postgres -- Idempotent: unschedule any previous copy of this job name first SELECT cron.unschedule(jobid) FROM cron.job WHERE jobname = 'bloat-ratio-check'; -- Every 5 min in this lab (fast feedback); 15-30 min is plenty in production SELECT cron.schedule_in_database( 'bloat-ratio-check', '*/5 * * * *', $$ INSERT INTO bloat_alert_history (schemaname, relname, table_size_bytes, dead_tup_pct, live_tuples, dead_tuples, alert_triggered) SELECT schemaname, relname, pg_total_relation_size(relid) AS table_size_bytes, round(100.0 * n_dead_tup / NULLIF(n_live_tup + n_dead_tup, 0), 2) AS dead_tup_pct, n_live_tup, n_dead_tup, (round(100.0 * n_dead_tup / NULLIF(n_live_tup + n_dead_tup, 0), 2) > 20) AS alert_triggered FROM pg_stat_user_tables WHERE relname = 'customer_orders'; $$, 'bloatlab', null, true ); Here's what actually happened when I ran it (re-verified live on a PostgreSQL 17 instance with pg_cron installed): You are now connected to database "postgres" as user "postgres". CREATE EXTENSION You are now connected to database "bloatlab" as user "postgres". CREATE TABLE You are now connected to database "postgres" as user "postgres". unschedule ------------ t (1 row) schedule_in_database ----------------------- 6 (1 row) And triggering the job body manually inside bloatlab the same way pg_cron fires it every 5 minutes to confirm the insert actually works end-to-end. This is the exact body of the scheduled job: INSERT INTO bloat_alert_history (schemaname, relname, table_size_bytes, dead_tup_pct, live_tuples, dead_tuples, alert_triggered) SELECT schemaname, relname, pg_total_relation_size(relid) AS table_size_bytes, round(100.0 * n_dead_tup / NULLIF(n_live_tup + n_dead_tup, 0), 2) AS dead_tup_pct, n_live_tup, n_dead_tup, (round(100.0 * n_dead_tup / NULLIF(n_live_tup + n_dead_tup, 0), 2) > 20) AS alert_triggered FROM pg_stat_user_tables WHERE relname = 'customer_orders'; INSERT 0 1 SELECT * FROM bloat_alert_history; checked_at | schemaname | relname | table_size_bytes | dead_tup_pct | live_tuples | dead_tuples | alert_triggered --------------------------------+------------+------------------+-------------------+--------------+-------------+-------------+----------------- 2026-09-02 09:52:26.002581+02 | public | customer_orders | 122880 | 0.00 | 1000 | 0 | f (1 row) SELECT jobid, jobname, schedule, database, active FROM cron.job ORDER BY jobid; jobid | jobname | schedule | database | active -------+--------------------+-------------+----------+-------- 6 | bloat-ratio-check | */5 * * * * | bloatlab | t (1 row) Worth showing why the \c bloatlab matters: with the table created in postgres instead, registration still succeeds no error at setup time but running that same INSERT INTO bloat_alert_history query against bloatlab fails immediately: ERROR: relation "bloat_alert_history" does not exist LINE 1: INSERT INTO bloat_alert_history ^ One thing to get right: \c targets. cron.schedule_in_database's job body executes inside whichever database you pass as its 4th argument (bloatlab here) not wherever you were connected when you called it. bloat_alert_history has to live in that same database, or every run fails with relation "bloat_alert_history" does not exist. The extension, and cron.job/cron.job_run_details, stay in postgres by convention; only the history table needs to move. Important: as written, this doesn't send a real notification. alert_triggered is just a boolean column the job only inserts a row into bloat_alert_history every 5 minutes. Nobody gets paged, emailed, or messaged unless you separately wire that table (or the query) into a real channel: an Azure Monitor action group, a Logic App, or a Teams webhook. Until you do that, this is silent detection you have to go query yourself. A 20% dead-tuple threshold worked well as a starting point tune it per table based on write pattern. What the Watchdog Caught Over Eight Hours SELECT to_char(checked_at,'YYYY-MM-DD HH24:MI') as checked_at, live_tuples, dead_tuples, dead_tup_pct, pg_size_pretty(table_size_bytes) as table_size, alert_triggered FROM bloat_alert_history ORDER BY checked_at; checked_at (UTC) live_tuples dead_tuples dead_tup_pct table_size alert 11:15 3,000,000 0 0.00 6063 MB false 11:20 3,000,000 3,000,000 50.00 7064 MB true 11:30 2,988,902 6,011,103 66.79 10 GB true 12:05 3,000,000 9,000,000 75.00 13 GB true 13:10 3,000,000 9,000,000 75.00 13 GB true 13:15 3,000,000 0 0.00 13 GB false (autovacuum ran) 13:45 3,000,000 3,000,000 50.00 13 GB true 14:10 - 19:00 3,000,000 ~6,000,000 66.67 13 GB true, ~5 hours 19:05 2,999,914 377 0.01 3465 MB false - fixed Five hours of continuous alerting with the table pinned at 13 GB that's the exact silent, ongoing cost this kind of monitoring exists to catch. And the last row isn't me manually re-checking: it's the same cron job automatically confirming the pg_repack fix below worked, five minutes after it finished. Keeping the history table itself in check The watchdog asks, “Is this table bloated?” This maintenance job applies the same discipline to the watchdog’s history table. Cleanup is not as time-sensitive as detection, so a 12- to 24-hour schedule is generally sufficient: SELECT cron.unschedule(jobid) FROM cron.job WHERE jobname = 'bloat-alert-history-cleanup'; -- Once every 24h at 03:00 UTC (use '0 */12 * * *' for every 12h instead) SELECT cron.schedule_in_database( 'bloat-alert-history-cleanup', '0 3 * * *', $$ DELETE FROM bloat_alert_history WHERE checked_at < now() - interval '30 days'; DELETE FROM cron.job_run_details WHERE end_time < now() - interval '7 days'; $$, 'bloatlab', null, true ); cron.job_run_details is pg_cron's own run-history table, and it isn't pruned automatically either so it gets cleaned up in the same job instead of a separate schedule. 30 days of history here is just a starting point; pick a window long enough to see the patterns you actually care about for a given table. If you'd rather not maintain custom SQL for this, Azure has a native path too: Monitor Using Metrics and Logs in Azure Database for PostgreSQL Flexible Server - Azure Database for PostgreSQL | Microsoft Learn Portal's Diagnose and solve problems blade also ships ready-made Autovacuum monitoring and Autovacuum blockers/wraparound workbooks, and Azure Advisor raises a High bloat ratio recommendation automatically once a server crosses its threshold. Part 2: fix it online with pg_repack Once the watchdog told me the table was bloated, the obvious next move is VACUUM FULL. I didn't use it, and here's why: it reclaims space correctly, but it holds an ACCESS EXCLUSIVE lock on the table for the entire rewrite. For a multi-GB table under live traffic, that's real, customer-visible downtime. pg_repack can reclaim the space while normal reads and writes continue for most of the run. It is an online alternative to VACUUM FULL, not a guarantee of zero user impact: it still needs ACCESS EXCLUSIVE locks (typically brief) during setup and the final swap, and lock contention, workload pressure, or an interrupted run can delay or affect the application. Here’s the mechanism, followed by every command I ran in this lab. How it works under the hood For a table with a primary key or unique index (required), pg_repack: Creates a log table and a trigger that captures every INSERT/UPDATE/DELETE on the original table during the repack. Bulk-copies the current live rows into a shadow table using a plain INSERT ... SELECT, no exclusive lock, reading only live data and skipping all the bloated free space. Rebuilds all indexes on the shadow table. Replays everything the trigger captured onto the shadow table, iteratively, until caught up. Takes a brief ACCESS EXCLUSIVE lock just long enough to swap the shadow table in for the original -- a metadata-only rename, not a data rewrite. Drops the old table and temporary objects, then runs ANALYZE. Only steps 1 and 5 require ACCESS EXCLUSIVE locks. In this lab, I did not separately measure the exact lock-hold duration for those phases; they are typically short because they cover setup and metadata swap work rather than the bulk copy. That is not guaranteed: acquiring either lock can take longer when other transactions, DDL, or queued sessions are present, and final impact depends on workload, dependencies, server resources, and table activity. The bulk copy and index build run while normal traffic continues, but they still consume I/O, CPU, storage, and connection capacity. Decision point: I treat pg_repack as an option only after the applicability checks pass. If physical bloat is confirmed, the table has a qualifying key, there is enough storage, I/O, and WAL headroom, and brief blocking is acceptable, I plan a controlled pg_repack run. If any of those checks fail, I choose the safer path for that problem: ordinary VACUUM for space reuse, REINDEX for index-only bloat, or VACUUM FULL during an approved maintenance window. Everything I ran, in order After allowing the extension through the server's azure.extensions setting, create it in the target database; no server restart is required: CREATE EXTENSION IF NOT EXISTS pg_repack; Two things I had to know going in: azure_pg_admin is not a true PostgreSQL superuser on Flexible Server, so pg_repack needs -k / --no-superuser-check to run without complaint. TCP keepalives on the client connection turned out to be necessary in my lab more on that below. The command that did the actual work: pg_repack -d "host=<server>.postgres.database.azure.com port=5432 dbname=<db> \ user=<admin> sslmode=require keepalives=1 keepalives_idle=20 keepalives_interval=10 keepalives_count=6" \ -t public.customer_orders -k --echo It completed cleanly in 13 minutes 28 seconds against a 13 GB table. Here's the real --echo trace it produced, with my own annotations added: -- 1. Trigger + log table setup (brief exclusive lock on the original table for setup) LOCK TABLE public.customer_orders IN ACCESS EXCLUSIVE MODE SELECT repack.create_log_table(24851) CREATE TRIGGER repack_trigger AFTER INSERT OR DELETE OR UPDATE ON public.customer_orders FOR EACH ROW EXECUTE PROCEDURE repack.repack_trigger('order_id') -- 2. Bulk-copy live rows only (no exclusive lock) INSERT INTO repack.table_24851 SELECT order_id,customer_id,order_status,order_total,created_at,updated_at,payload FROM ONLY public.customer_orders -- 3. Rebuild indexes on the new copy CREATE UNIQUE INDEX index_24859 ON repack.table_24851 USING btree (order_id) CREATE INDEX index_24861 ON repack.table_24851 USING btree (customer_id) CREATE INDEX index_24862 ON repack.table_24851 USING btree (order_status) -- 4. Catch up on everything written during steps 2-3 (ran twice: bulk pass + mop-up pass) SELECT repack.repack_apply($1, $2, $3, $4, $5, $6) -- 5. Atomic swap -- final exclusive-lock phase; duration depends on contention (rename operation, not a data copy) LOCK TABLE public.customer_orders IN ACCESS EXCLUSIVE MODE LOCK TABLE repack.table_24851 IN ACCESS EXCLUSIVE MODE SELECT repack.repack_swap($1) COMMIT -- 6. Cleanup and finalize SELECT repack.repack_drop($1, $2) ANALYZE public.customer_orders When it doesn't go cleanly the first time I encountered this warning after a client-side connection dropped during the copy phase in my lab. Before retrying, inspect the table and repack schema to determine which temporary objects remain: WARNING: The table's row triggers are not migrated to the new table. In this lab, the following commands removed the identified leftovers. Replace <oid> only after verifying the object identifiers, dependencies, and active sessions. Do not treat this as a universal cleanup sequence: DROP TRIGGER IF EXISTS repack_trigger ON public.customer_orders; DROP TABLE IF EXISTS repack.log_<oid> CASCADE; DROP TYPE IF EXISTS repack.pk_<oid> CASCADE; -- pg_repack's own error handling can miss this one What actually changed Metric Before After pg_repack Total size (table + indexes) 13 GB + 422 MB ≈ 14.45 GB 3465 MB (3348 MB + 116 MB) n_dead_tup / dead % 6,000,000 / 66.67% 323 / 0.01% pgstattuple tuple_percent (live data ratio) 23.5% 93.99% pgstattuple waste (dead + free %) 75.72% 4.99% Downtime - No full outage observed; latency spikes and one statement timeout occurred In this lab, I observed no full application outage during the 13-minute 28-second run, but I did observe latency spikes and one statement-timeout event. Treat this as a test result, not a guarantee: pg_repack still acquires ACCESS EXCLUSIVE locks in critical phases, and production impact depends on lock contention, workload intensity, client timeouts, server headroom, and whether the run completes cleanly. One thing pg_repack doesn't do pg_repack returns space to the filesystem inside the data directory, but it doesn't shrink the Azure-provisioned storage tier itself. If Storage Auto-Growth already bumped into a server from, say, 32 GiB to 64 GiB before you remediate, the server stays provisioned and billed at 64 GiB afterward, since Flexible Server storage doesn't scale back down. That's exactly why Part 1 and Part 2 of this post are meant to be used together: run pg_repack proactively, off the back of the pg_cron alert, before autogrow ever fires. One more practical note: Azure Monitor's storage_used / storage_percent metrics can lag real time by up to an hour. Verify results directly with pg_stat_user_tables / pgstattuple immediately after a repack, rather than trusting the portal graph right away. Conclusion Table bloat is manageable once you distinguish statistical signals from physical storage evidence. The key is to treat dead_tup_pct as a hint rather than a verdict. Pair it with pgstattuple or a physical size check so that “autovacuum ran” is never mistaken for “the file became smaller.” When physical bloat is confirmed and the prerequisites are satisfied, pg_repack can reclaim space while preserving availability for most of the operation—but it still requires careful planning for locks, resource consumption, and failure recovery. There is no universal bloat percentage that requires remediation. Reusable free space may be acceptable when it is stable and causes no storage, performance, or maintenance pressure. Investigate when waste keeps growing, affects large tables, slows queries, threatens storage headroom, or indicates that autovacuum is falling behind or being blocked. A bloated table does not always mean autovacuum is misconfigured, but it is a reason to check autovacuum health: last run time, dead tuple trend, long-running transactions, replication slots, table-level settings, and whether cleanup is keeping pace with the write workload. Key takeaways Don't rely on dead_tup_pct alone -- pair it with pgstattuple or physical size checks for ground truth. Schedule a pg_cron job against pg_stat_user_tables so bloat gets caught in minutes, not after an Advisor recommendation. Consider pg_repack instead of VACUUM FULL when a table must remain available and the scenario fits: physical bloat is confirmed, a suitable primary key or unique index exists, temporary storage and I/O headroom are available, and brief lock attempts are acceptable. On Azure Database for PostgreSQL Flexible Server, use -k / --no-superuser-check when the administrative role is not a true PostgreSQL superuser. Configure client keepalives when network stability or long-running connections warrant them. After an interrupted pg_repack run, inspect and remove only verified leftover objects before retrying; do not run generic DROP commands without validating object identifiers and dependencies. Remember that pg_repack frees space inside the data directory; it does not reduce the Azure-provisioned storage tier. Use proactive monitoring to avoid unnecessary autogrow events.396Views3likes0CommentsPostgres Trip Report from Postgres Summit US 2026
Photo gallery: Microsoft team at Postgres Summit US 2026 Postgres Summit US 2026 was a conference of connections: between database internals and the infrastructure underneath them, between AI ideas and production engineering, and between the people building PostgreSQL today and those who will carry it forward. For anyone who could not be in New York, this report captures the talks, technical questions, hallway conversations, and community moments that defined the week. The event also opened a new chapter. After years as PGConf NYC, the conference returned as Postgres Summit US, bringing more than 240 developers, DBAs, architects, contributors, technology leaders, and partners to Convene on Broadway from September 30 through October 2. The Microsoft team contributed six sessions across performance, replication, infrastructure, benchmarking, AI, developer tools, and community sustainability. Around those talks was a much larger program shaped by speakers and attendees from across the PostgreSQL ecosystem. 01 - Microsoft speaker highlights 02 - What the wider program was talking about 03 - Workshops and the hallway track 04 - The conversations continued after the slides 05 - What we brought home from New York 06 - Explore the Postgres Summit US 2026 program Gratitude for the organizers, speakers, sponsors, and attendees 01 - Microsoft speaker highlights Abe Omorogbe and Jared Meade: "Tour of Postgres on Azure with HorizonDB, Agentic workflows, & VS Code." Their end-to-end tour moved from HorizonDB's shared-storage architecture, rapid failover, and elastic read scale to SQL-declared chunking and embedding pipelines, durable incremental processing, intelligent product search, Copilot CLI Postgres skills, and an interactive VS Code query-plan visualizer. Although the demos used Microsoft technology, the engineering message applied broadly: production AI needs a dependable data layer, observable workflows, and tools that help developers understand what the database is doing. Microsoft Azure HorizonDB Documentation Landing Page | Microsoft Learn Claire Giordano delivered two talks that connected PostgreSQL's technical foundations with its future. In "A Secret Decoder Ring for Postgres Replication: A Beginner's Guide," Claire turned the alphabet soup of logical, physical, streaming, synchronous, and asynchronous replication into approachable mental models tied to high availability, disaster recovery, read scaling, migrations, WAL, and Patroni. In "Building the next generation of Postgres contributors: what's working & what's getting in the way," she marked PostgreSQL's 30th anniversary by examining the project through three lenses: the soul of its people and culture, the machine of its workflows and governance, and the fuel of economics and funding. Together, the talks asked both how PostgreSQL keeps data moving and how the community keeps itself moving. Divya Bhargov: "Same Postgres, Moving Ground: How Infrastructure Changes Shape Database Behavior." Divya explored a production reality that applies to every environment: PostgreSQL can remain stable while VM families, storage layers, operating systems, kernels, and networking stacks change underneath it. Drawing from large-scale operational experience, she showed why teams should correlate database symptoms with infrastructure transitions before assuming every behavioral change originated inside PostgreSQL. Gayathri Paderla: "PostgreSQL Performance Mysteries: When Low IOPS Still Means High Latency." Gayathri unpacked real production cases where latency increased even though familiar signals such as IOPS, query duration, CPU pressure, and indexing did not point to the cause. The trail instead led through memory behavior, cache eviction, PostgreSQL shared buffers, the operating system page cache, and storage interactions. The session showed how to correlate pg_buffercache, pg_stat_statements, wait events, storage behavior, and cache-warming techniques such as pg_prewarm. The practical lesson was memorable: low IOPS does not mean storage is uninvolved, and a normal query metric does not mean the application is experiencing normal latency. Here are the slides from the talk. PostgreSQL Performance Mysteries When low IOPS still means high latency - Speaker Deck Richard Yen: "Pushing PostgreSQL to the Limit: How to Benchmark Hardware with Postgres." Richard challenged the numbers used to sell hardware and cloud storage. Massive advertised IOPS or throughput does not tell a DBA whether the real limit will be storage, CPU bandwidth, PostgreSQL locks, checkpoints, archive_mode overhead, or autovacuum interference. His session focused on building an impartial PostgreSQL benchmarking harness, instrumenting both system and database metrics, and avoiding synthetic-test traps that can produce confident but misleading conclusions. Pushing PostgreSQL to the Limit: How to Benchmark Hardware with Postgres 02 - What the wider program was talking about Beyond the Microsoft sessions, the schedule showed where PostgreSQL engineering is headed. The keynote "Lessons Learned from Developing Agentic AI Tooling for Postgres" set a practical tone for AI. Other sessions explored hybrid search, agent memory, AI-agent security, PostgreSQL 19, planner behavior, VACUUM, index prefetching, change data capture, driver maintenance, Kubernetes migrations, replication, and zero-downtime operations. The breadth of the program mattered. Healthcare, financial services, government, SaaS, analytics, and cloud-native teams have different workloads, but they share the same production requirements: reliability, security, predictable performance, recovery, regional availability, and a clear way to choose the right platform for each workload. The question is no longer simply whether PostgreSQL is enterprise ready. It is how each organization should use PostgreSQL without creating unnecessary operational complexity. 03 - Workshops and the hallway track The workshop track made the conference approachable for people at different stages of their PostgreSQL journey. Sessions such as "Getting Comfortable with Postgres," "Postgres DBA Basics Nobody Told You,"And "Locks, Monitoring & the Config That Matters" turned administration, configuration, troubleshooting, and performance concepts into hands-on practice. That mix of beginner-friendly learning and deep technical sessions is one of the best things about PostgreSQL conferences. Photo gallery: hands-on learning and community conversations 04 - The conversations continued after the slides The Day 1 reception gave everyone time to compare notes after the first full program, and many of the best exchanges continued at sponsor booths, over dinner, and between sessions. Engineers compared production lessons. Contributors heard directly from users. Teams discovered that problems they had considered unique were often shared by people at other companies. That hallway track is difficult to capture in an agenda, but it is a big reason people travel to PostgreSQL events. Postgres Summit US is organized by the United States PostgreSQL Association (PgUS) and supported by volunteer organizers, reviewers, speakers, and sponsors. The sponsor community included cloud providers, database companies, observability vendors, and open-source specialists. Microsoft was proud to participate, but the event's real strength came from the range of people willing to share what they had built, what had failed, and what they had learned. 05 - What we brought home from New York Microsoft brought home five key takeaways from Postgres Summit US 2026: Production AI is now a PostgreSQL architecture and operations discussion. The community is moving beyond AI prototypes toward dependable data foundations, secure agent access, observable pipelines, hybrid search, and production-ready developer tooling. Infrastructure changes can affect database behavior even when PostgreSQL itself has not changed. VM, storage, operating-system, kernel, and networking changes must be considered when diagnosing PostgreSQL performance and reliability. Observability and explainability are essential at scale. Effective diagnosis requires correlating PostgreSQL internals, query behavior, memory, caching, wait events, infrastructure metrics, and storage behavior rather than relying on one familiar metric. Organizations want to consolidate more workloads on PostgreSQL without increasing operational complexity. Customers expect simpler operations, predictable performance, stronger recovery, high availability, and clear guidance for selecting the right PostgreSQL platform. Community knowledge sharing remains one of PostgreSQL’s greatest strengths. Technical sessions, workshops, hallway conversations, and candid production lessons help practitioners, contributors, and new community members learn from one another. These takeaways reinforce Microsoft’s continued investment in PostgreSQL performance, developer experiences, AI integration, operational reliability, and open-source collaboration. The transition from PGConf NYC to Postgres Summit US felt appropriate. The event still had the technical depth, welcoming hallway conversations, and practical learning that people value, but the scope was broader. AI-enabled applications are moving into production, PostgreSQL 19 is opening new possibilities, and operators are asking sharper questions about reliability and performance. Microsoft will continue investing in PostgreSQL performance, developer experiences, AI integration, and open-source collaboration. We are already looking forward to the next gathering. Microsoft booth, reception, community dinner, and New York moments 06 - Explore the Postgres Summit US 2026 program Conference schedule :https://postgresql.us/events/postgressummitus2026/schedule/ Conference sessions and abstracts: https://postgresql.us/events/postgressummitus2026/sessions/ Gratitude for the organizers, speakers, sponsors, and attendees A conference like this only happens because many people contribute behind the scenes. Thank you to Postgres Summit US, the volunteer organizers, the program committee, the speakers who did the work behind every slide and demo, the sponsors who helped make the event possible, and the attendees who brought thoughtful questions and real production experience into every room. To everyone who shared a lesson, asked a difficult question, demonstrated a new idea, or welcomed someone new to the community: thank you. Hopefully these photos and highlights give you a feel for the energy in New York. See you at the next PostgreSQL gathering.142Views2likes0CommentsWhat sustained PostgreSQL performance really requires: Lessons from an independent benchmark
Coauthored by Jared Meade and Teneil Lawrence For teams running transaction-intensive applications, database performance is rarely about a single specification. More vCores can help, but compute is only one part of the equation. Storage performance, workload concurrency, high availability, and database configuration all influence how a PostgreSQL workload performs under sustained demand. That is why we recently commissioned Principled Technologies to independently evaluate Azure Database for PostgreSQL and Amazon RDS for PostgreSQL using a high-concurrency OLTP workload. In the configurations tested, Azure Database for PostgreSQL – flexible server delivered 72.7% higher throughput without high availability and 79.2% higher throughput with high availability than the tested Amazon RDS for PostgreSQL configurations. Those results are compelling, but the more useful story for teams evaluating a Postgres managed service is what sits behind them. The study reinforces an important principle for planning database infrastructure: sustained performance depends on how compute, storage, availability, and workload characteristics work together. Putting PostgreSQL performance to the test Principled Technologies used HammerDB 5.0 and its TPROC-C workload, which is derived from TPC-C and designed to simulate a transaction-intensive environment. The test used a 3,000-warehouse database and evaluated performance across increasing numbers of virtual users. The study compared: Azure Database for PostgreSQL – flexible server using a Standard_D16s_v6 compute instance with Premium SSD v2 storage Amazon RDS for PostgreSQL using a db.m7i.4xlarge instance with gp3 storage Both configurations used 16 vCPUs, 64 GB of memory, and 2,048 GB of storage. The Azure configuration provisioned 80,000 IOPS and 1,200 MB/s of storage throughput, while the Amazon RDS configuration provisioned 40,000 IOPS and 1,200 MB/s. Both environments were configured with wal_level=logical. Principled Technologies tested each platform both with and without high availability enabled. For Azure, that meant zone-redundant high availability. For Amazon RDS, the study used Single-AZ and Multi-AZ configurations. To measure sustained rather than momentary performance, each test included a 30-minute warm-up followed by a 30-minute measurement period and a five-minute cooldown. Each configuration was tested three times, with the database restored between runs, and the median result was reported. The results showed: Without HA: Azure Database for PostgreSQL achieved 51,134 new orders per minute (NOPM), compared with 29,605 NOPM for the tested Amazon RDS configuration, a 72.7% advantage. With HA: Azure achieved 53,620 NOPM, compared with 29,907 NOPM for the tested Amazon RDS configuration, a 79.2% advantage. Just as importantly for teams designing resilient applications, Principled Technologies found that enabling zone-redundant HA did not meaningfully reduce throughput on the Azure configuration tested. These findings apply to the specific configurations and methodology evaluated in the report. Every PostgreSQL workload is different, which is why independent benchmarks are most valuable as a starting point for your own performance evaluation. Performance is a system, not a single number It can be tempting to look at a database benchmark and attribute the result to one component. In practice, PostgreSQL performance is more interconnected. A transaction-intensive workload can be constrained by CPU, storage IOPS, throughput, latency, query behavior, connection patterns, or a combination of these factors. Increasing the capability of one layer will not automatically improve application performance if another layer becomes a bottleneck. Storage is an especially important part of that equation for OLTP workloads. The Azure configuration in the Principled Technologies study used Premium SSD v2, which gives customers flexibility to configure storage capacity, IOPS, and throughput independently, within supported limits. That flexibility can help teams align storage resources more closely with the characteristics of their workload instead of treating storage capacity and performance as the same sizing decision. The benchmark should not be interpreted as showing that storage alone produced the performance difference. The results reflect the complete configurations tested, including Dv6 compute, Premium SSD v2, PostgreSQL configuration, and the characteristics of the TPROC-C workload. The practical takeaway is straightforward: understanding where your workload is constrained is essential to making the right scaling decision. Expanding storage choices for demanding PostgreSQL workloads We are continuing to expand the storage options available for Azure Database for PostgreSQL, giving customers more flexibility as workload requirements evolve. Azure Ultra Disk is now available in preview for Azure Database for PostgreSQL, providing another storage option for I/O-intensive workloads that require high levels of IOPS and throughput with low latency. Like Premium SSD v2, Ultra Disk allows customers to configure storage capacity and performance independently within supported limits. We are also bringing storage autogrow for Premium SSD v2, helping customers address a different operational challenge: capacity growth. Storage autogrow is designed to automatically increase provisioned storage as available capacity becomes constrained, reducing the need for teams to manually manage storage expansion. These capabilities were not used in the Principled Technologies benchmark, and they should not be viewed as drivers of the results. Instead, they represent the next step in giving PostgreSQL teams more options to match storage infrastructure to their application requirements. That distinction matters. A workload approaching its storage capacity limit has a different problem from one constrained by IOPS or latency. Autogrow can help address capacity management, while a workload with demanding I/O requirements may warrant evaluating a different storage configuration or tier. The goal is always to give teams the flexibility to make that choice based on evidence. So how do you make that decision? Start with the workload Benchmarks can provide a useful reference point, but the best performance plan starts with your own application. As you evaluate PostgreSQL infrastructure, consider a few questions: What does peak demand look like? Measure sustained and peak transaction volume rather than relying only on averages. Where is the workload constrained? Look across CPU utilization, IOPS, throughput, storage latency, query execution, and connection behavior. How quickly is the database growing? Capacity requirements and performance requirements do not always grow at the same rate. What availability architecture does the application require? Test performance with the same HA configuration you expect to use in production. Does your test reflect production behavior? Representative data volumes, concurrency, query patterns, and transaction characteristics matter. The Principled Technologies study provides one useful data point. Under the specific 16-vCPU configurations and TPROC-C methodology tested, Azure Database for PostgreSQL - flexible server delivered higher OLTP throughput than the tested Amazon RDS for PostgreSQL configurations, both with and without high availability enabled. For us, the takeaway goes beyond the benchmark percentage. As PostgreSQL workloads become more demanding, teams need the ability to align compute, storage, and availability with the characteristics of their applications. With Dv6 compute, Premium SSD v2, expanding storage capabilities such as Ultra Disk, and greater automation for storage management, Azure Database for PostgreSQL Flexible Server continues to give teams more options for doing exactly that. Read the full Principled Technologies report to explore the configurations, methodology, and results, and use the findings as a starting point for testing the workloads that matter most to your applications.June 2025 Recap: Azure Database for PostgreSQL
Hello Azure Community, We have introduced a range of exciting new features and updates to Azure Database for PostgreSQL in June. From general availability of PG 17 to public preview of the SSD v2 storage tier for High Availability, there have been some significant feature announcements across multiple areas in the last month. Stay tuned as we dive deeper into each of these feature updates. Before that, let’s look at POSETTE 2025 highlights. POSETTE 2025 Highlights We hosted POSETTE: An Event for Postgres 2025 in June! This year marked our 4th annual event featuring 45 speakers and a total of 42 talks. PostgreSQL developers, contributors, and community members came together to share insights on topics covering everything from AI-powered applications to deep dives into PostgreSQL internals. If you missed it, you can catch up by watching the POSETTE livestream sessions. If this conference sounds interesting to you and want to be part of it next year, don’t forget to subscribe to POSETTE news. Feature Highlights General Availability of PostgreSQL 17 with 'In-Place' upgrade support General Availability of Online Migration Migration service support for PostgreSQL 17 Public Preview of SSD v2 High Availability New Region: Indonesia Central VS Code Extension for PostgreSQL enhancements Enhanced role management Ansible collection released for latest REST API version General Availability of PostgreSQL 17 with 'In-Place' upgrade support PostgreSQL 17 is now generally available on Azure Database for PostgreSQL flexible server, bringing key community innovations to your workloads. You’ll see faster vacuum operations, richer JSON processing, smarter query planning (including better join ordering and parallel execution), dynamic logical replication controls, and enhanced security & audit-logging features—backed by Azure’s five-year support policy. You can easily upgrade to PostgreSQL 17 using the in-place major version upgrade feature available through the Azure portal and CLI, without changing server endpoints or reconfiguring applications. The process includes built-in validations and rollback safety to help ensure a smooth and reliable upgrade experience. For more details, read the PostgreSQL 17 release announcement blog. General Availability of Online Migration We're excited to announce that Online Migration is now generally available for the Migration service for Azure Database for PostgreSQL! Online migration minimizes downtime by keeping your source database operational during the migration process, with continuous data synchronization until cut over. This is particularly beneficial for mission-critical applications that require minimal downtime during migration. This milestone brings production-ready online migration capabilities supporting various source environments including on-premises PostgreSQL, Azure VMs, Amazon RDS, Amazon Aurora, and Google Cloud SQL. For detailed information about the capabilities and how to get started, visit our Migration service documentation. Migration service support for PostgreSQL 17 Building on our PostgreSQL 17 general availability announcement, the Migration service for Azure Database for PostgreSQL now fully supports PostgreSQL 17. This means you can seamlessly migrate your existing PostgreSQL instances from various source platforms to Azure Database for PostgreSQL flexible server running PostgreSQL 17. With this support, organizations can take advantage of the latest PostgreSQL 17 features and performance improvements while leveraging our online migration capabilities for minimal downtime transitions. The migration service maintains full compatibility with PostgreSQL 17's enhanced security features, improved query planning, and other community innovations. Public Preview of SSD v2 High Availability We’re excited to announce the public preview High availability (HA) support for the Premium SSD v2 storage tier in Azure Database for PostgreSQL flexible server. This support allows you to enable Zone-Redundant HA using Premium SSD v2 during server deployments. In addition to high availability on SSDv2 you now get improved resiliency when using Premium SSD v2 with zone-redundant HA, helping customers build resilient, high-performance PostgreSQL applications with minimal overhead. This feature is particularly well-suited for mission-critical workloads, including those in financial services, real-time analytics, retail, and multi-tenant SaaS platforms. Key Benefits of Premium SSD v2: Flexible disk sizing: Scale from 32 GiB to 64 TiB in 1-GiB increments Fast failovers: Planned or unplanned failovers typically around 10 seconds Independent performance configuration: Achieve up to 80,000 IOPS and 1,200 Mbps throughput without resizing your disk. Baseline performance: Free throughput of 125 MB/s and 3,000 IOPS for disks up to 399 GiB, and 500 MB/s and 12,000 IOPS for disks 400 GiB and above at no additional cost. For more details, please refer to the Premium SSD v2 HA blog. New Region: Indonesia Central New region rollout! Azure Database for PostgreSQL flexible server is now available in Indonesia Central, giving customers in and around the region lower latency and data residency options. This continues our mission to bring Azure PostgreSQL closer to where you build and run your apps. For the full list of regions visit: Azure Database for PostgreSQL Regions. VS Code Extension for PostgreSQL enhancements The brand-new VS code extension for PostgreSQL launched in mid-May and has already garnered over 122K installs from the Visual Studio Marketplace! And the kickoff blog about this new IDE for PostgreSQL in VS Code has had over 150K views. This extension makes it easier for developers to seamlessly interact with PostgreSQL databases. We have been committed to make this experience better and have introduced several enhancements to improve reliability and compatibility updates. You can now have better control over service restarts and process terminations on supported operating systems. Additionally, we have added support for parsing additional connection-string formats in the “Create Connection” flow, making it more flexible and user-friendly. We also resolved Entra token-fetching failures for newly created accounts, ensuring a smoother onboarding experience. On the feature front, you can now leverage Entra Security Groups and guest accounts across multiple tenants when establishing new connections, streamlining permission management in complex Entra environments. Don’t forget to update to the latest version in the marketplace to take advantage of these enhancements and visit our GitHub repository to learn more about this month’s release. If you learn best by video, these 2 videos are a great way to learn more about this new VS Code extension: POSETTE 2025: Introducing Microsoft’s VS Code Extension for PostgreSQL Demo of using VS code extension for PostgreSQL Enhanced role management With the introduction of PostgreSQL 16, a strict role hierarchy structure has been implemented. As a result, GRANT statements that were functional in PostgreSQL 11-15 may no longer work in PostgreSQL 16. We have improved the administrative flexibility and addressed this limitation in Azure Database for PostgreSQL flexible server across all PostgreSQL versions. Members of ‘azure_pg_admin’ can now manage, and access objects owned by any role that is non-restricted, giving control and permission over user-defined roles. To learn more about this improvement, please refer to our documentation on roles. Ansible collection released for latest REST API version A new version of Ansible collection for Azure Database for PostgreSQL flexible server is now released. Version 3.6.0 now includes the latest GA REST API features. This update introduces several enhancements, such as support for virtual endpoints, on-demand backups, system-assigned identity, storage auto-grow, and seamless switchover of read replicas to a new site (Read Replicas - Switchover), among many other improvements. To get started with using please visit flexible server Ansible collection link. Azure Postgres Learning Bytes 🎓 Using PostgreSQL VS code extension with agent mode The VS Code extension for PostgreSQL has been trending amongst the developer community. In this month's Learning Bytes section, we want to share how to enable the extension and use GitHub Copilot to create a database in Agent Mode, add dummy data, and visualize it using the Agent Mode and VS Code extension. Step 1: Download the VS code Extension for PostgreSQL Step 2: Check GitHub Copilot and Agent mode is enabled Go to File -> Preferences -> Settings (Ctrl + ,). Search and enable "chat.agent.enabled" and "pgsql copilot.enable". Reload VS Code to apply changes. Step 3: Connect to Azure Database for PostgreSQL Use the extension to enter instance details and establish a connection. Create and view schemas under Databases -> Schemas. Step 4: Visualize and Populate Data Right-click the database to visualize schemas. Ask the agent to insert dummy data or run queries. Conclusion That's all for the June 2025 feature updates! We are dedicated to continuously improve Azure Database for PostgreSQL with every release. Stay updated with the latest updates to our features by following this link. Your feedback is important and helps us continue to improve. If you have any suggestions, ideas, or questions, we’d love to hear from you. Share your thoughts here: aka.ms/pgfeedback We look forward to bringing you even more exciting updates throughout the year, stay tuned!1.1KViews3likes0Comments
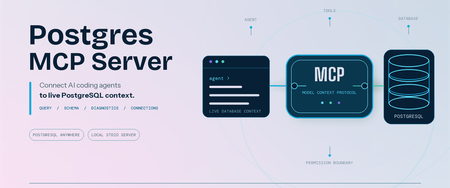
Postgres MCP Server: Connect AI coding agents to PostgreSQL
Coding agents can write SQL, troubleshoot applications, and reason about data. Useful database work starts with your schema and environment context. We are pleased to announce that Microsoft has open-sourced the Postgres MCP Server under the MIT License. Built entirely in Rust for fast, resource-efficient operation, it connects Model Context Protocol (MCP) compatible coding agents to PostgreSQL, so your agent can inspect real database context and run permitted operations. The server works with PostgreSQL locally, on-premises, on Azure, AWS, GCP, or through another PostgreSQL-compatible service. It is built for anyone who works with PostgreSQL through a coding agent, including application developers, database administrators, data professionals, platform engineers, and PostgreSQL enthusiasts. Give AI agents live PostgreSQL context The Postgres MCP Server exposes PostgreSQL operations as tools that your coding agent can call. After connecting to a profile, ask: "List the tables in my PostgreSQL database." "Show me the ten most recent orders." "Generate the schema for these tables and indexes." "What is slowing down my PostgreSQL server?" The tools let your agent: Generate queries and run analytics. Run read-only SQL or use separate tools for data and schema changes. Explore and design schemas. Inspect tables, indexes, functions, sequences, and other database objects before generating database changes. Diagnose performance. Detect server capabilities and collect focused performance metrics for the server and its queries. Manage connections. Create named connection profiles, connect to the right database, and switch between environments without placing credentials in the MCP client configuration. Install and connect securely Prerequisites: Node.js 22 or later, which includes npm and npx. Linux x64 or arm64, macOS x64 or arm64, or Windows x64. Windows on Arm uses x64 emulation. An MCP-compatible coding agent or client. A reachable PostgreSQL or wire-compatible database and a database role with the permissions needed for your intended tasks. No separate installation is required when you use npx; it downloads and runs the package for you. If you prefer the postgres-mcp command to be available globally, install the package: npm install --global @Microsoft/postgres-mcp The examples use npx. With a global installation, replace npx -y Microsoft/postgres-mcp with postgres-mcp. Create a profile and store its password: npx -y @Microsoft/postgres-mcp connection add local \ "postgresql://postgres@localhost:5432/postgres" npx -y @Microsoft/postgres-mcp connection set-password local The server stores the password in your operating system keyring, separate from the profile. For headless or CI environments without a keyring, use the environment-based connection option. Add the server to clients that use the mcpServers configuration: { "mcpServers": { "postgres": { "command": "npx", "args": ["-y", "@microsoft/postgres-mcp", "run"] } } } Configuration formats and file locations differ by client. The Postgres MCP usage guide includes examples for supported clients. For Azure Database for PostgreSQL, the server can use Microsoft Entra ID when a saved profile does not contain a password. PostgreSQL role permissions remain the security boundary. New profiles permit write tools unless you set access_mode: ro. For exploration, combine that setting with a read-only database role. Your MCP client controls approval prompts, and CSV tools can read only from approved local paths. Add expert PostgreSQL skills The open-source Postgres Skills repository complements the MCP server with expert guidance for query performance, indexing, vector search, security, operations, Azure workflows, and AI and knowledge graph scenarios. These reusable instructions help coding agents apply PostgreSQL best practices when investigating an issue or completing a task, while the MCP server supplies the live database context and permitted operations needed to act on that guidance. Next steps Explore the Postgres MCP Server repository. Review the Postgres MCP usage and security guide. Follow the Postgres Skills plugin setup guide. Share feedback or contribute through Postgres MCP GitHub issues. Thank you!1.6KViews0likes1Comment
Rethinking Memory Management for Azure HorizonDB on Disaggregated Storage
In Smarter Storage for Azure HorizonDB, we described how HorizonDB moves durability, replication, checkpointing, and recovery out of PostgreSQL and into a purpose-built storage layer. The compute node writes only the write-ahead log (WAL). Data pages are rebuilt and stored by remote page servers. That design raises an obvious question: if PostgreSQL no longer reads and writes its own data files, what happens to its memory management? PostgreSQL's buffer manager was built around a specific partner: the operating system's page cache. Many of its defaults and heuristics only make sense because the kernel is quietly doing a lot of work underneath. HorizonDB removes that partner. This post explains which assumptions broke, and the changes we made to the PostgreSQL engine, so memory works well on disaggregated storage. What PostgreSQL assumes about the kernel PostgreSQL stores each table and index as ordinary files and accesses them with buffered I/O. Every page therefore can live in two places in memory: in PostgreSQL's own buffer pool (shared_buffers) and in the operating system's page cache. This "double buffering" is a deliberate part of the design, and it shapes several behaviors. A modest buffer pool. The PostgreSQL documentation suggests starting shared_buffers at about 25% of system memory. Much of the rest is expected to act as kernel file cache. A page evicted from shared_buffers is often still in the kernel cache, so reading it back costs a memory copy rather than a disk read. Prefetching is a hint to the kernel. When PostgreSQL knows it will need a page soon—during a bitmap heap scan, for example—it calls posix_fadvise with POSIX_FADV_WILLNEED. The kernel starts reading the page into its cache. A later read finds it there. PostgreSQL itself never allocates a buffer for the prefetched page. Sequential scans rely on kernel readahead. For sequential access, the kernel detects the pattern and reads ahead automatically, so PostgreSQL can issue fewer explicit hints. Ring buffers protect the cache. Large sequential scans, VACUUM, and bulk writes such as COPY use a small private ring of buffers—from a few hundred kilobytes to a few megabytes—instead of the whole buffer pool. A scan of a table much larger than memory therefore cannot push the working set out of shared_buffers. This is safe because a page that cycles through the ring is usually still in the kernel cache if it is needed again. Writes are cheap and deferred. When a dirty buffer is evicted, PostgreSQL writes it to the kernel cache, which flushes it to disk later. The background writer cleans buffers ahead of eviction so that queries rarely wait for a write. Checkpoints write all dirty pages and call fsync to make them durable. Each of these behaviors assumes that a miss in shared_buffers is usually cheap, and that writing a page means writing it to a local file. What changes in HorizonDB Figure 1. Compute memory layout: Community PostgreSQL vs. Azure HorizonDB. In HorizonDB, permanent tables and indexes do not exist as local files on the compute node. There is no kernel page cache holding database pages. A miss in shared_buffers must be served by the remote storage layer: Tier Where it lives Typical role Shared buffers Compute memory Working set; all pages are read and modified here SSD cache Compute local disk Extends shared buffers; holds cached copies of pages Page servers Remote storage fleet Page cache of the current version of every page Azure Blob Storage Remote, zone-redundant Durable backing store for pages and WAL A page that falls out of memory no longer drops into a free kernel cache. It may require a network round trip to a page server, which is much more expensive than a memory read. Writes change too. Because page servers rebuild pages from WAL, "writing" a dirty page on the compute node does not mean copying it anywhere. PostgreSQL only has to make sure the WAL describing the change is durable - a rule it already enforces before any page write. Taken together, this inverts the trade-offs behind PostgreSQL's defaults. Memory is no longer one of two caches. It is the primary cache. Design principle: shared buffers are the primary cache We organized the engine changes around one principle. shared_buffers is the primary cache, eliminating the memory overhead of double buffering and improving memory efficiency. Every page that is about to be needed should arrive in memory before the query asks for it. The following sections describe the engine changes that implement it. 1. Size shared buffers for the machine Without a kernel cache to share memory with, leaving 75% of RAM to the operating system would waste most of it. HorizonDB sizes shared_buffers automatically at 60–70% of the compute node's memory, depending on the size of the instance. The remaining memory is left for connections, query execution memory such as sorts and hashes, and the operating system. 2. Retire ring buffers Ring buffers exist so that a large scan can use a few megabytes of memory and rely on the kernel cache for anything it needs again. In HorizonDB, there is no such safety net. Recycling a small ring means that every page the scan touches is read, used once, and discarded—and a second scan of the same table must fetch everything again from storage. Ring buffers also exist to limit write traffic: a bulk operation that dirties pages in a small ring must write them out quickly. HorizonDB doesn't need to write dirty data pages back to disk at all, so that motivation disappears as well. HorizonDB therefore disables buffer ring strategies. Sequential scans, VACUUM, and bulk loads use the shared buffer pool like any other query. This is a trade-off, not a free win. A very large scan can now displace pages from shared_buffers that other queries were using. Two factors limit the cost. First, clock-sweep replacement tracks how often each buffer is used, so frequently accessed pages outlive pages a scan touched only once—and buffer replacement is an area we continue to improve. Second, pages that leave shared_buffers are not simply lost: HorizonDB can keep them close by in the local SSD cache. How it decides and what goes there is a story for a separate post. 3. Prefetch directly into shared buffers On a local disk, a prefetch miss costs a disk seek. On disaggregated storage, it costs a network round trip. Hiding that latency matters even more, so HorizonDB makes prefetching explicit, aggressive, and memory aware. Prefetch requests go to the page servers. When PostgreSQL issues a prefetch, HorizonDB sends a read request for the page to the page server that owns it, and does not wait for the answer. Each backend keeps a set of outstanding requests by default, so dozens of page reads overlap instead of running one after another. Sequential scans prefetch explicitly. PostgreSQL's read stream mechanism, which drives sequential scans and other block-range reads, normally avoids prefetching sequential blocks because it expects kernel readahead to cover them. HorizonDB turns that assumption off, so sequential reads are prefetched like any other access pattern. Responses land in their final buffer. In stock PostgreSQL, a prefetch only warms the kernel cache, so the later read still has to copy the page into shared_buffers. In HorizonDB, the page server's response goes straight into a shared buffer. When the query asks for the page, it is already in memory, with no extra copy and no second request to storage. These are only some of the prefetch optimizations we have built into the engine. Others use custom prefetch implementations and logic that tunes how far ahead each query reads. All of them share one goal: hiding storage latency so queries spend less time waiting on I/O and more time doing useful work. What this means for you As a fully managed service, our goal is to delight customers with a best-in-class PostgreSQL experience. You shouldn't have to think about kernel caches, buffer rings, or prefetch windows—that is our job. HorizonDB retains full PostgreSQL compatibility, so applications keep the familiar Postgres programming interface while the engine is tuned to deliver predictable performance on the storage underneath696Views5likes1CommentA Single View of Your PostgreSQL Estate: Database Hub in Public Preview
By Varun Dhawan, Matt McFarland, Erdem Tuna from Microsoft PostgreSQL team Azure Database for PostgreSQL support in Database Hub is now in public preview, bringing fleet visibility, security posture, and performance monitoring into one place. This preview is part of the broader vision outlined in our SQLCon Barcelona 2026 announcement: bringing database signals together so teams can see where attention is needed and take a well-informed next step. Here, we focus on the Azure PostgreSQL experience in Database Hub. Database Hub in Microsoft Fabric lets you monitor existing flexible servers in their Azure subscriptions and regions, without moving or mirroring data or building a new customer-managed telemetry pipeline. Baseline monitoring uses existing Azure Monitor metrics. Available capabilities vary by database service. Start with a practical question: Which PostgreSQL servers show sustained memory pressure, and which should I investigate first? Follow the three views below to narrow the scope and compare trends. See the PostgreSQL monitoring guide for setup and preview details. 1. Start with an estate-wide Overview Overview brings cross-engine findings and performance summaries into one starting point. Spot a signal worth investigating, such as elevated PostgreSQL memory usage, then open Estate to focus on the relevant resources. Figure 1: Overview combines cross-engine findings with performance summaries, including PostgreSQL, to help prioritize investigation. Illustrative mockup with sample data. 2. Focus on your Azure PostgreSQL estate In Estate, select the PostgreSQL view and filter by subscription or resource group to define the scope for the memory-pressure investigation. Compare the flexible servers you can access before choosing resources to examine: Filter your PostgreSQL estate by subscription or resource group to focus on the servers you manage. Review a flexible server's resource details in one place. The inventory represents server instances, not each database hosted inside them. Save and share a custom view for a scope you revisit regularly. Colleagues see only the resources their existing permissions allow. Figure 2: Estate filtered to PostgreSQL, bringing flexible server resources, status, findings, and subscription context into one inventory. Illustrative mockup with sample data. Once you have scoped your estate, switch to Performance and select the PostgreSQL servers you want to investigate. 3. Review security posture and performance Security posture In public preview, Database Hub assesses four aspects of your Azure PostgreSQL security configuration: Microsoft Entra authentication: identify servers where it is not enabled. Encryption at rest using customer-managed keys: review key management against your organization's policy. A server using service-managed keys is still encrypted at rest. Microsoft Entra authentication enforced: review whether Microsoft Entra authentication is required, rather than only available as an option. Public Network Access Disabled: review public exposure against your network policy. The private networking guidance explains the virtual network integration option. Performance monitoring In Performance, select the PostgreSQL dashboard and use CPU, memory, and storage summaries to identify servers that need a closer look. You can also review disk activity, connections, failed connections, and applicable read-replica lag. For the memory-pressure question, compare server trends over the same interval to distinguish sustained pressure from a brief spike. Use the Azure Monitor metric reference to match units and aggregation. Missing data is not proof of good health. Figure 3: Performance monitoring with PostgreSQL selected, illustrating utilization summaries and trends for closer investigation. Illustrative mockup with sample data. When a server needs a deeper look, continue in the Azure portal and PostgreSQL tools using the monitoring and diagnostics guidance. Preview scope: Monitoring is metric-based; query-level diagnostics remain in native PostgreSQL tools. Security findings are not a complete compliance audit. Database Hub does not automatically tune, resize, or remediate PostgreSQL servers. Check the servers selected in Performance: dashboard scope can differ from the Estate inventory. Why this matters if you run Postgres at scale Database Hub doesn't replace your PostgreSQL expertise or native tools. It reduces the work of finding which servers need attention, alongside your other supported database engines including SQL Database and Cosmos DB. The Database Hub FAQ explains the access boundaries and how the experiences fit together. Get started Review the Database Hub documentation and PostgreSQL prerequisites, then: Enable the preview: Ask your Fabric administrator to enable Users can access the Database hub (preview) in Tenant settings. Check access: Use a Microsoft Entra identity with Reader or greater permissions on each subscription containing the servers you want to monitor. Start here: open Database Hub in Microsoft Fabric. Scope your estate: In Estate, choose View: PostgreSQL and filter to the subscriptions or resource groups you manage. Compare servers: In Performance, select PostgreSQL, choose the servers to compare, and set the same time range and aggregation. Access boundary: Resource visibility and shared views do not grant permission to query databases. Existing PostgreSQL authentication and network controls still apply. As your PostgreSQL estate grows, Database Hub brings the bigger picture into focus, helping you see where attention is needed and take a more informed next step. We're excited to bring Azure PostgreSQL into this shared experience. Explore the public preview in Microsoft Fabric and discover a simpler way to stay on top of your PostgreSQL estate.449Views3likes2Comments