This blog post assumes that you have already configured your Service Level Objectives. If you need a tutorial on that then please review http://blogs.technet.com/b/servicemanager/archive/2012/01/25/scsm-2012-service-level-management.aspx
Now assuming you have setup your Service Level Objectives, it is very easy to notify the users before the SLA is breached.
Let’s assume you have the following SLO created for Incident Resolution Time as shown in the screen shot below:

In the above setup
- if the Incident is not resolved in 30 minutes, it puts the SLA in the Breached State
- Note: Out of the box Metrics->Resolution Time is defined as difference between created date and resolved date)
- If the incident is not resolved within 20 minutes, it puts the SLA in the Warning State .
You can use this States on SLA to trigger notification.
This post shows how to configure the notification, when SLA is in the warning state, so we can notify the user of the imminent breach.
Step 1: Create a SLA Warning Notification Template
- Navigate to Administration -> Templates
- Click on Create E-Mail Template
- Enter the name and description as shown
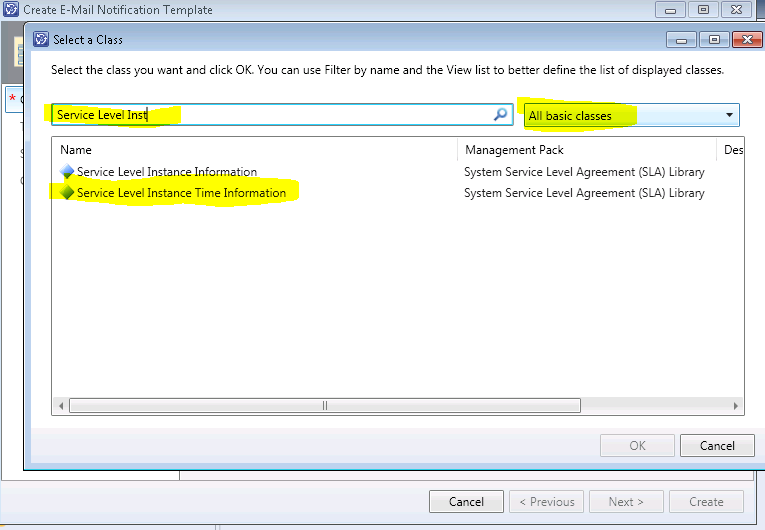
- For the Target Class Select Service Level Instance Time Information
- Note: After clicking browse on the class click on the drop down for All Basic Classes, search for “Service Level Instance Time Information” – as shown below in the screen shot


- Enter the Management Pack to store the template
- For Template Design you can enter the subject and message
- In addition you can add tokens that gives details about the Incident
- In the screenshot below I have shown how you can add the Incident ID


- Save the template
Step 2: Create Notification Subscription
In this step you will create a notification subscription that uses the template created above.
- Navigate to Administration ->Notifications->Subscriptions
- Click on Create Subscription
- Enter the Name and Description
- Choose the trigger condition as “When an object of the selected class is updated”
- For the Targeted Class use: Service Level Instance Time Information (same as the one in the Step above)

- You can select specific Group / Queues if it applies in your case but I’ll skip it here and go to the Additional criteria
- There are 2 tabs for the criteria – Changed From and Changed To
- For Changed From specify the Status does not equal Warning as shown below

- For Changed To specify Status equal Warning
- You can specify additional criteria in the Changed To, for the parent work item, in this case incident as shown below – for example if you want to only notify if the Incident was categorized for Enterprise Applications

https://msdnshared.blob.core.windows.net/media/TNBlogsFS/prod.evol.blogs.technet.com/CommunityServer.Blogs.Components.WeblogFiles/00/00/00/70/66/2553.SLAWarning_8.png
Note : The criteria on Parent Item in this case Incident can only be applied in the “Changed To” tab due to the system limitation.
- For Template chose the template created in Step 1.

- For the Recipient, you can add directly the users that are in your AD and in CMDB to be notified, but more interesting is the “ Related Recipient ”.
- This is new in 2012 release. You can specify the recipients in context, i.e. Notifying the user that incident is assigned to , or primary owner etc..
- You can navigate up to 4 levels, but in this case we need only one level up as shown below
- The screen may look a little too overwhelming when you try to add a “Related Recipient”. The reason being we have to navigate all the relationships and present only user relationships.


You are done
Here is the example of the notification threshold for the one that I created above.
