This blog post was written up by one of our Senior Escalation Engineers in Microsoft Support – Richard Usher. Thanks Richard!
=======
After installation and when you are trying to connect to a list of Service Manager Servers, the list may be empty:

Even when clicking the Registered Servers Icon, no servers are returned. This usually means that the Service Connection Point for the Service Manager Server did not get created in Active Directory during install.
A service publishes its specific details in Active Directory as a Service Connection Point (SCP) to enable clients of the service to locate and connect to the service. Service Manager utilises SCPs on the Service Manager Server and the Data Warehouse Server and normally creates these during install. Perhaps due to a permissions issue the SCP may fail to be created during install, this leaves the Admin UI unable to automatically locate the Server using the above window, although manually typing the Server name still works OK.
Using ADSIEdit you should see a SCP for the Service Manager Server.

If this was not created during install, then you can manually add this.
Manually Adding an SCP
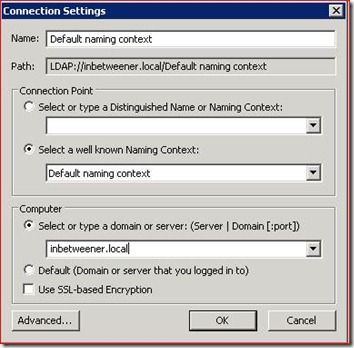
Start ADSI Edit and connect to the domain in which Service Manager was installed.
Drill down to the Service Manager Server in the Computers container.

Right-click it and select New, Object

Select the serviceConnectionPoint class from the list and click Next

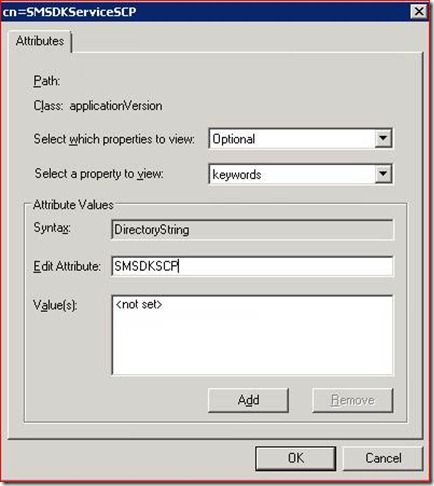
In the Create Object window set the Value to SMSDKServiceSCP and click Next

Click the More Attributes button

In the Select a property to view, drop-down list select keywords and set the value to SMSDKSCP. Click Add.
Change the Select a Property to view to serviceBindingInformation and add the fqdn of the Service Manager Server followed by :5724 and click Add

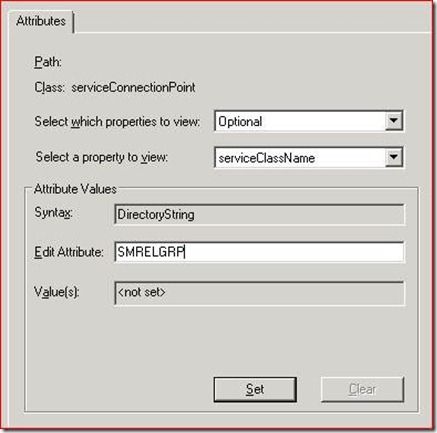
Change the Select a Property to view to serviceClassName and add the name of the Service Manager Management Group Name and click Set
Finally, change the Select a Property to view to serviceDNSName and add the fqdn of the Service Manager Server and click Set.

Click OK, and Click Finish.
Return to the Admin Console and attempt to connect. Click the Registered Servers icon again and now you should get the SM Server(s) you added, returned.

NB If you have also installed a DW Server, you may also be missing the appropriate SCP for that Server too. Check the quick ref below for those specific settings, Take care to specify the DW Management Group name for the serviceClassName, rather than the Service Manager Management Group, as well as the other attribute values.
Quick Ref for properties to add:
Service Manager Server
Object Name SMSDKServiceSCP
Attribute Value
serviceBindingInformation fqdn_of_SMServer:5724
serviceClassName ManagementGroupName
serviceDNSName fqdn_of_SMServer
keywords SMSDKSCP
Data Warehouse Server
Object Name SMSDKServiceSCP
Attribute Value
serviceBindingInformation fqdn_of_SMDWServer:5724
serviceClassName DWManagementGroupName
serviceDNSName fqdn_of_SMDWServer
keywords SCDWSDKSCP