First published on TECHNET on Mar 28, 2011
Hi, I am Nitin Bhat, Program Manager on the SCVMM team. Today I am going to provide you with an overview of how to integrate a load balancer into your SCVMM 2012 Beta environment for use in deploying VMM created services.
Introduction
In SCVMM 2012 Beta administrators can create IP pools that provide the capability to reserve IP addresses which could be allocated as Virtual IP Addresses for load balancers. This helps you to deploy, for example, a Web Tier Service using VMM2012 service creation feature behind a load balancer. Hence, whenever a service is deployed within SCVMM 2012 and one of the tiers is associated with a load balancer, the virtual IP address (VIP) is checked out automatically from the VIP reservation done within the IP Pool.
Load Balancer Configuration Provider
SCVMM 2012 beta supports different types of load balancer vendors. The interface to integrate these load balancers from different vendors is based on PowerShell and we have worked with different various vendors like F5 and Citrix to make the providers ready for SCVMM 2012 Beta.
You can obtain a list of supported load balancers from the SCVMM 2012 Public Beta connect site. https://connect.microsoft.com/site799/Downloads
Note: you will be directed by the document to correct location to download the provider. These providers are MSI based installers and will require installation on the SCVMM 2012 server.
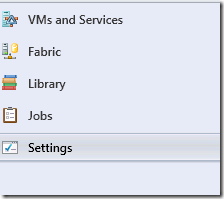
Once you have installed them, to check the status of the providers, select “Settings”
Under settings, click on the configuration Providers.

Once you have installed the configuration providers, this is how they would show up in the SCVMM 2012 Admin console.

In this example, both the providers for F5 and Citrix are depicted with details of version, publisher, model and manufacturer.
Adding specific Load Balancers to your environment
Go to the Fabric Workspace and under the networking node, you will find the Load Balancers Node.

Click on the ribbon button “Add Load Balancer”. A wizard pops up.
1. Here you will need to specify a Run as Account which is used to communicate with the load balancer instance.

2. Select the host group affinity for the load balancer.

3. Select the model and manufacturer

In the example here I have selected a F5 load balancer.
4. Specify the DNS address for the load balancer instance along with the port number


TechNet Library Content
Link to the TechNet Library with additional information on SCVMM 2012
http://go.microsoft.com/fwlink/?LinkID=209605
Have a great day!
Nitin Bhat, Program Manager, SCVMM
Updated Mar 11, 2019
Version 4.0System-Center-Team Microsoft
MicrosoftJoined February 15, 2019
System Center Blog
Follow this blog board to get notified when there's new activity


