~ Rupanter Chhabra | Microsoft Support Engineer
UPDATED 06/13/2016: Azure Automation has a new way to connect with Azure ARM resources and soon will also support a new way to connect with Azure Classic resources. See this article for more information: https://azure.microsoft.com/en-us/documentation/articles/automation-sec-configure-azure-runas-account/
=====
Hi everyone, we get a lot of questions regarding Azure Automation so I thought I’d take a few minutes and walk through an example of how to get everything set up, how to import a Runbook and then schedule a published workflow. In this particular example I’ll demonstrate how to configure Azure Automation to start/stop ARM virtual machines, however the general process can be used for a variety of tasks.
To get started, we first need to create an Azure Active Directory user that we can use for automation:
1. Select Active Directory :

This will forward you to Classic portal.
2. Click ADD USER :

3. Add the appropriate account information:

4. Next we need to select a role so that we’ll have the proper rights to access the virtual machines and the subscription.
NOTE Do not enable Multifactor Authentication.

Get your temporary password:


5. Now we need to allow this Azure Active Directory user to manage the Azure subscription:

6. We need to be sure that we change the temporary password so here are the steps:
- a. Start Internet Explorer. If you’re currently logged, be sure you log out of your current Azure Account.
- b. Log in to Azure by using the .onmicrosoft.com account that we created earlier (the Active Directory User account).
- c. You will now be prompted to change the user’s password.
7. Now we need to create the Azure Automation account. Start by selecting Automation Accounts :

Click on Add for a new Automation Account:

Add your Automation Account name and select Resource Group (New) to create a new one.


8. Next we need to add ASSETS :

Add the following:
- The Automation credential asset called AzureCredential that contains the Azure AD user credential (the .onmicrosoft.com account that we created earlier).
- The Automation variable asset called AzureSubscriptionId that contains the Azure subscription.
First we add Credential :


Then we need to add a Variable which contain our Azure Subscription ID:


Now we have all needed Assets.
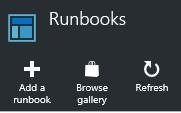
9. Next we need to select Runbooks and import the needed Runbooks from the gallery:

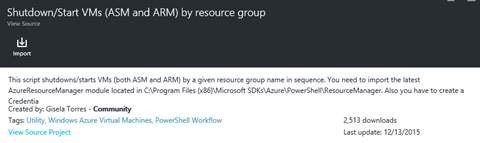
Select Start Azure ARM VMs:

Import:

Select Edit :

The script will look like this after removing the ASM code. This is the Runbook from the Gallery:
workflow Shutdown-Start-VMs-By-Resource-Group1
{
Param
(
[Parameter(Mandatory=$true)]
[String]
$AzureResourceGroup,
[Parameter(Mandatory=$true)]
[Boolean]
$Shutdown
)
#The name of the Automation Credential Asset this runbook will use to authenticate to Azure.
$CredentialAssetName = "AzureCredential";
#Get the credential with the above name from the Automation Asset store
$Cred = Get-AutomationPSCredential -Name $CredentialAssetName
if(!$Cred) {
Throw "Could not find an Automation Credential Asset named '${CredentialAssetName}'. Make sure you have created one in this Automation Account."
}
#Connect to your Azure Account
Add-AzureRmAccount -Credential $Cred
##Add-AzureAccount -Credential $Cred ##As we are doing it for ARM Virtual Machines.
if($Shutdown -eq $true){
Write-Output "Stopping VMs in '$($AzureResourceGroup)' resource group";
}
else{
Write-Output "Starting VMs in '$($AzureResourceGroup)' resource group";
}
#ARM VMs
Write-Output "ARM VMs:";
Get-AzureRmVM -ResourceGroupName $AzureResourceGroup | ForEach-Object {
if($Shutdown -eq $true){
Write-Output "Stopping '$($_.Name)' ...";
Stop-AzureRmVM -ResourceGroupName $AzureResourceGroup -Name $_.Name -Force;
}
else{
Write-Output "Starting '$($_.Name)' ...";
Start-AzureRmVM -ResourceGroupName $AzureResourceGroup -Name $_.Name;
}
};
}
10. After putting in values like AzureCredentials and SubscriptionID , test it in Test pane before publishing it.

11. Put in the values for the resource group and If you want to shut down or start the machine.

12. After our modifications are done, we need to publish the Runbook:

13. Now we need to schedule the Runbook:


At this point we are good to go with the schedule and Runbooks. Custom scripts can be tedious so I wanted to share another (simple) Runbook that will start and stop ARM VMs:
# Get AutomationPSCred Asset you use to do automation work
# This account behind the asset must be granted access to the ResourceGroup
$Cred = Get-AutomationPSCredential -Name "AzureCredentialname"
write-output $cred
# Specify Resource Group where ARM VMs were created
$vnetResourceGroup = "GroupName"
$AzureSubscriptionIDAssetName = 'SubscriptionID'
$SubID = Get-AutomationVariable -Name $AzureSubscriptionIDAssetName
Add-AzureRmAccount -Credential $Cred -SubscriptionId $SubID
#get the list of VMs in the resource group
$vmList = Get-AzureRmVM -ResourceGroupName $vnetResourceGroup
write-output $vmList
#To start the virtual machines
write-output "Starting VMs"
start-AzureRmVM -ResourceGroupName "GroupName" -Name "VMname"
#To stop the Virtual Machines
write-output "Stopping VMs"
stop-AzureRmVM -ResourceGroupName "GroupName" -Name "VMname"
I hope this post helps and provides enough information to setup Automation Accounts and schedule your Runbooks. Please let me know in the comments below if you have any feedback!
Rupanter Chhabra
, Support Engineer
Microsoft Enterprise Cloud Group