Exchange 2007 introduces a completely rewritten Setup GUI experience, designed to match the Administrative experience you'll get with Exchange 2007 Management Console once the installation is completed. Like the Exchange 2007 Management Console, the new Exchange Setup is written on top of the Windows PowerShell cmdlets and is therefore completely scriptable with one-liners!
In the rest of this blog post, I'll show you the new GUI and talk about the various options available throughout the setup process.
The Auto launch Screen
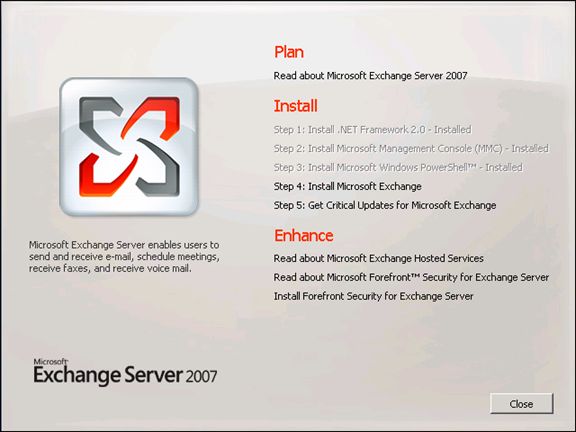
Above is the "auto launch" screen which is presented upon inserting the DVD disc. If this program does not run automatically, you can access it by double-clicking on setup.exe on the DVD. By clicking on the links, you can read about Exchange Server 2007, Hosted Services, Forefront Security, and install all the prerequisites before installing Exchange. Once installed, each prerequisite will indicate that it has been met by graying out the option and indicating "Installed" at the end of the text. Click on "Step 4: Install Microsoft Exchange" when you have completed installing the required programs.
Introduction
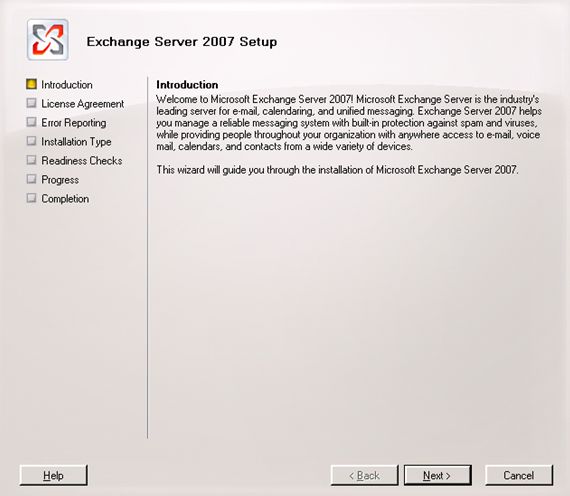
This is the introduction screen in Exchange Server 2007. Click "Help" to find out more, or click "Next" to continue. At any point of the installation, click on the "Help" button will bring up the relevant help section. Also, throughout the Setup wizard, the "Back" button can be used to go back to the previous page. The "Cancel" button can be used to abort the installation.
License Agreement
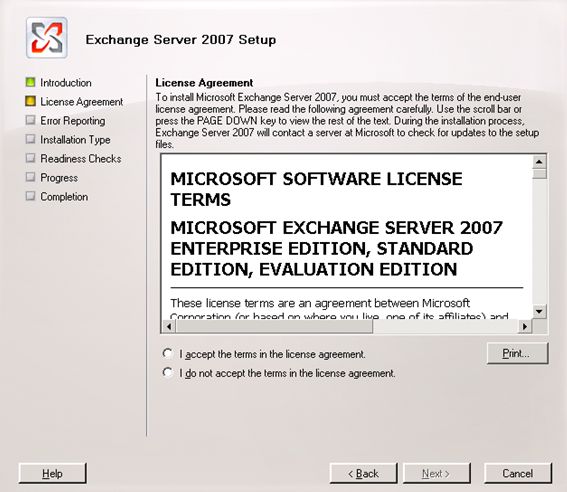
Please read through the end user license agreement (EULA). If you accept, please click "I accept the terms in the license agreement" and then click "Next". If you do not accept, you may click "Cancel" to exit.
Error Reporting

Error reporting will allow Exchange Server to send error information to Microsoft without user intervention. This will help us improve the quality of the software and also suggest solutions that may help with any errors encountered. Note that any personal information submitted in reports, if present, will not be used. If you would like to enable error reporting, please select "Yes"; otherwise click "No". To continue, click "Next".
Installation Type
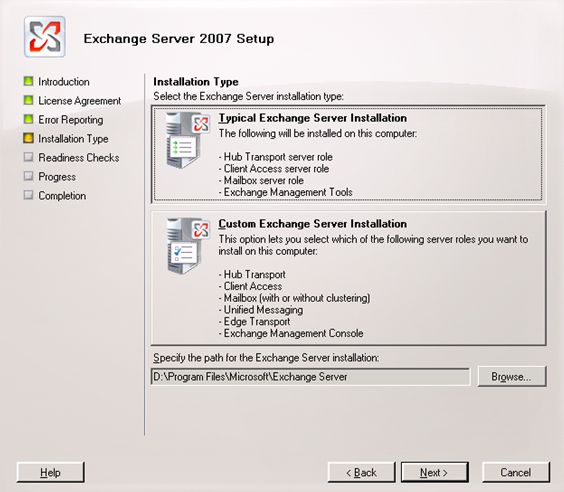
Please select the installation type by clicking on the "Typical Exchange Server Installation" or the "Custom Exchange Server Installation" button. A typical installation will include the Hub Transport, Client Access and Mailbox roles, and Management Tools. If "Custom" is selected, you will be presented with page to customize the Exchange Server roles to install. To change the default installation path for Exchange, click "Browse" and select a path. By default it will be installed in "[Program Files directory]\Microsoft\Exchange Server". To continue, click "Next".
Server Role Selection
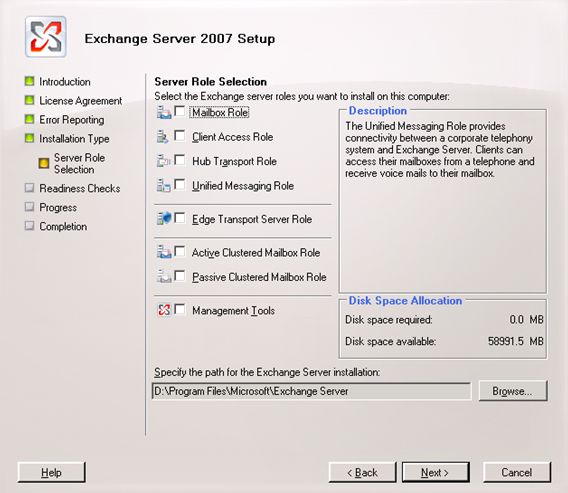
This page will be presented only if "Custom Exchange Server Installation" was selected from the last page. Click on the checkbox beside each role name to install the corresponding Exchange Server role. The Mailbox, Client Access, Hub Transport, and Unified Messaging server role can be installed together if desired. However, please note that each of the Edge Transport Server Role, Active Clustered Mailbox Role, and Passive Clustered Mailbox Role cannot be installed with another role on the same Exchange server. The Management Tools are installed with any selected role, or can be installed independently for an "Admin Only" configuration.
Exchange Organization
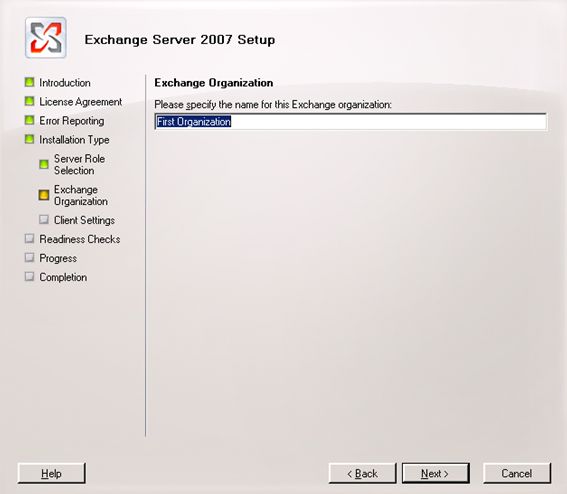
Please specify the name of the Exchange organization by typing in the text box. Note that this page is not presented if the Organization Name has already been specified by the first Exchange 2007 Server install or if you are installing in a preexisting Exchange 2003 organization.
Client Settings
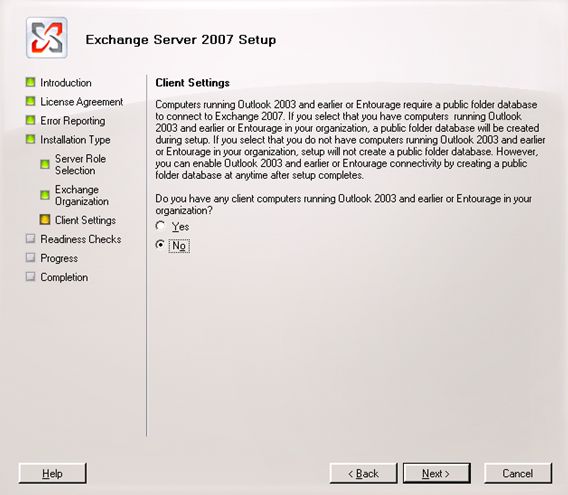
This page is presented if the Mailbox role has been selected for installation and if this will be the first one in the organization. It is asking if you want public folders enabled for any Outlook 2003 or Entourage clients in your organization. This is the same as the "/EnableLegacyOutlook" switch when running setup from the command line. Select "Yes" or "No", then click "Next" to continue.
Mail Flow Settings
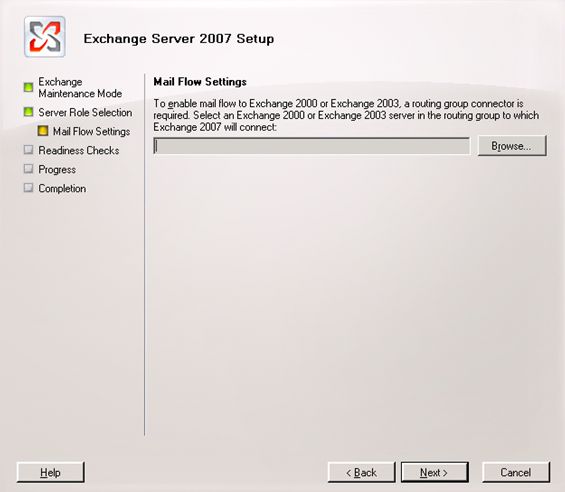
This page is presented if the Hub Transport has been selected for installation and if this will be the first install of the Exchange 2007 Hub Transport role in the organization. Please click "Browse" to select a legacy routing server (this server will be the target of the routing group connector, which will be automatically created).
Cluster Settings
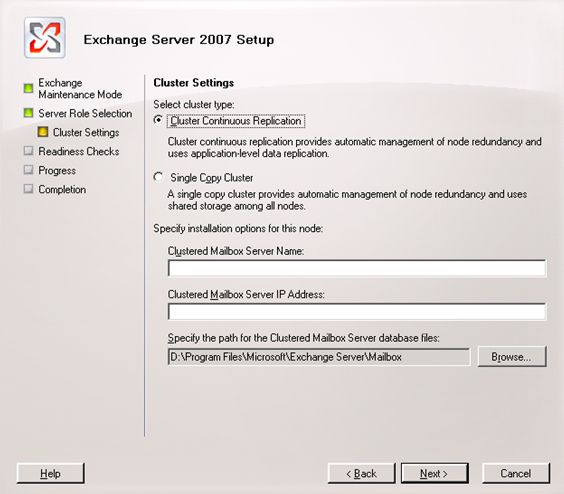
This page is presented if you are installing the Active Clustered Mailbox Role. For the cluster type radio button, please select either "Cluster Continuous Replication" (CCR) or "Single Copy Cluster" (SCC). The CMS (Clustered Mailbox Server, previously called an "Exchange Virtual Server" - EVS) name is the name which will be created for the Exchange resource group. Please do not use the Windows cluster name or the name of any node that is in the cluster. The IP Address is the static IP address for the CMS, and it needs to be unique to the CMS.
Readiness Checks
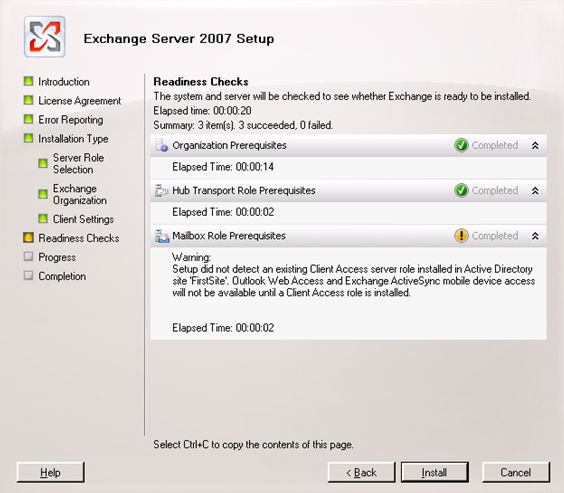
The installation prerequisites for each role are checked here. Please wait for the checks to complete then click "Install" to start the installation. If there are errors, a detailed error message will be given on how to resolve the problem. If there are warnings, please take note and take appropriate action. The same prerequisite may show up more than once across the server roles (such as a required software update), but fixing the problem will satisfy the prerequisite. Note: if you wish to collapse the information area under each role, click once on the double up arrows on the right. To expand the information, click on that arrow (double down arrows) again.
Completion
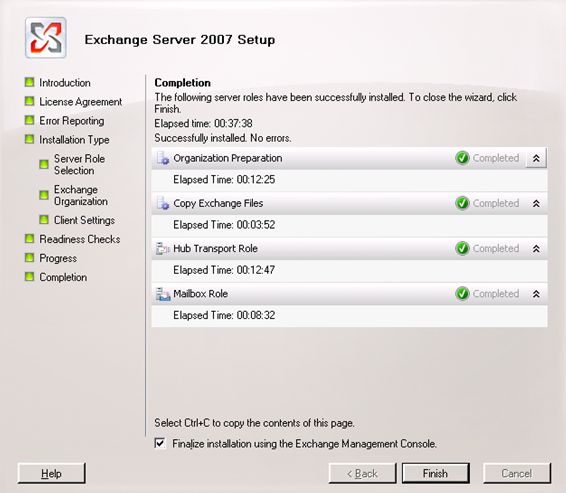
The installation progress is shown in this screen and will be updated as the installation continues to each step. The installation can take a number of minutes to complete while at this stage. After everything is done, click Finish and the Exchange Management Console will open if the checkbox at the bottom remains checked. After this point, the auto launch screen is again presented and you should continue to "Step 5: Get critical updates for Microsoft Exchange" to get the latest updates.
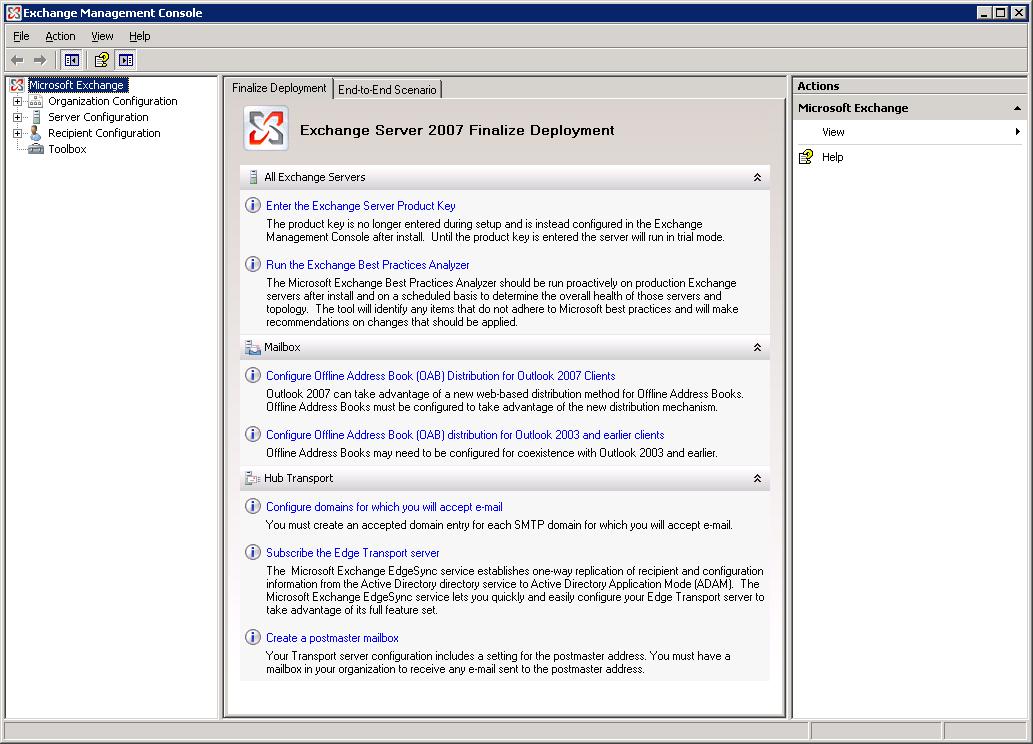
Exchange Management Console – Finalize Deployment
The screenshot below shows the Exchange Management Console after Exchange Server 2007 is installed. The console helps you start configuring the newly installed server using the Exchange Server 2007 Finalize Deployment and End-to-End scenario guidance. Please click on the thumbnail to see a bigger version!