One of the biggest benefits that Exchange Server 2013 provides is that it enables personal information sharing among different people in different organizations. Email itself is a great example of sharing because it allows people to easily share thoughts, images, and attachments. However, using federated sharing in Exchange 2013, you can share much more than just email. Federated sharing allows your users to share calendar free/busy information and additional calendar/contact information with people in different Exchange organizations.
This post covers the basic steps for using the Exchange Administration Center (EAC) to set up and configure federated sharing for an on-premises Exchange 2013 or an Office 365 Exchange Online organization. To learn more about federated sharing, see Understanding Federated Sharing.
Although the introduction of the EAC in Exchange 2013 significantly changed the administrative management experience, the basic process of configuring federated sharing hasn’t changed much from Exchange 2010. For those of you already familiar with how to configure federated sharing in Exchange 2010, here’s a quick rundown of the general configuration steps in Exchange 2013:
Configure a federation trust For your on-premises Exchange 2013 organization, you must configure a federation trust with the Microsoft Federation Gateway (MFG). The MFG, a free cloud-based service offered by Microsoft, acts as the trust broker between your on-premises Exchange 2013 organization and other federated Exchange 2010 and Exchange 2013 organizations. To learn more about federation trusts, see Understanding Federation.
If you’re configuring federated sharing for an Exchange Online-only organization as part of an Office 365 tenant, you don’t have to configure a federation trust. The federation trust with the Microsoft Federation Gateways is automatically configured when you sign up for the Office 365 service, and it’s automatically updated with any custom domains that you add to the Office 365 tenant.
Configure an organization relationship Organization relationships allow organizations to share calendar free/busy information between users in different Exchange organizations. Organization relationships are one-to-one relationships between two Exchange organizations, not a relationship between individual users in the Exchange organizations. To learn more about organization relationships, see Understanding Federated Sharing.
- Configure a sharing policy A sharing policy enables user-established, sharing of calendar and contact information with different types of external users. To learn more about sharing policies, see Understanding Federated Sharing.
Federated Sharing - EMC vs. EAC
If you’ve managed federated sharing for an Exchange 2010 organization, you’re probably very familiar with the Exchange Management Console (EMC). In the EMC, you’d use the Organization Configuration node to create and manage the federation trust and organization relationships for your on-premises Exchange organization. Shown below in Figure 1, each area had its own sub-node within the Organization Configuration node that allowed you to launch the configuration wizards and modify the configuration settings. For sharing policies, administrators would navigate to the Mailbox sub-node and use the Sharing Policies tab (in the result pane) and the New Sharing Policy wizard (in the action pane).
Although efficient and straight-forward, the management experience for federated sharing in the EMC didn’t offer an intuitive feel for the sequence in which the basic steps for configuring federated sharing needed to be performed, which increased the chances of misconfiguration.

Figure 1 Managing federation trust and organization relationships in the EMC
In Exchange 2013, the EAC provides a more functional and centralized method for setting up and managing federated sharing. In the EAC, the controls for managing federation trusts (for on-premises organizations only), organization relationships, and sharing policies for both on-premises and Exchange Online organizations are grouped together on the Sharing tab in the Organization feature area. The EAC also guides you through the federated sharing configuration process by explicitly asking you to enable and configure a federation trust with the MFG when you initially access the Sharing tab (see Figure 2).
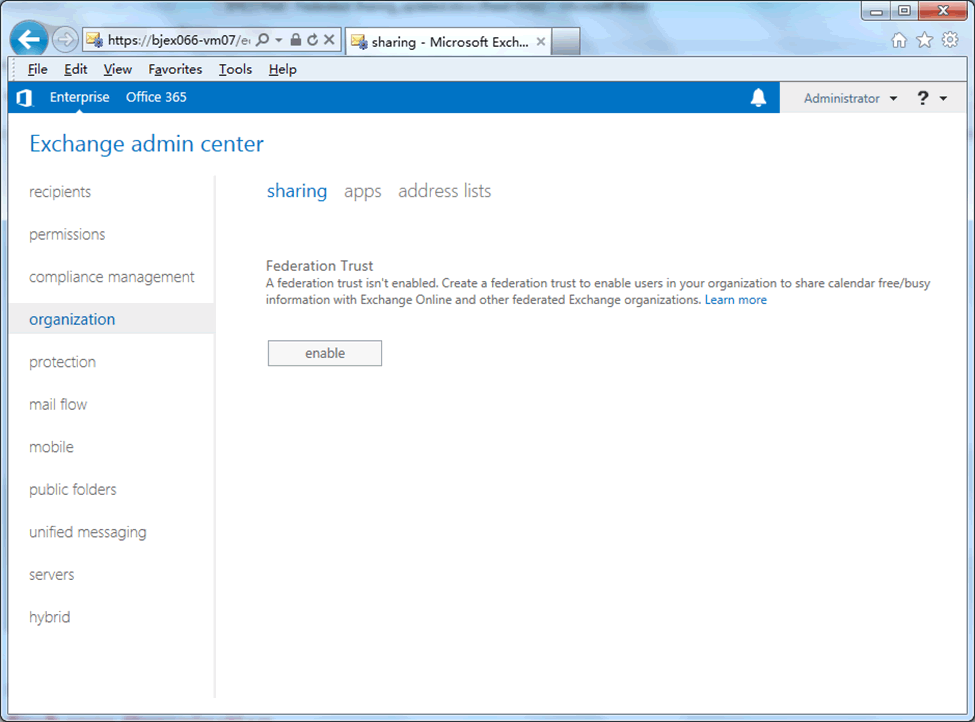
Figure 2 EAC federated sharing entry point
Creating and Configuring a Federation Trust for an On-Premises Exchange Organization
Creating a Federation Trust
As shown in Figure 2, the first step when enabling federated sharing in an on-premises Exchange organization is to create of a federation trust. When you click the enable button, the EAC creates the federation trust object and guides you through the process of configuring the federation trust.
Important Creating and configuring a federation trust is skipped when setting up federated sharing for Exchange Online-only organizations. The federation trust with the Microsoft Federation Gateways is automatically configured when you sign up for the Office 365 service, and it’s automatically updated with any custom domains that you add to the Office 365 tenant.
When you click Enable, the EAC:
- Creates a self-signed certificate for the federation trust.< /li>
- Uses the New-FederationTrust cmdlet to create the federation trust using this self-signed certificate.
After clicking Enable, you’ll see a progress bar that displays the status of the federation trust creation process. When complete, a confirmation window will notify you that the federation trust has been enabled successfully.
After the federation trust object has been created, the EAC will display the Organization Sharing and Individual Sharing management sections on the Sharing tab, as shown in Figure 4. Because a federation trust is a requirement for most federated sharing features, the EAC always starts the configuration process by enabling and creating a federation trust object. However, there are still some federation trust configuration items that must be completed before the federation trust is complete. If you want to configure an organization relationship before completely enabling the federation trust, you’ll need to use the Exchange Management Shell to complete the process. However, to enable all the federated sharing features in your organization, we strongly recommend that you first enable and configure the federation trust completely before you configure an organization relationship and a sharing policy.
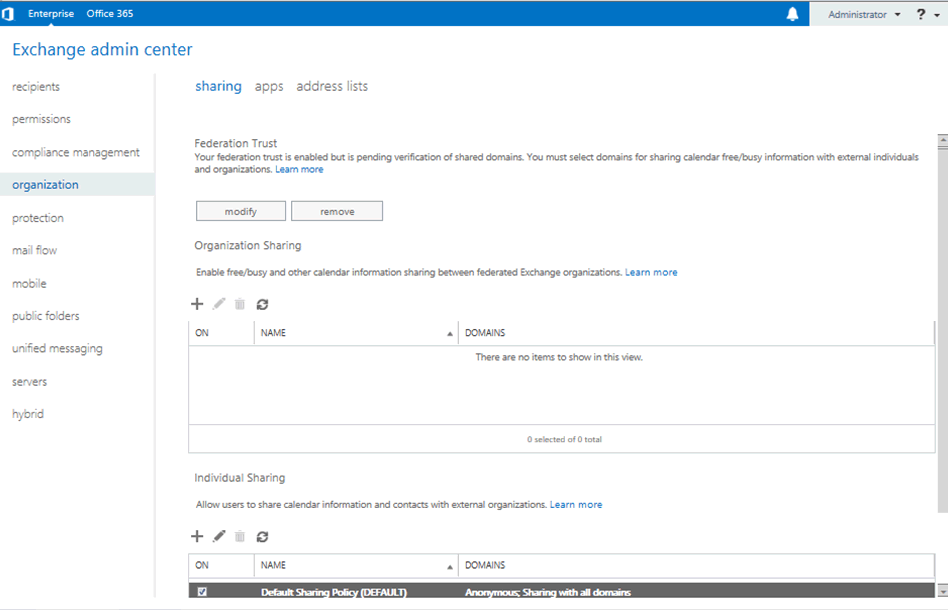
Figure 3 Organization Sharing and Individual Sharing sections in the EAC
Configuring the federation trust
In the Federation Trust section of the Sharing tab, click the modify button to open the Sharing-Enabled Domains page, which walks you through the steps for configuring federated domains for the federation trust.
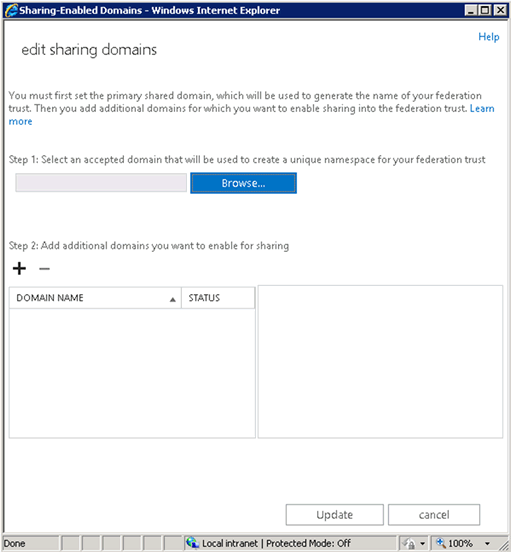
Figure 4 Sharing-Enabled Domains page
One of the great improvements provided by the EAC federated sharing management experience is that it helps you identify the correct sequence for each action. As you can see in Figure 5, there are two steps listed:
- Select an accepted domain First, you’ll need to add an accepted domain to be used as the primary shared domain for the federation trust. The term primary shared domain is new and introduced in the EAC to help you better understand the correct sequence for configuring the federation trust. The primary shared domain is the unique account namespace used as the organization identifier (OrgID) for the federation trust and will have the pre-defined string FYDIBOHF25SPDLT appended to the primary shared domain as the account namespace. For example, if you specify the accepted domain contoso.com as the primary shared domain for your federation trust, the FYDIBOHF25SPDLT.contoso.com account namespace will be automatically created as the OrgID for the federation trust in your Exchange organization.
- Add additional domains you want to enable for sharing Use this section to add additional accepted domains as federated domains for the federation trust.
Step 1: Select the primary shared domain
Click Browse to select an accepted domain to be the primary domain you want to enable for sharing. Typically, this is the primary SMTP domain for your organization. Next, you’ll need to prove your ownership of this domain by adding a TXT record for the primary shared domain on your public DNS server. The EAC automatically generates a validation string for the TXT record after you’ve selected an accepted domain for the primary shared domain.
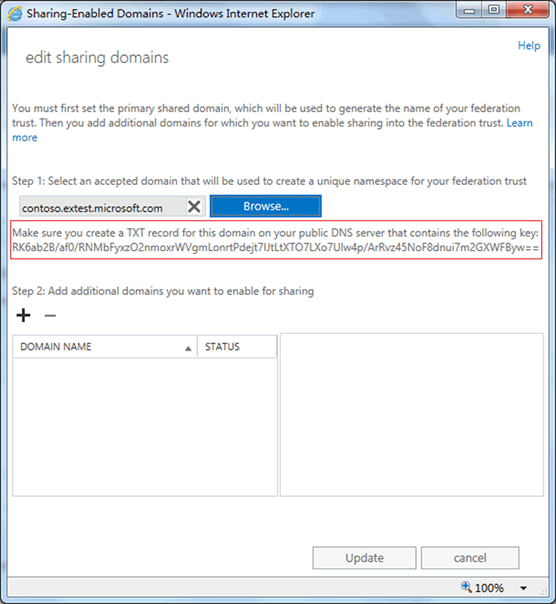
Figure 5 The string you must use for creating a TXT record to prove domain ownership
After the TXT record has propagated on your public DNS, click Update to submit a request to the Microsoft Federation Gateway to add this domain as your primary shared domain. When you click Update, the EAC uses the Set-FederatedOrganizationIdentifier cmdlet to create the account namespace for the federation trust. The full command:
Set-FederatedOrganizationIdentifier –AccountNamespace <primary shared domain that you selected>
Important In Exchange 2013, as well as in Exchange 2010 SP2, you don’t need to specify a domain starting with exchangedelegation as an account namespace. You can use any accepted domain to be your primary shared domain without worrying about the underlying detail of the account namespace.
When you open the Sharing-Enabled Domains page again, you’ll notice that the primary shared domain and the account namespace has been set correctly.
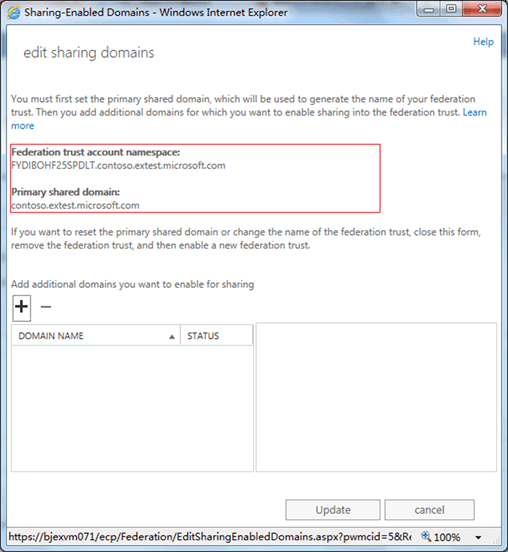
Figure 6 Account namespace and primary shared domain are ready.
Step 2: Add additional domains you want to enable for sharing
If needed, your next step would be to add additional domains to the federation trust as federated domains. If you’re running a small company (and only use a single domain for user email addresses), you may only need to enable sharing for your primary shared domain. However, this may not be the case for larger businesses where you may have multiple segments in your organization and need to enable sharing for different subdomains.
If you need to add additional domains for sharing, click the + button to open the Select Accepted Domains page and select one or more domains you want to federate. Next, you’ll need to prove domain ownership for the domain(s) you’ve selected and add a TXT record for each additional domain to your public DNS. As in Step 1 above, Exchange automatically generates validation strings for the additional domains and displays them in the right pane, next to the list of additional domains.

Figure 7 EAC displays the string you must use for creating TXT records for each additional federated domain
After the TXT record has propagated in your public DNS, click Update to submit your request to the Microsoft Federation Gateway to add the domain(s) as additional federated domain(s). When you click Update, the EAC uses the Add-FederatedDomain cmdlet and the additional domain(s) to update the federation trust. The full command:
Add-FederatedDomain –DomainName <your additional shared domain(s)>
In terms of free/busy sharing and calendar/contact sharing, these additional domains will behave exactly the same as primary shared domain.
When you open the Sharing-Enabled Domains page again, you’ll see that these additional shared domains have been added to federation trust successfully.
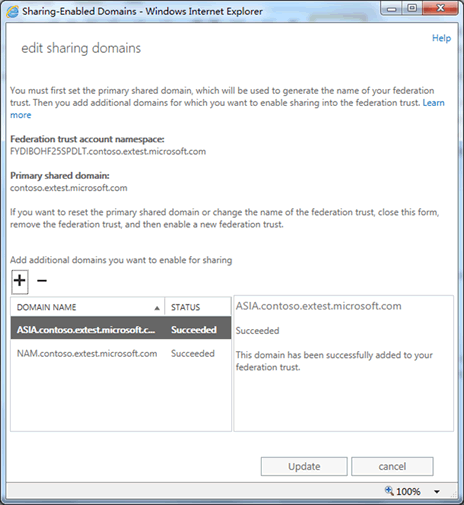
Figure 8 Additional federated domain has been added successfully
You’ve now configured your federation trust successfully! If you want to enable calendar free/busy and additional calendar/contact sharing, you’ll also need to configure an organization relationship and sharing policy in your organization.
Configuring an Organization Relationship for On-Premises or Exchange Online Organizations
By creating and configuring an organization relationship, you’ll be able to enable organizational-level free/busy sharing between your organization and another federated Exchange organization. Users in both organizations will be able to see and share calendar free/busy information with each other in accordance with the organization relationship settings. To create and configure an organization relationship, navigate to Organization > Sharing > Organization Sharing in either the Enterprise or Office 365 areas of the EAC.
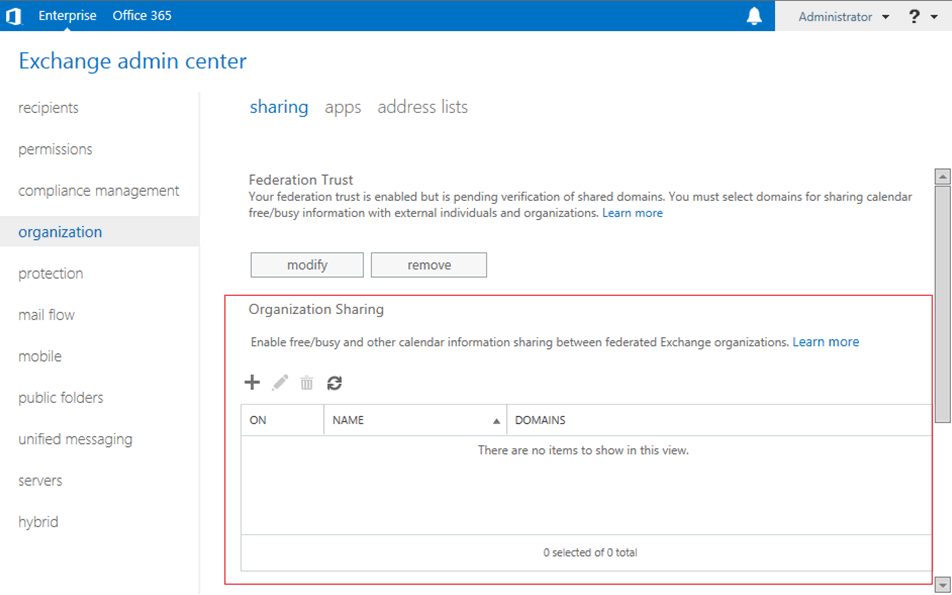
Figure 9 Organization Sharing in the Enterprise version of the EAC
To create and configure an organization relationship, click the + button to open the Organization Relationship page and enter the following settings:
- Relationship name The friendly name for the organization relationship.
- Domains to share with The domains for external federated Exchange organizations you want to enable sharing with in your organization.
- Calendar free/busy sharing level The level of calendar free/busy sharing you want to allow users in external Exchange organizations to see for you users.
- Who should share calendar free/busy information The users or groups in your organization that will share calendar free/busy information with external Exchange organizations.

Figure 10 Creating an Organization Relationship
If you need to configure other settings of an organization relationship, such as enabling or disabling MailTips or mailbox moves, you’ll need to use the OrganizationRelationship cmdlets in the Shell.
Configuring a Sharing Policy for On-Premises or Exchange Online Organizations
Sharing policies enable user-established, people-to-people sharing of both calendar and contact information with different types of external users. Sharing polices are assigned to user mailboxes and allow your users to self-manage and share both their free/busy and contact information (including the Calendar and Contacts folders) with recipients in other external federated organizations. For recipients that aren't in an external federated organization or are in non-Exchange organizations, sharing policies also allow people-to-people sharing of their calendar information with anonymous users through the use of Internet Calendar Publishing.
To create and configure sharing policies, navigate to Organization > Sharing > Individual Sharing in either the Enterprise or Office 365 areas of the EAC.
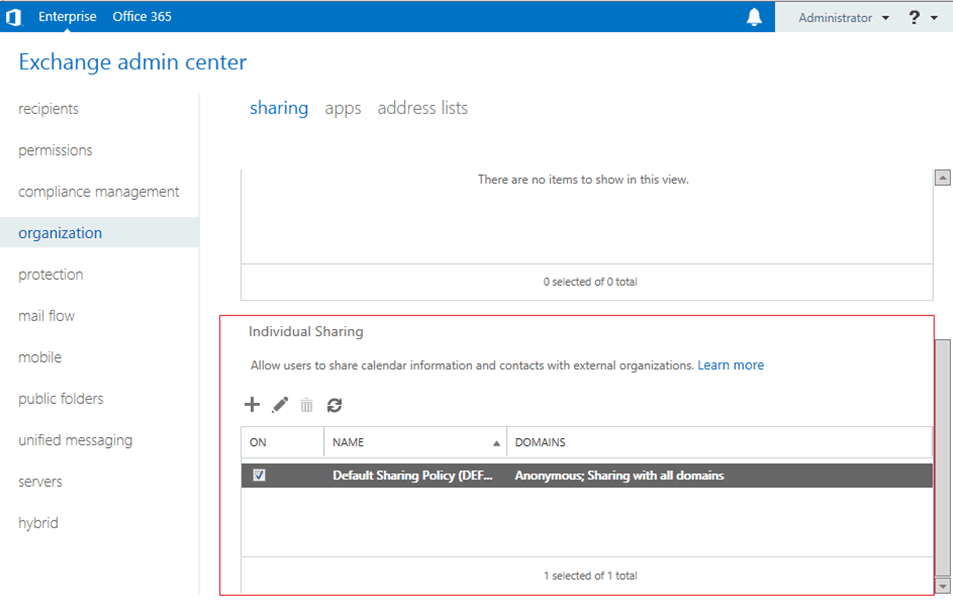
Figure 11 Individual Sharing in the Enterprise version of the EAC
To create and configure a sharing policy, click the + button to open the Sharing Policy page. You’ll need to define the following settings:
- Policy name The friendly name for the sharing policy.
- Define sharing rules for this policy Rules that apply to this sharing policy, including the domains you want to share with, the level of sharing for calendar information, and if you want to share your Contacts folder.
- Default sharing policy Whether this policy is the default sharing policy for your organization.

Figure 12 New Sharing Policy page in EAC
To create and configure a sharing rule for the sharing policy, click + to open the Sharing Rule page. You’ll need to define the following settings:
- Who to share calendar/contact information with
- What information you want to share
- Whether to share your Contacts folder

Figure 13 Sharing Rule page in EAC
Each rule defined in the policy will map to an individual-to-individual sharing relationship. A user can initiate multiple sharing relationships with different individuals under the control of the sharing policy. For example, you create these two rules in a sharing policy:
- Share calendar free/busy with contoso.com
- Share calendar free/busy + subject + location + Contacts folder with fabrikam.com
If you assign this sharing policy to a user named Jim, Jim would be able to share his calendar and contact information differently for the contoso.com and fabrikam.com organizations.
We hope that you’re as excited as we are about the new federated sharing experience in Exchange 2013 and the EAC. If you’d like to know more details, see Federated Sharing.
Elber Ren and Robert Mazzoli