Guest blog by Julian Chow Microsoft Student Partner at Imperial College London.
Introduction:
I am Julian, a first year student studying Computing at Imperial College London. I was born and raised in Hong Kong, where I developed a great enthusiasm for football, the outdoors, and technology.

Using Custom Vision to easily build and train image classifiers
Custom Vision is a Microsoft cognitive service that allows you to easily create an image classifier – and all you need are a few labelled images to start. The end result is a tool that can put a label on any image you give it, while also continuously improving its model with each use.
Visual Intelligence Made Easy
Easily customize your own state-of-the-art computer vision models that fit perfectly with your unique use case. Just bring a few examples of labelled images and let Custom Vision do the hard work.
Setting up Custom Vision
To begin using this service, sign into your Microsoft account at https://customvision.ai – after which you will be greeted with the following screen.

Clicking on ‘New Project’ opens up a menu to enter a name and description for your project. To demonstrate Custom Vision, I will adapt one of the assignments I had this year where I was researching machine learning within home robotics, creating a new project entitled ‘Animals’ that will classify images to the tag of ‘dog’ or ‘cat’. For certain projects, you can even optimise your model through the ‘Domains’ selection, but this example will use the default ‘General’ option.
Once inside the project, click ‘Add images’ to start training your classifier. You can then add pictures from your computer by clicking ‘Browse local files’. Microsoft recommends adding around 30 images for each tag that you are going to use, ideally from a variety of angles, backgrounds and lighting to make the results more generalisable.

Once you have selected your pictures, you can specify the tags that these images refer to, pressing ‘+’ between each one. To finish the process, click ‘Upload [number] images’ followed by ‘Done’. This returns you to the ‘Training Images’ workspace, which should now be full of your images – in my case, 30 pictures of dogs tagged as ‘dog’. You can add more images by clicking ‘Add images’ again, which I will now do with 30 pictures of cats.
Training the model
When you have added your pictures, you can click the green ‘Train’ button at the top of the page to train your classifier. This returns two values that can be used to evaluate your classifier, ‘Precision’ and ‘Recall’. This is calculated through automated testing with k-fold cross-validation . Precision refers to the percentage that the model got correct from the given set of training images, while recall reflects the accuracy of correctly classifying each tag.

Evaluating and testing the classifier
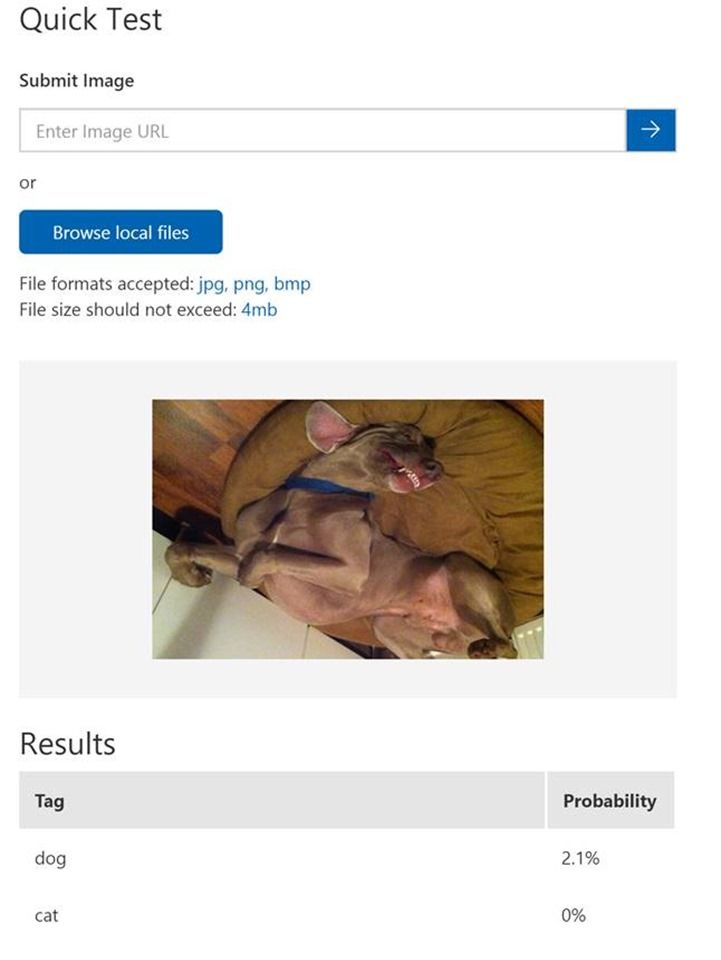
To quickly test your model in the web app, you can click ‘Quick Test’ on the top bar to test an image on your newest iteration. As you can see, the model is able to recognise similar pictures of dogs and cats.


However, it is less likely to recognise a picture of a dog or cat in a different style as the ones in the training data, as seen in this example of an upside down dog.
As with all types of machine learning, it is important to include all these different variations in training – the more quantity the program has to learn from the better. More and more pictures can be added to the model by simply going back to ‘Add images’, which will continually improve results with each iteration.
Using Custom Vision through the REST API
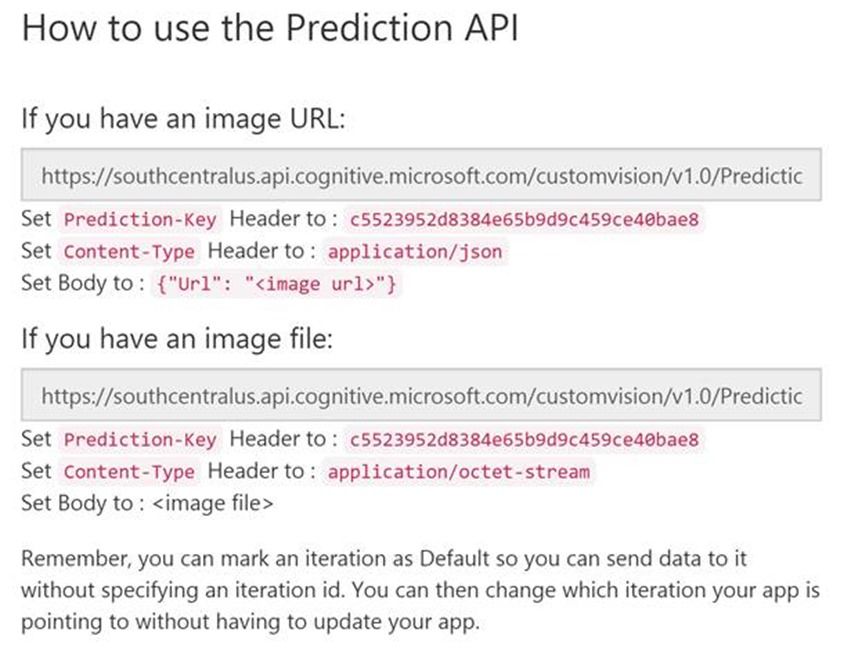
To utilise Custom Vision within your own program, you can use the provided REST API to make HTTP requests to the service. To select which iteration of the model to use as the endpoint URL in your program, go to the ‘Performance’ tab along the top and select which iteration to use – you can also click on ‘Make default’ to send data to the URL without specifying the iteration ID in the URL itself. When you have selected the intended iteration, click on ‘Prediction URL’ to get the URL that you need to interact with the model, which depends on whether your images are local or online. From there you can set the ‘Prediction-Key’ and ‘Content-Type’ headers of your request as indicated, along with the image location in ‘Body’. Executing the request now returns the results in a format for you to parse into your program.
Resources
Put intelligence APIs to workMicrosoft Cognitive Services let you build apps with powerful algorithms using just a few lines of code. They work across devices and platforms such as iOS, Android and Windows, keep improving and are easy to set up.
https://azure.microsoft.com/en-gb/services/cognitive-services/
Conclusion
The potential of Custom Vision is endless; allowing you the opportunity to create your own custom computer vision model with ease. Whether you are comparing animals, cars, food, or buildings, you are able produce a model that is always improving and learning. Abstracting the complications of machine learning and artificial intelligence, the service is incredibly accessible - making the process of building, deploying, testing, and improving the tool both fast and simple.
 Microsoft