First published on MSDN on Jul 29, 2017
Guest blog by Jan Helmich Microsoft Student Partner at the University of Cambridge

Let me introduce myself. My name is Jan Helmich and I am currently a computer science student at the University of Cambridge. During the last moths I have found more and more interest into the areas of automation, IoT and machine learning I just finished my first year of Computer Science studies. There are plenty of things and areas in Computer Science I am interested in, especially in the direction of automation and cyber physical systems. Apart from that, I am heavily involved in University Rowing and, whenever I have time I enjoy doing social work with children in my hometown in Germany
After doing a bit of research about the general Microsoft IoT strategy and the Azure Platform, I dived straight into the task with one of my long-time favourite projects of automating my garden (because let’s be honest here, I am lazy and always forget to water my plants). At this point I could not really use the hardware as I am stuck in Cambridge for a while, but I instead decided to just simulate the devices for the moment. This does not cause any issues because apart from getting useless sensor data, it still allows me to utilize all aspects and features of the Azure IOT Hub and SDKs.

But now, first things first: The beginning of all things is creating both a Microsoft Azure account and (for this project) at least one IOT Hub. Although this was pretty straight forward in my eyes, under https://docs.microsoft.com/en-gb/azure/iot-hub you find loads of useful documentations and examples, including the get-started guide for several different programming languages. In my case, I am using Java for all the coding that follows.

A few button clicks later, I created myself a completely new, nice S1 IoT Hub that allows me to receive up to 400.000 messages per day (I know, a bit overkill). When I first did it, I was positively surprised about how easy it was to set up such a big entity and how fast it was, until I could access it. I could go on praising the ease of use of the Azure platform, but let us instead just dive into creating our first (simulated) devices.
To make things easier later, it is useful to write down the essential information about the IOT-Hub like Hostname, Primary Key Connection String, Event Hub Name and its compatible Endpoint.
· A device that simulates the sensors in the plant pots and delivers information about temperature, ground moisture, and any other values you might want (I will stick with these two for the ease of use now)
· A device or service that analyses the data and, if necessary, triggers the command to water certain plants
· A device that can receive the watering instructions and executes the appropriately. It should also update the information when the plants were last watered to keep track of the water usage.
One could start getting creative with approaches of machine learning for water need, optical ripeness recognition, predictive error avoidance etc. but these are all optional, further expansions that might or might not come once I have both a little bit more time and more experience with the IoT SDK.
Now that we have a fully functioning IOT-Hub, we still need to create a device identity, pretty much the Internet of Things equivalent of creating a new user for your computer, just more independent and in the cloud. This will allow you to uniquely identify and communicate with the participating devices in the network later, so you must have one identity for each device. There are ways to automatically create the Identities, but as we only have a very small test setup, I am using the Azure Device Explorer (which can either be used directly on the Azure Platform or quickly installed as a terminal tool. Further instructions can be found here https://docs.microsoft.com/en-us/azure/iot-hub/iot-hub-node-node-device-management-get-started ).

The most important line to make a note of here is the connection string line, which will be used to establish the connection from your device to the Hub later. I called my test device garden_1 which will be used to both send the (simulated) sensor data as well as receive watering instructions from the cloud.
Now that we’ve got our identities ready for running, it is time to get our hands dirty with a simulated device that produces some sensor data and allows us to simulate some simple control instructions. So, how do we do this? First of all we must get our self familiar with Maven, as this facilitates the dependency organisation a lot. And when I say this, I mean it. As we are forced to work with the Microsoft Azure IOT SDKs, it would make a lot of effort to manually include all of them for every single little project. Once you have Maven set up and running (Find tips on the Apache project site: https://maven.apache.org/install.html ), you only need to download the correct SDKs from The Central Repository ( http://search.maven.org/ ) and quickly install it (Guide for installing 3 rd Party JARs in Maven https://maven.apache.org/guides/mini/guide-3rd-party-jars-local.html ).
The basic framework for our device identity can once more be found on the IoT get-started guide provided by Microsoft, although I had to add a couple of features and combine it with the Device Management project to add the required control functionality via direct messages. The most important lines of code which make the project work are
which establishes a connection to my IoT-Hub, which can then be used by my class Message Sender to Pass the simulated sensor values over to the cloud. This happens in form of a String, created from a class called TelemetryDataPoint that stores data as a semi-structured Gson Object.
The other half of the device functionality can be found in the DeviceManagement Package which handles and Cloud to Device (C2D) messages. Although there are many more possibilities to implement, like the DeviceTwin feature that allows you to store status information about devices in the cloud, due to the time restriction set I only properly implemented two DirectMethod calls. The supported features here are
· Reboot: Simulates a restart of the device
· Water: Instructs the device to water the plants, which now only brings up the simulated humidity back to 100%
In both cases the system starts a new threat to execute the commands which is not particularly realistic but allows to keep up a constant stream of sensor value messages.
The controller provides the counterpart to the (simulated) device on the other side. Although we would have the option to entirely process the IoT-Hub messages in the cloud, I decided to handle this case in form of another Java Project. The creation of the project follows the exact same procedure as the simulated device despite that we need the Eventhubs SDK instead of the Device Client .
Overall I structured the project into three parts. The main class which is responsible for establishing the EventHubs connection to our IoT-Hub and receiving all messages (with a built in filter to only use the ones that are received while the device is only. This works for the testing but should be changed in a professional environment as you might lose data otherwise), the Analyser, which is taking the incoming messages apart and looks for humidity values under 25% (This is again only a value chosen arbitrarily for the demonstration. In the real life environment, these values must be normalised and adjusted to all kinds of data like type of soil, plant species and state of the sensor) and a DeviceMessenger which automatically triggers the watering if such a value is found.
The essential code for the Device messenger is found in the lines
methodClient = DeviceMethod. createFromConnectionString (iotHubConnectionString);
System. out .println("Invoke " + methodName + " direct method");
MethodResult result = methodClient.invoke(deviceId, methodName, responseTimeout, connectTimeout, null);
which establish the DeviceMethod Connection and invoke the requested method. This in our case is Water.
The Result
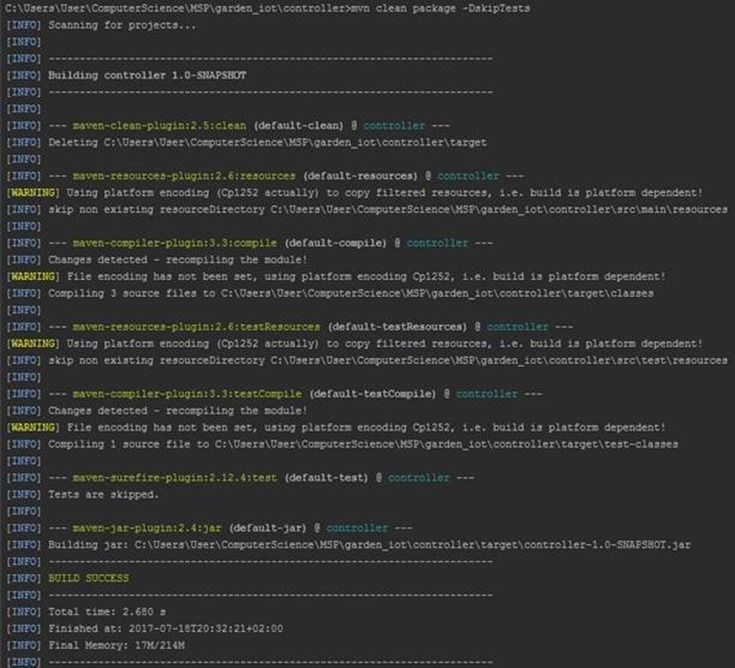
Once all the coding is done (look at all the files in the git repository for more details) we are ready to build our two projects and run them. This is done with the commands
mvn package clean -DskipTests
to build and to run the final project. If you changed your package id or renamed the App class, you certainly need to adjust those
mvn exec:java -Dexec.mainClass=”com.mycompany.app.App”
Once you have both Apps up and Running at the same time, you should see the behaviour as in the attached video. The Temperature is behaving more or less randomly (although due to my choice of variance slowly rising over time) and the humidity is going down until it is blocked at 15%. Once the humidity reaches 25%, the controller will trigger the plant watering command and the humidity will go back to 100%.
Video demonstration of both devices, including the watering command.
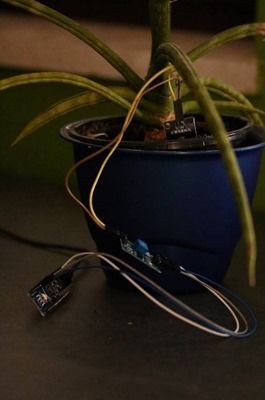
Now that the foundations of my IoT Garden management system are realised, I have big plans. Not only have I already started hooking an Arduino up to a couple of sensors to deliver me some real world data, I am also planning to annoy my mother (or help her, depending on who you ask) by installing my system on our rooftop strawberry garden. As she is a professional gardener, I already have someone who can help me calibrate my devices properly. Once this is done, my plan is to integrate a few more commands into the set which the device can receive, including a manual configuration of the measurement intervals, hook up a pump controller and run a few machine learning algorithms to (hopefully) automatically improve the water usage, depending on the weather conditions given. In that case I could even reduce the amount of sensors needed as I can estimate the water which is needed.
You can check out my source code at https://github.com/darcrey/GardenIoT
As I said earlier, the options are nearly endless, and the time is strictly limited. But the advantages I found using the Microsoft Azure platform, not only for the IoT aspects but also in general are quite shocking. It is fast, easy to learn and very powerful, and although in the long term, it costs you a few bugs, in my opinion the advantages will outplay this, especially if you scale your solutions to an industrial scale where the savings and improvement in productivity can be quite enormous. If you want to learn more about their general strategy regarding the Internet of Things, including the advantages from a more informal perspective and some real world examples, make sure to read the articles on https://www.microsoft.com/en-us/internet-of-things/ but to be honest, I personally think that the best way to understand what you can do with Microsoft Azure IoT and how to do it, is to just give it a try!
Tutorials and Online Resources http://catalog.azureiotsuite.com/getstarted
Using the Azure Online Simulator http://channel9.msdn.com/coding4fun/blog/Raspberry-Pi-Online-Simulator-and-Azure-IoT
Microsoft Virtual Academy Online Learning http://mva.microsoft.com
Guest blog by Jan Helmich Microsoft Student Partner at the University of Cambridge
Let me introduce myself. My name is Jan Helmich and I am currently a computer science student at the University of Cambridge. During the last moths I have found more and more interest into the areas of automation, IoT and machine learning I just finished my first year of Computer Science studies. There are plenty of things and areas in Computer Science I am interested in, especially in the direction of automation and cyber physical systems. Apart from that, I am heavily involved in University Rowing and, whenever I have time I enjoy doing social work with children in my hometown in Germany
Azure IoT
After doing a bit of research about the general Microsoft IoT strategy and the Azure Platform, I dived straight into the task with one of my long-time favourite projects of automating my garden (because let’s be honest here, I am lazy and always forget to water my plants). At this point I could not really use the hardware as I am stuck in Cambridge for a while, but I instead decided to just simulate the devices for the moment. This does not cause any issues because apart from getting useless sensor data, it still allows me to utilize all aspects and features of the Azure IOT Hub and SDKs.
The IoT Hub
But now, first things first: The beginning of all things is creating both a Microsoft Azure account and (for this project) at least one IOT Hub. Although this was pretty straight forward in my eyes, under https://docs.microsoft.com/en-gb/azure/iot-hub you find loads of useful documentations and examples, including the get-started guide for several different programming languages. In my case, I am using Java for all the coding that follows.
A few button clicks later, I created myself a completely new, nice S1 IoT Hub that allows me to receive up to 400.000 messages per day (I know, a bit overkill). When I first did it, I was positively surprised about how easy it was to set up such a big entity and how fast it was, until I could access it. I could go on praising the ease of use of the Azure platform, but let us instead just dive into creating our first (simulated) devices.
To make things easier later, it is useful to write down the essential information about the IOT-Hub like Hostname, Primary Key Connection String, Event Hub Name and its compatible Endpoint.
A quick recap about the things we need for the nice little garden setup:
· A device that simulates the sensors in the plant pots and delivers information about temperature, ground moisture, and any other values you might want (I will stick with these two for the ease of use now)
· A device or service that analyses the data and, if necessary, triggers the command to water certain plants
· A device that can receive the watering instructions and executes the appropriately. It should also update the information when the plants were last watered to keep track of the water usage.
One could start getting creative with approaches of machine learning for water need, optical ripeness recognition, predictive error avoidance etc. but these are all optional, further expansions that might or might not come once I have both a little bit more time and more experience with the IoT SDK.
The Device Identity
Now that we have a fully functioning IOT-Hub, we still need to create a device identity, pretty much the Internet of Things equivalent of creating a new user for your computer, just more independent and in the cloud. This will allow you to uniquely identify and communicate with the participating devices in the network later, so you must have one identity for each device. There are ways to automatically create the Identities, but as we only have a very small test setup, I am using the Azure Device Explorer (which can either be used directly on the Azure Platform or quickly installed as a terminal tool. Further instructions can be found here https://docs.microsoft.com/en-us/azure/iot-hub/iot-hub-node-node-device-management-get-started ).
The most important line to make a note of here is the connection string line, which will be used to establish the connection from your device to the Hub later. I called my test device garden_1 which will be used to both send the (simulated) sensor data as well as receive watering instructions from the cloud.
The Simulated Device
Now that we’ve got our identities ready for running, it is time to get our hands dirty with a simulated device that produces some sensor data and allows us to simulate some simple control instructions. So, how do we do this? First of all we must get our self familiar with Maven, as this facilitates the dependency organisation a lot. And when I say this, I mean it. As we are forced to work with the Microsoft Azure IOT SDKs, it would make a lot of effort to manually include all of them for every single little project. Once you have Maven set up and running (Find tips on the Apache project site: https://maven.apache.org/install.html ), you only need to download the correct SDKs from The Central Repository ( http://search.maven.org/ ) and quickly install it (Guide for installing 3 rd Party JARs in Maven https://maven.apache.org/guides/mini/guide-3rd-party-jars-local.html ).
The basic framework for our device identity can once more be found on the IoT get-started guide provided by Microsoft, although I had to add a couple of features and combine it with the Device Management project to add the required control functionality via direct messages. The most important lines of code which make the project work are
client = new DeviceClient( connString , protocol );
client.open();
which establishes a connection to my IoT-Hub, which can then be used by my class Message Sender to Pass the simulated sensor values over to the cloud. This happens in form of a String, created from a class called TelemetryDataPoint that stores data as a semi-structured Gson Object.
The other half of the device functionality can be found in the DeviceManagement Package which handles and Cloud to Device (C2D) messages. Although there are many more possibilities to implement, like the DeviceTwin feature that allows you to store status information about devices in the cloud, due to the time restriction set I only properly implemented two DirectMethod calls. The supported features here are
· Reboot: Simulates a restart of the device
· Water: Instructs the device to water the plants, which now only brings up the simulated humidity back to 100%
In both cases the system starts a new threat to execute the commands which is not particularly realistic but allows to keep up a constant stream of sensor value messages.
The Controller
The controller provides the counterpart to the (simulated) device on the other side. Although we would have the option to entirely process the IoT-Hub messages in the cloud, I decided to handle this case in form of another Java Project. The creation of the project follows the exact same procedure as the simulated device despite that we need the Eventhubs SDK instead of the Device Client .
Overall I structured the project into three parts. The main class which is responsible for establishing the EventHubs connection to our IoT-Hub and receiving all messages (with a built in filter to only use the ones that are received while the device is only. This works for the testing but should be changed in a professional environment as you might lose data otherwise), the Analyser, which is taking the incoming messages apart and looks for humidity values under 25% (This is again only a value chosen arbitrarily for the demonstration. In the real life environment, these values must be normalised and adjusted to all kinds of data like type of soil, plant species and state of the sensor) and a DeviceMessenger which automatically triggers the watering if such a value is found.
The essential code for the Device messenger is found in the lines
methodClient = DeviceMethod. createFromConnectionString (iotHubConnectionString);
System. out .println("Invoke " + methodName + " direct method");
MethodResult result = methodClient.invoke(deviceId, methodName, responseTimeout, connectTimeout, null);
which establish the DeviceMethod Connection and invoke the requested method. This in our case is Water.
The Result
Once all the coding is done (look at all the files in the git repository for more details) we are ready to build our two projects and run them. This is done with the commands
mvn package clean -DskipTests
to build and to run the final project. If you changed your package id or renamed the App class, you certainly need to adjust those
mvn exec:java -Dexec.mainClass=”com.mycompany.app.App”
Once you have both Apps up and Running at the same time, you should see the behaviour as in the attached video. The Temperature is behaving more or less randomly (although due to my choice of variance slowly rising over time) and the humidity is going down until it is blocked at 15%. Once the humidity reaches 25%, the controller will trigger the plant watering command and the humidity will go back to 100%.
Video demonstration of both devices, including the watering command.
From here on
Now that the foundations of my IoT Garden management system are realised, I have big plans. Not only have I already started hooking an Arduino up to a couple of sensors to deliver me some real world data, I am also planning to annoy my mother (or help her, depending on who you ask) by installing my system on our rooftop strawberry garden. As she is a professional gardener, I already have someone who can help me calibrate my devices properly. Once this is done, my plan is to integrate a few more commands into the set which the device can receive, including a manual configuration of the measurement intervals, hook up a pump controller and run a few machine learning algorithms to (hopefully) automatically improve the water usage, depending on the weather conditions given. In that case I could even reduce the amount of sensors needed as I can estimate the water which is needed.
You can check out my source code at https://github.com/darcrey/GardenIoT
As I said earlier, the options are nearly endless, and the time is strictly limited. But the advantages I found using the Microsoft Azure platform, not only for the IoT aspects but also in general are quite shocking. It is fast, easy to learn and very powerful, and although in the long term, it costs you a few bugs, in my opinion the advantages will outplay this, especially if you scale your solutions to an industrial scale where the savings and improvement in productivity can be quite enormous. If you want to learn more about their general strategy regarding the Internet of Things, including the advantages from a more informal perspective and some real world examples, make sure to read the articles on https://www.microsoft.com/en-us/internet-of-things/ but to be honest, I personally think that the best way to understand what you can do with Microsoft Azure IoT and how to do it, is to just give it a try!
Resources
Tutorials and Online Resources http://catalog.azureiotsuite.com/getstarted
Using the Azure Online Simulator http://channel9.msdn.com/coding4fun/blog/Raspberry-Pi-Online-Simulator-and-Azure-IoT
Microsoft Virtual Academy Online Learning http://mva.microsoft.com
Updated Mar 21, 2019
Version 2.0Lee_Stott Microsoft
MicrosoftJoined September 25, 2018
Educator Developer Blog
Follow this blog board to get notified when there's new activity