Azure API Management (APIM) is a tool that manages various types of backend APIs of your organisation. It offers many awesome features, and APIM Policies is one of the ones. For example, You can use the APIM policies to extends the APIM features or configure security policies to protect your backend APIs. While you need to write the policy documents in the XML format, it has a fairly bit amount of learning curves – it's not that easy to use.
Throughout this post, I'm going to discuss how GitHub Copilot helps us write the APIM policy documents, with a few technical scenarios.
APIM instance provisioning
I'm not going to discuss how to provision an APIM instance in this article. But here's the reference you can do it by yourself – Quickstart: Create a new Azure API Management service instance by using the Azure portal
APIM Policy documents at various levels
First of all, as soon as you provisions a new APIM instance, you'll see the default global policy document as follows:
<policies>
    <inbound />
    <backend>
        <forward-request />
    </backend>
    <outbound />
    <on-error />
</policies>
You can apply the policy documents at the various level of scopes. This document gives you better understaning of the scopes – Policy scopes and statements in Azure API Management.
Like above, once you get the default policy document, you need to define your own policy document based on your business logic. At this point, you can use the policy snippets in the picture below.
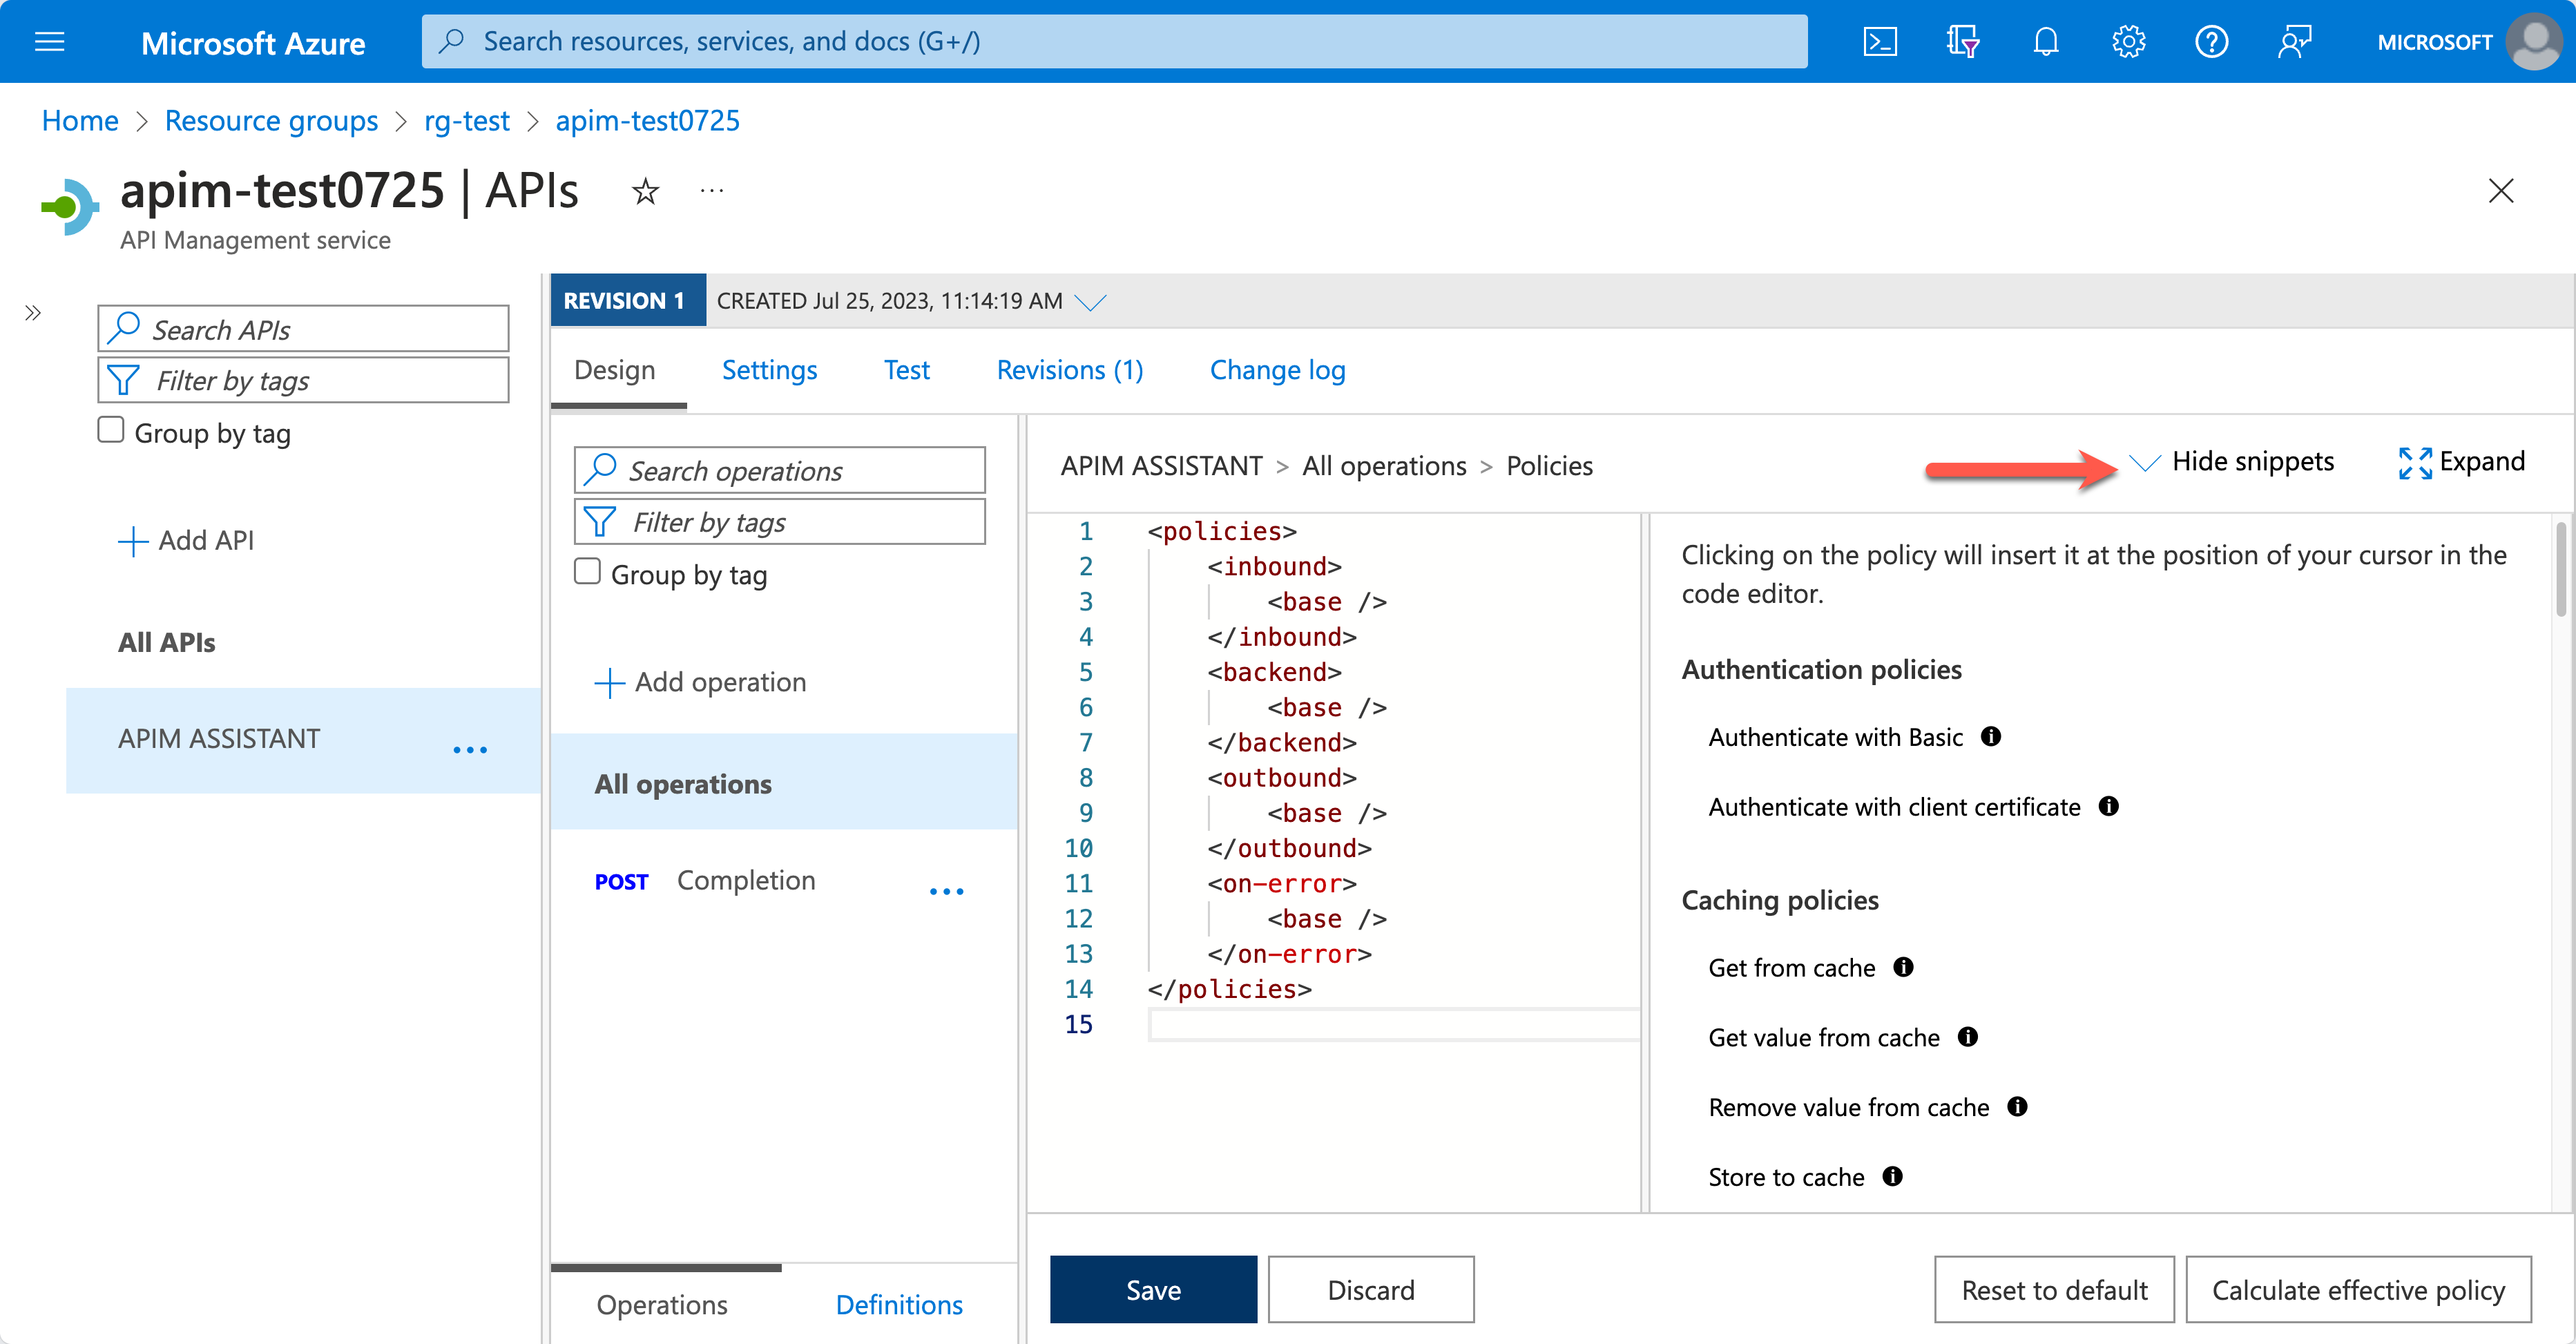
However, it's still cumbersome to find the right snippet and insert it into the policy document. Also, it has a fairly bit amount of learning curves. To overcome this, let's use GitHub Copilot. As of writing this post, GitHub Copilot Chat is now available as a public beta version, which is a good timing.
Prerequisits
- Visual Studio Code
- GitHub Copilot subscription – If you are a student, join the Student Developer Pack program for free GitHub Copilot offer and other perks.
- GitHub Copilot extension
- GitHub Copilot Chat extension
APIM Policy documents with GitHub Copilot
You can write APIM policy documents at the global, API and operation levels, and the context is slightly different. Let's take a look.
Global-level policy document
First of all, let's write a global policy document. Here's the scenario:
In most cases, you apply the CORS policy between the frontend and backend applications at the global level. Let's apply this CORS policy to the global policy document.
Open Visual Studio Code and open the GitHub Copilot Chat window.
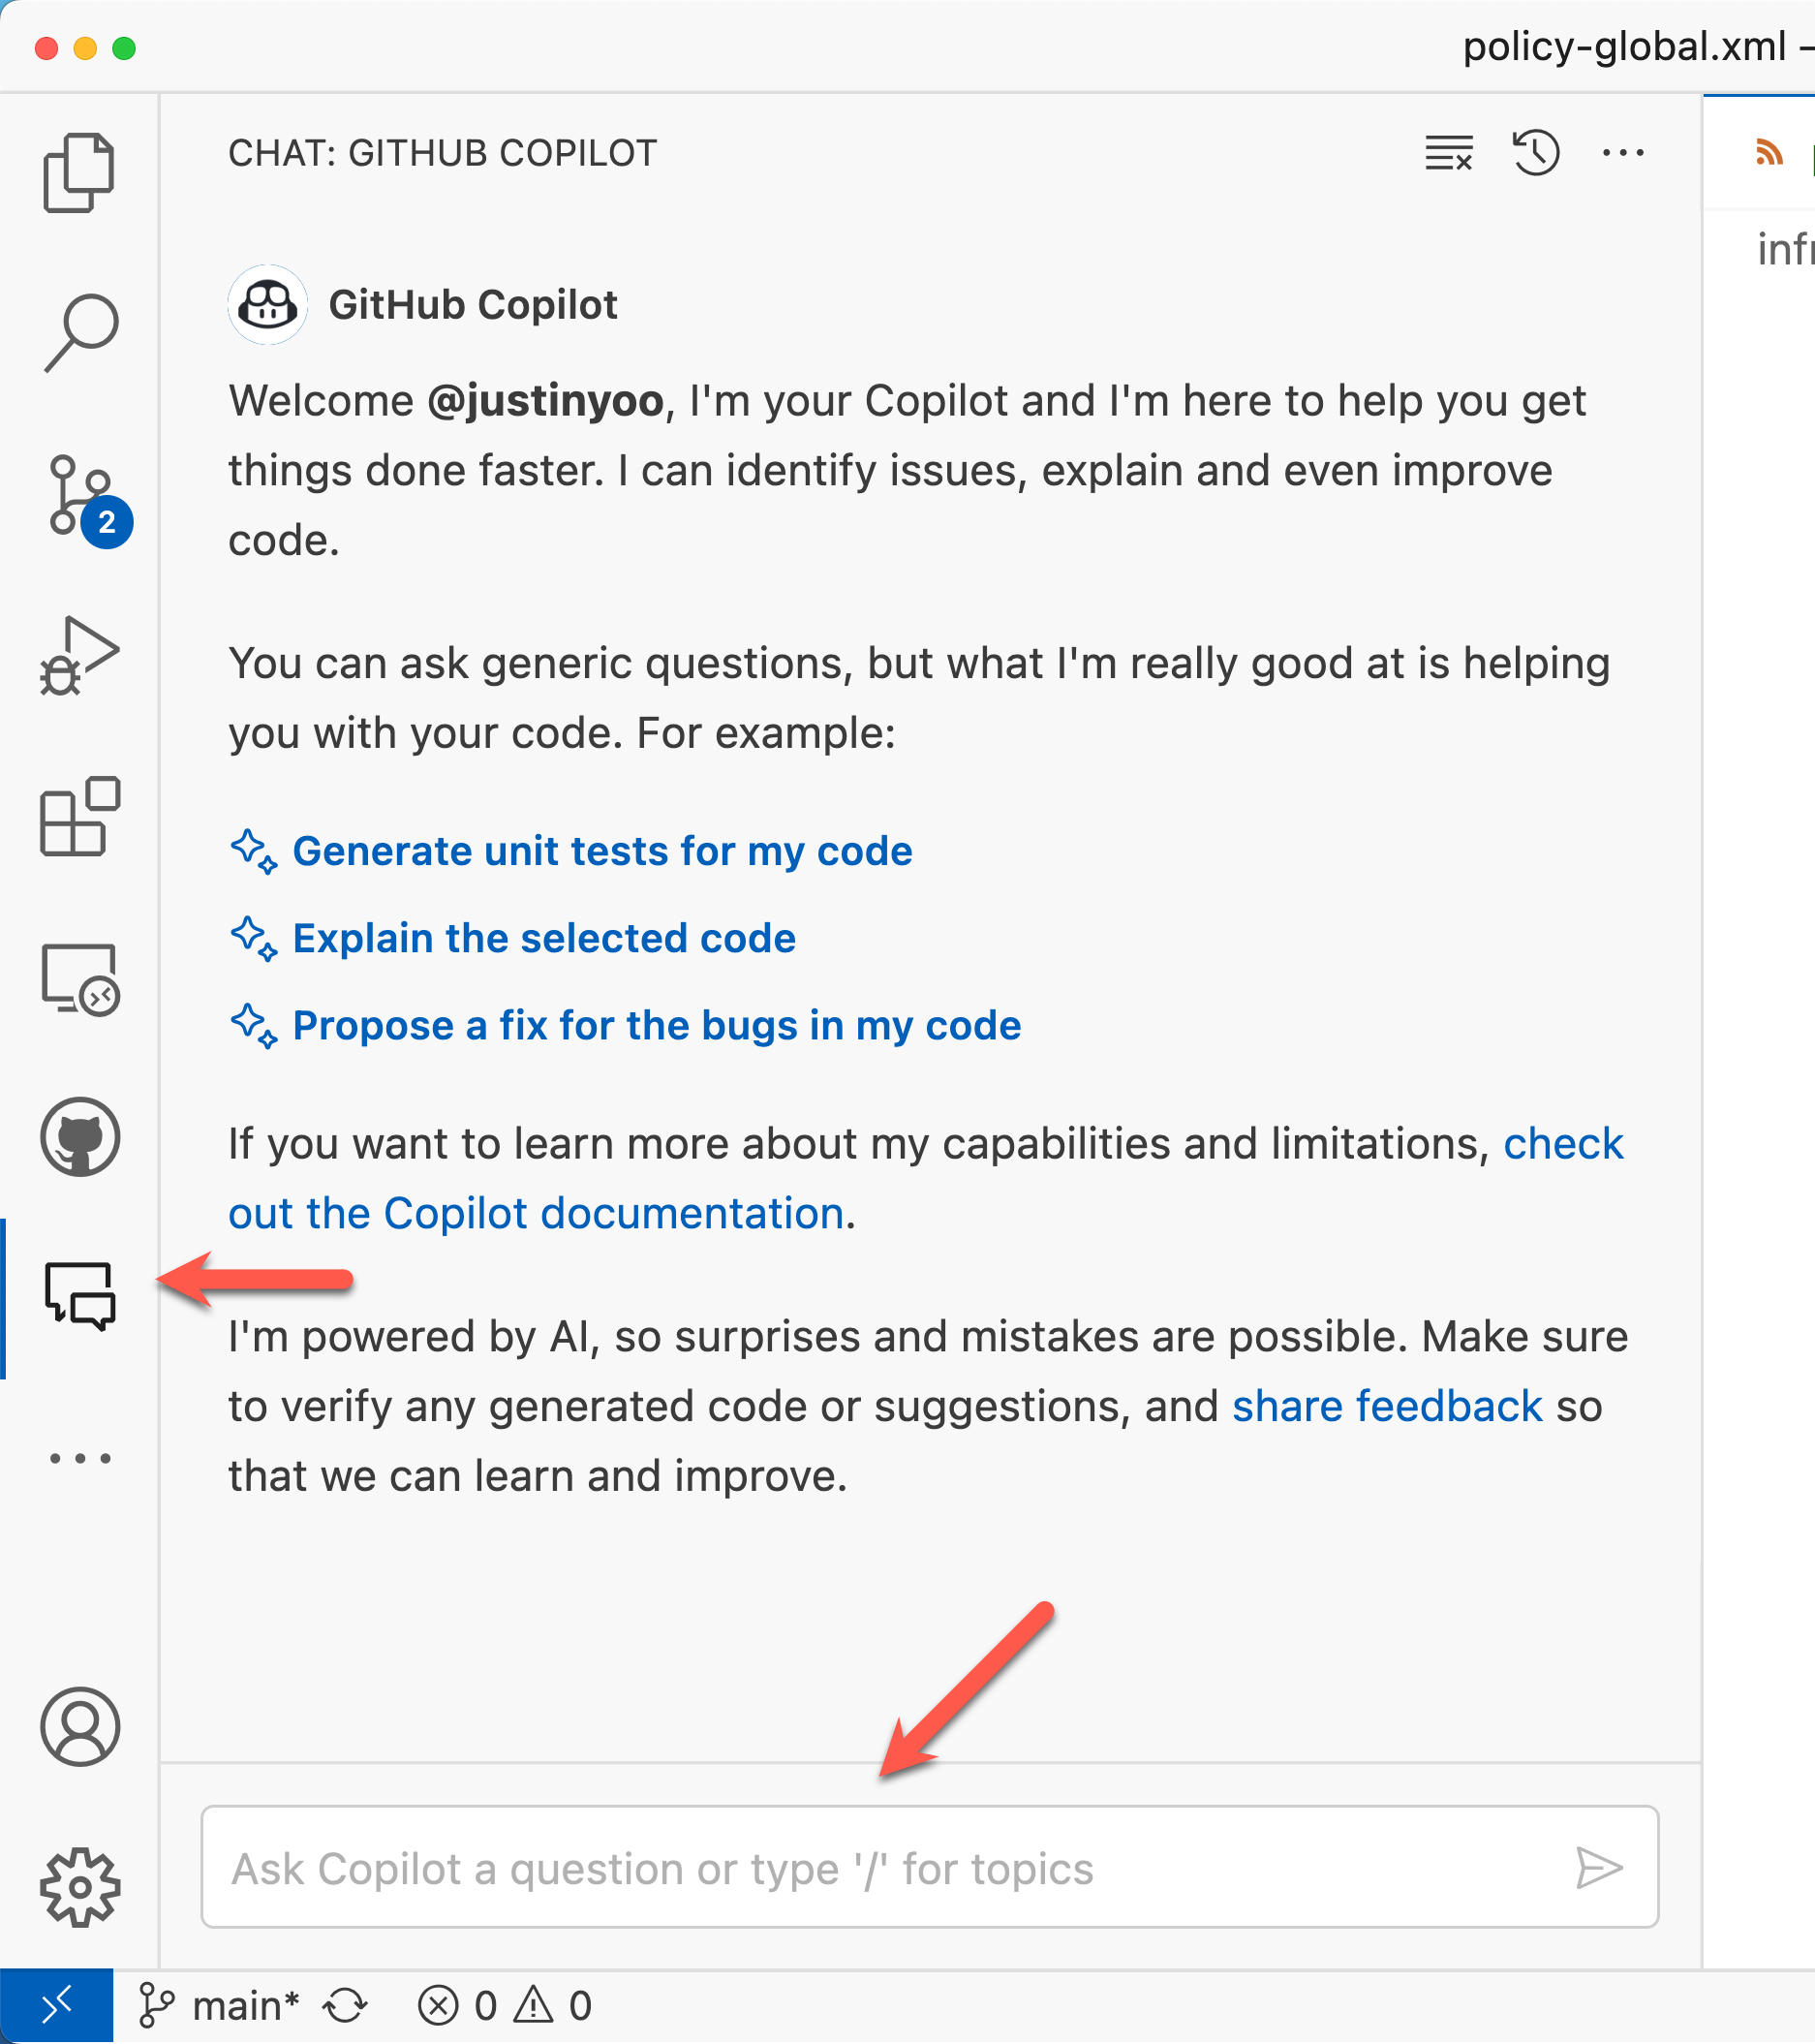
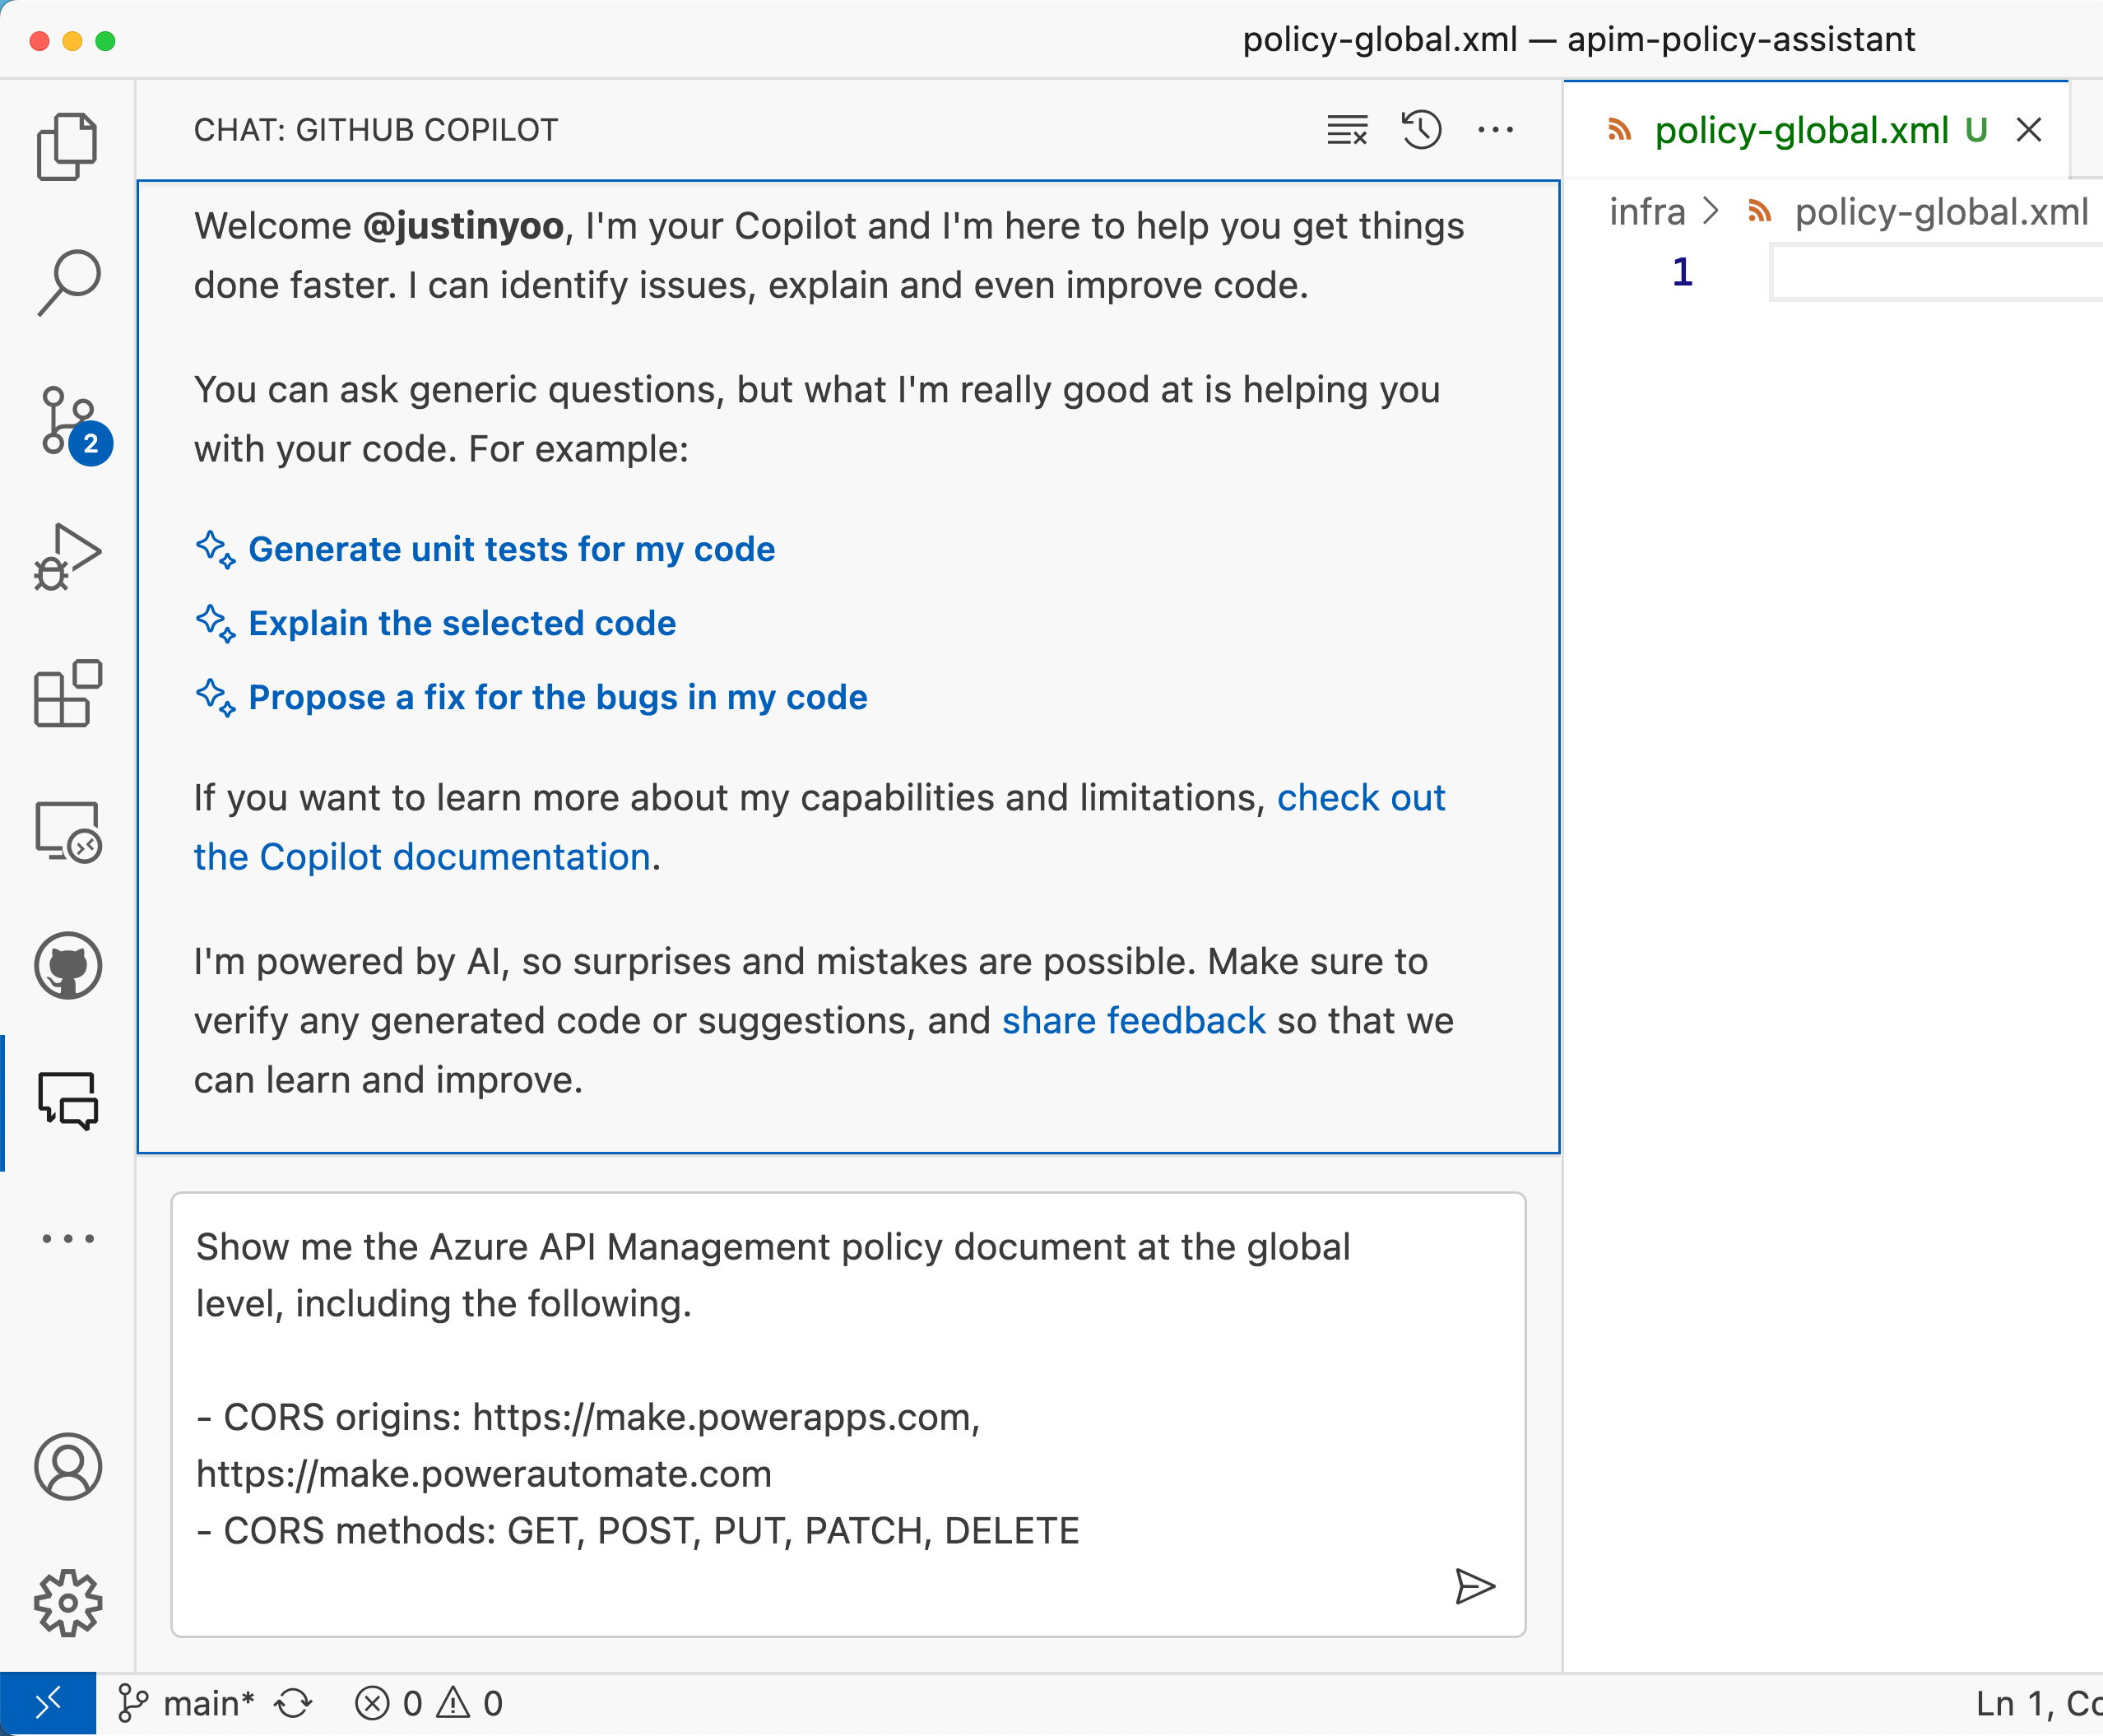
Enter the following zero-shot prompt:
Show me the Azure API Management policy document at the global level, including the following.

- CORS origins: https://make.powerapps.com, https://make.powerautomate.com
- CORS methods: GET, POST, PUT, PATCH, DELETE
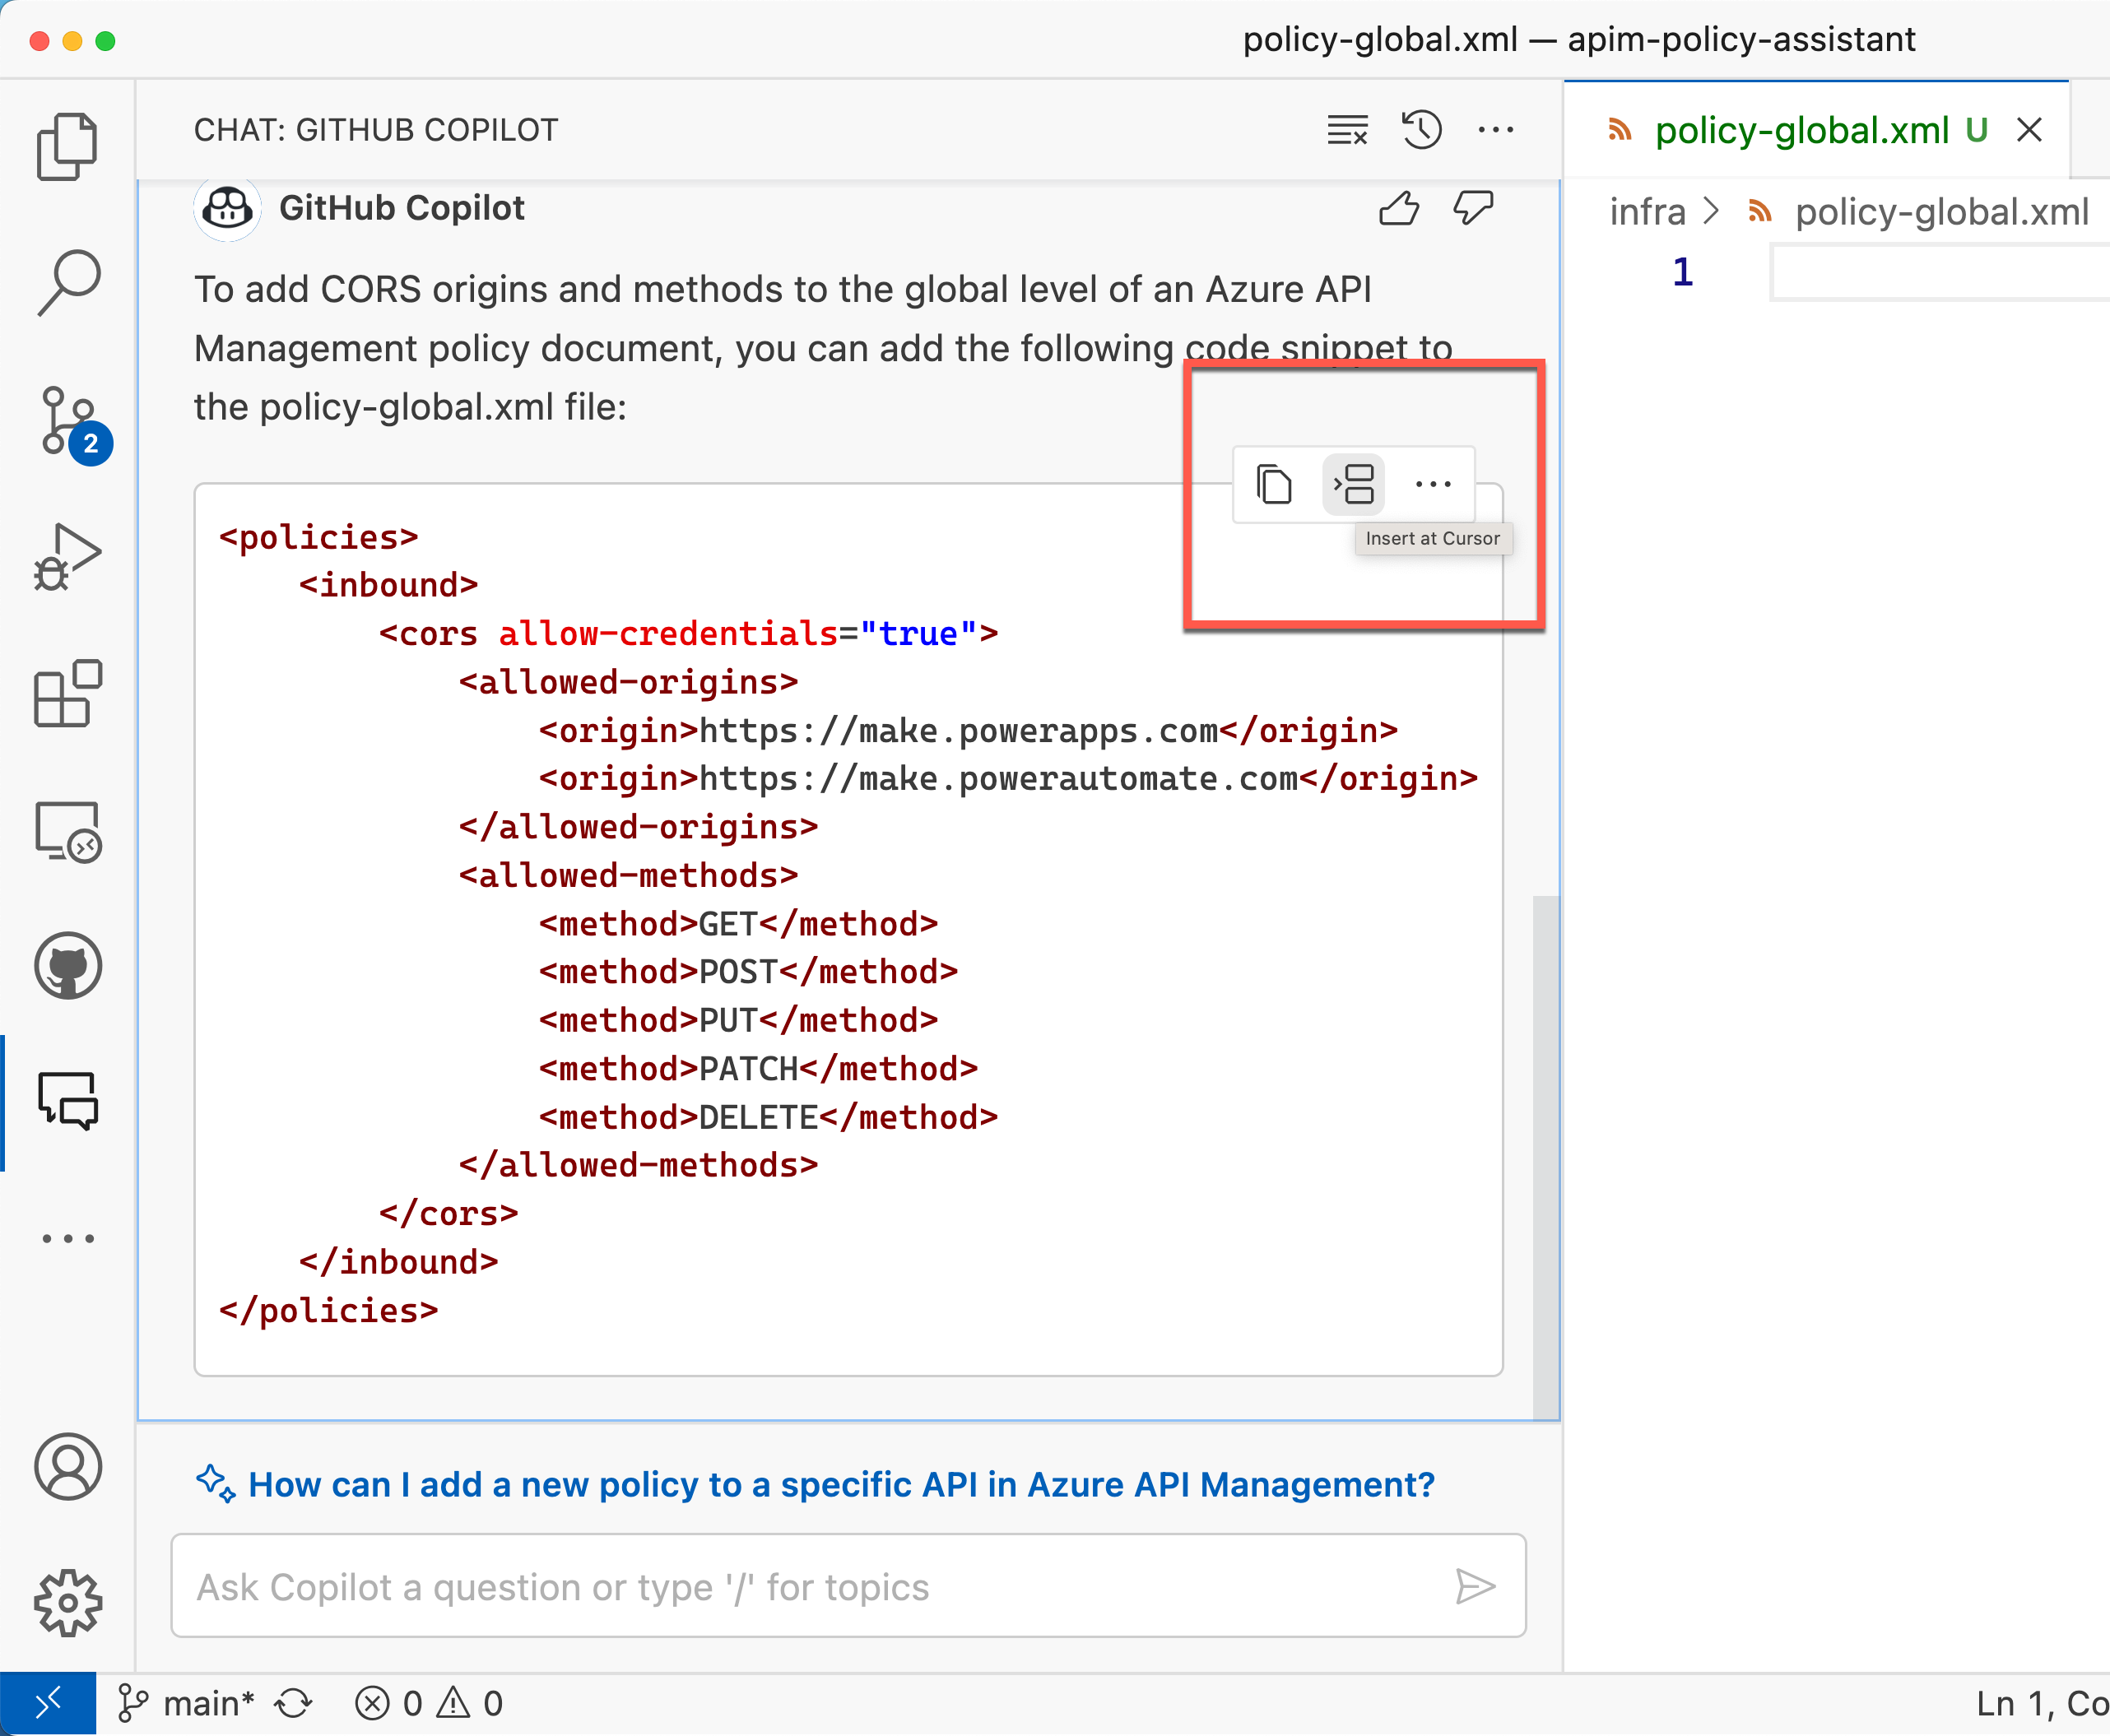
Then, it generates the following policy document.
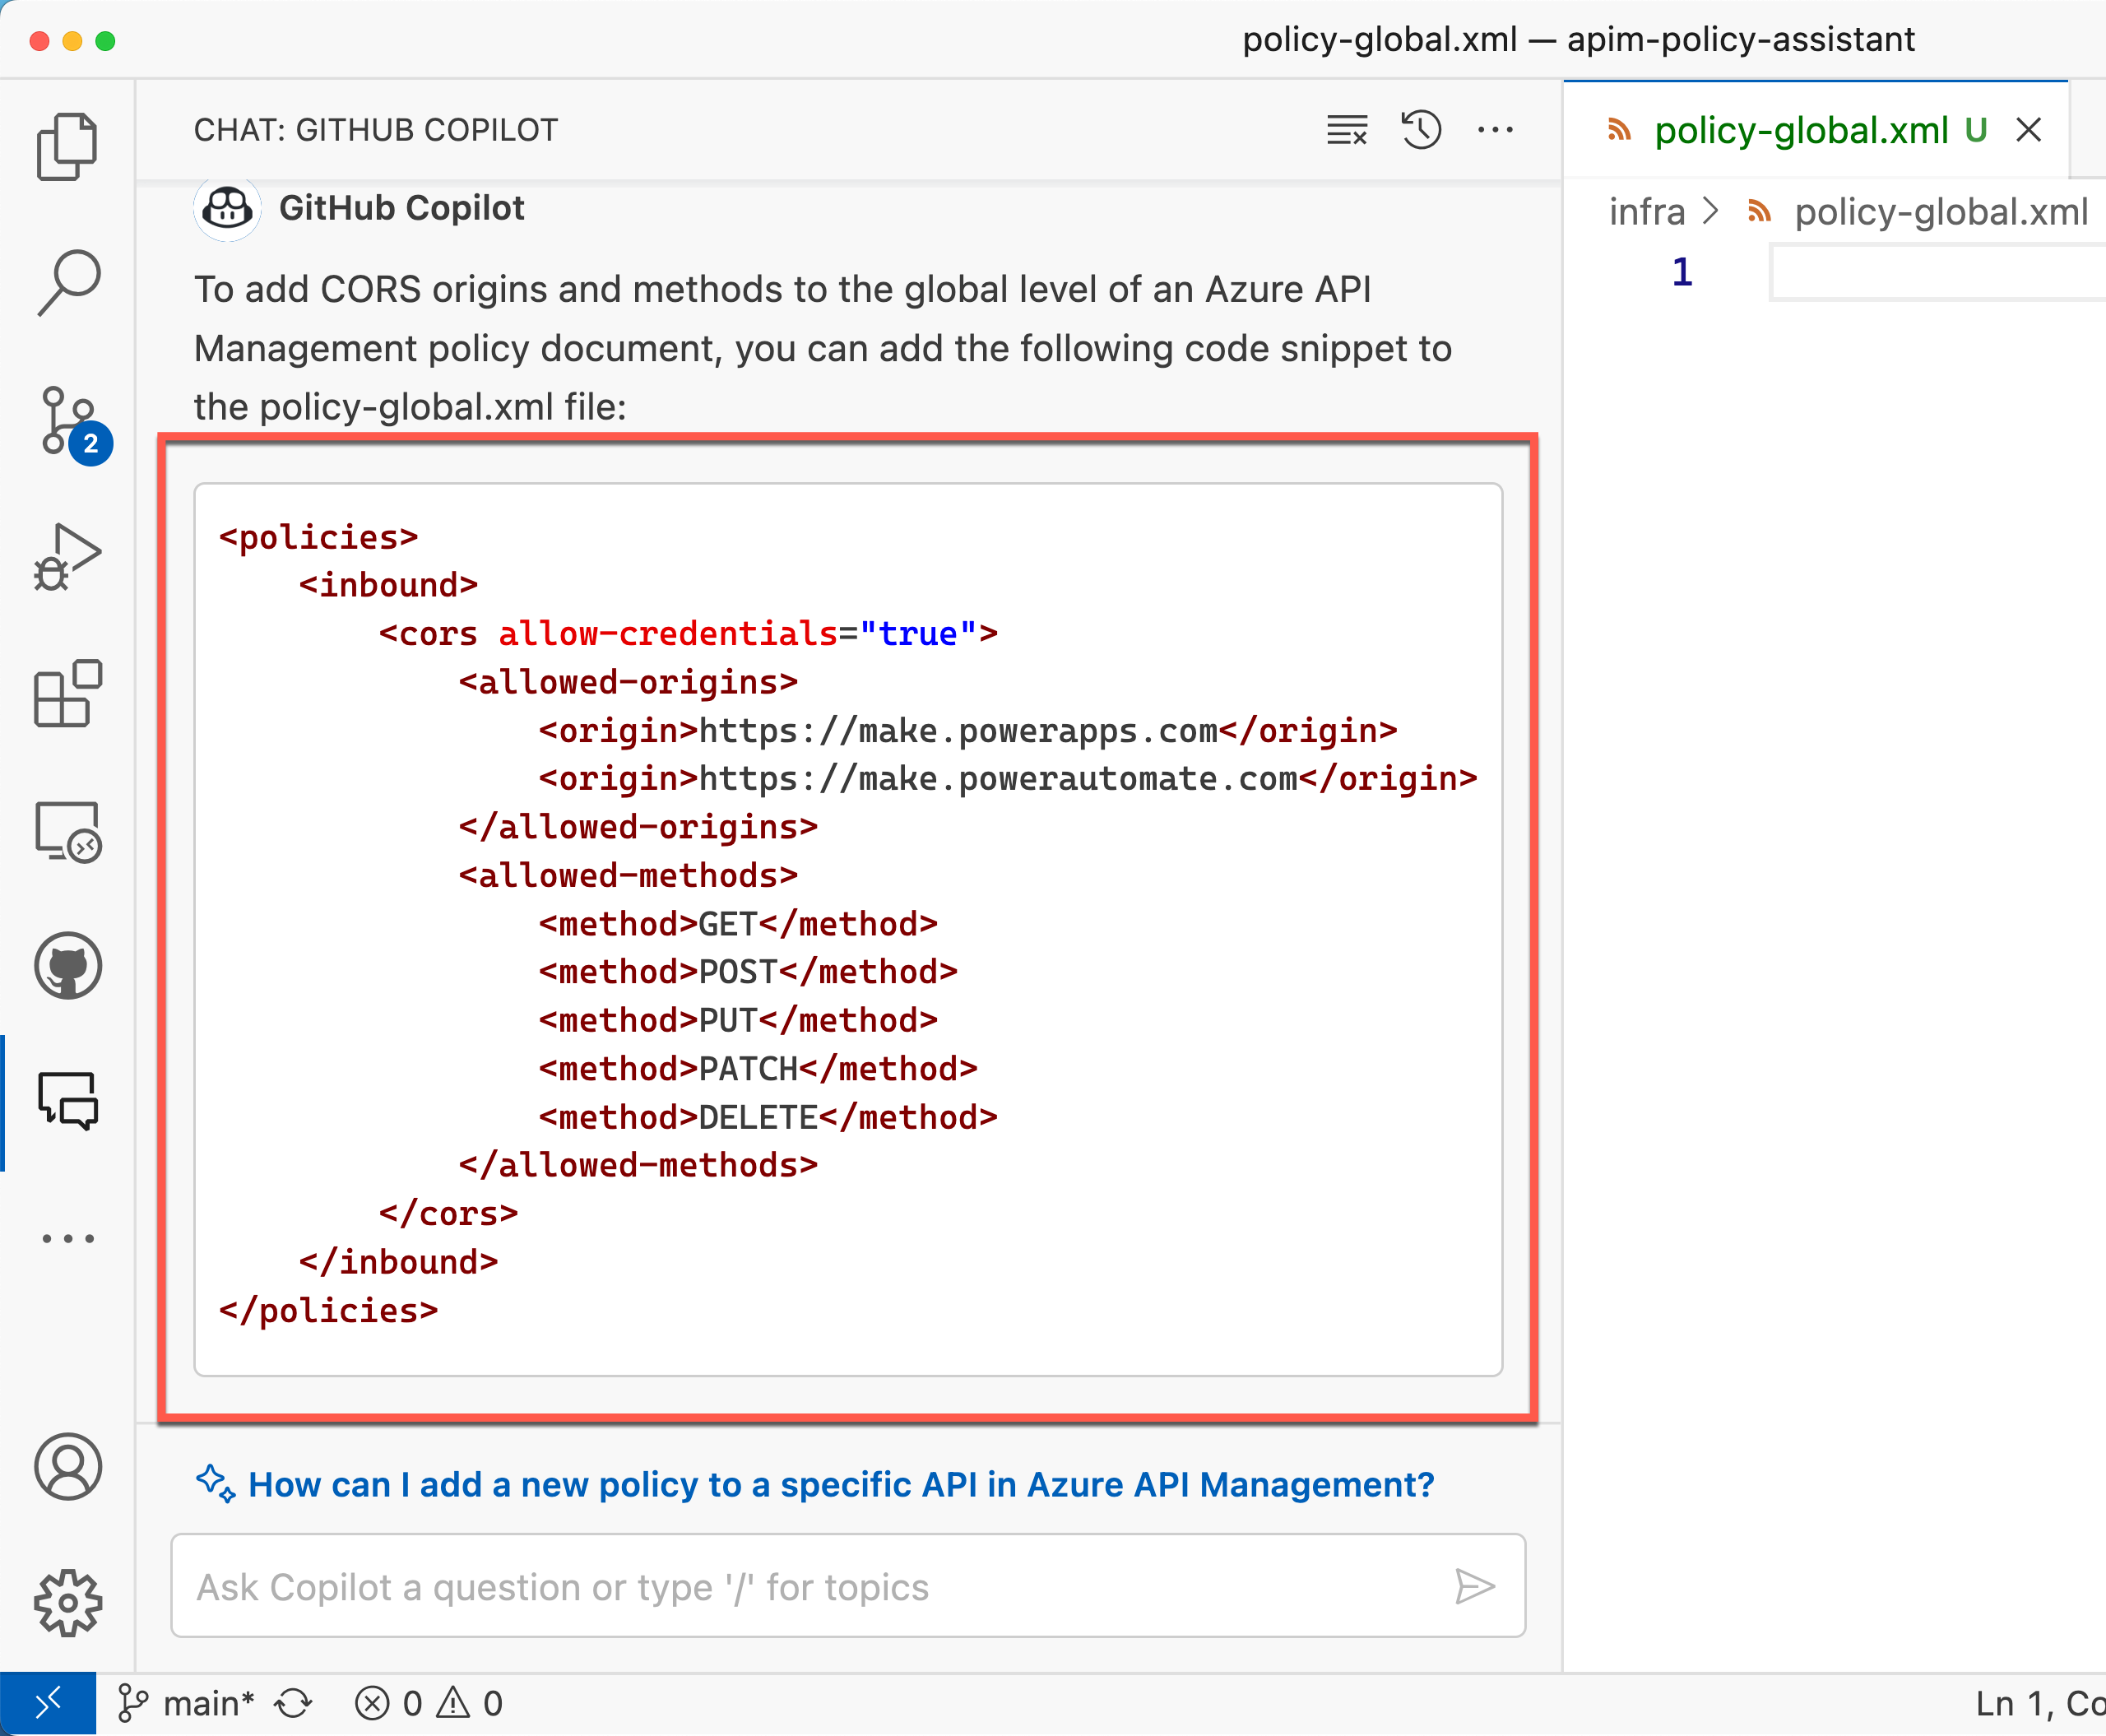
If you're happy with the result, click the "Insert at Cursor" menu to insert the policy document into the policy-global.xml file on the right.
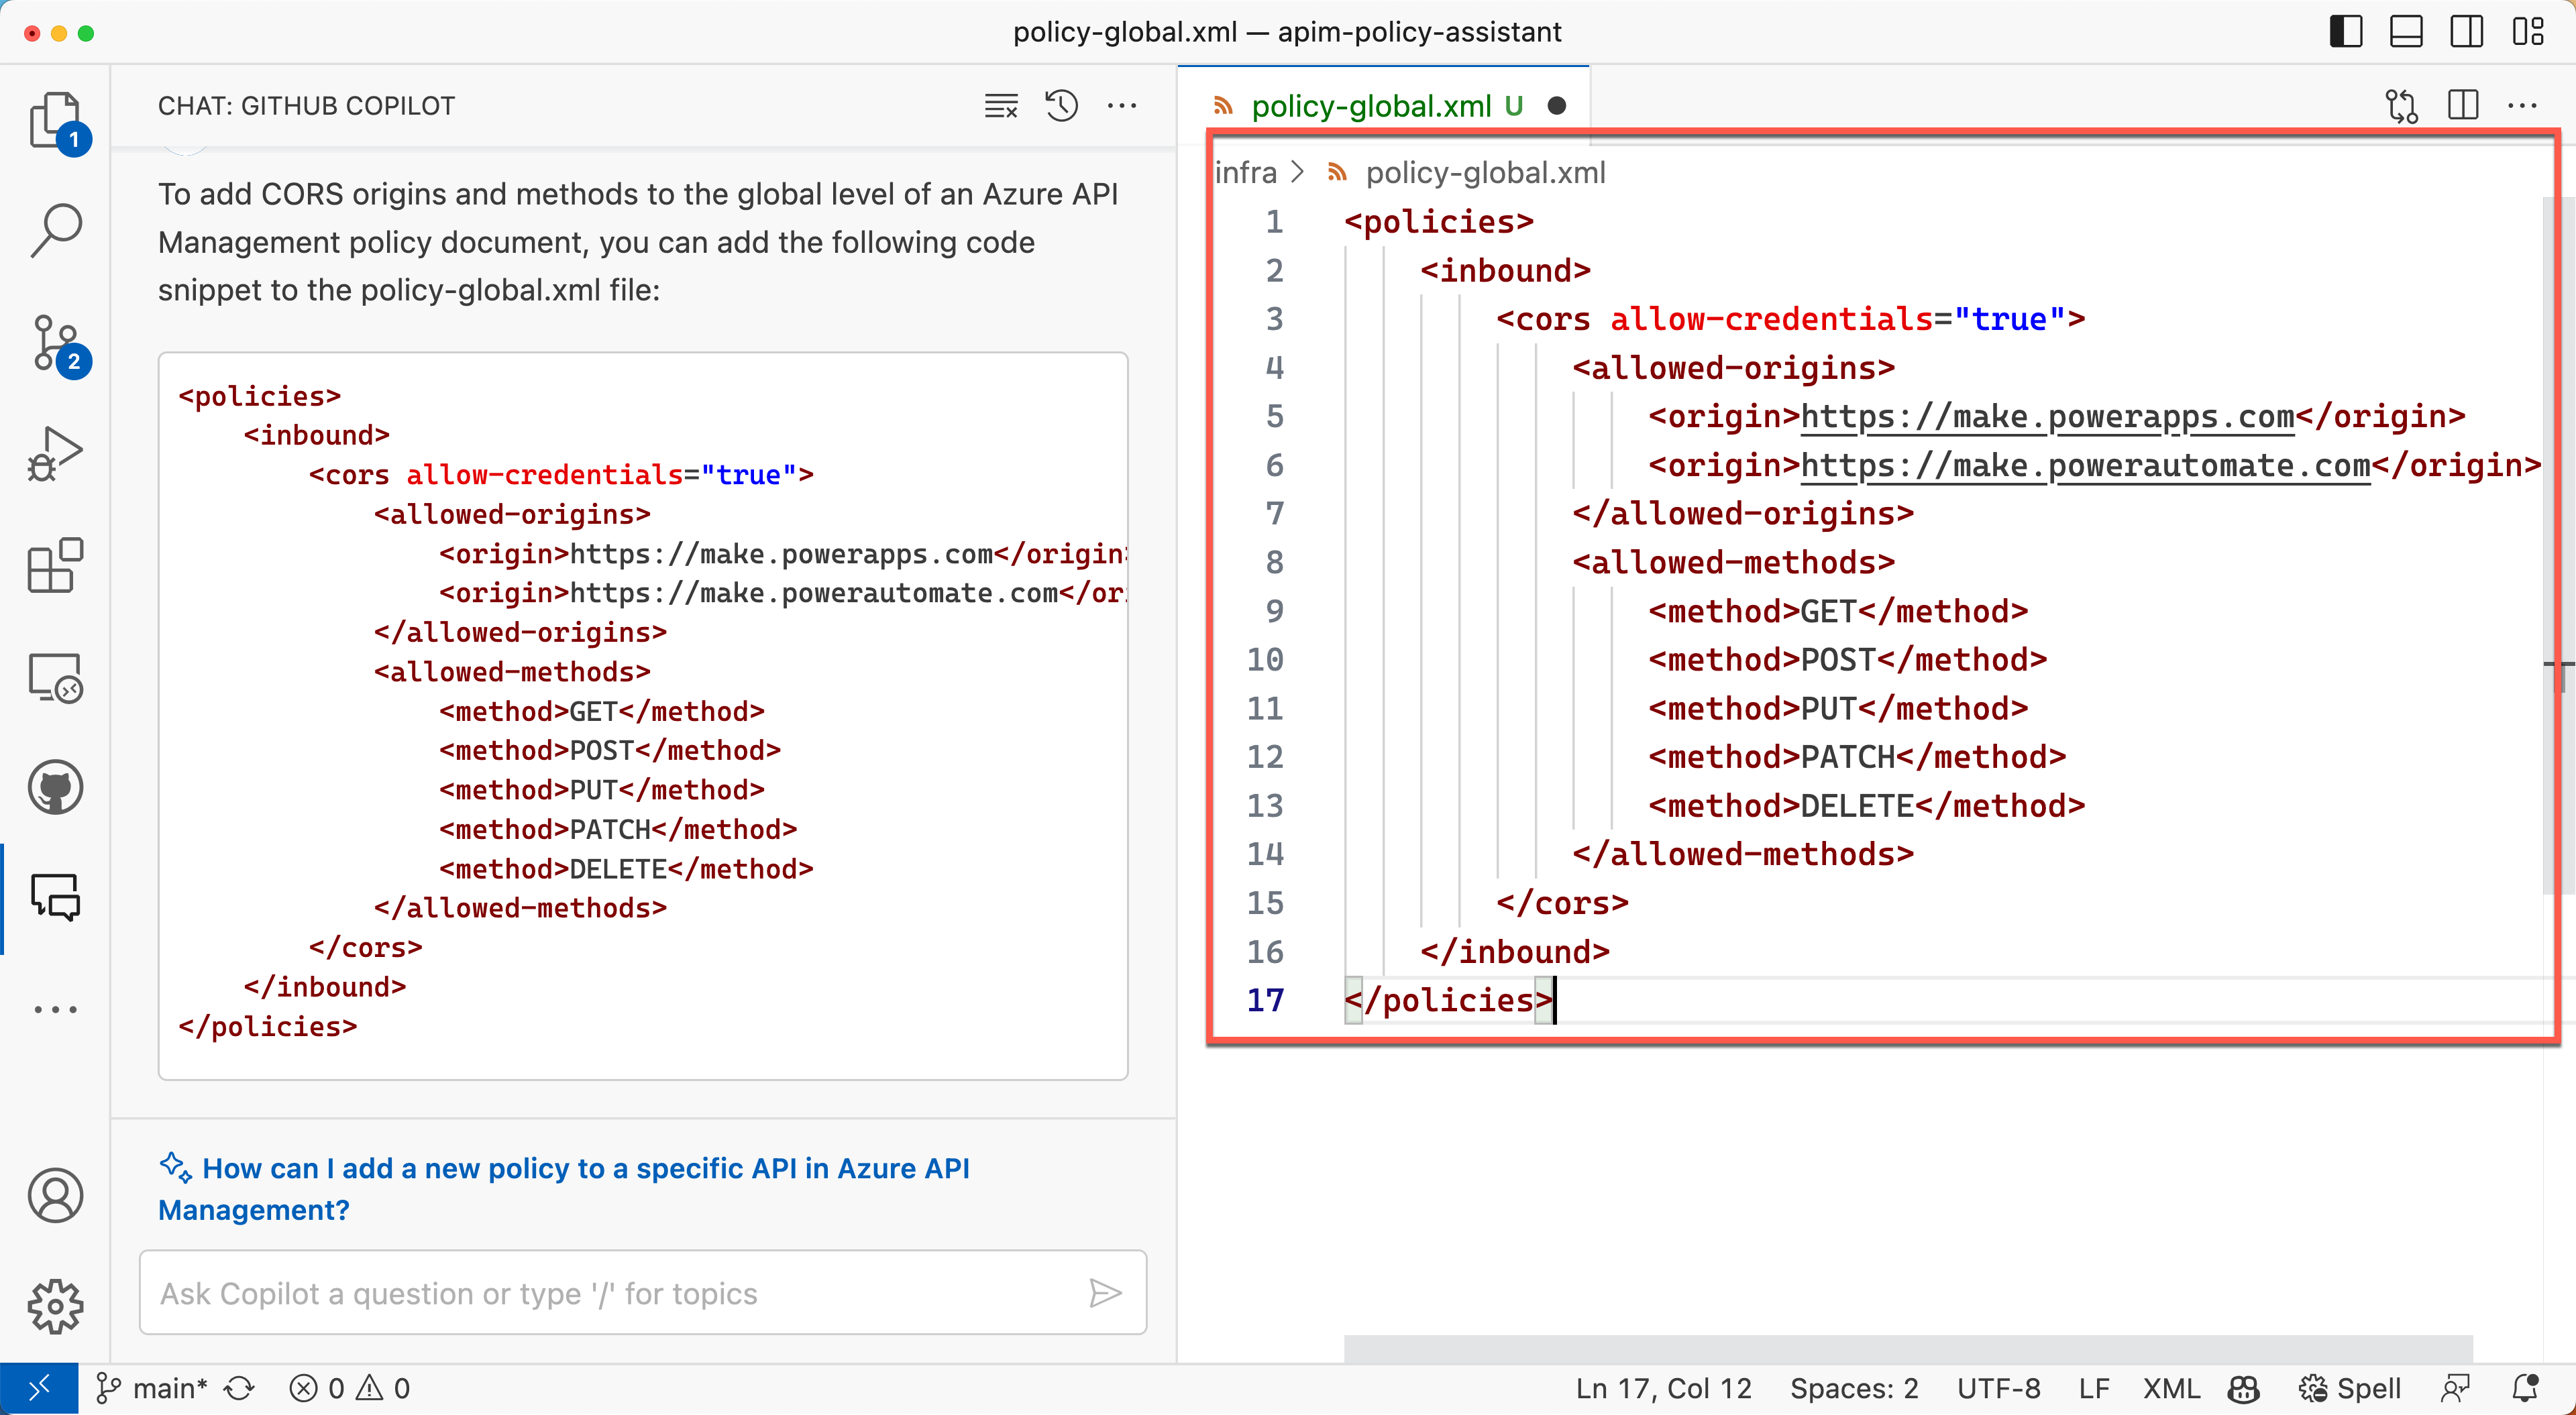
Then, you'll have the global-level policy document like below:
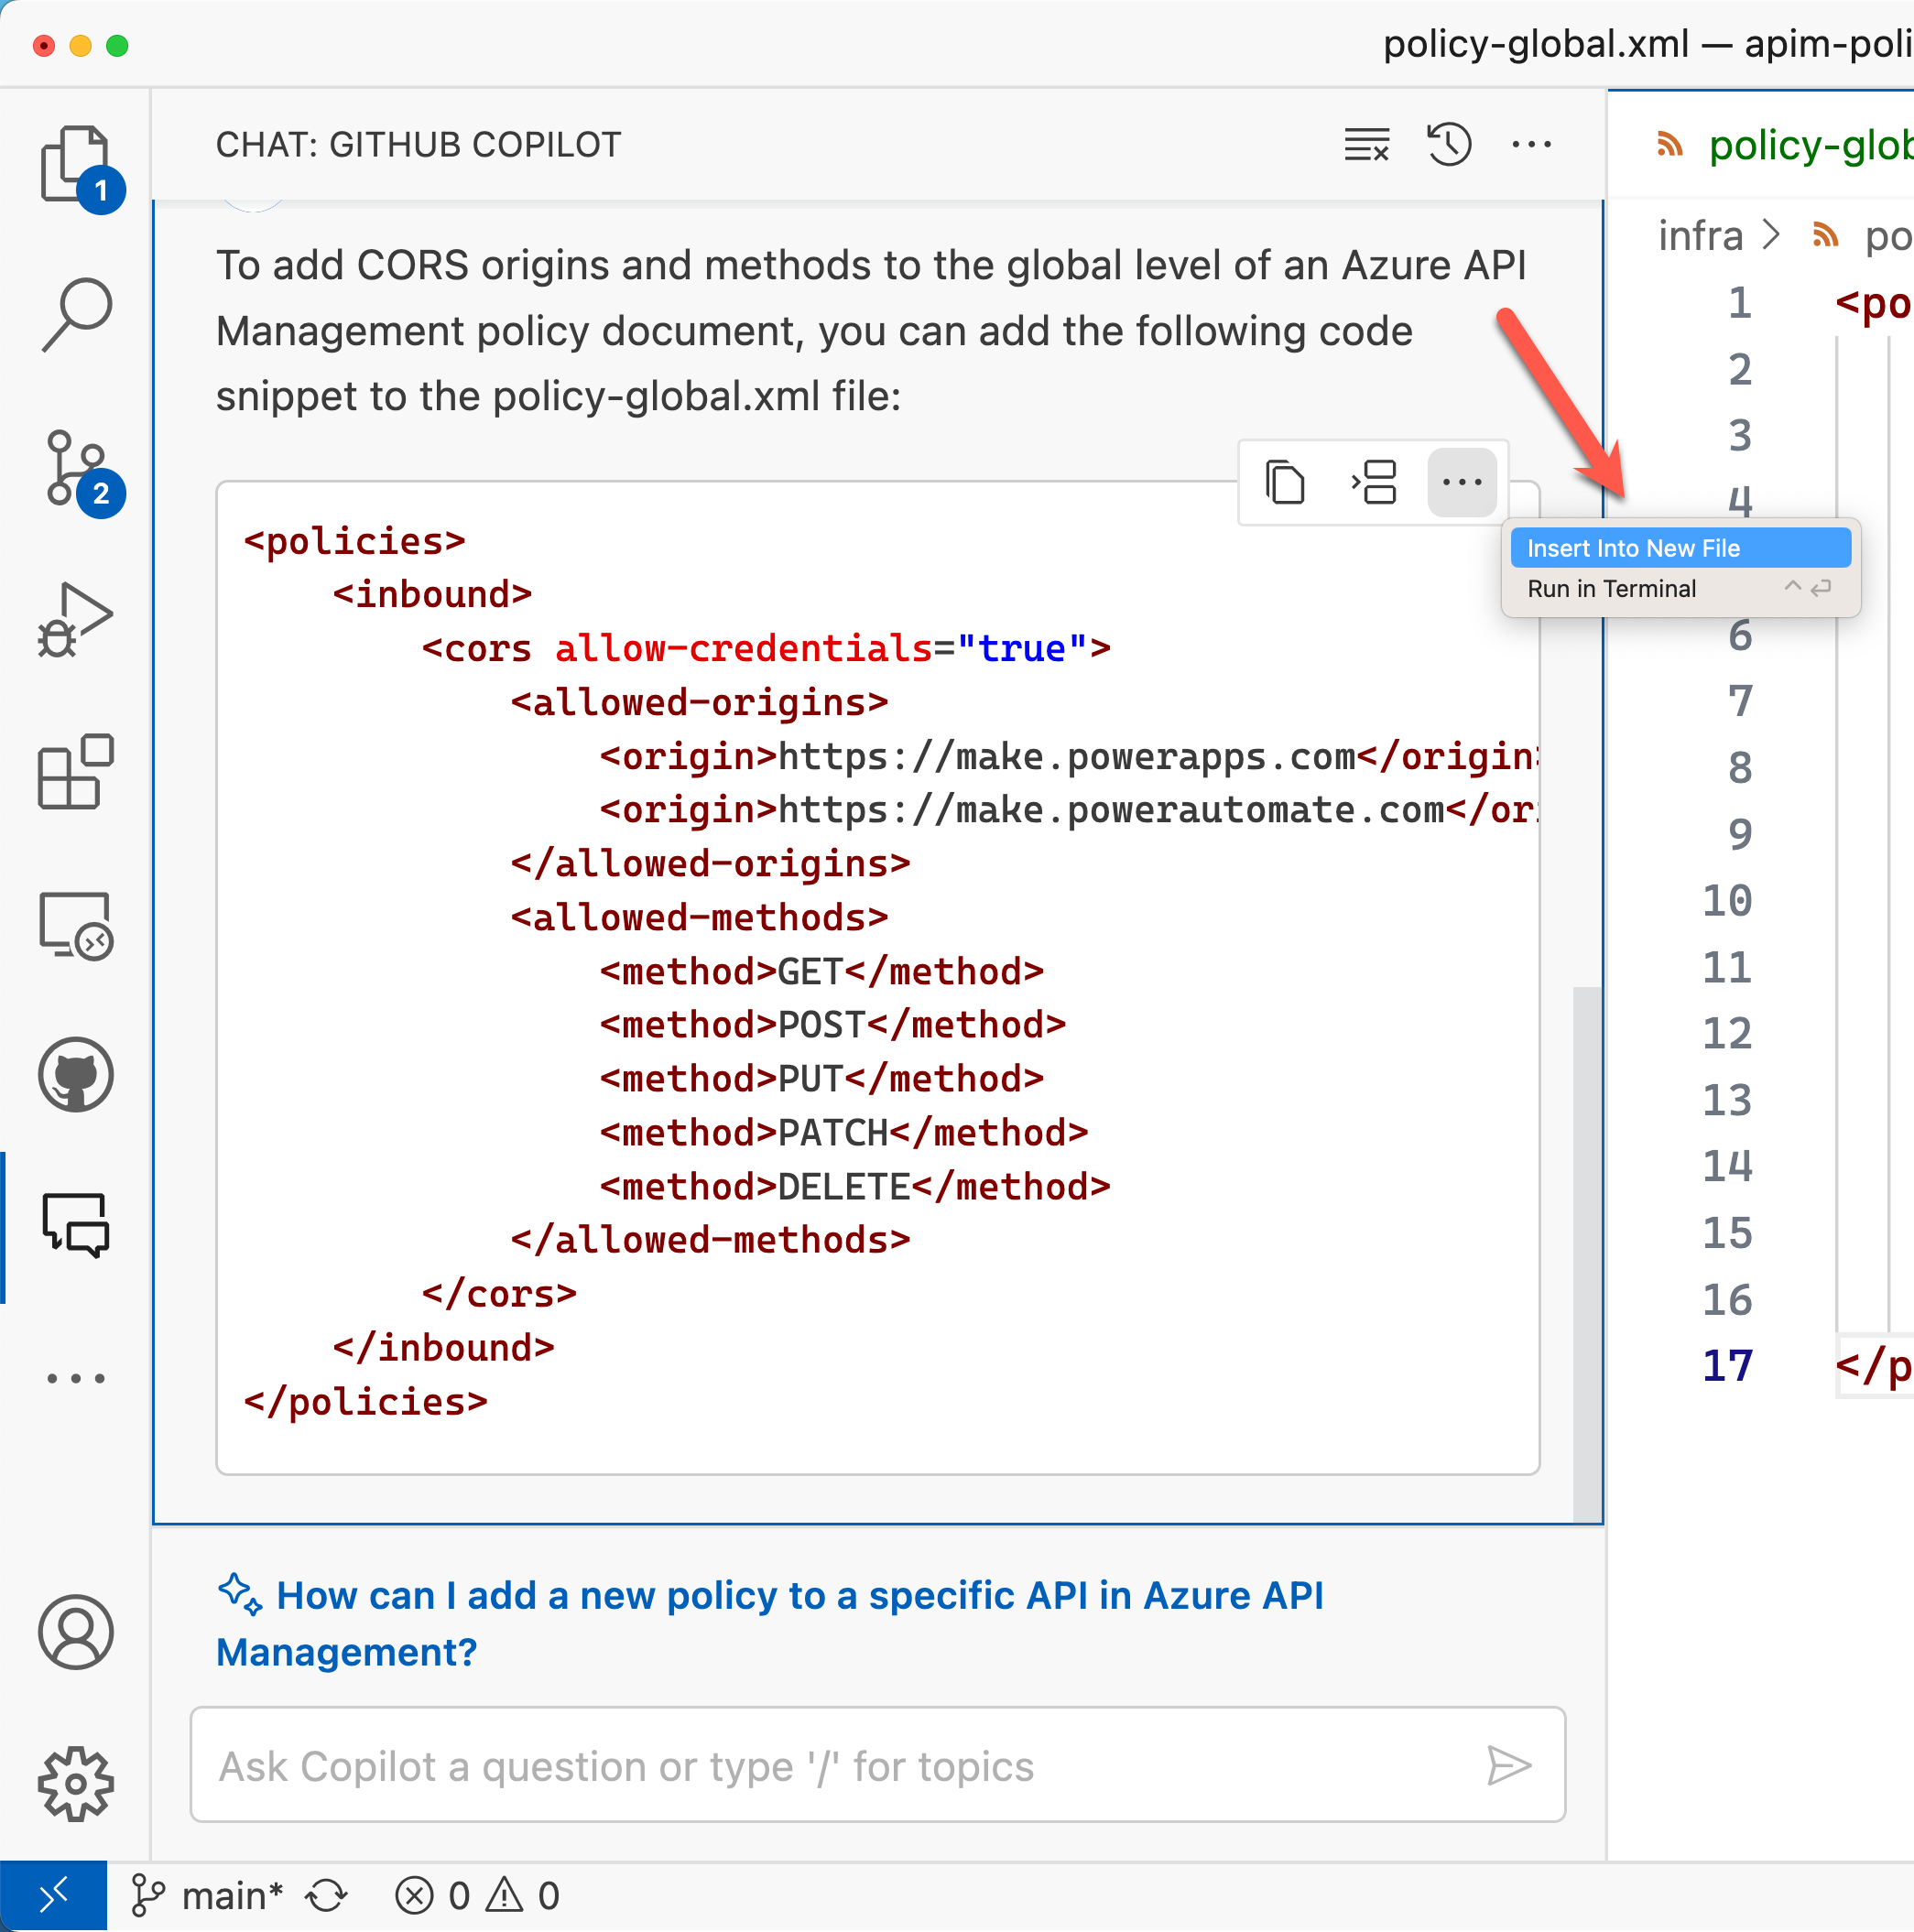
Of course, you can open a new XML document and insert the result.
As long as you're happy with that, that's fine. But in most cases, you might need to modify the policy document. Let's modify the policy document with GitHub Copilot. Add the following comment right after the </allowed-methods> tag and press the Enter key.
</allowed-methods>
<!-- add the allowed-headers node and accept everything -->
GitHub Copilot will suggest something like below. Press the Tab key to accept it.
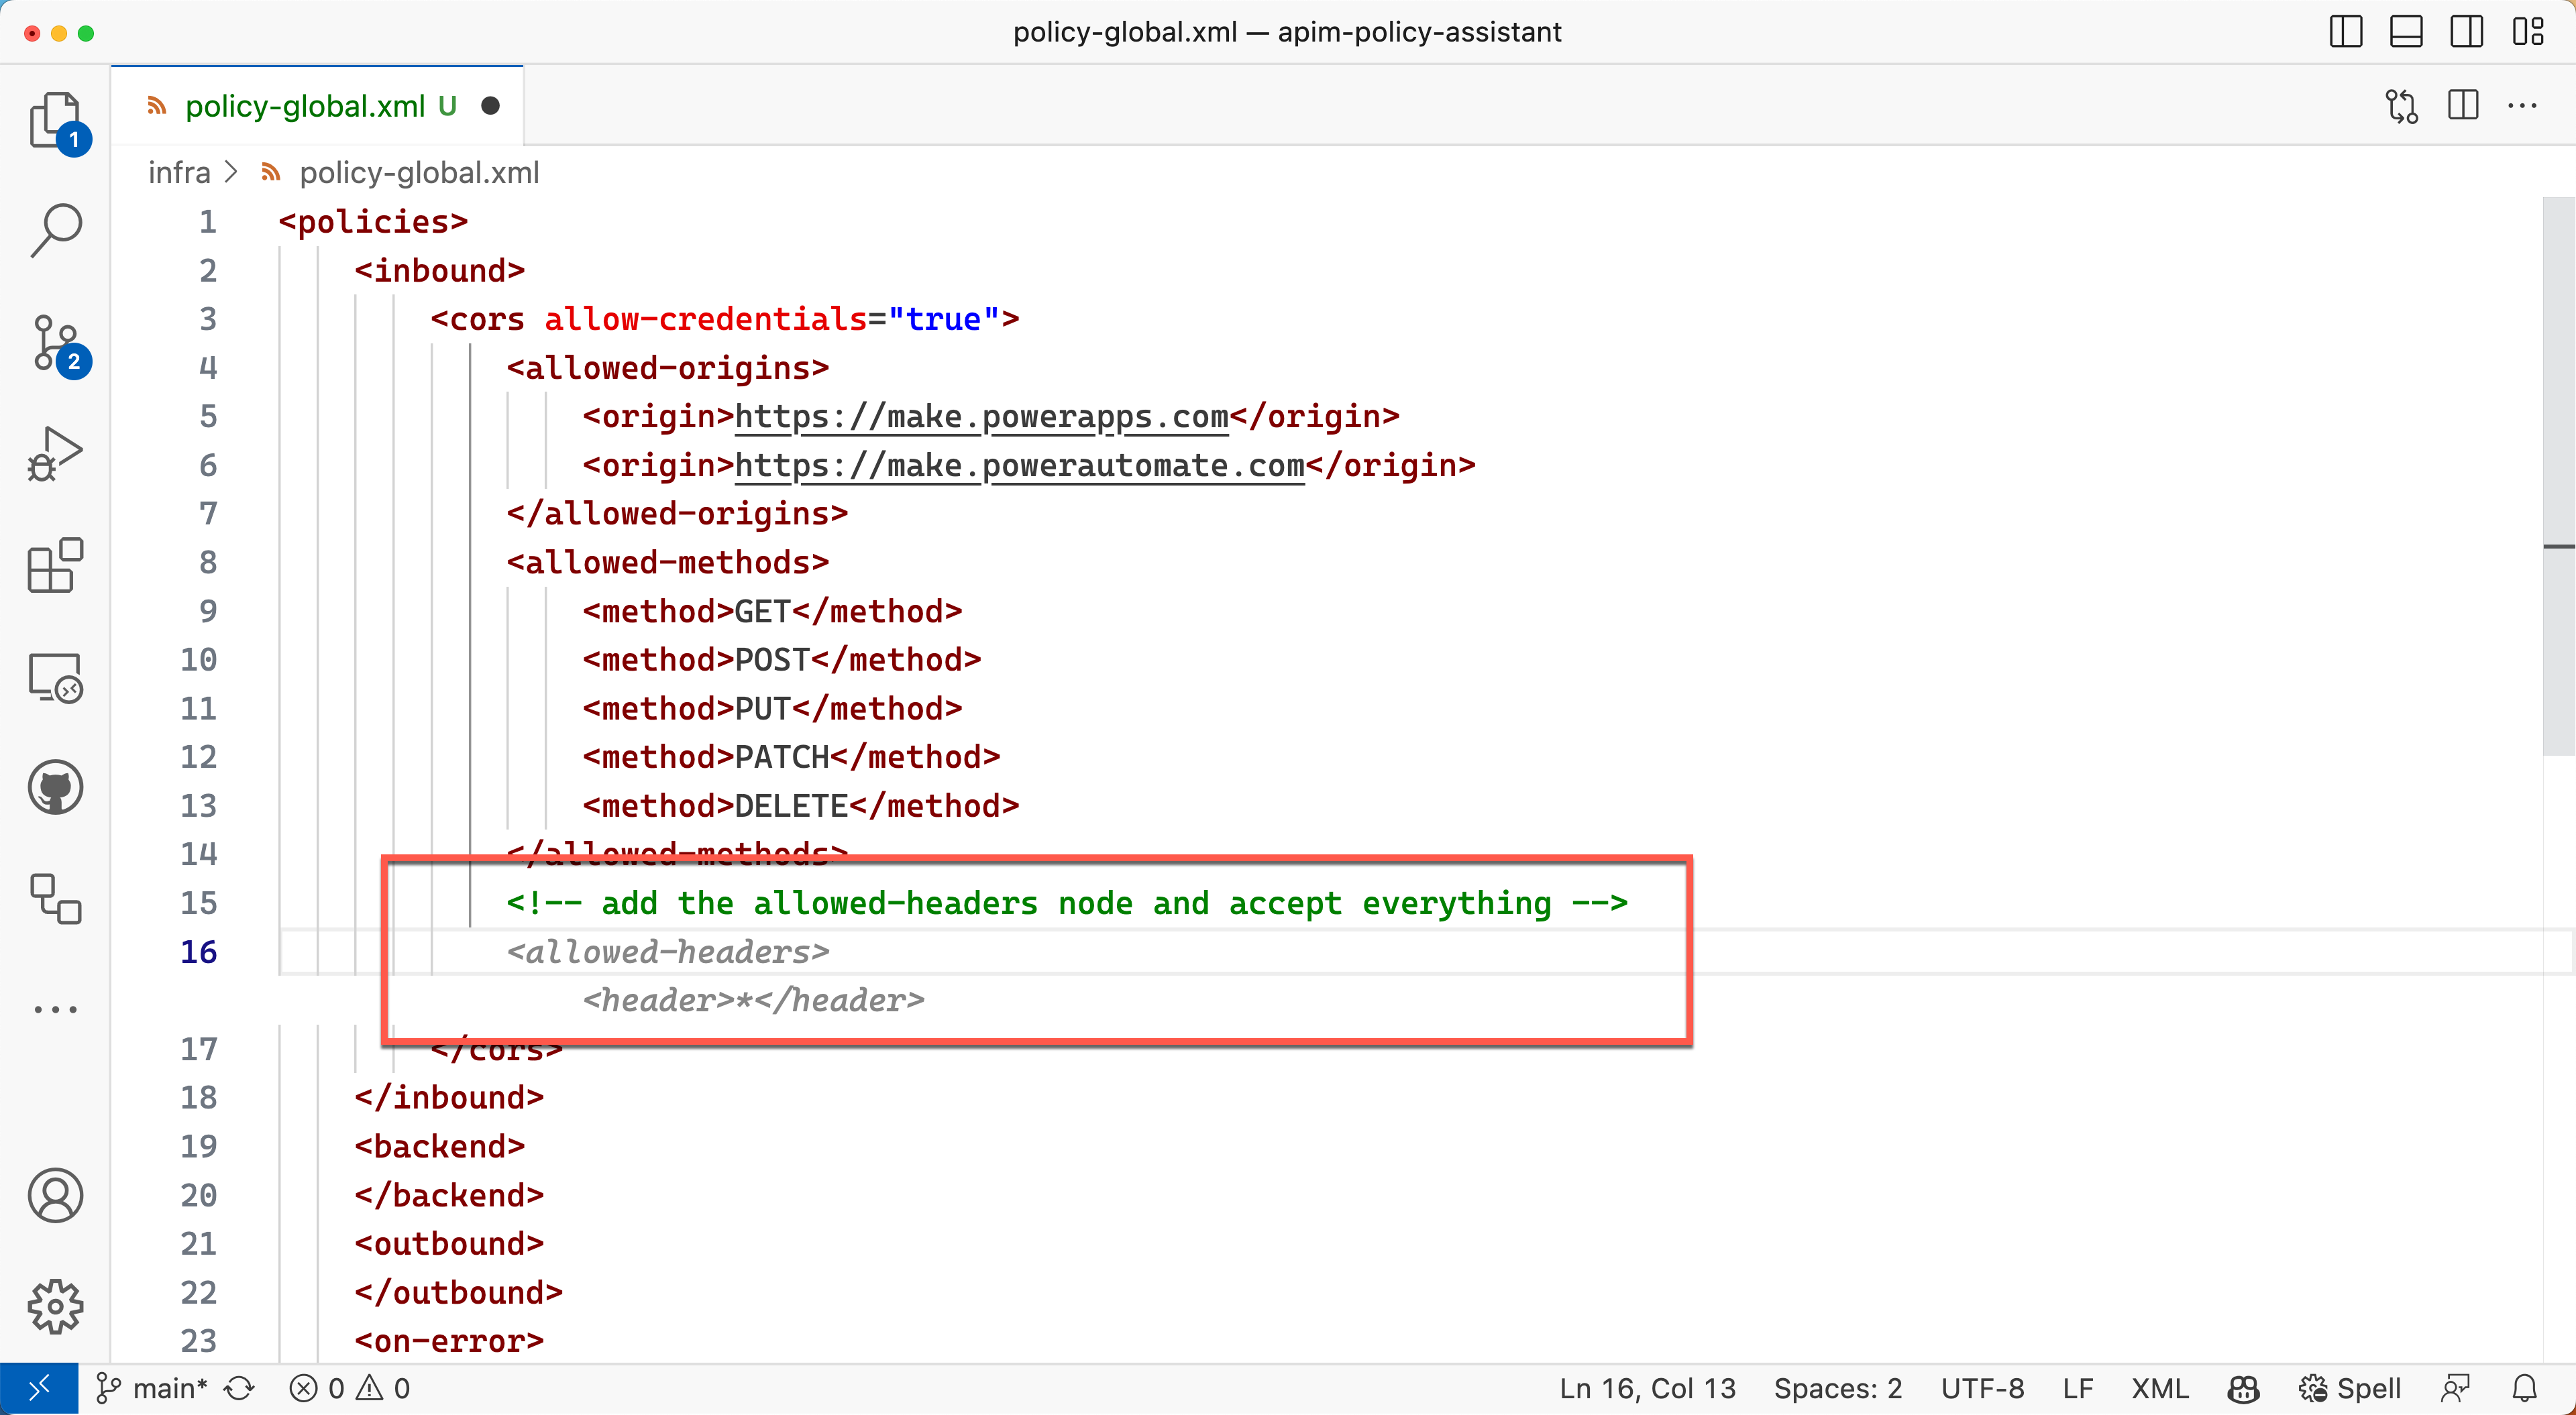
Every time you hit the enter key, GitHub Copilot will suggest something you might want. Repeat this process and modify the policy document as follows:
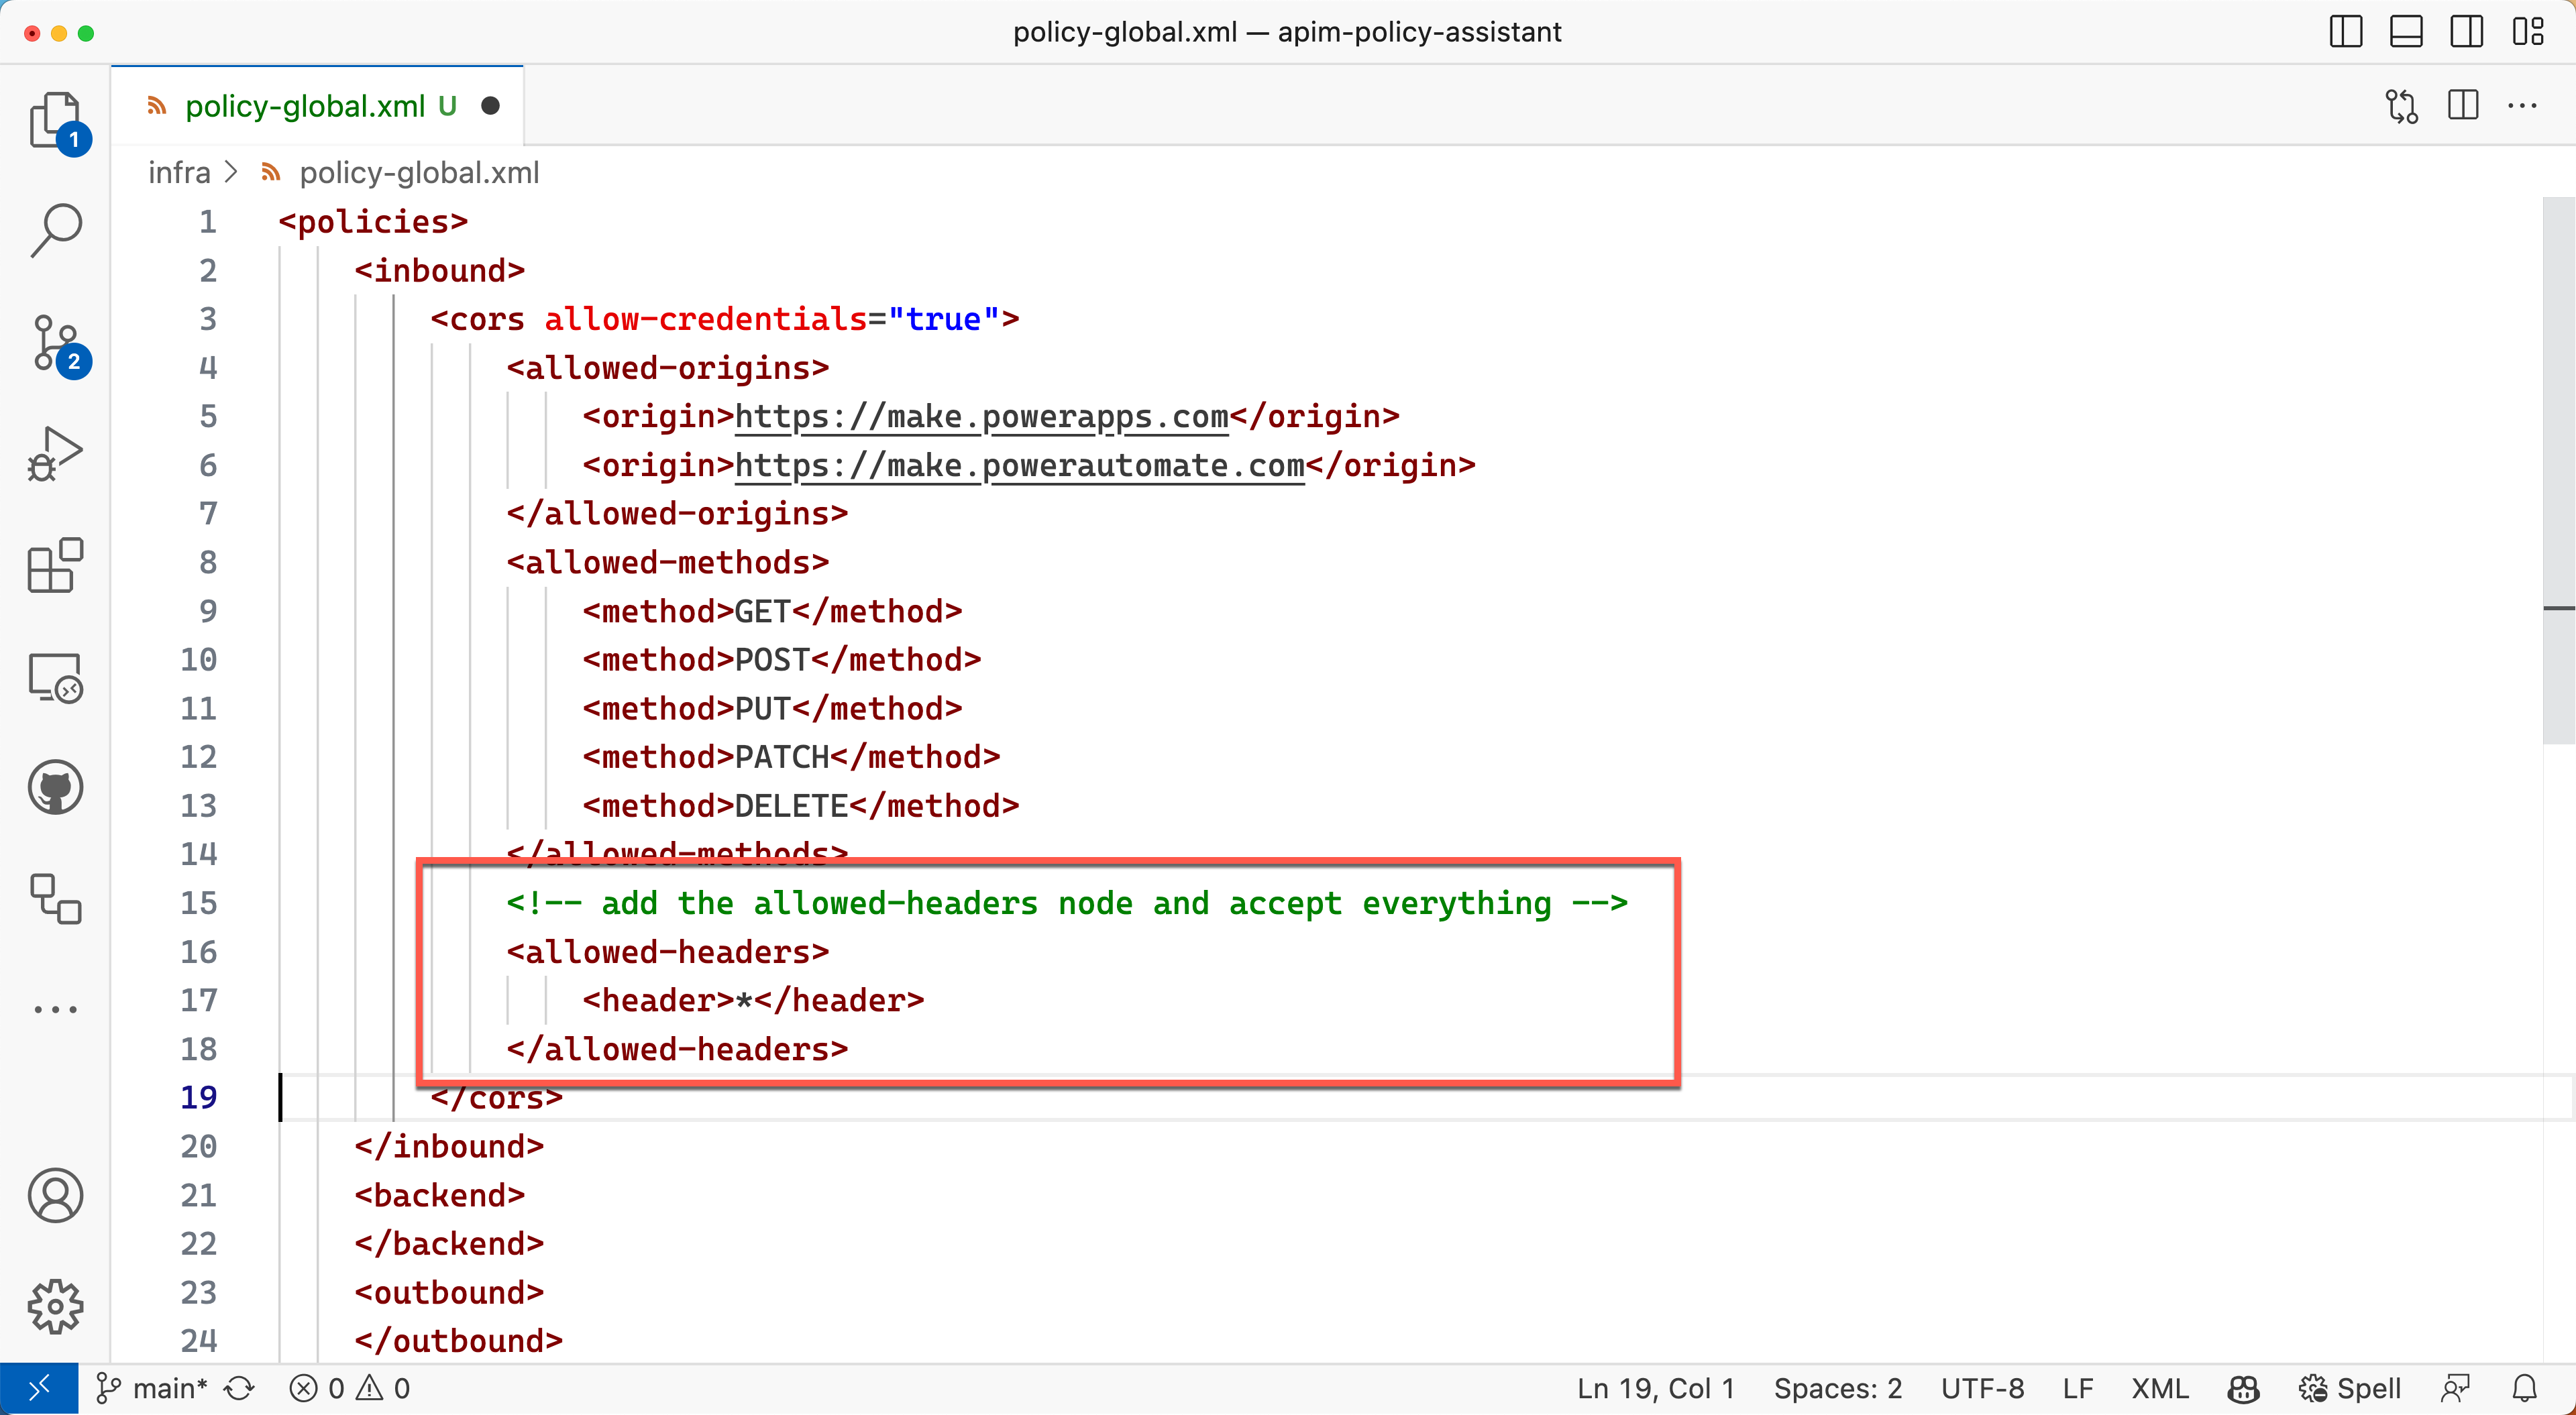
Let's add response header policy in the global policy document. Add the following comment right after the </allowed-headers> tag and press the Enter key.
</allowed-headers>
<!-- add the expose-headers node and accept everything -->
Accept the suggestion from GitHub Copilot, if you're happy with that.
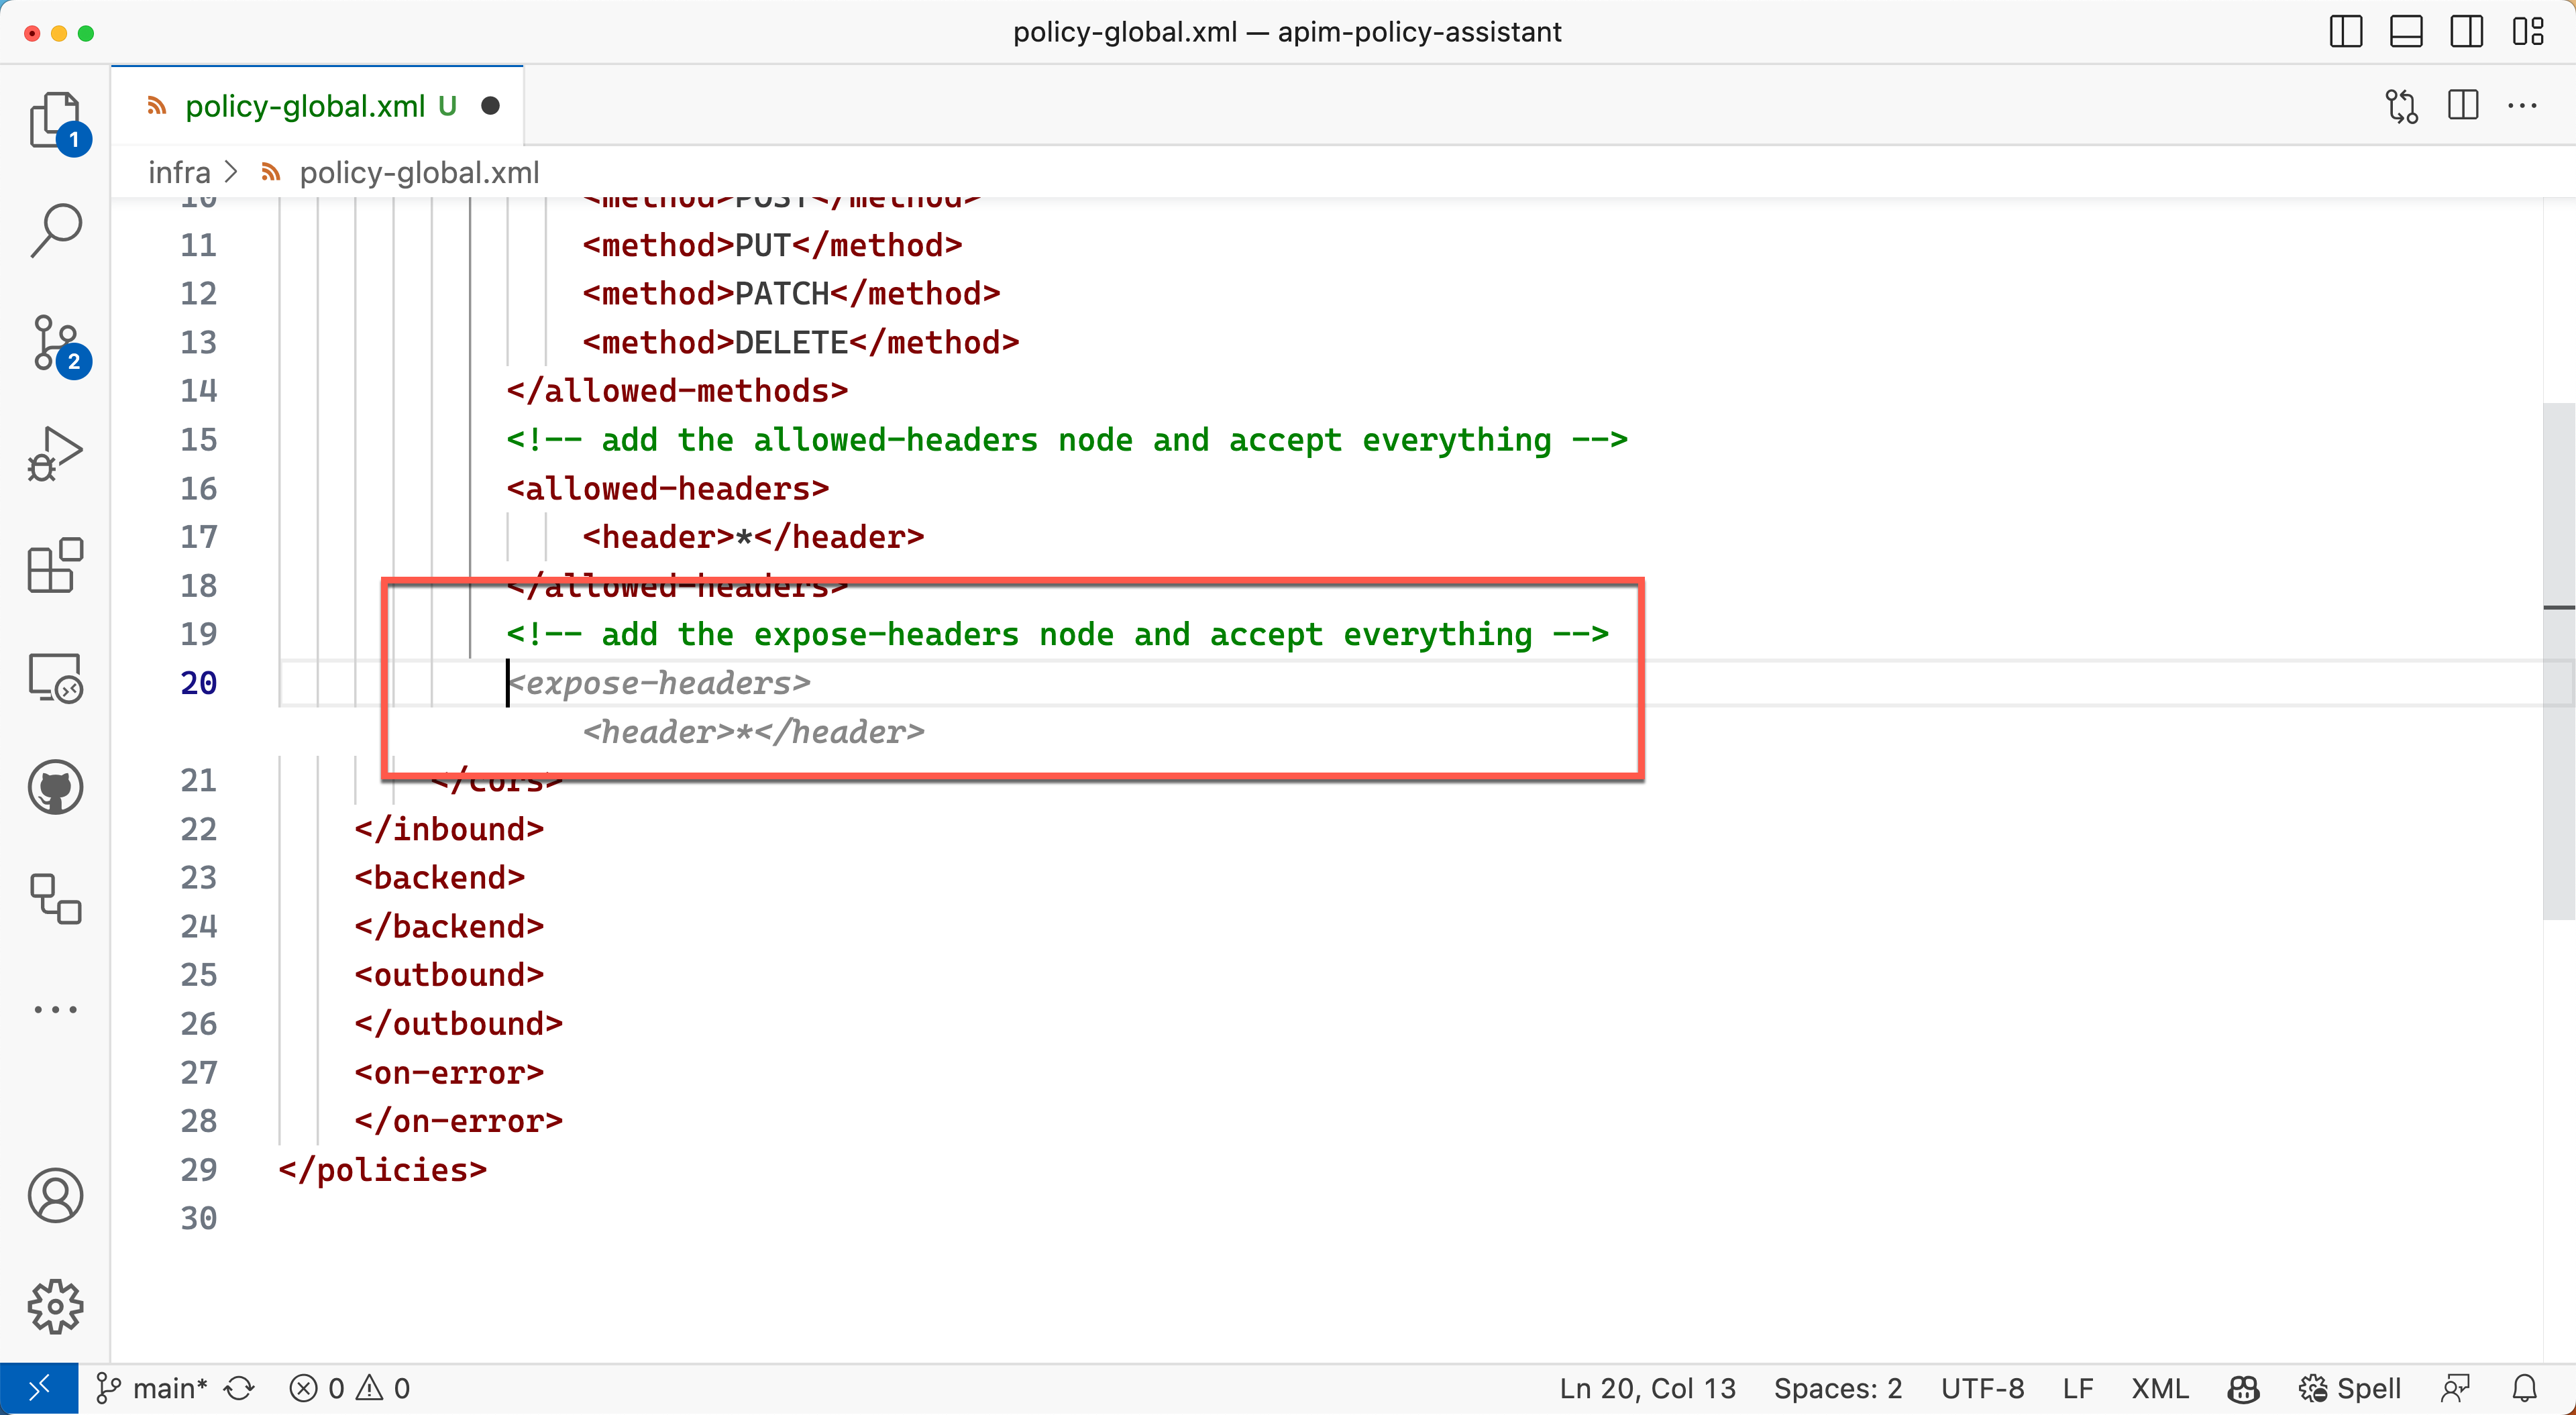
Keep repeating this until you get what you want.
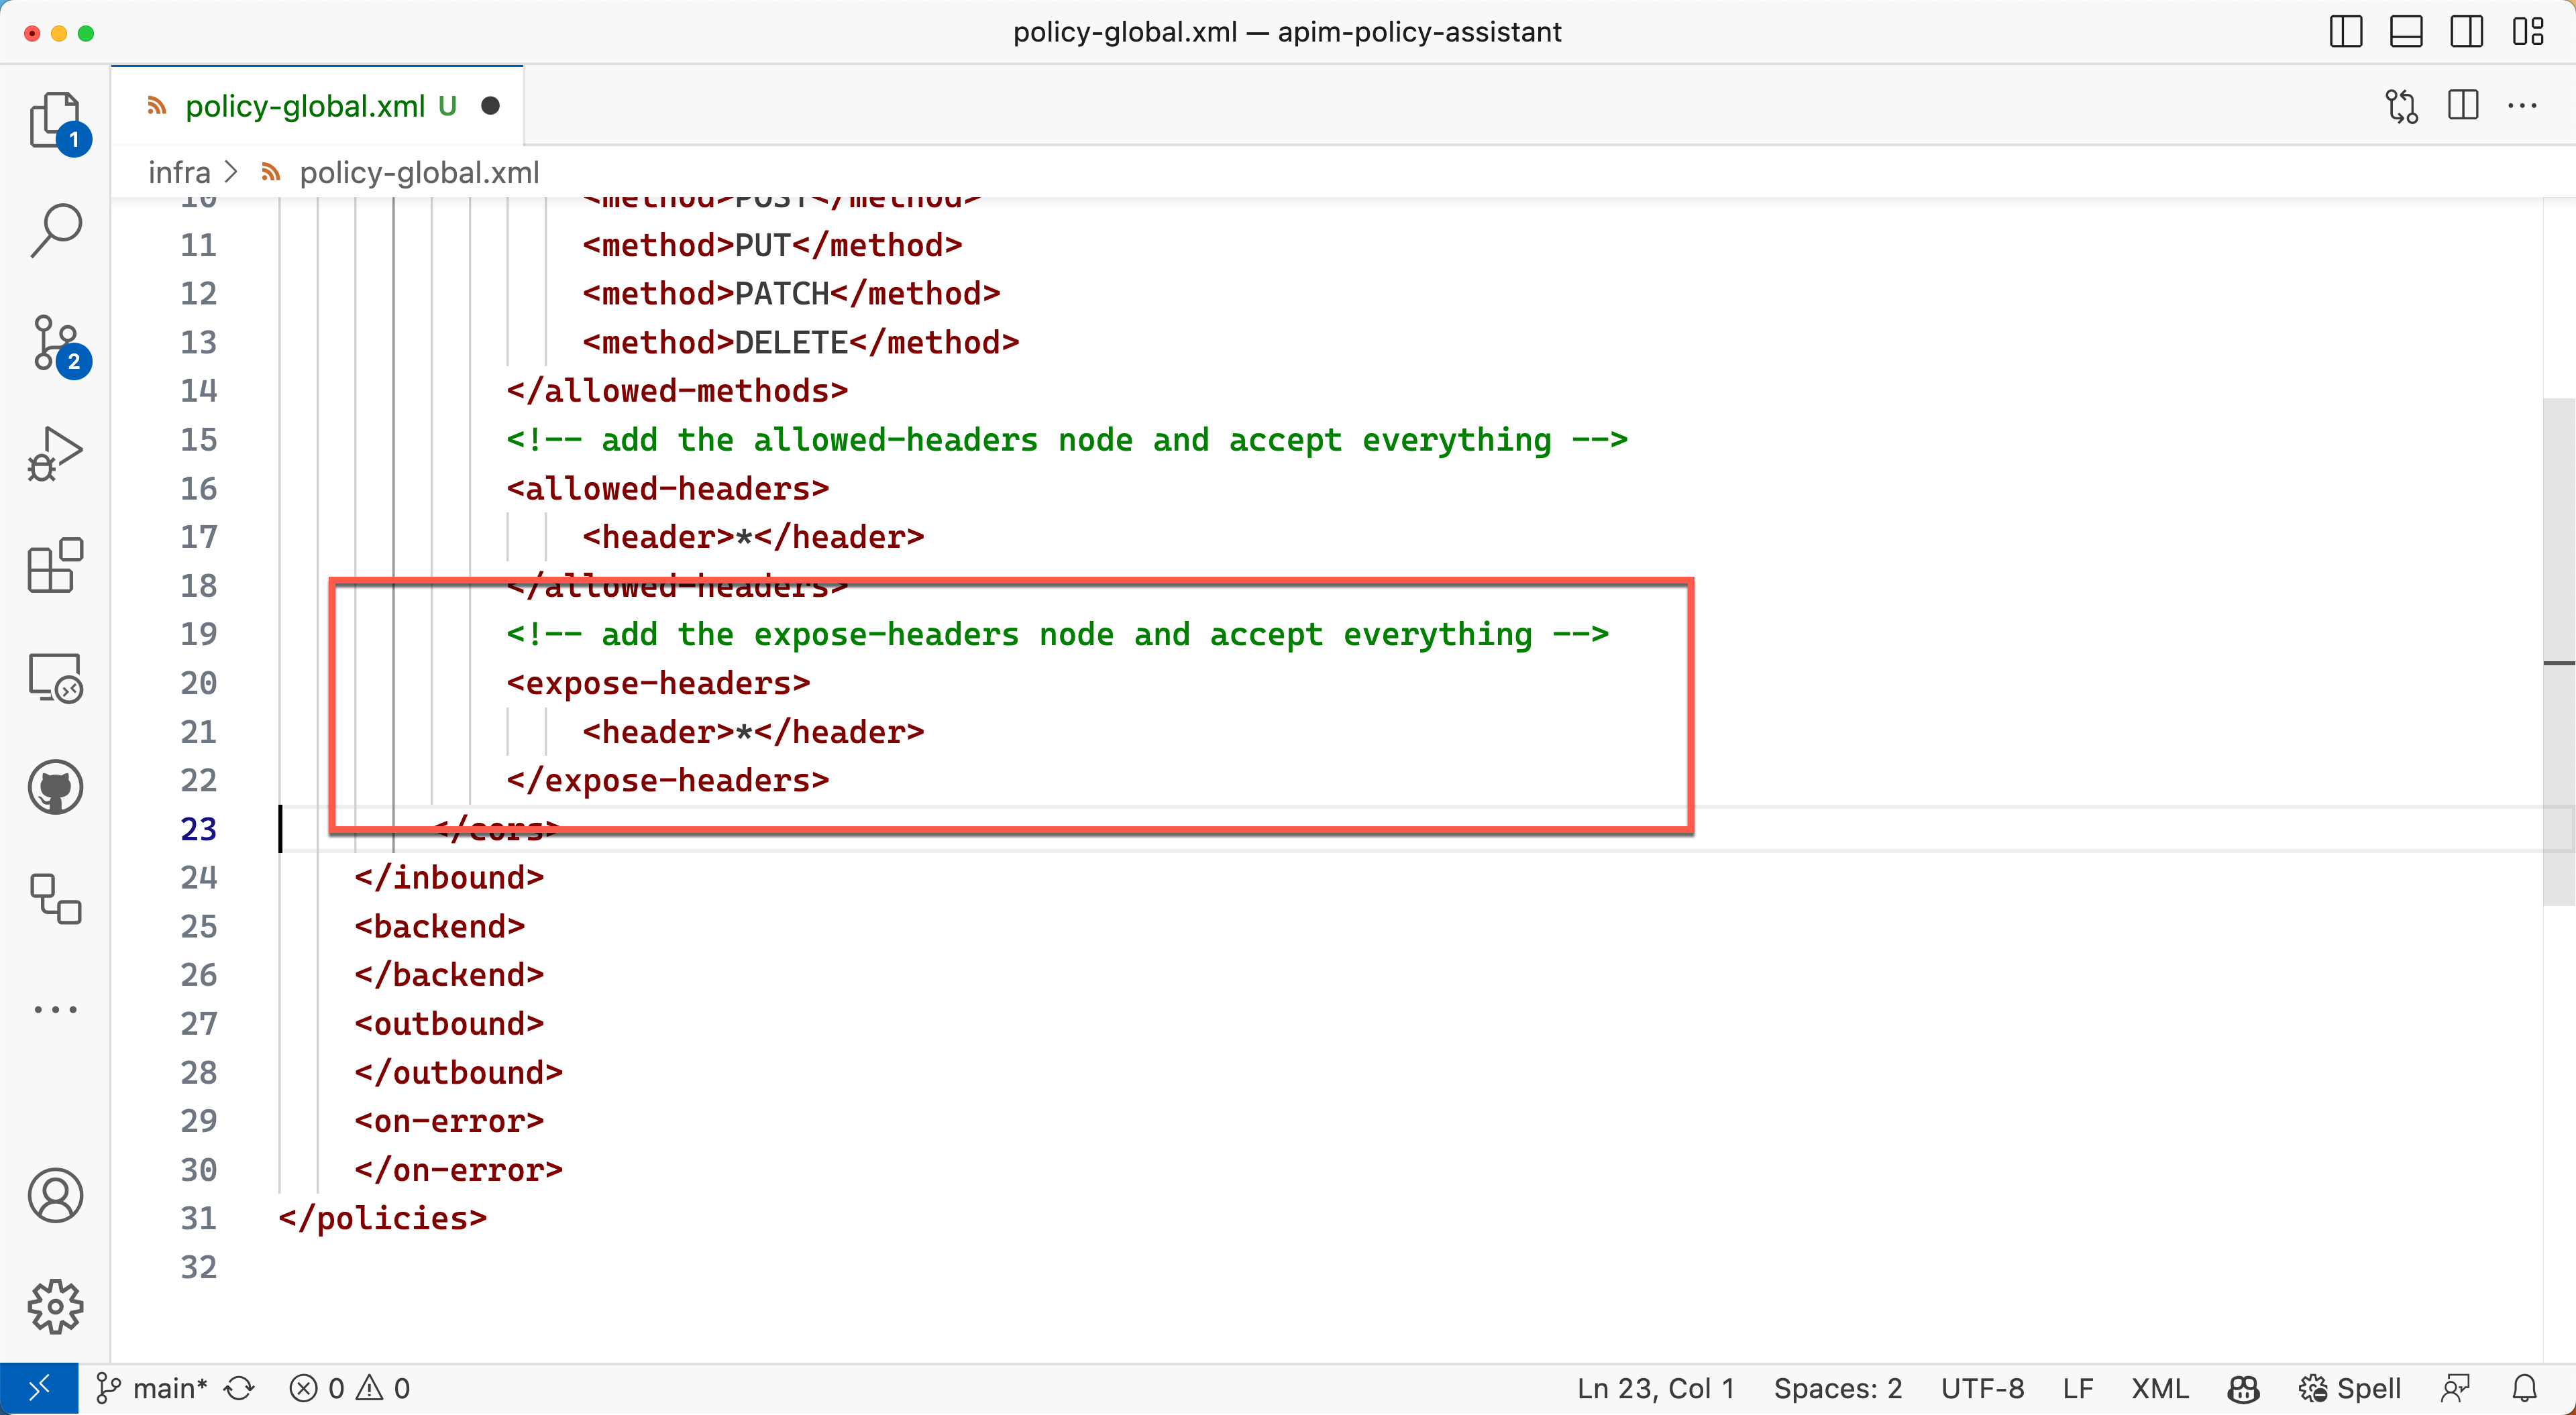
Now you've got the global policy document. Save it as policy-global.xml.
API-level policy document
Let's write an API-level policy document. Here's the scenario:
Apply the same API key to all endpoints of the API. Assume that the API key is already stored in the APIM's Named Values feature.
Open Visual Studio Code and open the GitHub Copilot Chat window. Enter the following zero-shot prompt:
Show me the Azure API Management policy document at the API level, including the following.

- Request header insertion
- Header name: x-functions-key
- Header value: API key value stored in the Named Values feature as "{{X_FUNCTIONS_KEY}}"
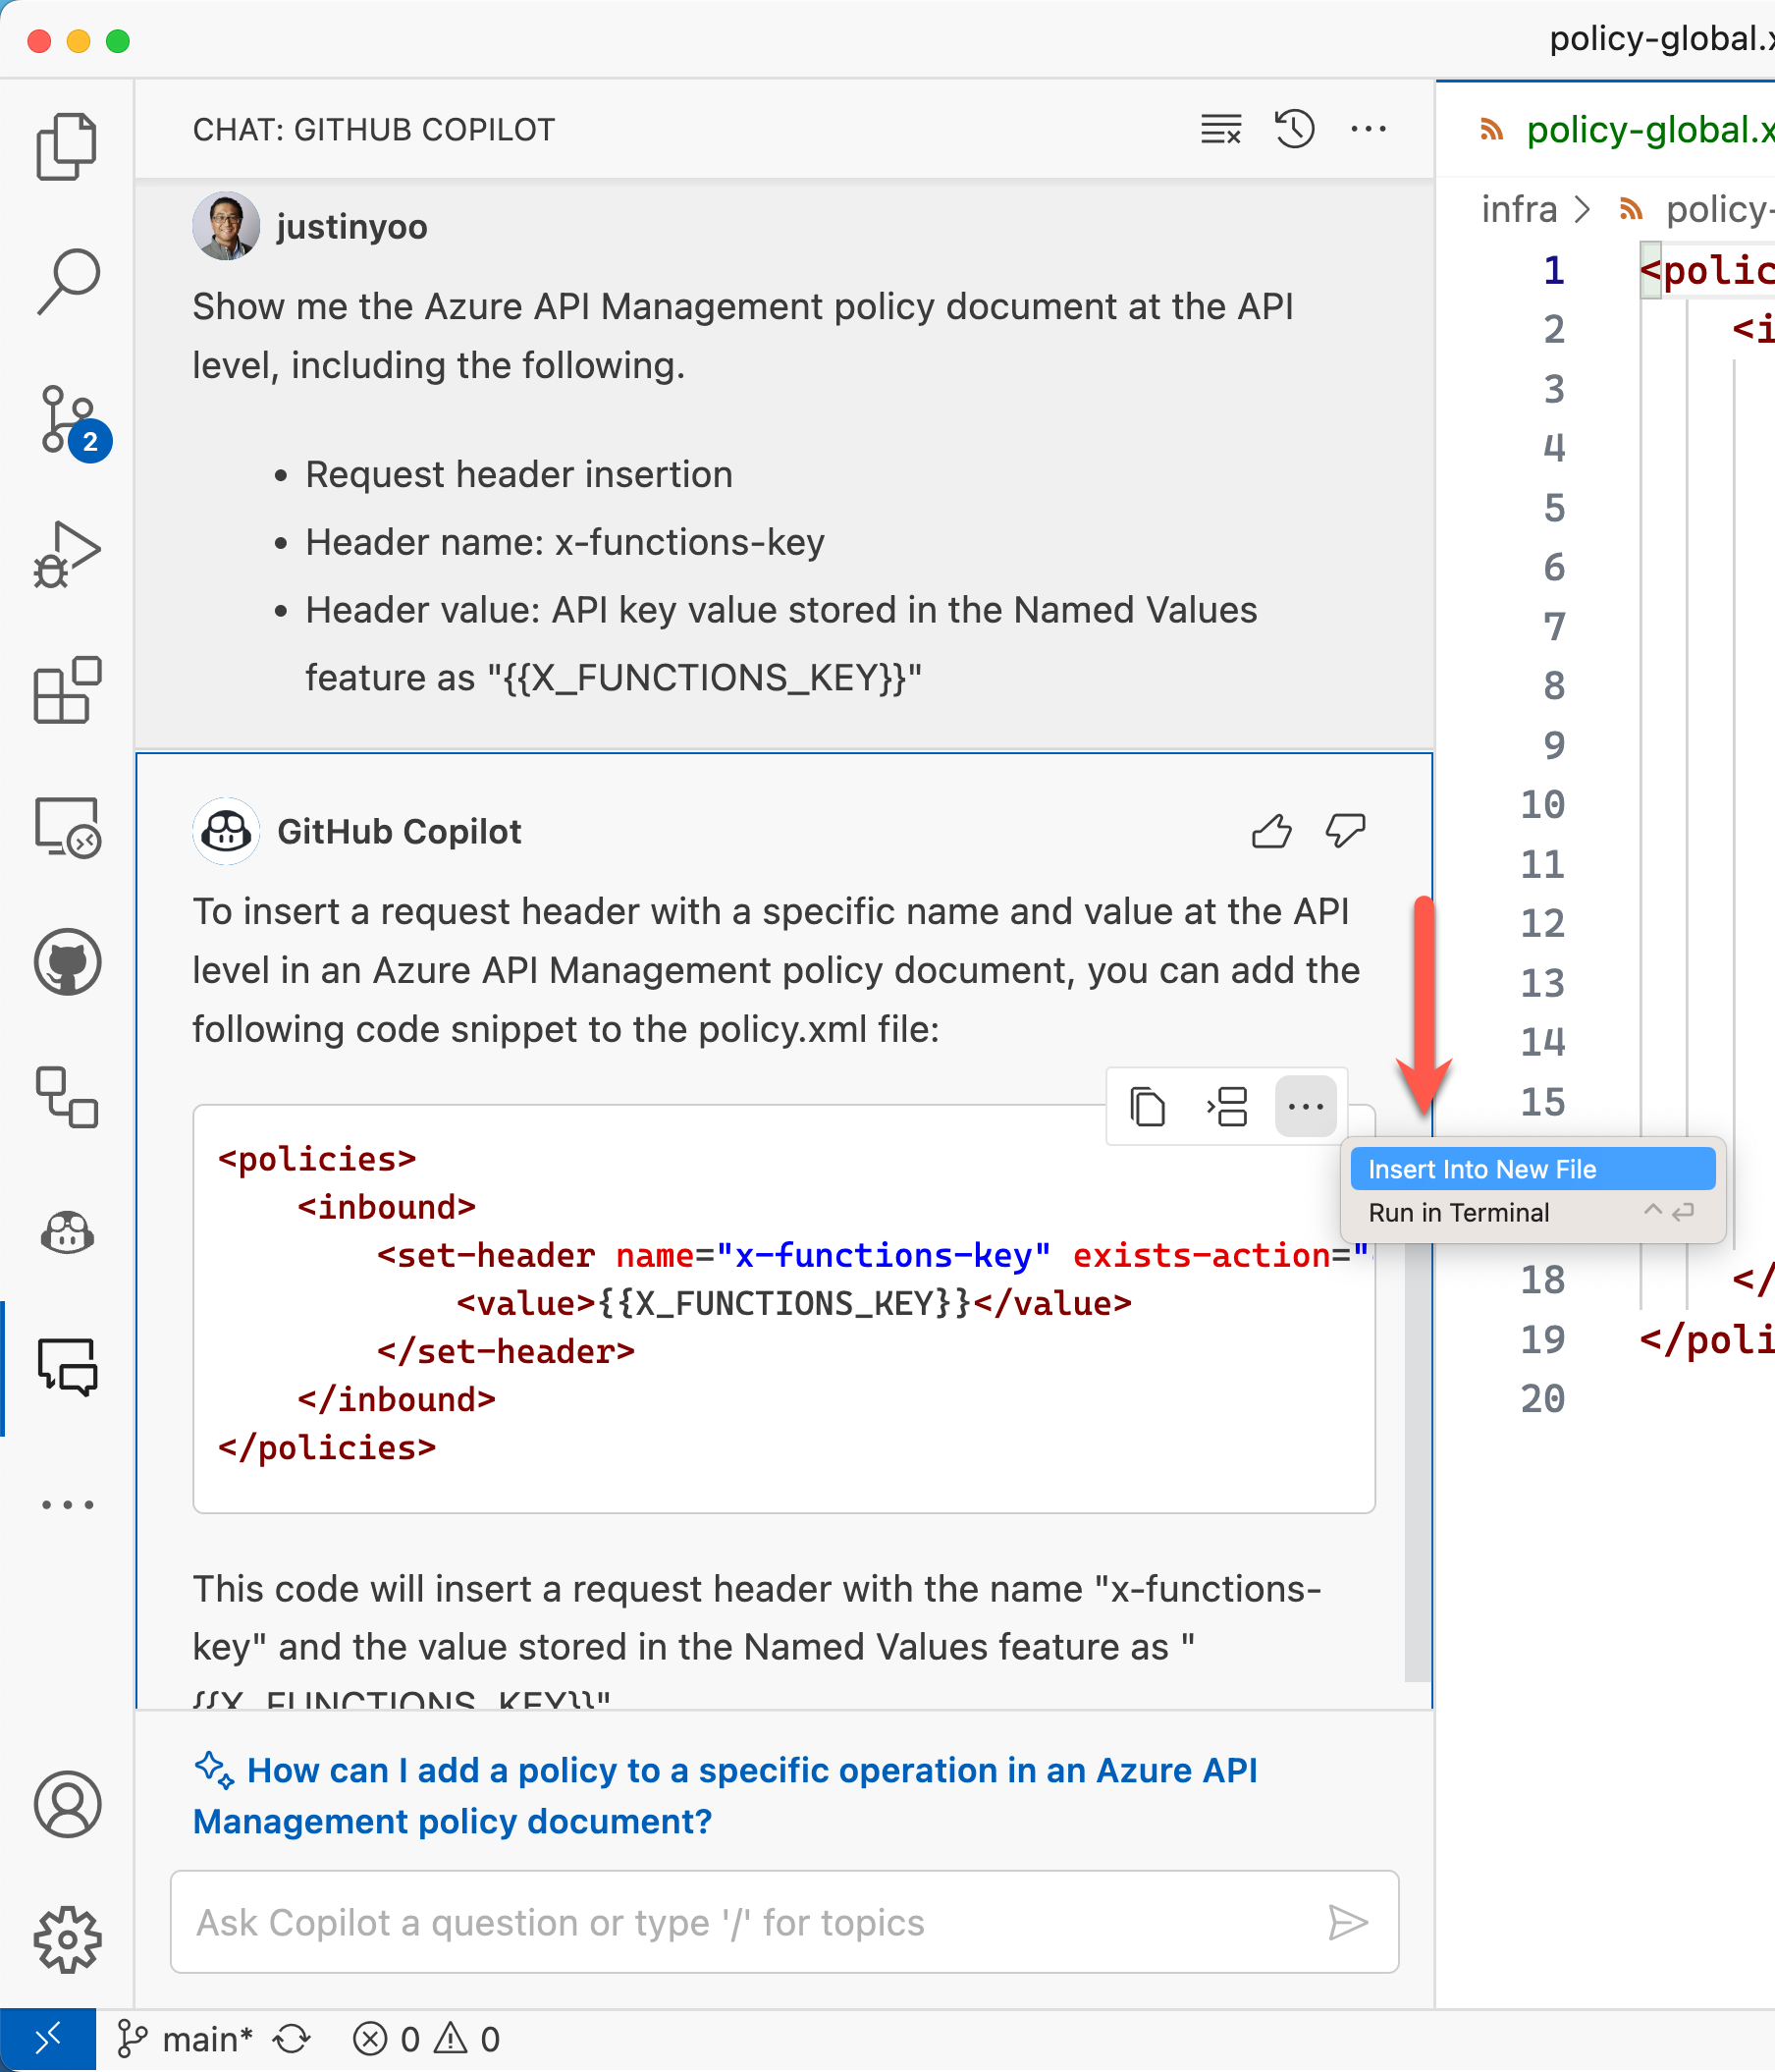
You might get something like below:
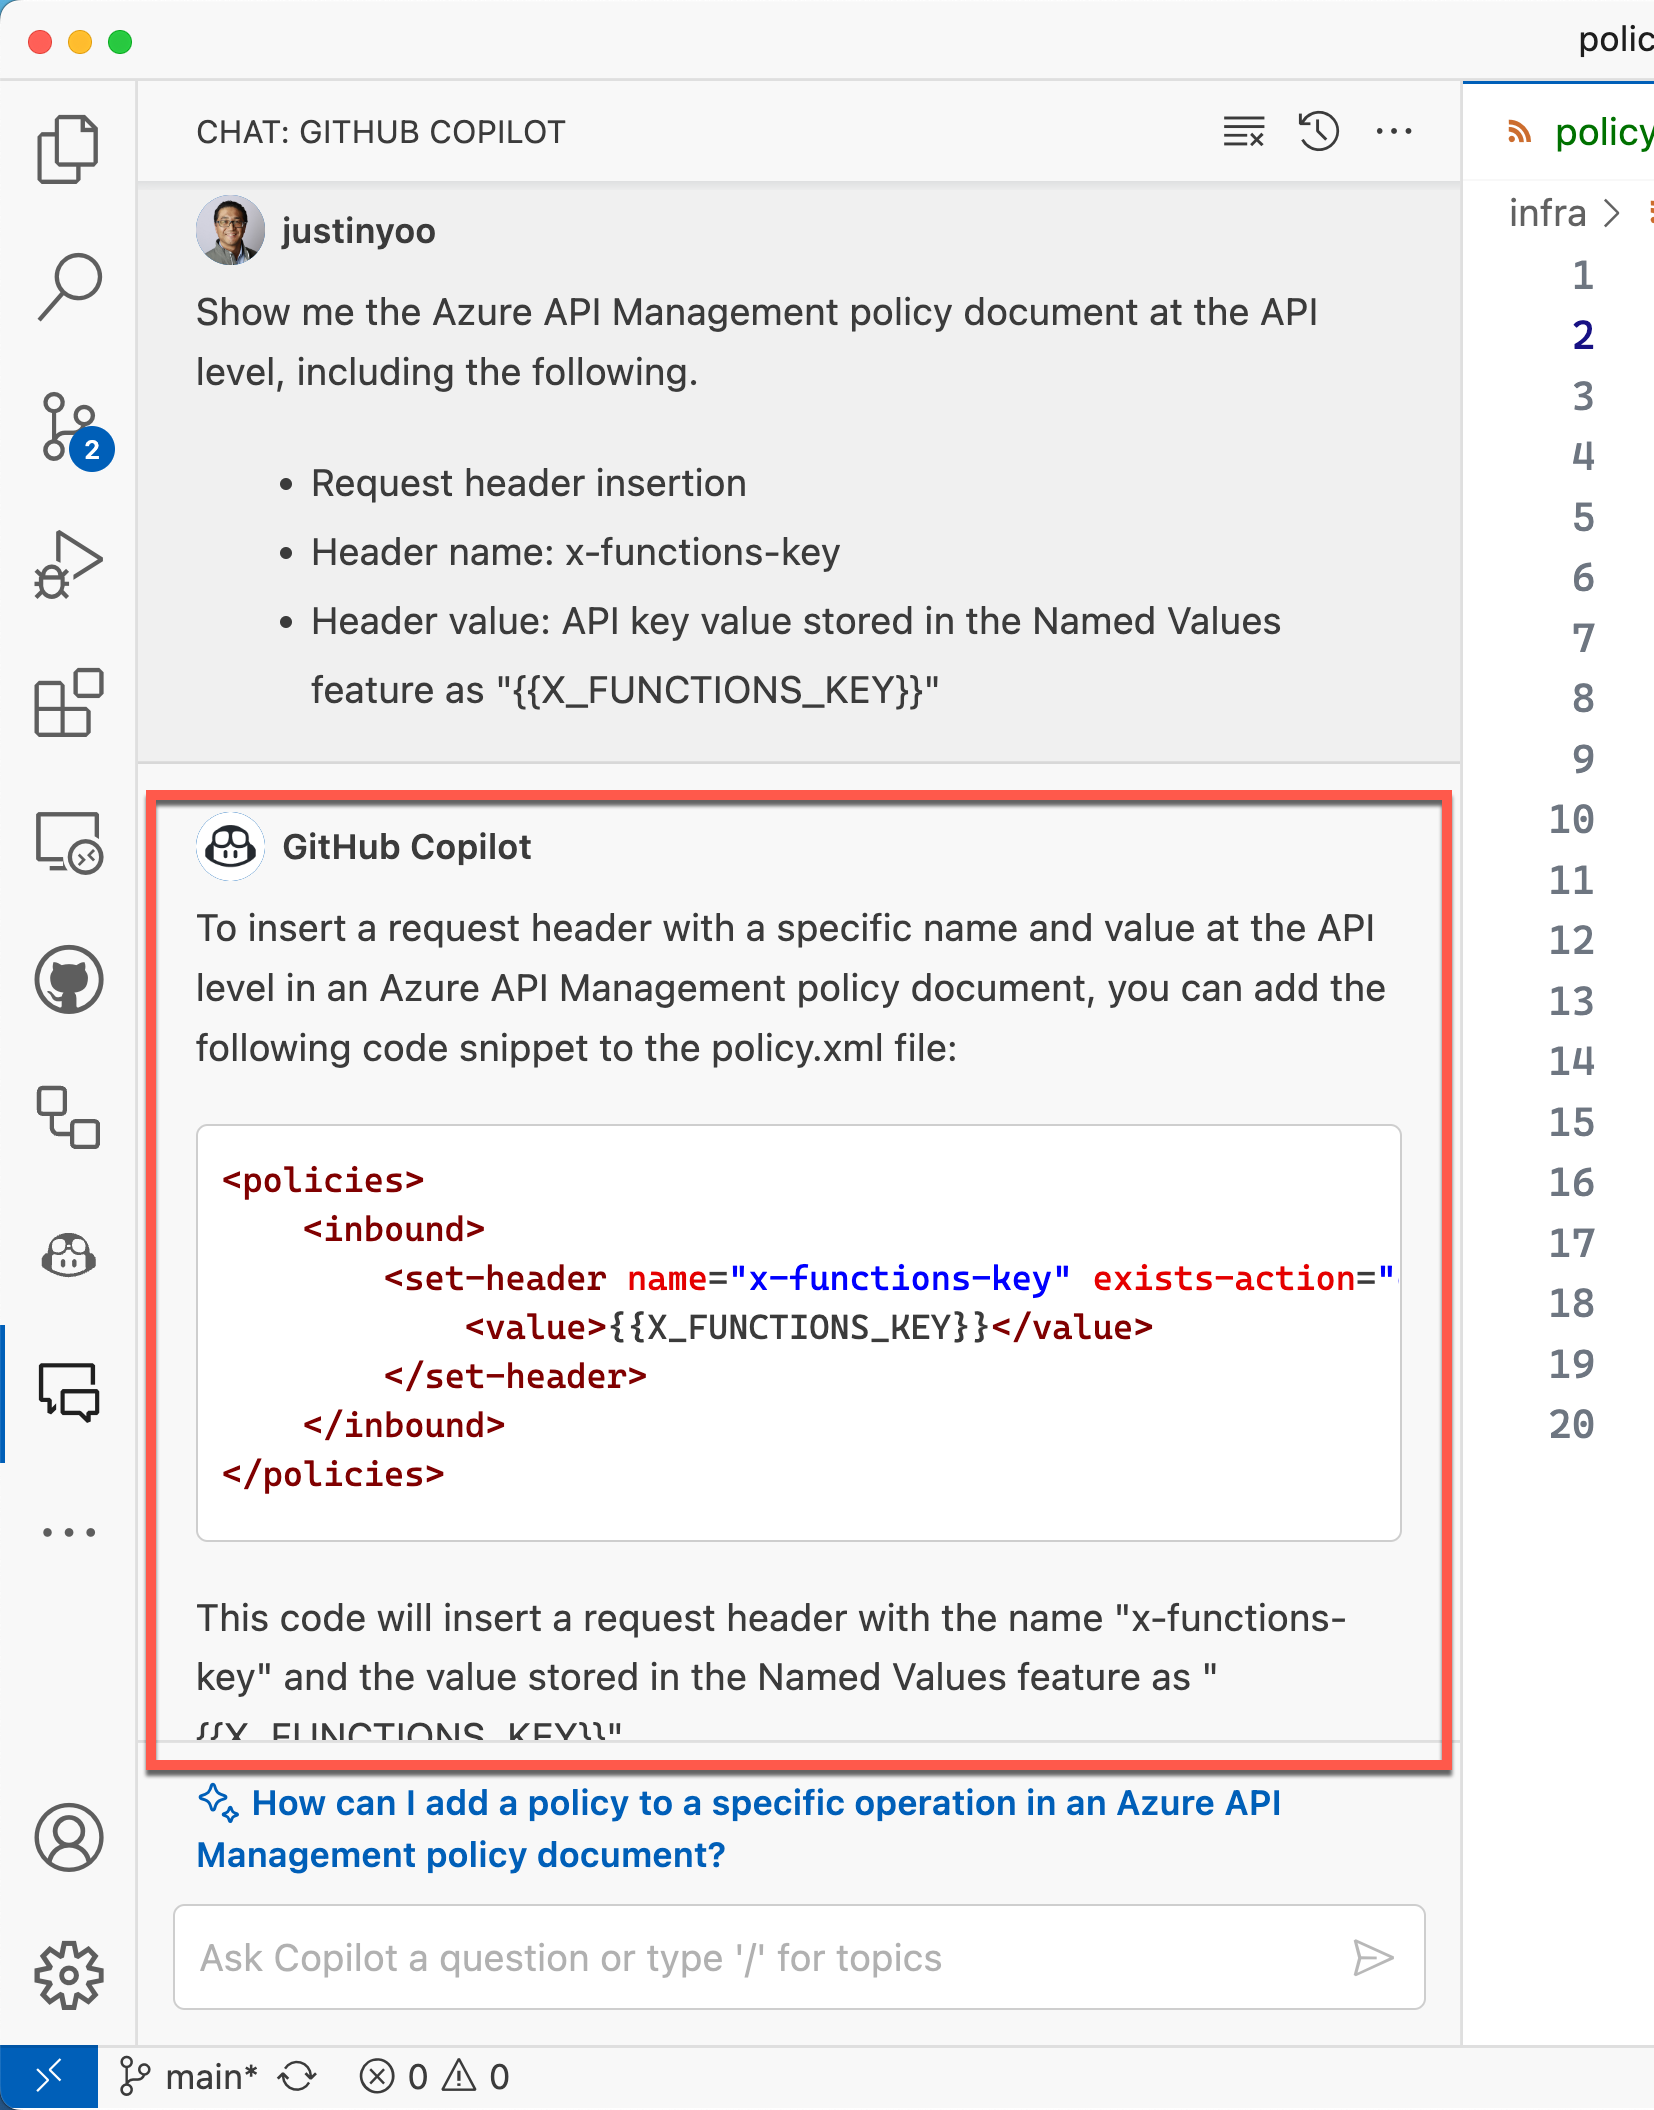
If you want to store this policy document as a new file, you can do so by clicking the "Insert into a New File" menu.
You have the new file.
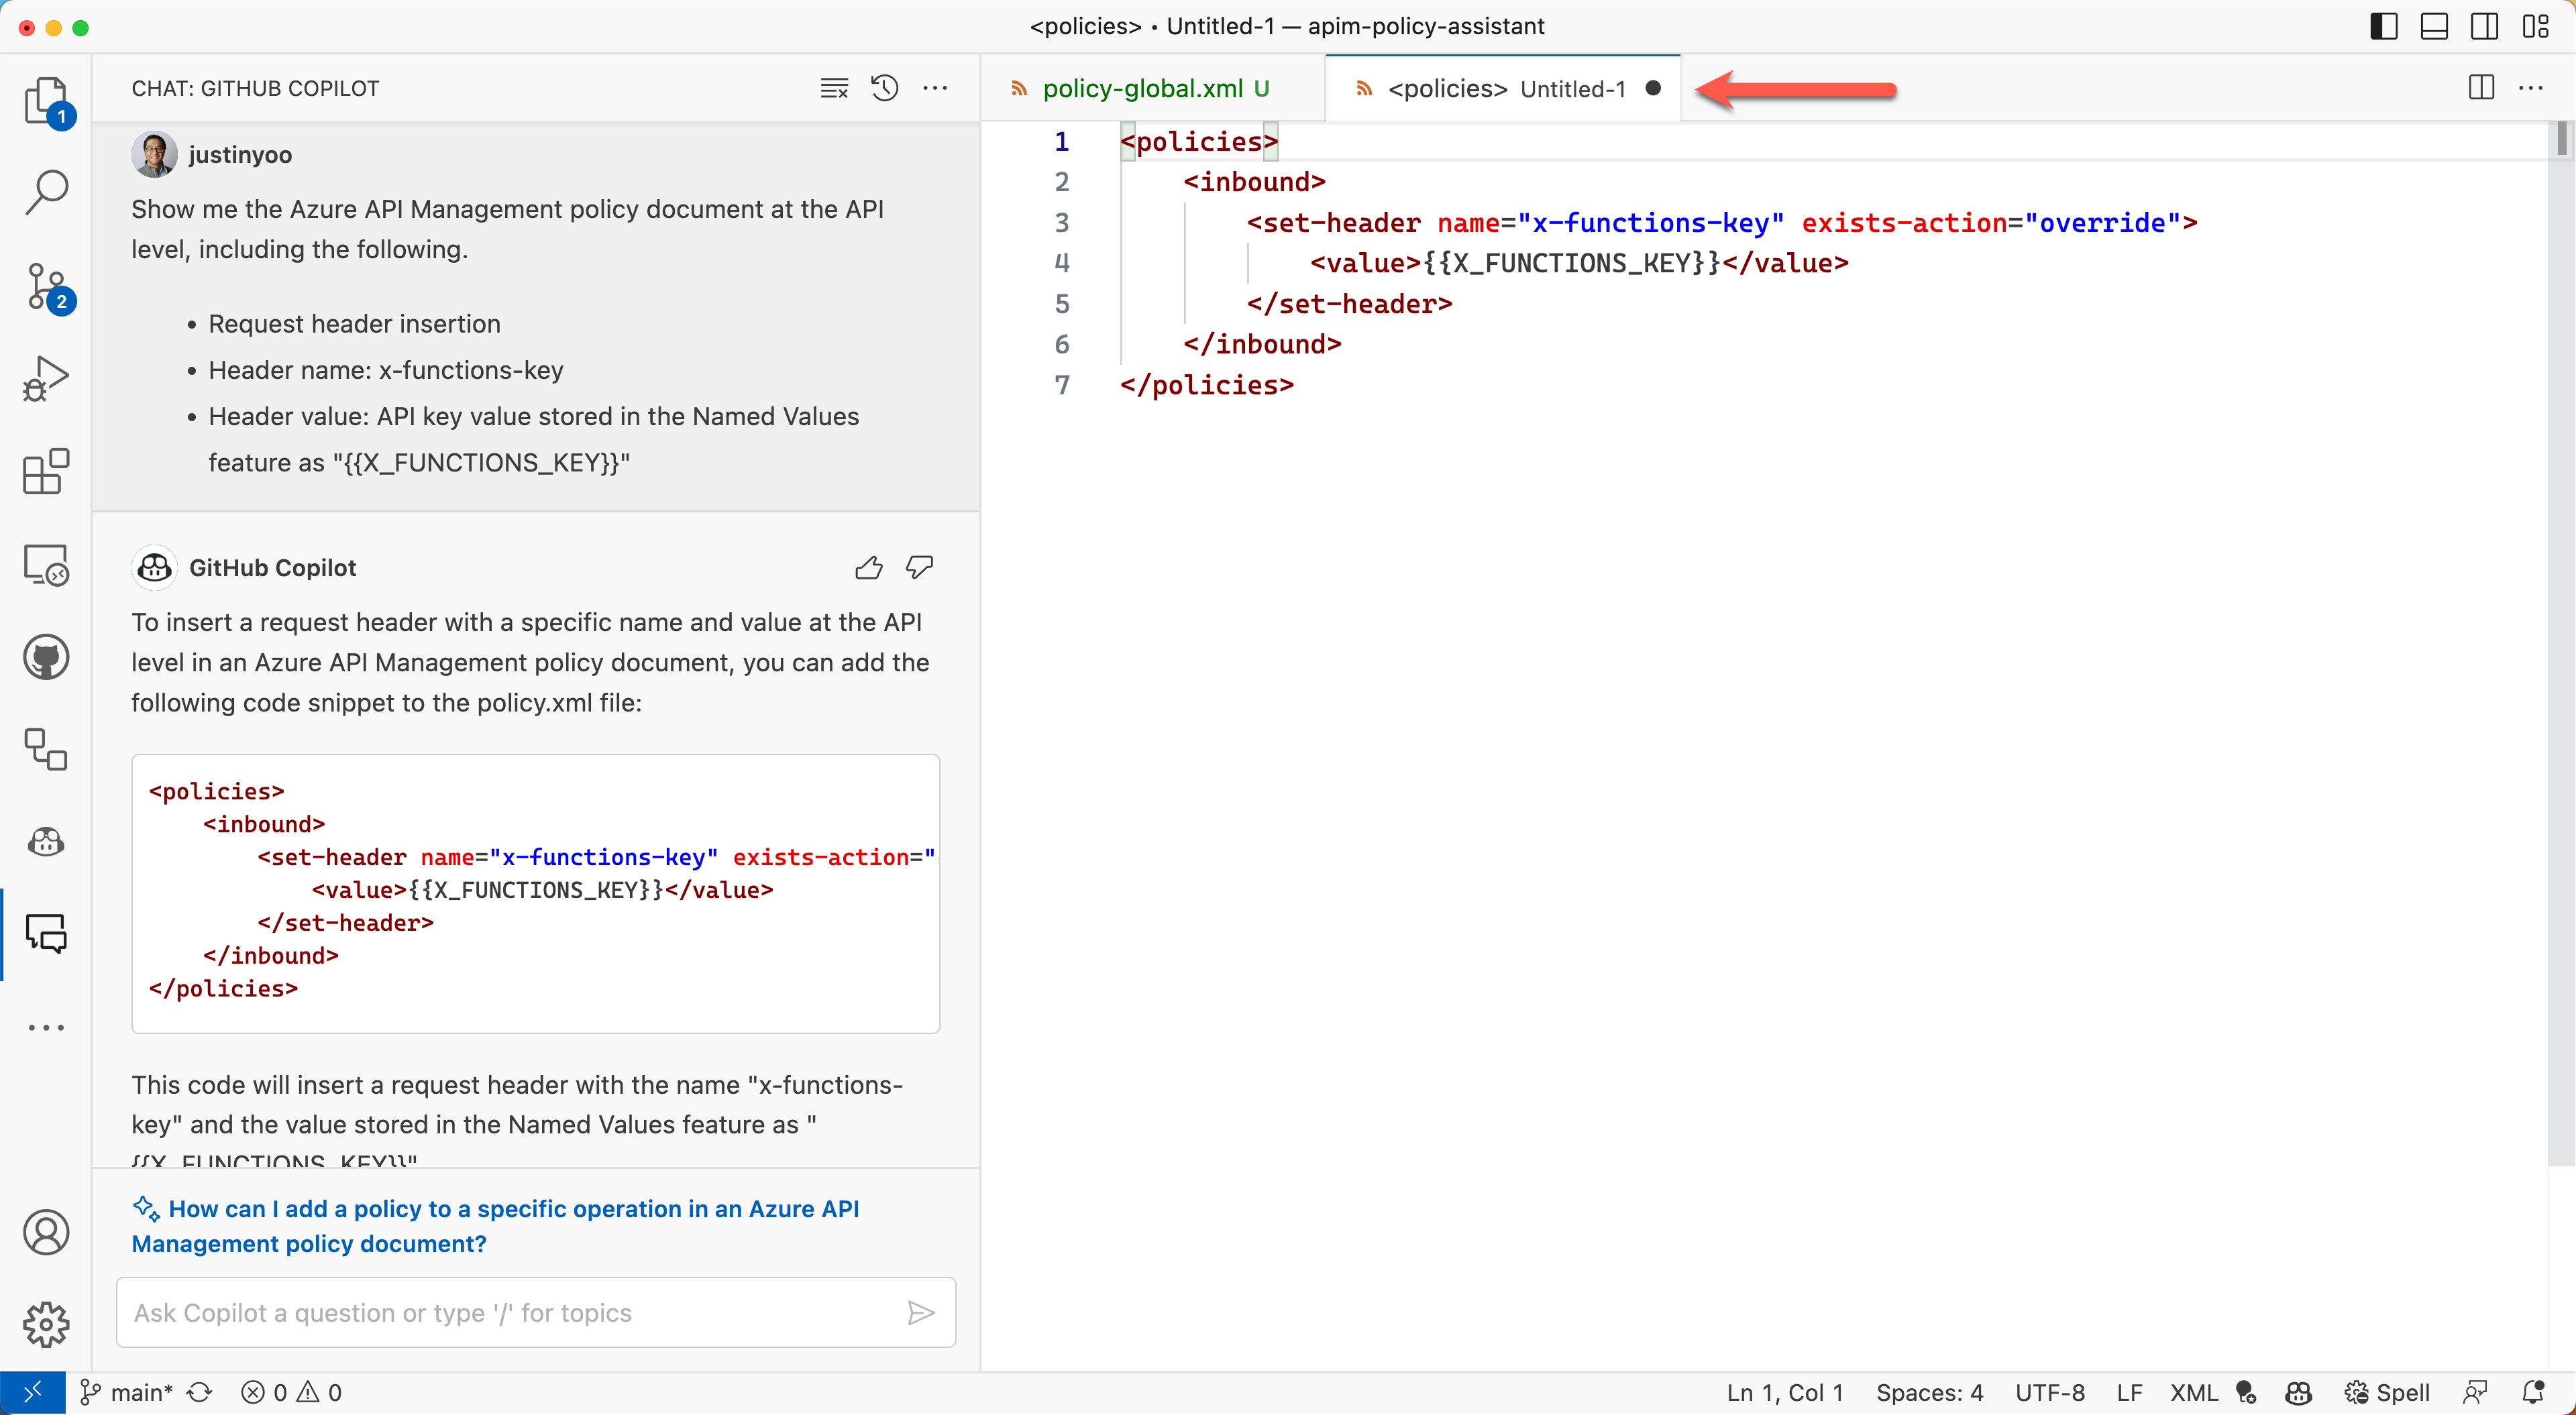
Save this file as policy-api.xml.
At the API level, GitHub Copilot has suggested the policy document that fulfills the scenario. If you need some more, you can open the policy-api.xml file and add more policies with GitHub Copilot like what you did for the global policy document.
Operation-level policy document
Finally, let's write an operation-level policy document. Here's the scenario:
For the
/products/{id}operation, rewrite the URL to/products?id={id}and change the backend server address tohttps://fabrikam.com/api.
Within the GitHub Copilot Chat window, enter the following zero-shot prompt:
Show me the Azure API Management policy document at the operation level, including the following.

- URL rewriting: Change /products/{id} to /products?id={id}
- Backend server URL: https://fabrikam.com/api
Here's the suggestion from GitHub Copilot:
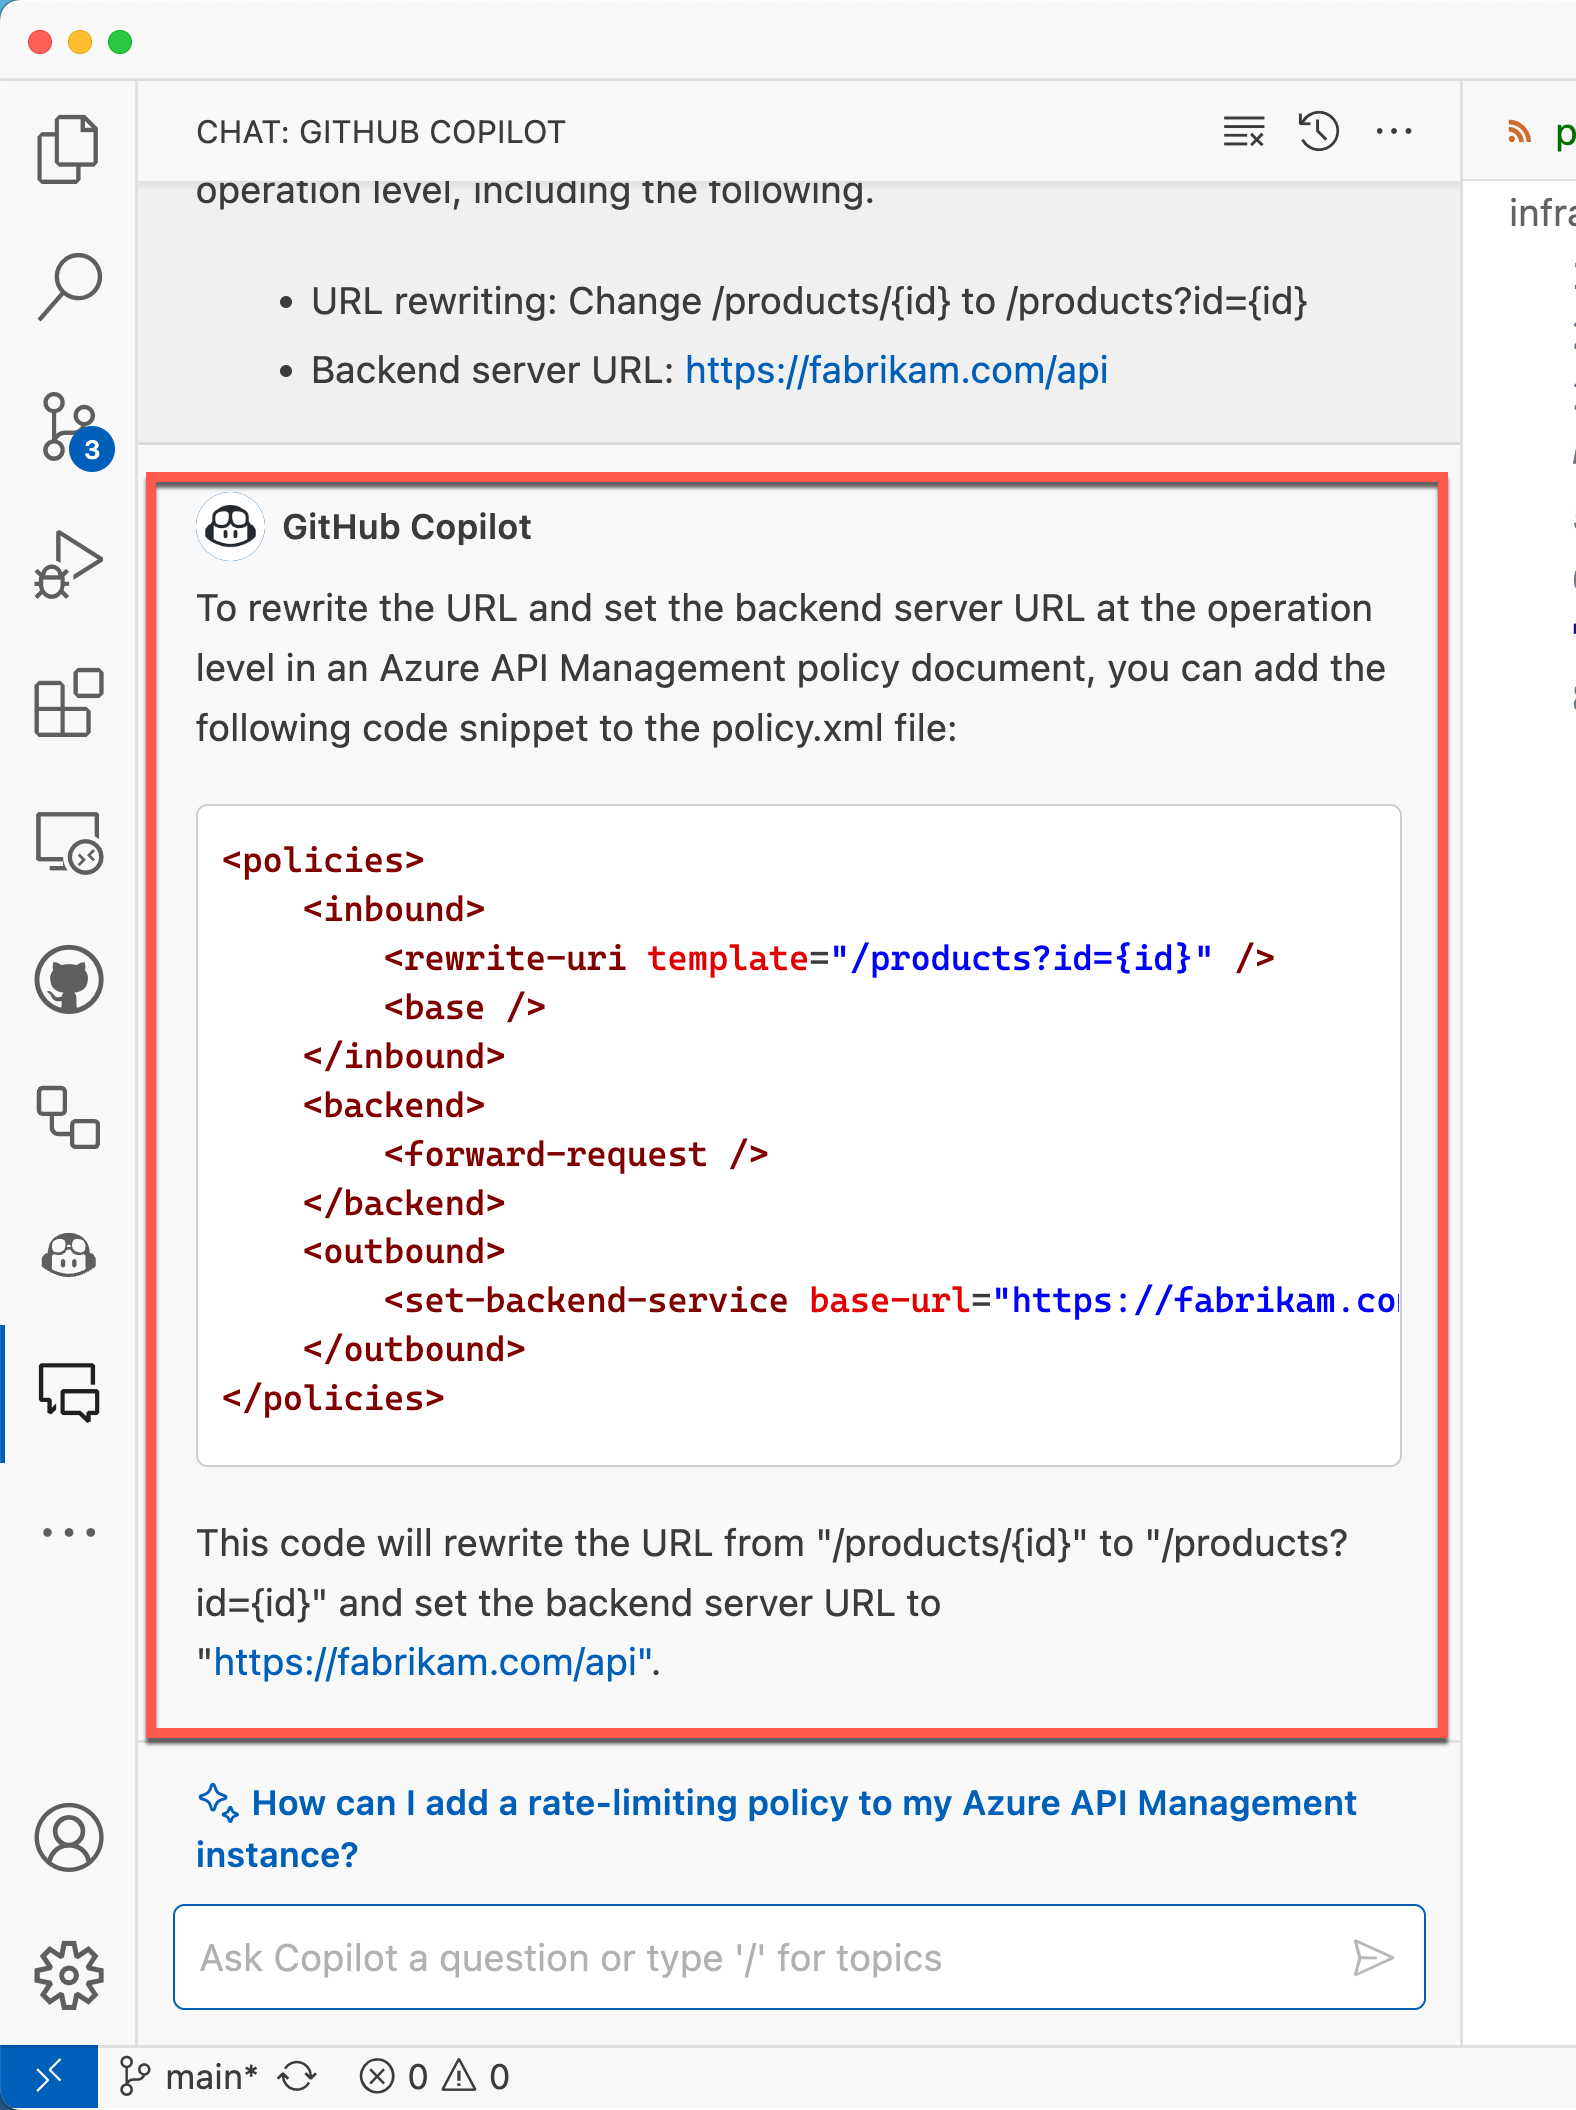
If you're happy with that, save it as policy-operation.xml, by clicking the "Insert into New File" menu. However, the policy document is not quite complete yet. You need to move the the <set-backend-service> node to either the <inbound> node or the <backend> node.
Once you've done, copy all those documents and paste them into the APIM portal.
So far, I've demonstrated how GitHub Copilot helps us write the APIM policy documents at the global, API and operation levels. As I mentioned at the beginning, writing or modifying the APIM policy documents can be cumbersome, and it has a fairly bit amount of learning curves. However, if you use GitHub Copilot, you can write the APIM policy documents much easier and faster.
More about APIM...
If you want to learn more about APIM and APIM policies, the following links might be helpful.
- Azure API Management key concepts
- Quickstart: Create a new Azure API Management service instance by using the Azure portal
- Azure APIM policies
- Implement API Management
This article was originally published on Dev Kimchi.
 Microsoft