First published on TECHNET on Apr 18, 2016
When You are working on issues related to Microsoft Exchange Unified Messaging there may come a Time when you would want to collect Traces on the Exchange UM server for The Unified Messaging component to conduct some deeper troubleshooting. The Below article describes the Process of collecting EXTRA trace specifically for Issues involving Unified Messaging.
The Process below is for Exchange server 2010. The Extra tracing component is Built in Exchange 2010 however if You are using Exchange server 2013 then you may have to download the MSI for EXTRA tool first and install on your Exchange 2013 server. Once You install the Tool on Exchange 2013, Double click to open the tool and the process from there on is exactly similar to Exchange 2010.
Note: At the moment there is NO publicly available location from where one can Download the MSI for EXTRA for Exchange 2013. The Only supported way of Getting the EXTRA tool for Exchange 2013 is by contacting Microsoft Support.
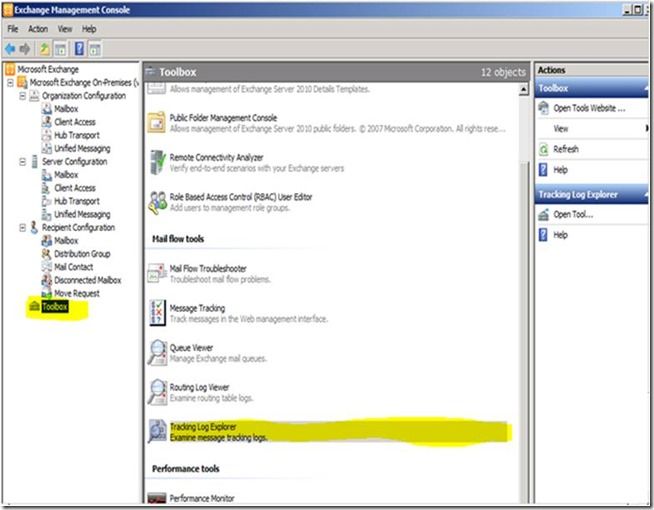
Launch Exchange Management Console
On your Left Click on Toolbox
On the right screen click on Tracking Log Explorer
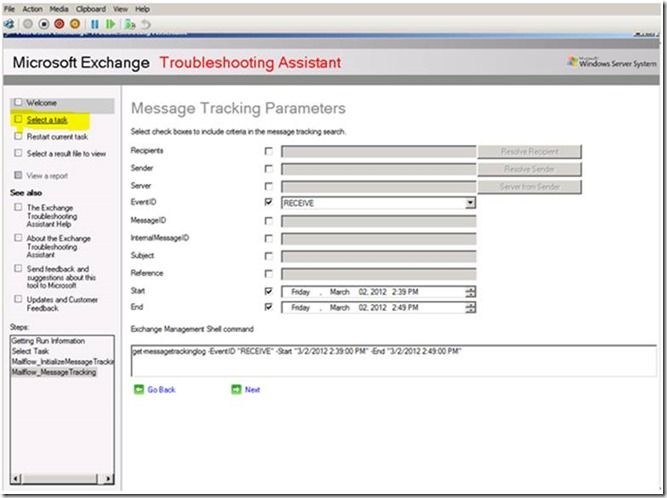
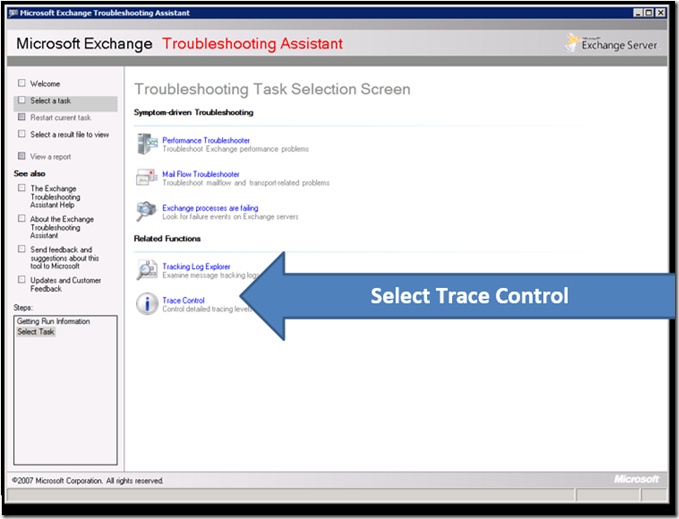
You May see one of the two screens below ( fig.b or fig.c ), Irrespective of what screen you see just look for the option Select a Task
Fig. b;
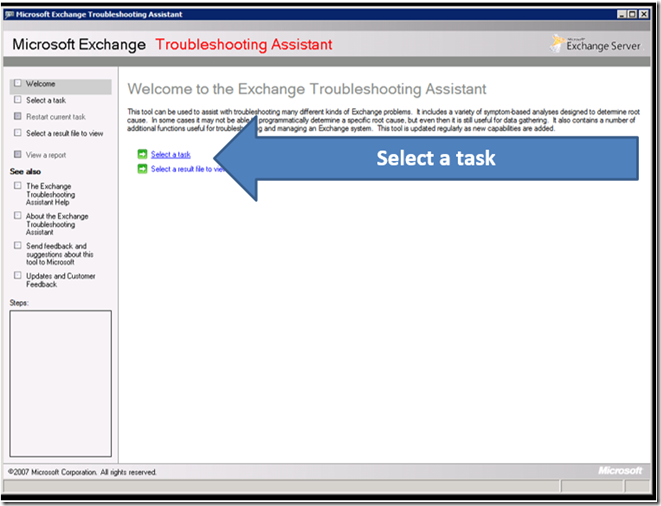
Fig. C
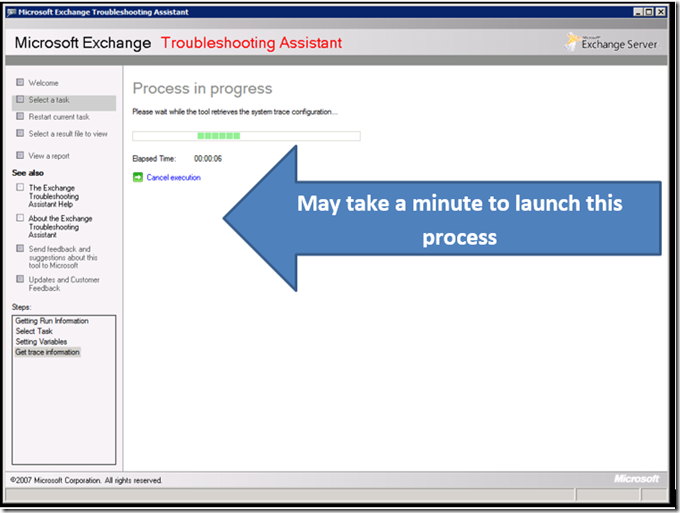
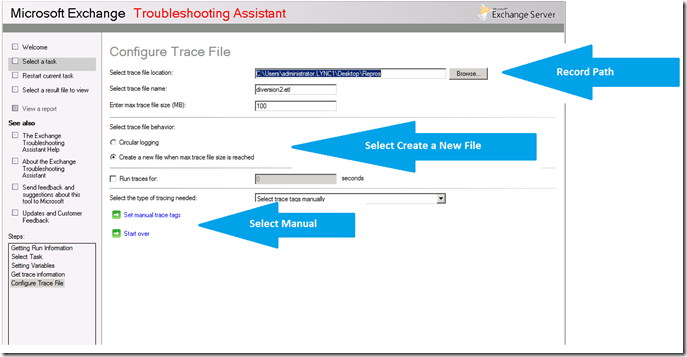
Important: The Section that says "RECORD PATH" is where the logs will be saved, make a note of this.
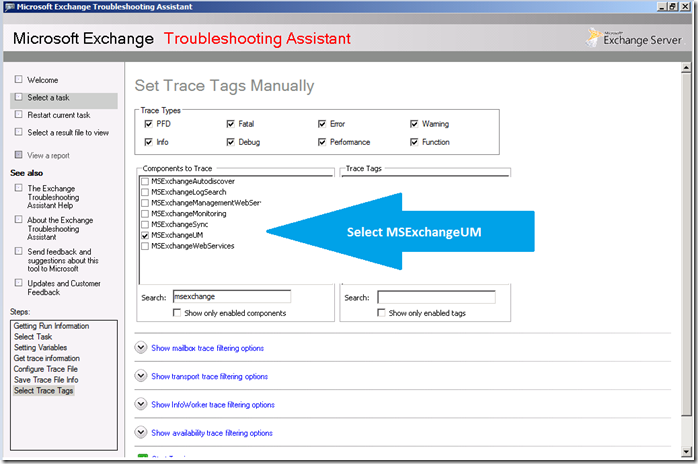
Remember to Select ALL 8 FLAGS under Trace Types
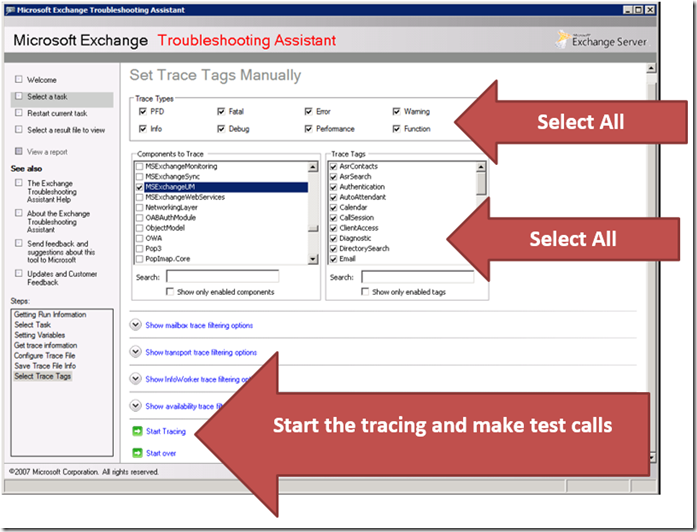
Now Reproduce the issue and then stop tracing when Repro is done.
Logs will be saved in the path that indicated in Screen shot 6 (RECORD PATH)
When You are working on issues related to Microsoft Exchange Unified Messaging there may come a Time when you would want to collect Traces on the Exchange UM server for The Unified Messaging component to conduct some deeper troubleshooting. The Below article describes the Process of collecting EXTRA trace specifically for Issues involving Unified Messaging.
The Process below is for Exchange server 2010. The Extra tracing component is Built in Exchange 2010 however if You are using Exchange server 2013 then you may have to download the MSI for EXTRA tool first and install on your Exchange 2013 server. Once You install the Tool on Exchange 2013, Double click to open the tool and the process from there on is exactly similar to Exchange 2010.
Note: At the moment there is NO publicly available location from where one can Download the MSI for EXTRA for Exchange 2013. The Only supported way of Getting the EXTRA tool for Exchange 2013 is by contacting Microsoft Support.
Launch Exchange Management Console
On your Left Click on Toolbox
On the right screen click on Tracking Log Explorer

You May see one of the two screens below ( fig.b or fig.c ), Irrespective of what screen you see just look for the option Select a Task
Fig. b;

Fig. C


Important: The Section that says "RECORD PATH" is where the logs will be saved, make a note of this.

Remember to Select ALL 8 FLAGS under Trace Types

Now Reproduce the issue and then stop tracing when Repro is done.
Logs will be saved in the path that indicated in Screen shot 6 (RECORD PATH)
Updated May 20, 2019
Version 2.0Mohammed Anas Shaikh Microsoft
 Microsoft
Joined February 13, 2017
Skype for Business Blog
Follow this blog board to get notified when there's new activity