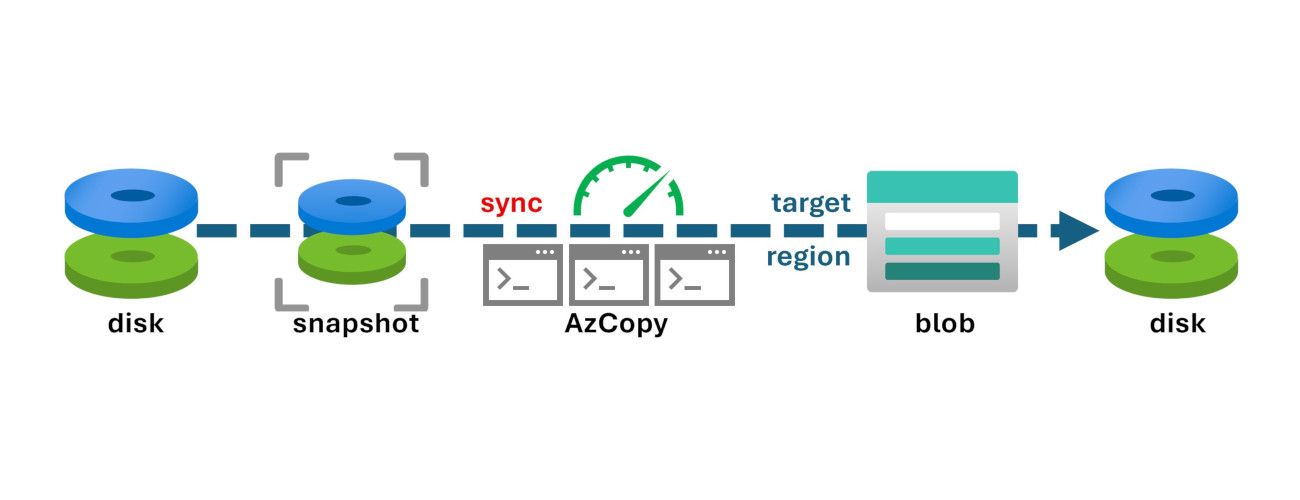
This BLOG gives guidance for moving respectively copying Azure disks to other regions. There are different ways that can be used which results in different performance and complexity. Finally, this BLOG introduces a tool that is easy to use and runs at high speed.
When you want to re-deploy an existing Azure VM in a different region, you must first move or copy all disks of the VM from the source region to the target region. Depending on the regions and disk size, this can be a time-consuming task. Within the same region, copying a disk is easy and fast: create a snapshot of the disks and then create new disks using the snapshot. When the disks must be created in a different region, you have three options:
Copy methods
A snapshot copy to a different region can be relatively easily started using PowerShell commands New-AzSnapshotConfig/New-AzSnapshot. This starts an asynchronous copy of an incremental snapshot to a different region. Using Get-AzSnapshot you can check if the snapshot copy has finished. You can then use the copied snapshot in the target region to create the new disks.
Using BLOB copy is typically faster but more complicated. Hereby, you must first create a storage account in the target region. After that, you copy the snapshots in the source region to BLOBs in a storage account container. These BLOBs can finally be used to create the new disks in the target region. Blob copy is also an asynchronous process. You can use PowerShell command Start-AzStorageBlobCopy for starting it and Get-AzStorageBlob to see if it has finished.
Using the tool AzCopy is the fastest way. However, AzCopy runs synchronously. AzCopy cannot copy multiple snapshots within a single process. Therefore, you should start multiple instances of AzCopy in parallel (one for each snapshot you want to copy). AzCopy triggers a direct copy from the snapshots to the BLOBs. However, it creates lots of network traffic and CPU load (for starting chunks and monitoring progress). Therefore, it would be better to start AzCopy inside an Azure VM rather than running it on a laptop at home.
Reasons for varying performance
The runtime of a disk copy mainly depends on these factors:
- Source and target region
Different Azure regions might be connected with different network bandwidth. - The fill rate of the disks
Not the size of a disk but the actual fill rate is the most important factor that impacts the runtime of copying a single disk. - Number of disks copied in parallel
A few parallel running copies typically do not slow-down each other. Therefore, it is much faster to copy 4 disks of 512GiB compared with copying a single disk of 2TiB.
Measurement of runtime
For comparing performance, I have created a VM with eight 512GiB data disks. Four of these disks are fully filled, four of them have a fill rate of 10%. To fill the disks, I created files with random bytes using the tool openssl. I copied the disks multiple times from Germany to different Azure regions, starting all three disk copy methods at the same point in time. Here are the results:
|
date |
source region |
target region |
AzCopy |
BLOB-copy |
Snapshot-copy |
|
7/17/2026 |
germanywestcentral |
westus2 |
89 |
276 |
505 |
|
7/17/2026 |
germanywestcentral |
swedencentral |
63 |
73 |
1075 |
|
7/18/2026 |
germanywestcentral |
northeurope |
64 |
78 |
184 |
|
7/19/2026 |
germanywestcentral |
westus2 |
70 |
175 |
505 |
|
7/20/2026 |
germanywestcentral |
northeurope |
63 |
73 |
100 |
|
7/20/2026 |
germanywestcentral |
northeurope |
64 |
78 |
88 |
|
7/21/2026 |
germanywestcentral |
swedencentral | 64 | 78 | 124 |
The table shows the runtime of the different copy methods in minutes. The runtime difference between AzCopy and snapshot copy in the second test is 1012 minutes, which is more than 16 hours!
You can clearly see that
- AzCopy is the fastest method with almost constant runtime
- Blob copy is in some regions quite good, but still always slower than AzCopy
- Snapshot copy does not have a predictable runtime
Having a detailed look at the AzCopy jobs shows a runtime that depends on the fill rate of the disks. Copying the full disks take about 10 times longer compared with the disks that are 10% full.
job state     done[%] size[GiB] [minutes] [TiB/h] source name
--- -----     ------- --------- --------- ------- ------ ----
  3 Completed 100.0         512     75.09    0.40   disk martinme-fulldisk-lun1…
  5 Completed 100.0         512     79.30    0.38   disk martinme-fulldisk-lun2…
  7 Completed 100.0         512     88.68    0.34   disk martinme-fulldisk-lun3…
  9 Completed 100.0         512     83.15    0.36   disk martinme-fulldisk-lun4…
 11 Completed 100.0         512      8.19    3.66   disk martinme-pct10-lun10.v…
 13 Completed 100.0         512      8.39    3.58   disk martinme-pct10-lun11.v…
 15 Completed 100.0         512      8.32    3.60   disk martinme-pct10-lun12.v…
 17 Completed 100.0         512      8.02    3.74   disk martinme-pct10-lun13.v…
In this example, AzCopy was running inside a VM of size Standard_D4s_v6. You can see high CPU usage and a total network traffic of 1.5GiB in the time frame of copying the disks. This is the reason why you should not run this on your laptop at home.
08:28:43   %user %system  %idle rx KiB/sec tx KiB/sec total MiB
--------   ----- -------  ----- ---------- ---------- ---------
09:57:24   49.22   42.71   7.95     146.53     150.69   1544.53
In between the copy job, the peaks are even higher (compare with the average):
08:28:55   %user %system  %idle rx KiB/sec tx KiB/sec
--------   ----- -------  ----- ---------- ----------
08:32:27   57.64   41.69   0.01    1310.00     838.80
Simplifying the process
The copy process using AzCopy is indeed much more complicated than described so far. In detail, you must
- Create a storage account in accordance with your company policy. This might require disabling storage account key access and the creation of a network security perimeter.
- Grant network access to the storage account. Therefore, you must create a subnet rule or an IP rule for either the storage account or the network security perimeter.
- Create an access token for the storage account container using the storage account key or a user delegation token.
- Create the snapshots (in parallel). These must be incremental snapshots for premiumV2 and ultraSSD disks. However, for an OS disk of a confidential VM, it must be a full snapshot. Be aware that for disks larger than 4TiB, you cannot use BLOB copy. These disks must be copied separately using snapshot copy.
- Create SAS tokens for the snapshots (in parallel).
- Start a separate instance of AzCopy for each snapshot in parallel. For a single OS disk snapshot of a confidential VM you must start 3 BLOB copies: For disk-, meta- and state-data.
- Create the disks from the BLOBs (in parallel).
- Cleanup everything: Revoke SAS token, delete storage account.
Luckily, the whole process can be simplified by using the tool RGCOPY (https://github.com/Azure/RGCOPY). This tool performs all the steps described above for you. For copying all disks of a resource group to another resource group in a different region, you can use the following PowerShell commands:
Update-AzConfig -EnableLoginByWam $true
Connect-AzAccount -AuthScope 'Storage' -Subscription '<SubscriptionName>'
$rgcopyParameter = @{
  sourceRG = '<source_resourceGroup>'
  targetRG = '<target_resourceGroup>'
  targetLocation = 'eastus'

  justCopyDisks = $true
  useAzCopy = $true
  defaultDiskZone = 1
}
.\rgcopy.ps1 @rgcopyParameter
RGCOPY can do much more than just copy disks. See the documentation for details.

 Microsoft