This post should be helpful to you if you are planning to install Beta 2 of Exchange Server in your lab. It is not meant to be a replacement for any documentation that is included with Exchange 2007, but is provided as supplementary help.
PLEASE NOTE: You should NOT be installing Exchange 2007 Beta 2 in your production environment unless you have been specifically approved to do so by Microsoft. Please read this if you are thinking of doing this.
Also please note that we do not recommend that you attempt to upgrade earlier versions of Exchange 2007 (such as Beta 1 or CTP builds) to Beta 2 build. There were multiple significant changes since those builds were released and best approach is to start fresh.
Prerequisites
Active Directory prerequisites:
- A Schema Master FSMO role holder and GCs need to run Windows 2003 SP1 or Windows Server 2003 R2; it is recommended that all DCs run Windows 2003 SP1
- Domain functional level of all domains in the forest has to be "Windows 2000 Server native" or higher
Exchange organization prerequisites (if you are joining an existing org):
- Exchange organization needs to be in Native Mode
Exchange Server computer OS prerequisites:
- System and Exchange partitions have to be formatted with NTFS file system
- W2003 Service Pack 1 or Windows Server 2003 R2 need to be installed on the server
- Microsoft .NET Framework 2.0 needs to be installed
- Microsoft Command Shell (MSH) (aka Monad); In builds Beta 2 and higher, the Setup.exe gives you a link where to download the Microsoft Command Shell (MSH) from. Remove any older versions you might have installed previously and install that version.
- Microsoft Management Console (MMC) 3.0
- If you are installing on a 64-bit machine, you might also get a popup to install a QFE hotfix.
For more information on prerequisites, please see Beta 2 release notes.
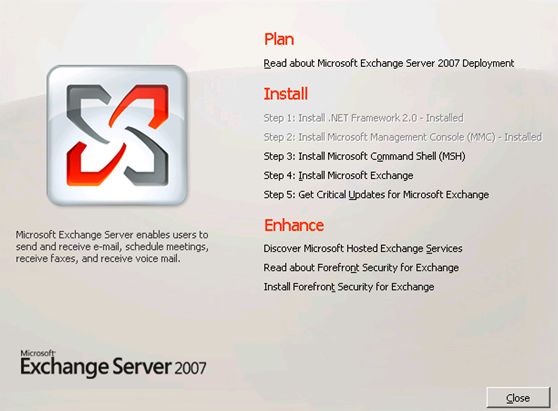
NOTE: If you are installing Exchange Server 2007 on a 64 bit OS, you should be installing the 64 bit version of Exchange Server 2007 too. 32 bit version of Exchange Server 2007 does not run under WOW on a 64 bit windows. Additionally, if you are installing Exchange 2007 on a Windows Server 2003 R2, you will not have to install .NET Framework 2.0 and MMC 3.0 as they are already installed. When in doubt, follow the links on the first Setup screen as shown below.
Exchange Server computer IIS requirements:
- NNTP service must not be installed
- SMTP service must not be installed
- Mailbox role requires the following IIS components: Enable network COM+ access, Internet Information Services, World Wide Web Service
- Client Access Server role requires the following components: World Wide Web Service, ASP.NET
Please see the Release Notes for more information on prerequisites!
Note: Many new features in Exchange 2007 require Outlook 2007 to experience them to the fullest. Example of those would be the new Availability improvements as well as Autodiscover functionality.
Running UI setup (installation)
Note: The following steps assume that you are running Setup in a simple AD environment with speedy AD replication. Steps for installation into multi AD site and multi domain environment are more complex and will be covered at a later time.
If you have installed all of the prerequisites as listed above, once you double-click on Setup.exe you should see a screen like this:
Note that if .NET Framework 2.0, MMC 3.0 or Microsoft Command Shell (MSH) are not installed, the links on the above page can take you to download locations. Note that even if you have Microsoft Command Shell (MSH) already installed, Setup might not detect it if it is too old to be used. See "OS prerequisites" section earlier in this document for help on what to do.
Once you press the "Step 4: Install Microsoft Exchange" link, Setup will copy some files first. Then you will be taken to the 1st step of Exchange Server 2007 Installation Wizard where you can press Next.
You will then have to accept the EULA and press Next yet again.
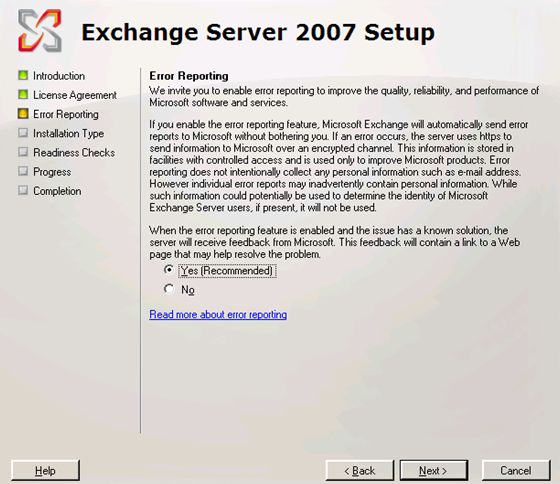
The next step is deciding if you want to set up automatic error reporting for this Exchange 2007 installation. Please read and make a selection. While we encourage you to enable error reporting, it is not a mandatory step:
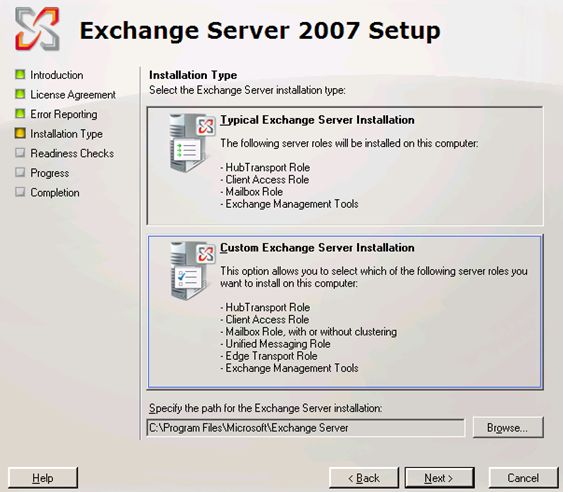
On the next screen, you get to choose what kind of installation you want to run. There are two choices here:
Typical Exchange Server Installation - this will install Hub Transport Role (formerly Bridgehead), Client Access Role, Mailbox Role and the Exchange Management Tools (formerly known as Exchange System Manager) - on this same machine.
Custom Exchange Server Installation - here you can choose exactly which server roles you want to install. If you want to install a clustered mailbox server, you should use Custom Setup. When installing a clustered mailbox server, you can choose if you are installing the Active or Passive node.
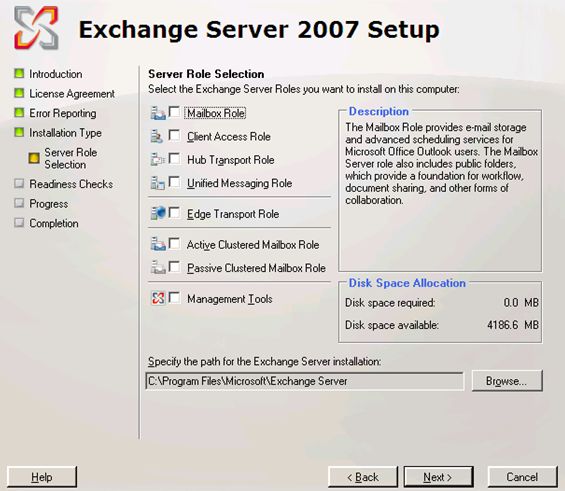
If you pressed the Custom Exchange Server Installation button and pressed next, you will see the following:
Few next screens will differ on the situation:
Specify the organization name - if you are creating a new Exchange organization, you will get asked for the name of the new org here.
Mail Flow Settings – if Setup detects that you are joining an existing organization, then you will be prompted to select an existing Exchange 2000/2003 server in the routing group that Exchange 2007 will connect to. Press the Browse button and select an existing server.
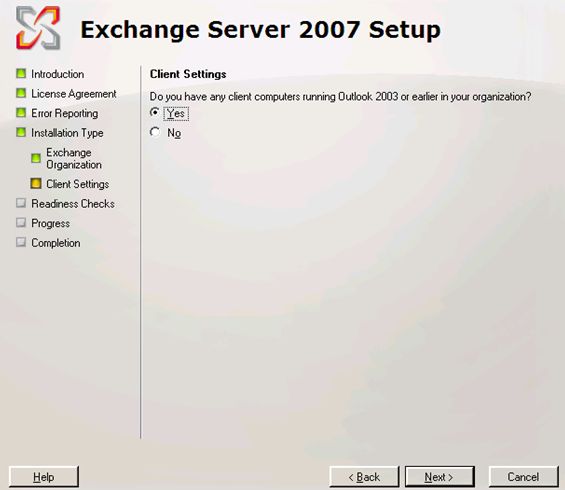
If you are creating a new Org, the next screen asks if there are any clients in the organization that run Outlook 2003 or earlier. The reason why this is important is that - if the answer to this question is "Yes" then Exchange 2007 Mailbox role will also include a public folder database. Seeing that the public folders are an optional component (if all clients are using Outlook 2007) - answering "No" to the above will give you an Exchange 2007 server without a public folder database.
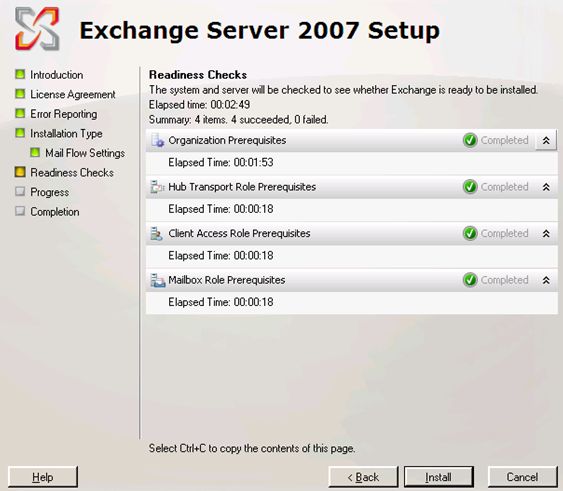
After the above, Exchange 2007 will run prerequisite checks for the roles that you have selected to install. The result of those prerequisite checks will be displayed in the wizard, and can be copied out of the wizard if you want to - by pressing CTRL+C. If all prerequisites are met, the Install button will become available; ideally you will end up with a screen looking like this:
NOTE: the prerequisite check will give you a warning if you are installing a 32 bit version of Exchange Server 2007. As we discussed before on this blog, 32 bit version of Exchange Server 2007 is not supported in production environments, but you are not installing this Beta 2 in production anyway, right?
When the Install button is pressed, Setup will be installing the roles you have selected in previous step. The "Organization Preparation" step typically takes the longest of all other steps (if it was not run previously). After all roles are installed correctly, press the Finish button.
Maintenance setup
If you want to modify your Exchange 2007 installation (add or remove server roles), you should go to Add/Remove Programs Control Panel applet; to add server roles, press the Change button. To remove them, press the Remove button:
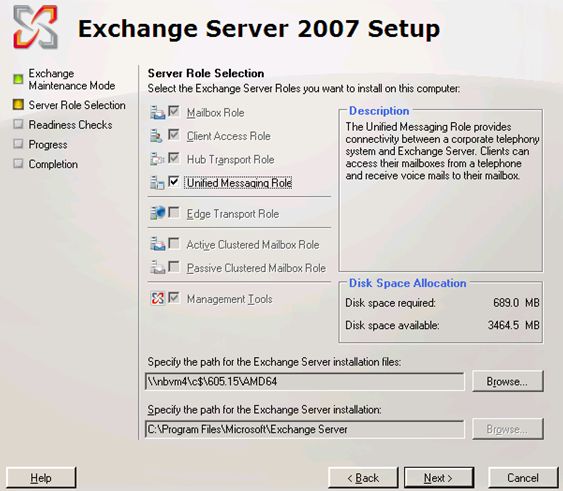
Pressing the Change button allows you to check only the roles that are available to install (meaning - can be possibly installed on the server, as they do not conflict with roles already installed and are not yet installed). Other roles will be either grayed out (not available to install concurrently with other roles already installed) or will be checked and grayed out (already installed roles). Checking new roles and pressing Next will start the prerequisite check and then later installation of those roles only:
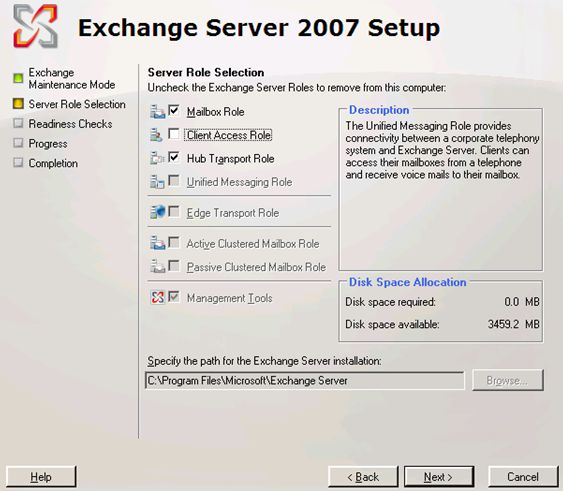
Pressing the Remove button will show you roles that are currently installed as checked checkboxes that can be unchecked. Unchecking the role here and pressing next will start the prerequisite check and then remove the selected roles:
Setup logs
In newer builds of Exchange 2007, all of the Setup logs are stored in a single location, in a folder on the C: drive. The default log path is:
C:\ExchangeSetupLogs
There are several files in there; the ones that are used the most are:
ExchangeSetup.msilog - this log file contains information about the unpack phase of setup where Windows Installer extracts the binaries and places them on disk for use during setup.
Exchange Server Setup Progress.log - this log file was included in previous version of Exchange and contains information related to the configuration data.
ExchangeSetup.log - this log file is new to Exchange 2007 and contains more information about the task that are run in setup. This log is usually the primary log for you to look at Setup problems, especially if there are some server roles that have failed the Configuration stage.
The ExchangeSetup.log is broken out in subcomponents highlighting different levels (indents). These levels can be used by future parsers.
• [0] - Begin main run of a particular task
• [1] - High level run of a specific task
• [2] - Subset of a particular task
Setup run of this log file are separated by the following markers:
[7/14/2006 4:49:42 PM] [0] **********************************************
[7/14/2006 4:49:42 PM] [0] Starting Microsoft Exchange 2007 Setup
[7/14/2006 4:49:42 PM] [0] **********************************************
and
[7/14/2006 6:28:30 PM] [0] End of Setup
[7/14/2006 6:28:30 PM] [0] **********************************************
Additionally, major setup tasks are separated by the following:
[7/14/2006 4:06:59 PM] [0] **************
To read more about Exchange 2007 configuration post setup, please check out Exchange 2007 Help file (ExchHelp.chm)
- Malvin M. Seale and Nino Bilic
