Hey, Chris here. I recently had a case where the customer wanted to determine what Schema Extensions have been made to their schema. I decided to do this via an excellent utility called the AD DS/LDS Schema Analyzer. The AD DS/LDS Schema Analyzer is a tool that is part of Active Directory Lightweight Domain Services. The AD DS/LDS Schema Analyzer is intended to be used to migrated Active Directory Schema’s to ADAM. However, it can also be used to compare to AD Schemas.
The process of using the AD DS/LDS Schema Analyzer to determine what schema changes have been made in your environment, does take a little work. Below is the whole process.
1. Build a test environment, which matches your Active Directory Environment, this will be used for your baseline. For Example if your Domain Controllers are Windows 2008, build your test environment with Windows 2008 Domain Controllers. Also, verify and duplicate the Domain and Forest functional level of your production environment.
2. Install Active Directory Lightweight Domain Services on a Server. For our purposes it does not matter whether it is an Actual Server or a Physical Server. It also does not matter if it is a Member Server or a Standalone Server. Use LDIFDE to dump your production Schema to an LDF file.
3. Use LDIFDE to dump your production schema to an LDF file.
4. Use LDIFDE to dump your baseline schema to an LDF file.
5. Compare Schema’s with the AD DS/LDS Schema Analyzer.
6. Research any differences in the Schemas.
Step One: Build your Baseline Environment
Step Two: Install Active Directory Lightweight Domain Services on a Server
Install Active Directory Lightweight Directory Services Role on Windows Server 2008. This can be accomplished by Opening Server Manager, navigating to the Roles Node, and Select Add Roles.
Step Three: Use LDIFDE to dump your production Schema to an LDF file
Log on to a domain controller with an account that is a member of the Schema Admins security group, and run the following command to dump the schema to an LDF File:
Ldifde –f <output file name> -d <Distinguished Name of your Schema>
Where <output file name> is the name of the resulting LDF file, and where <Distinguished Name of your Schema> is you guessed it the DN of your schema.
See example below:

Step Four: Use LDIFDE to dump your test Schema to an LDF file
Follow the instructions in Step Three to dump the Schema of the Test Environment you created.
Step Five: Compare Schema’s with the AD Schema
1. Log onto the machine on which you installed Active Directory Lightweight Directory Services.
2. Open a Command Prompt, and Navigate to the “C:\Windows\ADAM” folder.
3. Type “ADSchemaAnalyzer.exe”, and press Enter, this will launch the AD DS/LDS Schema Analyzer Tool.
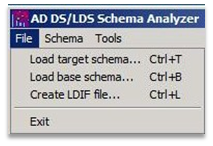
4. From the Menu, select the “File”, and then select “Load Target Schema…”

5. From the “Load Target Schema” dialog box, click on the “Load LDIF” button.
6. Browse to the LDF file that you created in your production environment, and click on the “Open” Button.
7. From the Menu, select the “File”, and then select “Load base schema…”

8. From the “Load Target Schema” dialog box, click on the “Load LDIF” button.
9. Browse to the LDF file that you created in your test environment, and click on the “Open” Button.
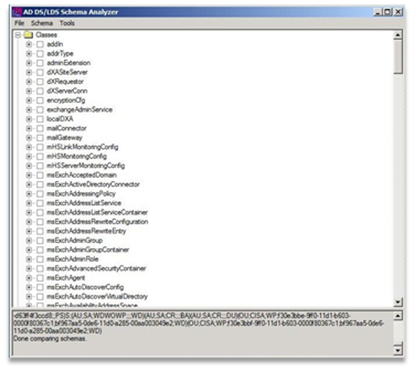
10. From the Schema Menu, select “Hide Present Elements”. This will hide Classes and Attributes that exist in both Schemas.

Expand the “Classes” node in the AD DS/LDS Schema Analyzer.

Step 6: Research any differences in the Schemas
You will now have to research what application created these additional Classes and Attributes. In my example I have a number of Exchange related Classes and Attributes, so it is pretty simple for me to deduce that the additional changes to the Schema came from Exchange.
- Chris ‘I bleed Carolina blue’ Delay