<Updated 8/21/2024>
With the recent release of a new tool to help with the MMA Migration, I would suggest folks review:
MMA Discovery and Removal Utility - Azure Monitor | Microsoft Learn
I will leave this blog up in the event the above isn't what you are looking for
</Updated 8/21/2024>
Hello, it has been a while since I have posted any articles, but my little buddy Raven (my miniature schnauzer) and I are here to talk about the Microsoft Monitoring Agent (MMA).
Raven has an old, worn-out bed that she has been using for years. It has lost its cushioning, doesn’t offer much comfort anymore, and you can see the years of use etched into it. But Raven, being the creature of habit that she is, refuses to part with it. This bed is her comfort zone, her familiar territory, much like the Microsoft Monitoring Agent is for many of us. It has been reliable over the years, but it doesn’t quite serve its purpose as effectively as it used to.
Now, imagine introducing a clean and new dog bed to Raven. This is not just any bed - it is comfortable, plush, and designed to provide the ultimate comfort for her. But Raven is hesitant. She sniffs around it, paws at it curiously but chooses to retreat back to her old bed. This scenario is not unlike the introduction of the Azure Monitoring Agent (AMA) in our tech world. It is a more advanced, efficient, and comprehensive tool designed to make monitoring a breeze. Yet, many of us find ourselves resisting this change, sticking to our ‘old beds’ out of familiarity and fear of the unknown.
However, it is important to note that just like how Raven’s old bed cannot last forever, the Microsoft Monitoring Agent is also being sunset in August 2024. It is a gentle reminder that change is inevitable and often for the better.
In the following sections of this blog, I will provide a step-by-step guide to help you migrate away from MMA to AMA. This guide is designed to make the transition as smooth and seamless as possible, minimizing any potential disruptions to your monitoring workflow.
But that is not all. To make things even easier, there is a GitHub site that hosts the necessary binaries for this migration process. These binaries will be used to install a set of utilities in Azure, including a process dashboard. This dashboard will provide you with a visual representation of the migration process, making it easier to track and manage.
Overview
The Legacy Azure Microsoft Monitoring Agent (MMA) is scheduled for retirement in August 2024. To ensure a smooth transition and prevent duplication of logging data, it is strongly recommended to replace the MMA agent with the new Azure Monitor Agent (AMA) as soon as possible.
Goal:
The goal of this document is to assist you in cleaning up your Azure environment by removing the MMA agent in bulk from all devices within your Subscription/Resource group(s).
Important Information:
MMA Retirement Date: August 2024
Action Required: After loading the new Azure Monitor Agent (AMA), promptly remove the Legacy MMA agent to avoid data duplication.
Conclusion:
Removing the Legacy Azure Microsoft Monitoring Agent is a critical step in maintaining the efficiency and accuracy of your logging data. By following the instructions provided in this document, you can seamlessly transition to the new Azure Monitor Agent, ensuring continuous monitoring and optimization of your Azure resources.
The instructions to install this solution can be a bit difficult to follow, but they are located at:
AzTS-docs/MMA Removal Utility at main · azsk/AzTS-docs (github.com)
This document will walk through this guidance.
AzTS-docs/MMA Removal Utility/SingleTenantSetupInstallation.md at main · azsk/AzTS-docs (github.com)
Agent Removal limitations
The MMA agent, residing on the host VM, will only be removed if it was deployed utilizing the ARM APIs.
Prerequisites:
- You have the option of choosing either Windows 10 or Windows Server 2019, or any later versions for either operating system.
- Start up a PowerShell command prompt as a local administrator
- PowerShell needs to be at v 5.0 or later
- $PSVersionTable
- PoSh Full Language mode
- $ExecutionContext.SessionState.LanguageMode
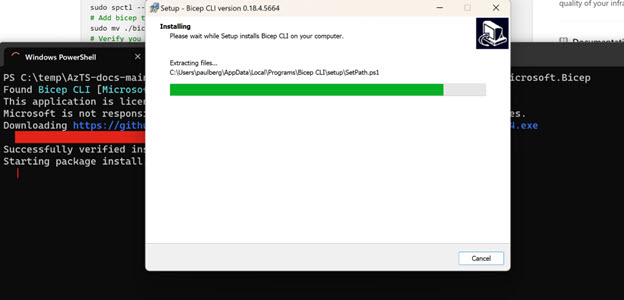
- Verify that Bicep has been installed.
- From a PowerShell command prompt run the following
- “Bicep --version”
- From a PowerShell command prompt run the following
- If not installed
- There are multiple ways to install Bicep, but for this example “WinGet” was used.
- See the GitHub guide for a full set of options.
- From a PowerShell command prompt (Admin perms not required)
- winget install -e --id Microsoft.Bicep
- There are multiple ways to install Bicep, but for this example “WinGet” was used.
Installation of the Removal Code:
Download of content
Browse to the GitHub site:
Select the “Code” button and select “Download ZIP”.
- Extract the contents of the newly downloaded file, AzTS-docs-main.
Installation
- Start up a PowerShell command line and change directory to where the downloaded/extracted zip file was extracted too.
CD "c:\temp\AzTS-docs-main\MMA Removal Utility\DeploymentFiles"
Load the Script into the Deployment Workstation
- Load the setup script by executing “MMARemovalUtilitySetup.ps1”
- The extracted the folder and contents were sent to c:\temp\AzTS-docs-main
- The MMARemovalUtilitySetup.ps1 script will therefore be located at
- C:\temp\AzTS-docs-main\MMA Removal Utility\DeploymentFiles\ MMARemovalUtilitySetup.ps1
- Execute the script.
- C:\temp\AzTS-docs-main\MMA Removal Utility\DeploymentFiles\ MMARemovalUtilitySetup.ps1
Note: Executing this script builds cmdlets that will be in memory for the duration of the command shell. If this command shell is destroyed the MMARemovalUtilitySetup.ps1 script will need to be run again.
Install the required PowerShell Modules
- From a PowerShell command prompt run the following. If there are any required PowerShell modules needed, this will determine what they are, and it will offer to load them
Set-Prerequisites
Connect to Azure
Connect to an Azure tenant with an Identity that can create a new Resource Group or Update one that already exists.
$TenantId = "99999999-9xx9-9x99-99xx-9999999999xx"
Connect-AzAccount -Tenant $TenantId
From a PowerShell command prompt:
Setup/Configure access for a user assigned Managed Identity (MI)
- Connect to Azure with the subscription to be updated
- Connect-AzAccount -Tenant “99999999-aaaa-9999-aaaa-999999999999”
- Open a PowerShell editor and populate the parameters for the Set-AzTSMMARRemovalUtilitySolutionRemediationIdentity
- Complete parameter details can be found below or in the SingleTenantSetupInstallation.md.
- This step will update the permissions of the Managed Identity (If it doesn’t exist it will be created).
- In the captured example below, it will create the Managed Identity = “MI-MMA-Removal” and grant “Read” and “Virtual Machine - Contributor Access” to the defined subscription(s).
# -----------------------------------------------------------------#
# Create remediation user-assigned MI
# -----------------------------------------------------------------#
$Identity = Set-AzTSMMARemovalUtilitySolutionRemediationIdentity `
-SubscriptionId <MIHostingSubId> `
-ResourceGroupName <MIHostingRGName> `
-UserAssignedIdentityName <MIName> `
-Location <Location> `
-TargetSubscriptionIds @("<SubId1>","<SubId2>","<SubId3>") `
-TargetManagementGroupNames @("<MGName1>","<MGName2>","<MGName3>") `
[-TenantScope]
Reviewing the target subscription(s) permission updates for the MI
Create and Configure the Telemetric Environment and Shared Dashboard
- From the PowerShell command prompt run the following command to build out the Azure Environment.
- Complete parameter details can be found below or in the SingleTenantSetupInstallation.md.
- This step will update the permissions of the Managed Identity (If it doesn’t exist it will be created).
- In the captured example below, it will:
- Create resources needed for the Removal Utility in Azure.
- Create the Shared Dashboard = “MMAAgentRemovalUtilityProgress-999x9”.
- 999x9 = A random generated value at run time.
- Deploy Function Apps that query hosts for the defined RG’s that need to be evaluated.
# -----------------------------------------------------------------#
# Setup installation
# -----------------------------------------------------------------#
$SetupInstallation = Install-AzTSMMARemovalUtilitySolution `
-SubscriptionId <HostingSubId> `
-HostRGName <HostingRGName> `
-Location <Location> `
-ManagedIdentityId $Identity.Id `
-AzureEnvironmentName <AzureEnvironmentName>
- Note: To find the newly created resources:
- Browse to the Azure “Resource Group” blade and filter on “MMA”
Configure the Subscriptions/Resource Groups to Target for the Removal Utility
- From the PowerShell command prompt run the following command to build out the Azure Environment.
- Complete parameter details can be found below or in the SingleTenantSetupInstallation.md.
- This step will define the target Subscription/Resource Groups to Discover.
# -----------------------------------------------------------------#
# Configure target scopes
# -----------------------------------------------------------------#
$ConfiguredTargetScopes = Set-AzTSMMARemovalUtilitySolutionScopes `
-SubscriptionId <HostingSubId> `
-ResourceGroupName <HostingRGName> `
-TargetSubscriptionIds @("<SubId1>","<SubId2>","<SubId3>") `
[-TenantScope]
Device Discovery and Dashboard Results
At this point the MMA Removal Utility infrastructure has been completed, but nothing is actually running to discover hosts that are running the Legacy MMA agent.
There are a number of different timings options that can be set to start discovery for the devices that need to have the agent removed. In the example below the settings are configured to start the discovery immediately and rerun every 30 minutes. The 30 minutes is probably too aggressive and every couple of hours would probably be sufficient.
- From the PowerShell command prompt run the following command to begin to interrogate the hosts, starting immediately and set to a 30-minute interval.
- Complete parameter details can be found below or in the Schedule or Trigger site.
# -----------------------------------------------------------------#
# Schedule discovery phase (first step) immediately and second step after 30 minutes.
# -----------------------------------------------------------------#
Update-AzTSMMARemovalUtilityDiscoveryTrigger `
-SubscriptionId <HostingSubId> `
-ResourceGroupName <HostingRGName> `
-StartScopeResolver Immediately `
-StartExtensionDiscoveryAfterMinutes 30
Log Analytics Workspace for MMA Removal Utility
Once the discovery has been configured, data will begin to populate in the recently created Log Analytics Workspace. This workspace serves as the repository for all discovery data related to the MMA Removal Utility.
- Workspace Name: MMARemovalUtility-LAWorkspace-999x9
- Value of 999x9: The value "999x9" represents the same randomly generated identifier used for other objects within this deployment. In the current example, the value is "314e4."
The Log Analytics Workspace facilitates data storage and analysis, essential for monitoring and managing the MMA Removal process.
There are multiple KQL queries that can be run against this data and the GitHub site has several that will allow a user to:
- Get a list of all the VM’s available in the configured scope(s).
- Get a list of all the VM’s which have both agents installed on them.
- Get a list of all the VM’s with the MMA agent installed.
The queries can be found in the FAQ (6 – 😎 within the README.md at the GitHub site:
Note: It is recommended to wait ~30 minutes after the discovery phase has been initiated before data will begin to show up in the workspace.
Finding the MMA Removal Utility Dashboard in Azure
Once the data becomes available for querying, it will populate the MMA Removal Utility Dashboard, enabling users to examine the data. To access the shared dashboard in Azure, follow these steps:
- Navigate to the "Dashboard's" blade in Azure.
- Look for the dashboard named "MMAAgentRemovalUtilityProgress-999x9".
- Ensure that the value "999x9" in the dashboard name matches the one used for the Log Analytics Workspace.
By following these steps, users can easily locate and access the specific MMA Removal Utility Dashboard related to their deployment.
The MMA Removal Utility Dashboard provides users with 10 windows that offer information on the current state of the MMA Removal activity:
- Progress: Configured scopes triggered for discovery phase
- Progress: Fetching Subscriptions and VMs
- Progress: Fetching VM Agents/Extensions
- Inventory: Virtual Machines
- Inventory: MMA & AMA Agents
- Inventory: VM’s eligible for Removal Phase
- Progress: Removing MMA agent
- Failures: Agent removal request
- Progress: Validating MMA agent removal
- Summary: Total MMA agents successfully removed
Monitoring MMA Removal Progress with the Dashboard
The dashboard offers users valuable insights into the MMA removal process, enabling them to monitor progress across various phases. In the screen grab below, six out of the ten windows are visible. To view the remaining four windows, simply scroll down the dashboard.
The comprehensive view of the dashboard empowers users to efficiently track the removal activity and make informed decisions throughout the process.
The screen grab from the Log Analytics Workspace (LAW) – Agents blade below shows what a particular LAW shows for connected devices. It doesn’t show hosts with both, but it does provide a different view of connected hosts and their agents.
MMA Agent Removal from Discovered Hosts
Once a complete scan (Discovery) of the target environment has been completed and data has been reviewed the MMA Removal Utility can be configured to remove the MMA agent from the environment. This will require an update to the environment, telling it to begin the removal process.
- From the PowerShell command prompt run the following command to begin to interrogate the hosts, starting immediately and set to a 30-minute interval.
- Complete parameter details can be found below or in the README site.
# -----------------------------------------------------------------#
# Enable and Schedule Removal phase
# -----------------------------------------------------------------#
Update-AzTSMMARemovalUtilityRemovalTrigger `
-SubscriptionId <HostingSubId> `
-ResourceGroupName <HostingRGName> `
-StartAfterMinutes 60 `
-EnableRemovalPhase `
-RemovalCondition 'CheckForAMAPresence'
Monitoring the MMA Agent Removal Progress
In the example above, the removal process was initiated for "Immediate" removal. This triggers the "Function Apps" to begin the removal process of any eligible hosts.
To view the current progress, follow these steps:
- Browse to the MMA Removal Utility Dashboard.3
- Scroll down to the bottom of the dashboard to find the four windows related to the progress of the MMA agent removal.
Note: To ensure accurate progress monitoring, it may take up to 1 hour for changes to hosts to be reflected in the Dashboard.
Based on the provided screen grab below, it is evident that four hosts have successfully had the MMA agent removed, and there are no reported failures.
By following these instructions, users can effectively track the removal process and stay informed about the status of their Azure resources.
Previously Removed Hosts
Once a host has had its MMA agent removed it will not automatically be re-processed for a second removal by default. There are steps required that aren’t documented on the GitHub site but are covered in the steps below.
Scan Configuration
To be able to rescan previously processed devices, the “Functions Apps” need to be modified. To find these open the Resource Group where the objects were created.
- Within the Resource group search for “MMARemovalUtility-WorkItemScheduler”.
- Click on “MMARemovalUtility-WorkItemScheduler-999x9”
This should open the “Function App” (as seen below)
- Scroll down to the “Api” group and select the “CORS” blade.
- Allowed Origins = https://portal.azure.com
- Click save.
- Select “Configuration under “Settings”
- Click on “+New application setting”.
- Under “Add/Edit application setting”
- Name = “ProcessConfigurations_ForceRetry”
- Value = “true”
- Click “Ok”
Re-Trigger Scan of ALL hosts
- Select “Functions” under “Functions”
- Select “AzTS_04_VMInventoryCollectionScheduler”
- Click “Code + Test” under “Developer”.
- Click “Test/Run”.
- Select “Run”.
This should trigger a rescan of the defined list of subscriptions. Please allow 1 hour for a complete re-scan to complete.
Retrigger Removal Scan Process
To be able to re-remove previously processed devices, the “Functions Apps” need to be modified. To find these open the Resource Group where the objects were created.
- Select “Functions” under “Functions”
- Click on “AzTS_06_VMExtensionsRemovalScheduler”
- Click on “AzTS_06_VMExtensionsRemovalScheduler”
- Click on “Test/Run”.
- Click on “Run”.
This should trigger a removal process of the defined list of subscriptions. Please allow 1 hour for a complete removal process to be completed.
So, there you have it, a tale of old and new, of comfort zones and new horizons, all inspired by my little buddy, Raven. Just as we are encouraging Raven to embrace her new bed for a more comfortable and joyful experience, we too should be open to embracing the Azure Monitoring Agent.
Change can be daunting, especially when it involves something as crucial as a monitoring agent that we have grown accustomed to. But remember, just like how Raven’s curiosity is piqued each time she sniffs around her new bed, our curiosity to explore new tools and technologies can lead us to discover more efficient and powerful solutions.
With the right resources and guidance, we can make this transition smoothly and efficiently. As Raven gradually warms up to her new bed, finding comfort in its plushness and warmth, we too will find the Azure Monitoring Agent to be a powerful tool that enhances our monitoring capabilities.
So, let us embark on this journey of change together, much like Raven exploring her new bed. Remember, every step forward is a step towards progress. And who knows? We might just find our ‘new bed’ to be much more comfortable than we imagined! Thank you for joining me on this journey, and I hope you found this guide helpful.
FAQ
AzTS-docs/MMA Removal Utility/README.md at main · azsk/AzTS-docs (github.com)
Disclaimer
The sample scripts are not supported under any Microsoft standard support program or service. The sample scripts are provided AS IS without warranty of any kind. Microsoft further disclaims all implied warranties including, without limitation, any implied warranties of merchantability or of fitness for a particular purpose. The entire risk arising out of the use or performance of the sample scripts and documentation remains with you. In no event shall Microsoft, its authors, or anyone else involved in the creation, production, or delivery of the scripts be liable for any damages whatsoever (including, without limitation, damages for loss of business profits, business interruption, loss of business information, or other pecuniary loss) arising out of the use of or inability to use the sample scripts or documentation, even if Microsoft has been advised of the possibility of such damages.
 Microsoft