microsoft foundry
95 TopicsFoundry Toolbox Lifecycle: Deploy and Promote
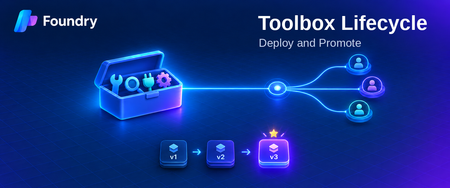
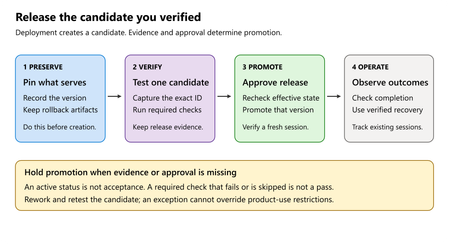
Foundry Toolbox Lifecycle: Deploy and Promote For developers looking to manage Microsoft Foundry tools across agents, this article presents one recommended pattern: define each Toolbox in its own azure.yaml , deploy it separately from project infrastructure and agents, and pass environment-specific Bicep outputs through GitHub Actions. Why Manage a Foundry Toolbox Separately? Organizations are integrating agent development into established software development lifecycles, raising questions about how teams govern and reuse tools. In this post, a “tool” means an external capability an agent invokes such as web search, a tool exposed by a Model Context Protocol (MCP) server, or a third-party application. Tools let agents retrieve live data or take actions in external systems. How can teams avoid rebuilding the same integrations? Microsoft Foundry Toolbox offers a shared way to manage tools. This post explores how to structure Toolbox ownership and deployment so a reusable collection doesn’t become a Toolshed. What Is a Microsoft Foundry Toolbox? A Toolbox in Foundry is a versioned collection of tools exposed through a single MCP-compatible endpoint. It is created in the context of a Foundry Project, and agents connect to that endpoint to use its tools. Microsoft’s Toolbox overview describes a way to define shared tools once and expose them through a single MCP-compatible endpoint. It centralizes tool access, credentials, governance, and versioning so teams can reuse approved tools across agents without rebuilding each integration. Instead of embedding a separate Web IQ integration in every Finance agent, teams can configure Web IQ once in a shared Toolbox. Each agent then connects to the Toolbox’s MCP endpoint and invokes the tools it exposes. The Toolbox and its project connections provide the shared configuration and credentials. Should a Toolbox Be Deployed with an Agent? Foundry examples show toolboxes created through SDKs and consumed by agents. The key design decision is which deployment lifecycle owns toolbox version changes. When multiple agents share a toolbox, manage its versions separately from any one agent’s deployment. A Foundry Project can contain zero or more agents. Agent deployments should be idempotent and managed independently. An agent’s availability should not depend on another agent. A Toolbox has its own lifecycle and versioning. A Toolbox lives outside any single agent, within a Foundry Project. Creating a toolbox with the Python SDK does not, by itself, make the toolbox part of an agent; the SDK call creates a version in the Foundry Project. The coupling arises when the agent’s deployment pipeline also owns and publishes that toolbox. To keep the lifecycles independent, manage toolbox versions through a project-level pipeline and have agents consume the toolbox endpoint. This avoids redeploying an unrelated agent for toolbox changes and avoids making shared tool availability depend on one agent’s lifecycle. Provision the Project, Then Deploy the Toolbox A Foundry project is provisioned as an Azure resource (`Microsoft.CognitiveServices/accounts/projects`), while toolbox versions are created through the Foundry project API. In this deployment pattern, we need to provision the project and any required connections first, then create and deploy the toolbox using the project endpoint. See the toolbox version API reference for details. The Foundry project and its project-level role-based access control (RBAC) and connections are infrastructure prerequisites that can be managed with infrastructure as code (IaC). The toolbox version is then created in a separate deployment step using the project endpoint, with environment-specific values supplied as Bicep outputs. This keeps the Toolbox alongside the project’s lifecycle without coupling it to any one agent. Where to Store the Toolbox Configuration Like the Foundry Project, a Toolbox is shared across agents and should follow the project’s lifecycle rather than an individual agent’s lifecycle. Store its definition alongside the project’s IaC and include its deployment in the project-level infrastructure workflow. Create a separate folder and `azure.yaml` for each Toolbox. This gives each Toolbox its own deployment step and `azd` environment, so teams can deploy, update, and version Toolboxes independently without coupling their release cycles. This post uses that structure to make each Toolbox’s lifecycle explicit. Foundry Toolbox Versioning and Promotion Foundry stores each Toolbox version as an immutable snapshot of its configuration. Changes create a new version rather than modifying an existing one. The first version becomes the default automatically; subsequent versions must be promoted explicitly. See Foundry Toolbox version managementfor details. Agents using the Toolbox’s stable consumer endpoint receive the default version. Developers can use a version specific endpoint to validate changes before promotion. Promoting a version changes what the consumer endpoint serves without requiring a rebuild and deploy of the agents code. To roll back, promote a previously retained version. Foundry provides these versioning and promotion capabilities, but the team still decides how changes are tested, approved, retained, and retired. A version captures Toolbox configuration not a frozen copy of the external services it calls—so rolling back the Toolbox does not necessarily reverse downstream service changes. i.e. changes that were made to tools of a custom downstream MCP server. Teams can remove older or unwanted versions after confirming they aren’t needed for rollback or used through version specific endpoints. If multiple versions exist, promote another version before deleting the current default. When using `azd`, deleting the only remaining version also removes the Toolbox. One important connection to our example: its `postdeploy` hook promotes immediately. We should distinguish that sample behavior from a production process that validates a candidate version before promotion. Deploy a Foundry Toolbox with GitHub Actions In this example, the Toolbox is deployed as a separate step in the same GitHub Actions workflow, after the Bicep deployment provisions the Foundry Project. This lets the workflow populate the Toolbox’s `azd` environment with the infrastructure outputs before deployment. You can also split the deployments across jobs or workflows, provided the Toolbox step receives the required outputs and runs after its prerequisites are ready. Prerequisites Foundry Project and region: Create the Foundry Project and any project connections required by the Toolbox before deployment. Confirm that the target region supports the Toolbox’s tool types and models using the tool support by region and model table Identity and access: Configure GitHub Actions to authenticate to Azure using OpenID Connect (OIDC), as in the linked sample. The identity that creates or updates Toolbox versions needs the Foundry User role on the project (Toolbox prerequisites). If the same workflow deploys Bicep, that identity also needs permission to deploy the template’s resources and create its role assignments at the applicable scopes. Tooling: Install Azure Developer CLI 1.37.0+, as required by the unified `microsoft.foundry` extension. Install the extension with `azd ext install microsoft.foundry`, following the Foundry extension installation guidance. The linked sample pins `azd` 1.37.1 and installs `azure.ai.toolboxes` separately. Configuration Provide the project endpoint, environment name, location, and every downstream endpoint or connection name referenced by the Toolbox’s `azure.yaml`. Create the required Foundry project connections before deploying the Toolbox. Configure credentials on those connections or in an approved secret store, not in Bicep outputs; see Toolbox authentication. - name: Deploy and promote the toolbox working-directory: foundation/toolboxes/fibey-toolbox env: AZURE_ENV_NAME: ${{ steps.infrastructure.outputs.AZURE_ENV_NAME }} FOUNDRY_PROJECT_ENDPOINT: ${{ steps.infrastructure.outputs.FOUNDRY_PROJECT_ENDPOINT }} AZURE_AI_PROJECT_ENDPOINT: ${{ steps.infrastructure.outputs.AZURE_AI_PROJECT_ENDPOINT }} run: | azd deploy fibey-toolbox --no-prompt The infrastructure deployment should expose the values the Toolbox needs as outputs—in this case, Bicep outputs. The linked sample uses `AZURE_ENV_NAME`, `AZURE_LOCATION`, `FOUNDRY_PROJECT_ENDPOINT`, and `AZURE_AI_PROJECT_ENDPOINT` for the deployment context. Its Toolbox configuration also consumes `INVENTORY_MCP_URL`, `WORK_ORDERS_API_URL`, `KB_MCP_URL`, and `KB_CONNECTION_NAME`. Expose the corresponding values for each target environment and region. The Toolbox’s `azure.yaml` references the imported values, so the same definition can be reused across environments and regions. For each target, provide that target’s infrastructure outputs instead of manually changing endpoint values, and confirm that the required services and tools are supported in the target region. The example references `steps.infrastructure.outputs` because the infrastructure and Toolbox deployment steps run in the same GitHub Actions job. If they run in separate jobs, expose the required values as job outputs and consume them through `needs`. This keeps the deployments connected without tying their release cycles together: infrastructure provides the deployment context, and the Toolbox consumes it. Keep credentials in managed identities or approved secret stores rather than ordinary deployment outputs. The complete workflow demonstrates authentication, infrastructure outputs, and environment initialization. Its extension-install step currently uses `azure.ai.toolboxes`; replace that step with `azd ext install microsoft.foundry` when following the current Learn guidance above. Version promotion is handled by the `postdeploy` hook in the Toolbox’s `azure.yaml`. Verify Toolbox Deployment and Promotion The sample’s `postdeploy` hook promotes the deployed version to the default and checks that promotion succeeded. Redeploying an unchanged Toolbox definition does not create a new version. To inspect the versions and confirm which one is default, run: azd ai toolbox versions list fibey-toolbox The default version is marked with `*`. This confirms which version is default, but not that its tools work. For runtime verification, follow the Toolbox verification guidance to initialize MCP and list tools using the version-specific endpoint. Test a tool call only with a safe, read-only operation. The developer needs the Foundry User role on the project; prompt-agent and OAuth scenarios can require additional permissions for the agent identity or end user. Troubleshooting If deployment or promotion fails, check that the deployment identity has the required project role, that the project endpoint and Toolbox configuration values were supplied, and that the required project connections and tools are available in the target region. Conclusion Toolbox provides a shared way to manage tools across agents without tying their lifecycle to any one agent. Keeping toolbox definitions alongside your Foundry Project infrastructure, while deploying them as a separate step, lets teams update and version tools independently while retaining a clear dependency on the project. As your organization adopts this pattern, consider who owns each toolbox, how changes are tested and promoted, and who can access its tools. That governance will help keep a useful Toolbox from becoming a Toolshed.66Views0likes0CommentsFrom Python Agents to Copilot Harness : Putting Microsoft Foundry to the Test
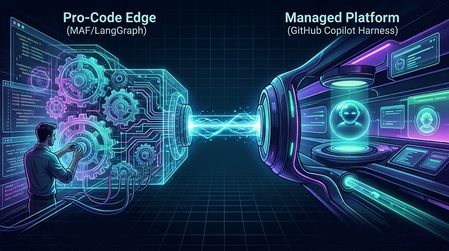
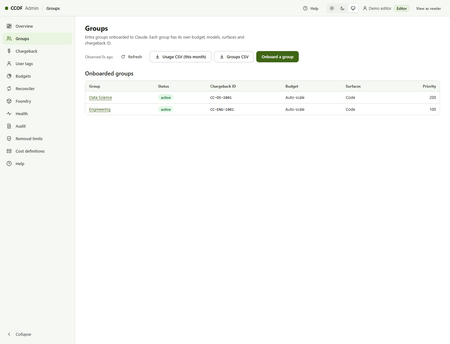
You have built the agents. Written the Python. Connected the data. Worked out how the pieces talk to each other. Then the conversation shifts to harnesses. The prospect of convergence around the GitHub Copilot harness across GitHub, Microsoft Foundry and Copilot Studio (CPS) raises a very practical question: What happens to the pro-code agents I already built? Do I rewrite them, wrap them, or keep them? Rather than debate it in the abstract, I wanted to give it a shot. I already had a Microsoft Agent Framework (MAF) demo with Python agents, Fabric sales data and product knowledge. Could I keep the useful business workflows, remove the custom agent wrappers, and let a managed harness do more of the work? That experiment became the demo behind this blog. Not another empty chat box, but an app to ask business questions, inspect actual tool activity, follow the evidence and create a brief you can revise and download. This is a practical Foundry experiment and the question I wanted to answer was: how much of this particular agent application can move into the harness, and what still belongs in my code? TL;DR: I moved a Python/MAF research demo to a Foundry-managed Copilot harness to test whether it could handle the same business questions. Native research and source connections reduced the agent-side orchestration I had to write, while the app still owns authentication, streaming and secure access. Downloadable briefs are an extra experiment, not part of the original migration. Focused tests were promising, but do not establish complete feature parity or production readiness. The Starting Point: Pro-Code Agents The starting point is olivierb123/microsoftiq-lead-agent-demo. It used four hosted Agent Framework wrappers and application-controlled fan-out. Python agent code and custom source adapters handled the integrations; the application determined which agents to call and assembled their results. That approach makes the orchestration explicit. It also puts the responsibility for hosting the wrappers, maintaining source adapters and coordinating the workflow in the application. For this experiment with harness, I kept the business scenario but changed the execution model. Instead of recreating those wrappers inside another service, I configured one Foundry-managed Microsoft Copilot harness agent with instructions, native capabilities and connected sources. Responsibility Pro-Code Demo Harness Experiment Workflow orchestration Application-controlled agent calls Managed agent selects tools and can delegate Research Hosted wrappers and custom adapters Native web search and page fetching Business data Application source integration Native Fabric connection Product knowledge Application retrieval integration Foundry IQ knowledge-base retrieval through native MCP Working output Application-managed result assembly Conversation workspace and published artifacts Application code UI plus agent orchestration UI, authentication, streaming and session/download authorization This repository contains the migrated implementation. The original pro-code demo remains separate and was not overwritten. A Practical Question, Not a Tool Demonstration The scenario is a fictional sales team working with FieldForge product documentation. A useful assistant should help answer questions such as: How many opportunities are open in the expanded synthetic demo, what is their total and probability-weighted value, and how do our internal forecasting definitions explain those numbers? That request needs two different kinds of evidence: structured opportunity data and the actual internal document defining the forecast. It should not require the user to name a connector or prescribe a tool sequence. A more advanced request asks for a South territory brief combining sales performance, priority opportunities, product capabilities and official construction heat-exposure guidance. The user can then request a revision or a downloadable Markdown artifact in the same conversation. These examples exercise the harness as a working environment, not just a text-generation endpoint. However, they are requests to explore, not promises that every tool or subagent will run on every turn. Why a Local Web App? I deliberately kept the test experience in a local web app. I wanted to make it easy to ask a question, try a follow-up and inspect what happened, without turning the experiment into a web-hosting project first. The React workbench and Node.js backend run locally; the agent and connected sources run in the cloud. After signing in, I can choose a sample question, watch the streamed response, inspect Activity and Evidence, and request a revision or download in the same conversation. I do not need to reconstruct a raw SDK response to see whether a source was actually called. That separation also makes the migration easier to understand. The web app is the test surface, not the agent runtime. There is no local Python agent server hiding behind it: the backend sends the request to Foundry and handles the application's authentication, streaming and session-owned downloads. For this first experiment, the backend is intentionally loopback-only. Hosting the application publicly is a separate engineering task, not a prerequisite for testing the harness against a useful scenario. The Architecture The configured agent uses microsoft_copilot_preview and gpt-5-mini. The agent definition lives in harness/azure.yaml, rather than a Python agent server. The application, backend and data scripts use JavaScript/Node.js. There is no Python application runtime, pip setup or virtual environment required for this version. That is not a zero-code migration: the application still owns sign-in, token validation, streaming, conversation ownership and secure downloads. The backend does not execute the native source calls a second time. Foundry executes them; the application observes their returned results and presents them in Activity and Evidence. What It Looks Like in the Foundry Portal The local workbench is only one view of the experiment. Foundry also supports hosted pro-code agents: I can package custom agent code, including a Python/MAF implementation, and its dependencies in a container and let Foundry manage the hosting. I still own the agent implementation and its orchestration; using Python does not mean I must run the server myself. This experiment instead uses a managed-harness prompt agent. I configure its instructions, capabilities and source connections, while Foundry supplies the harness execution environment and native tool orchestration. Both approaches can run in Foundry. The distinction is not simply local versus cloud, or Python versus no Python: it is how much agent runtime and orchestration I implement versus delegate to the managed harness. The application's UI, authentication and session/download authorization remain my responsibility in this demo. My microsoftiq-copilot agent and its configured tools/connections make the change tangible. The configuration ties together the native harness capabilities, Fabric access and product-knowledge retrieval shown in the architecture diagram. No Web IQ Wrapper in This Version The Web IQ integration from the earlier demo is not carried forward. External research uses the harness's native web search to discover sources and its Web capability to read relevant pages. This supports the research portion of the scenario without maintaining a separate Web IQ agent wrapper. It is not a claim that native web research reproduces every Web IQ behavior or data contract. Fabric and product knowledge are optional grounding sources, not stages that every question must pass through. A public-research question can stay a public-research question. Private business data must not be sent to public web tools. More Direct Integration with Fabric and Foundry IQ For me, the integration improvement is the ownership boundary: the harness uses configured native connections instead of calling application adapters that obtain credentials and query sources themselves. Fabric supplies structured business facts. The native Fabric connection uses the signed-in user's context to access a dedicated data agent over imported semantic models. There is no app-only Fabric credential fallback. The models contain demonstration data, not live CRM records. Foundry IQ supplies document evidence. The product-knowledge MCP connection reaches a knowledge base backed by Azure AI Search. Query planning and semantic retrieval return extractive evidence, including stored document metadata, for the harness to use in its answer. This connection uses the Foundry project's managed identity; it does not establish per-user document ACL enforcement. The distinction matters. A supportingDocId in an opportunity row is a relationship reference, not proof that the corresponding document has been retrieved. Fabric cannot substitute for document content, titles or update dates from the knowledge base. Calling this integration "better" means more direct native integration with clearer source responsibilities. I have not established a quality, latency or cost improvement over the MAF implementation, nor certified genuinely different-user authorization. What the Experiment Actually Showed Focused tests showed that the harness could retrieve sales figures, find internal documents, research the web and continue a conversation. That supported the core research workflows we wanted to carry over from the MAF demo. The most revealing test asked for sales figures together with the internal document explaining how the forecast should be interpreted. Some early runs got the numbers right but did not retrieve the requested document. The answer sounded convincing, but part of its explanation lacked verified support. After clarifying the agent's instructions and which source should answer each part of the question, one test run successfully retrieved evidence from both sources. This used synthetic demo data, not live customer information. The lesson: connecting the tools is only the start. You still need to test whether the agent uses the right sources and whether those sources actually support its answer. Beyond the Migration: Trying Workspace Files and Briefs Once the core question-answering workflows were working in focused tests, I wanted to try something we had not implemented in the MAF demo: turning an answer into a working document. Why save a brief? Not every answer needs one. But a territory review is a useful example: instead of leaving the analysis in a chat response, I can request a Markdown document to keep, review or hand off, then ask for a revision in the same conversation. The file is an optional deliverable, not a prerequisite for retrieving sales data or product evidence. This is where the harness's conversation workspace and native file capabilities become interesting. I can explore creating, reading back and revising an artifact in the managed environment without rebuilding those agent-side tools in a Python wrapper. MAF could support the same kind of workflow with appropriate tools and code; this is an additional capability in this demo, not something exclusive to a harness. Publication adds a separate step when the user actually wants a download. A workspace file is not automatically downloadable: the workbench registers it only after a successful native upload returns a real file ID, and only the owning unexpired session can download it. The application still implements those access checks. The migration question is therefore "can I keep answering the useful business questions?" The extension question is "what else can I build on the harness's native capabilities?" Briefs help explore the second question. Actual tool results, not assistant narration, establish whether creation, revision or publication occurred. There are still operational boundaries. The app is loopback-only, the harness is a public preview, inference and retrieval incur costs, and workspace state is not durable application storage. Refreshing the browser or restarting the backend loses local session mappings. Production hosting, retention and broader authorization need separate work. Shell and external business-system writes remain disabled. The Takeaway So, what happened to my Python agents? For this scenario, their hosted wrappers were no longer needed. The business questions stayed; their execution moved into a managed harness, and the remaining application code focused on the experience and its security boundaries. For this practical research scenario, that shifts the work from maintaining Python wrappers and fixed fan-out toward configuring the agent, defining source responsibilities, building the user experience and verifying evidence. Fabric and Foundry IQ fit into that environment directly, while native web research replaces the earlier Web IQ path for the tasks explored here. When I Would Still Use MAF Deterministic Routing and Local Hybrid Execution: MAF allows you to deploy hybrid topologies where small, local models (like MAI-Decision / Jev) handle rapid, deterministic triage and tool-gating, reserving expensive cloud-hosted frontier models for complex reasoning. A managed harness forces all routing into its proprietary cloud runtime, stripping away your ability to optimize latency and compute token economics. Absolute Control over the Orchestration Loop: The Copilot Harness uses an abstracted reasoning engine to decide when to activate a skill or invoke a tool. Native Toolchain Continuity and Hosting: MAF agents operate as standard C# or Python applications. Granular State and Semantic Memory: Managed harnesses provide a generalized shared memory layer. MAF allows you to build custom memory providers (like custom Azure SQL or Cosmos DB schemas) Unrestricted Interoperability Mechanics: While the Copilot Harness can consume Agent-to-Agent (A2A) protocols and Model Context Protocol (MCP) servers, building the actual server logic in MAF gives you the power to manipulate the raw protocol mechanics. If you need to manage custom message headers, inject highly specific tokens for platforms like SAP or ServiceNow, or alter payload structures mid-flight, MAF provides the unabstracted access required to do so. For this demo, the harness was a useful way to move beyond fixed fan-out and put research, connected evidence and artifacts into one managed environment. For another application, keeping its MAF agents may be the better decision. My takeaway is simple: start with a real task, move the responsibilities that fit the harness, and test the boundary instead of assuming the migration works. What's Next This experiment answered one question—now I'm curious about others: How does the harness perform under sustained load? What happens when Fabric semantic models grow to production scale? Can the same approach work for agents that need to write back to business systems? If you're exploring similar migrations, I'd be interested to hear what worked and what didn't. Try the Project The code is available at olivierb123/microsoftiq-copilot-harness-demo. Choose your path: Run the demo locally → Start with the README and setup checklist Explore the agent configuration → See harness/azure.yaml for the Foundry agent definition Understand the data model → Review the synthetic data documentation Compare with the original MAF approach → Check out the original pro-code demo Questions or feedback? Open an issue on the repo or share your own migration experience in the comments below.96Views1like0CommentsImprove production agents with closed-loop evaluations in Microsoft Foundry
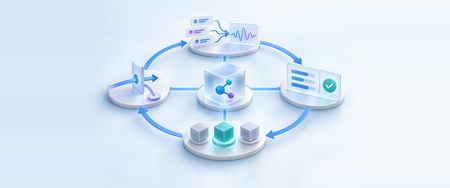
A production agent can lose accuracy or cost too much without a single code change. As live traffic grows, new user requests expose gaps in the agent instructions. At the same time, newer models can offer better quality or lower operating cost. Yet editing prompts by hand or swapping models in place risks breaking workflows that already work. The diagram uses v1 and v2 for the active baseline and candidate; Microsoft Foundry assigns the actual version numbers. Prerequisites and integration responsibilities Before implementing this workflow, verify these platform resources and application components: Microsoft Foundry resources: Deploy a hosted agent with the Agent Optimizer SDK. Connect Application Insights, deploy approved models, and grant Microsoft Entra ID permissions. Application team responsibilities: Supply the sandboxed tool test harness, reviewed outcome labels ( ground_truth ), the CI/CD release policy script, and session canary routing ( version_indicator ). How the scheduled loop runs end to end A scheduled GitHub Actions workflow or an Azure Monitor alert starts each cycle across Microsoft Foundry and GitHub Actions. On each run, the workflow reads recent continuous evaluation scores, Application Insights error metrics, and newly approved model deployments. When triage confirms an agent quality drop or a scheduled model evaluation, the workflow samples recent traces into a dataset for human label review. Next, Agent Optimizer searches across instructions, skills, tool descriptions, and models on your training and validation datasets. Your release automation applies the selected candidate and opens a pull request for engineer review. It then gates promotion on a held-out regression suite and updates .agent_configs/baseline/ after promotion. 1. Monitor live traffic with continuous evaluation Safe promotion starts with measuring the active production configuration, which serves as the baseline for every comparison against a proposed candidate. On live traffic, Microsoft Foundry continuous evaluation scores execution traces to track how quality, tool use, latency, and cost change over time: Tool output versus reply ( groundedness ). Checks whether the reply has support in the supplied context, flagging unsupported completion claims. Instructions versus actions ( task_adherence ). Checks whether the agent followed its system prompt rules during the conversation. Query versus tool calls ( tool_call_accuracy and intent_resolution ). Verifies that the agent selected the right tool and arguments for the user's request. Safety and trace rules ( indirect_attack and span checks). Flags injected instructions while span checks detect tool errors and repeated write calls. Triage alerts and set the optimization objective When a quality alert fires, check Application Insights traces and Azure Monitor metrics first. Separate an agent configuration issue from other operational changes before running an optimizer job: Backend or tool outages. Rising tool timeouts or API errors call for infrastructure recovery before you tune the agent. Traffic-mix shifts. A surge in a new request type may require new tools, policy rules, or test coverage before optimization. Evaluator or rubric updates. A changed grader prompt or threshold shifts scores even when agent behavior is unchanged. Confirm that a configuration change can address the issue, or start a run from a scheduled review or new model deployment. Define the objective up front: Optimization objective Primary target Mandatory requirements Improve quality Achieve a target score gain on failing task categories and meet the required quality floor Preserve scores in existing categories, pass all critical safety and business checks, and stay within cost and latency limits Reduce operating cost Lower token and model cost across the agent workload Meet the quality floor, stay within the allowed variation margin, pass all critical checks, and stay within latency limits 2. Turn production traces into isolated, executable datasets Once monitoring identifies what to improve, the next step is building the evaluation datasets for Agent Optimizer and CI/CD. Microsoft Foundry trace dataset generation ( project_client.datasets.begin_create_generation_job ) samples production traces from Application Insights into a versioned dataset registered in your project. When you set max_samples , Microsoft Foundry uses MinHash sampling to filter out repetitive messages and select diverse conversations. Pinning agent_version samples behavior from one known release while redacting private content ( redact_private_content=True ) by default. In a tool-using workflow such as an order refund agent, flagged traces often expose three failure patterns: Unsafe retries after a tool timeout. The agent calls a write tool such as submit_refund , and the call times out with outcome_unknown . The agent repeats the write request before it checks the first request's status. The backend must also prevent duplicate transactions. Premature completion claims on asynchronous work. The agent skips get_refund_status and reports a refund as completed while backend processing remains pending . Prompt injection inside untrusted tool data. The agent obeys injected text inside a customer return note ( untrusted_return_note ) and reports an unverified status. Figure 1. The agent checks the refund status after a timed-out submission. The tool sequence shows how it handles an unknown outcome. Bridge the gap from recorded traces to safe test execution A generated trace dataset captures the conversation history from production. Turning those recorded interactions into safe, repeatable evaluation cases requires verified expected outcomes and a sandboxed test backend. Keep all evaluation runs isolated from live payment APIs and customer databases: Review expected outcomes ( ground_truth ). Inspect each sampled trace and add the reviewed business outcome ( status , order_id , refund_id , and reason ) to ground_truth . Preserve the original captured response as the historical record. Isolate tool execution in a test harness. Bind each evaluation case to controlled tool doubles and a resettable test database or ledger snapshot. Every evaluation run executes fresh tool calls against this sandbox. Keep optimizer data separate from the release regression suite. Split reviewed cases into training and validation datasets ( 2a ) for Agent Optimizer, and reserve a held-out regression suite ( 2b ) for CI/CD release gating. Keep all requests from the same incident in one data split. Figure 2. This example dataset uses synthetic interactions to illustrate the production trace workflow. Reviewers verify expected outcomes and pair each case with isolated test state. 3. Configure eval.yaml and evaluators against fixed requirements With the datasets registered in Microsoft Foundry, define how each run is scored. Use eval.yaml to bind your baseline agent configuration, the training and validation datasets, evaluators, and approved model search space: name: Refund agent configuration search agent: name: refund-release-loop kind: hosted model: gpt-5.4-mini config: .agent_configs/baseline/metadata.yaml dataset: name: refund-loop-training version: "1" validation_dataset: name: refund-loop-validation version: "1" evaluators: - builtin.task_adherence - name: refund-state version: "3" options: eval_model: gpt-5.4-mini optimization_model: gpt-5.4 max_candidates: 4 optimization_config: model_search_space: - gpt-5.4-mini - gpt-5.4 Keep the held-out regression suite ( refund-loop-release ) in a separate CI/CD evaluation configuration so Agent Optimizer cannot access or overfit those cases during search. Keep release criteria independent of candidate instructions Prompt evaluators such as builtin.task_adherence help spot instruction drift, while Agent Optimizer rewrites instructions.md and SKILL.md to improve performance. Grade every candidate against fixed business requirements kept outside the editable agent configuration: Evaluator type What it checks on each fresh sandboxed run How it protects the release gate Semantic and rubric evaluators Grades the reply against fixed task-level criteria , mapped grounding context, and ground truth Allows better phrasing or model changes while enforcing business rules and grounded claims Custom code evaluator Inspects the tool call sequence, structured JSON output, and resulting sandbox ledger state Blocks duplicate write calls, skipped status checks, and mismatched transaction states To use builtin.groundedness on tool-supported claims, pass serialized tool outputs as grounding context and map that field in your evaluator inputs. Before testing, set your quality floor, target gain or cost savings, and allowed regression margin. Semantic evaluation permits harmless wording changes. The regression margin defines the largest acceptable quality loss. Assess sampling uncertainty separately. Microsoft Foundry custom code evaluators inspect the candidate's tool events and sandbox state snapshot directly. The following illustrative check blocks duplicate refund submissions and status claims that disagree with the verification tool or ledger: # Illustrative custom code evaluator logic submissions = [e for e in events if e["tool"] == "submit_refund"] if len(submissions) > 1: failures.append("repeated_submission") verifications = [e["result"] for e in events if e["tool"] == "get_refund_status"] claimed = output.get("status") if claimed in {"completed", "pending", "failed"}: if not verifications or verifications[-1].get("status") != claimed: failures.append("unverified_claim") if not ledger or ledger[-1].get("status") != claimed: failures.append("claim_state_mismatch") Because custom code evaluators run in an isolated environment without network access, the evaluation harness attaches the resulting sandbox state snapshot to each evaluation item. 4. Run Agent Optimizer on your evaluation dataset Once eval.yaml is ready, run Agent Optimizer from your agent project root: azd ai agent optimize The command detects eval.yaml automatically. Agent Optimizer is in preview; see the optimization quickstart for supported flags and regions. During the job, it scores .agent_configs/baseline/ , proposes up to max_candidates revisions from training tasks, and ranks candidates on validation_dataset : Optimization target Baseline input What Agent Optimizer changes Instruction tuning instructions.md Rewrites the system prompt with explicit constraints, step ordering, and output format rules Skill improvement skills/<name>/SKILL.md Refines domain skill descriptions, bodies, and activation criteria while keeping their purpose intact Tool optimization tools.json Clarifies function and parameter descriptions without changing the executable tool schema Model selection model_search_space in eval.yaml Tests candidate model deployments from the approved list in your Foundry project Load the selected instructions, skills, model, and tool descriptions at runtime with load_config() . Keep application logic, authorization, and tool contracts outside the optimization scope. For an illustrative submit_refund timeout, a candidate can update the refund skill and tool descriptions to check get_refund_status first. The configuration diff shows the intended changes, while evaluation provides evidence that the agent follows your business rules. Figure 3. The comparison ranks four candidates on validation runs. The selected candidate refines the skill and tool descriptions. 5. Gate the candidate in GitHub Actions CI/CD After you select a candidate in Agent Optimizer, apply its configuration to .agent_configs/ and open a pull request for review: azd ai agent optimize apply --candidate <candidate-id> In GitHub Actions, the workflow signs in to Azure with Microsoft Entra ID. It then runs a four-step release gate while live traffic stays on v1 : Deploy the candidate version ( v2 ). Run azd deploy --no-prompt to register the candidate container without changing the endpoint selector ( v1 ). Evaluate both pinned versions on the held-out suite ( 2b ). Run cloud evaluations on refund-loop-release for v1 and v2 (or azd ai agent eval run per version). Retrieve complete grades and resource metrics. Collect all evaluator scores, latency metrics, and model token counts from both completed runs. Enforce the release policy. Compare v2 against v1 using the objective from Step 1, and exit non-zero when the policy fails: Release check result Outcome on the held-out regression suite CI/CD gate action Quality objective pass Candidate clears the quality floor, meets the required quality gain after accounting for sampling uncertainty, passes all critical checks, and stays within resource limits Pass the release gate and permit canary verification Cost objective pass Candidate reduces measured model spend (using model token pricing), clears the quality floor, stays within the allowed regression margin, and passes all critical checks Pass the release gate and permit canary verification Insufficient gain or savings Candidate misses the target quality gain or measured cost reduction Keep the baseline active Regression or critical failure Candidate drops below the quality floor or triggers repeated_submission , unverified_claim , or claim_state_mismatch Fail the workflow and block release Separate evaluation job health from agent task performance. Every test case must return a complete evaluation record and all required evaluator scores; missing records or failed evaluator jobs always block release. Score recorded agent execution errors (such as a malformed response) as task failures. This lets a candidate repair a broken baseline case, such as an illustrative outcome_unknown timeout retry. Fixing one failure mode alone does not satisfy every release requirement. In Figure 4, the gate blocks promotion when the run shows category regressions, excess token usage, or incomplete baseline evidence. Figure 4. GitHub Actions deploys the candidate version, blocks release when the held-out regression suite fails, and skips endpoint promotion. 6. Run a canary release, promote, and prepare the next cycle Passing the held-out regression suite provides evidence that the candidate meets the requirements covered by those tests. Verify live traffic in four steps before full promotion: Smoke-test the deployed version. Send synthetic sessions with version_indicator set to v2 to verify container startup, credentials, and tool connections. Route canary sessions against a live control. Microsoft Foundry hosted endpoints send 100 percent of default traffic to v1 . Set your minimum sample count, observation window, and thresholds before starting. Route a slice of new sessions ( 5% , then 25% ) to v2 via version_indicator alongside matching v1 control traffic. Wait for settled outcomes. Hold the canary stage until v1 and v2 collect enough continuous evaluation scores, Azure Monitor metrics, and settled refund outcomes. Promote, hold, or roll back: Canary and post-deployment evidence Release action Candidate meets quality, latency, and settled outcome thresholds against live v1 control traffic during the canary window Promote v2 by switching the Microsoft Foundry endpoint version selector to v2 for all new default sessions Sample size is still below the minimum count or asynchronous transactions are still settling Hold the current canary percentage and continue collecting evidence Candidate quality falls below the required floor, exceeds the allowed regression margin against control, or triggers critical tool errors or Azure Monitor alerts Roll back routing for new sessions to v1 , stop or drain active v2 sessions, and reconcile affected records Plan for both session routing and backend state during a rollback. During a canary, clearing version_indicator sends new sessions to the default version ( v1 ). After promotion, rolling back requires switching the Microsoft Foundry endpoint selector back to v1 . Existing v2 sessions continue on v2 until you stop them explicitly (for example, with project_client.agents.stop_session ) or let them drain. For transactions already submitted during the canary window, use backend idempotency keys and compensating reversals to keep customer records consistent. Reset the baseline and refresh held-out cases for the next loop After promoting v2 to 100 percent of default traffic, your release automation records its configuration in .agent_configs/baseline/ as the new comparison baseline. Keep v1 available until all in-flight v1 sessions finish. To keep the held-out regression suite representative of current traffic, periodically add fresh reviewed production traces to both your training datasets and your release suite. This reduces the risk of repeated candidate selection gradually overfitting a single fixed test set. Next steps: Implement continuous evaluation and CI/CD gating Use these paths to set up the workflow in Microsoft Foundry: Enable continuous evaluation and trace datasets. Configure production monitoring on your deployed agent and convert production conversations into trace datasets. Create your evaluation suite and custom evaluators. Prepare eval.yaml and datasets for Agent Optimizer, add custom evaluators, and run cloud evaluations. Optimize and automate CI/CD releases. Follow the Agent Optimizer overview, the optimization quickstart, and the hosted agent CI/CD guide to gate deployments in GitHub Actions.331Views0likes0CommentsMoonshot AI’s Kimi K3.1 Pro comes to Microsoft Foundry
The hardest work for an AI agent rarely fits into a single prompt. A coding agent may need to follow a change across a large repository. A research agent may need to work through lengthy documents, charts, and images before it can give a useful answer. In both cases, the challenge is not just generating a response, but keeping track of the work as it unfolds Today, Moonshot AI’s Kimi K3.1 Pro is coming to Microsoft Foundry. It is an open-weight model built for agentic work, with text and image understanding and a context window of up to 1 million tokens. That combination makes it an interesting choice for developers building coding, research, and document-heavy applications. Where Kimi K3.1 Pro stands out Kimi K3.1 Pro is the first model in Moonshot AI’s K3.1 series. It builds on Kimi K3 with improvements across coding, research, and other multi-step tasks. Its large context window gives applications room to bring more relevant material into a task, while its multimodal capabilities let the model work with images alongside text. That opens up practical possibilities: Coding across a larger body of work. Give an agent the context it needs to investigate a change, understand related files, and work through an engineering task. Research grounded in source material. Bring lengthy reports and supporting material into a workflow so the model can examine the evidence before producing a synthesis. Work that combines text and visuals. Build applications that need to interpret images, charts, or document pages as part of a broader task. A large context window is useful, but it is not a shortcut to a good application. What matters is whether the model can use that context effectively, complete the task, and do so at a cost and speed that work for the customer. Choose based on the work your users need done Moonshot AI’s benchmarks have strong results for Kimi K3.1 Pro across coding, agentic, and multimodal evaluations. Those benchmarks are a useful starting point, but they do not answer the question every developer ultimately has: Will this model perform well in my application? The best way to find out is to test it on representative tasks. Compare the quality of the completed work, not just the first response. Look at how reliably the agent handles long inputs, where it needs tools, how it performs with visual material, and the cost per successful task. That is the value of bringing another capable model into Microsoft Foundry. Developers can evaluate Kimi K3.1 Pro alongside other models and make a choice grounded in their own workload, rather than assuming one model is right for every step. Pricing table Model Input Price /M Tokens Cache Price /M Tokens Output Price /M Tokens Kimi 3.1 Pro $2.30 $0.23 $11.50 Get started in Microsoft Foundry Explore Kimi K3.1 Pro in the Microsoft Foundry model catalog.. Start with a real coding, research, or document workflow, establish a baseline with the model you use today, and see where Kimi K3.1 Pro makes a meaningful difference. The opportunity is not simply to fit more into a prompt. It is to build agents that can stay with a complex task long enough to deliver a better result. We understand from customers how important a variety of open weight models are for their specific workloads and needs. Today’s launch of Kimi K3.1 Pro on Microsoft Foundry is the latest in our ongoing investment in the open weight model ecosystem. Microsoft Foundry features a wide range of open-weight models from providers including NVIDIA, OpenAI, DeepSeek, MiniMax, Mistral AI, Moonshot AI, and Qwen. Even more models are available through partners, such as Fireworks on Foundry.1.5KViews0likes0CommentsInformation Extraction with Low-Inference-Cost Models: 85% F1 Gain via Foundry Interactive Training
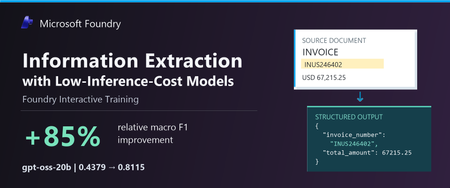
Authors: Shih-Yao Lin, Apurva Saksena The task: turn documents into structured data Many business workflows need to turn documents into structured data. The model must find the right values, capture the requested records, and return output the next system can use. Long documents and repeated tables make this harder. We tested gpt-oss-20b and gpt-oss-120b to explore lower-cost alternatives to frontier models. In our baseline tests, both fell short on field coverage. gpt-oss-20b also declined the task or returned unparseable output. We wanted to see whether task-specific fine-tuning could improve these results. In Figure 1, we show an invoice that we held out from training. We can quickly spot the invoice number, customer, due date, and balance, but our application must map those values to the correct schema fields, preserve all 37 line items, and return complete, valid JSON. A wrong or missing value can trigger downstream errors or manual review, while invalid JSON can break the workflow altogether. We used schema-guided extraction. We gave the model document text and a JSON Schema defining the required fields, then asked it to return one JSON object. Our grader compared normalized field-path/value pairs with the expected answer, counting repeated occurrences. We measure precision as the share of extracted pairs that match the expected answer, and recall as the share of expected pairs we recover correctly. We use F1 to combine the two into one score, using their harmonic mean. F1 ranges from 0 to 1, with higher scores indicating better extraction. A wrong value hurts precision and can also hurt recall if the expected value remains unmatched. A missing value hurts recall. What changed after fine-tuning We evaluated the base and fine-tuned versions of gpt-oss-20b and gpt-oss-120b on the same 20 documents. Both improved their extraction F1. gpt-oss-20b rose from 0.4379 to 0.8115, and gpt-oss-120b rose from 0.6816 to 0.8573. gpt-oss-20b made the larger gain, with an 85.3% relative improvement after 100 GRPO steps. Fine-tuned gpt-oss-120b finished with the higher F1. Fine-tuning helped both models, but the size of the improvement differed. We also evaluated GPT-5.5, GPT-5.6-sol, and GPT-6-sol as reference models. They scored 0.9760, 0.9766, and 0.9764, respectively—still higher than our fine-tuned models. gpt-oss-20b reached 83.1% of GPT-5.6-sol’s reference F1. This is a substantial improvement for gpt-oss-20b and a promising starting point for further task-specific tuning. Our base and tuned scores are averaged across repeated evaluations, while the reference models used a different single-pass protocol. These reference scores provide useful context for the progress we made, with the evaluation differences noted above. These improvements make lower inference-cost base models worth a closer look. Table 1 compares published Azure inference prices. The pricing comparison is intended to provide inference-cost context only and should not be interpreted as a complete total-cost-of-ownership analysis, which would also include training, hosting, retries, and operational costs. Table 1. Extraction macro F1 and published Azure inference prices (USD per 1M tokens); GPT-5.5, GPT-5.6-sol, and GPT-6-sol are included as frontier-model references Model Macro F1 Azure input / 1M Azure output / 1M gpt-oss-20b 0.8115 $0.07 $0.30 gpt-oss-120b 0.8573 $0.15 $0.60 GPT-5.6-sol 0.9766 $4.00 $20.00 GPT-5.5 0.9760 $5.00 $30.00 GPT-6-sol 0.9764 $2.00 $10.00 Notes: Prices checked October 9, 2026, in USD; input rates are uncached. gpt-oss-20b prices are published fine-tuned inference rates for Regional deployments. gpt-oss-120b prices are base-model rates; its fine-tuned rates remain unconfirmed. Frontier prices use Global Standard pricing, with the short-context tier for GPT-5.6-sol and GPT-6-sol. These rates do not represent measured deployment costs for our experimental checkpoints. Token rates exclude training and hosting costs. F1 scores come from fine-tuned checkpoints for the two gpt-oss models and reference runs for the frontier models. All use the same 20 documents, but tuned scores average repeated evaluations while frontier references use a different single-pass protocol. We observed more parseable output and higher coverage We looked through gpt-oss-20b’s responses and found examples where it declined the task or said it could not finish. We tracked this with a “refusal-wording rate”: the share of responses where our grader detected an apology or cannot-complete language. This measures wording, not whether the model made a safety refusal. We tracked JSON parseability and field coverage separately, although these problems can overlap. After fine-tuning, the refusal-wording rate (Refusals) fell from 25% to zero; JSON parseability (Valid JSON) rose from 63.8% to 98.8%, and coverage rose from 47.1% to 94.9%. Valid JSON means our grader could read the response as an object or array. Coverage compares the number of predicted field/value pairs with the expected count, capped at 100%. Wrong or extra pairs can raise coverage, so we read it alongside F1 rather than treat it as a measure of correctness. Extraction quality and output behavior before and after fine-tuning on the same 20 documents. Bars show means across repeated evaluations. “Valid JSON” measures JSON parseability, not schema compliance or value correctness. “Refusal rate” measures detected refusal wording, not safety refusals. Higher is better except for refusal rate. Figure 4 shows how these measures changed during training. We repeated the full training run with a second seed. It reached 0.8101 F1, close to the headline run’s 0.8115. We ran four temperature-0 evaluations for each seed. Across all eight post-training evaluations, our grader detected no refusal wording. What we learned from the model comparison We saw different starting points and different gains between the two models. gpt-oss-20b had clearer output problems before training: it sometimes declined the task, returned unparseable JSON, or missed required information. After fine-tuning, we saw improvements in extraction F1, JSON parseability, and field coverage, along with less refusal wording. gpt-oss-120b started with fewer format problems. We detected no refusal wording, and 96.3% of its baseline responses were parseable JSON. But parseable output did not mean complete or correct extraction. After fine-tuning, its field coverage rose from 74.1% to 94.1%, and its F1 rose from 0.6816 to 0.8573. gpt-oss-20b made the larger F1 gain, while fine-tuned gpt-oss-120b finished with the higher F1. For us, the lesson is to measure the problem first. Try simpler, lower-cost changes, such as prompting, before committing to training. Then consider fine-tuning when your grader can reward the improvements your application needs. How we trained with Foundry Interactive Training We used the Foundry Interactive Training API [1] with 17 training documents, expected structured answers, and a Python grader. We followed the cookbook to connect our grader to Foundry’s managed generation and training operations. We ran 100 group relative policy optimization, or GRPO, steps and saved checkpoints for evaluation. For each document, we had gpt-oss-20b generates eight candidate answers. Our grader awarded partial credit for correct values and penalized invalid JSON. GRPO used the candidates’ relative scores to reinforce better answers. We used the expected answers only for grading. We did not include them in the inputs we gave the model during reinforcement training. The model had to produce its own answers, and the grader supplied the feedback. 5. Customers define the application outcome and quality bar; Foundry Interactive Training runs the post-training loop in Microsoft Foundry. How customers can use Foundry Interactive Training To try this approach, bring four ingredients: a supported base model, examples from your workload, expected outcomes, or another way to check the answers, and a Python grader. Your grader should measure what matters to the application—not just whether an answer looks convincing. To prepare your extraction data and establish a baseline, start with the ExtractBench text-evaluation sample. It includes data preparation, an extraction grader, and evaluation of F1, refusal wording, JSON parseability, and field coverage. The sample covers preparation and evaluation only; follow the onboarding cookbook below for training. Get connected. Request access to the Microsoft Foundry Interactive Training public preview [2] and connect the onboarding cookbook [3][4] to an assigned Foundry project. Separate your data. Build training, validation, and final test sets. Use validation data to choose checkpoints. Keep the final test set for an independent check, with new sources and document structures where possible. Build your grader. Implement a grader that rewards the desired outcome. For our extraction task, we checked normalized field-path/value pairs and penalized unparseable JSON. Run a bounded experiment. Set a training budget, inspect the training signal, and compare saved checkpoints on the validation set. Once you choose a checkpoint, evaluate it on the untouched final test set. Evaluate and prepare for deployment. Use session sampling to test your LoRA adapter on held-out prompts and compare it with the baseline. Save checkpoints so you can continue experimenting. Before using the model in an application, confirm the supported deployment path, model compatibility, and serving costs. Takeaway With Foundry Interactive Training, we improved extraction F1 for both gpt-oss-20b and gpt-oss-120b. We brought our task examples and a Python grader, and Foundry managed the generation and training loop. gpt-oss-20b made the larger gain, while fine-tuned gpt-oss-120b reached the higher F1. We did not match the frontier references, but our results show why task-specific fine-tuning is worth exploring before switching to a higher-priced model. The final choice should depend on independently tested quality and the full cost of deployment. Reference [1] https://github.com/microsoft-foundry/fine-tuning [2] What is interactive training (preview) in Microsoft Foundry? - Microsoft Foundry | Microsoft Learn [3] Interactive Training - Public Preview Intake Form [4] https://github.com/microsoft-foundry/fine-tuning/tree/main/interactive_training How to Cite If you find this work useful, please consider citing this article: MISC{lin2026informationextraction, title = {Information Extraction with Low-Inference-Cost Models: 85\% {F1} Gain via {Foundry Interactive Training}}, author = {Lin, Shih-Yao and Saksena, Apurva}, year = {2026}, howpublished = {Microsoft Azure AI Foundry Blog}, url = {https://techcommunity.microsoft.com/blog/azure-ai-foundry-blog/information-extraction-with-low-inference-cost-models-85-f1-gain-via-foundry-int/4563661} }610Views0likes0CommentsAn engineering guide to Claude Code on Microsoft Foundry with Azure API Management
An engineering guide to my Claude Code on Foundry implementation: what users get, the Azure/APIM architecture, deployment and group onboarding, client setup, operational checks and scaling boundaries.482Views1like0Comments
Turn enterprise knowledge into a personalized voice and avatar agent in minutes with Voice Agent
A customer asks how a product works, then follows up: “Can you give me an example?” They need a useful explanation based on your product documentation, without searching through pages of information. Now imagine that conversation delivered in a voice and with a face that represent your brand. Voice Agent in Foundry Agent Service brings three things together in one real-time conversation: your knowledge through Foundry IQ, your voice through Personal Voice, and your face through a custom photo avatar. Once these assets are prepared, combining them takes a few minutes in the Foundry portal: create a Voice Agent, connect the knowledge, select the voice and avatar, and start talking. You don't need to build speech, avatar or app code to try it: the playground handles all of that. Why Voice Agent Minutes, not a project. With your knowledge base, voice and avatar ready, setup is four steps in the portal, with no code required to try the experience. Answers grounded in your content. Foundry IQ connects the agent to your documents, and you can instruct it to say when the materials don't contain an answer instead of guessing. A natural conversation. Users speak in real time and ask follow-up questions that build on conversation context. With interruptions enabled in a supported voice configuration, users can also interrupt the agent mid-answer. Build the identity once, update the knowledge anytime. Refreshing your documents does not require recreating the voice or avatar, and the same prepared assets can be reused across agents. Give your knowledge a voice and a recognizable face Personalization is most useful when it helps someone complete a task. A common pattern brings together your knowledge, your authorized identity, and a Voice Agent that makes both conversational. Here are some places to start: Scenario Knowledge to connect Voice and avatar Product concierge on your website or in a store kiosk Product manuals and approved FAQs Your brand spokesperson Employee onboarding and HR help Policies, handbooks and benefits guides A familiar HR partner or team lead Internal IT helpdesk Runbooks and troubleshooting guides Your support team's representative Training and e-learning tutor Course materials The course instructor Museum, tourism or campus guide Exhibit and visitor information A curator or guide Expert “office hours” Talks, FAQs and published content The expert, with their consent In each case, users can move from an overview to a concrete example at their own pace, in the same conversation, instead of navigating long documents or restarting their search. These are starting points to adapt to your audience and approved use, not customer deployments. Watch the conversation, not just a talking avatar The demo below uses a Theodore Roosevelt knowledge base to show three connected interactions with Voice Agent in the Foundry playground. The historical topic is a compact example; replace it with your own knowledge to apply the same pattern to any of the scenarios above. Ask the Voice Agent What it shows What were Theodore Roosevelt's main contributions to conservation? A grounded answer from the connected knowledge base Could you give one specific example and explain why it mattered? A follow-up that builds on the conversation context What was Microsoft's closing stock price yesterday? Knowing its limits: the agent says the available materials do not contain the answer instead of guessing The voice and avatar in this demo are AI-generated. Theodore Roosevelt is the subject of the knowledge base, not the identity portrayed by the assistant. The point is not simply to animate a response. It is to let a user get an explanation, explore it through a follow-up and understand when the connected knowledge cannot help. The demo uses a platform-provided voice (Andrew Dragon HD) and a preset photo avatar (Marcel); with Personal Voice and a custom photo avatar, the conversation works the same way, with your own identity. From prepared assets to a conversation in four steps Start in a supported Foundry project with these resources prepared, or reuse ones you already have: Knowledge: a Foundry IQ knowledge base created from your authorized documents. Try a sample question to preview the results. Voice: a Personal Voice created from a short, clean voice sample and the speaker's recorded consent statement. Appearance: a custom photo avatar created from an authorized photo and a consent video of the person pictured. You can also start right away with platform-provided voices and avatars and personalize later. The Voice Agent setup guide walks through preparing each resource, including the consent and eligibility requirements, for both the portal and Python. 1. Create a Voice Agent In the Foundry portal, open your project and go to Agents → Build an agent. Enter a name, select Voice as the interaction mode, choose the appropriate use case, and select Create agent and open playground. Review the model and default instructions for your scenario. 2. Connect the knowledge that helps users complete their task In the agent configuration, expand Knowledge, select Add, and choose your prepared Foundry IQ knowledge base from Available knowledge bases. Give the agent a clear purpose, such as explaining product features from approved documentation, and keep spoken answers concise. For example: Use the connected knowledge base for factual answers. Give a brief, direct answer and use conversation context for follow-up questions. If the available materials do not contain the answer, say so rather than guessing. This gives the conversation a useful boundary: the knowledge supplies the answer, and the voice and avatar determine how it is presented. 3. Choose how the agent sounds and appears Under Voice, select your Personal Voice (Custom → Personal). Enable Avatar and choose your custom photo avatar (Custom → Photo avatar). Preview the selections to confirm they match the intended identity and are available for your project's resource and region. This is where the experience becomes recognizable: the same product knowledge can be delivered by your brand spokesperson or your trainer, and you can swap the knowledge or the identity independently. 4. Save and start talking Select Save, then Start session, and allow browser microphone access. Ask about your content, follow up naturally (for example, “Can you give me an example?”), and try a question outside your documents to check whether the agent acknowledges when the information is unavailable. That's it: your knowledge, voice and avatar are working together in a live conversation, right in the playground, with no local SDK setup. Check the answers against your source documents before sharing the agent with users. Personalize with permission Use voice, likeness and documents you are authorized to use, complete the required consent and access approvals, and disclose synthetic voice and avatar output. Personal Voice and custom photo-avatar capabilities have eligibility requirements; available models, regions and preview features vary. The setup guide links to the applicable requirements. Review audience access and data handling before using enterprise content, and validate the experience for your intended deployment. Build your first Voice Agent Start with one focused knowledge collection, one authorized identity and three useful questions. Voice Agent in Foundry Agent Service turns those building blocks into a conversation that people can hear, see and follow up on. Ready to build it? Follow the step-by-step setup guide to prepare your knowledge base, Personal Voice and photo avatar, then bring them together in a Voice Agent through the Foundry portal or Python. For more documentation, quickstarts and samples, explore the Microsoft Voice Agent repository. Your knowledge, your voice, your face: one conversation, a few clicks away.487Views1like0CommentsWhen the Answer Isn’t in the Document: Metadata-Aware Agentic RAG with Foundry IQ
The problem SharePoint libraries often contain years of carefully curated metadata, including root cause, severity, business unit, document type, owner and classification. If that metadata never reaches the retrieval pipeline, however, a RAG system cannot use it. This creates a common blind spot: the information that explains what a document is about may exist in its metadata rather than its text. Consider an incident review containing this statement: “Investigation found that a DNS record was repointed during a migration while the old target was still serving writes.” The associated Root Cause Category is Configuration change, but those words do not appear in the document. Another review might mention that a configuration change was suspected and ruled out. Text-only retrieval can therefore favour the wrong document. In the sample dataset used for this project, none of the 19 reviews classified as configuration-change incidents contained the word “configuration”, while six reviews with other root causes did. Metadata does not improve every search. It helps when the information that determines what a document is lives outside the document text. Why tuning alone cannot fix it With a native SharePoint knowledge source, document text is extracted, chunked and embedded, while standard properties are retained. Custom SharePoint columns are not part of that ingestion path. Fields such as Root Cause Category, Contributing Factors, Detection Method and Severity therefore never become structured fields available to retrieval. If the metadata is absent from the index, search tuning cannot make it count. Flattening all metadata into a single text string is also problematic: Notification Service | Sev2 | Configuration change | Missing runbook This preserves the words but loses their meaning. A root cause, severity and contributing factor represent different concepts and should remain separate fields. Bring a custom Azure AI Search index The approach is to create and control a custom Azure AI Search index, then expose it to Foundry IQ as a searchIndex knowledge source. This combines metadata control with agentic query planning and a governed retrieval surface. Approach Metadata control Agentic planning Native SharePoint knowledge source No Yes Custom index queried directly Yes No Custom index as a knowledge source Yes Yes Architecture The key design principle is simple: every chunk carries its parent document's metadata. Figure 1. Metadata-aware retrieval architecture with Azure AI Search and Foundry IQ. The ingestion pipeline extracts a document, creates chunks, attaches document-level metadata to every chunk, generates embeddings and writes the records to Azure AI Search. Foundry IQ then uses the index as a knowledge source. Azure AI Search holds the metadata. Foundry IQ decides when to use it. Figure 2. Detailed implementation view, including the baseline and metadata-aware retrieval paths. At query time, the search service calls the configured models for vectorisation and query planning. Where key authentication is disabled, the search service's managed identity needs the required access. In the tested implementation, the Cognitive Services User role resolved HTTP 401 responses from retrieve requests. Put metadata on every chunk A chunk can only be retrieved and ranked using information available on that chunk. Each metadata property should therefore remain in its own field: { "id": "doc1035-000", "parentId": "doc1035", "title": "Notification Service: failed sign-ins", "content": "<extracted review text>", "rootCauseCategory": "Configuration change", "contributingFactors": "Missing runbook; Change outside window", "detectionMethod": "Customer report", "severity": "Sev2" } A separate metadata index does not solve the same problem because a match against metadata in one index cannot raise the ranking of a content chunk in another. What influences retrieval Four areas matter in this design: Search fields: searchFields determine which fields generated subqueries search. Semantic configuration: prioritised fields give the semantic reranker access to important metadata. Query hints: hints help the planner connect natural-language requests to known metadata values. Filters: a baseFilter or request-level filterAddOn can enforce constraints. Boost hints influence ranking without excluding documents. Filter hints can narrow the result set when the planner determines that a filter is appropriate. "queryHints": { "boosts": [{ "kind": "fieldValue", "field": "rootCauseCategory", "fieldValues": ["Configuration change", "Capacity", "Software defect", "Dependency failure", "Certificate expiry"], "boost": 3.0, "boostInstructions": "Boost when the user describes what caused an incident." }] } Hints are best effort. Hard requirements should use a base filter or document-level access control rather than relying on the planner to select a hint. The tested configuration used the 2026-08-01-preview API. Current documentation should be checked for supported models, limits and behaviour before implementation. Why can't vector search or semantic ranking solve this? This is probably the most obvious question: if embeddings understand meaning, and semantic ranking understands context, why do we need metadata at all? The answer is that vector search and semantic ranking solve a different problem. This approach complements them rather than replacing them. Vector search finds similarity, not recorded facts In a typical RAG pipeline, document chunks are converted into embeddings, numerical representations of their meaning. The user's question is embedded as well, and vector search finds chunks that are close to it in vector space. For example, a passage saying: “The gateway routing rule was updated shortly before the incident.” might rank highly for: “Find incidents caused by configuration changes.” That's useful. But it doesn't necessarily mean Configuration change was the confirmed root cause. The passage could describe an investigation path, a contributing factor, or even something that was later ruled out. Vector similarity is essentially asking: “Does this content mean something similar to what the user is asking about?” Metadata lets us ask a different question: “What was this incident actually classified as?” If the incident review already contains a curated rootCauseCategory = Configuration change field, we should not require an embedding model to rediscover that fact from the prose every time somebody searches. What about semantic ranking? Semantic ranking helps, but at a different stage. In Azure AI Search, semantic ranker applies secondary ranking to an initial result set, using language understanding to promote results that are more semantically relevant to the query. That can help distinguish between: a configuration change that caused an incident a configuration change that was merely investigated a configuration change that was explicitly ruled out But semantic ranking still works with the information supplied to the retrieval pipeline. It cannot make use of a classification stored in a separate metadata field if that field was never supplied to retrieval or ranking in the first place. The difference becomes clearer with a real query Consider: “Show me configuration change incidents that customers reported.” A content-first approach primarily asks: “Does this passage sound relevant to configuration changes and customer reports?” A metadata-aware approach can additionally ask: “Is the recorded root cause Configuration change , and is the recorded detection method Customer report ?” Those signals can influence retrieval in different ways: Boost: favour incidents with those metadata values while still allowing other relevant results. Filter: restrict the candidate set when those classifications represent hard constraints. Retrieval layer Typical content-first RAG Metadata-aware approach Vector search Finds chunks with similar meaning using content embeddings Keeps content embeddings for narrative similarity Searchable fields Primarily searches document content and other configured fields Makes classifications such as root cause and detection method explicit searchable or filterable fields Semantic ranking Reranks the supplied candidate content for relevance Can also benefit from curated text fields when those fields are included and prioritised in the semantic configuration Query planning Translates the question into retrieval over content, optionally with application-defined filters Uses the metadata taxonomy to generate field-specific boosts or filters where appropriate There is an important nuance here: traditional RAG can absolutely use metadata filters and hybrid search. So the contribution here isn't a new embedding algorithm, nor is metadata an alternative to vector search. It is about making structured knowledge a first-class retrieval signal, and wiring that information into candidate retrieval, ranking and Foundry IQ's agentic query planning rather than asking the system to infer every classification from document text. And importantly, in the comparison below, both approaches use the same Azure AI Search index. So the comparison isn't: vector search vs. metadata. It's: content-first retrieval vs. retrieval that can also use the structured information the organisation already knows. Measuring the impact Two knowledge bases were created over the same Azure AI Search index. The baseline searched title and content. The metadata-aware configuration used the same content plus structured metadata, semantic configuration and query hints. Ten questions were run through both configurations. Correctness was determined directly from the metadata attached to returned reviews, rather than by asking an LLM whether a result appeared relevant. For the question “What can be learned from outages caused by configuration changes?”, the planner generated: rootCauseCategory eq 'Configuration change' Matching reports in top 5 Score Baseline 0 Metadata-aware 3 Best possible 5 Across ten questions and four runs using gpt-5.4-mini for query planning, the baseline returned 26 matching reviews in the top five. The metadata-aware configuration returned 39 to 41, against a best possible score of 50. The gains appeared where metadata carried the missing meaning: Configuration changes: 0 → 3 Configuration changes reported by customers: 0 → 3 Capacity in production: 1 → 5 Alert fatigue: 3 → 5 Queries whose important terms already appeared in the document text scored 5/5 in both configurations. The result is therefore more specific than “metadata improves search”: metadata closes a retrieval gap when document text does not fully describe what the document represents. A failure mode worth handling Because query planning uses an LLM, the planner can occasionally generate a filter that the search index rejects. Two invalid examples observed during testing were: severity eq Sev1 changeRelated eq true The first omitted quotes around a string. The second treated an Edm.String field containing Yes and No as a Boolean. The latter caused the retrieve request to fail with HTTP 502. The fix was to make the schema and allowed values explicit: This is a text field, not a Boolean. The only valid values are 'Yes' and 'No'. Never compare the field with true or false. Application code should also handle retrieval failures rather than assuming every generated filter will be valid. Production considerations A custom index provides control, but the solution now owns ingestion. Options include the SharePoint indexer with custom columns, an Azure Function using Microsoft Graph, or an existing pipeline built with Logic Apps, Azure Data Factory or Microsoft Fabric. A custom Azure AI Search index does not automatically inherit the SharePoint permissions model. Where users have different document permissions, ACLs must be carried into ingestion and retrieval. Query hints should also be regenerated when taxonomy values change. Key takeaways Confirm that the required metadata reaches the index. Keep metadata structured rather than flattening it into one text field. Attach parent-document metadata to every chunk. Use search fields, semantic configuration, query hints and filters deliberately. Describe field types and valid values clearly in filter instructions. Evaluate against a baseline using objective correctness rules. Metadata-aware retrieval is not about making every search better. It gives the retrieval system access to context that does not exist in the document text. Try the proof of concept The complete proof of concept, synthetic dataset, index scripts, knowledge-base configurations and A/B evaluation harness are available in the GitHub - shikha-msft/foundryiq-metadata-agentic-rag. References Create a search index knowledge source Create a knowledge base Query a knowledge base via API or MCP What is Foundry IQ?545Views0likes0Comments