- Home
- Microsoft 365
- Modern Work App Consult Blog
- Push notifications in a PWA running on Windows 10
- Subscribe to RSS Feed
- Mark as New
- Mark as Read
- Bookmark
- Subscribe
- Printer Friendly Page
- Report Inappropriate Content
In the previous post we have seen how we are able to activate a Progressive Web App on Windows 10 from a toast notification. However, the sample used in the post had a limitation compared to a real world scenario: the notification was generated by the app itself, as a consequence of the user pressing a button. In a real application, this is hardly the case. Notifications can be received at anytime, even when the application isn’t running. This is the reason why the mobile world has embraced since a long time the push notification concept, which is a way to engage with the user and at the same time respect the battery and the performances of the device. Before push notifications, most of the notifications scenarios were implemented with a polling approach. The client (in our case, the application) keeps checking with the server if there’s nothing new and, if that’s the case, displays a notification to the user.
Push notifications, instead, work the other way around. The server establishes a channel with the client and, whenever there’s something to notify, it sends a signal to the client, which processes it. This channel is always alive, even when the application is not running. Push notifications are the best technology when the event that triggers the notification doesn’t happen locally, but in a remote environment. Let’s take, as example, the news PWA we’ve built in the previous post. Let’s image that it’s a companion app for a news website, which has a backend that offers a text editing interface to add a news. In this scenario it’s me, the news writer, who is aware that I’m about to add an important news in the backend, not the application. As such, I would imagine to see a checkbox labelled “This is a breaking news” in the editing page. When I flag it and I post the news, automatically every registered device will receive a push notification.
Let’s see how we can extended the previous sample to add this specific behavior. At startup, the PWA will register itself to receive push notifications. Then we’re going to build a simple backend (in this case, it will be made by a Windows Forms app) which is capable to send push notifications to our app. Let’s start!
Web notifications vs Windows notifications
W3C has defined a standard Web API to handle push notifications, which is supported by all the major browsers. The Edge team has published a great tutorial on this on their samples website: https://webpushdemo.azurewebsites.net/ This implementation is cross-platform from a client point of view, meaning that the same code will work regardless of the browser. However, it’s not the same for the server side implementation. The URL where to send the notification, in fact, will change based on the browser which is rendering the PWA.
However, since we’re running on Windows, we have also the opportunity to leverage the native Windows APIs to support push notifications. The client side code won’t be cross-platform anymore, but we will gain much more power and flexibility, since we can support the rich adaptive toast notification model introduced with Windows 10. This means the opportunity to send notifications with hero images, interactive elements like buttons or text boxes, etc. In this post we’re going to see how to implement this kind of notifications in our web application.
Push notifications overview
From a high level overview, push notifications work in the same way regardless of the platform and it involves three actors:
- A cloud service provided by the owner of the platform, which acts as a middle man between the client and the server
- A client, which connects to the cloud service and establish a communication channel
- A server, which sends notifications to the clients passing through the cloud service

The difference, based on the platform, is the way you communicate with the cloud service. In case of Windows, the service is called WNS (Windows Notification Service). Whenever a client registers with the WNS, it gets assigned a unique channel which is represented by a URI. Whenever the backend wants to send a notification to that device, it must compose a XML payload (which is different based on the notification type you want to send) and push it using a HTTP POST command against the assigned URI.
As you can see, the advantage of this approach is that it doesn’t rely on any proprietary SDK or API, but on standard protocols and languages like XML and HTTP. As such, you will be able to integrate push notifications no matter which is the technology you have used to build the backend of your project.
The server side
As first step, we need to implement the backend which is going to send the push notification to our web application. As I’ve described before, in a real world scenario you’ll probably have a web application, an Azure function or any other kind of trigger that sends it. In our case, since we’re building just a sample, we’re going to create a Windows Forms application. The application will allow to specify some information about the notification (like title and text) and the URL of the device. After pressing a button, the application will send the notification payload to the WNS using the assigned URL, which will take care of routing the notification to the correct device.
As an overview, interacting with the WNS requires two steps:
- First you need to authenticate against WNS, using a set of credentials that the Store assigns to your application when you register it on the Dev Center.
- After you have successfully authenticated, you will receive a token that you will need to append to every request to the WNS. Without this token, the request will be rejected.
The process isn’t very complex, but it requires lot of work:
- You need to manually build the HTTP request to authenticate and store the returned token.
- You need to manually build the HTTP request to send the notification. It’s enough to specify the wrong content type or the wrong header to see the request failing, so you have to be very careful in following the documentation.
- You need to build a retry mechanism, in case the authentication token is expired and you need a new one.
To make things simpler please welcome PushSharp , an open source library built by a member of the Xamarin team which makes the server side implementation of push notifications much easier. Instead of manually building all the required HTTP requests, you’re going to use a set of high level #C APIs which will make all the hard work for you under the hood. In this post we’re going to see the specific Windows implementation, but PushSharp is a cross-platform library. This means that you can send push notifications from any C# based backend to iOS, Android and Windows devices.
Before writing some code, however, we need to register our PWA on the Dev Center, in order to get the credentials to authenticate against WNS. This step is required, otherwise a malicious developer would be able to send push notifications to our customers just by spoofing the channel URI. I’m assuming that you already have a Dev Center account, so you can just go to https://dev.windows.com , login and reserve a new name for the application you want to publish (in case you don’t have it already). Once you have done it, you will have access to the full dashboard for your app.
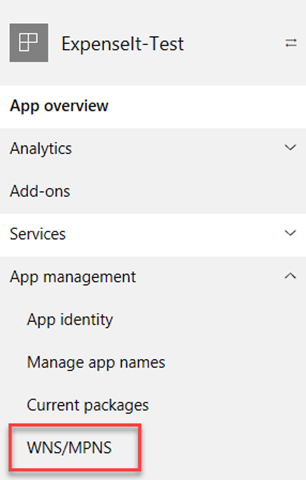
Click on the WNS/MPSN option and then click on the Live Services Site link that you will find in the page under the WNS section:

After clicking on it, you will be redirected to a page that will contain all the registration information of your application against the Microsoft services. The information we need to retrieve for our purposes are:
-
The secret, under
Application Secrets
- The Package SID , under Windows Store
-
The Package Family Name, which can be extracted from the
Name
attribute of the
Identity
tag in the
Application Identity
section


Note them down because we’re going to need them later.
Now let’s build the server app. I’m taking, as code base, the same solution I’ve built for the previous post and that you can find on GitHub at https://github.com/Microsoft/Windows-AppConsult-samples-PWA/tree/master/ToastActivation. As already shared, I’m going to build a Windows Forms project but it could be a WPF app or an ASP.NET Core website. The PushSharp library, in fact, works across any C# based framework, including .NET Core. This is the simple user interface I’ve built:

- The first field will be used to specify the title of the notification
- The second field will be used to specify the text of the notification
- The third field will be used to specify the ID of the news (so that we can redirect the user to correct detail page)
- The fourth field will be used to specify the channel URI of the device where we want to send the notification
Now let’s move to the code and, as first thing, let’s right click on the project, choose Manage NuGet packages and install the PushSharp.Core package:

Now let’s open the code behind of the main form of our application and let’s add the following namespace to the header of the class:
using PushSharp.Windows;Do you remember the information we have previously noted about our application from the Dev Center? Now it’s time to use them! Let’s create a variable inside our class, one for each information:
string secret = ""; // need to replace this with your own secretstring sid = ""; // need to replace this with your own sid
string package = "29949MatteoPagani.ExpenseIt-Test" // need to replace this with your package family name;
Of course, fill the empty values with the correct information you have retrieved from the Dev Center.
Now we can start implementing the method that actually sends the push notification to our web app. Let’s see the whole code and then let’s comment it piece by piece:
public void SendNotification(string uri, string title, string text, string newsId){
var config = new WnsConfiguration(package, sid, secret);
var wnsBroker = new WnsServiceBroker(config);
wnsBroker.OnNotificationFailed += (notification, aggregateEx) => {
aggregateEx.Handle(ex => {
// See what kind of exception it was to further diagnose
if (ex is WnsNotificationException)
{
var notificationException = (WnsNotificationException)ex;
Debug.WriteLine($"WNS Notification Failed: {notificationException.Message}");
}
else
{
Debug.WriteLine("WNS Notification Failed for some (Unknown Reason)");
}
// Mark it as handled
return true;
});
};
wnsBroker.OnNotificationSucceeded += (notification) => {
Debug.WriteLine("WNS Notification Sent!");
};
// Start the broker
wnsBroker.Start();
string payload = $"<toast launch=\"{newsId}\"><visual><binding template=\"ToastGeneric\"><text>{title}</text><text>{text}</text></binding></visual></toast>";
WnsToastNotification toastNotification = new WnsToastNotification
{
ChannelUri = uri,
Payload = XElement.Parse(payload)
};
wnsBroker.QueueNotification(toastNotification);
wnsBroker.Stop();
}
The method accepts 4 parameters in input, which are the ones retrieved from the various text boxes in the user interface. The first step is to build a WnsConfiguration object, which require the authentication information we have previously stored. Then we can create a WnsBroker object, passing the configuration as parameter. It’s the object that we’re going to use to communicate with the WNS.
The next lines of code aren’t strictly required, but they can be really helpful for debugging or logging purposes. We subscribe to the:
- OnNotificationFailed event, which is triggered when one or more of the notifications we have sent can’t be delivered. From the Message property of the notification we can understand which is the issue, so we print it in the output window of Visual Studio.
- OnNotificationSucceded event, which is triggered instead one one or more of the notifications we have sent has been successfully queued by the WNS.
Then we can write the real code to send the notification. First we start the broker by calling the Start() method. Then we prepare the content of the notification, in this case by using a WnsToastNotification object since we want to send a toast notification. We build the object by specifying the ChannelUri property (the URI of the channel where to send the notification) and the Payload property (the XML that represents the notification). In this case, the payload is the same we have seen in the previous post and it’s the standard one for a generic toast notification. The difference is that we populate the launch attribute and the two text nodes using the information specified by the user in the UI.
Then we queue the notification by passing the object we have just created to the QueueNotification () method and we stop the broker by calling the Stop() method.
In a real world scenario the code would be pretty much the same, except that the QueueNotification() method might be called multiple times, based on the scenario we need to implement. For example, if it’s a messaging app, probably we will call it just once because we need to notify only the sender that there’s a new message. In case of a news app, instead, we will likely call it for each device that we have registered in our system, which represents every user that has subscribed to receive breaking news.
That’s all! As you can see, the PushSharp library makes the overall operation much easier. You can notice how, for example, we didn’t need to take care of making two separate HTTP calls, one for the authentication and one for sending the actual notification. The library performs automatically the authentication request under the hood and takes care, if the token is expired, to refresh it.
Now we can move to the client code: our Progressive Web App!
The Progressive Web App
We won’t start from scratch, but we’re going to add push notifications support to the PWA we’ve built in the previous post , which is included in the sample on GitHub and which is made by two components:
- The ToastWebsite project, which is the real web application. It’s an ASP.NET Core 2.0 website which I’ve deployed to an Azure Web App.
- The App project, which is a Hosted Web App project that, in the manifest, just points to the URL where I’ve deployed the web application. Thanks to this project, I’m able to run my website like if it’s a native application.
Since the second project is just a wrapper for the website, we’re going to write all the actual code in the first project. Let’s move to Pages –> Index.cshtml , which is the main page of the website. It’s the page where, in the last post, we have added some code to:
- Display a toast notification when the user presses a button
- Register for the activated event, so that when the user clicks on the notification we can intercept it and redirect him to the appropriate landing page
We’re going to add some new code, specifically a couple of new functions and a property:
<script type="text/javascript">var channel;
if (typeof Windows !== 'undefined' &&
typeof Windows.UI !== 'undefined' &&
typeof Windows.UI.Notifications !== 'undefined') {
function registerPush() {
var channelOperation = Windows.Networking.PushNotifications.PushNotificationChannelManager.createPushNotificationChannelForApplicationAsync();
var rval = channelOperation.then(function (newChannel) {
channel = newChannel;
channel.addEventListener("pushnotificationreceived", onPushNotification, false);
console.log('Channel: ' + channel.uri);
document.getElementById('channelUri').innerHTML = channel.uri;
},
function (error) {
console.log('Error: ' + error);
}
);
return rval;
}
function onPushNotification(e) {
e.cancel = true;
document.getElementById('notificationStatus').innerHTML = 'Notification received';
}
</script>
First, let’s remember that we need to wrap the new functions inside a if (typeof Windows) statement. We need to leverage this code only if the application is running as a PWA on Windows 10, because we’re going to use some specific WinRT APIs exposed by the Universal Windows Platform. As such, the previous code would generate an exception if the web app is executed inside a browser or on another platform.
Inside the registerPush() function we use the APIs included in the Windows.Networking.PushNotifications namespace to create a new channel URI. Specifically, we use the createPushNotificationChannelForApplicationAsync() method exposed by the PushNotificationChannelManager class. If the operation is successful, it means that the WNS has created a new channel for us. If that’s the case, we can use the promises approach to define a function that is invoked when the creation of the channel is completed. All the information about it are stored inside a parameter of the function. The most interesting one, for us, is inside the uri property. It’s the full URI that our backend will need to use to send us a push notification. In a real world scenario, at this point we would need to send the URI to the backend, for example by invoking a REST API exposed by our server. The REST API will take care of storing the URI inside a database, so that we can retrieve it at a later stage when needed.
In our sample, to make things easier, we just display it in the HTML page, inside a div control I’ve placed. It will be up to us to copy the URL and paste it inside the user interface of the Windows Forms application we have built.
Please notice another important piece of our code: we register to an event exposed by the channel we have just created called pushnotificationreceived , which is invoked every time we receive a push notification and the app is currently running. Inside this event we have access to an object which exposes a cancel property, which is a boolean. By setting it to true , we are telling to Windows that we want to take care of the notification and that it should ignore it. The final result is that the user won’t see the toast notification appearing in the bottom right corner of the screen and then being stored in the Action Center. Subscribing to this event isn’t a requirement, but it can be useful in some scenarios to provide a better user experience. For example, if you’re building a messaging app and the user receives a message on the chat he’s already looking at, you can decide to not display any notification and just add the message to the history. In our case, we’re using this event to block the toast notification and display a message to the user directly in the page.
As last step, let’s just add in our page a button connected to this new function we have just created, plus a couple of div elements to display the output to the user:
<h2>Toast notifications</h2><p><button onclick="registerPush();">Register for push notifications</button></p>
<p>Channel URI: <div id="channelUri"></div></p>
<p id="notificationStatus"></p>
Let’s put all the code together!
Now we can test if the code we have written works. However, before doing that, there’s an important step to make. At the beginning of the post we have registered a new application on the Dev Center in order to get the credentials needed to authenticate with WNS. However, we have never linked this application to our PWA. We can do it by right clicking on our UWP project (the App one which, in the previous post, we have created using PWA Builder ) and choosing Store –> Associate App with the Store . You will be able to login with your developer account and choose, from the list, the same name you have reserved in the beginning. This way the manifest will be automatically filled with the correct identity.
Now we can move on with the testing. First, we need to publish the changes we have made to our website on our web server. In my case, I’m using again an Azure Web App, but this time I’ve published it on another URI, which is https://toastwebsitewithpush.azurewebsites.net/ If you want to do the same, remember to follow the guidance of the previous post and make sure to set, in the Application and Content URIs sections of the manifest, the new URI.
Deploy the App project on your machine and launch the PWA. Remember that you can’t test this code directly from the browser, since you don’t have access to the WinRT APIs we’re using to create a push notification channel. Click on the Register for push notifications button and, if everything goes well, you should see a long URI appearing below:

Now, from Visual Studio, launch the Windows Forms app we’ve built and fill the Title, Text and News Id fields with some values. Make sure, in the URL field, to paste the URI that you are seeing in the main page of your PWA.

Now press the Send Push button. If everything goes well, after a while you should see the message Notification received in the main page of your PWA.

If you remember the code we have written, this is happening because we have subscribed to the pushnotificationreceived event and we are telling to Windows that we want to handle it. As a consequence, the user is seeing just the message on the page, but he’s not seeing any toast notification popping up.
Now close the PWA and, in the Windows Forms app, press again the Send Push button.

This time the notification is popping up in Windows. The application, in fact, is not running, so the pushnotificationreceived event can’t be raised.
Enhancing your PWA with tile notifications
The advantage of using a WNS infrastructure for sending push notifications is that you can leverage it to further enhance your PWA, by adding for example live tiles support. The same exact technique we’ve seen so far, in fact, can be used also to update the tile of your application and make it more engaging. From the backend, you just need to send a different payload, based on the adaptive tile schema . Additionally, toast and tile notifications can be sent together at the same time, so that the user will receive both updates at the same time. Here is, for example, how I changed the last part of the code of the Windows Forms app to achieve this goal:
// Start the brokerwnsBroker.Start();
string payload = $"<toast launch=\"{newsId}\"><visual><binding template=\"ToastGeneric\"><text>{title}</text><text>{text}</text></binding></visual></toast>";
string tile = $@"<tile>
<visual>
<binding template='TileMedium'>
<text hint-style='subtitle'>{title}</text>
<text hint-style='captionSubtle'>{text}</text>
</binding>
<binding template='TileWide'>
<text hint-style='subtitle'>{title}</text>
<text hint-style='captionSubtle'>{text}</text>
</binding>
<binding template='TileLarge'>
<text hint-style='subtitle'>{title}</text>
<text hint-style='captionSubtle'>{text}</text>
</binding>
</visual>
</tile>";
WnsToastNotification toastNotification = new WnsToastNotification
{
ChannelUri = uri,
Payload = XElement.Parse(payload)
};
WnsTileNotification tileNotification = new WnsTileNotification
{
ChannelUri = uri,
Payload = XElement.Parse(tile)
};
wnsBroker.QueueNotification(toastNotification);
wnsBroker.QueueNotification(tileNotification);
wnsBroker.Stop();
As you can see, the code is the same. The only differences are the payload and the usage of another class, called WnsTileNotification , to setup the tile notification. At the end, I use the broker to queue it together with the toast notification I’ve previously created.
As outcome, other then seeing the toast notification or the message in the app (depending if it’s running or not), you’ll see the tile on the Start menu being updated. Of course, to see it, you will need first to right click on the icon in your Start menu and choose Pin to start .

Wrapping up
In this post we’ve seen how to further expand the previous sample, by adding support for real push notifications in our PWA. You have the option to implement web notifications, which are more limited but they work cross-platform and also inside the browser, or native Windows notifications, which offers more power and flexibility. We’ve also seen how to implement a simple backend environment and how we can use it not just to send standard push notifications, but also to light up other Windows features like live tiles.
As usual, you can download the full sample used in this post on GitHub at
https://github.com/Microsoft/Windows-AppConsult-samples-PWA/tree/master/ToastActivationWithPush...
And I think this is also a great time
to welcome our friends at GitHub to the Microsoft family

Happy coding!
You must be a registered user to add a comment. If you've already registered, sign in. Otherwise, register and sign in.