Turn on suggestions
Auto-suggest helps you quickly narrow down your search results by suggesting possible matches as you type.
- Home
- Windows Server
- Virtualization
- Setting up Linux Operating System Clusters on Hyper-V (2 of 3)
Setting up Linux Operating System Clusters on Hyper-V (2 of 3)
- Subscribe to RSS Feed
- Mark as New
- Mark as Read
- Bookmark
- Subscribe
- Printer Friendly Page
- Report Inappropriate Content
By
Published
Mar 21 2019 04:56 PM
1,632
Views
Mar 21 2019
04:56 PM
Mar 21 2019
04:56 PM
First published on TECHNET on Feb 23, 2016
Author: Dexuan Cui
Link to Part 1 Setting up Linux Operating System Clusters on Hyper-V
This blog post is the second in a series of three that walks through setting up Linux operating system clusters on Hyper-V. The walk-through uses Red Hat Cluster Suite (RHCS) as the clustering storage and Hyper-V’s Shared VDHX as the shared storage needed by the cluster software.
Part 1 of the series showed how to set up a Hyper-V host cluster and a shared VHDX. Then it showed how to set up five CentOS 6.7 VMs in the host cluster, all using the shared VHDX.
This post will set up the Linux OS cluster with the CentOS 6.7 VMs, running RHCS and the GFS2 file system . RHCS is specifically for use with RHEL/CentOS 6.x; RHEL/CentOS 7.x uses a different clustering software package that is not covered by this walk through. The GFS2 file system is specifically designed to be used on shared disks accessed by multiple nodes in a Linux cluster, and so is a natural example to use.
Let’s get started!
Setup a guest cluster with the five CentOS 6.7 VMs running RHCS + GFS2 file system
# yum groupinstall "High Availability Management"
# chkconfig luci on; service luci start
# yum groupinstall "High Availability" "Resilient Storage"
# chkconfig iptables off
# chkconfig ip6tables off
# chkconfig NetworkManager off
edit /etc/selinux/config: SELINUX=disabled
# setenforce 0
# passwd ricci [this user/password is to login the web-based HA configuration tool luci]
# chkconfig ricci on; service ricci start
# chkconfig cman on; chkconfig clvmd on
# chkconfig rgmanager on; chkconfig modclusterd on
# chkconfig gfs2 on
# reboot [Can also choose to start the above daemons manually without reboot]
Create a GFS2 file system in the shared storage /dev/sdb and test IO fencing
Wrap Up
Wow! That’s a lot of steps, but the result is worth it. You now have a 5 node Linux OS cluster with a shared GFS2 file system that can be read and written from all nodes. The cluster uses a quorum disk to prevent split-brain issues. These steps to set up a RHCS cluster are the same as you would use to set up a cluster of physical servers running CentOS 6.7, but the Hyper-V environment Linux is running in guest VMs, and shared storage is created on a Shared VHDX instead of a real physical shared disk.
In the last blog post, we’ll show setting up a web server on one of the CentOS 6.7 nodes, and demonstrate various failover cases.
~ Dexuan Cui
Author: Dexuan Cui
Link to Part 1 Setting up Linux Operating System Clusters on Hyper-V
Background
This blog post is the second in a series of three that walks through setting up Linux operating system clusters on Hyper-V. The walk-through uses Red Hat Cluster Suite (RHCS) as the clustering storage and Hyper-V’s Shared VDHX as the shared storage needed by the cluster software.
Part 1 of the series showed how to set up a Hyper-V host cluster and a shared VHDX. Then it showed how to set up five CentOS 6.7 VMs in the host cluster, all using the shared VHDX.
This post will set up the Linux OS cluster with the CentOS 6.7 VMs, running RHCS and the GFS2 file system . RHCS is specifically for use with RHEL/CentOS 6.x; RHEL/CentOS 7.x uses a different clustering software package that is not covered by this walk through. The GFS2 file system is specifically designed to be used on shared disks accessed by multiple nodes in a Linux cluster, and so is a natural example to use.
Let’s get started!
Setup a guest cluster with the five CentOS 6.7 VMs running RHCS + GFS2 file system
- On one node of the Linux OS cluster, say, my-vm1, install the web-based HA configuration tool luci
# yum groupinstall "High Availability Management"
# chkconfig luci on; service luci start
- On all 5 nodes, install RHCS and make proper configuration change
# yum groupinstall "High Availability" "Resilient Storage"
# chkconfig iptables off
# chkconfig ip6tables off
# chkconfig NetworkManager off
Disable SeLinux by
edit /etc/selinux/config: SELINUX=disabled
# setenforce 0
# passwd ricci [this user/password is to login the web-based HA configuration tool luci]
# chkconfig ricci on; service ricci start
# chkconfig cman on; chkconfig clvmd on
# chkconfig rgmanager on; chkconfig modclusterd on
# chkconfig gfs2 on
# reboot [Can also choose to start the above daemons manually without reboot]
After 1 and 2, we should reboot all the nodes to make things take effect. Or we need to manually start or shut down the above service daemons on every node.
Optionally, remove the “rhgb quiet” kernel parameters for every node, so you can easily see which cluster daemon fails to start on VM bootup.
- Use a web browser to access https://my-vm1:8084 (the web-based HA configuration tool luci -- first login with root and grant the user ricci the permission to administrator and create a cluster, then logout and login with ricci)
-
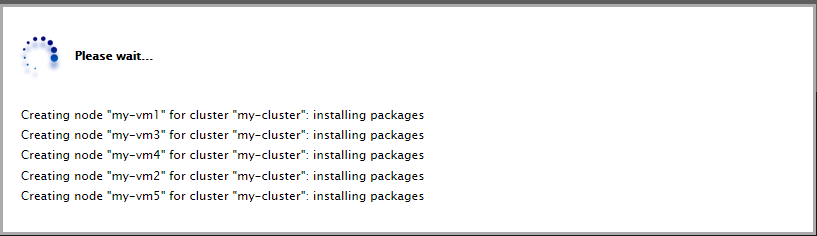
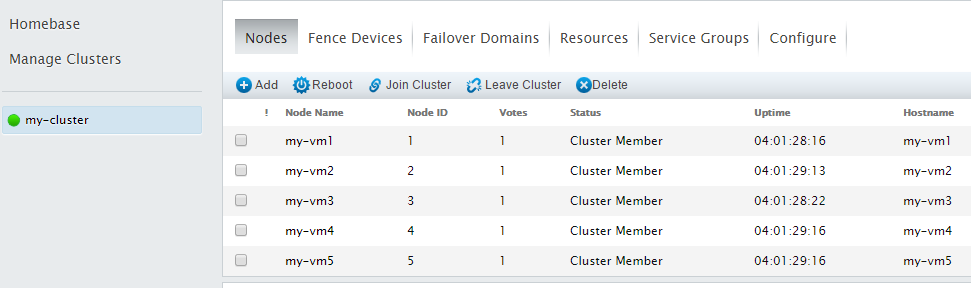
Create a 5-node cluster “my-cluster”
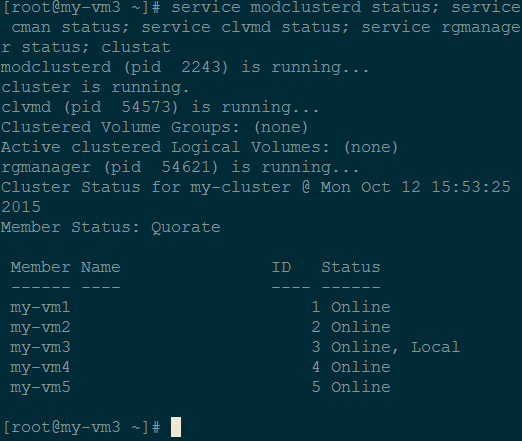
We can confirm the cluster is created properly by checking the status of the service daemons and checking the cluster status (clustat):
service modclusterd status
service cman status
service clvmd status
service rgmanager status
clustat
e.g., when we run the commands in my-vm3, we get:
- Add a fencing device (we use SCSI3 Persistent Registration) and associate all the VMs with it.
- Add a Quorum Disk to help to better cope with the Split-Brain issue. “In RHCS, CMAN (Cluster MANager) keeps track of membership by monitoring messages from other cluster nodes. When cluster membership changes, the cluster manager notifies the other infrastructure components, which then take appropriate action. If a cluster node does not transmit a message within a prescribed amount of time, the cluster manager removes the node from the cluster and communicates to other cluster infrastructure components that the node is not a member. Other cluster infrastructure components determine what actions to take upon notification that node is no longer a cluster member. For example, Fencing would disconnect the node that is no longer a member. A cluster can only function correctly if there is general agreement between the members regarding their status. We say a cluster has quorum if a majority of nodes are alive, communicating, and agree on the active cluster members. For example, in a thirteen-node cluster, quorum is only reached if seven or more nodes are communicating. If the seventh node dies, the cluster loses quorum and can no longer function. A cluster must maintain quorum to prevent split-brain issues. Quorum doesn't prevent split-brain situations, but it does decide who is dominant and allowed to function in the cluster. Quorum is determined by communication of messages among cluster nodes via Ethernet. Optionally, quorum can be determined by a combination of communicating messages via Ethernet and through a quorum disk. For quorum via Ethernet, quorum consists of a simple majority (50% of the nodes + 1 extra). When configuring a quorum disk, quorum consists of user-specified conditions.”

Fencing is used to prevent erroneous/unresponsive nodes from accessing the shared storage, so data consistency can be achieved.
See the below for an excerpt of IO fencing and SCSI3 PR :
“SCSI-3 PR, which stands for Persistent Reservation, supports multiple nodes accessing a device while at the same time blocking access to other nodes. SCSI-3 PR reservations are persistent across SCSI bus resets or node reboots and also support multiple paths from host to disk. SCSI-3 PR uses a concept of registration and reservation. Systems that participate, register a key with SCSI-3 device. Each system registers its own key. Then registered systems can establish a reservation. With this method, blocking write access is as simple as removing registration from a device. A system wishing to eject another system issues a preempt and abort command and that ejects another node. Once a node is ejected, it has no key registered so that it cannot eject others. This method effectively avoids the split-brain condition .”
This is how we add SCSI3 PR in RHCS:


NOTE 1: in /etc/cluster/cluster.conf , we need to manually specify devices="/dev/sdb" and add a <unfence> for every VM . The web-based configuration tool doesn’t support this, but we do need this, otherwise cman can’t work properly.
NOTE 2: when we change /etc/cluster/cluster.conf manually, remember to increase “config_version” by 1 and propagate the new configuration to other nodes by “ cman_tool version -r ”.
In our 5-node cluster, if more than 2 nodes fail, the whole cluster will stop working.
Here we’d like to keep the cluster working even if there is only 1 node alive, that is, the “Last Man Standing” functionality (see How to Optimally Configure a Quorum Disk in Red Hat Enterprise Linux Clustering and High-Availa... ), so we’re going to set up a quorum disk.
- In my-vm1, use “fdisk /dev/sdc” to create a partition. Here we don’t run mkfs against it.
- Run “mkqdisk -c /dev/sdc1 -l myqdisk” to initialize the qdisk partition and run “mkqdisk -L” to confirm it’s done successfully.
-
Use the web-based tool to configure the qdisk:
Here a heuristics is defined to help to check the healthiness of every node. On every node, the ping command is run every 2 seconds. In (2*10 = 20) seconds, if 10 successful runs of ping aren’t achieved, the node itself thinks it has failed. As a consequence, it won’t vote, and it will be fenced, and the node will try to reboot itself.
After we “apply” the configuration in the Web GUI, /etc/cluster/cluster.conf is updated with the new lines:
< cman expected_votes="9" />
<quorumd label="myqdisk" min_score="1">
<heuristic program="ping -c3 -t2 10.156.76.1" score="2" tko="10"/>
</quorumd>
And “ clustat ” and “ cman_tool status ” shows:
[root@my-vm1 ~]# clustat
Cluster Status for my-cluster @ Thu Oct 29 14:11:16 2015
Member Status: Quorate
Member Name ID Status
------ ---- ---- ------
my-vm1 1 Online, Local
my-vm2 2 Online
my-vm3 3 Online
my-vm4 4 Online
my-vm5 5 Online
/dev/block/8:33 0 Online, Quorum Disk
[root@my-vm1 ~]# cman_tool status
Version: 6.2.0
Config Version: 33
Cluster Name: my-cluster
Cluster Id: 25554
Cluster Member: Yes
Cluster Generation: 6604
Membership state: Cluster-Member
Nodes: 5
Expected votes: 9
Quorum device votes: 4
Total votes: 9
Node votes: 1
Quorum: 5
Active subsystems: 11
Flags:
Ports Bound: 0 11 177 178
Node name: my-vm1
Node ID: 1
Multicast addresses: 239.192.99.54
Node addresses: 10.156.76.74
Note 1: “Expected vote”: The expected votes value is used by cman to determine if the cluster has quorum. The cluster is quorate if the sum of votes of existing members is over half of the expected votes value. Here we have n=5 nodes. RHCS automatically specifies the vote value of the qdisk is n-1 = 4 and the expected votes value is n + (n -1) = 2n – 1 = 9. In the case only 1 node is alive, the effective vote value is: 1 + (n-1) = n, which is larger than (2n-1)/2 = n -1 (in C language), so the cluster will continue to function.
Note 2: In practice, “ ping -c3 -t2 10.156.76.1 ” wasn’t always reliable – sometimes the ping failed after a timeout of 19 seconds and the related node was rebooted unexpectedly. Maybe it’s due to the firewall rule of the gateway server 10.156.76.1. In this case, replace “ 10.156.76.1 ” with “127.0.0.1” as a workaround.

-
Create a 30GB LVM partition with fdisk
[root@my-vm1 ~]# fdisk /dev/sdb
Device contains neither a valid DOS partition table, nor Sun, SGI or OSF disklabel
Building a new DOS disklabel with disk identifier 0x73312800.
Changes will remain in memory only, until you decide to write them.
After that, of course, the previous content won't be recoverable.
WARNING: invalid flag 0x0000 of partition table 4 will be corrected by w(rite)
WARNING: DOS-compatible mode is deprecated. It's strongly recommended to switch off the mode (command 'c') and change display units to sectors (command 'u').
Command (m for help): n
Command action
e extended
p primary partition (1-4)
p
Partition number (1-4): 1
First cylinder (1-13054, default 1):
Using default value 1
Last cylinder, +cylinders or +size{K,M,G} (1-13054, default 13054): +30G
Command (m for help): p
Disk /dev/sdb: 107.4 GB, 107374182400 bytes
255 heads, 63 sectors/track, 13054 cylinders
Units = cylinders of 16065 * 512 = 8225280 bytes
Sector size (logical/physical): 512 bytes / 512 bytes
I/O size (minimum/optimal): 512 bytes / 512 bytes
Disk identifier: 0x73312800
Device Boot Start End Blocks Id System
/dev/sdb1 1 3917 31463271 83 Linux
Command (m for help): t
Selected partition 1
Hex code (type L to list codes): 8e
Changed system type of partition 1 to 8e (Linux LVM)
Command (m for help): w
The partition table has been altered!
Calling ioctl() to re-read partition table.
Syncing disks.
[root@my-vm1 ~]#
NOTE: the above fdisk command is run in node1. On nodes 2 through 4, we need to run “partprobe /dev/sdb” command to force the kernel to discover the new partition (another method is: we can simply reboot nodes 2 through 4). -
Create physical & logical volumes, run mkfs.gfs2 and mount the file systemRun the following on node1:
# pvcreate /dev/sdb1
# vgcreate my-vg1 /dev/sdb1
# lvcreate -L +20G -n my-store1 my-vg1
# lvdisplay /dev/my-vg1/my-store1
#
# mkfs.gfs2 -p lock_dlm -t my-cluster :storage -j5 /dev/mapper/my--vg1-my--store1
(Note: here “my-cluster” is the cluster name we used in Step 4.)
Run the following on all the 5 notes:
# mkdir /mydata
# echo '/dev/mapper/my--vg1-my--store1 /mydata gfs2 defaults 0 0' >> /etc/fstab
# mount /mydata
-
Test read/write on the GFS2 partition
- Create or write a file /mydata/a.txt on one node, say, node 1
- On other nodes, say node 3, read /mydata/a.txt and we can immediately see what node 1 wrote
- On node 3, append a line into the file and on node 1 and the other nodes, the change is immediately visible.
-
Test node failure and IO fencing
First retrieve all the registrant keys and the registration information:
[root@my-vm1 mydata]# sg_persist -i -k -d /dev/sdb
Msft Virtual Disk 1.0
Peripheral device type: disk
PR generation=0x158, 5 registered reservation keys follow:
0x63d20004
0x63d20001
0x63d20003
0x63d20005
0x63d20002
[root@my-vm1 mydata]# sg_persist -i -r -d /dev/sdb
Msft Virtual Disk 1.0
Peripheral device type: disk
PR generation=0x158, 5 registered reservation keys follow:
0x63d20004
0x63d20001
0x63d20003
0x63d20005
0x63d20002
[root@my-vm1 mydata]# sg_persist -i -r -d /dev/sdb
Msft Virtual Disk 1.0
Peripheral device type: disk
PR generation=0x158, Reservation follows:
Key=0x63d20005
scope: LU_SCOPE, type: Write Exclusive, registrants only
Then pause node 5 using Hyper-V Manager, so node 5 will be considered dead.
In a few seconds, node 1 prints the kernel messages:
dlm: closing connection to node5
GFS2: fsid=my-cluster:storage.0: jid=4: Trying to acquire journal lock...
GFS2: fsid=my-cluster:storage.0: jid=4: Looking at journal...
GFS2: fsid=my-cluster:storage.0: jid=4: Acquiring the transaction lock...
GFS2: fsid=my-cluster:storage.0: jid=4: Replaying journal...
GFS2: fsid=my-cluster:storage.0: jid=4: Replayed 3 of 4 blocks
GFS2: fsid=my-cluster:storage.0: jid=4: Found 1 revoke tags
GFS2: fsid=my-cluster:storage.0: jid=4: Journal replayed in 1s
GFS2: fsid=my-cluster:storage.0: jid=4: Done
And nodes 2 through 4 print these messages:
dlm: closing connection to node5
GFS2: fsid=my-cluster:storage.2: jid=4: Trying to acquire journal lock...
GFS2: fsid=my-cluster:storage.2: jid=4: Busy, retrying...
0x63d20004
0x63d20001
0x63d20003
0x63d20005
0x63d20002
[root@my-vm1 mydata]# sg_persist -i -r -d /dev/sdb
Msft Virtual Disk 1.0
Now on nodes 1 through 4, “clustat” shows node 5 is offline and “cman_tool status” shows the current “Total votes: 8”. And the sg_persist command show the current SCSI owner of /dev/sdb is changed from node 5 to node 1 and there are only 4 registered keys:
[root@my-vm4 ~]# sg_persist -i -k -d /dev/sdb
Msft Virtual Disk 1.0
Peripheral device type: disk
PR generation=0x158, 4 registered reservation keys follow:
0x63d20002
0x63d20003
0x63d20001
0x63d20004
[root@my-vm4 ~]# sg_persist -i -r -d /dev/sdb
Msft Virtual Disk 1.0
Peripheral device type: disk
PR generation=0x158, Reservation follows:
Key=0x63d20001
scope: LU_SCOPE, type: Write Exclusive, registrants only
In a word, the dead node 5 properly became offline and was fenced, and node1 has fixed a file system issue (“Found 1 revoke tags”) by replaying node 5’s GFS2 journal, so we have no data inconsistency issue.
Now let’s resume node 5 and we’ll find the cluster still doesn’t accept the node 5 as an online cluster member before node 5 reboots and rejoins the cluster with a known-good state.
Note: node 5 will be automatically rebooted by the qdisk daemon.
If we perform the above experiment by shutting down a node’s network (by “ifconfig eth0 down”), e.g., on node 3, we’ll get the same result, that is, node 3’s access to /mydata will be rejected and eventually the qdisk daemon will reboot node 3 automatically.
Wrap Up
Wow! That’s a lot of steps, but the result is worth it. You now have a 5 node Linux OS cluster with a shared GFS2 file system that can be read and written from all nodes. The cluster uses a quorum disk to prevent split-brain issues. These steps to set up a RHCS cluster are the same as you would use to set up a cluster of physical servers running CentOS 6.7, but the Hyper-V environment Linux is running in guest VMs, and shared storage is created on a Shared VHDX instead of a real physical shared disk.
In the last blog post, we’ll show setting up a web server on one of the CentOS 6.7 nodes, and demonstrate various failover cases.
~ Dexuan Cui
You must be a registered user to add a comment. If you've already registered, sign in. Otherwise, register and sign in.